-
Posts
698 -
Joined
-
Last visited
Content Type
Profiles
Forums
Events
Blogs
Gallery
Store
Everything posted by Hardrada
-
This is what I use: https://www.danswhetstone.com/product/bench-stones/ Soft and hard. Does the job. Japanese skiving knives are super easy to sharpen on those, as they only have one bevel and are straight, so just hold at your preferred angle and push. Even I can do it. Round knives, on the other hand... require better technique.
-
Get the best: KS Blade. https://ksbladepunch.com/product-category/pricking-irons
-
Aye, I wasn't pitching the Summit to you; it's just that that one video contains one of the best explanations and demonstrations on creasing I've seen so far. You can work with what you have now, for sure. Even seasoned veterans like Harry Rodgers still use spirit lamps and manual creasers. It just takes experience, which you can get by working with your current creasers. Get one of these and some ethanol and you're creasing: https://www.leevalley.com/en-ca/shop/tools/supplies/finishing/20070-alcohol-torch?item=93K3401
-
Crease first, for that's when your edges are most straight. Once you burnish they become irregular, not by much and it's hardly noticeable, but the micro-irregularities can still net you a wavy or crooked crease.
-
NO!! You'll burn it. See here:
-
That's most likely done with an electric creaser. Your best bet for heating creasers up is a spirit lamp. Lighters tend to soot the creasers and you have to wipe them off on a piece of leather or shop towel prior to applying them to the leather: in the process they lose heat. Once you apply them to the leather, they lose heat to the leather too, and you have to put them back on the flame again. It takes experience obtained through sustained use to become able to gauge the right temperature and the lengths you can crease whilst maintaining that optimal temperature; that's one reason why many prefer to use a creasing machine. You also have to be careful with the time the creaser is left on the flame: I once melted my creaser by leaving them over the spirit lamp too long, and by "too long" I'm talking less than 5 minutes. Oh, I almost forgot: you can use an electric range to heat up your creasers too. That's what Jo from J.H.L. Leather does. Oh #2: they do sell left-handed creasers.
-

Getting slanted stitches only on back side
Hardrada replied to allenayres83's topic in Sewing Leather
Yes, I'm having the same issue myself now. Beats me why, as I'm doing things by the book. Here's a demonstration of proper methodology: https://www.youtube.com/watch?v=XQK8R0oYT8o Hopefully, you guys will have better luck than me. I've noticed that if I cast on the right side (the front side), the stitches look nice where they must. A pain to reverse my procedure, though. -
^^ This. The widest anvil on the Shärffix is just the right size for watch straps. Once you've made your gauging pieces of leather, you're set, at a fraction of the cost of the bell skiver and no need to plug it in.
-
I was watching this the other night: The left side has card pockets that are too wide for the standard card: this can make them easier to take them out. Also, having the pockets open towards the centre can facilitate card removal by folding the card open along the centre line. Of course, I'm not suggesting you replicate that one wallet, but you could borrow the idea for the pockets' orientation and size. As for making it easier to remove, maybe adding a dee-ring to which a pull/wrist strap or belt-attached chain can be hooked?
-
As an addendum, here are some channels that are good and trustworthy resources: Nigel Armitage's: https://www.youtube.com/user/Nordicbadger Ian Atkinson: https://www.youtube.com/c/IanAtkinsonLeather/videos Hahn's Atelier: https://www.youtube.com/c/HahnsAtelier/videos I also got some good tips from Stock & Barrel when I was starting out. He seems to have moved more in the direction of industrial home workshop, bringing in a number of machines to automate some processes, but there might still be something there for beginners and those of us who prefer hand tools: https://www.youtube.com/c/Stockandbarrelco/videos Last, but not least, and specially given your interest in belts, Harry Rodgers: https://www.youtube.com/c/mrwindsorchair/videos (hmm, looks like he's gotten into shoes, but his belt "films" are still there). I think all of them have at least one video about what are the essential tools you need to get into leathercraft.
-
@JDsims: Bear in mind that your intended purposes span across "genres" of leatherworking. Meaning that you'll require a larger repertoire of tools. I'll spoon feed you: Belts, dog collars, and slings all fall into the genre of strap-making. You'll need a set of rulers (12" and 60" minimum, 36" recommended), a strap cutter, a couple of bevelers (#1 and #2), needles, and stitching chisels or pricking irons (4 mm or 6 spi). You'll also need a wood slicker to burnish edges. An adjustable creaser is a nice addition. Wallets and book covers fall in the genre of small leather goods, and these require tools that are aimed at precision work. In addition to the ones I listed above for straps, you'll have to add: a #0 beveler, a craft knife, another set of chisels/pricking irons (3.85 mm or 3.38 mm, 7 spi and 8 spi respectively). As a must, for all genres, you'll also need a square ruler, a cutting board, a cutting mat, a punching pad, a scratch awl, a set of hole punches, a poly mallet, a diamond awl, a stitching pony, a wing divider, and very sharp knives (I'd start with an Olfa utility cutter, and a Japanese style skiving knife), a bone folder, and a spirit lamp to heat your creasers. Eventually you'll want a round knife. Don't forget your supplies also and the accoutrements they need: thread, contact cement, glue applicators, edge coat/paint, burnishing agent, canvas for burnishing, and shop towel for all kinds of tasks. Where to get all these things? First of all, avoid made in China junk. Yes, the price is awesome... and it must be because you'll be paying it a score of times over very often. Rocky Mountain Leather Supply has many tools and tons of leather and supplies. They have Ritza Tiger thread: easily the best thread for leathercraft. Goods Japan has tons of inexpensive tools that are of very good quality. Get your Japanese skiving knife and your Kyoshin Elle edgers from them. You won't regret it. Forget Amazon and ewwBay, Goodsjapan.com ARE the guys you should hit for budget-priced tools that are actually good. There are other suppliers in the US, but I'm in Canada and those are the main international suppliers I use. The rest of my stuff I get it domestically. There are tons of videos out there on "tools for starting in leathercraft" but I find it disingenious to direct a newcomer there because beginners can't tell the wheat from the chaff and good advice from BS. That being said, there are a number of leather workers with YT channels who speak with the authority given from experience, knowledge of the craft, and whose advice you can trust. Two of them are Nigel Armitage and Ian Atkinson. The latter also has a guide for beginners: https://www.ianatkinson.net/leather/leatherguide.htm Hope that helps.
-

Hoping for info about leather-product smells
Hardrada replied to RFrolic's topic in How Do I Do That?
Can't really be of much help, since it's YOUR nose that must make the final determination. I find the scents of quite some of the stuff in this business awesome... but then again, I used to eat white glue when I was in elementary school. FWIW, gum tragacanth has a very strong smell: not unpleasant (to me), but strong. You might want to stay clear of that one. The (possible) good news is that Tokonole burnishing agent is not stinky. If you work in a well-ventilated area with the current coming from your back, I'd bet you wouldn't notice it. I detect very little if any odour coming from Uniters edge paint, but if you heat it with a fileteuse it will give off some scent. I guess contact cement is essentially out of your league. You may need to stick to water-based cements like Renia's Aquilim 315. But in our latitudes these cements are ruined by freezing and thus cannot be shipped in the winter. By far, the most unpleasant product I've handled is neatsfoot oil. Its charnel house smell almost makes me gag. I'd rather spend 5 minutes smelling contact cement than 30 seconds smelling pure neatsfoot oil. -
Yeah. Also, if it's a large order, it's highly unlikely they'll send replacements with no questions asked and no need to return the defective ones. Whilst I'd be reluctant to return defective dyes out of suspicion they'll just put them back on the shelves, the manufacturer can also be suspicious that the customer is trying to pull a fast one on them in order to get free product—without hard evidence that the dye in every single bottle is ruined, it's reasonable for them to wonder. One of those situations in which both sides are in a difficult position.
-
Hmm, I just got a spool of that, thinking of using it for a wallet, because the 0.6 mm Tiger thread looked kinda thick for this application. One thing I didn't like about the Lin Cable is that it's not as waxed as Tiger: I couldn't melt the Lin's ends—they smouldered but didn't melt. How do you handle this last part of the stitching?
-
I had seen something similar in a book I once got:
-
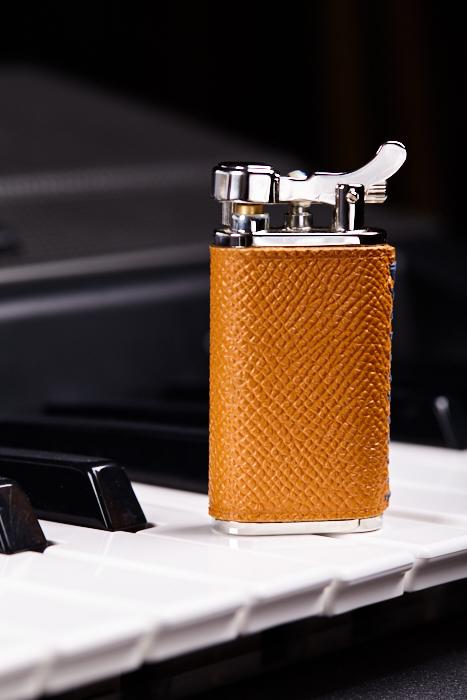
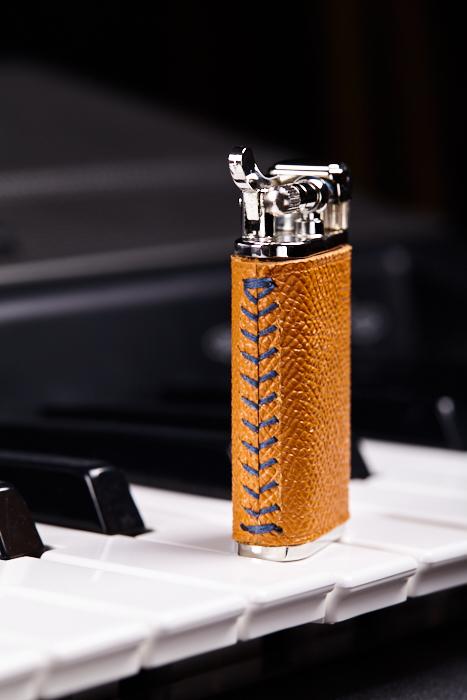
Got meself a new tobacco pipe lighter: Kiribi Kabuto. Now, Kiribi offers a leather-covered version of their Kabuto (Kiribi Kabuto Kuroi), and looking at it I saw that its texture was suspiciously similar to Riviera calfskin... of which I had a remnant here... hmm A few hours later, I ended up with this: Not happy with that roughing up of the leather along the stitch line. Wonder how it can be avoided in the future. Of course, I couldn't hammer the stitches on this, so I rubbed them with the bone folder. All in a night's work, I guess.
-
The shells' rims are wider than the casing. If you use fim tempered leather you shouldn't have that problem. Still, if you want to be completely sure, you can wet mold around the shells. I'd use snap caps to mould over, though.
-
The viral thing seems to have bollixed them up completely. It's a crapshoot now. Expensive shipping and it can take up to 3 weeks for stuff that used to be delivered on the next day after purchase?? WTH I still buy from them, but only when I can't source stuff elsewhere.
-
How are you gonna make them? Tool them? Embossing machine?
-
Haha. That was yet another thing I was thinking of suggesting after watching a review of an electric creaser in which the reviewer warned against using the creaser on wet leather because it would burn it: In that video he also explains that chrome tan requires higher temperatures to get an impression (~22:00 mark). Makes sense why one of the ways to test whether something is real leather is to apply flame: "if it burns it's not leather!" they say, but of course that applies mostly to chrome tan: I have charred veg tan with a lighter. Again, I didn't suggest wetting the leather because I don't know whether that's a recommended practice with your machine. I don't have an electric printing machine and I wouldn't want to give advice that results in damage to the project (or worse, to the machine, or worst, to yourself! ), but if you want to experiment... wetting the leather would be something to try: try with wetting the leather, letting if dry a bit, and then stamp it; and also try applying the stamp right after wetting it. See what happens.
- 9 replies
-
- heat stamping
- debossing
-
(and 2 more)
Tagged with:
-
If they're re-selling this: https://www.goodsjapan.com/craft-sha-japanese-leathercraft-skiver-utility-leather-knife-39mm/a-19821 I can vouch for it: it's worth its weight in gold.
-

Cigar case, hand stitched.
Hardrada replied to Isaact's topic in Purses, Wallets, Belts and Miscellaneous Pocket Items
I'm not too keen on it. Not so much the craftsmanship, but the fact that the cigars are exposed and need to have their wrapper in order to maintain their proper humidity. Not all cigars come wrapped in cellophane. I've plenty in my humidor that are bare, and were I to take them on the road I'd need a case that covers them completely, like this one: Granted, it's still not airtight sealed like a humidor, but it would keep the cigars fresh inside longer. Sorry I can't heap praise. I'm frustrated as well, as I'm also trying to make cigar cases and have so far not been successful. That's the reason I readily clicked on this thread: I was interested in seeing what others have come up with.- 4 replies
-
- handstitch
- cigar holder
-
(and 2 more)
Tagged with:
-
Yep, I was a bit diffident about suggesting upping the heat since you mentioned your dies are made of magnesium which is explosive when exposed to flame. I still gave the suggestion thinking that the machine manufacturer would have factored high heat into the safety threshold for his product, and also that the heating is electrical. I use brass stamps which are not inflammable, and an alcohol lamp to heat them, and an arbor press to stamp. Alas, I can't report on long term results, as I don't have years in this. Maybe it depends on the use? Heck, my problem probably is the stams not being hot enough:
- 9 replies
-
- heat stamping
- debossing
-
(and 2 more)
Tagged with:
-
Shop towel. I tear a small piece off a sheet, fold it to a width narrow enough to dip it into the bottle and dip it only so far as to get the end moist with the solution; then apply over the project quickly and thoroughly with a light touch, making sure no bubbles form, and if they do I quickly pass the towel over them to eliminate them; I wipe off the excess liquid with the dry end of the folded piece of towel. Once the solution has seeped into the leather and dried on the surface (less than a minute if you don't over apply), I buff to a shine with a piece of linen (cut off from an old pillow case). After buffing with the cloth, I buff once more with the horse hair brush. That's it!
-
Many people seem to love it, though. I'm not crazy about it, either. Personally, I prefer a uniform look; however, one plus I've found for the pull-up is that it can minimise the visibility of lesser marks or scratches on the leather: just rub it a bit with your finger or bend it and unbend it and voila, the mark is hidden.


