-
Posts
776 -
Joined
-
Last visited
Content Type
Profiles
Forums
Events
Blogs
Gallery
Store
Everything posted by Mulesaw
-
Vintage Champion Shoe sewing or stitching machine?
Mulesaw replied to aml311's topic in Leather Sewing Machines
@aml311 If it is in working condition, there normally is a market for it. Do you by chance have some pictures of it? That would help a lot for someone in here to give a more educated guess about model and how sought after the machine is etc. You can try to advertise it for sale on this forum too. https://leatherworker.net/forum/forum/82-machinery-sewing-and-stitching/ The Forum rules in the "for sale section" are stated on the top of this site: https://leatherworker.net/forum/forum/71-items-for-sale/ Brgds Jonas -
@Steve75 I fully agree that we should continue to share knowledge and especially to someone who is new to the forum. Generally I think there is a very civilised and helpful tone in here which is just as it should be :-) It is just that I am genuinely puzzled: Did the OP expect another answer?, Should we have offered more help? Was the OP in reality looking for a turnkey operation business plan to make a fortune making holsters? I guess it is just that I always gets so astonished when people don't acknowledge that someone is trying to help them. A simple "thank you" would suffice. Just plain old fashioned regular courtesy. Brgds Jonas
-
@Calidora There is a German classified page that usually has some spare parts on it: https://www.kleinanzeigen.de/s-junker-ruh-sd/k0 I just searched for "Junker Ruh SD" at the moment there are two parts for sale. But there have a seller that had a bunch of parts. I know that shipping will be a bit expensive,but I hope that you'll be able to find the parts. Brgds Jonas
-
@Calidora I think the only place to find spare parts are on Ebay or similar sites. But just as a "warning" before you spend too much time and money hunting parts: The needles are really hard to find, and not readily available. I once checked Gross Beckert, and they'll make a production run if I ordered something like 500 needles. But if you have a couple of needles, then all is good :-) I have a machine like it at home, but I have been too busy tinkering with it. But I am pretty sure that it dodn't come with any spare parts (I am at sea right now, so I can't go check it) Brgds Jonas
-
Tutorial, replacing zippers in riding boots.
Mulesaw replied to Mulesaw's topic in Shoes, Boots, Sandals and Moccassins
@TomE I have never tried a compound foot machine. I only have two patchers and an old SInger class 7 with a spring loaded foot (can't remember the actual name). I ought to treat myself to a compound machine one day :-) The small patcher is with a threadle and I really fint it easier to use compared to the newer one that has an electric motor. There is just something that works well for me with being able to go ultra slow and that there is just a cozy clicking sound. Even my wife thinks it sounds homely and cozy. (Good thing since I keep it in the dining room which is adjacent to the living room). I do 80% horse repairs on the patcher. blankets, boots, rubber bell boots, etc. The only jobs on the class 7 are sewing the leather ends on elastic girths, adn that accouint for maybe 5% maximum, the remaining 15% are hand sewn saddle repairs or bridle repairs etc. I find the hardest thing on the patcher is to keep a really straight sewing line, but practise goes a long way. Before I found a place to buy those bottom stops for zippers, I would also melt the teeth to form a stop, that is a good method. A couple of times per year I am asked to alter the width of the shaft on riding boots, I have started to charge by the hour for those jobs. Sometimes people manage to buy new boots of the wrong size in the leg/shaft, and if they can't return them, I can make them fit. Or they sustain a damage to a leg and suddenly hte leg is thicker than what it used to be. I'll check if I have any pictures of those repairs, and make a post about it. -
Leather covered bit, replacement of the leather
Mulesaw replied to Mulesaw's topic in Saddle and Tack Accessory Items
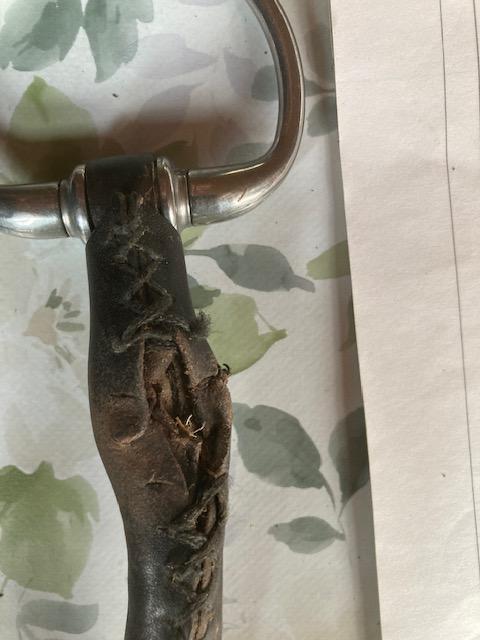
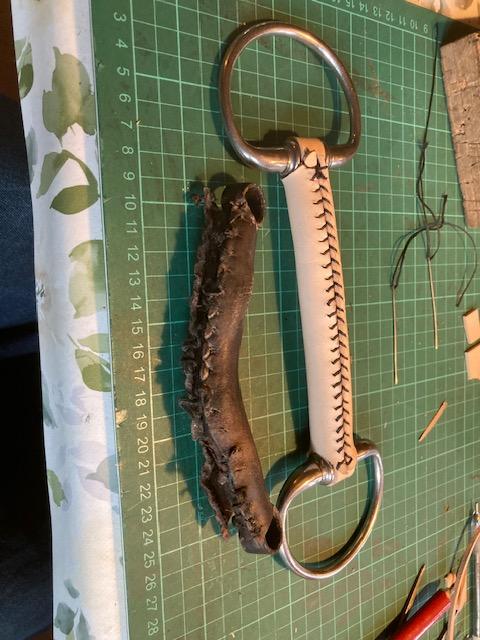
@DieselTech Thanks The 4th picture is the best for explaining it (I forgot to take a picture shoeing the details) There are two "straps" that are part of the wrapping. they go around the rings and are sewn together first. Next a similar sized loose strap is inserted between the wrap aorund part and the central part of the bit. Finally the wide part is wrapped around the strap part and baseball stitched together. Hope it helps a bit though it is kind of a weird explanation, :-) Brgds Jonas -
Leather covered bit, replacement of the leather
Mulesaw replied to Mulesaw's topic in Saddle and Tack Accessory Items
Thanks Tom I didn't think of looking in Stohlman's book, So I just made it with 2 needles :-) I thought that just going from a criss cross pattern to baseball stitch was adventurous enough for me. Brgds Jonas -
Tutorial, replacing zippers in riding boots.
Mulesaw replied to Mulesaw's topic in Shoes, Boots, Sandals and Moccassins
@TomE Hi Tom I only shorten the zipper at the bottom if it needs to be shortened. If I have to do that, I install a metal bottom stop on and cut the surplus part of with a pair of scissors. I cut the zipper part itself square, and then each of the sides just a little on the diagonal, maybe 15 degrees sloping so that the center(zipper teeth) are the longest part. Then I burn the edges so it doesn't fray. It helps a little when you try to insert the bottom of the zipper, but it is still a fiddly business. On the top of the zipper I have tried different methods, from folding the zipper down to making an elaborate fold that go down and back. But at the moment I just cut it square and burn the edges. I am pretty sure that the factories sew in the zipper before mounting the bottom of the boot, and that they do it before trimming the lining, because often the zipper ends so far beneath the insole of the boot that you need to cut it and pull out the remaining part with a plier. On boots where it is possible to sew across the zipper, I try to make sure that I put the metal bottom stop below where I want my stitching to be. So far I have only needed 3 lengths for regular boots. 40 cm (16"), 45 cm (18") and 50 cm (20"). The 40 cm (16") is called for maybe once per year, so I have decided to not restock that one, but just shorten a longer zipper instead. What really helped me was when I started just sewing one side of the zipper first. I had tried double sided tape and contact gluye, but it still managed to shift around. Doing the "difficult" side of the boot first ensures that all the pulling and tuckling with the boot on the patcher doesn't dislocate the zipper, like it does when it is taped in place in both sides. Still dressage boots are a pain in the neck compared to juming boots. For some strange reason, the cheapest jumping no-name boots are much easier to work on compared to high end boots like DeNiro or Cavallo boots. The business side of it: I charge a fixed amount for replacing a zipper, and I provide the zipper, that way I know the quality and model of the zipper so I don't risk putting in a wron type of zipper. Technically I ought to charge more compared to what I charge per hour doing saddle repairs, but I choose to look at it like a way to get people to know the business. Chances are that if you have riding boots, you have some other horse related equipment that I can repair on another occasion, or I could sell some of the stable equipment that we also make. I generally try to do the repair in a day or two. Children's boots I have done it the same day, since I know how much it means to kids that they know their eqiupment is ready and they shouldn't need to worry about if they are able to attend the riding school on Friday etc. This is something that is really appreciated by the customers, I have even had a customer who gave me two bottles of wine as a tip due to fast service. :-) Off course, If I am at sea, there is a waiting time, but when I am at home, boots get prioritzed. There is another method to replace the zipper which I think is a lot faster, but I don't do it since I don't think it is good craftmanship. In that method you just cut the teeth of the old zipper of as close to the doubling as you can. Then the new zipper is taped on the inside of the lining and sewn in place. The benefits is that you don't have to spend 20 minutes carefully cutting the old zipper loose, and there is less fiddling with inserting the new zipper. The downside is that it doesn't look very preofessional in my opinion. And if I had a nice pair of boots, I would like the repairjob to be as close as possible to the original job. Brgds Jonas -
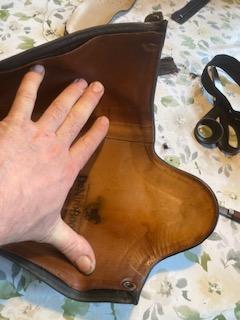
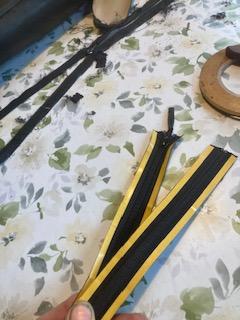
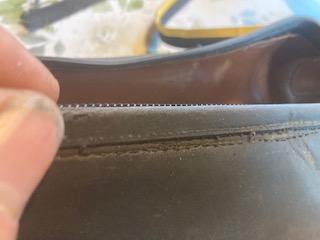
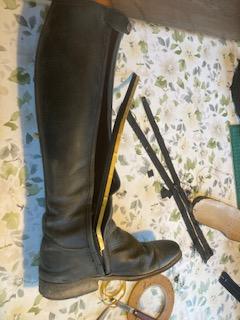
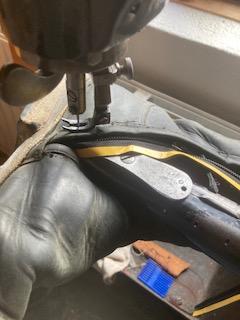
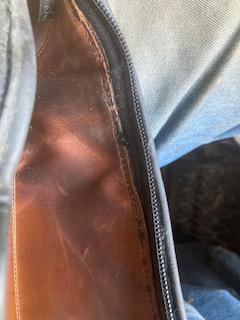
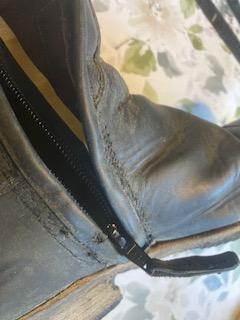
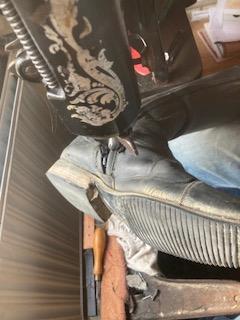
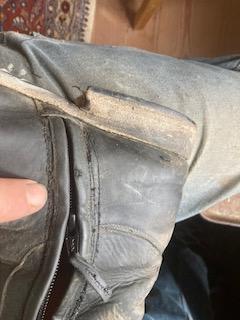
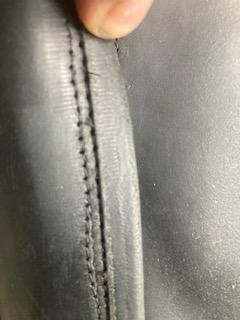
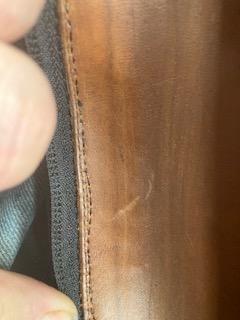
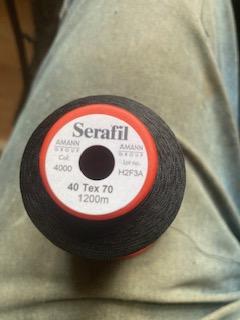
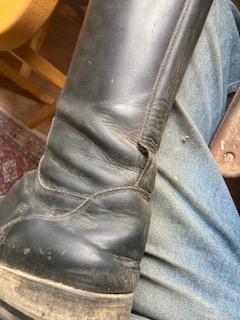
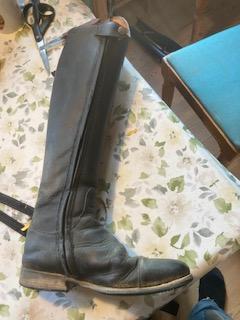
This tutorial is aimed at replacing zippers in riding boots, but the basics are the same in case you need to replace zippers in e.g. motorcycle boots or fashion boots. Materials & tools needed: - A zipper of the correct type and length, - double sided tape for fabric/leather (I use 1/4" wide tape) - A patcher sewing machine. Initial considerations and "warnings" Riding boots come in different models and designs, some are easier to work on than other, here is my ranking from easy to hard: -zipper on the back -zipper on the side -zipper on the front including short boots -Dressage boots are much more unwieldy than jumping boots due to the built in stiffeners. -To protect very shiny dressage boots from marring from the feed dogs on the patcher, it might be necessary to cover those feed dogs with a small piece of rubber tube or tape. If the boot is worn, the original parts that sort of protects the zipper are often worn away where the pur straps are placed or where the inside of the boot touches the saddle. In those cases I often recommend the customer that I install a Vislon type zipper instead of the standard type spiral zipper. The Vislon doens't look quite as elegant but it can take a lot more beating and that will save you from having the boot come back a month later from an unhappy customer. Depending on the type, it takes me as an average about 1.5 hours to change a zipper if I concentrate on the job. As a service to my customers, I always check the boot for any other small repairs that need to be done, and I carry those out too just as a service. Don't despair if the stitching doesn't look perfect. It is an honest repair job, and often the boots are damaged and worn so you need to move your stitch line to be able to attach the liner as well. 1) The old zipper is removed by cutting the threads carefully so you don't accidentally cut the leather or the lining of the boot. Next all the little pieces of thread are removed from inside and the outside of the boot. On this boot (dressage side zipper), there is a full leather lining, so both sides of the zipper will be sandwiched between layers. 2) A matching zipper is found. The small pull strap is sewn on the zipper before mounting it on the boot (if a pull strap was on the old zipper). Double sided tape is put on the zipper. Since this boot has got a full leather lining, we need tape on all 4 sides of the zipper. Place the tape along the outer edge of the zipper. 3) The zipper is taped to the stiffest side of the boot first. The other side of the zipper is just left hanging for the time being. Start from the top. 4) The zipper is positioned so that the teeth are flush with the doubling. This doubling protects the zipper from abrasion and should just touch the doubling onthe other side of the boot once completed and zipped up. In case the doubling is damaged or perhaps if the boot is made of a different design without one, I opt for a Vislon type zipper instead. First tape the zipper to the outside of the boot, starting at the top of the boot going dwon towards the sole. Next tape the lining to the zipper, note that you need to hold the shaft of the boot curved while you do so since the lining is glued to the main part of the shaft. 5) Take he boot to the patcher and start sewing from the bottom. This is because it is the most difficult part to sew, and there is a much better chance of a good result if you sew this part first, otherwise the stiffness of the boot can shift the zipper. Start by doing the stitchline that is farthest away from the edge. That stitch is also going through the lining and holding that in place too. It helps if you position the boot diagonally on the arm of the patcher, that way the lining will not be pushed to the side from the needle plate. When you have reached the top of the boot, lock the stitching by sewing back and forth a bit. 6) Check that you have stitched the lining, a few missed spots is OK, it is also very normal that part of the lining is missing particularly around the ankle section, If there are large places missing, sew these again. 7) Now tape the zipper to the other side of the boot. This time starting at the bottom. Again first tape it to the outside part of the boot and next tape the lining part. The teeth of the zipper should again just be flush to the doubling. 8) Start sewing from the bottom, the stitch line farthest away from the edge. This is the most difficult part of the process, since access is difficult and the stiffness makes it unwieldy. Take it slowly and be prepared to hold the zipper in place with your fingers and take one stitch at a time. The first 2" are difficult. Also you might need to move the glider a bit to be able to pass by it. Sew all the way to the top, lock the stitching by sewing back and forth a bit. Sew down again this time stitching just next to the doubling. If the boot allows you to sew across the zipper, do that with a couple of passes (this particular boot does not allow for that). 9) Sew from the top to the bottom right next to the doubling on the side that was sewn first. 11) The two stitch lines, there is a little bit of "fuzzy" old thread that comes out if you don't manage to get it all out, that can be burnt away with a quick touch of a lighter. 12) The stitch lines are approximately 1/8" apart. One it just next to the doubing, and the other a bit farther in. 13) One stitch line to hold the lining in place and one just outside the lining. 14) I use Serafil 40 in black as thread. 15) check the boot for any obvious small defects that can easily be fixed. Here the stitching for the cover for the back stiffener has become undone. It takes about 2 minutes to do this little job, and gives a happy customer. Damaged/missing buttons I charge for replacing, but minor sewings is included. The completed boot. Ready for some more use.
-
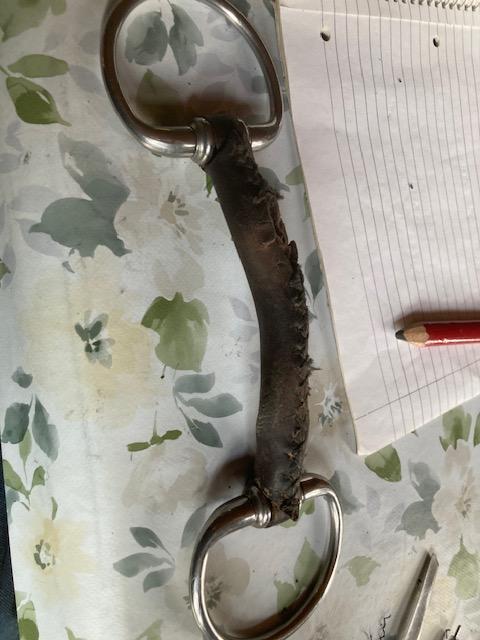
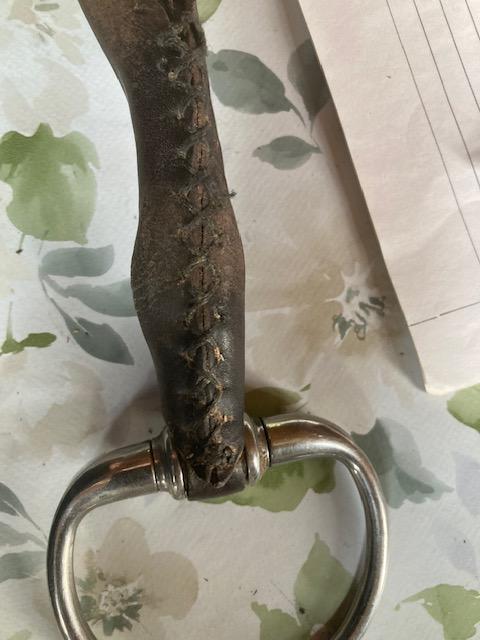
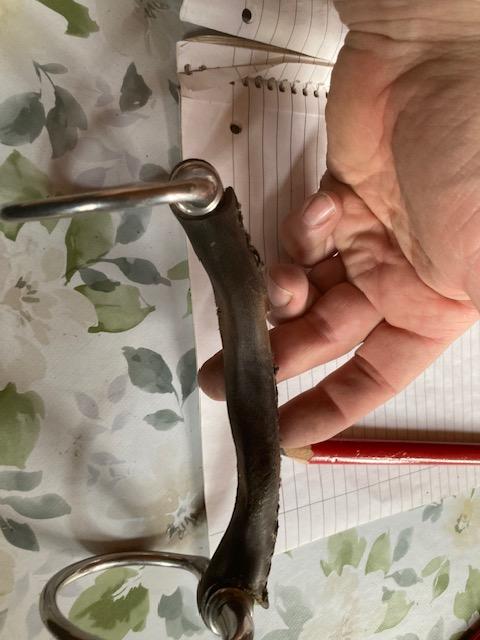
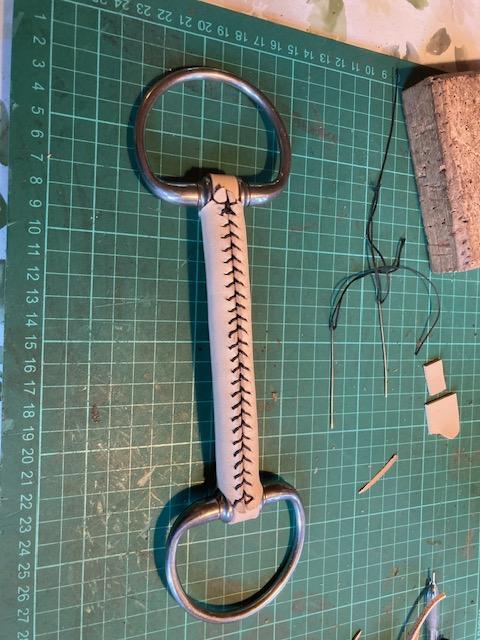
This time at home I was asked if I could replace the leather on a leather covered bit. I gently removed the old covering and used it to make a template for the new covering. I used some veg tan since I read that it was the preferred material for the horse to chew on. THe idea is semingly that the leather is easier on the teeth and the mouth of the horse, and that sounds right to me. I opted for a baseball stitch instead of the original criss cross type stitch, In my head I am able to make a tighter sewing that way. I read on a page regarding leather bits that it was encouraged to give the leather a coat of olive oil, again as far as I could make of it all because the horse likes the taste and it is not harmfull. The process took about one hour in total. I forgot to take a picture of the unfolded pattern/template. There are two long pieces that follow the length of the bit and wraps around the rings, then the wide part is wrapped wround those to hold it all in place. Further on the inside there is a loose long strip to give a bit of symmetry on the opposite site of the long wrap around pieces. The bit is to be mounted with the stitching facing fwd, so away from the corners of the mouth of the horse. All in all a doable project with a minimal use of materials. Worn bit. New leather sewn on Comparison between old leather and new covering.
-
@bsshog40 I think it could be a deliberate choice to not have a "like" button. An old horse forum in Denmark pretty much died within a month or two after adding "like / dislike" buttons. Suddenly nobody commented on threads anymore, all the discussion was lost and that sort of took the charm out of the forum. So I tend to do like @chuck123wapati simply just reply a short remark that you like the content :-) Brgds Jonas
-
Looks really good. The sewing looks very consistent, and also the buckle fits very nicely in regards to colour, size and shape. Admittedly I have zero experience with western type headstalls, so there might be a reason, but considering your quality of hand sewing, I think you should have stitched the buckle in place instead of using that type of rivets (can't remember their English name). Brgds Jonas
-
Bought a beautiful Singer 29K-70 with treadle base
Mulesaw replied to Mr. Jay's topic in Leather Sewing Machines
@Mr. Jay Welcome to the forum. Congratulations on your find, those are great sewing machines. It looks like it is in a very fine state. I have a similar model (can't remember from the top of my head the number of it), but also one with the shorter arm like yours. When you get to the cleaning/oiling job, please remember to grease/oil the pivot bearings for the foot plate and for the main shaft with the flywheel. Since they are under the table it is very easy to forget those 🙂 Brgds Jonas -
@Einherj Welcome top the forum 🙂 Cool machine, sadly I haven't got any direct information about it. My suggestion would be to contact Sieck in Germany (www.sieck.de), and ask if they have any information about a machine like that. I would think that any manual regarding an eylet setting machine would be helpful, I would guess that the working principle is the same for those machines. Brgds Jonas
-
That's one mean looking snake! Really good job!
-
It is a nice touch to use reflective material for the edge roll. And yes, straight lines are difficult - It can help to mark a line using a very soft pencil, that gives your eye something to follow, But if you have an edge guide that is probably even better (I haven't got one on my sewing machines). Another option that I use often is to let the side of the presser foot follow the side of whatever I am sewing. Brgds Jonas
-
Looking good, and good looking dog too! Is it a Great Dane? It looks very stoical and majestic. Brgds Jonas (Newfoundland dog owner)
-
@beijinho There are some videos on Youtube with a saddlemaker from Pakistan or India, that makes an English style saddle from scratch. I can't remember the name of it at the moment, but I am pretty sure that I just searched for saddle making" and scrolled till I found them. It isn't exactly an instructional video, but it still shows the processes and that is pretty much what I would need. The link I provided is for this site (leatherworker.net), and it is a good book despite it isn't the most modern. If you read that and look at some videos you are pretty well off I'd say. I don't know where you live, but if you can get your hands on an old saddle, you can learn a lot about how they are constructed by taking one apart. I got two worn out pony saddles a couple of years back that I intended on copying, but I haven't found the time so far. What type of saddle are you planning on building? Dressage, jumping or combination? Brgds Jonas
- 6 replies
-
- saddle
- english saddle
-
(and 2 more)
Tagged with:
-
@beijinho The book " making a saddle" can be found here 🙂 The first link is dead, but the moderator Northmount has fixed it, so the second last comment has got a pdf for the book. Brgds Jonas
- 6 replies
-
- saddle
- english saddle
-
(and 2 more)
Tagged with:
-
@Ledhep Welcome to the forum. I can follow you completely in wanting to take your skills to the next level. In your profile information you write that you are interested in learning about hand tooling, sewing and finer work. Perhaps set yourself a challenge of making for example: 3 tooled belts this year. It could be a floral design or something completely different, as long as it is something you like. After each belt examine them closely and be honest with yourself in your own critique. Was the stitching consistent, well laid out pattern etc. that'll give you something to work on for the next belt. Afdter that, you again look at it, and compare it to the first one. Did you do better on the focus points etc. That way you can monitor your own progress. The reason I suggested belts is that they allow for a lot of practise with a not too high investment in materials. and you can always give them away as birthday gifts when you don't need anymore yourself. Also if you work really focused, you can see the result in e.g. a weeks work with a couple of hours here and there. I think the most important thing is to do something you enjoy from the start, and it needs to be something where you can see a progress. Because there is just something comforting in being able to see that you are actually moving forward. Brgds Jonas
-
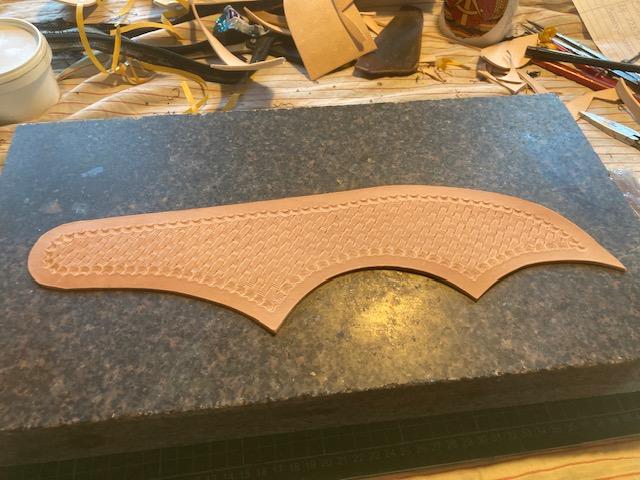
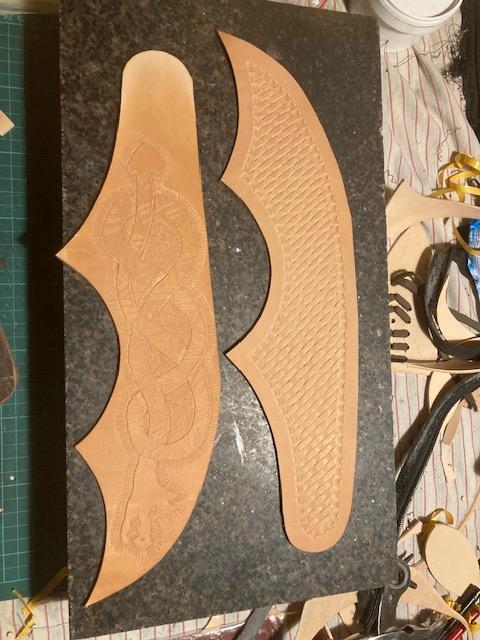
I had made a pair of chaps for one of Gustavs friends. I had been asked to make them exactly the same size, so I did.. The first time he tried them on he realized they were too small around the waist, and the legs should have been 4" longer. It is a guy who has helped Gustav a lot, and Gustav wanted to give them to him as a gift, and since he is the only western rider I know of in Denmark, I had promised to make them. But still it kind of bugged me that they didn't fit the first time, so I started making a chaps measuring belt. I have seen a video on Youtube with a shop where they have a belt like that. So techjnically it is a set of yokes, an adjustable backbels and an adjustable front belt. That way it will be possible to find the correct size and get the yokes to sit nice on each of the hips. That will also give something to use for measuring the height of the chaps so they will fit. At least that is the idea. In order to make it a little bit interesting for me, and also to show people the limited skills I have in carving, I decided to make one of the yokes with traditional basket weave, and the other with a norse inspired dragon/snake that coils around itself - in case someone wants to order a set of biker chaps (those people in Denmark at least seem to be more into snakes/dragons than basket weave). Looking at the finished carving I can see that I still need to work a lot on making the dragon more fluent and coily, but for a first attempt it is OK I think. So far the biggest mess up is that I forgot to leave room for the end of the front belt, so that will cover the head of the dragon/snake, but it was pretty fun to do the carving and trying to get by with my 4 stamps that are not for basket weave. I have made a back belt and a front belt, but I didn't have time to mount them before going out to sea again. Tandy pattern yoke with basket weave. (before beveling the edges) Norse inspired dragon/snake, 1st attempt both in design and execution.
-
Saddlery Workshop - Kings Troop, Royal Horse Artillery
Mulesaw replied to StuH's topic in Sewing Leather
Really interesting video. The way the sewing ends on the straps is new to me. I have never seen it done with a small "return stitch" for a lack of better description. Visible on several straps around the 0:47 mark in the video. But then I haven't got much experinece in military draft tack. Brgds Jonas -
Stretching leather for a set of sliding reins
Mulesaw replied to Mulesaw's topic in Saddle and Tack Accessory Items
The sliding reins ended up really nice. I polished the edges and gave them, a solid amount of my own leather grease (ox lard and neatsfoot oil), I found myself just sitting and running them through my fingers when I sat in the sofa in the evening, so I decided they were a success even before Gustav started using them 🙂 I have a bad conscience.. I had promised to write a tutorial in here about changing zippers. Bu I still haven't pulled myself around to do it. Glad to hear that you managed to fix those boots. Once in a while I get some boots too that are so heavily over oiled that the leather feels kind of tacky. But it is like you describe: Impossible to get anything to hold, whether contact glue or tape. That really doesn't help with the project. I haven't done any with a curved zipper on the outside, it sounds terrible! The worst kinds I think are tall dressage boots with the zipper in the front. They are just a pain in the neck to do, it is so hard to make it look decent at bottom. Repairing zippers isn't the most economically sound thing to do for our little business. We charge a fixed amount for a zipper, and it doesn't give a lot per hour if I try to calculate it that way. But it is really generating a huge customer base once word gets around that you can do it. Plus when I am home I really try to do it within a day or two. People really appreciate that since the normal lead time can be a couple of weeks as far as I have been told. Brgds Jonas -
Stretching leather for a set of sliding reins
Mulesaw replied to Mulesaw's topic in Saddle and Tack Accessory Items
@Gezzer @Samalan Thanks for the nice comments, It worked like a charm. I forgot to write that I cut the straps a smidge wider than the 5/16", so that they would end up being the correct width after stretching. Brgds Jonas


