


MarshalWill
-
Posts
525 -
Joined
-
Last visited
Content Type
Profiles
Forums
Events
Blogs
Gallery
Store
Everything posted by MarshalWill
-
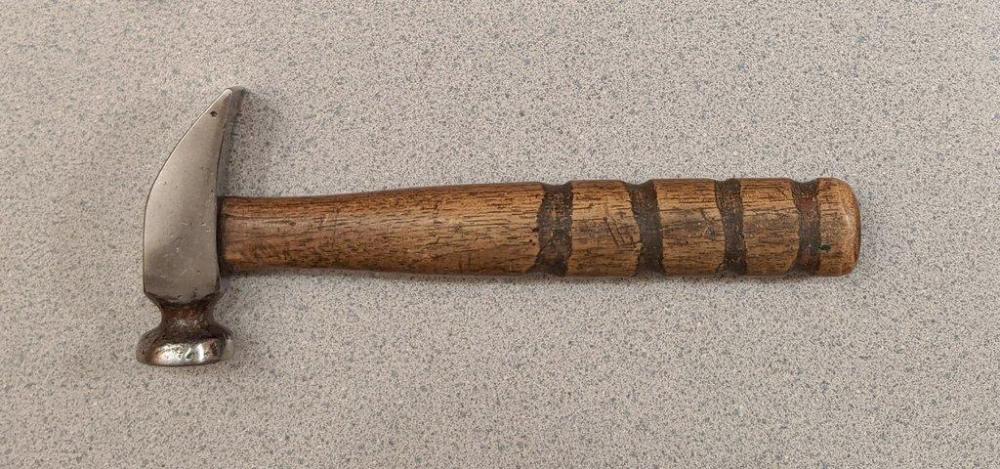
Beautiful. It's always good to see old tools made good again. I use my grandfather's cobbler's hammer and it was a pitted mess when I got it. I had to take off a lot of metal to clean it up. You can still see one pit at the top that was really deep and i didn't want to take off enough to get rid of that one.
-
Looking really good, LD. It can get addicting.
-
It sounds like a good excuse reason to me.
-
Close to the edge where it's easy to nick the bench so don't do it on a kitchen table. LOL
-
Before I cut with one, I punch tight inside curves with hole punches before cutting the piece. Oh, yeah, I also don't have any carpet so I just cut off the edge of the bench.
.jpg.1c09812d156891b4d22964bbbdf273d6.jpg)
-
The only thing I use an X-Acto knife for is to cut out pieces. Other than that, they really don't have much use in leather working, at least for me. Here's a video showing a guy using one much like I do. This technique really makes cutting complex pieces easy. For cutting pieces out, watch from 2:49 to 3:33.
-
Looks mighty usable. Nice job.
-
Yeah, I strop them and whatnot but when they get down some, I stick a new one in.
-
True, one can't have too many knives. I have a good selection of them that I've made myself. I do draw the line at making an X-Acto knife, though.
-
If it works anything like the leather knife I made, you can run a long straight cut or a curve with ease. The advantage being it looks like you could cut quite a bit tighter inside curve. And yes, sharpening should be a breeze. It's a great idea, may have to think about making one similar to it.
.JPG.8bafa48daca8670c25f8837cb48a061b.JPG)
-
I like this one a lot! There would be a lot of different applications for it. I wonder how it would feel with the handle set a little farther onto it. Of course my experience is with stubby handled knives for push cutting. Good job, Chuck.
-
I have one suggestion for you to consider. If the clamp part can rotate on the cross base, it will allow you to hold the work at any angle you find easiest.
-
Those are fine holsters. Very nice!
-
You're getting there. This one is cleaner. Glad to hear the burr worked better for you. A head that was just the size of the letters would be good.
-
Yeah, the cost is up there. But as you said, after cutting steel for a while you should be able to easily control the rotary tool. So far, I've only made stamps that can be done with files. For complex ones, I go to the pros. It would be fun to make a stamp with a mill, though. You could really get accurate work with one.
-
Hey, that's an idea. Maybe take a stab at making one out of Delron. It would be a lot easier to cut than steel.
-
Oh no, I'm not that good. Not even close. I had that made by Jeff at Grey Ghost Graphics. He does spectacular work. It's laser cut out of Delron. I just wanted to illustrate the cut back around it to give you thge idea.
-
I will remember that. Be sure to post some of those feathers you do once you get one.
-
I thought about that but I still might want one so I'd better hang onto it.
-
Man, that's beautiful. You're fortunate to have found such a nice spot to live.
-
I have one but I've never used it. I bought it one time when I thought I might have a use for it but found out I didn't. So my only experience is that it doesn't take up much drawer space. LOL
-
That might do you well. It would take some practice but you'd soon find the best way to use one on feathers.
-
Beautiful work. I'd have a hard time choosing a favorite.
-
Those look good. I agree with @DieselTech that the feathers and sunflowers should be the most popular.
-
Don't be hesitant to take much off around it. Here's one I had made but notice how much was relieved around it. It makes it easier to align.
.jpg.b44e884541fa20d04c144f24e3b86756.jpg)

