
BigBore
-
Posts
184 -
Joined
-
Last visited
Content Type
Profiles
Forums
Events
Blogs
Gallery
Store
Everything posted by BigBore
-
Thank you all! Much appreciated!
-
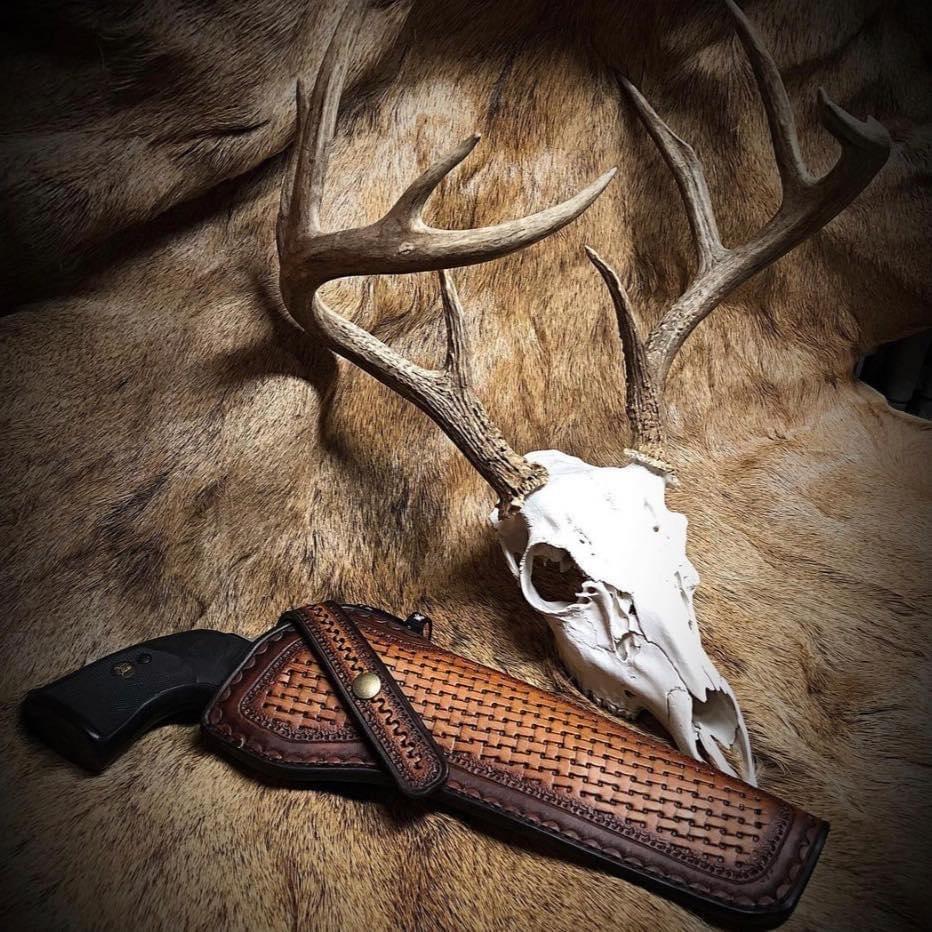
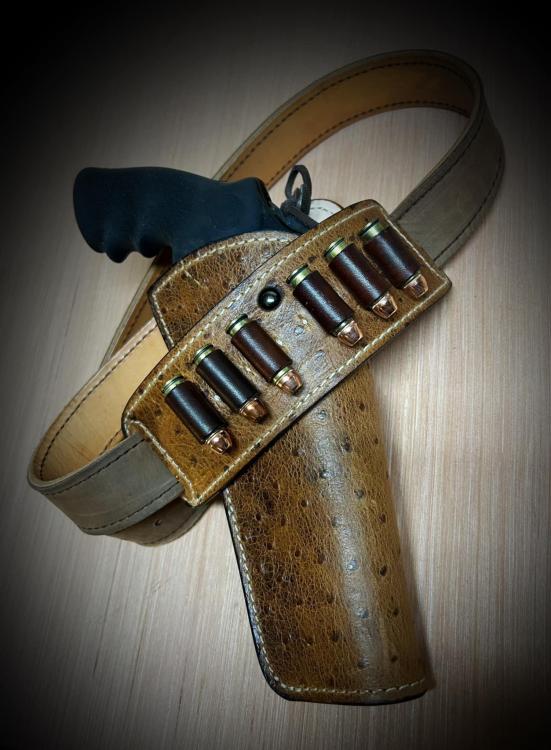
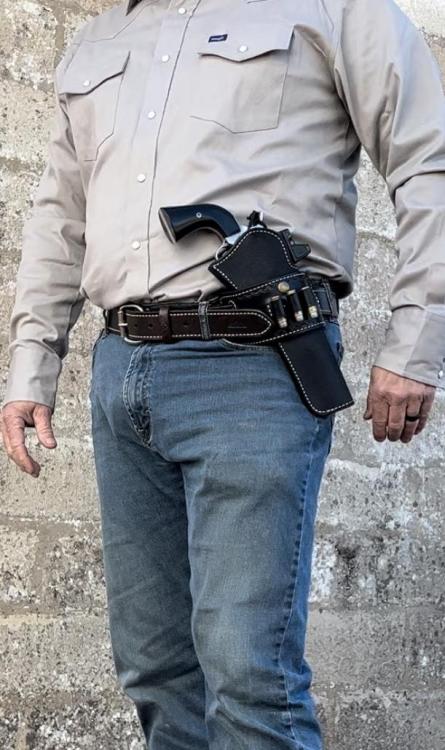
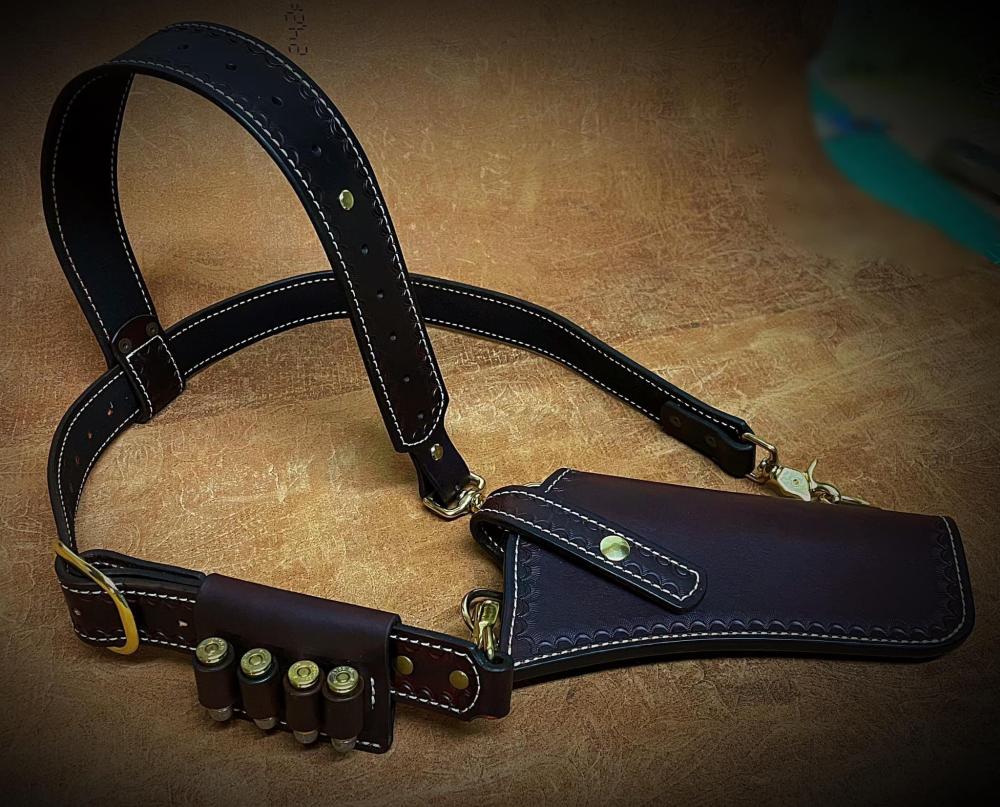
A few recent builds. The first is what I call the ‘Texas Sidekick’. I’ve posted this before, in different leather/color combinations. The belt slide stays with you all day, but the gun/holster can quickly and easily be removed while at camp or when you get to your hunting spot. Can be worn strong side or cross-draw. This particular one is for me. Made with Ostrich bonded and stitched to veg-tan. Revolver is a S&W 57 in .41 magnum. Second picture is of me wearing one cross-draw. The next two are my ‘bread and butter’ in terms of orders. Customized chest rigs for various handgun/optic combinations. Almost all my orders are from handgun hunters. Thanks for looking!
-
Stunning work!
-
Stunning work!
-
Very nice! ‘Sharp’ looking project!
-
Outstanding work!
-
Very sharp!
-
Outstanding work!
-
This is what I do. I have customers send me a detailed tracing; I then take it and glue to a piece of 1x6; cut it out; sand the edges; and bam...pattern. Works every time and very well. For me this is the best route anyway because 90% of what I build is for handgun hunters and the possibilities are endless between handgun/optic combinations.
-
Thank you. Yes, this is how the hide came. No top coat either. I tested a scrap with a top coat and didn’t like the way it looked.
-
Thanks everyone! And yessir, it’s one piece.
-
Thank you both. I just thought I kept my machine well oiled. Until yesterday I had only ever just oiled the drilled holes across the machine. After CowboyBob replied I took the side plate off and did it more thoroughly. Seems to have fixed the issue.
-
Working on a holster this weekend and the presser foot is getting stuck in the 'up' position. I can push on it and it will snap back down, or essentially raise it with the foot pedal and it will fall. Then it will work a little while and then do it again. I've also noticed when raising the presser foot with the pedal, it isn't a 'smooth' cycle, if that makes sense. I keep my machine well oiled, unless I'm missing a port somewhere. Anyone experience this before?
-
Very nice.
-
Thank you both very much!
-
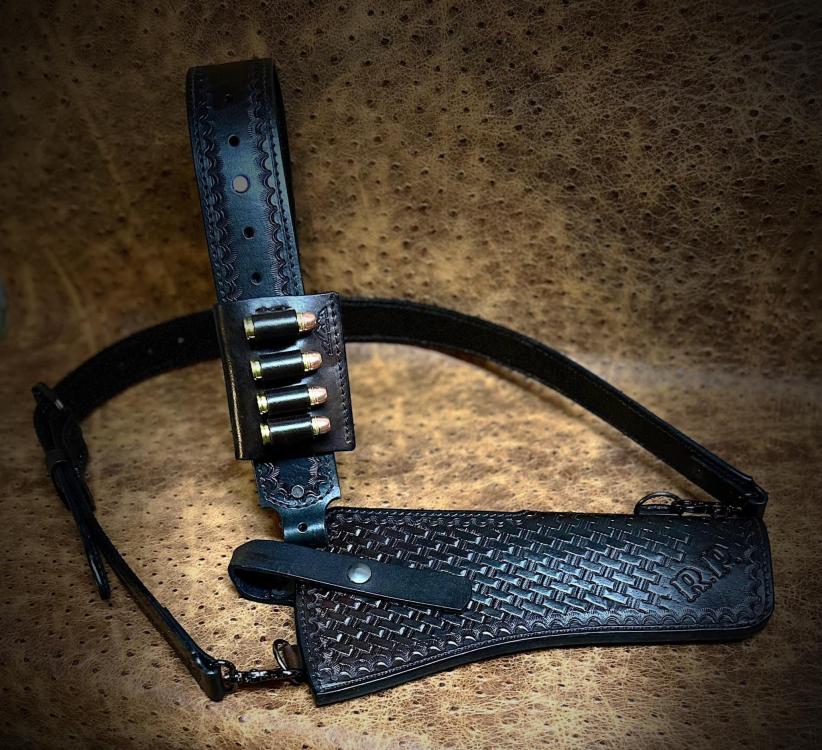
Created a wheelgun holster: Let me know what you think!
BigBore replied to YinTx's topic in Show Off!!
Very nice work! -
Slim Jim 51 Navy Holster
BigBore replied to JWheeler331's topic in Gun Holsters, Rifle Slings and Knife Sheathes
Outstanding work! -
Creepy is right! Nice work!
-
Well done!
-
Thank you both!
-
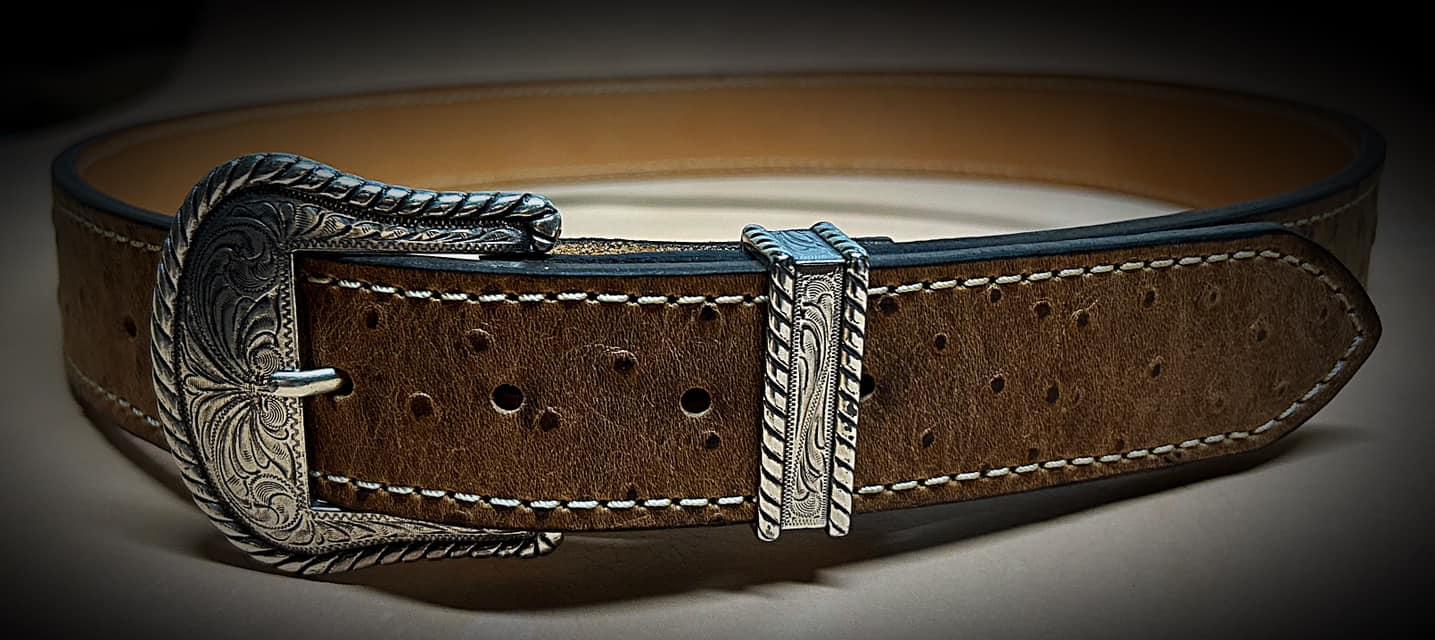
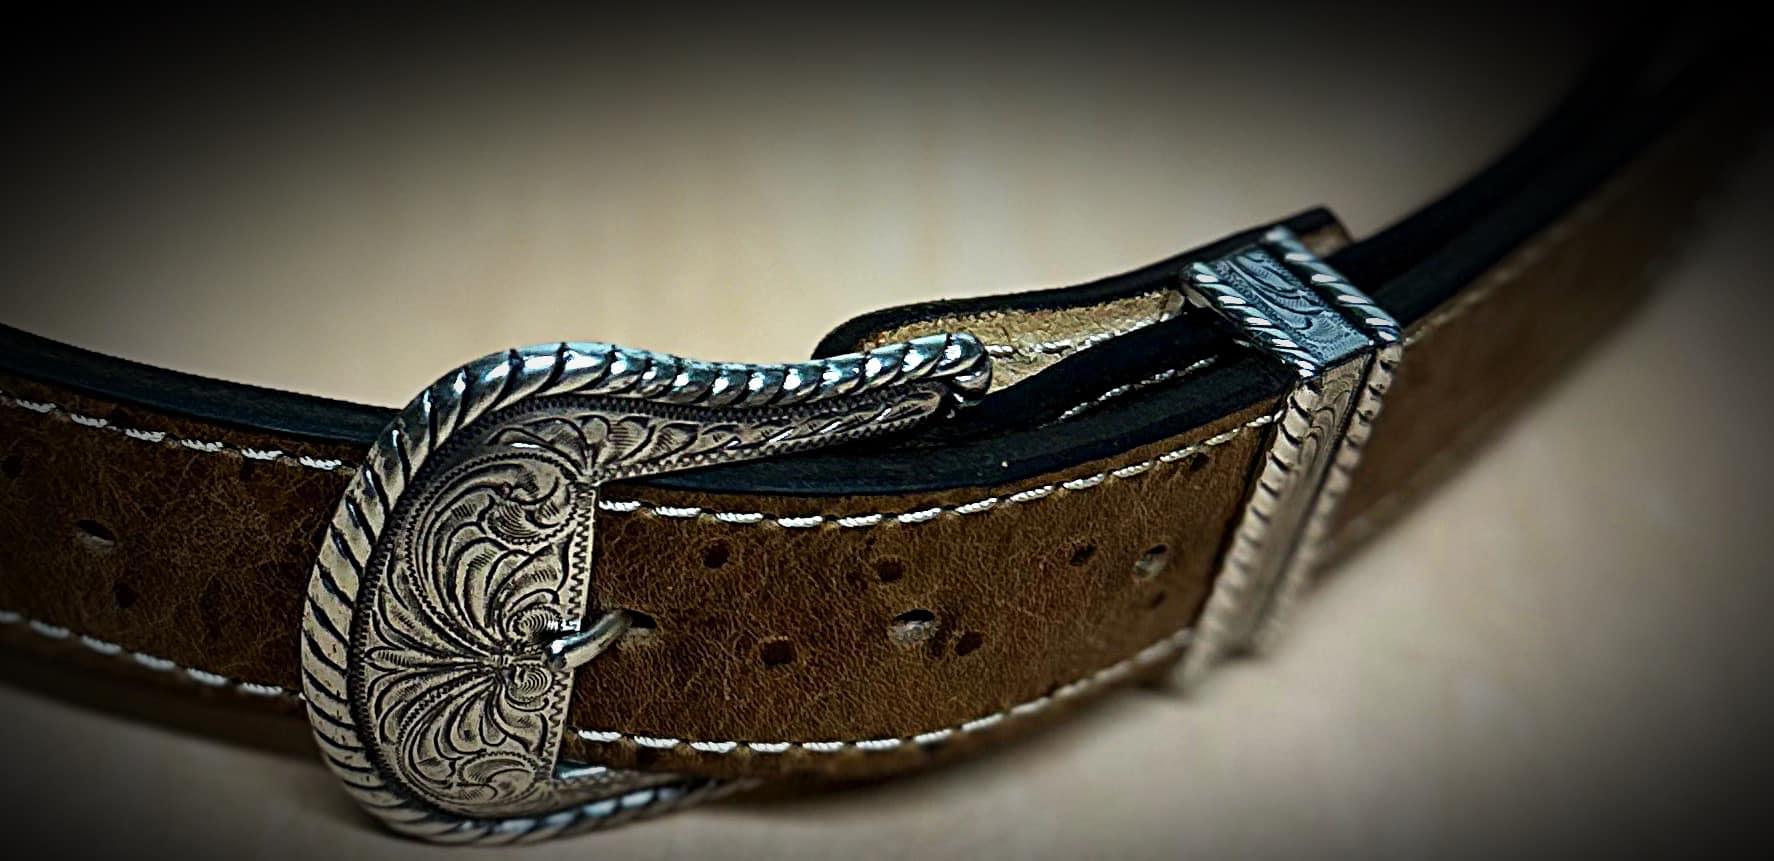
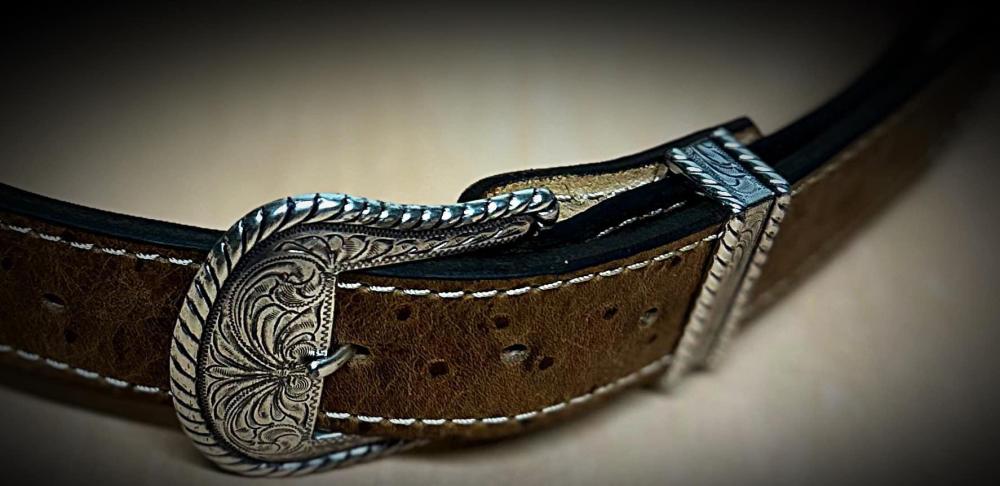
Finally had time to knock this out. I've had intentions on making myself a belt to match a new pair of boots for several months now. Got caught up on customer orders recently so it was nice to do something for ME! haha. Simple project but I'm please with how it turned out. Ostrich (pretty thin hide) on top, 10 oz veg-tan as the lining - bonded, stitched, and buckle added.

-
Well done!
-
Thank you both very much!
-
Texas Sidekick. It’s my project. To get the contrast on that belt slide, I tooled the leather, let it dry completely, coated the whole thing with tan kote, let it dry completely, then used brown antique paste. I use an ample amount and make sure the paste gets worked into all the groove/tooled areas, then use a clean paper towel and wipe the excess off the top or, un-tooled areas. Let it dry completely, and then a final coat of tan kote over the whole project again.
-
Thank you all very much!