Search the Community
Showing results for tags 'timing'.
-
I recently acquired an Adler 169-373 cylinder arm machine. It had many issues ( you get what you pay for, right?!). I have taken care of most of them, however, the one I cannot figure out is, the feed timing issue. The needle and inside foot as well as lower feed dog all start moving back ( toward operator) before the needle has cleared the work. This is completely wrong for a compound feed machine. I have never had this issue and don't know what to adjust. No manual I have found has dealt with this adjustment. Any help out there? Current collection of machines- Adler169-373, Adler 67GK373 (2), Adler 205-64, Consew 225, Consew 225RB-3,Singer 153W103, Singer286G132, Singer111W154, Singer 29K60, Adler 30-70, USMC Model C clicker, Randall NSB Edge Beveler.
- 8 replies
-
- timing
- adler169-373
-
(and 1 more)
Tagged with:
-
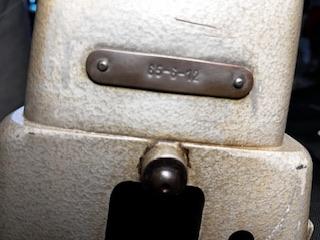
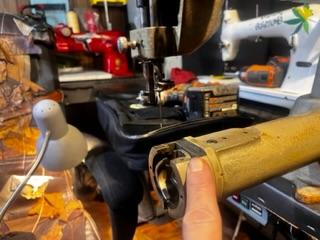
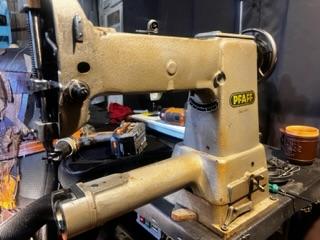
I pick up this old Pfaff and would really like to time it. I can’t access the front of the cylinder bed that covers the bobbin area. Any advice on how to access this part of the bed would be greatly appreciated, and how do you find the model of the machine? Looks like a 28, but badge says different… thanks in advance!!!
-
I have a THOR GS1341, LOVE it but cannot get timing set for some reason. any tips or anything I can try? I am rewriting the manual as there are MANY errors etc.
-
Could some one give me some advice on how to set up the timing on a Singer Model 2732. It's not a heavy duty machine it is supposed to sew zigzag and decorative stitching but everything seems out of wack. It breaks thread and sounds like things are binding internally and skips stitches; I'm sure it's the timing. Does anyone have instructions on how to set this machine? Any information would be greatly appreciated. Thanks Kevin
- 4 replies
-
- set up timing
- model 2732
-
(and 2 more)
Tagged with:
-
Good day every one, My name is Carlos, from Houston Texas, I recently acquired a singer 111w155 since I have been interested in learning to sew some leather as a hobby, I also have a Adler 30-1. have only done a little patching a minor items with it. I have problems with the singer 111w155, and would appreciate some needed help if possible. got it about a week ago, cleaned it with W40 and kerosene , then oiled with sewing machine oil. It did not have a belt to motor, but after it was lubed I did some manual stitching and it worked some. Noticed the arrow in the timing pulley was a little bit, OFF, removed timing belt, installed it with the take up level up and the arrows pointed as it showed in a members video ( Mr Grosse). But now the hook is way off when the needle in down position starting to come up ( first picture), even if I loose the the set screws for the gear for the hook timing does not even come close,, any advice on what to do, I have looked at videos and have the manual but can not figure it out 2nd and third picture is how timing belt was installed Thank you. Carlos
-
This is a general question, that relates to a more "normal" sewing machines with ordinary drop feet (not walking foot). Most people with some knowledge of sewing machines know about, that the timing of the hook in relation to the needle is important. But the timing of the feed dog are not an issue in the domestic sewing maschine service manuals, that I have seen. I have checked the five sewing machines i got, and they all have a similar timing of the feed dog, and it seems to me that the timing is about 30 degrees late. I think that the designers of sewing machines must have a reason for that, I just like to know why. For domestic sewing machines, there may be some jobs of soft fabrics of high thickness, that a user may like to use the machine for. But this seems not made possible by the chosen timing. I made this video about the issue. I hope someone here may have an answer to the question - why the normal feed dog timing is like that? The cover picture of the video shows the measured position of the feed dog of my Singer 201k.
-
I have been tweaking and practicing on my new Ferdco Pro 2000 for the last several days without so much as a missed stitch. Last night I thought I would try 4 layers of 11/12 oz veg tanned (5/8" thick stack), to see how the machine would handle that. Good Idea, bad execution, as I used some older leather that was given to me and although not cracking by any means, it might have been a little too dry, and tough for this test. At about 2 inches into the test piece, there was a loud thunk and the needle snapped in half. So I removed the material, checked to make sure the shuttle area and race was clear of debris and installed a new needle. Upon bringing the needle down by hand, I noticed that shuttle did not appear to be in the correct position. Uh oh, timing issue. I just happened to have watched Uwe's video on shuttle hook timing earlier in the day and even printed out his gauge templates on card stock to bring home from work. However upon further examination of the machine (after watching Uwe's video again), I believe that it is not a shuttle hook timing issue, but rather a shuttle driver timing issue. Diagnosis/Observation: When the needle bar is brought down to its lowest position, 25.9 mm above the needle plate, I believe that the shuttle driver should be in the farthest counter clockwise position with the tip of the shuttle hook sticking out about 1 mm. Then as the needle bar starts to rise, the shuttle should start to turn clockwise so the shuttle hook can catch the loop being formed in the top thread, as the needle rises. On my machine, with the needle bar down in its furthest position (26.5 mm), the shuttle appears to be a full 180 degrees off. When the needle starts to rise, the shuttle starts to turn counter clockwise, instead of clockwise. That is why I am thinking that this is a shuttle driver timing issue. I did an internet search for this problem last night, but found no solution. I am hoping that @CowboyBob, @Cobra Steve, @Wizcrafts, @SolarLeatherMachines, @Gregg From Keystone Sewing, @Uwe, or any of you other 441 experts can point me to a solution for this issue.
- 11 replies
-
- timing
- ferdco pro 2000
-
(and 1 more)
Tagged with:
-
Hello everyone! I have been reading here for quite some time and finally created an account, great site! Down to business, I recently picked up a consew 206rb-5, I cleaned and oiled the machine and have gone through some adjustments following the manual to a T. My machine is occasionally skipping stitches (maybe 1 in every 10-15 stitches) and the machine occasionally is ripping the top thread as it pulls back up through the material. I am using 69 thread with a size 21 needle. Typically sewing approx 1/4" thick veg tan leather. I would like to get this fixed as I have a family sew servo motor and 6’’ hand wheel on the way from Bob at Toledo industrial Other info: Needle bar height is set per manual Hook timing is set per manual Hook spacing to needle set per manual Needle inserted and aligned properly Feed dog alignment set per manual Needle alignment with feed dog set per manual Any help is greatly appreciated.
-
I Have an older Consew 226 with reverse (name plate just says 226) that has been used, maybe well used. It sews fairly well as far as stitching goes but I can't seems to make it run quite straight as the needlebar rock frame moves on the stud. I also need to get this last bit of backfeed taken care of. I have gone through all of the upper end adjustments/eccentrics and this is as close as I can get. The feet and feed dog are worn and I will be replacing those soon, hopefully straightening out the stitch and relieving the rock. What do I try next? Adjusting feed dogs on the rockbar?
- 3 replies
-
- consew 226
- singer 111
-
(and 3 more)
Tagged with:
-
So after a speed reducer we broker a needle and kept getting a couple of issues with the bottom thread. I looked at the motion of the machine without the belt on and can see the bobbin pushing the thread slightly to the left when it hits the bottom of the indent (Juki 5550). As a total novice, how do I adjust this?
-
This is my most favorite site for sewing machine info and hoping the collective experience here can help and save me an embarrassing trip to the sewing machine shop. I mostly sew on canvas for sails and boat projects and started messing with my Pfaff 545 H3 that isn't totally new to me and sewed OK, but was obviously not tuned. I started with the available 1245 adjustment manual and followed the steps outlined there. Centering the lower dog within the needle plate was needed and easily done , so was adjusting the lower feed dog height, and the needle bar height (Sections 13.05.01 through 13.05.04). First problems occurred when trying to follow the 13.05.05 which involved centering the needle in the needle hole. The 1245, with the internal pressure foot spring, has a different needle bar frame (NBF)_ and associated adjustment compared to the 545. On my machine the needle entered the lower feed dog too far to the left (and this has caused some needle breakage if the needle got deflected too much while sewing). The only adjustment I could find was loosening the set screw on the top pivot shaft and then trying to move the NBF to the right. But it appears that the frame is out of travel space at the bottom and contacts the lower right-hand guide on the machine case. This then actually cause the needle bar frame to start "tilting" more to the left and further offsetting the needle relative to the feed dog. So with that in mind I tried tilting the whole frame the other way, which worked, but caused the outer pressure foot mechanism to bind. In the end I compromised and left the needle somewhat off center right-to-left. Am I missing some adjustment? In sorting all of the above out, I did manage to take things far enough apart to remove my broken needle bar (lowest thread guide was broken off) and replace it with a new one I had bought more than a year ago. I needed to do some serious battle to remove screw near the stitch length/reverse lever that adjusts the fore and aft centering/timing of the needle entering the lower feed dog. Somebody had previously tried and failed and left the flat head slot stripped. Small butane torch to heat things up, and then pitting German against German, my small Bosch 12V impact wrench finally did the trick. I felt pretty good after getting that screw out and doing the fore/aft adjustment. My next steps (and this is where things have gone awry) were to adjust the eccentrics related to the bottom feed dogs and drive motion eccentrics (13.05.06 and 07). In a total brain fart, I loosened the screws holding the tops of the rings riding on the eccentrics (the ones with the nice red lube holes) and not the eccentrics themselves. The machine immediately stopped turn over and no loosening/tighting of the screws, including those of the eccentrics has made things better. HELP! I assume the eccentrics themselves are round, but mounted off center on the shaft. I don't quite know where the friction is coming from - maybe the two eccentrics are rubbing against each other? Also, is there an adjustment manual specific for the 145/545? The timing instructions for the newest 1245 look a bit different although this manual (245, 1245, etc) seems to show an older machine and things look more similar to the 545. Hopefully all the above makes sense and thanks so much for any feedback and advice. BTW I am in the SF bay area and happy to meet with folks if necessary. Erik
- 6 replies
-
- needle bar frame
- eccentrics
-
(and 2 more)
Tagged with:
-
Hi all! New to this forum, and leatherwork too, but it seems to be an amazing wealth of information! I've dove in headfirst and bought some equipment, namely an Adler 30-10. I was aware of the price of spare parts before I bought it, but it didn't seem to be needing too many at the time of purchase (at least to a newbie), and the action felt tight, and turned smoothly. No play in the presser foot and needle went up and down smoothly as well. And seeing as how these never come up for sale in my neck of the woods I figured why not. I'm decently mechanically inclined so I figure I can handle most operations aside from machining new parts! So after a thorough cleaning of the exterior and getting to know the various parts I have a few questions that hopefully you guys have answers to: 1. The only way to transport this thing was on its side. Probably not the greatest idea in hindsight but that's how we did it. About a tablespoon or two of a yellowish oil leaked out of the cover plate on the rear. I'm not aware of a reservoir on this beast, so is it alarming to see this happen in such great quantity? When the time comes to lube it up again, what is the best stuff to use, and how liberally should it be applied? 2. I haven't tried to sew yet, but just inspecting the action of the shuttle/carrier. The carrier itself has play to it. Swings back and forth about 1/8" maybe 3/16". Also the shuttle itself is a Singer replacement but it doesn't exactly fit too tight in the carrier. Should I be concerned with this amount of slack? Is there any way to tighten the carrier up? Timing it will be a whole 'nother issue but is there anything to look for that signals "part replacement"? There isn't any visible grooving of the race/wear on the carrier. I suppose sewing with it is the only way to truly know? 3. Which Singer parts can be used to replace parts on a 30-10? I'm sure I'll have many more questions as I get a few levels deeper into this, but these are the first. Thanks in advance! Stoked to get this thing running its best! Cam
-
Hi everybody! I have a problem with old pfaff 545 (I believe, because front model plate was lost)- on single leather layer upper thread tension is not enough (needle thread №20, bobbin thread №30, tensioner kit is new, and screwed at max., needles 134-35 №120 LR, foot lift on low position, stitch lenght is about 4.5mm max). I tuned timing - needle 2.5mm up from lowest position, hook 1.6mm above the scarf of needle... I hope you can help me!) *sorry if my English was bad...
-
Hi all, I'd be grateful for some help getting my Pfaff 1445 going. I previous posted about feet, which I got from Hong Kong. They're mediocre but acceptable quality given the rarity of the machine. The machine wouldn't have been a bargain if it were free considering the time and expense that's gone into it. But hey, we've got another machine so I'll consider this thing a hobby. I've got the hook correctly timed, but I'm finding that it's very difficult to correctly balance relative top and bottom thread tension, or top dog pressure may be incorrect, or the bobbin case opener isn't correctly timed or distanced. Or all of these. Compound feed is accurately synchronized, needle bar centered in all dimensions, all stroke lengths are correct, bottom feed dog height properly set to ~.020" (.5mm) per the service manual. I've got a new needle plate, feed dog, and feet, which feed perfectly straight. I do need to take the needle plate over to the buffer and ease some of the edges the thread goes around. No problems with inconsistent tension between the cone of thread and tension rings. Top thread is correctly routed per the operating manual (unusual design and route). Bobbin thread is correctly placed and pulled. Pictures attached. Symptoms are: • Occasional skipped stitches and slightly inconsistent bottom stitch; the bottom and top quality don't match consistently • Backtack thread tension is very loose • Starting the stitch occasionally results in a squirrel's nest mess of thread on the bottom • When I get the top and bottom tension balanced such that the thread is more or less locking in the middle of my material, I occasionally find when turning the handwheel that the top thread is very tight as it crosses over the top of the bobbin and the motor may even slip on the belt I strongly suspect some kind of binding or tension issue is causing thread to get pulled off the bobbin or through the top inconsistently. I'm running a 3/4" HP servo motor with what I believe are the correct thread/needle combination for layers of 3 - 6 oz chrome tanned and retanned vegetable tanned leathers (the same size combination has always worked quite nicely on another machine).
-
Dear All, I am new to the forum and have a question that I imagine may already have been looked at by some of you. I was given a Frobana outsole stitcher in dubious shape but am keen to get it stitching. I am struggling a little to adjust the timing of the hook and am wary of getting too physical with the workings until I know which screws etc I need to deal with. Does anyone have any suggestions on this? I'm not sure of the model but it has a wooden base and no cowling over the machine....... looks like the one in this youtube post: Regards, Alex
-
I've got a techsew 5100 that is eating my lunch....I know the timing is off. I have gone through all the timing procedures. I have been dealing with machines for around 8 years now and so I've already gone through all the newbie mistakes. I get the shuttle lined up at zero stitch. The Allen screw is tight. Sewing thinner leather does ok but no matter what thickness, after a period of 15-30 stitches the top thread gets frayed, then it begins skipping stitches. I have changed needles, smoothed off burrs on shuttle hook, and done just about all I can think of....is there any issue that could be up inside the drive arm,etc? For whatever reason when it begins to have problems, the shuttle timing is off, but with everything I know of being tight, am I missing something? Any advice or criticism will be greatly appreciated. I also have a cobra class 4 and have been trying to see where the difference/problem can be and pfffft...Thanks in advance and hopefully somebody else has been down this road.
-
I have the original manual and a variety of military manuals. I've read previous forum posts on here and looked for videos. I've taken out / loosened all screws involved and I removed the pully. This bushing is stuck! This machine is a beauty and has about 99% of all it's original USA parts. The bushing is original USA and I don't think it's ever been removed. The machine belonged to an elderly woman who sold her house and left the machine there for the realtor to get rid of. I got wild and chopped out the original timing belt for obvious old belt reasons. I'm trying to get the bushing out to put the new belt on. I can't help but think I must be missing something. If there are tricks to getting out arm bushings that seem fused in, I am open to any and all suggestions.
- 23 replies
-
Help guys! I'm in a time crunch and after 5 hours of trying to figure out what's wrong, I"m going crazy. Here's what happened: I replaced my hook and shuttle, and while the needle was just barely grazing the hook tip, it worked fine for about a week. I then started breaking needles, and my timing got off. So I opened her up. I loosened the three screws on the main wheel, and adjusted the timing. In the process I took of my bottom feed dog but put it back on. My timing is fine now, but my feed dogs are off. My stitch length is much shorter than normal, and no matter how I adjust the bottom feed dog plate (up and down) it's just not working right.... I fear that while trying to adjust the timing and loosening a few "other screws" (including the cylinder to the left of the big timing gear- altho i tightened it back up), I really messed up my feed. I have a Cowboy 227R (cylinder arm) and while i cant find anything online for it specifically, I've been looking at the Consew 227 which I think is a very similar/same machine? However I still cannot find a solution. My nearest repair option is a few hours away and I'm desperate here. ANY help you can offer is appreciated! Thanks so much everyone- Erin
- 2 replies
-
- cowboy 227
- cowboy 227r
-
(and 3 more)
Tagged with:
-
Would really appreciate some help in resolving a problem that I've been having with my Cobra 4 stitcher. I know I probably am not using the right words to describe a problem that I'm having but my bobbin hook doesn't line up with my needle as the needle starts to come back up and I'm having a problem with skipped stitches. My hook isn't lined up and I don't know how to move it into the right position. The bar holding the needle is in the right place when it is in full up position, but the hook on the bobbin assembly isn't and I can't move it either... so that is my question how do I line the bobbin hook up so that the timing of the bobbin is correct. I am just trying to get it into proper position to correct the stitching problem Thanks Debbie
-
i purchased a brand spanking new techsew 2700 back in April of this year (less than 6 months ago) .I was wondering if anyone could help or give me any tips on dealing with this incredibly finicky machine. Every time i have the slightest issue such as thread break the machine is thrown out of time and i have to readjust the hook timing. then i get it back to sewing and i have to be very careful and sew at the slowest speed and with only 69 or 92 thread or I'm in for trouble. i have tried everything i know to try to get it to sew 138 thread. i tried increasing needle size to 22 with the leather needle, lengthening stitch length and also using 92 in bobbin. nothing works. the machine is advertised at being able to sew 138 thread. I'm using no more than 2 layers of 4-5 ounce vegetan. most of the time its only one layer of vegetan and one layer of an exotic skin (thin) . I am sooooooo frustrated. Has anyone found that there is a difference in quality of the "clones" i just want to sew . i want to be able to change thread size with out being afraid . i want to not have to put this thing back in time so much. i feel like a mechanic now . I've been sewing for more than 30 years and i have never thrown a machine out of time.
-
Attached is a document with Notes on Timing a Consew 229 post base industrial sewing machine, including details about what goes wrong when the thread piles up above the needle, or when there's looping below the fabric that can't be solved by ordinary tension adjustments. It's my version of notes about what is not already in the manual for the machine, and what a novice might want to know when venturing into this job. This is written for an absolute beginner, in what I hope will be viewed as very simple language. If any person has this machine and cannot locate the manual, try sending me a note at radavich at moscow.com, and I'll try to locate my source or will copy and mail to you. Roberta Timing Consew 229.doc
-
Title says it all. Does anyone have specifics on where the needle should be in relation to the shuttle hook during operation? I can see where it's adjusted, just want to put it in factory specs. Manual doesn't address this specifically. Thanks so much! Bill
-
Here's the story of a Singer 29-4 sewing machine repair, for a machine that is skipping stitches. I'm writing it for someone who follows after me that may not have much background in repairs, and may have a machine as worn out as mine, so descriptions are as simple as I can make them. I've been trying to figure out why the Singer 29-4 machine skips stitches. I was given this lovely old industrial treadle machine, and except that it moved a little stiffly, it mostly sewed ok. It only rarely skipped stitches, until the day I oiled it. No kidding... the old gunky oil must have been all that was holding some of these parts in alignment, as after oiling it moved really smoothly, but began skipping stitches like mad! What a shock! I didn't even know this was possible! Now this machine has seen a lot of wear, the insignias are completely worn off it, and it's been used to sew leather most of it's life. It dates at 1907 I discovered when I checked in with it's Singer serial number on their site. I wanted it to sew right. I messed with tension hoping that might help, but no help was had there. I verified that the needle was right for the machine, and the thread weight was right for the needle, the needle positioning was correct and then in frustration started the search for the manuals, the repair books, support forums, blogs, any place I could glean information. (many thanks to Wizcrafts for his postings on this machine) I got one good lead that the almost invisible black T shaped flat spring on the left side of the needle bar just below where it enters the body of the machine, was likely to cause skipped stitches if it was loose. Mine was loose, and with high hopes and a gentle hand, hoping against hope that I wouldn't break that little guy, I remedied that problem... but no... still a lot of skipping, big areas of an inch or longer would be left un-stitched. Feeling frustrated, I searched more. This led me to examine the timing, and after a lot of work with it, I realized that there are not more variations in how it can be set up... you simply cannot move the teeth on the rack to one side or the other without the rack either hitting the stops on the metal gear below the bobbin case, or failing to engage the second gear properly, if you move them even one tooth in either direction. Someone suggested that this placement of the timing rack could be changed, but on my machine, there appears to me to be only one way to set it up. If that gear below the bobbin case went all the way round in a circle with it's teeth, you could maybe move the rack over or back a tooth, but since it has only 3 teeth, when you slide the rack over, it either hits metal at one end of it's travel, or the second rack hits metal on the other end of it's travel. I took photos of the correct positioning, and will save them... not sure how to include them on this forum, but will try to imbed them into this message. For an inquisitive person, the timing racks and gears don't want to be looked at unless you first remove the machine from it's base and tip it back flat, before taking off that cover under there. Otherwise, all pieces will be on the floor, and you won't have clue where they went. So next I looked for slop in the bobbin action, and there was plenty there, nearly 1/8 inch of slop. I thought I might have to deal with new parts underneath, the gears and the racks that drive the bobbin shuttle, however I was hoping that it might not require this. So after more reading I also thought to check the amount of play in the needle bar. It had some side to side play of about 1 millimeter at the tip of the needle. I discovered that the second screw on the bottom of the needle bar, actually detaches a chunk off the bottom of the needle bar that holds the needle. All my newer machines were one solid piece down there, but this guy is made in two pieces,and the screw that doesn't hold the needle but is right near there on the needle bar, will allow you to position the needle side to side in relation to the bobbin shuttle. You can get it close enough to rub the bobbin shuttle case, which is too close, and then back it off just a hair and tighten it down. When adjusted properly, it appeared to send the eye of the needle right down beside the hook, ... but still the machine skipped stitches. Drat! Back to the homework of searching and reading. The real kicker for me turned out to be when I found the tip to examine how much up and down play was in the needle bar. I had a friend hold the hand wheel steady, and found that when I pushed up firmly on the needle bar, it went up maybe about 3/16ths of an inch, clearly way more than it should. I reasoned that when the needle hit a stiff piece of leather, instead of coming through, that slop would cause a serious delay in the downward progress of the needle, and the thread going through the eye of the needle would come down too late to catch on the passing bobbin shuttle hook during sewing. Even though it looked good in terms of placement when just moving it through it's paces without any leather in the machine, once the leather was there it would throw off the timing .... hence the skipping of stitches would only show when under load. Some information about the little silver guide wheel that travels in the track on the inside of the hand wheel led me to examine that, but it didn't seem overly loose, just a little bit worn. Upon closer examination I found that the big knuckle with it's attached pin which is at the top of the needle bar, and which fits into the end of the long rocking arm which comes across the top of the machine, had worn an oblong hole, and that pin was very, very loose in that hole. (I think the name of that part is Needle bar piston joint, and I am certain it is part number 8588 on plate 1032 of the old parts list.) I considered replacing the part, but what if the problem lay in the hole that the part rides in? A close look revealed that all the years of pounding through leather had caused excessive wear on the top of the hole where that pin slid in and out. I noticed the pin movement in and out was only about half an inch so I thought I'd try a shim in there to take up the slack, experimentally. I made a shim of brass, using brass shim stock that was .005 inch thick. Shim stock metal can be bought at most good hardware stores, and mine came in a little sheet of 4x6 metal. This shim I just cut with scissors about 3/8 inch wide and a couple inches long. I curved it a little bit so it would follow the curvature of the sliding pin, then with some futzing, I worked it into the gap at the top of the pin, (right there below the take up lever that guides your thread), sliding it gradually into the gullied out hole along the top of the pin until it was in there about 3/4 of an inch deep. I tried gently turning the hand wheel to see if it would stay in place, and it was somewhat daunting because the movement of the arm on the pin was a little stiff, however I put some pressure on it and after a moment it seemed to slide ok. The in and out movement had to be repeated a few times, and I also had to use a little screw driver tip to try to smooth the shim out over the top of the pin right up to the knuckle and make a sharp 90 degree bend upward in it to get the excess length out of the way. I eventually found I could fold it back over the top of the big black rocker arm, and actually tape the excess onto the rocker arm, so it was held in place, while the pin slid in and out below it. Being as my machine is black, I used black electrical tape, just for appearances sake. I'd hate to admit to anyone that my machine was held together by duct tape!... though to be sure that would have worked perfectly. Here's a photo of the shim folded back and taped in place... if it comes through on this forum. The movement of the arm was stiff for about three or 4 turns of the hand wheel as it flattened out the shim stock inside the hole against the pin, then it settled into a smooth movement, and I tested the needle bar up and down movement again. Almost no movement now... oh boy, let's try to sew something! I rethreaded the machine, took up the leather again, a double thickness of 1/8 inch leather, and started stitching, first by hand gently with the hand wheel, then got my courage up and used the treadle. It was catching properly! Nothing I could do would make it Not catch properly. I sewed little circles, I went all over the place! I adjusted the top and bottom tension... perfect! So even though there still is the side to side slop of about 1mm in the needle bar, and even though there is still a lot of slop in the shuttle movement, that one shim has completely set this old machine to rights, and I can sew again! I can't say how long that will last, and as I am only an occasional leather worker, making my own sandals and work boots, I hope it will last well enough to keep me going. What was significant to me was that this One shim was the real area where it was important to take up the slop. No doubt more could be done with further parts replacement, but for those on a sensitive budget, it's nice to know that it might be possible to resuscitate an old machine with just this one very inexpensive fix. This success made me really happy!! I'd be happy to send photos to any who might find it helpful. Roberta (in Northern Idaho) as i reach the end of this post i notice there is a place to add photos. Both the timing photos are correct, one is just at a different position in the shuttle rotation. the other photo of the completed shim job.
- 2 replies
-
- skipping stitches
- skipped stitches
- (and 5 more)
-
Hello everyone. Just got my 1st walking foot machine...Consew 225. It works but it needs TLC. Planning to make it work better, do some restoration to original condition and install Consew 226R parts to allow it to reverse. Lots of questions for you: 1. I have the 10 page Operating Instructions for Consew Models 224 & 224R-1 / 225 & 226R-1 and the 3-page Parts Chart from the Consew website. Does anyone have the parts list that describes the parts with numbers? This way I know how to refer to each part. 2. Timing belt needs replacing. I have removed the handwheel but cannot figure out how to remove the drive shaft bearing. The bearing sits in a housing. How do I get the housing out of the cast-iron machine housing? 3. To remove the belt it looks like a retaining ring needs to be removed. What is the easiest way to get this off? 4. The lifter works now but it is repaired and ugly. And the hand operated lifting lever is missing. In addition, the thread is not released so some fixes are needed. Using the lifting bar for the foot pedal is fine with me. It seems that I need several parts to accomplish this. The hand lifter area is the worst area. Part of the head casting is broken in this area. I plan to make a SS cover for this area and use some available threaded holes to hold it in place. Do you have any watch-outs? Can someone send a couple of pics of what this area should look like including close-ups for the hand lifter as I can't see how that lever will be installed. 5. Finally I want to add reverse capability. The 225 is similar to the 226R-1 so I think I can fit the 226R parts into the 225. Is this possible? It looks like the rotating point of the reverse lever will fit in the hole under the handwheel. I'll send more pics. If possible can you send some pics showing the reverse mechanisms on the 226R? Many many thanks in advance
- 8 replies
-
- timing
- timing belt
- (and 3 more)


