

All Activity
- Past hour
-
Thanks for the info, does your new motor creep in like a clutch motor
-
 I don't think 3D printing would really work. You'd be paying as much as the commercial heads. I would look for an amateur or hobbyist wood worker to make them from wood; kinda like rocking horses heads but scale bigger
 -
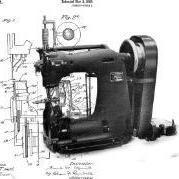
1) change the motor pulley to the smallest you can find, usually 45mm 2) go with a larger pulley substituted for the handwheel 3) speed reducer 4) I tried 1 and 3 above, ended up getting a different servo motor that would start at 50 rpmand not 200 or 300, game changer -
-
Hi, I have a Brother LS-B837 industrial machine and added a sevo motor which is great apart from when starting to sew, the motor doesn't come in slow and smooth like the old clutch motor used to. When its running its slow enough but would like a smooth start instead of it jumping straight into the slowest speed which is quite slow. Does anyone know of a mod that will acheive a smooth slow start like a clutched motor does Thanks
-
 Gram joined the community
 -
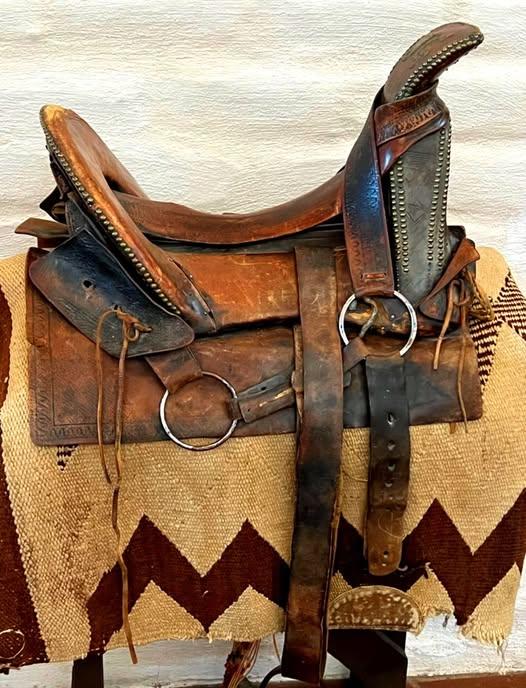
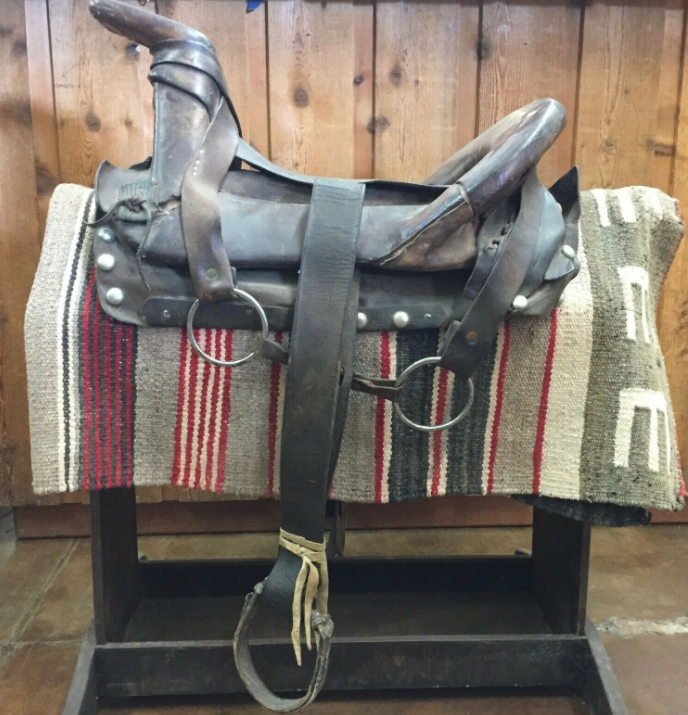
What Age Is This Simco?
Gram replied to 1nicesimco's topic in Saddle Identification, Restoration & Repair
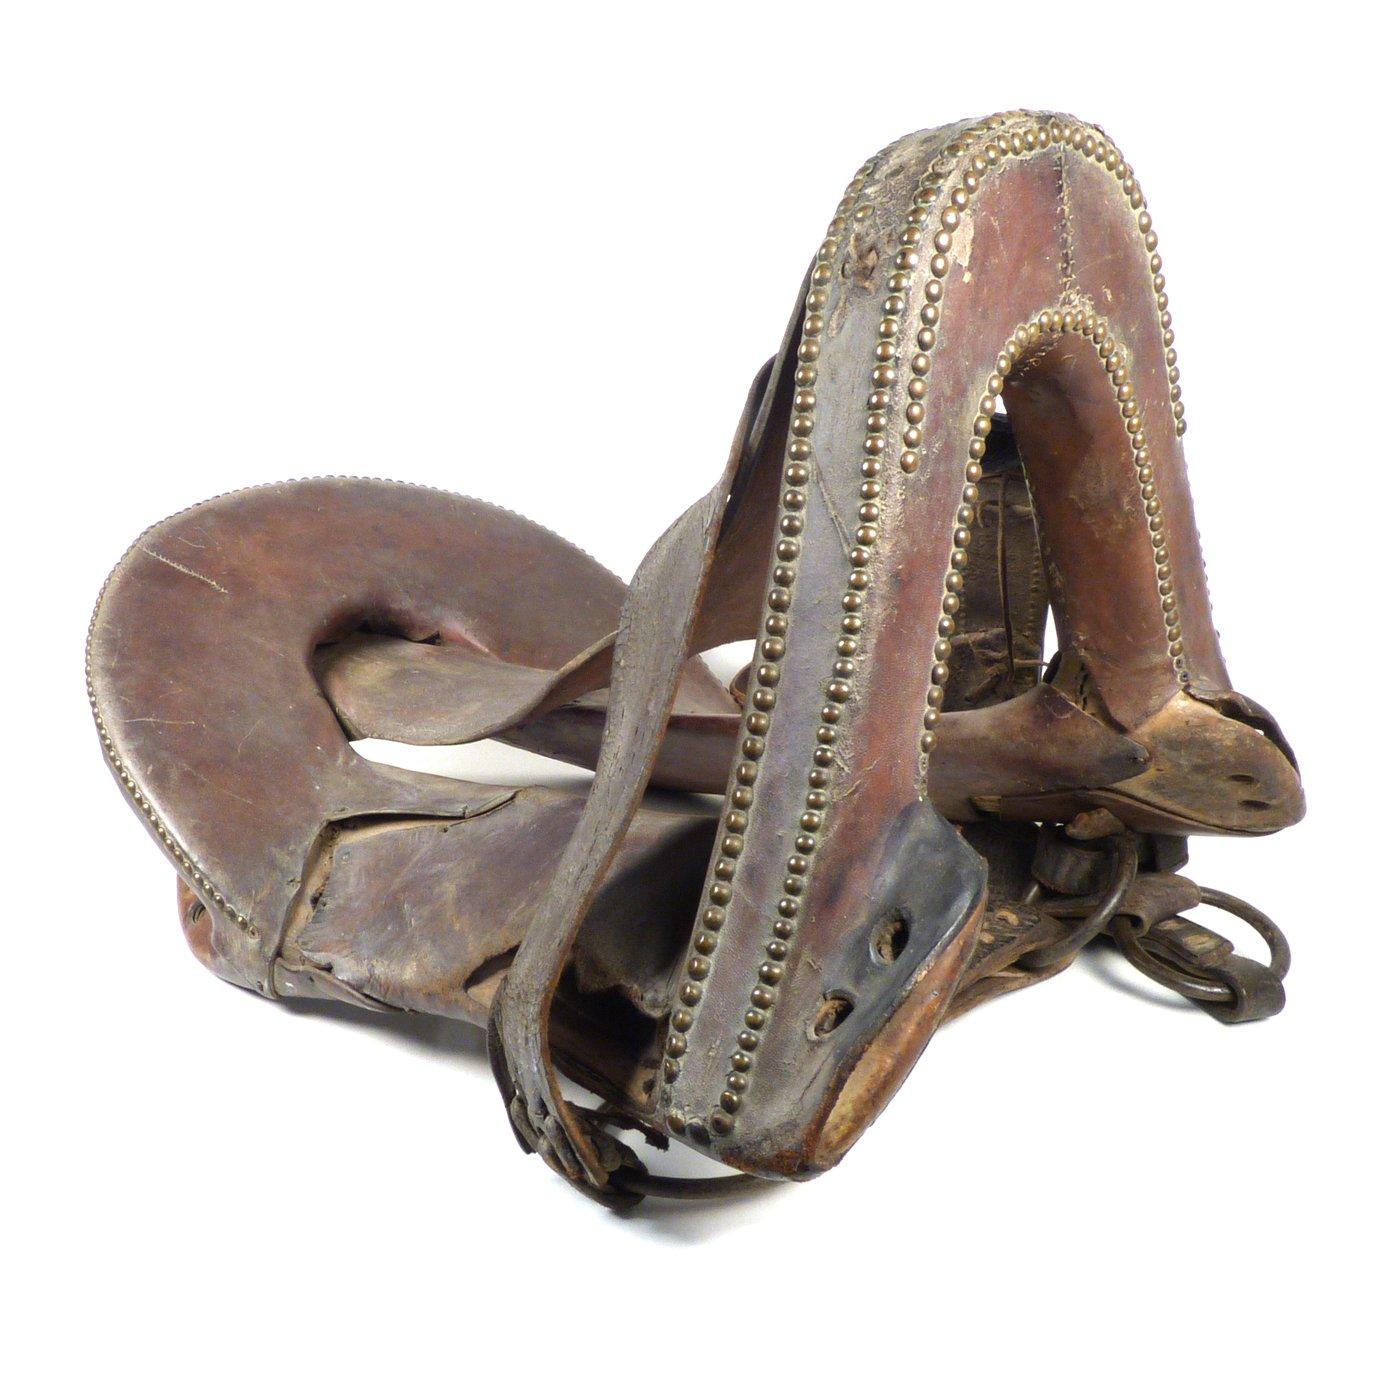
I have this saddle. It belonged to my aunt. She gave it to me when I got my pony in 1973. She got it for Christmas in 1955-57. - Today
-
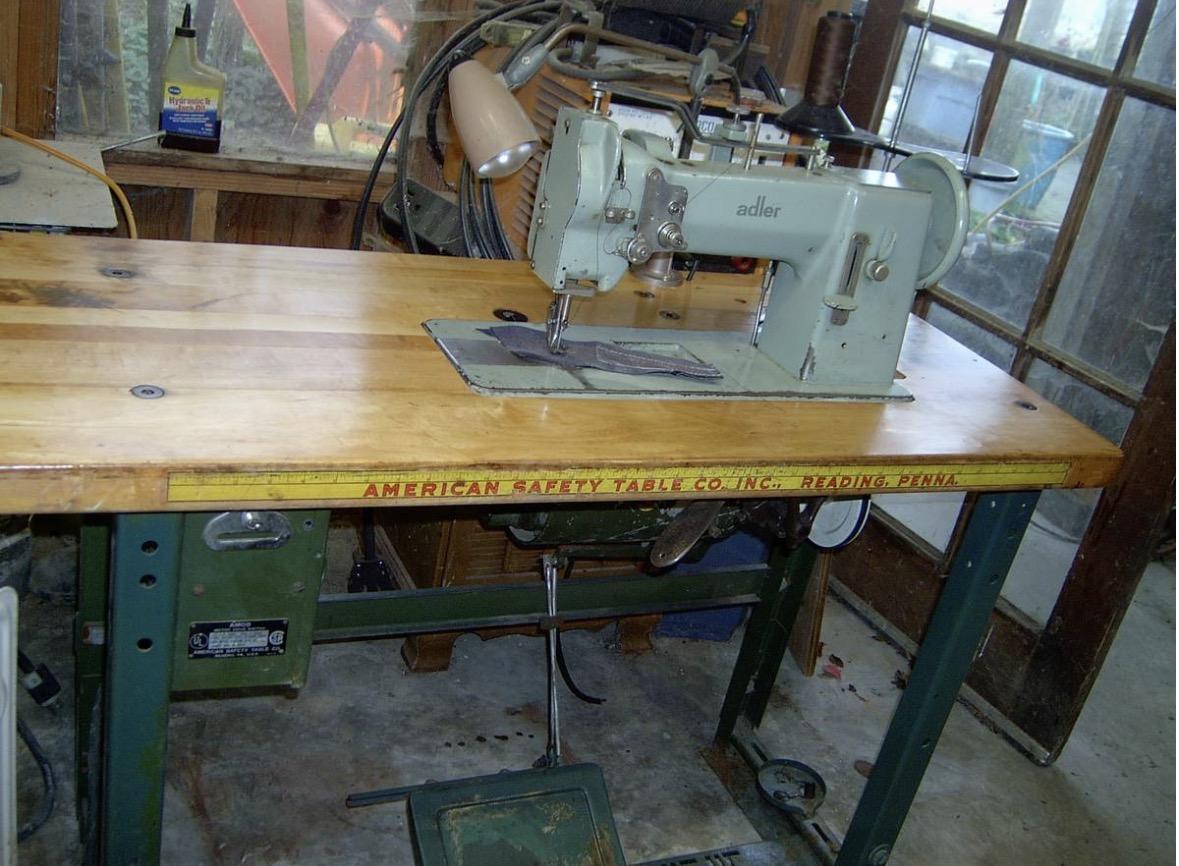
I would reconsider by the time you change the clutch motor out for a servo barring anything else you are up to about $1100 for a machine that came to the market in 1976. If you need parts they are going to be either hard to fine or expensive. Since you mentioned the Consew 226 which came to the market around 1960 I would go more for a newer Consew 206RB-5 which has a larger bobbin and costs about $1800 new. kgg
- Yesterday
-
 I would really look a the 3-d printing angle, I know you can print things in pieces and put them together, that would help with the size issue. Todd
 -
The tooling in itself has stiffened the leather by the compression from stamping. Alcohol will dry it out a bit adding to the stiffness, so will dying (it contains alcohol). Use NFO or mink oil to condition it before dying. It will loosen up a little on its own over time and with use. Don't overdo the oil. Any oil or conditioner will darken the leather a little bit. It looks darker right after application then lightens some. That's all in the nature of leather and you will learn to work with it.
-
 Ouch! I feel for ya, bro.
 -

Fender repair...
chuck123wapati replied to Brokenolmarine's topic in Saddle Identification, Restoration & Repair
Good luck man, you got this!! -
I have been making holsters, sheathes, pouches, belts, etc. My daughter came up for Christmas, and dropped a new project on my bench. One of her friends has an old saddle she loves, and her fenders are badly worn. "See if you can redo the fenders," my daughter said, "the attached stirrup leathers should be fine." The fenders were tooled in a basket weave pattern. "Nope, she'd actually rather lose the basket weave, it's been eating up her legs for years. A border would be okay." This will be a new experience. Break down the existing pieces, saving the parts that are still good, and the hardware. I ordered the saddle skirting weight from Makers, and the heavy rivets/burrs plus the setter I'd need. Looking forward to the challenge. The owner knows I've never done this work, but has seen my tooled belts and sheaths. I have my wife and daughter to advise me. Both have years of equine experience. Waiting on UPS. Wish me luck.
-
hello I have some undyed vegetable leather, got cut and tooled, to me feels stiffer now. my questiion is what can I use to soften before i dye? I read can use mix of rubbing alcohol with vaseline, mink oil or neatsfoot? what does everone use or find works best, for hoping not to darken leather.
-
 roman_v61 joined the community
 -
 As the title says, I'm looking for a way to display several headstalls, halters, hackamores, etc. Ideally something that can hang on the wall or somehow arranged in front of a saddle stand display with a plackard nearby explaining the what and why. I've found several places that sell plastic or fiberglass busts of horses heads, but often at $300+ and that will add up quick doing multiples (anywhere from 5 to 20 depending on how far I go). I'm wondering if anyone else has done something similar? I would actually prefer less detail so it doesn't detract from the displayed item, similar to mannequins in a department store, but It still needs to be life-size and have some form of mouth, ears, jowls, and everything else that would play into a headstall properly fitting a horse. I'm looking at 3D printing them myself, but the size makes that a challenge. Also considering a very very simplified wooden frame or lamination that again has the important area's but lacking detail. Almost like the heads used on steer roping dummies that have horns, but are not a fully modeled cows head. The alternative of course is hanging them on a hook like you would in any tack-room, but being able to see how it fits and why pieces are where they are is the real intent. This is more for educational display than for storage.
 -
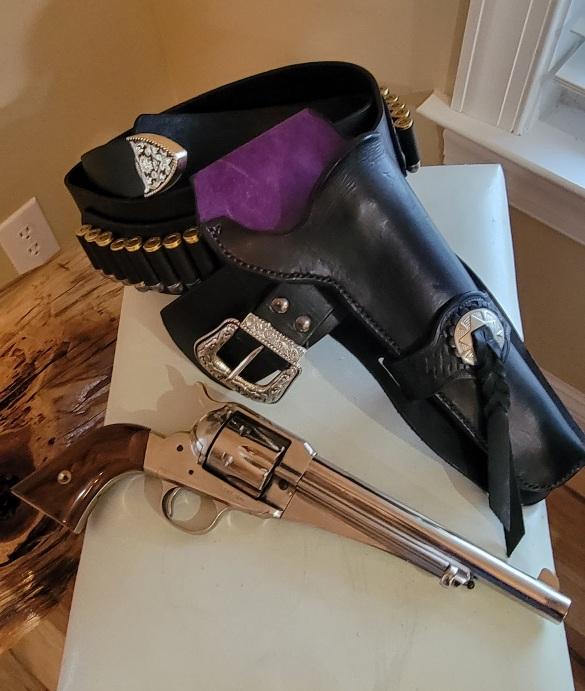
 I use Ballistol on my rifles and pistols, it's a great product, but I wouldn't use it directly on my holster. You may get some transfer from the weapon to the holster but I'm guessing it extremely minimal if you use it as intended. I use NFO on all my holsters and customer's holsters and never had an issue. Again you use it as intended and you shouldn't have a problem. I'm sad to say I did this to my first cowboy rig and I paid the price. I grit my teeth each time I look at my revolver.
-
 freders0 joined the community
 -
 Looks great! I made two Kangaroo Hide Bullwhips and I really enjoyed the learning process that came along with it. I got a LOT of help from Bernie Wojcicki a few years before he passed. He was such a great guy. I never got good or efficient at it, but it was fun. Bernie's videos can still be found on Youtube I think under Bernie46......
 -
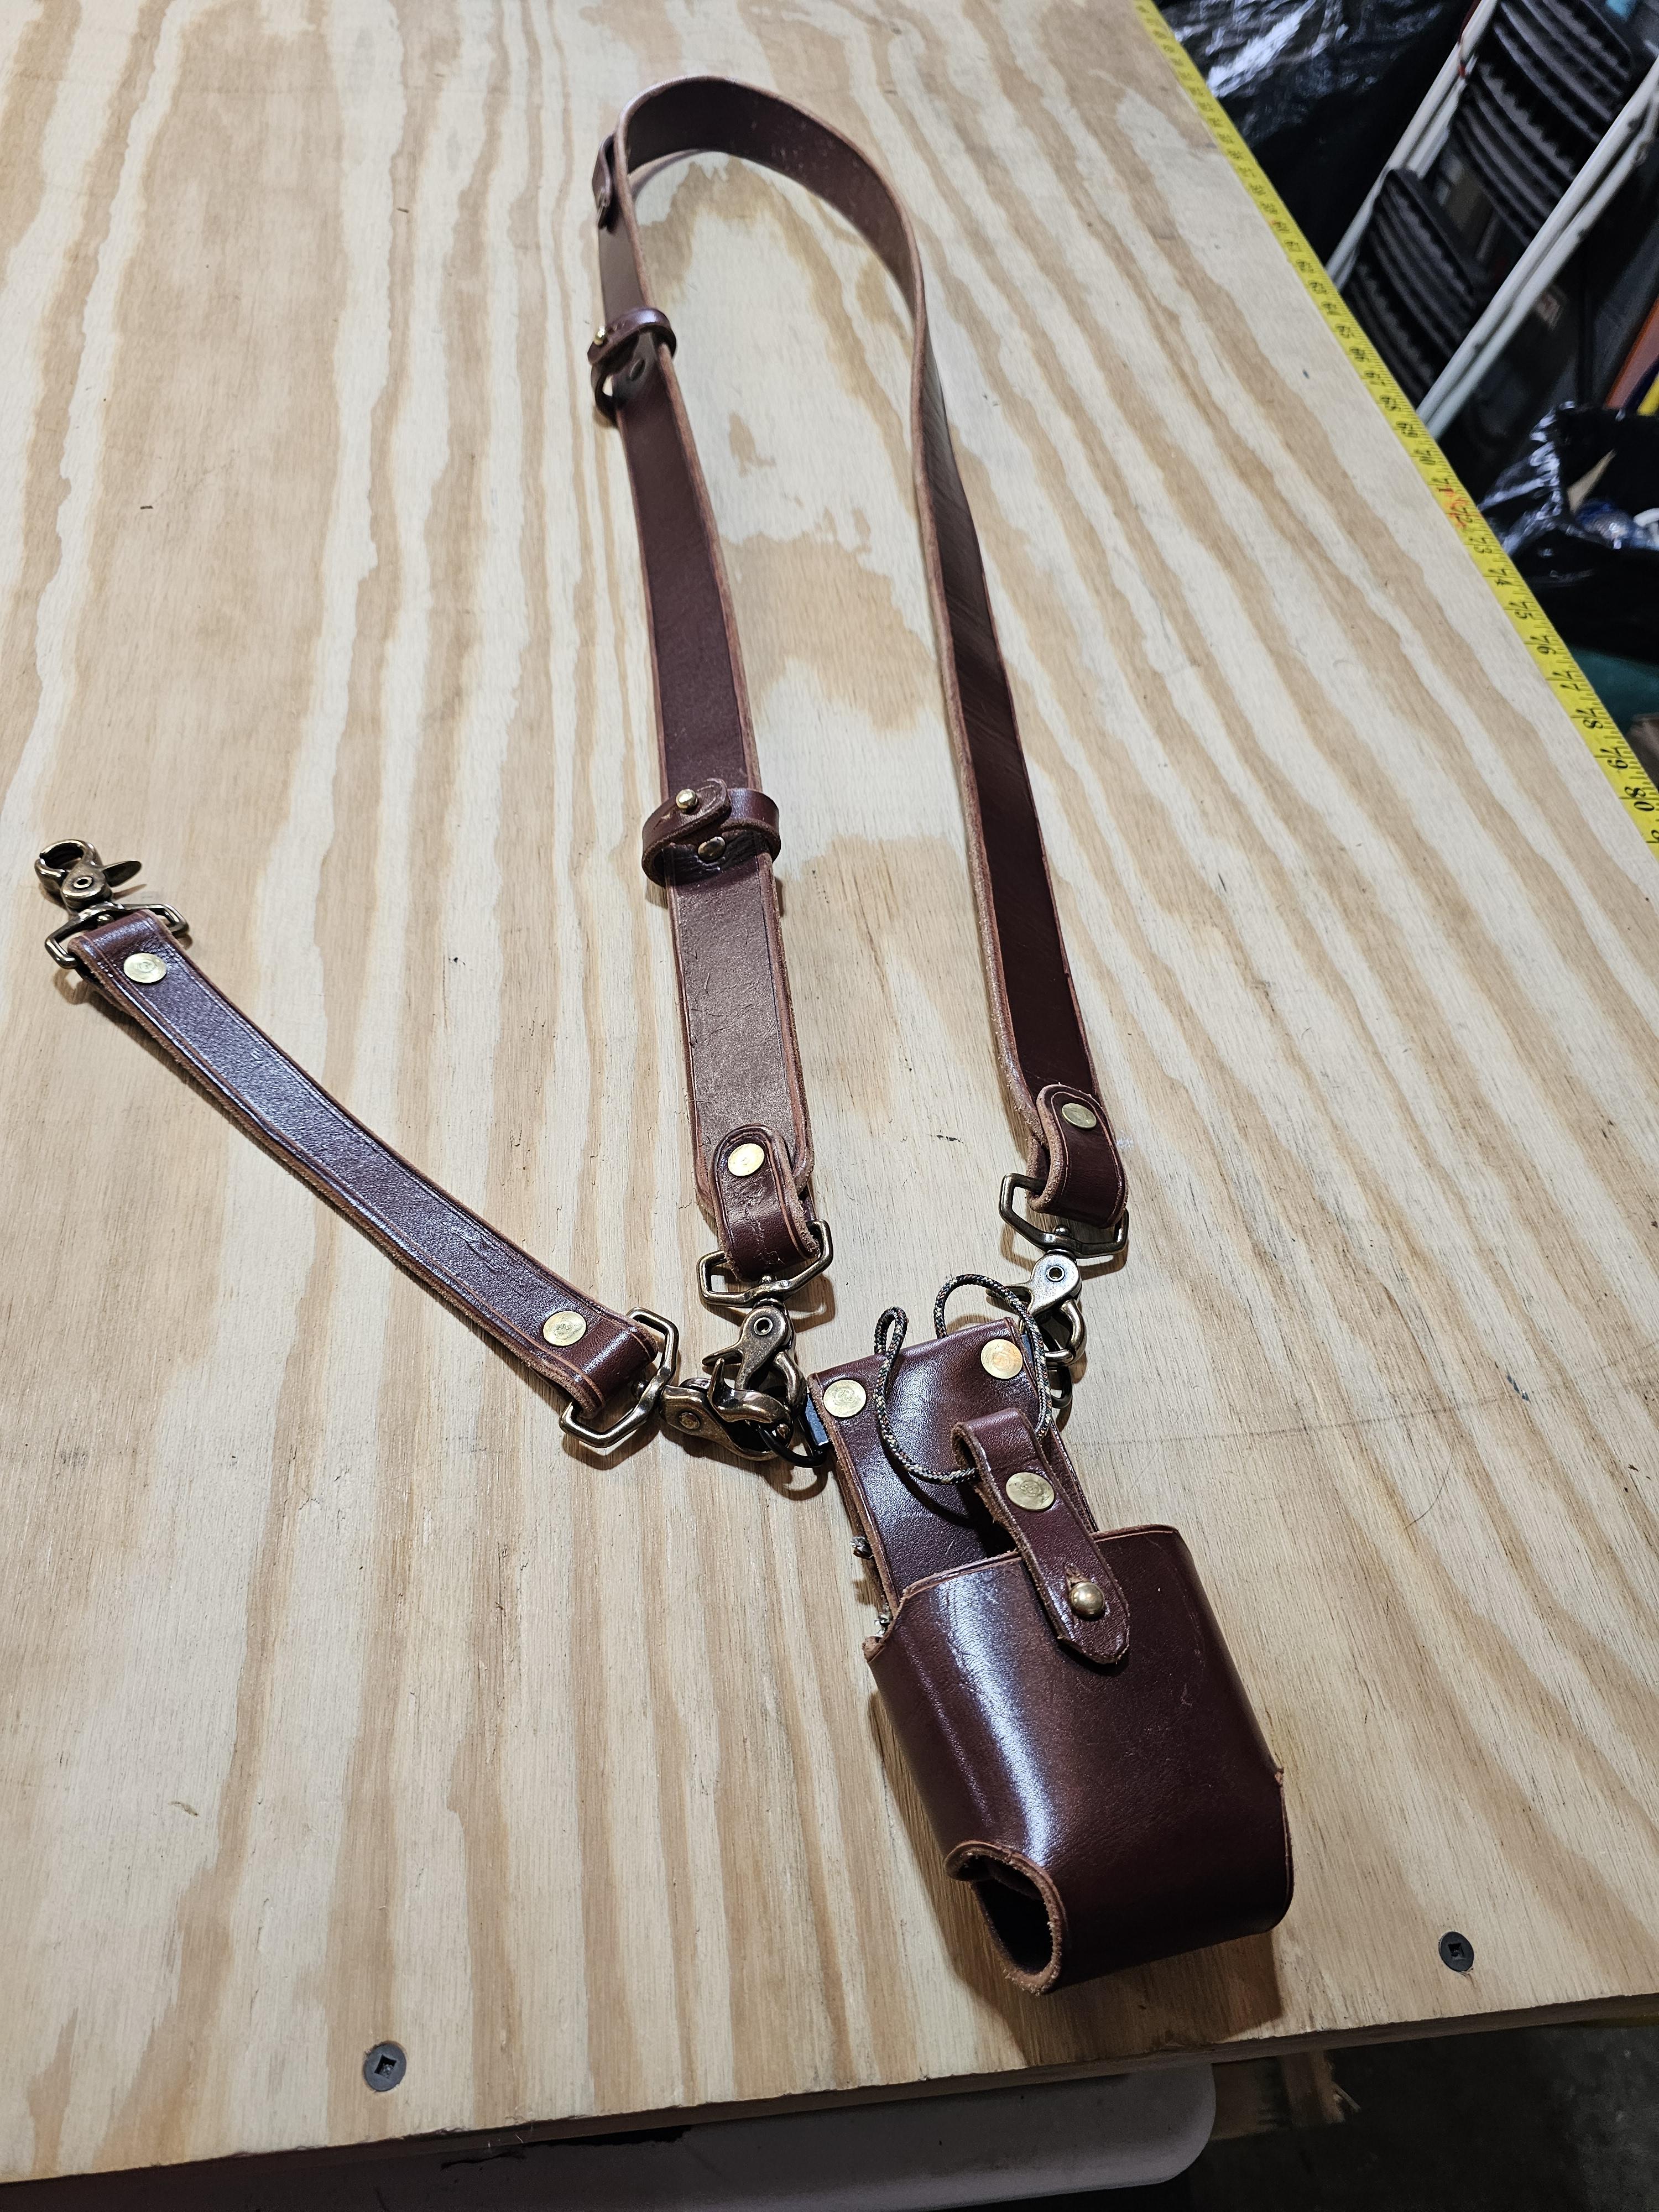
Hi, I'm a long time lurker, but I don't remember introducing myself. About 6 years ago, my husband and I bought a boat cover canvas biz. With it, came a Singer 531B-8BL/Consew 206RB-2, a Adler GK373-67, industrial machines, and a patcher Adler-30/Singer 29K71 [or similar]. I was sadly mistaken that the elderly couple would help train me with the machines, and it didn't happen. I was lost until I found this site. The members helped me find manuals, etc. I was especially excited when I learned that my machines are built for leather. When we picked up the patcher, it was covered up in a dusty corner, and I was told that it didn't work. Thanks to the info I found here, I was able to clean it up, and get it going. I love that machine. I've repaired ball gloves, purses, and used it to sew patches onto the g-kids letter jackets. Last year, launched me into leatherworking. My firefighter g-son asked if WE could make a leather radio strap together. Well, that WE project ended up being totally me. It was an experience, that's for sure, but I loved it. So, my attention now, is leaning more towards leather work. After I posted a picture of the strap, a friend has asked if I would repair the rope/braid on her leather bag. I am thrilled that this website has been updated. I'll be looking for help with the bag project. Thank you, admins, for all of your work. I am so excited to be back!
-
 mwf123 joined the community
 -
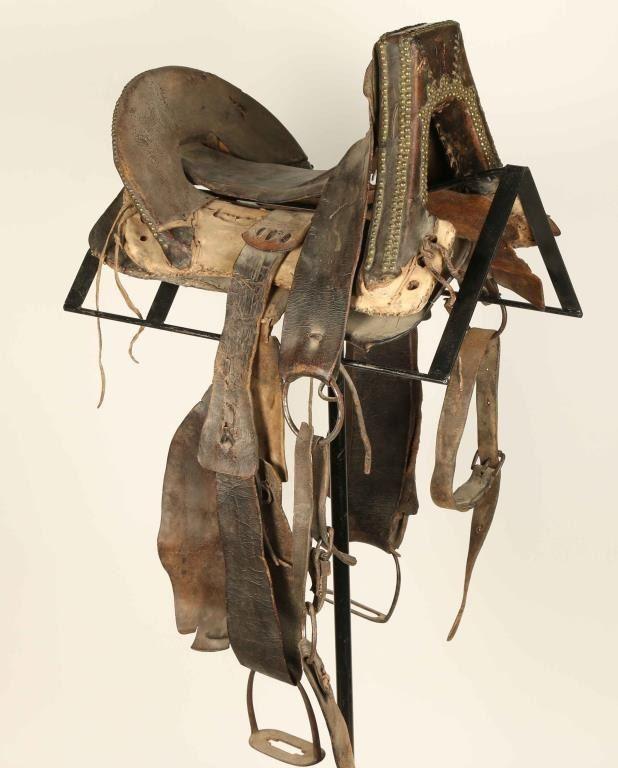
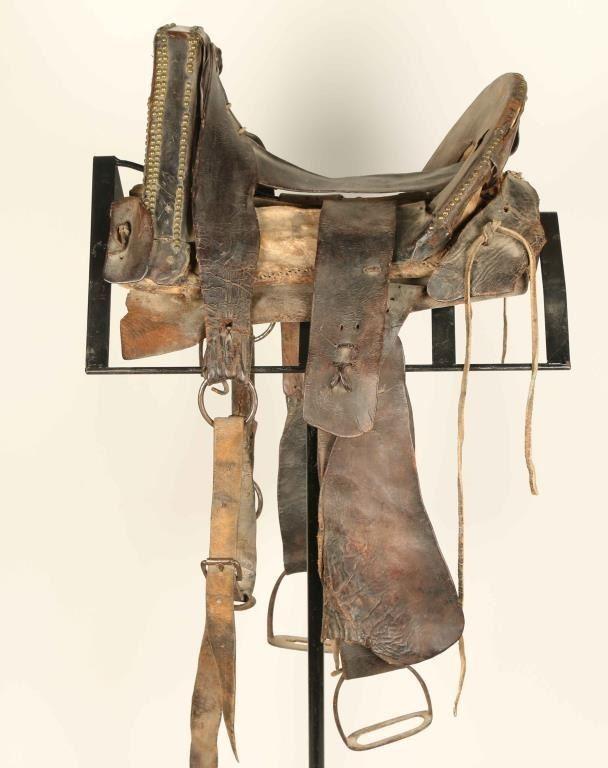
Here's a good Write up from Bill Manns on Facebook: (link) Rare NAVAJO SADDLE I just acquired this 1870s-80s Navajo saddle in Arizona a couple of years ago. The Navajo were the only tribe that made and used a saddle that was strikingly unique. Other tribes made simple rawhide covered trees of a mostly generic design except for the women’s saddles of the Crow, Sioux and Blackfoot in the northern plains. The Navajo tree evolved over time but was inspired by the early Spanish saddles appearing in the Navajo lands in the 1600s-1700s. Later they were simplified along the style of Anglo saddles used by mountain men arriving in the Southwest during the early 1800s. Much of the leather used by the Navajo in saddle building was recycled from old, damaged Anglo saddles. Not at all uncommon to see cowboy saddle fenders on an old Navajo saddle. The sling seat, cushioning detail was common on several styles of American saddles in use during the 1700s well into the 1900s. The rigging is a simple variation on the Sam-Stagg rigging that became very popular on Western saddles starting about the time of the Civil War. Brass tacking is a common detail on all Navajo saddles. Navajo horsemen were till using these saddles up until WWII. A truly handsome saddle and beautiful relic of the early Navajo equine culture.
-
And another. This one has the same swells construction, but also has a horn. It's referred to as a Navajo ladies saddle. According to the description linked bellow, the horn was used to hold gear that the ladies would pack, including a baby board, while the mens saddle didn't have a horn because it would have been in their way hunting and fighting. It also has skirts, and the tree sides are similarly leather wrapped, so I think mine originally likely had skirts tied under the sides. I find it interesting seeing the similarities between western saddles and these Navajo saddles. Link The link has more pictures of this example.
-
Here's another Navajo saddle. The stirups don't look correct (who knows, they could have been traded for?), but the stirrup straps and cinch look original. This one appears to have skirts as well.
-
I 100% agree. The only conservation I'm doing with this one is periodically (5-10 years apart?) cleaning conditioning the leather (no neats-foot oil). I've used generic saddle soap before, as well as a product called Victoria Cream that works well hydrating and sealing antique leathers. One of the rigging rings is missing and appears that it was cut or torn from the leather. If I can find one of the same diameter and similar patina, I plan to tie it in place with some string, but the original leather would remain modified.
-
I found a very similar saddle, referred to as a "Navajo Mens Saddle". Same basic shape and construction and same brass tacks. Sounds like Navajo blankets would be a perfect fit. Link
-
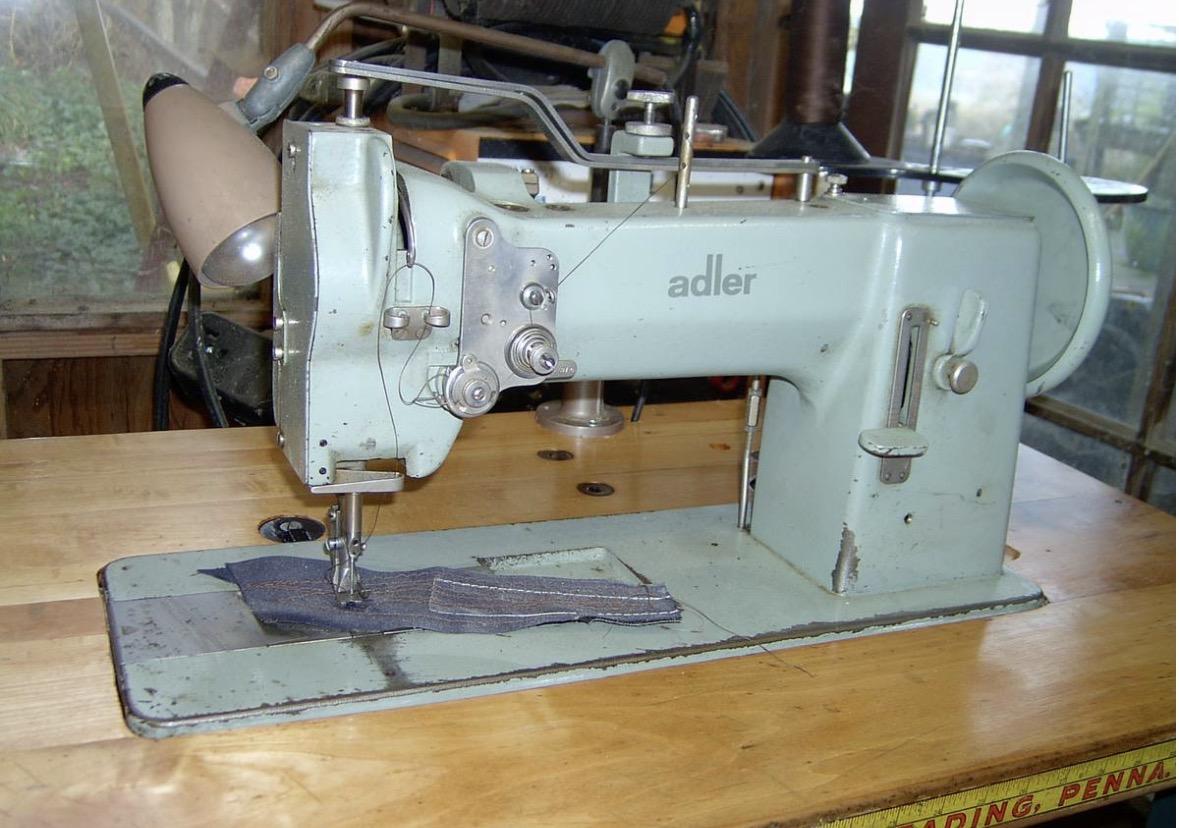
Hello all, first off I wanted to say thank you for allowing me into this group. What an amazing resource! I’m in the market for a walking foot machine for sewing marine canvas and Dacron sailcloth (for making tote type bags). There is an Adler 67gk373 for sale in my area that I took a look at last weekend. The seller is asking $950 but through my research it seems that $500-$700 is more what I’ve been seeing elsewhere. Clutch motor, knee lift, cool old table. I looked at the timing belt (rubber), gave it a quick once over, and did a bit of sewing; which it seemed to do without problems. Should I jump on this Adler if I can talk them down a bit or wait for a Consew 226? What else should I look for with the machine prior to buying? Thank you again and happy new year
-
Just be aware of how you restore/conserve the saddle. There is a difference in the two and you can ruin an antique saddle if not done correctly.
-
I'm going to do some digging and see if we have a set of oxbow stirrups in our collection that fit with this saddle. If so, I'll make a pair of simple stirup leathers to hang them (not permanent of course, but I'll try to color match them to the rest of the leather). I'm thinking about moving this saddle from the shelf it's been on to a saddle stand, as that would allow the rigging straps to hang more naturally. My mom has a few Navajo blankets/rugs that need to get out of her closet that I think one would fit in with the display as a saddle blanket.
-
 Frequency equals speed of light divided by wavelength: https://en.wikipedia.org/wiki/Frequency#In_wave_propagation Conversely, wavelength equals speed of light divided by frequency. Taking a car key fob with a frequency of 315MHz as an example: wavelength = 299792458 m/s divided by 315000000 Hz = 951.7 mm --> the holes in your faraday cage (mesh) need to be significantly smaller than 951 mm to block this frequency. Taking the other end of the spectrum at mm-wave RFID (24.125 GHz): 299792458 m/s divided by 24125000000 Hz = 12.4mm --> mesh holes need to be significantly smaller than 12 mm to block this frequency. In practice, any fine mesh or solid conducting foil will block (or rather: attenuate) all relevant frequencies.


