All Activity
- Past hour
-
Thank you! I've tried to use GPT but I got approximations such as "tandy" and "weaver", which is quite unaccurate. Also, I dont remember buying on any of these 2 sites, so again, no clue where I got them :D btu have them in silver and brass version. @FrankHester Yes, it surely does look amazing tho! Want to buy more tho
-

Learning to do Portraits of People
chuck123wapati replied to RidgebackCustoms's topic in Figure Carving
That is excellent!!! Stohlmans , The Art of Embossing Leather, is a good reference if you can find it. They use leather under the embossing to raise it. I, 've never tried i but i did get the ebook off of the Tandy site. I don't know if they still have it listed. -

Learning to do Portraits of People
RidgebackCustoms replied to RidgebackCustoms's topic in Figure Carving
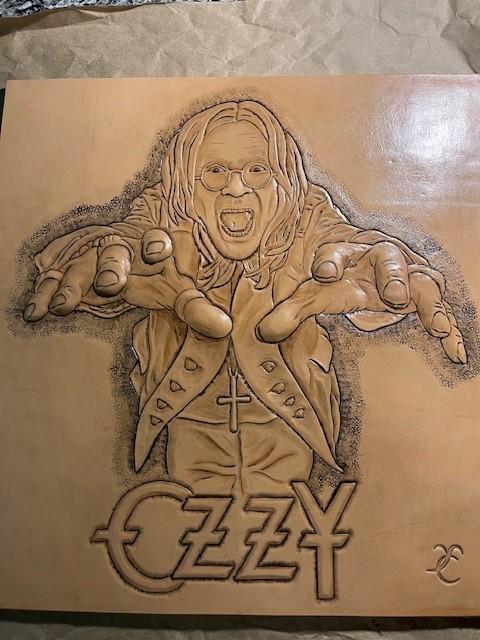
Was able to finish up 2 portraits this week. Next one is none other than Ozzy Osbourne. Granted, labeling the portrait is a little bit of cheating lol. This is my first time doing deep embossing (around the hands) to achieve more depth to the piece. I like the effect, but find I can't get the crisp detail out of the carving if I try to add tooling to the embossed section. The filler material (Renia 3D embossing filler) has a lot of give to it. I wonder if a hard setting epoxy or similar may be a better solution? Also maybe I should tool, emboss, then retool to establish the crispness that I lose by pushing out the embossed section? Not sure. I also used the black eco flo antique which I find I prefer the dark brown of the other portraits. The black is too much of a contrast for my taste. The brown seems to marry the leather undertones better, but just my opinion.
-
Most of my hand sewing is using #207 bonded nylon that I wax. If fact, I always re-wax waxed thread before use because the wax is usually dry and flaky. I use a cobbler's wax that is a mix of beeswax and pine resin. After waxing I burnish the thread with a piece of heavy brown wrapping paper to even out the wax.
- Today
-
it also works on wood screws, tap and die sets, your awls and needles. Just about anything that needs some help against friction, weird, isn't it?
-
I like that wallet, utilitarian design, simple I carry one very similar, and you're a front pocket carry, A' me to for the last 58 years. I have done some airbrushing, but I will definitely try your method on my next project. Thanks again.
-
you may have to bend it first too, or your stitches will look loose no matter what thread you use. Once bent it's a shorter distance between each hole than when straight. so does the copper still work under leather? I hate washing my wrists three times a day lol.
-

Birch tar based leatherconditioner and wax
Birchee replied to Birchee's topic in Miscellaneous/Other
Woops, thanks for letting me know. I can't edit so will drop it here: I use Canada Post for national and international shipping. Shipping cost is generally between $15 and $25 for regular parcel in north america and $25 to $35 for regular parcel to EU. You also have faster more expensive options for shipping such as xpresspost international but it is about 2-3 x the cost of regular parcel -
Nice !!!!
-
cooool i,m droolin , I love makin tools!!!!
-
 Laura11 joined the community
 -
That seat looks super comfortable. Nice work!
-

Hello from near Nairobi, Kenya – New Member Intro
OdinUK replied to Origibelts's topic in Member Gallery
Hi John, That looks like quality buckle you made. Im interest in casting too. I bought a small propane furnace and just lined it. All set to try melting some of the scrap Aluminum I have to get some practice sand casting. Regards Paul (in Germany) -
Hello from Germany - New Member Introduction
OdinUK replied to Tove09Tilda's topic in Member Gallery
Welcome from Southern Germany. Good luck with your leather pursuits. Paul -
Smaller stitching holes, these keep the thread tighter. Pull each stitch real tight Have you tried the pierced-thread way of putting your needle on?
-
Yes. I have a large block of wax that I can push the whole die into, at the start and about every 4 or 5 cuts
-
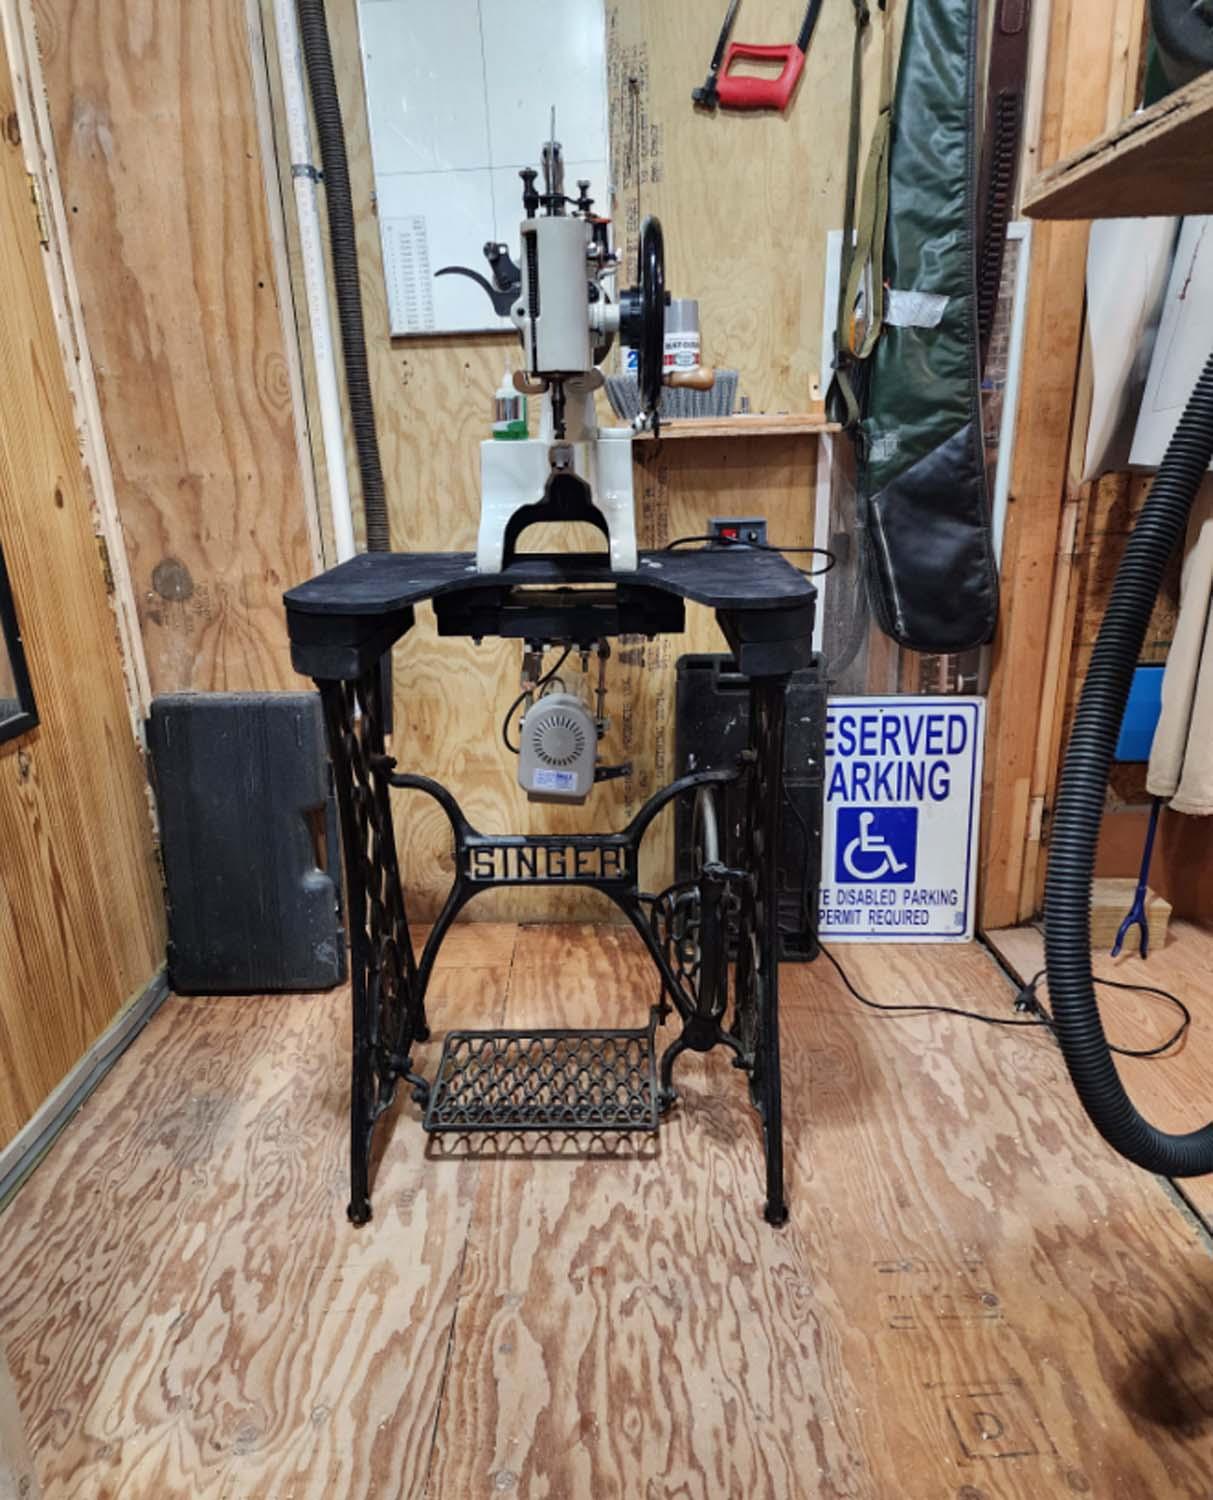
Who makes that one? I see the Singer table but where do you stand to use it???
-
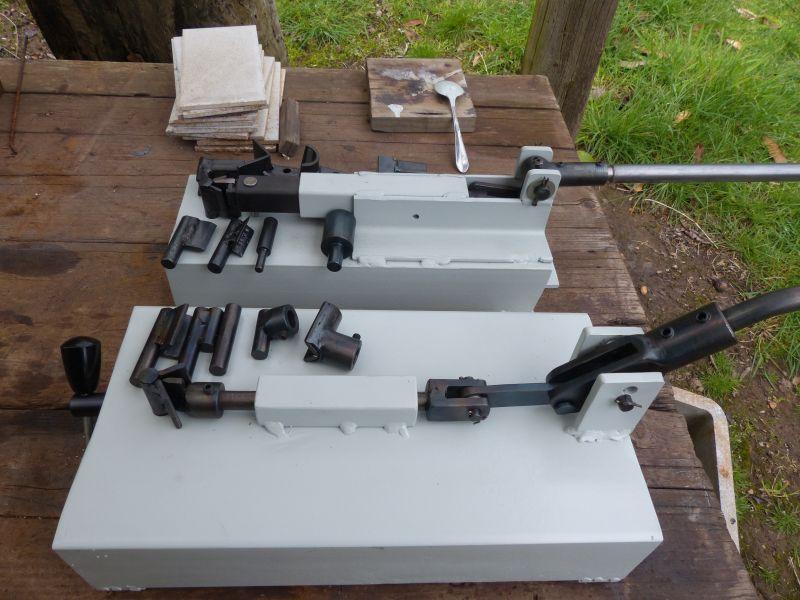
Yep, I didn't have any more of the smaller channel iron, this one was about the same length (so I didn't have to cut it) but is considerably heavier (it's been sitting in my forge for years!). I sat down for some time staring at the handle/pivot area and came to the conclusion that the design isn't very efficient when it comes to applying force and transferring it to the slide. So I'm redoing it similar to the original, shouldn't be too difficult, just some more cutting/drilling/welding. Hey kgg, don't you ever sleep?
-
The only purpose of a roller foot is to reduce the drag on the top layer of a stack of material that's being pulled on the bottom by feed dogs with teeth. If the material is grabby, a flat presser foot will fight against the feeding and cause uneven stitches. They are often used on machines that are going to sew patterns on shoes and boots, or on machines that sew hats. The roller is adjustable to the left and right. The usual practice is to position the bottom inside edge so it just clears the needle on the up and down stroke. This closeness ensures that the material doesn't lift with the ascending, threaded needle, which would cause skipped stitches. A roller foot gives 100% visibility of the needle in three dimensions. As KGG already mentioned, they are not used on walking foot machines, which have not two, but three bars extending down. They are meant for bottom feed machines that only have one presser foot bar. Walking foot machines already solve the problem of drag with their motion sequence.
-
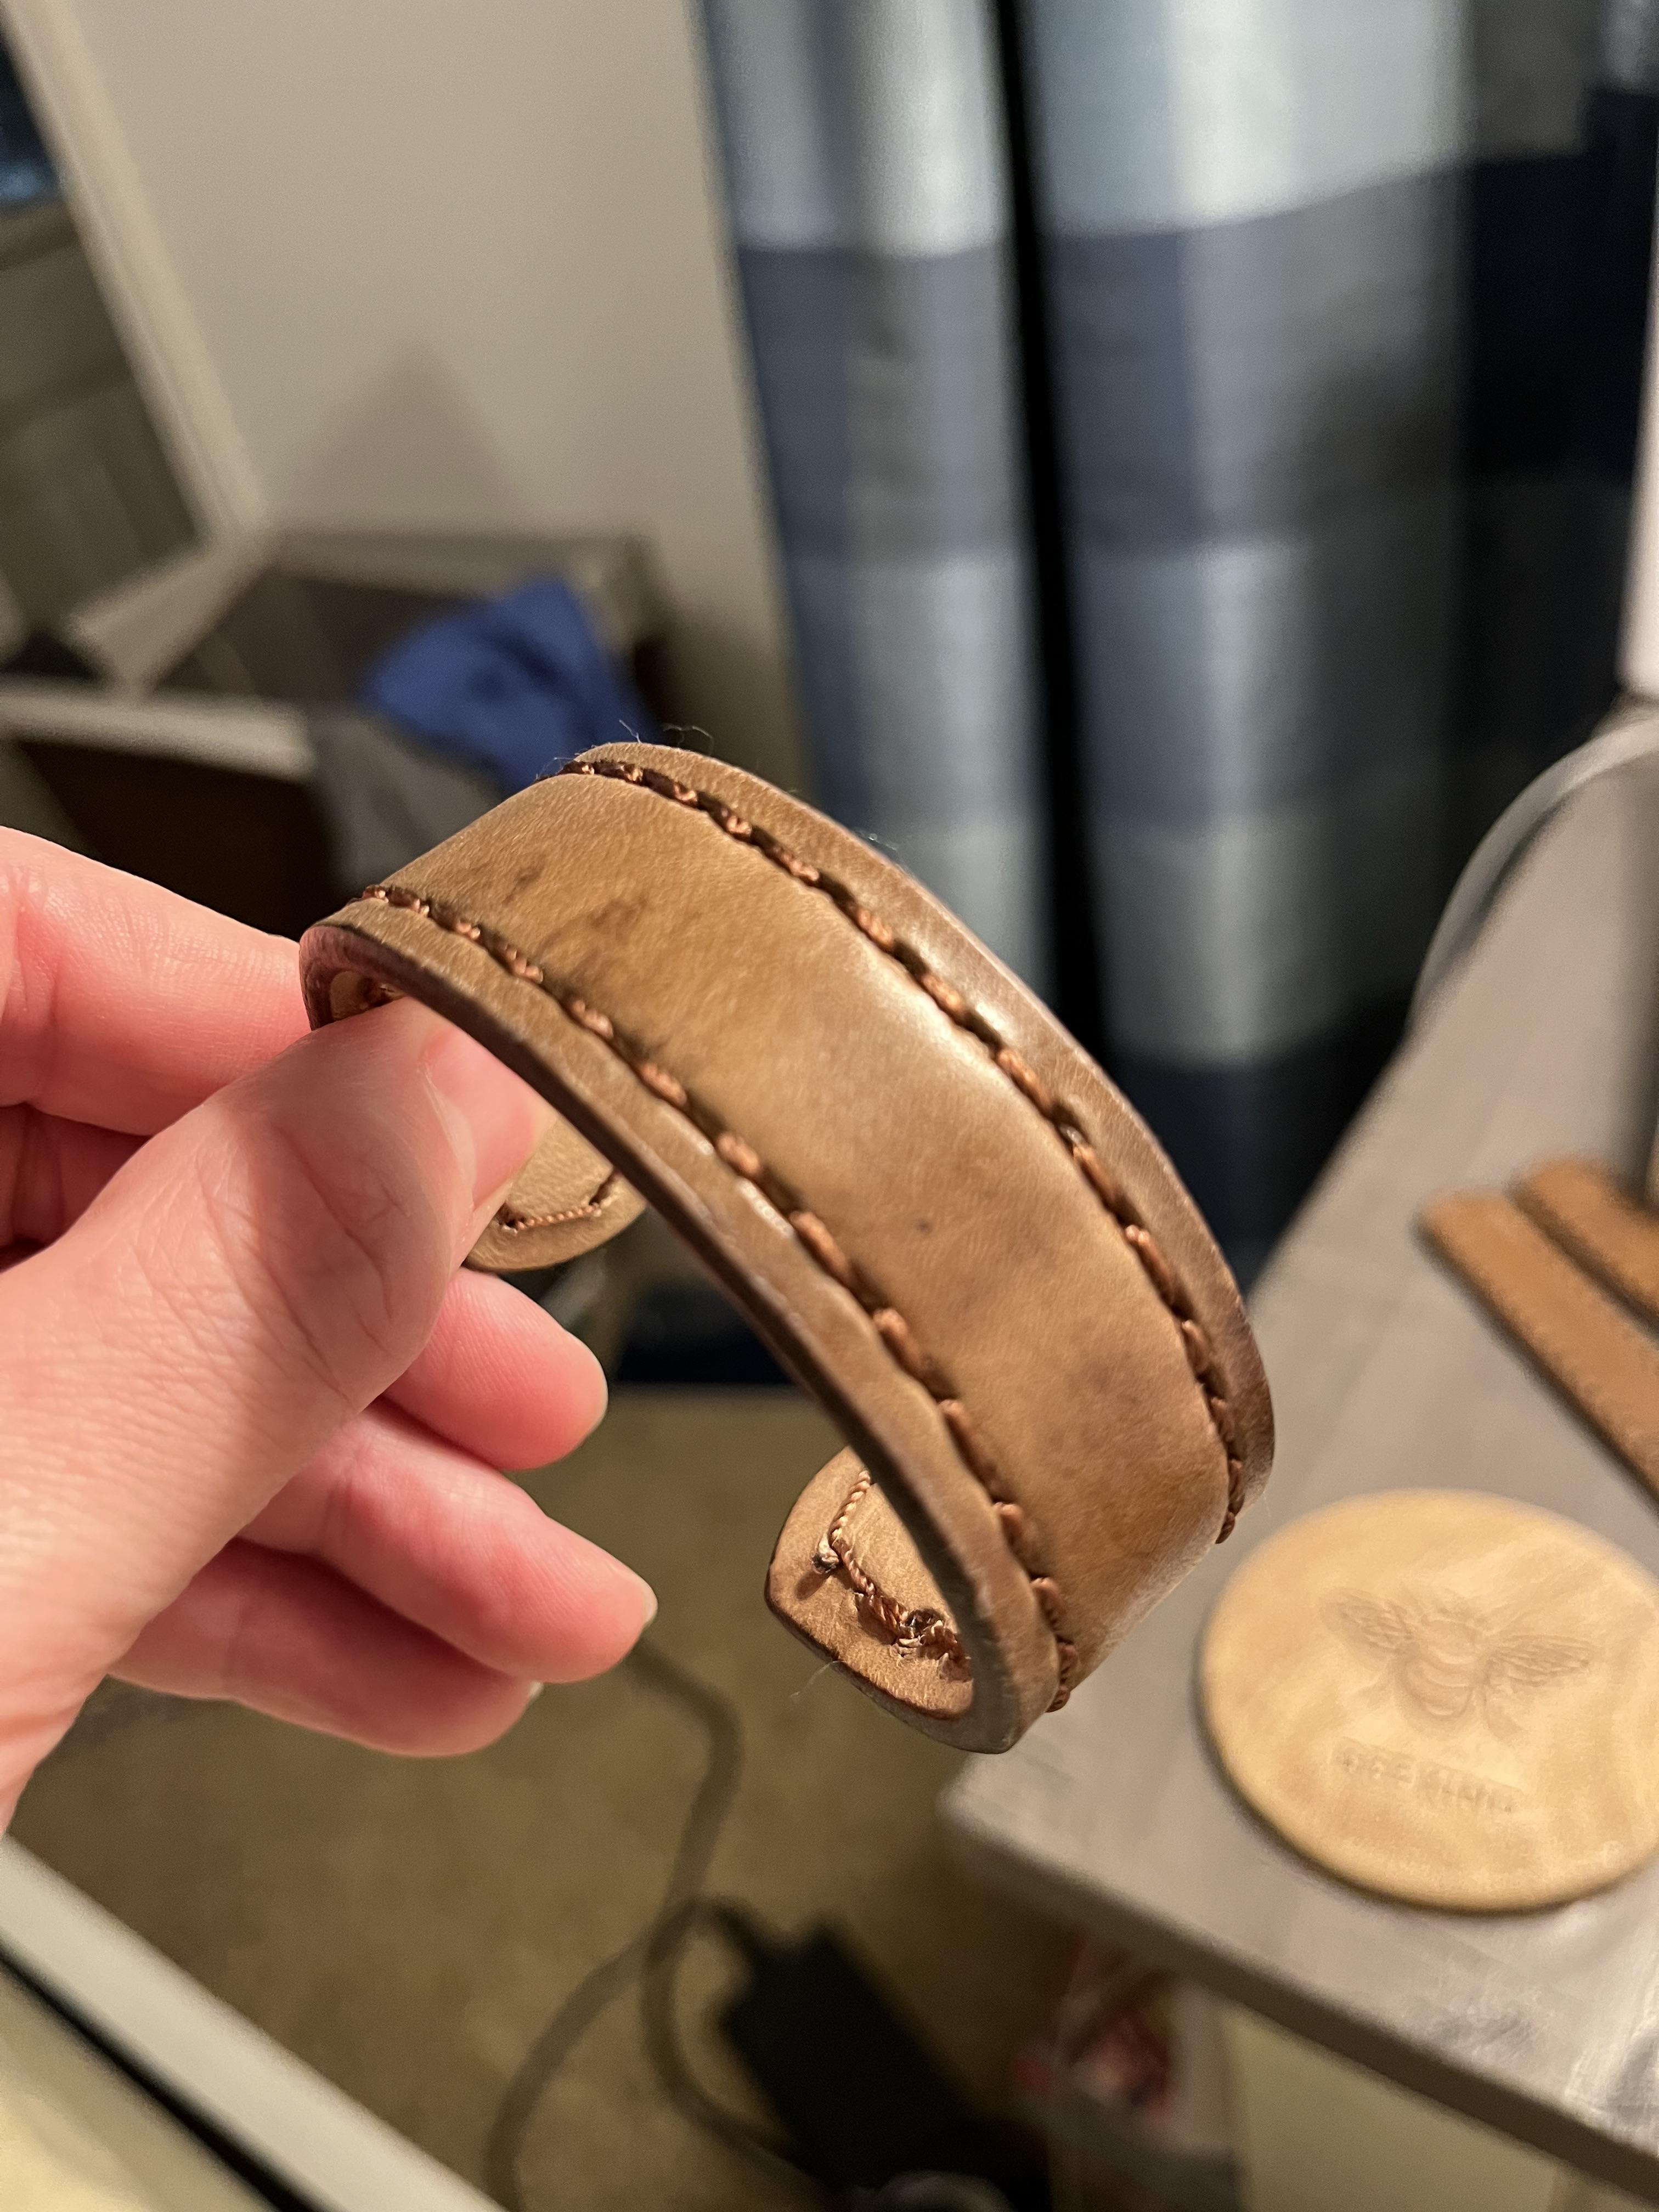
Hello! Previously I'd only hand-stitched stuff with waxed thread but decided to try bonded nylon. I like how this project turned out aesthetically, but I have two questions. 1) How do I keep the thread tight? I stitched the bracelet but when I bent it (copper core), the bottom thread appeared loose. Do I just need to try to sew with a lot more tension? Thicker thread, smaller stitch holes? (The thread I used is 277.) 2) Any suggestions for keeping the thread knot from unraveling from the needle? Because the thread is so slippery, it doesn't hold a knot very well, and I constantly have to re-tighten the knot.

-
I got my patcher . . . set up . . . and working . . . am very happy with it. May God bless, Dwight

-
Nicely done. I do like the rod drive verses the square tube drive. I am going to assume you made the base larger on the new one as you had the metal hanging around. kgg
-
Presser for wheels are generally used on bottom feed machines like post bed machines. An example would be the Techsew 810. They will not work on a walking foot or a compound feed machine, the Techsew 5100. kgg
-
I made another die bending jig. I had the idea to make one with a simpler linkage so just had to do it. Unfortunately while the linkage looks simpler it took a bit of messing around to get it to work, and the angle of the handle is too high which meant I had to put a hefty downward bend in it to get it to a comfortable height. I might re-make the handle linkage as my original idea seems to work better. The other difference is the push slide, the original square tube sliding in a square tube has a bit of slop in it, the rod version is quite a snug fit, but it meant attaching the fittings to it was more complicated. I now know how to make an even better one - but I won't as it will require too much machining and there's nothing to be gained.
-
.thumb.jpg.6e903dd66163ad5672f00f144058c571.jpg)
Birch tar based leatherconditioner and wax
Northmount replied to Birchee's topic in Miscellaneous/Other
You need to provide the following information. How much is shipping to various locations? Who do you use for national and international couriers? -
Hi! Anyone know why you’d want a presser wheel vs a foot…and if you can get them for a Techsew 5100?