All Activity
- Past hour
-
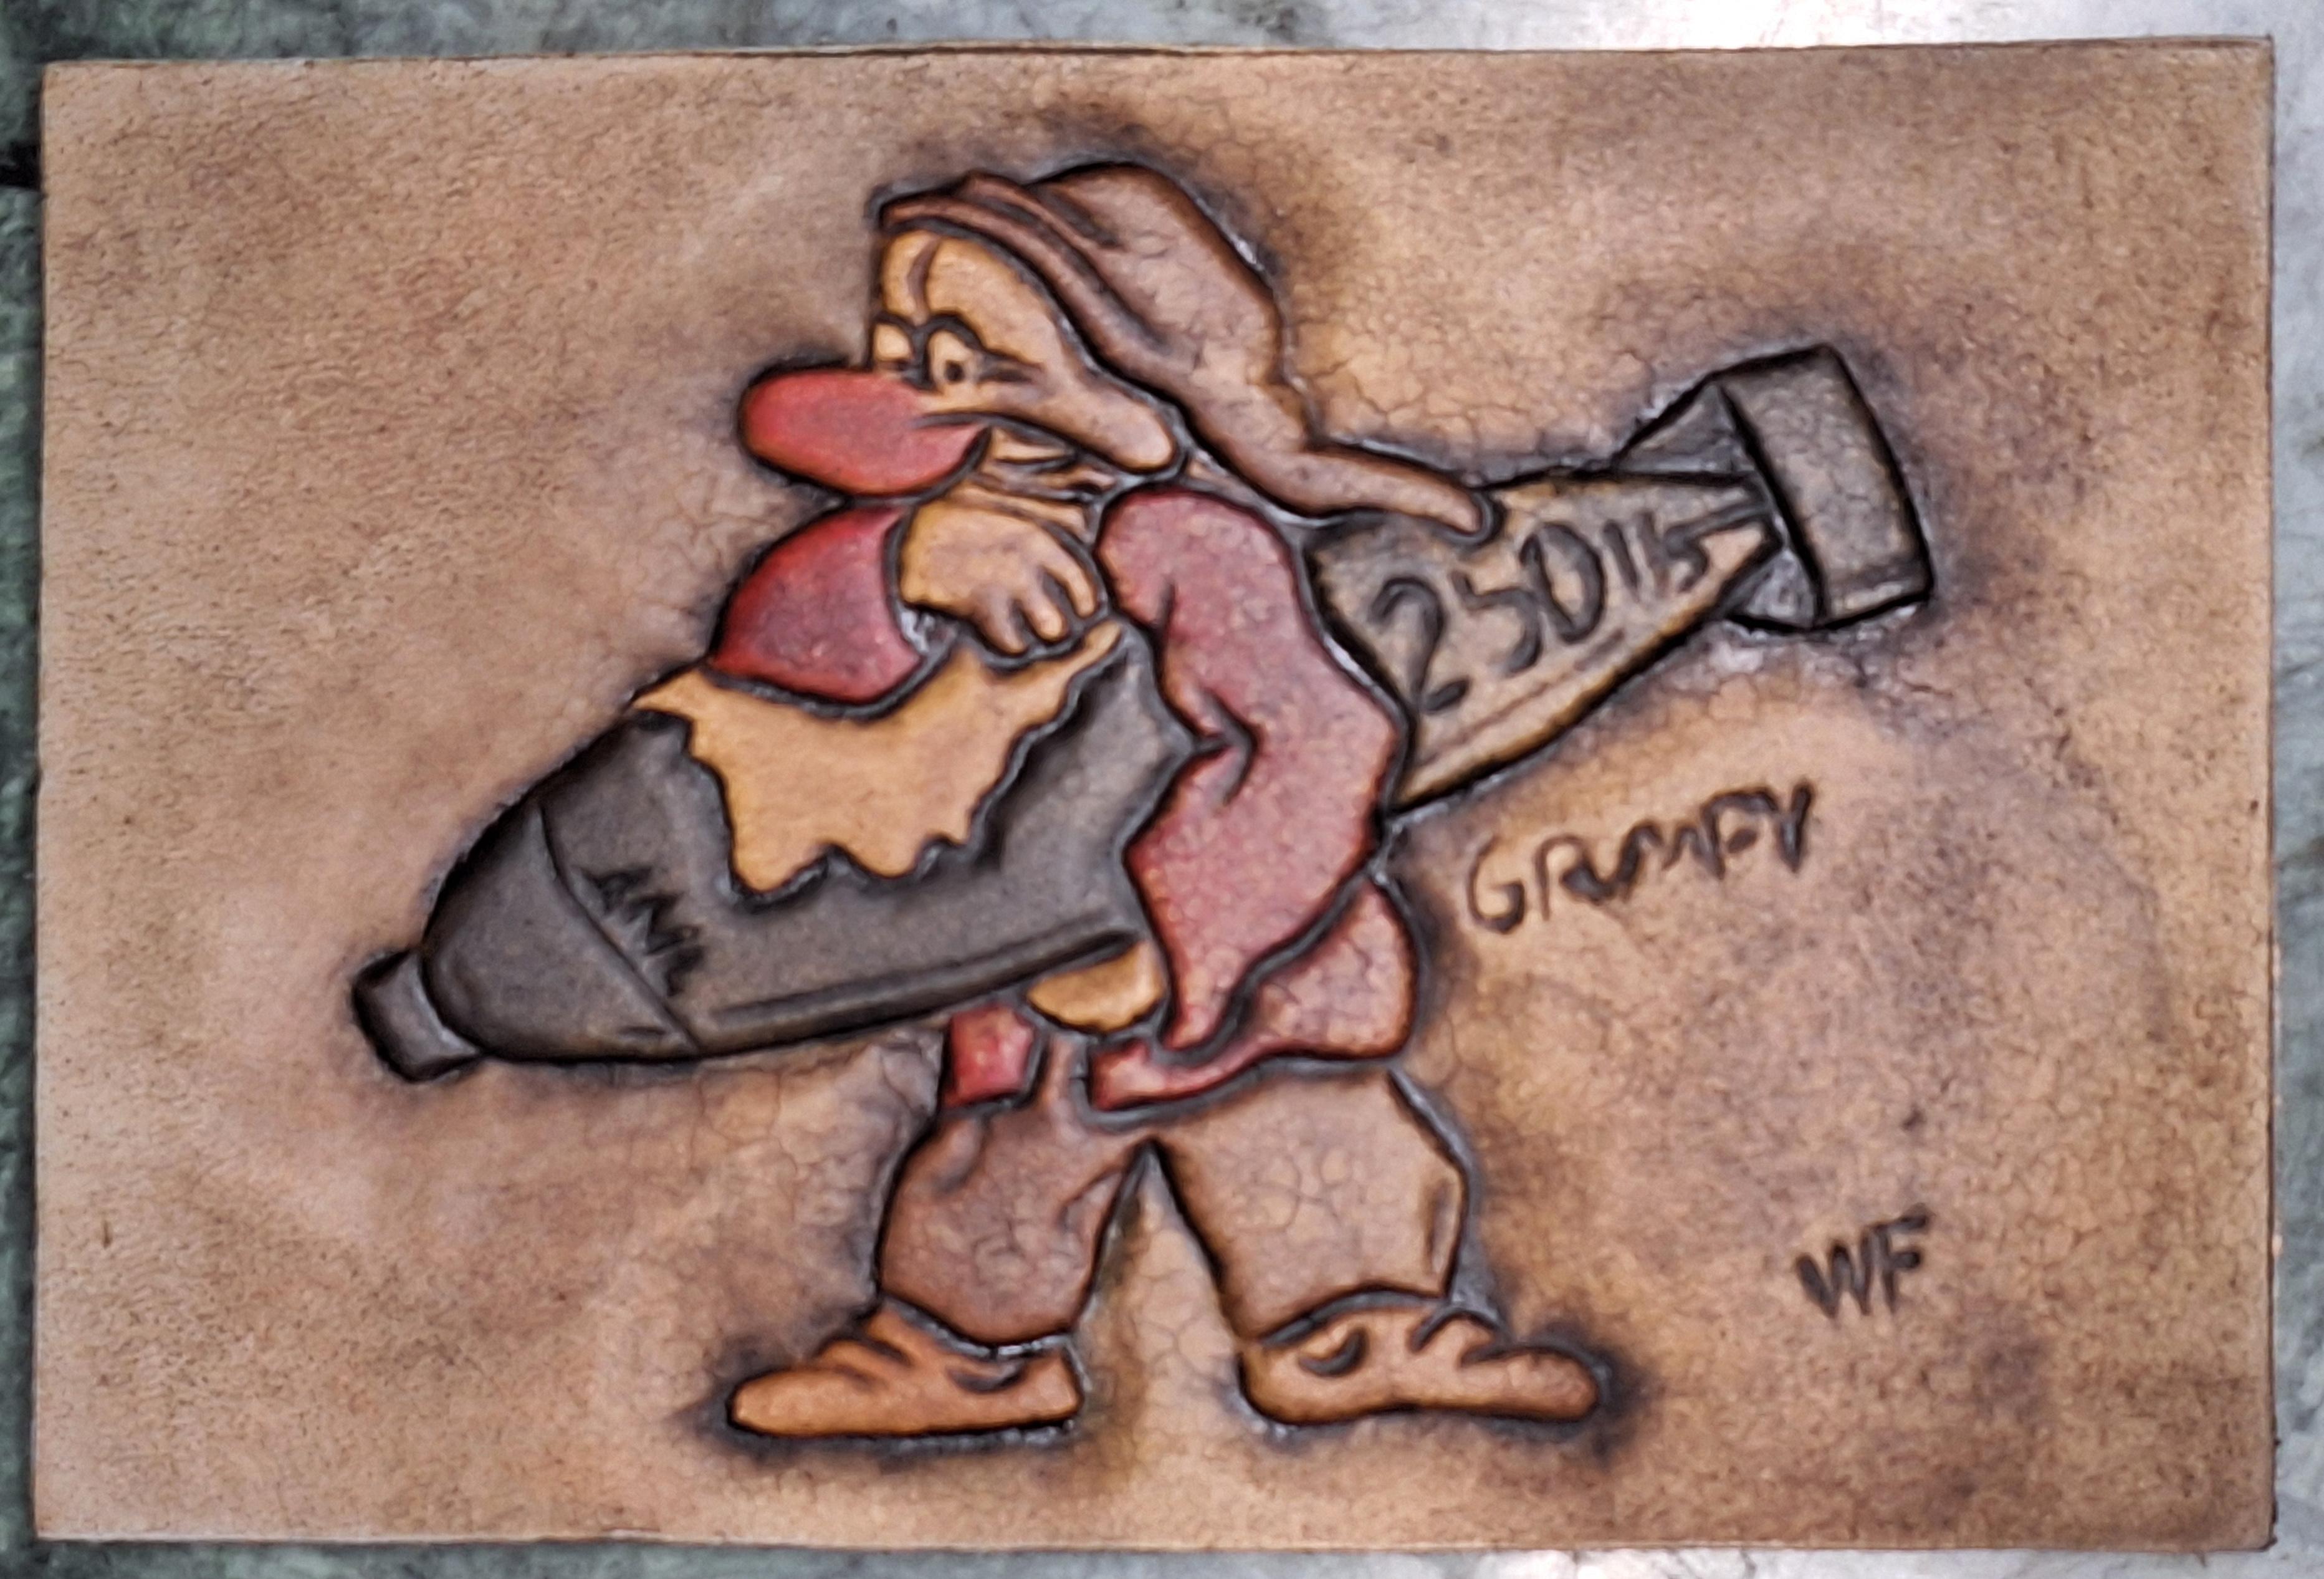
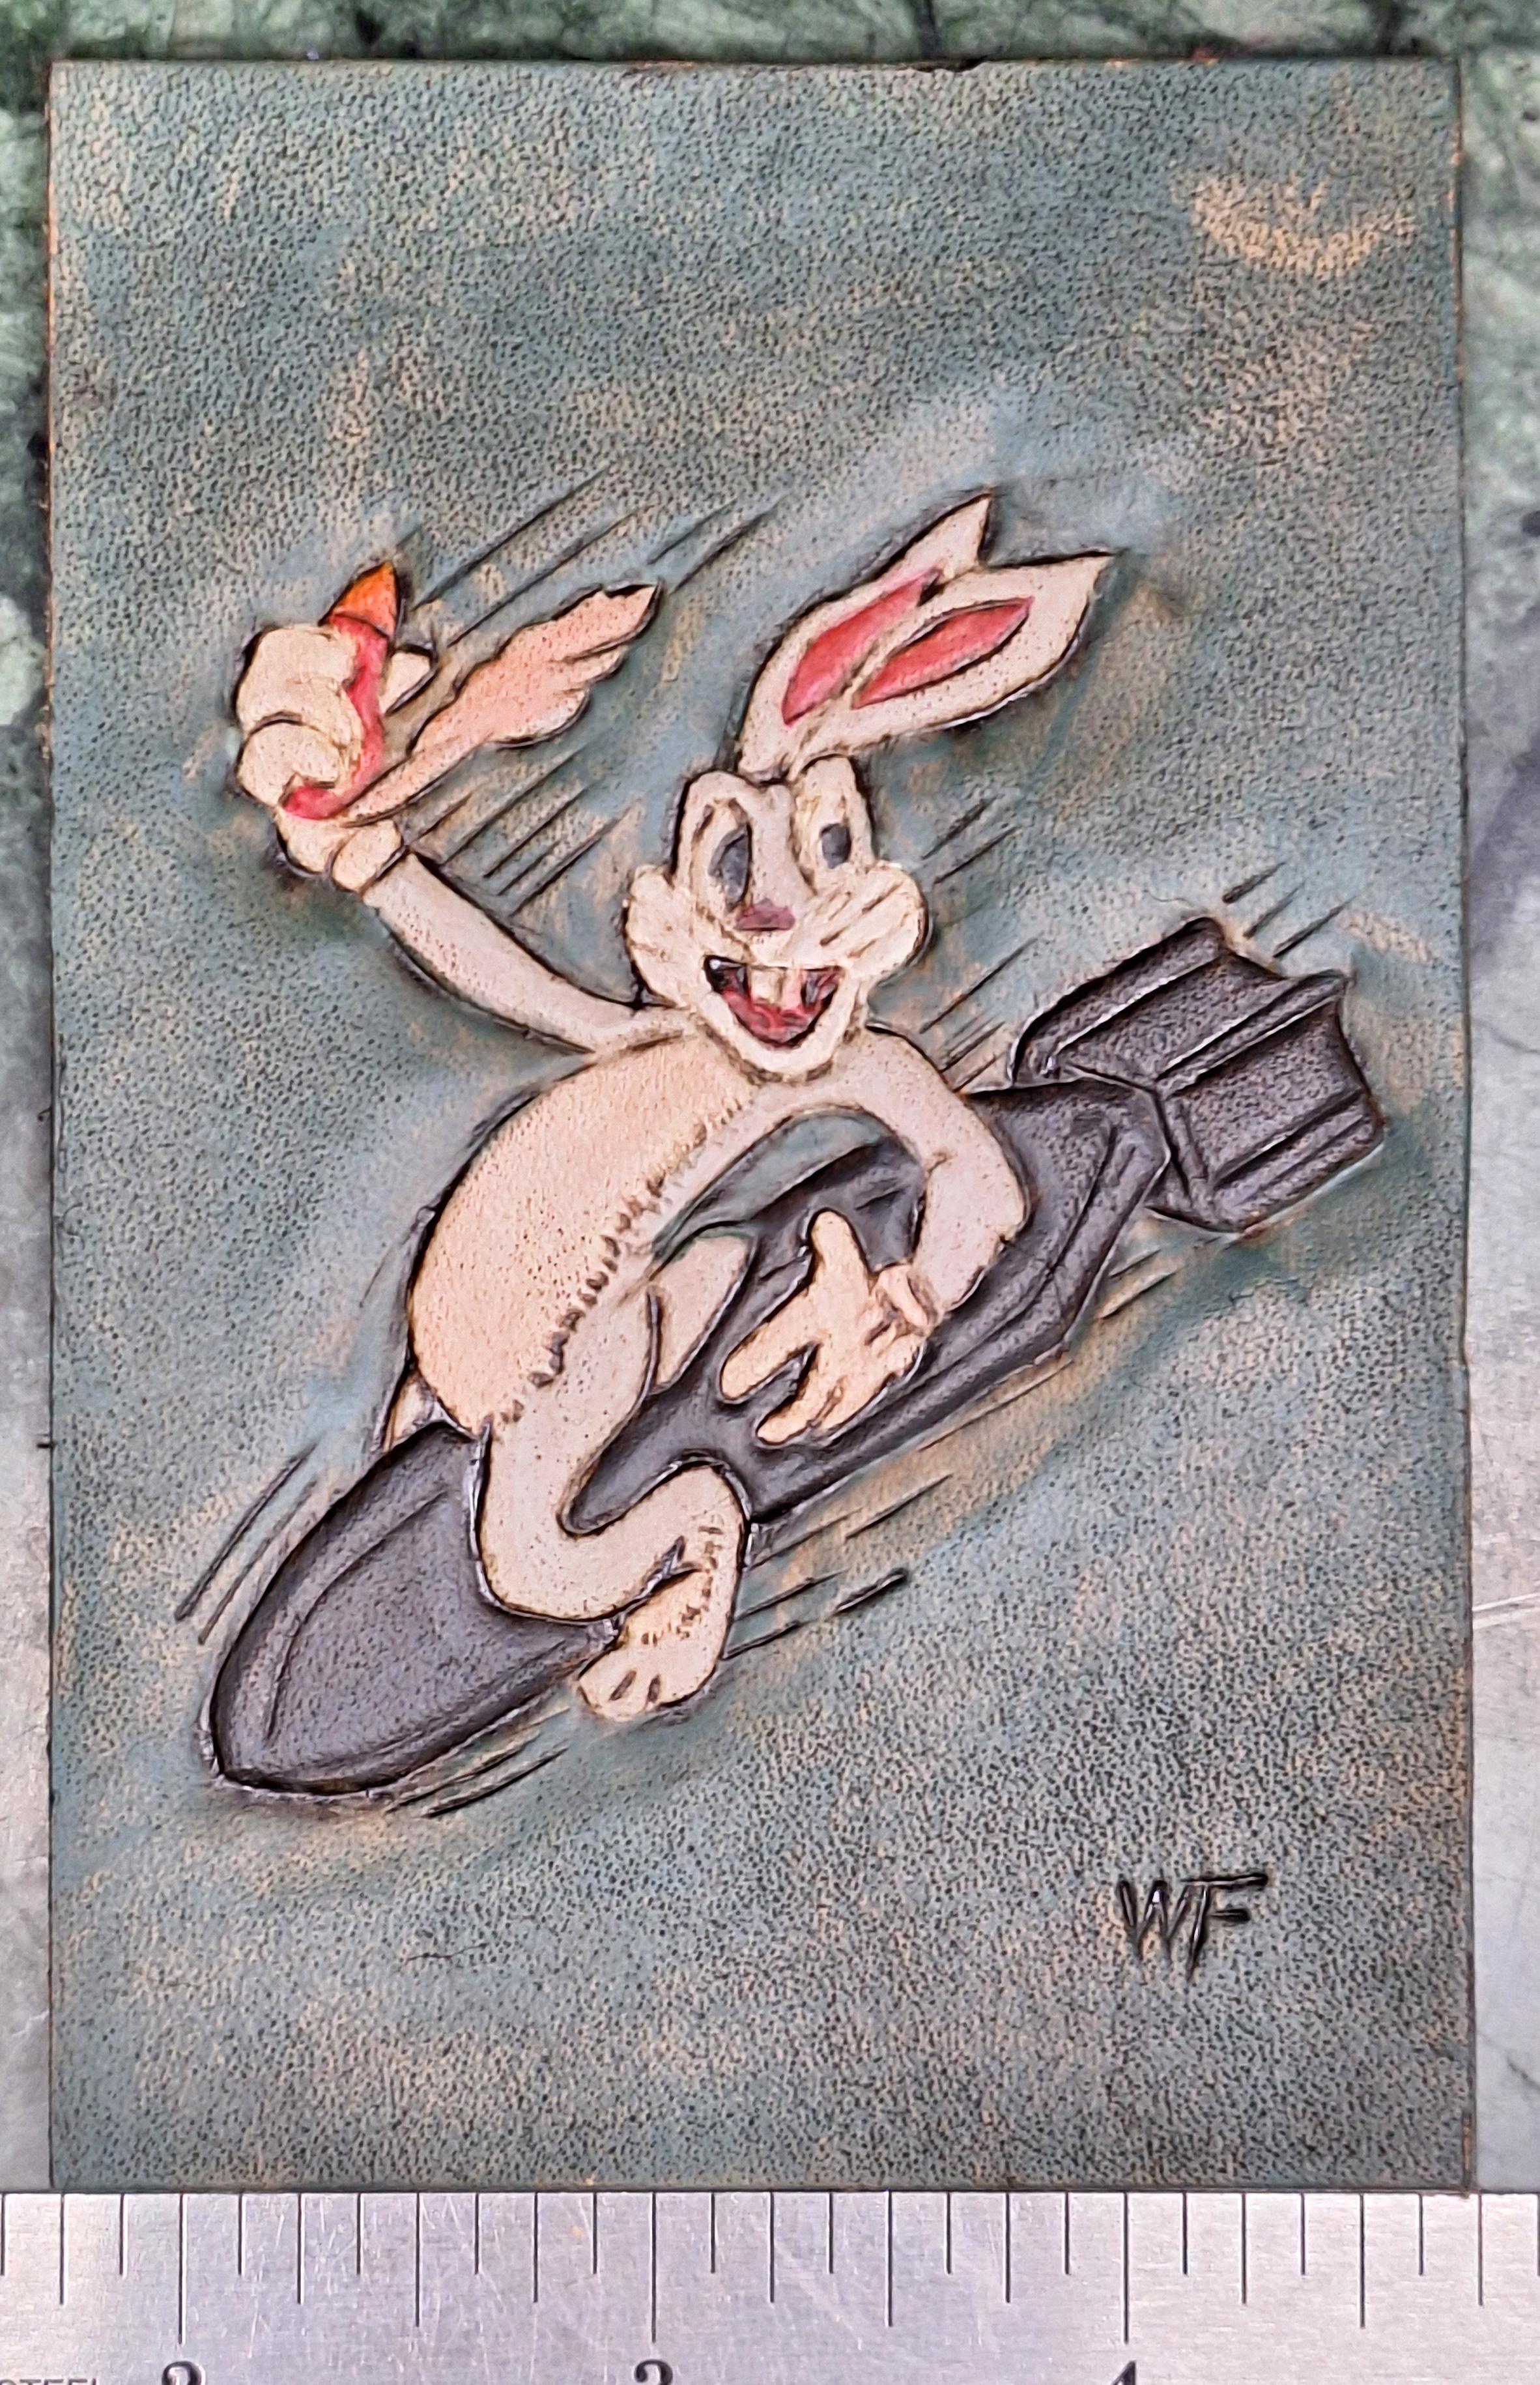
Another WWII nose art.
- Today
-
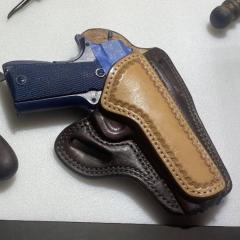
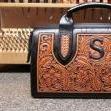
Hermann Oak G19 Leather Holster
LMullins replied to LMullins's topic in Gun Holsters, Rifle Slings and Knife Sheathes
No, you're not missing anything. I have a habit of taking photos before adding hardware/punching slots, and then once I do, I usually send the work out before I remember to grab another photo. 😆 -

Hermann Oak G19 Leather Holster
bladegrinder replied to LMullins's topic in Gun Holsters, Rifle Slings and Knife Sheathes
Is it going to get belt slots, or am I missing something? -
Another very well done video with tons of contact info.....
-

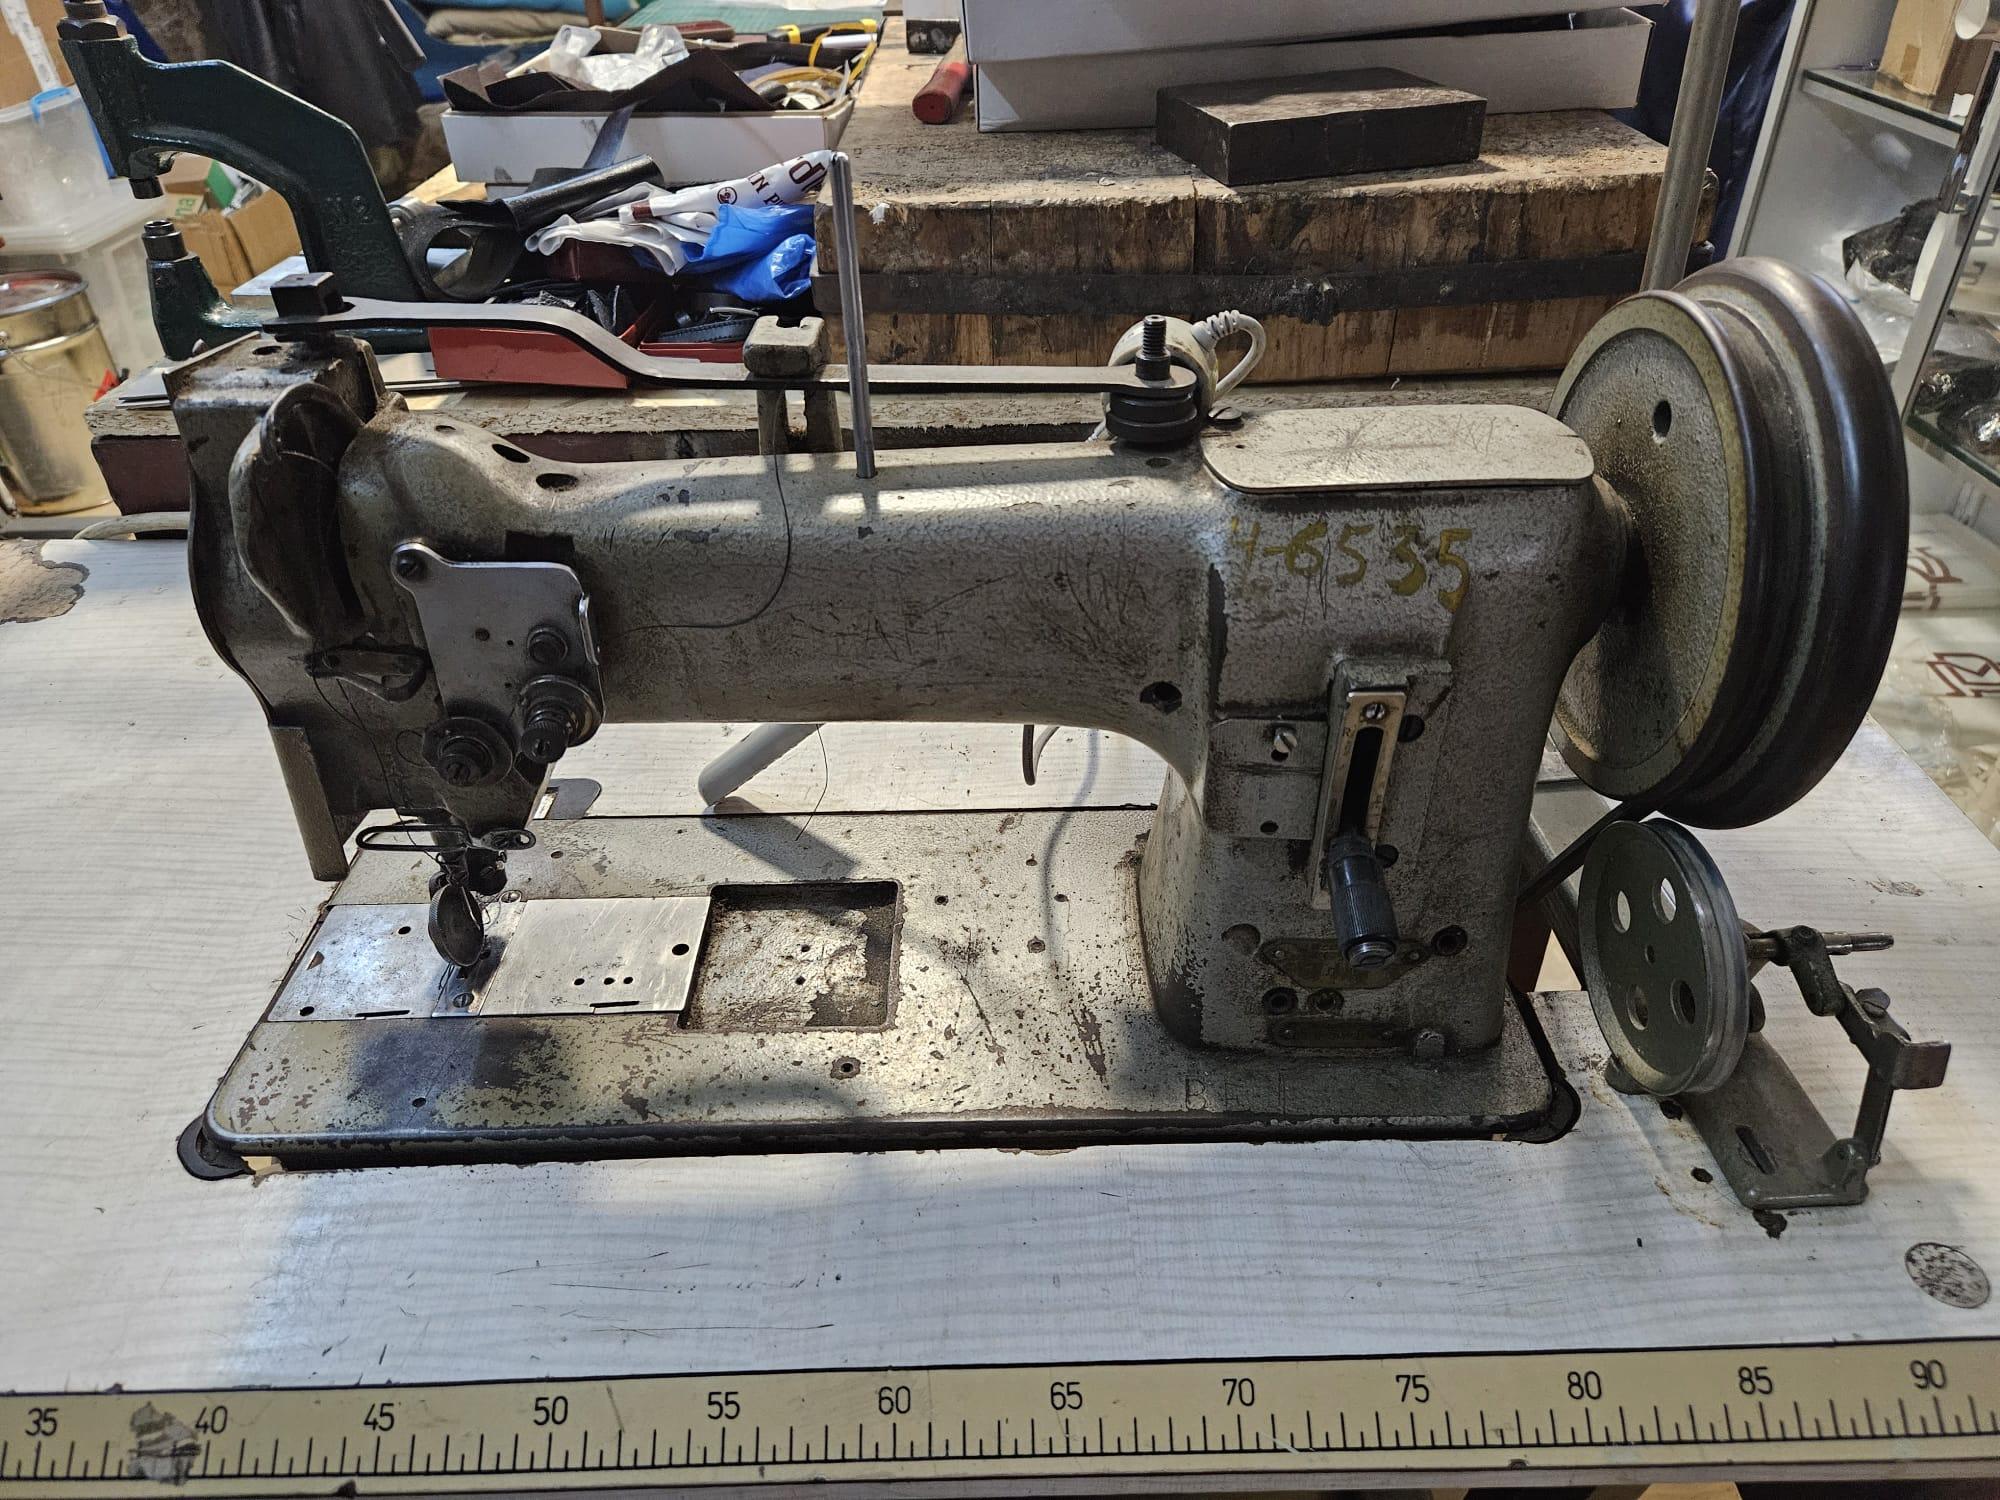
What Machine Do I Need to Sew 12 mm Leather
Dwight replied to OscarRush's topic in Leather Sewing Machines
And if you are hard up for cash . . . a Tippmann Boss is a manual machine . . . one pull and one push of the lever . . . makes one stitch. I've sewn some pretty heavy stuff with one of them until I got my Cowboy 4500 . . . It'll do what you need . . . brand new for something in the neighborhood of 1000 bucks US. A cowboy 4500 is over 3000 just for comparison May God bless, Dwight -
There is no real "calculation" you can make . . . what you have to do is take the holster . . . that has been wet formed . . . and then fully dried . . . give it a light coat of neatsfoot oil and let that dry . . . then add your contact cement to both sides of the inside of the holster . . . wait for it to dry . . . place the weapon in the holster and squeeze the sides together. I have a pair of tin bending pliers I use to squeeze the sides together. The holster stitch line has to be as close to the weapon as you can get . . . and again there is no "formula" for it. You use your sewing machine . . . mine is a Cowboy 4500 with only a half foot on it . . . allowing the needle to get up close to the intersection where the two pieces of leather are bound together with the contact cement. As you can see on this holster . . . I got up real close. I have a hand held stitch maker (from Tandy) which makes those lines next to the weapon. All outside stitch lines are made with a typical gouge set for a determined distance . . . then you simply connect the two . . . and you have your holster finished. There is no (A x C) / 3 = stitch line formula . . . or calculation . . . you simply sew it where the leather comes together. Most of the time this will produce a tight holster . . . the customer can loosen it with the freezer bag trick if he wants it more loose. May God bless, Dwight
-
Hermann Oak G19 Leather Holster
LMullins replied to LMullins's topic in Gun Holsters, Rifle Slings and Knife Sheathes
I've had the same experience with the Angelus being more prone to rub-off as well. it's a bit of a trade-off. The Angelus is indeed darker and more deep, but far more inconvenient. Fiebing's isn't quite as dark, but I find it applies much cleaner. I imagine it would be a lot easier to airbrush the Angelus, but I have not yet felt the need to purchase one. Either way, they're both good and it's good to have options. I have not tried Tandy's Satin Sheene but I just might give it a shot at some point. 🍻 -

Brown dye from household materials
1961Mike replied to Nowandagain's topic in Gun Holsters, Rifle Slings and Knife Sheathes
Hi Did the original poster ever try vinegaroon a second time? I've made at least 2 and I think 3 batches. They all worked great. I took a break from leatherwork this year for various reasons. I use the following procedure to use Vinegaroon: 1. Tool the belt and let it dry fully, or at least draw the guide lines and tool the belt after dying. 2. Put the belt in the Black Tea Tannin Solution for 2 minutes. 3. Put the belt in the Vinegaroon for 6 minutes. 4. Put the belt in the Baking Soda solution until it quits bubbling. This shows that the vinegar has been neutralized. 6 minutes also works well. 5. Rinse with Cold water. 6. Let the belt dry flat, this takes at least 3 days. 7. Coat the front and back of the belt with Extra Virgin Olive Oil (from Extra Ugly Olives) or Neatsfoot Oil, and let dry. 8. Put on a second coat of EVOO and let dry. 9. Use a couple of coats of Tankote (shiny) or Bagkote (less shiny) on the fur side of the leather. 10. Use multiple coats of Gum Tragacanth on the flesh side of the leather, smooth it with a glass deal and let try. 11. To get Really Shiny finish on the fur side of the leather, use Gum Tragacanth on that side too. Let it get mostly dry and them buff it out. 12. Mix Resolene half and half with distilled water and put on several coats. -
 Very nice work, and yes, that is a very deep and true Black. I tried Angelus Navy dye on one project and it had a lot of rub-off. Fiebing's Pro Black works for me, with almost zero rub-off but it can have a blue/purple iridescence to it at some angles in some lighting. Fiebing's USMC is Jet black but it has a lot of rub-off, so I never use it any more. Have you tried Tandy Eco-Flo Satin Shene for a more matte finish than Resolene? Not sure it would work to your satisfaction, but maybe. https://tandyleather.com/collections/leather-finishes/products/eco-flo-satin-shene
 -
Hey all, quick question… Been looking for a liner for a purse I’m working on, but I’ve been rather disappointed with the options I’ve found. Does veg-tanned pigskin (or lamb skin for that matter) tool/dye like veg-tan cattle leather? Thanks, AZR
-
I am so very impressed with your restoration, fantastic job. I thought you were in Europe, the part availability seems to be much better there than here in the US. I looked at the decals, unfortunately they don't have any for my model.
-
dyeing larger leather item
Tim Schroeder replied to stampingdelight's topic in Leatherwork Conversation
I use a gravity fed HVLP no matter what size the piece is. 12" pattern means just two passes on pieces that big. I spray very light coats in all four directions. Full control of amount of dye, air and pattern. You can dial it down to the size of a quarter if you need to. The blue backgammon board in my profile albums is the best example I have to show. I don't know how to get the picture from there to here. https://leatherworker.net/forum/gallery/image/11173-braves-board-003jpg/?context=new -
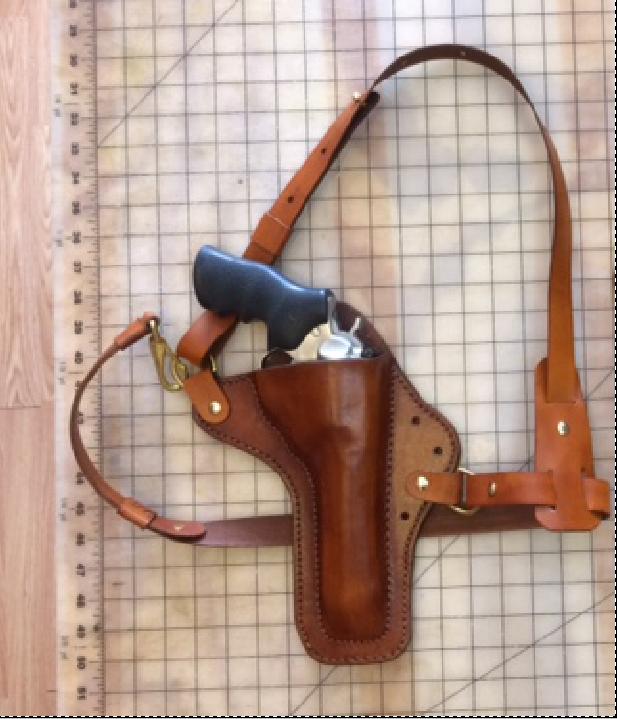
I usually make pancake and bucket styles for revolvers. I’m mainly curious about how others standardize stitch-line spacing for consistency and efficiency. Some earlier replies steered the conversation away from the topic, but this is really just about refining the process. Everyone has their own method, and I’d like to hear what works for different people. Maybe there is some techniques I can pick up on. That's why I'm on the site. 😎👍
-
 So, are you making fold over type holsters for these revolvers? Or the pancake? Maybe a picture of what you're currently making would help get focused responses?
 -
Sounds like you and I approach it very similarly. in my experience, semi autos are very straight-forward to work with. 1911 style pistols, Glocks, etc. are always pretty predictable as far as stitch lines and adapting goes. Larger revolvers are where pancake holsters become more nuanced for me. While I haven't had any issues producing a proper fit, accommodating the cylinder does require just a bit more consideration compared to something flat. I'd made a pancake holster for a 5.5 barrel .45 Vaquero and it came out really nice. Revolvers definitely are the prettiest when paired with leather.
-
 I start with my closest pattern, then use various measuring devices to adjust for the differences, usually keeping the top stitch line of my design as a constant. My most used holster design originated with a 1911 pattern that I made, and I have altered it to accept anything from a Colt Anaconda to a Taurus G3C. The basic methodology was taught to me in grade school, lol, back in the day we were taught to use rulers, compasses, protractors, and such in Geometry class and i didnt forget how i guess.
 -
 Igorz joined the community
 -
Thanks! I did a bit of paint chipping when I assembled the parts but that's for the patina...intentionally LOL. One thing I forgot mentioning in case somebody wants to add the needle feed. Timing between feed dog and needle is different in both cases. Drop feed = feed dog moves when the needle is out, dual feed= they go together. I want to see also what does it mean to add a larger feed dog, as surface. Such as one from pfaff 142 with dual needles. Because with its original feed dog on 543, the one which is offset to the needle, it feeds ok, but since the needlepushes down there is a small bit of movement on the material. So my intention is to use a dual needle feed dog so the presser wheel sits on the feed dog but also the needle to have some support underneath. In theory it should work. A 545 would solve each issue but since I already have the machine and honestly it stiches really nice. In the video, ticket 15 thread or v207 size up and down and VR 150(edit: needle is S cut in the video, checked today) size needle. I like VR compared to LR due to 2 more extra cuts. I've added a pic with how the machine looked before. A bit like crap. And I must say the parts are really durable. In terms of age, I dated based on the serial number, in 1955.
-
Hermann Oak G19 Leather Holster
LMullins replied to LMullins's topic in Gun Holsters, Rifle Slings and Knife Sheathes
Thank DieselTech. it's probably worth mentioning, I was always after a deep rich Black color and never really got it with Fiebing's. I used to do a base coat of blue dye, and then fully dry and buff, and then come back with black. This helped get a deeper dye but still not quite what I wanted. I find Angelus tends to apply more evenly and with a deeper color. Just my observation 😎 -
I never said I didn't know how to make them. There's several ways of patterning a holster for a firearm, which I won't be listing here because I could go on and on. Especially for SA Revolvers... I'm simply asking for ways to make the process more efficient and discuss different methods of achieving that goal.. which is a normal part of refining a workflow. That assumption doesn't add any insight to the topic at hand. That’s like responding to a question about better edge finishing by saying someone shouldn’t sell belts if they’re asking.
-
 This is the book I purchased when learning how to make holsters. I would tell you all about how I do mine but would take all day, start here and itemize your questions in the future. https://tandyleather.com/products/how-to-make-holsters-book?_pos=2&_sid=0419dee1e&_ss=r
 -
If you don't know how to make them . . . you probably shouldn't be taking orders . . . May God bless, Dwight
-
 BindingEnergy joined the community
 -

Hermann Oak G19 Leather Holster
DieselTech replied to LMullins's topic in Gun Holsters, Rifle Slings and Knife Sheathes
Nice work! Dye job looks great to. -
Hermann Oak G19 Leather Holster
AlZilla replied to LMullins's topic in Gun Holsters, Rifle Slings and Knife Sheathes
That is some precision work. Very nice! -
Worked on a WWII nose art trading card. There is so much inspiration for tooling in that genre.
- Yesterday
-
I used a trim paint roller on a 2'x 9" piece recently. worked well. My basic theory; larger piece, larger applicator.