All Activity
- Past hour
-

Leather covered bit, replacement of the leather
DieselTech replied to Mulesaw's topic in Saddle and Tack Accessory Items
Looks nice! You did great work. How did you do the ends of the leather around the rings? Thanks. -

Leather covered bit, replacement of the leather
Mulesaw replied to Mulesaw's topic in Saddle and Tack Accessory Items
Thanks Tom I didn't think of looking in Stohlman's book, So I just made it with 2 needles :-) I thought that just going from a criss cross pattern to baseball stitch was adventurous enough for me. Brgds Jonas -
Tutorial, replacing zippers in riding boots.
Mulesaw replied to Mulesaw's topic in How Do I Do That?
@TomE Hi Tom I only shorten the zipper at the bottom if it needs to be shortened. If I have to do that, I install a metal bottom stop on and cut the surplus part of with a pair of scissors. I cut the zipper part itself square, and then each of the sides just a little on the diagonal, maybe 15 degrees sloping so that the center(zipper teeth) are the longest part. Then I burn the edges so it doesn't fray. It helps a little when you try to insert the bottom of the zipper, but it is still a fiddly business. On the top of the zipper I have tried different methods, from folding the zipper down to making an elaborate fold that go down and back. But at the moment I just cut it square and burn the edges. I am pretty sure that the factories sew in the zipper before mounting the bottom of the boot, and that they do it before trimming the lining, because often the zipper ends so far beneath the insole of the boot that you need to cut it and pull out the remaining part with a plier. On boots where it is possible to sew across the zipper, I try to make sure that I put the metal bottom stop below where I want my stitching to be. So far I have only needed 3 lengths for regular boots. 40 cm (16"), 45 cm (18") and 50 cm (20"). The 40 cm (16") is called for maybe once per year, so I have decided to not restock that one, but just shorten a longer zipper instead. What really helped me was when I started just sewing one side of the zipper first. I had tried double sided tape and contact gluye, but it still managed to shift around. Doing the "difficult" side of the boot first ensures that all the pulling and tuckling with the boot on the patcher doesn't dislocate the zipper, like it does when it is taped in place in both sides. Still dressage boots are a pain in the neck compared to juming boots. For some strange reason, the cheapest jumping no-name boots are much easier to work on compared to high end boots like DeNiro or Cavallo boots. The business side of it: I charge a fixed amount for replacing a zipper, and I provide the zipper, that way I know the quality and model of the zipper so I don't risk putting in a wron type of zipper. Technically I ought to charge more compared to what I charge per hour doing saddle repairs, but I choose to look at it like a way to get people to know the business. Chances are that if you have riding boots, you have some other horse related equipment that I can repair on another occasion, or I could sell some of the stable equipment that we also make. I generally try to do the repair in a day or two. Children's boots I have done it the same day, since I know how much it means to kids that they know their eqiupment is ready and they shouldn't need to worry about if they are able to attend the riding school on Friday etc. This is something that is really appreciated by the customers, I have even had a customer who gave me two bottles of wine as a tip due to fast service. :-) Off course, If I am at sea, there is a waiting time, but when I am at home, boots get prioritzed. There is another method to replace the zipper which I think is a lot faster, but I don't do it since I don't think it is good craftmanship. In that method you just cut the teeth of the old zipper of as close to the doubling as you can. Then the new zipper is taped on the inside of the lining and sewn in place. The benefits is that you don't have to spend 20 minutes carefully cutting the old zipper loose, and there is less fiddling with inserting the new zipper. The downside is that it doesn't look very preofessional in my opinion. And if I had a nice pair of boots, I would like the repairjob to be as close as possible to the original job. Brgds Jonas - Today
-
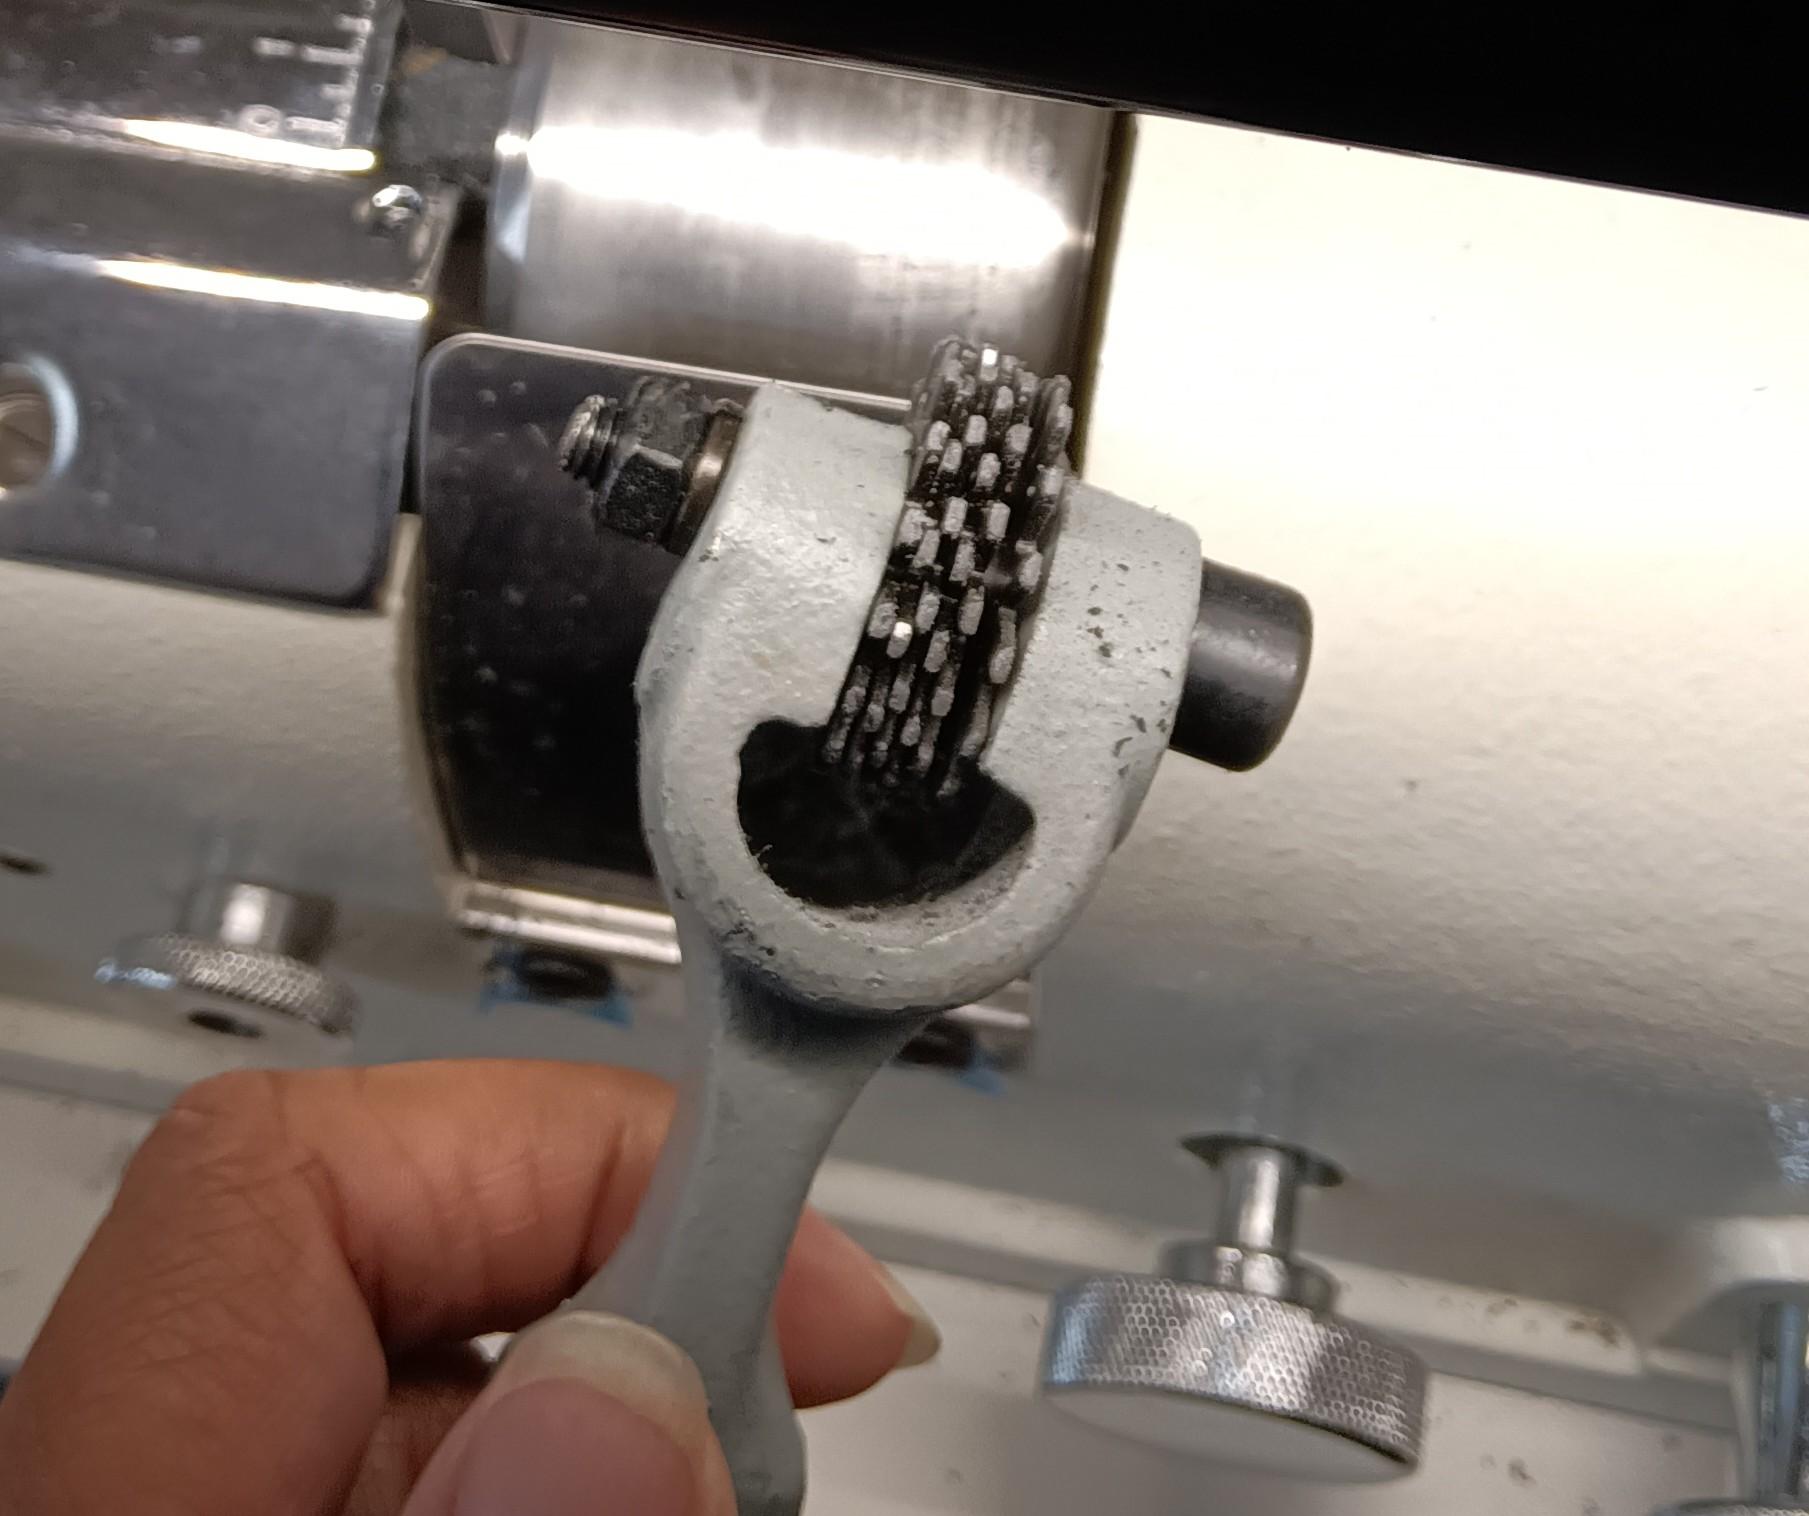
looks as if it had an edge trimming device? There is a bar with a blade, right?
-
I believe it happened many months ago.
-
I'm having different results depending on how I'm logged in. I'm ready to bork that whole section, although it is legit leatherwork. I'm going to bed, and I'll look at it again in the morning with fresh eyes.
-
That didn't work for me
-
You can also customize your activity stream to see only what you want and eliminate clutter you're not interested in.
-
I think I got it fixed. Please check to make sure the post from 6 hours ago does not show in your activity stream. You may need to log out and log back in.
-
I think they were kinda standard across a few different machines back in the day. I have a couple Singer Post bed heads in the corner, and one is a WW machine. I think both have the same hinge system as yours. Might not be so hard to find as one could think? Wish I had some leads for you though.
-
ach, sure, you're a dear
-
 When I bought my first Randall it belonged to a Jockey who did repairs down in Florida. He ran Barbours 4 cord...But not in Wax. He ran water in his lube pot. Apparently it worked. Stitching looked pretty decent and there was no residue of liquid wax or whatever. Of course that means the thread would be dry in the leather w/nothing to really protect it down the road. I never followed his advice other than just to try it out. On the UL's I run mostly nylon mostly in oil. On those machines there is a bit of a difference where the lock sets from nylon to poly. (stretch) but always works out well. What you need is 2 or 3 UL's...That way you can set one for Nylon, One for Poly and a spare for Linen if you run it sometimes! LOL
 -
I'm not sure what happened yet, but obviously something broke in the permissions. I'll get it fixed ASAP.
-

Randall leather sewing machine needs a shuttle
Wizcrafts replied to Vicki Vallencourt's topic in Leather Sewing Machines
I got my first ULS in 1986 or 87. I bought it off Tandy Leather. It was sitting in the middle of their parts warehouse, unused for years. There was nothing with it except the needle and awl in the head. No accessories or thread. Once I got a manual and learned how to thread it correctly, I used the large sizes of thread I already had from a Singer 132k6, which was my previous heavy duty machine. All my thread was bonded nylon. So, I used nylon thread in various sizes. I adjusted the pull up positioner, the looper, etc, until I got perfect stitches. I did this for most of the time I owned that machine. I tried running Barbour's Irish Linen thread, but it kept hanging in the barbed needle, or on the looper. I just couldn't figure out how to run linen thread through liquid wax without it sticking to the needle or looper. Arrg! So, I kept going back to bonded nylon. If I get another ULS, I will buy bonded polyester thread just to keep it happy! ;-) -
 teaganmay joined the community
 -

Leather covered bit, replacement of the leather
TomE replied to Mulesaw's topic in Saddle and Tack Accessory Items
Good looking stitching, Jonas. Stohlman's hand sewing book shows a baseball stitch using one needle. I couldn't get that method to look tidy, so I am using 2 needles now. Looks like you do the same. -
Your tutorial is a welcome resource, Jonas. I was sewing from the top, around the bottom, and back up the other side. That was causing lots of problems with the lining and zipper moving, and breaking needles crossing the zipper to sew up the other side. I was putting a metal bottom stop on the zipper and have stopped doing that. Will try your suggestions at my earliest opportunity. Thanks a lot! PS How do you treat the top of the zipper? Do you add top stops? Do you remove teeth and fold the tape back on itself?
- Yesterday
-
And my bell doesn't seem to adjust left and right with the outer knob.
-
Tune me out also, please!
-
-
I'm with Ferg on this I never asked for admittance to that area but I still see the posts on 'All activity' and 'Unread content'
-
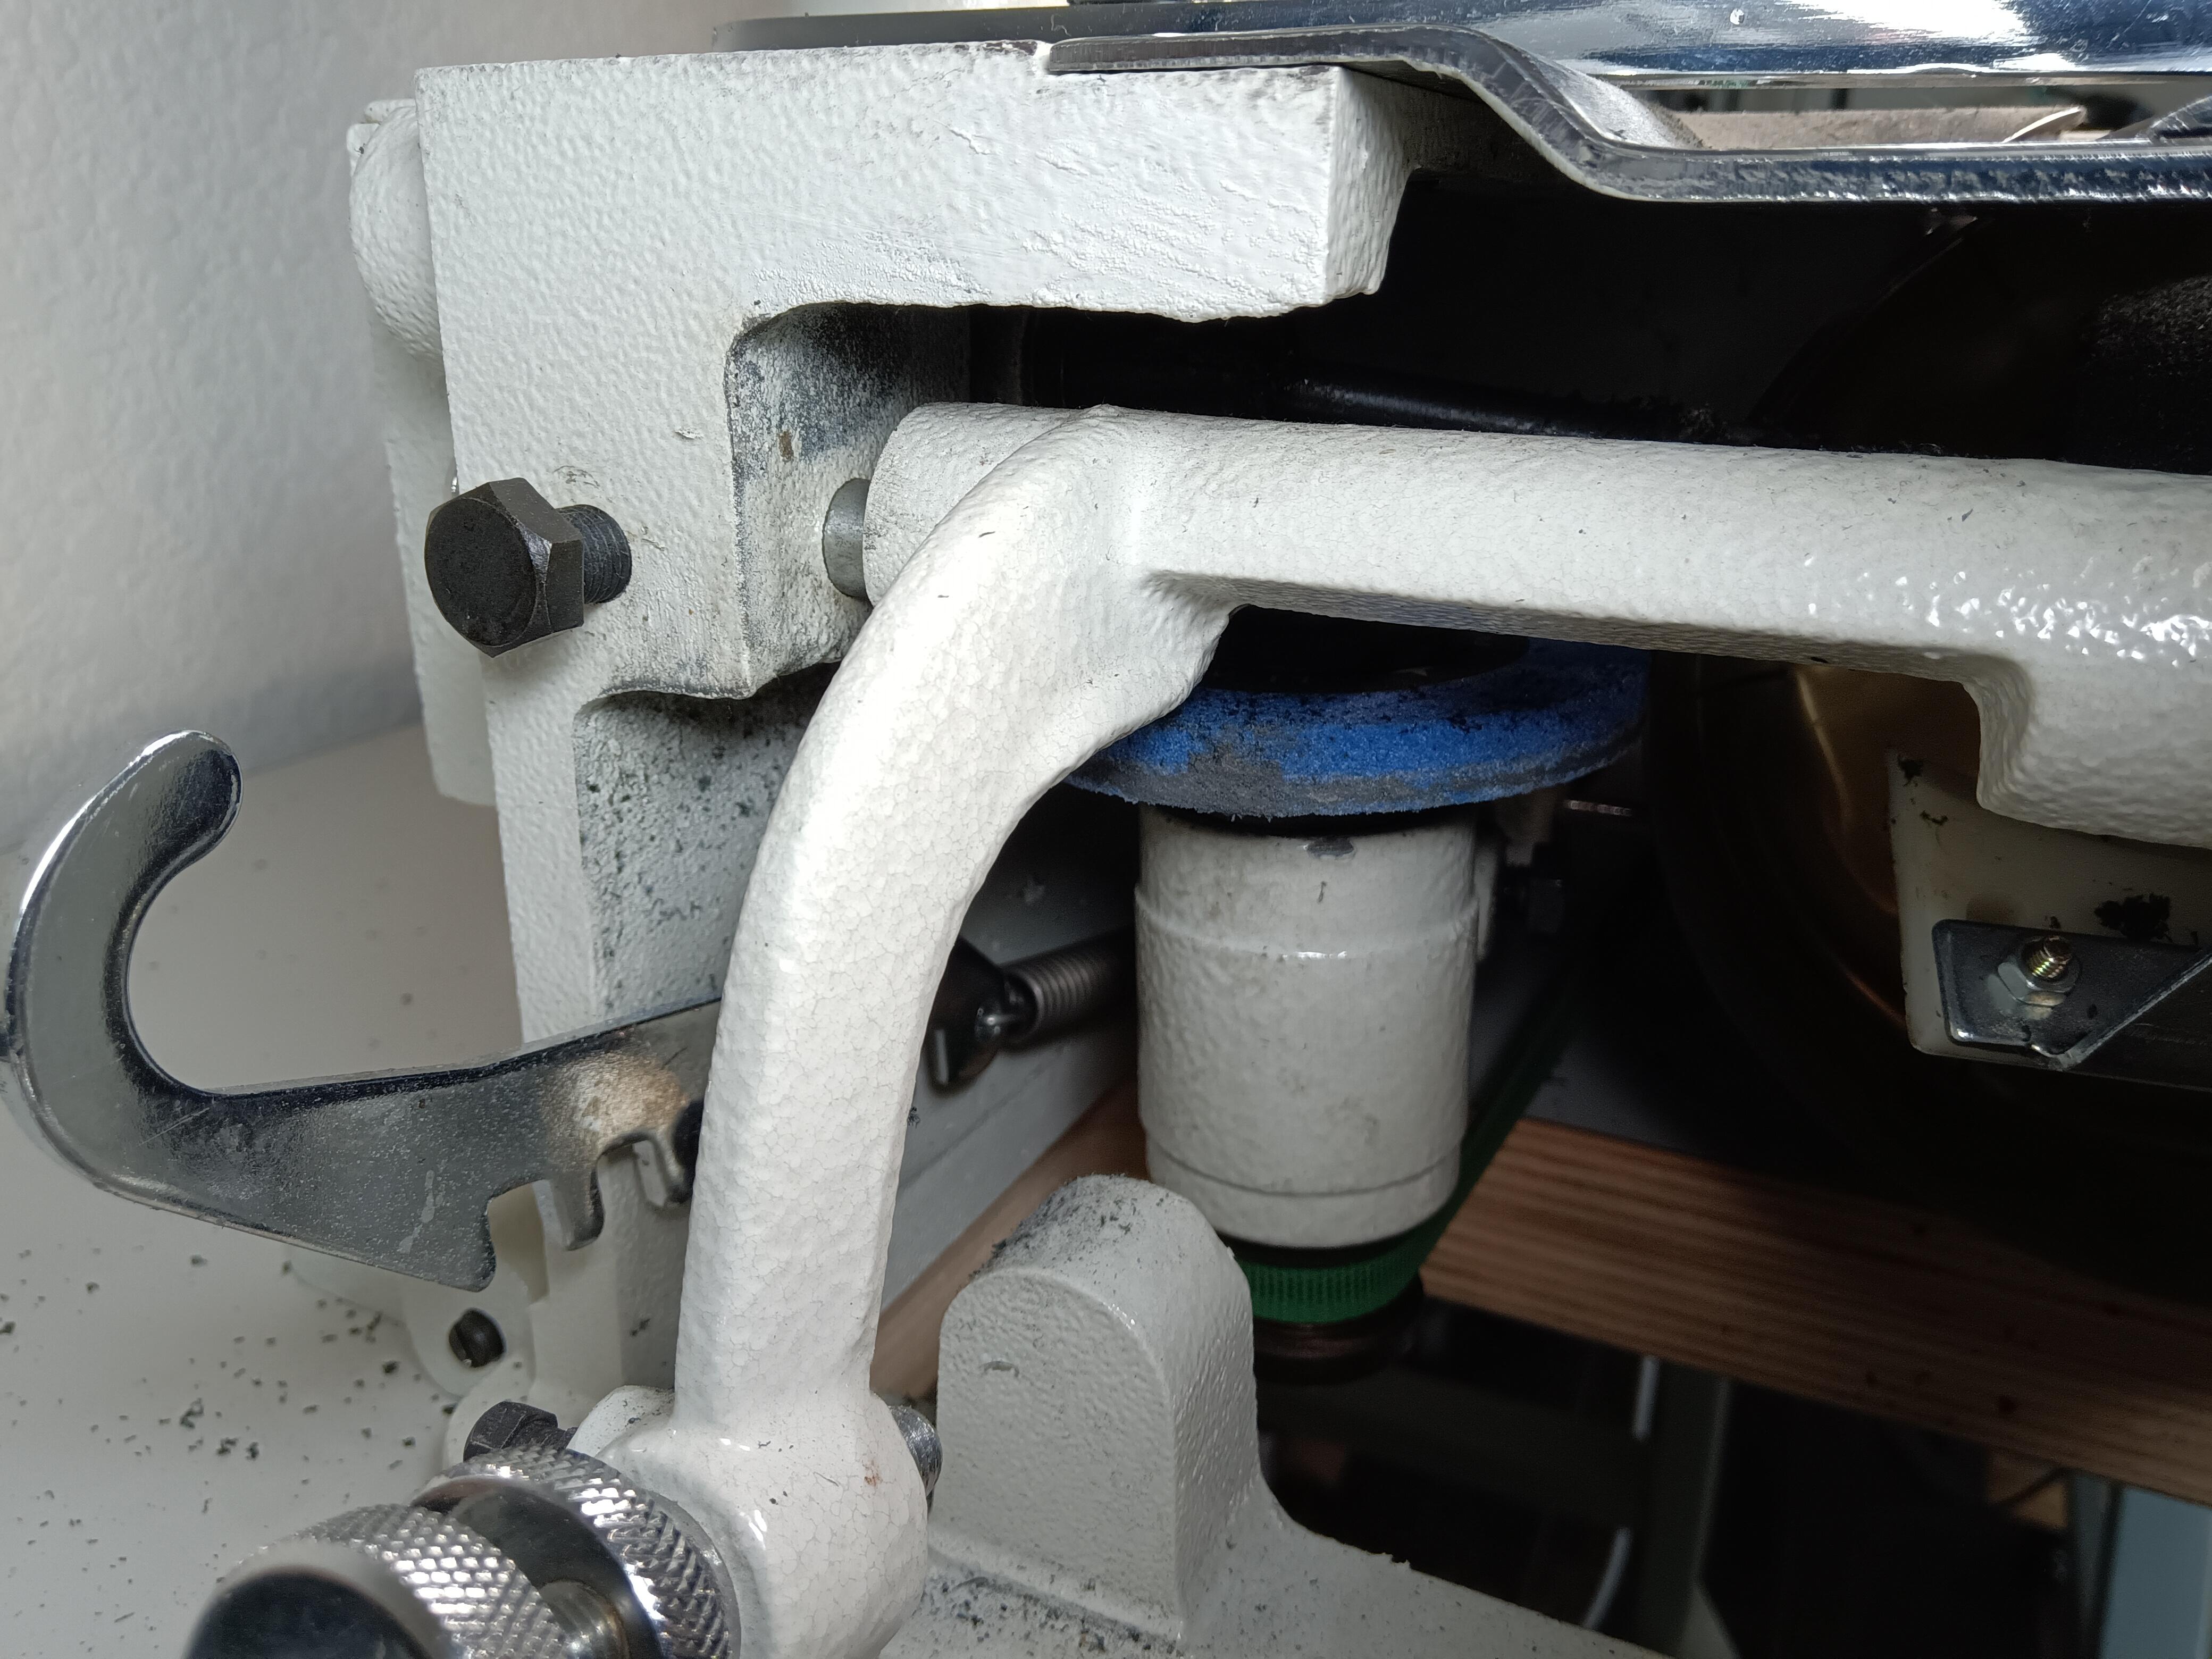
Thank you. It is skiving but I tried using this to clean the grinder but I can't get it in good enough. Is there something else I can use?
-
I believe @Johanna can make that forum invisible to you.
-
 Gerti joined the community
 -
I realize I am old and a fuddy duddy But...Jockstraps and Cod Pieces is just about the end of the line for me. If this is the nature of the posts (I know there is a place for them) that we are going to get from now on I think this old man will need to leave something I have enjoyed for a number of years. Ferg
-
A couple more photos would be nice but it does look very well done.
-
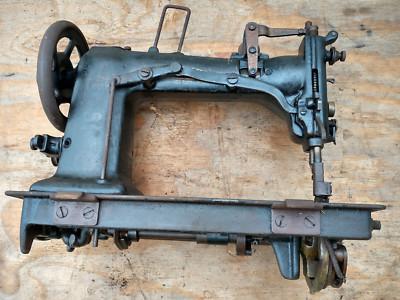
How's that for a longshot? The machine is actually a Singer 22W156, made by Singer after they bought W&W. Anyway, here's a pic. Might have to fabricate something.

.thumb.jpg.6e903dd66163ad5672f00f144058c571.jpg)