All Activity
- Today
-
Anyone can suggest me best leather conditioners for me. Thanks in advance!
-
My little leatherwork/reloading shed is a bit, umm, messy, I had about 7 boxes of various sizes holding various off-cuts, pieces, belts etc and at least two were permanently sitting on the table in the photo - the table that I use to cut leather on. Very annoying, moving stuff around. So, in the top of our wardrobe were three sets of Ikea plastic drawers, most of which had been empty for a while. Time to re-purpose them. They are 4-drawer units and can be stacked, so a bit of rudimentary woodwork to make a top and bottom, four casters on the bottom and Bob's yer uncle. Pretty much most of the bits and pieces fitted (didn't realise what I had in the boxes) with the exception of several pieces that are too long for the drawers, still trying to figure out where to put them. Part of what drove this is I've ordered a Vevor Leather cutting Machine, basically a small manual clicker press, and it will have to go on the table, which it couldn't do before.

-
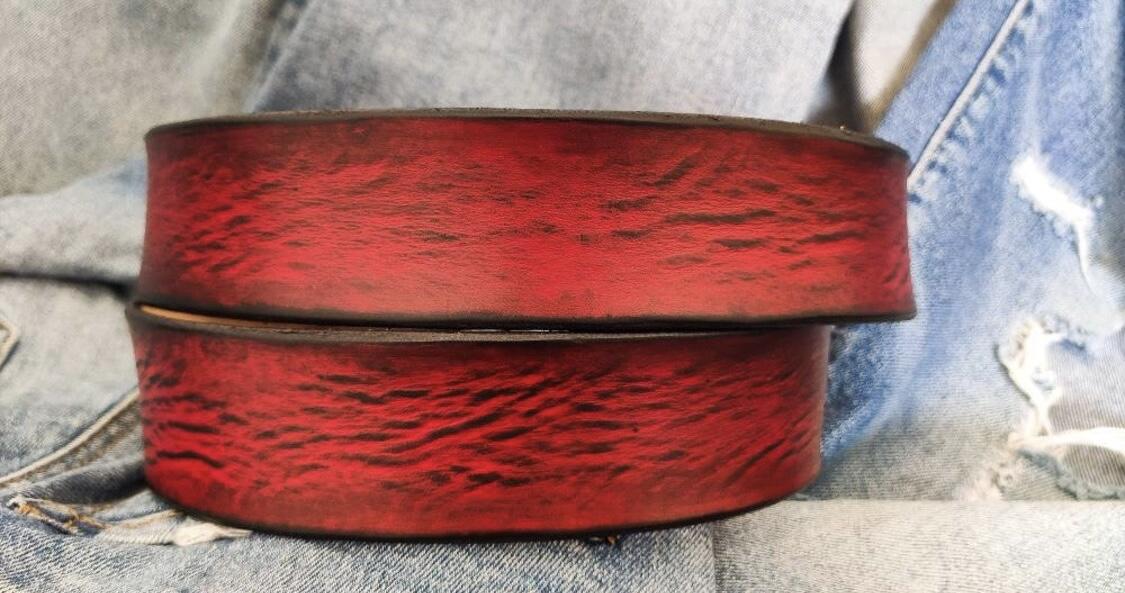
 If you mean the black "stripes" if the leather has a pronounced "grain" pattern, meaning the black bits are imprinted into the leather, then dying the leather first and then going over it with an antiquing paste should do it.
 -
The way I hold knife to exert some pressure is to put my fore-finger on the blade. That hole would make an excellent finger locator
-
We'll just call it a lightening hole, then.
-

Leather Machine Company Cobra Class 26 like new
Charles_Bandolero replied to Charles_Bandolero's topic in Used
Hi there @AlZilla My apologies. I will get some photos and the shipping/pick-up info up ASAP. Thanks for the heads up. -
Thanks mate, I've been faffing around with a logo using Inkscape and getting into all sorts of strife!! Similar process, guess it's just me not learning enough about Inkscape.
-

Leather Machine Company Cobra Class 26 like new
AlZilla replied to Charles_Bandolero's topic in Used
Hi @Charles_Bandolero Per the Marketplace Rules we also need pictures and your shipping info or if it must be picked up and where. We'll appreciate prompt compliance. Good luck with your sale! -
 I got the logo as a .png file then used the adobe free program to convert it into a .svg file. I imported it into tinkercad and added a little text, I increased the height of everything then I made a base for it not as thick as the logo and text. Then I put the base on the logo, evened the top of the base with the top of the logo, this leaves what you want to make the impression with sticking out of the base, I combine all pieces then rotate it 180 degrees so it is lying on the base with the impression parts sticking up. This lets you print it without supports. Then export as an .stl file and you are ready to print.
 -
Dropping the price to a steal $150 plus shipping
-
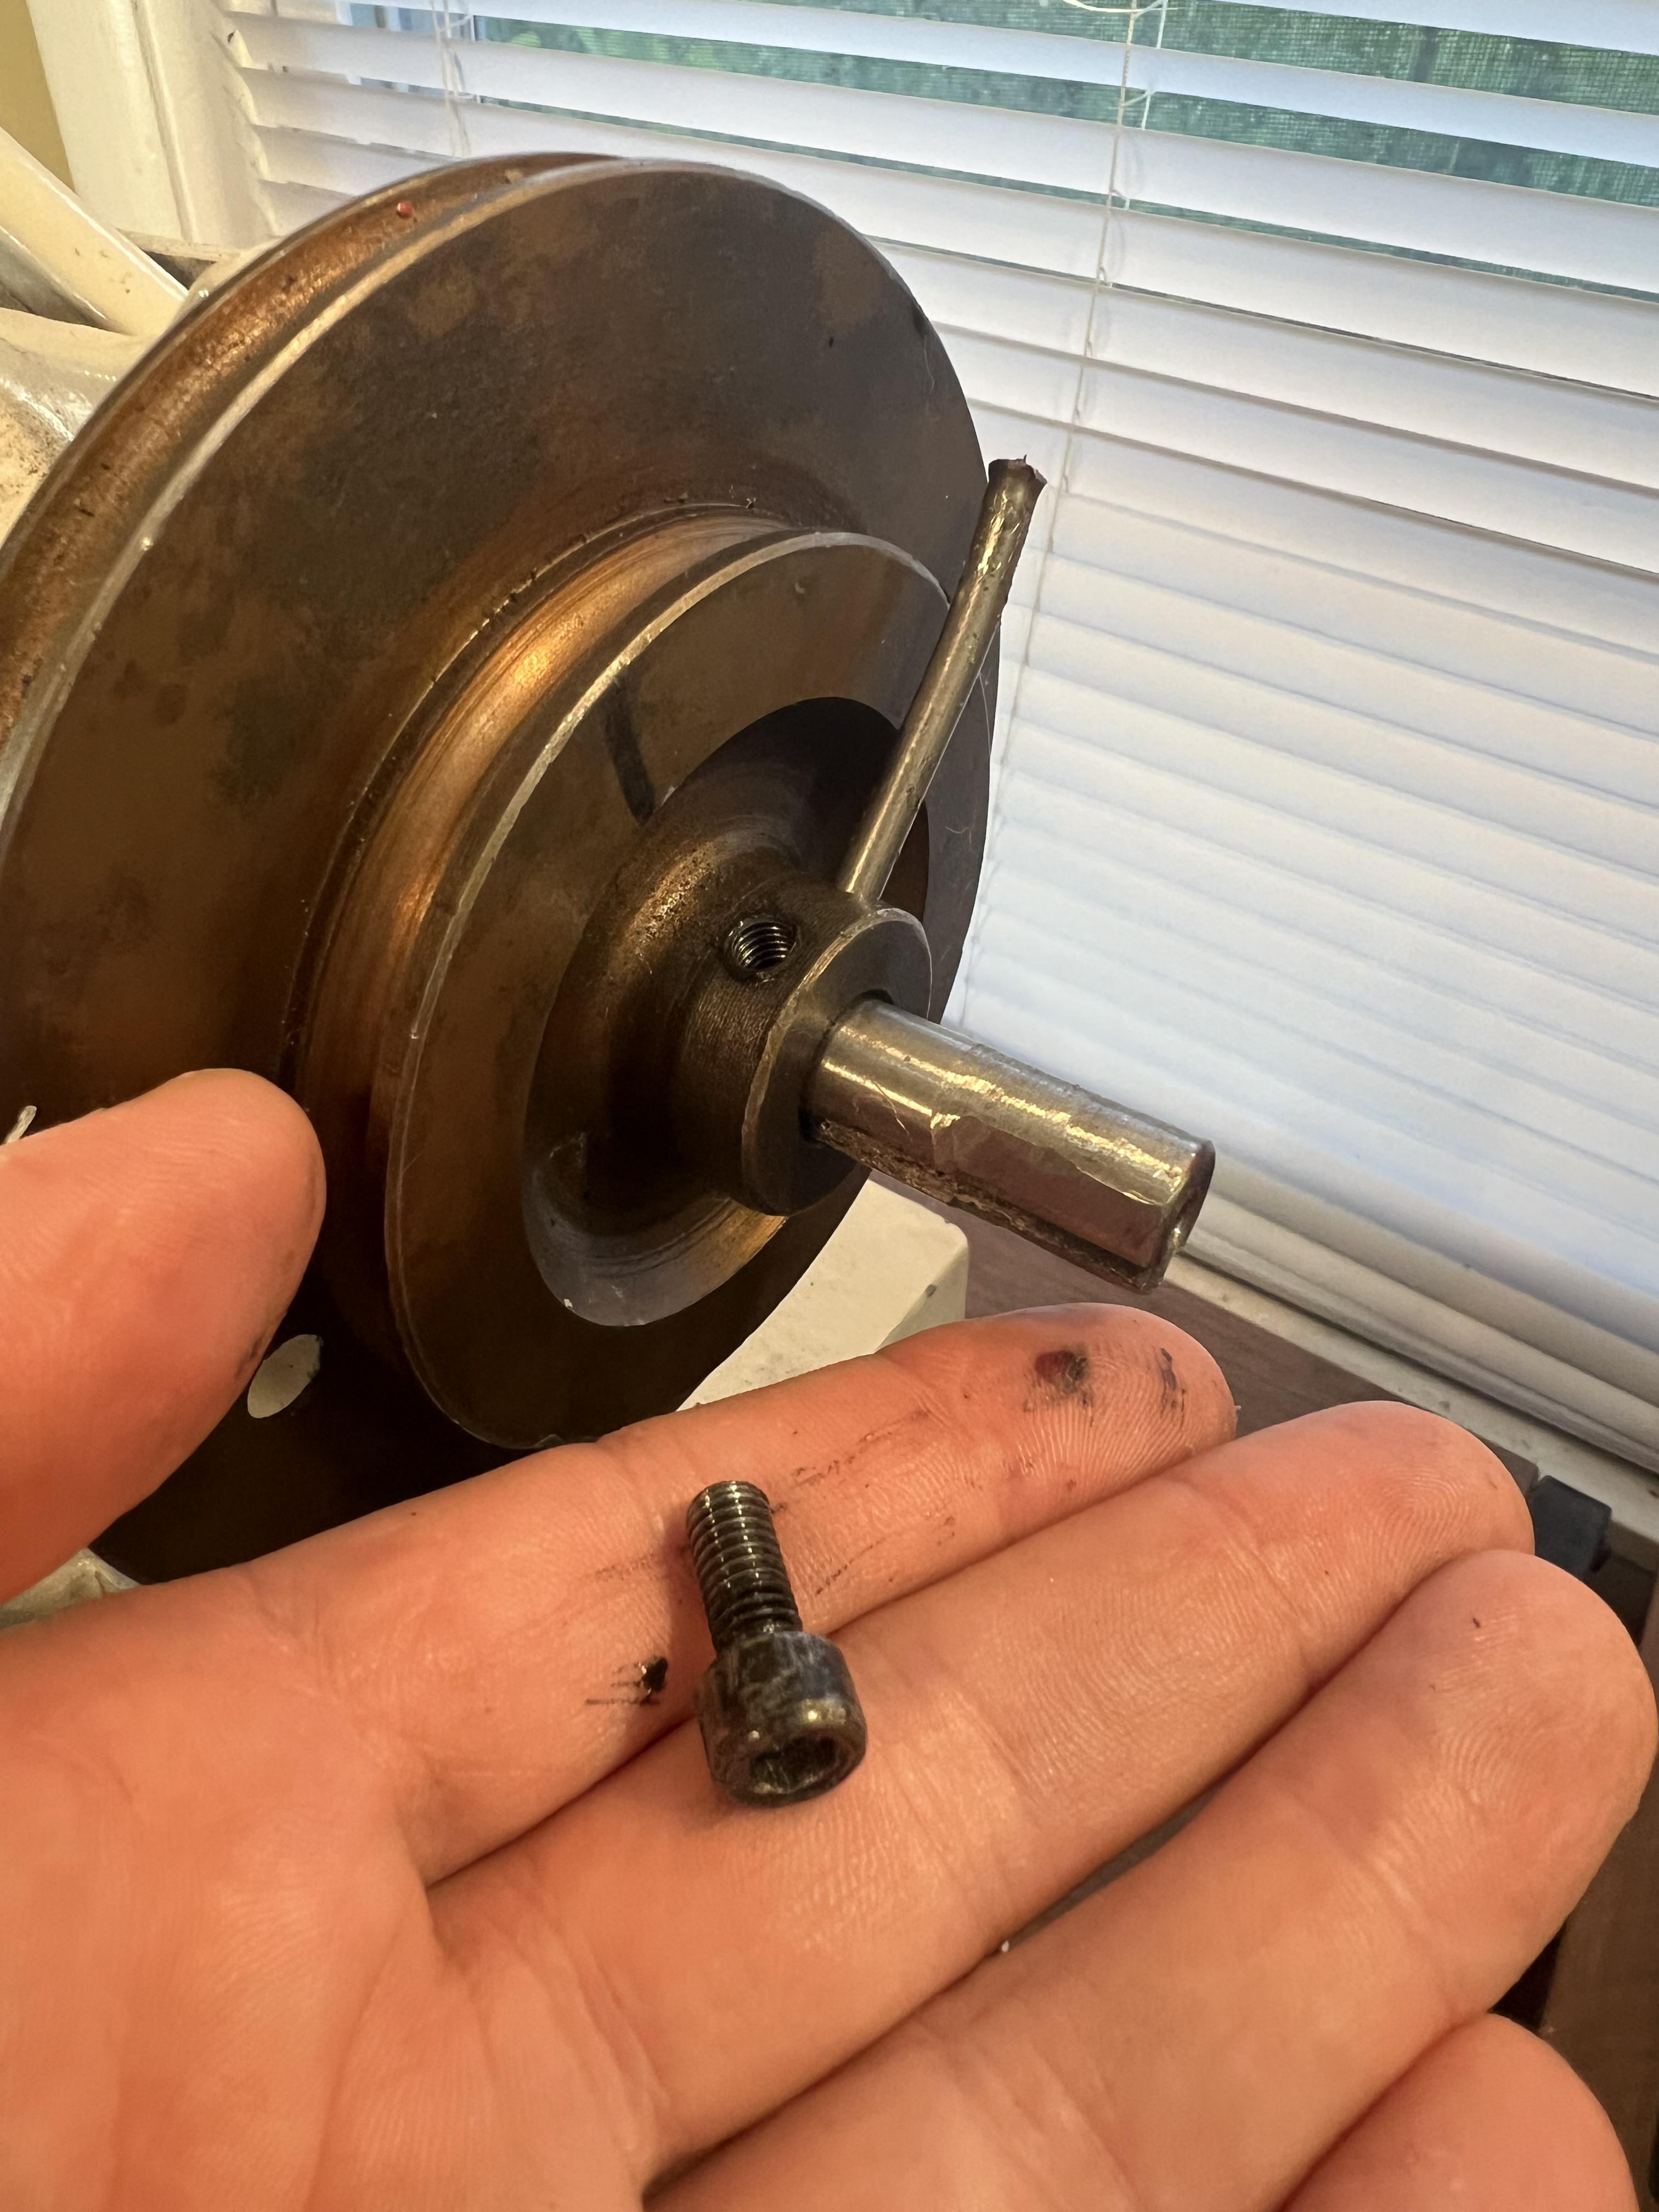
 The pin usually has a larger diameter on one side and by the looks of the pin you tried to knock it out the wrong way. I would try knocking it back, then cutting the damaged section off of the pin and use a drift punch to knock it out the other side. In the end you may wind up drilling it out. A 3" nail will work as a replacement pin. kgg
 -
Dropping the price to a steal $150 plus shipping
-
 Still haven’t got the pulley off but I was feeling the groove and there’s a little deep part right where it meets resistance.
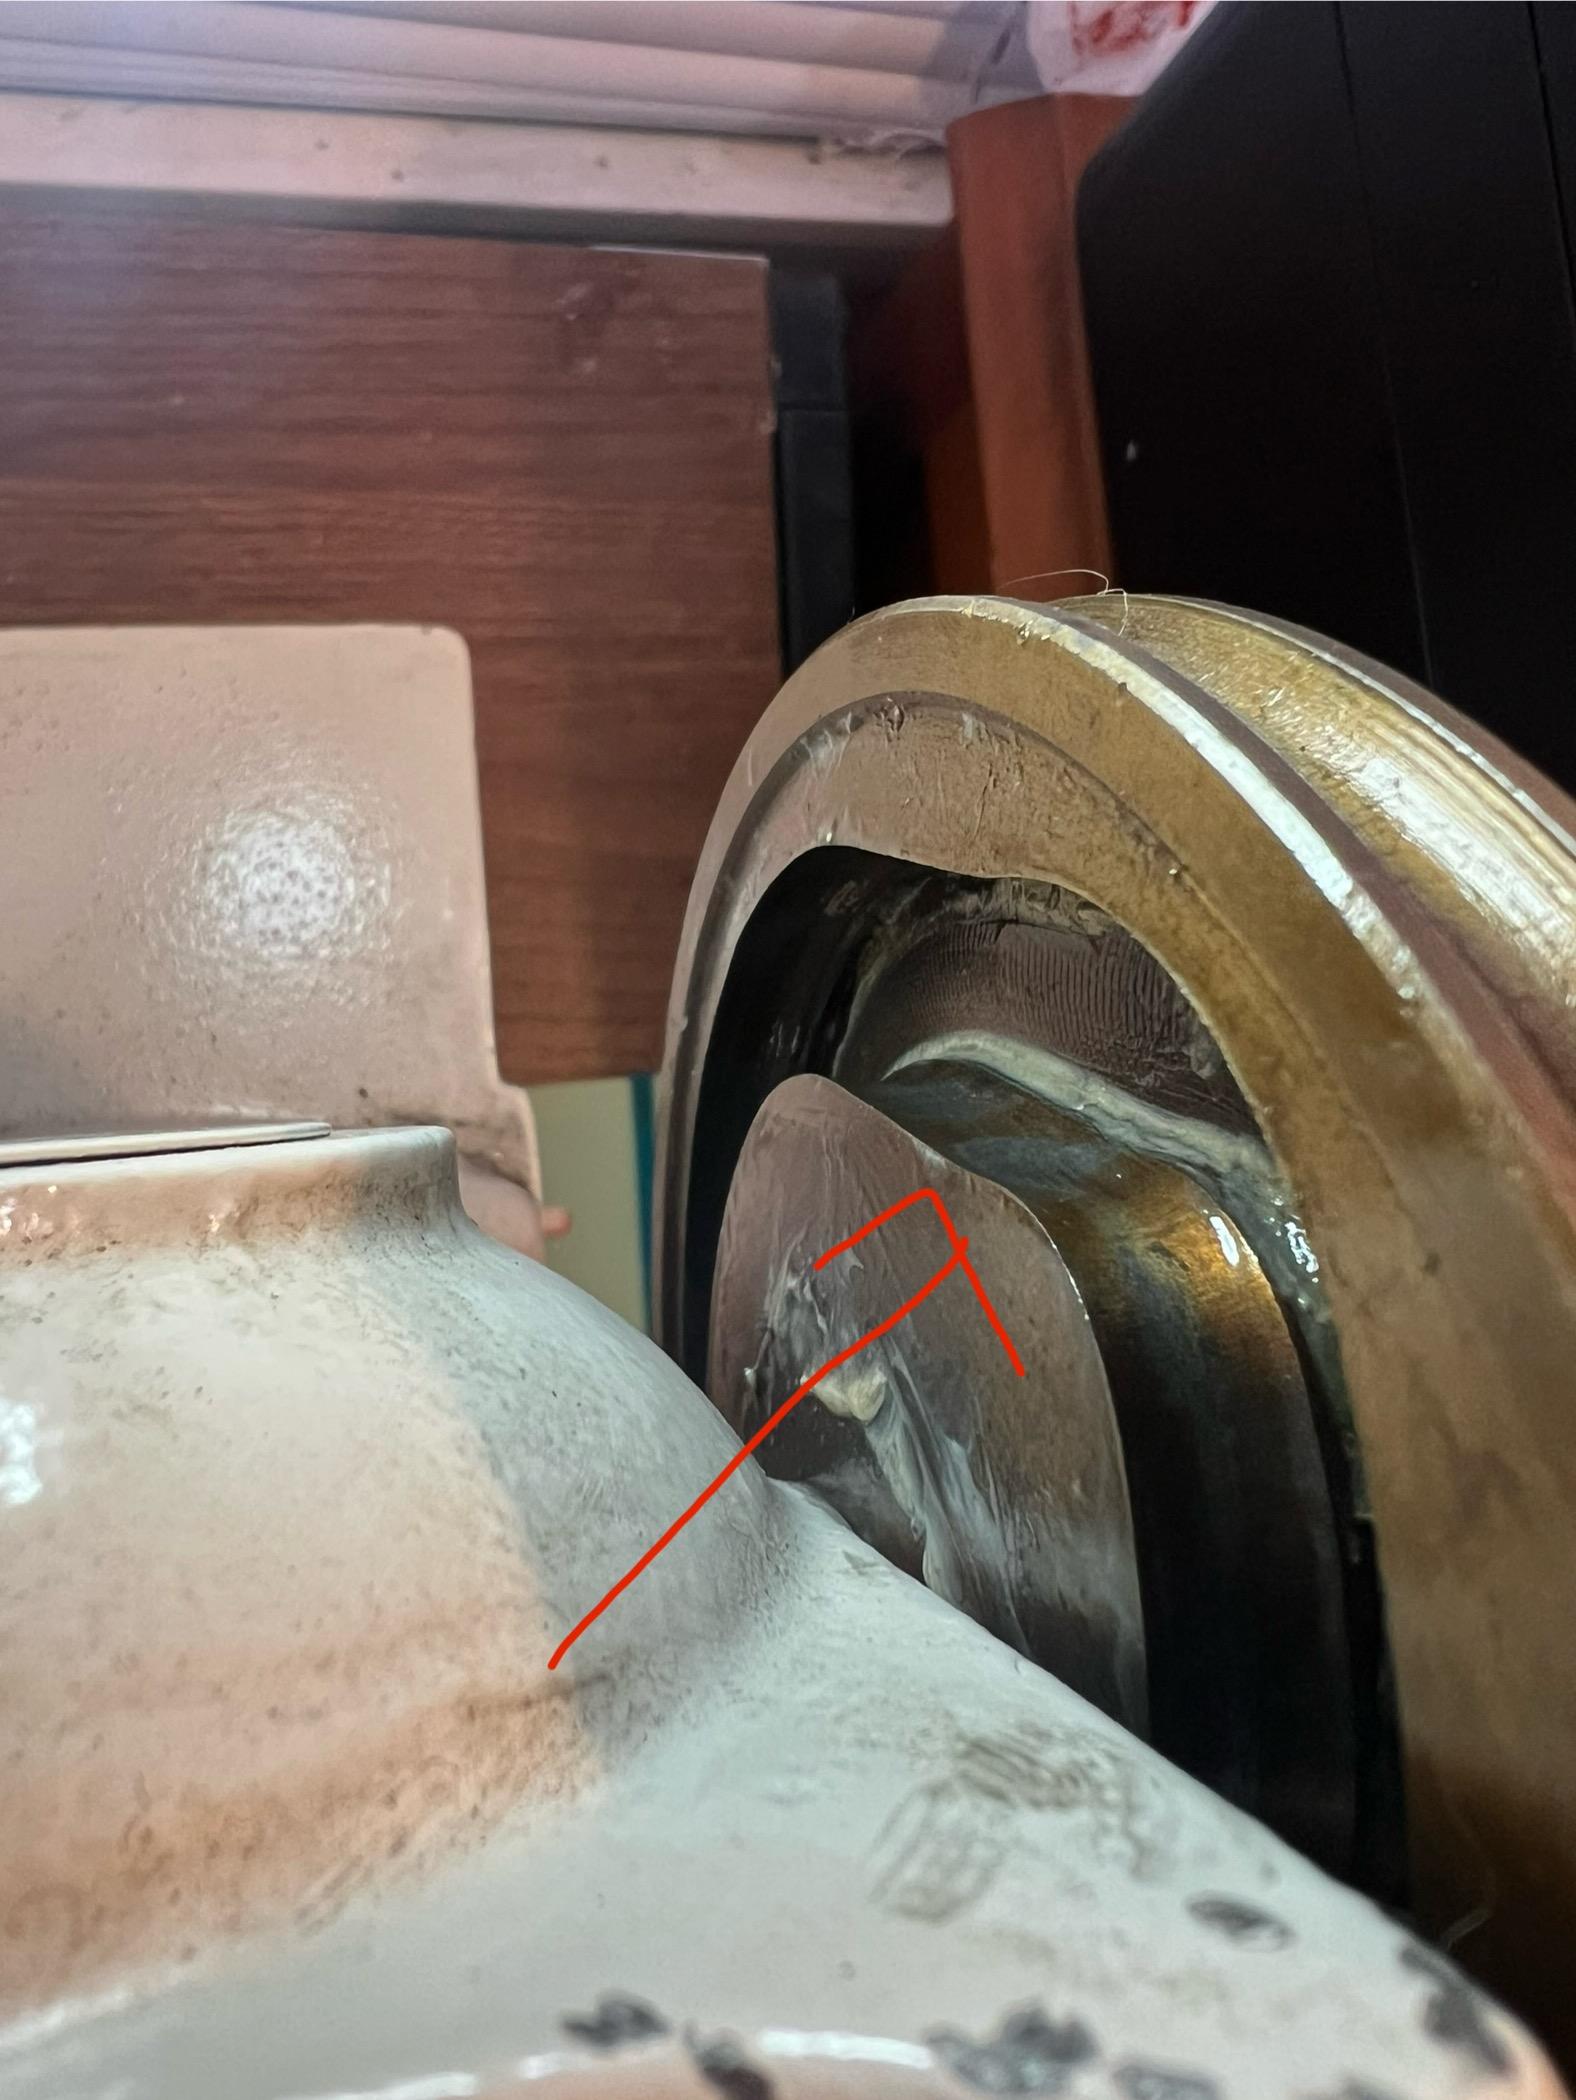
-
Ok so I’m trying to remove the pulley. I’m marked where it was. I took out the bolt that I thought was to secure it, but there’s a metal bar or pin stuck in it and no i dea how to get it out.
-

Learning to do Portraits of People
RidgebackCustoms replied to RidgebackCustoms's topic in Figure Carving
I like it! -

spring flowers and good food
Sheilajeanne replied to chuck123wapati's topic in All About Us and Off Topic
LOL, Chuck! Yep, as you get older, you learn to think ahead! The ability to make good decisions comes with experience. Experience comes from making bad decisions! - Yesterday
-
Very nice work. Are you stitching the bag right side out with your hands inside the bag? If yes then very very nice work. If not please enlighten me. Also I would like to see a picture of the lining and one of how you attach the flap. Thanks.
-

Singer 132k6 capabilitues and upgrades
friquant replied to Ed Neil's topic in Leather Sewing Machines
@Wizcrafts blogged about the 132k6 in his My history with leather sewing machines blog -
 Sam wurz joined the community
 -
looking to buy tooling for a J A Richards die bender please advice
-
Don't worry about the old motor, replacing it with a servo is a smart move.
-
Try and feel the area where it's "catching", as kgg suggested, and if you find a slight high spot/roughness then rubbing it with some fine sandpaper might fix it. Oil, every forum that uses machinery inevitably has lots of oil discussions! The simplest way is to get Lillywhite sewing machine oil, if not a light hydraulic oil is very similar to it. Try and keep away from motor-type oils, including 3-in-1, while they will work long term could be an issue as Northmount said.
-
 Thomas21787 joined the community
 -
Not uncommon. What I would do is: i) remove the pulley BUT mark it's position on the shaft as it is easy to put it back wrong and you will be out 180 degrees. ii) check and see if there is a high spot in the groove. Depending on findings you may have to lightly grid it. But this could be as simple as reinstalling the pulley not as far in on the shaft as it's original position. It could have been installed to far in at the factory or by the guy you got it from. Don't forget to lightly oil the shaft or the groove in the pulley. kgg
-
Singer 132k6 capabilitues and upgrades
friquant replied to Ed Neil's topic in Leather Sewing Machines
Can you send us pictures of your current setup? (Motor, pulley, belt, machine) Also photos of your old motor, control box, and nameplate if it has one? (If you want help diagnosing the old motor, that is) New leather belt? Old leather belt? I like having my belt tension set just high enough to go through my thickest material, that way I'm less likely to break things. My belt is not very grippy, but I'm considering getting a regular rubber automotive belt instead of these cloth-covered belts I've been using. Not sure what other folks are using for belts.