All Activity
- Past hour
-
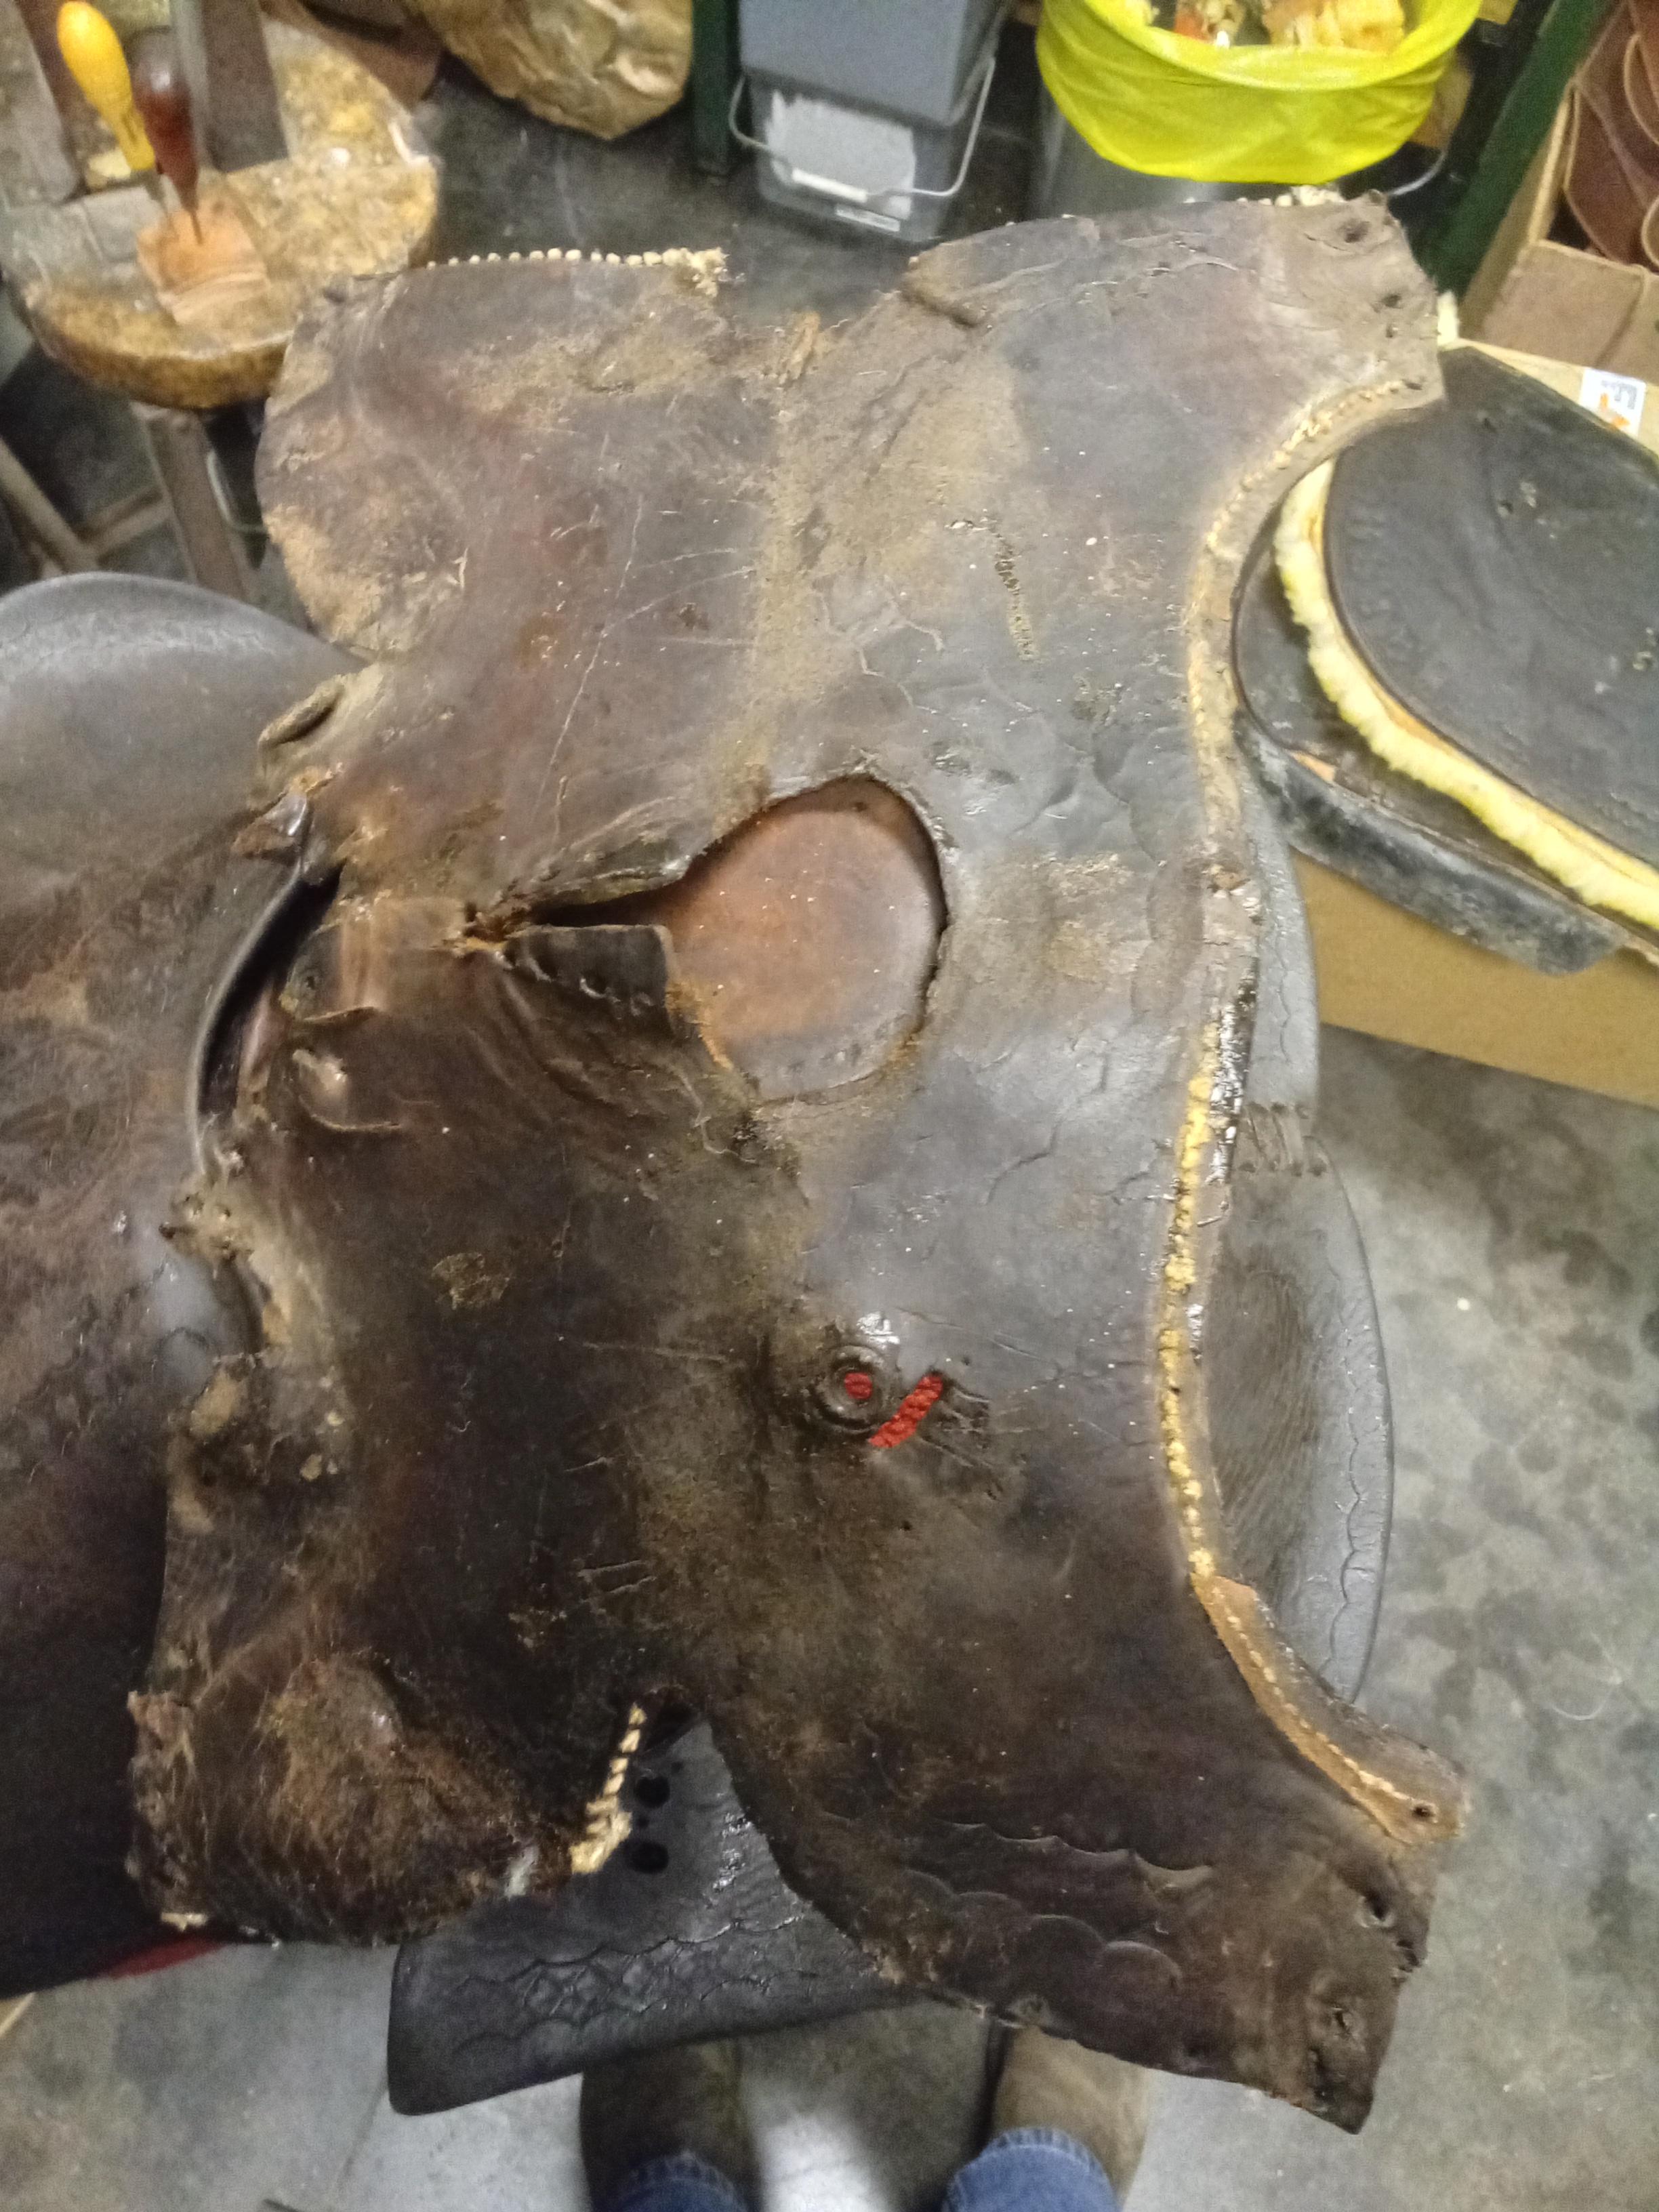
Thanks for your feedback! 🙂 Just to clarify, the seam on a rolled collar is intentionally smoothed rather than seamless, and the stitches can sometimes be slightly hidden or recessed. This is a traditional English saddlery technique — skiving down close to the stitching and smoothing the edges ensures comfort, even on the inside seam. With a dog’s fur and proper finishing, it shouldn’t cause any irritation. Skiving takes a lot of patience, as you have to get as close as possible to the stitch line without cutting into it, while maintaining a clear and even edge.
-
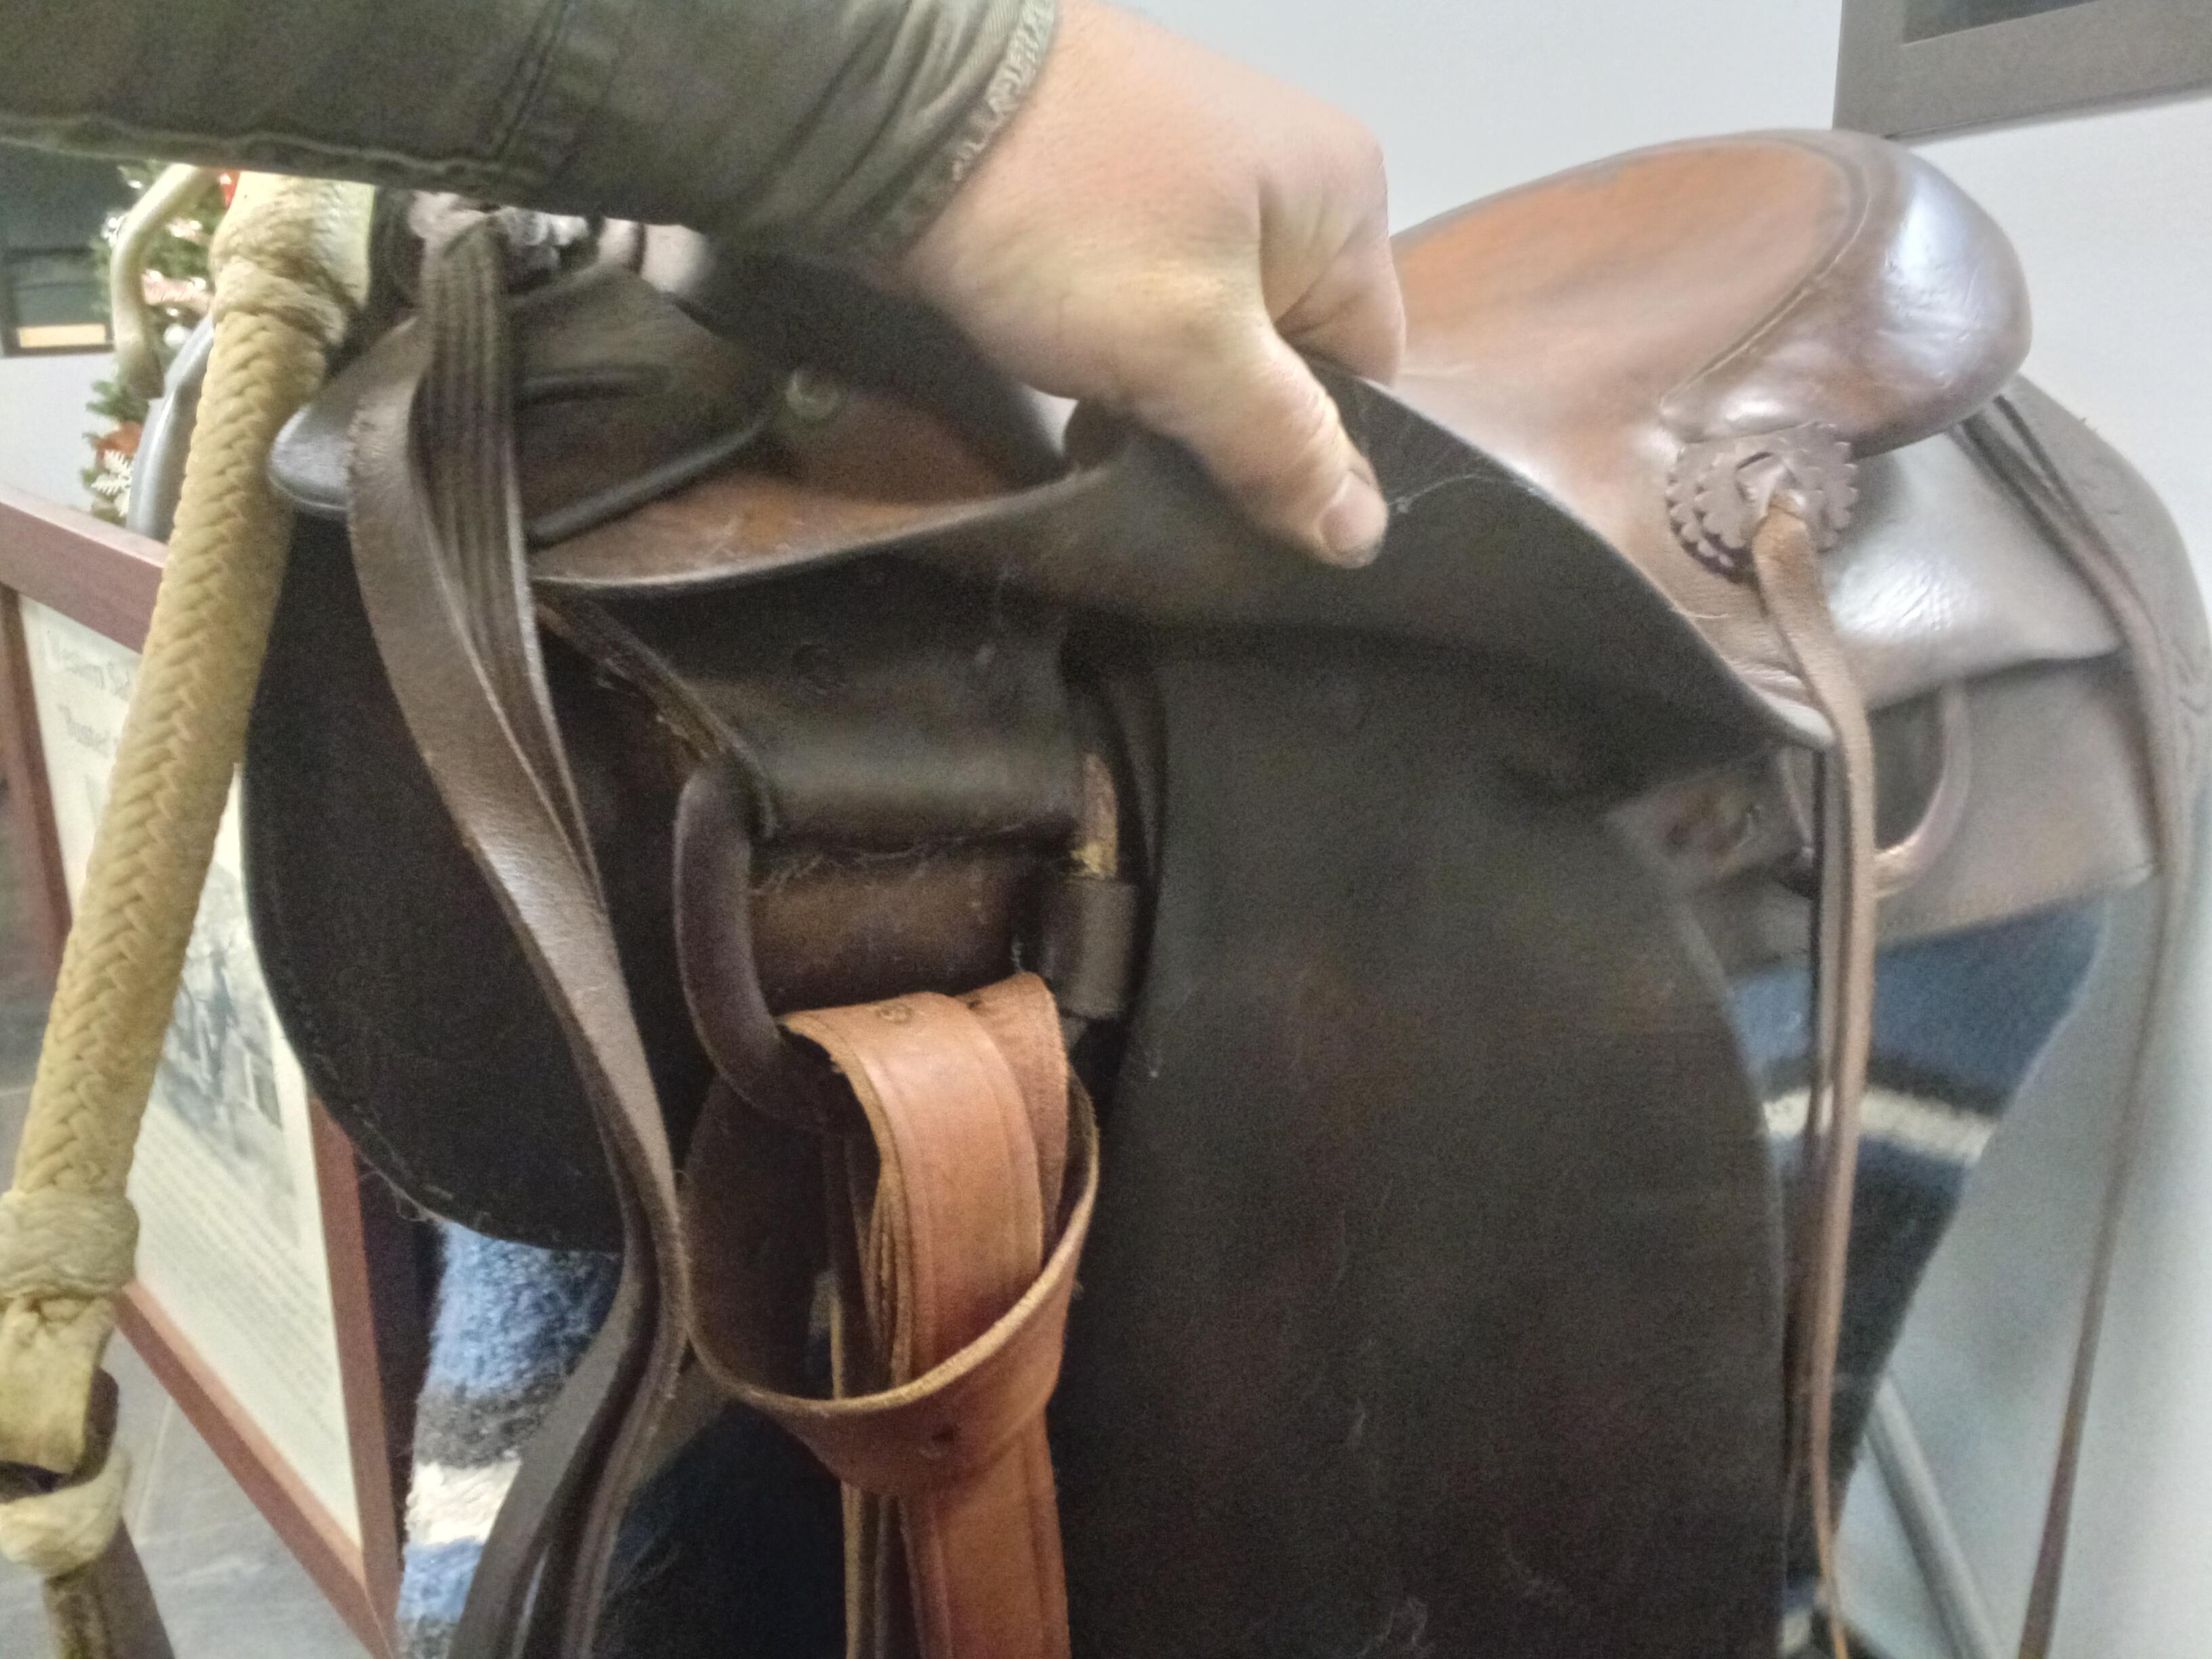
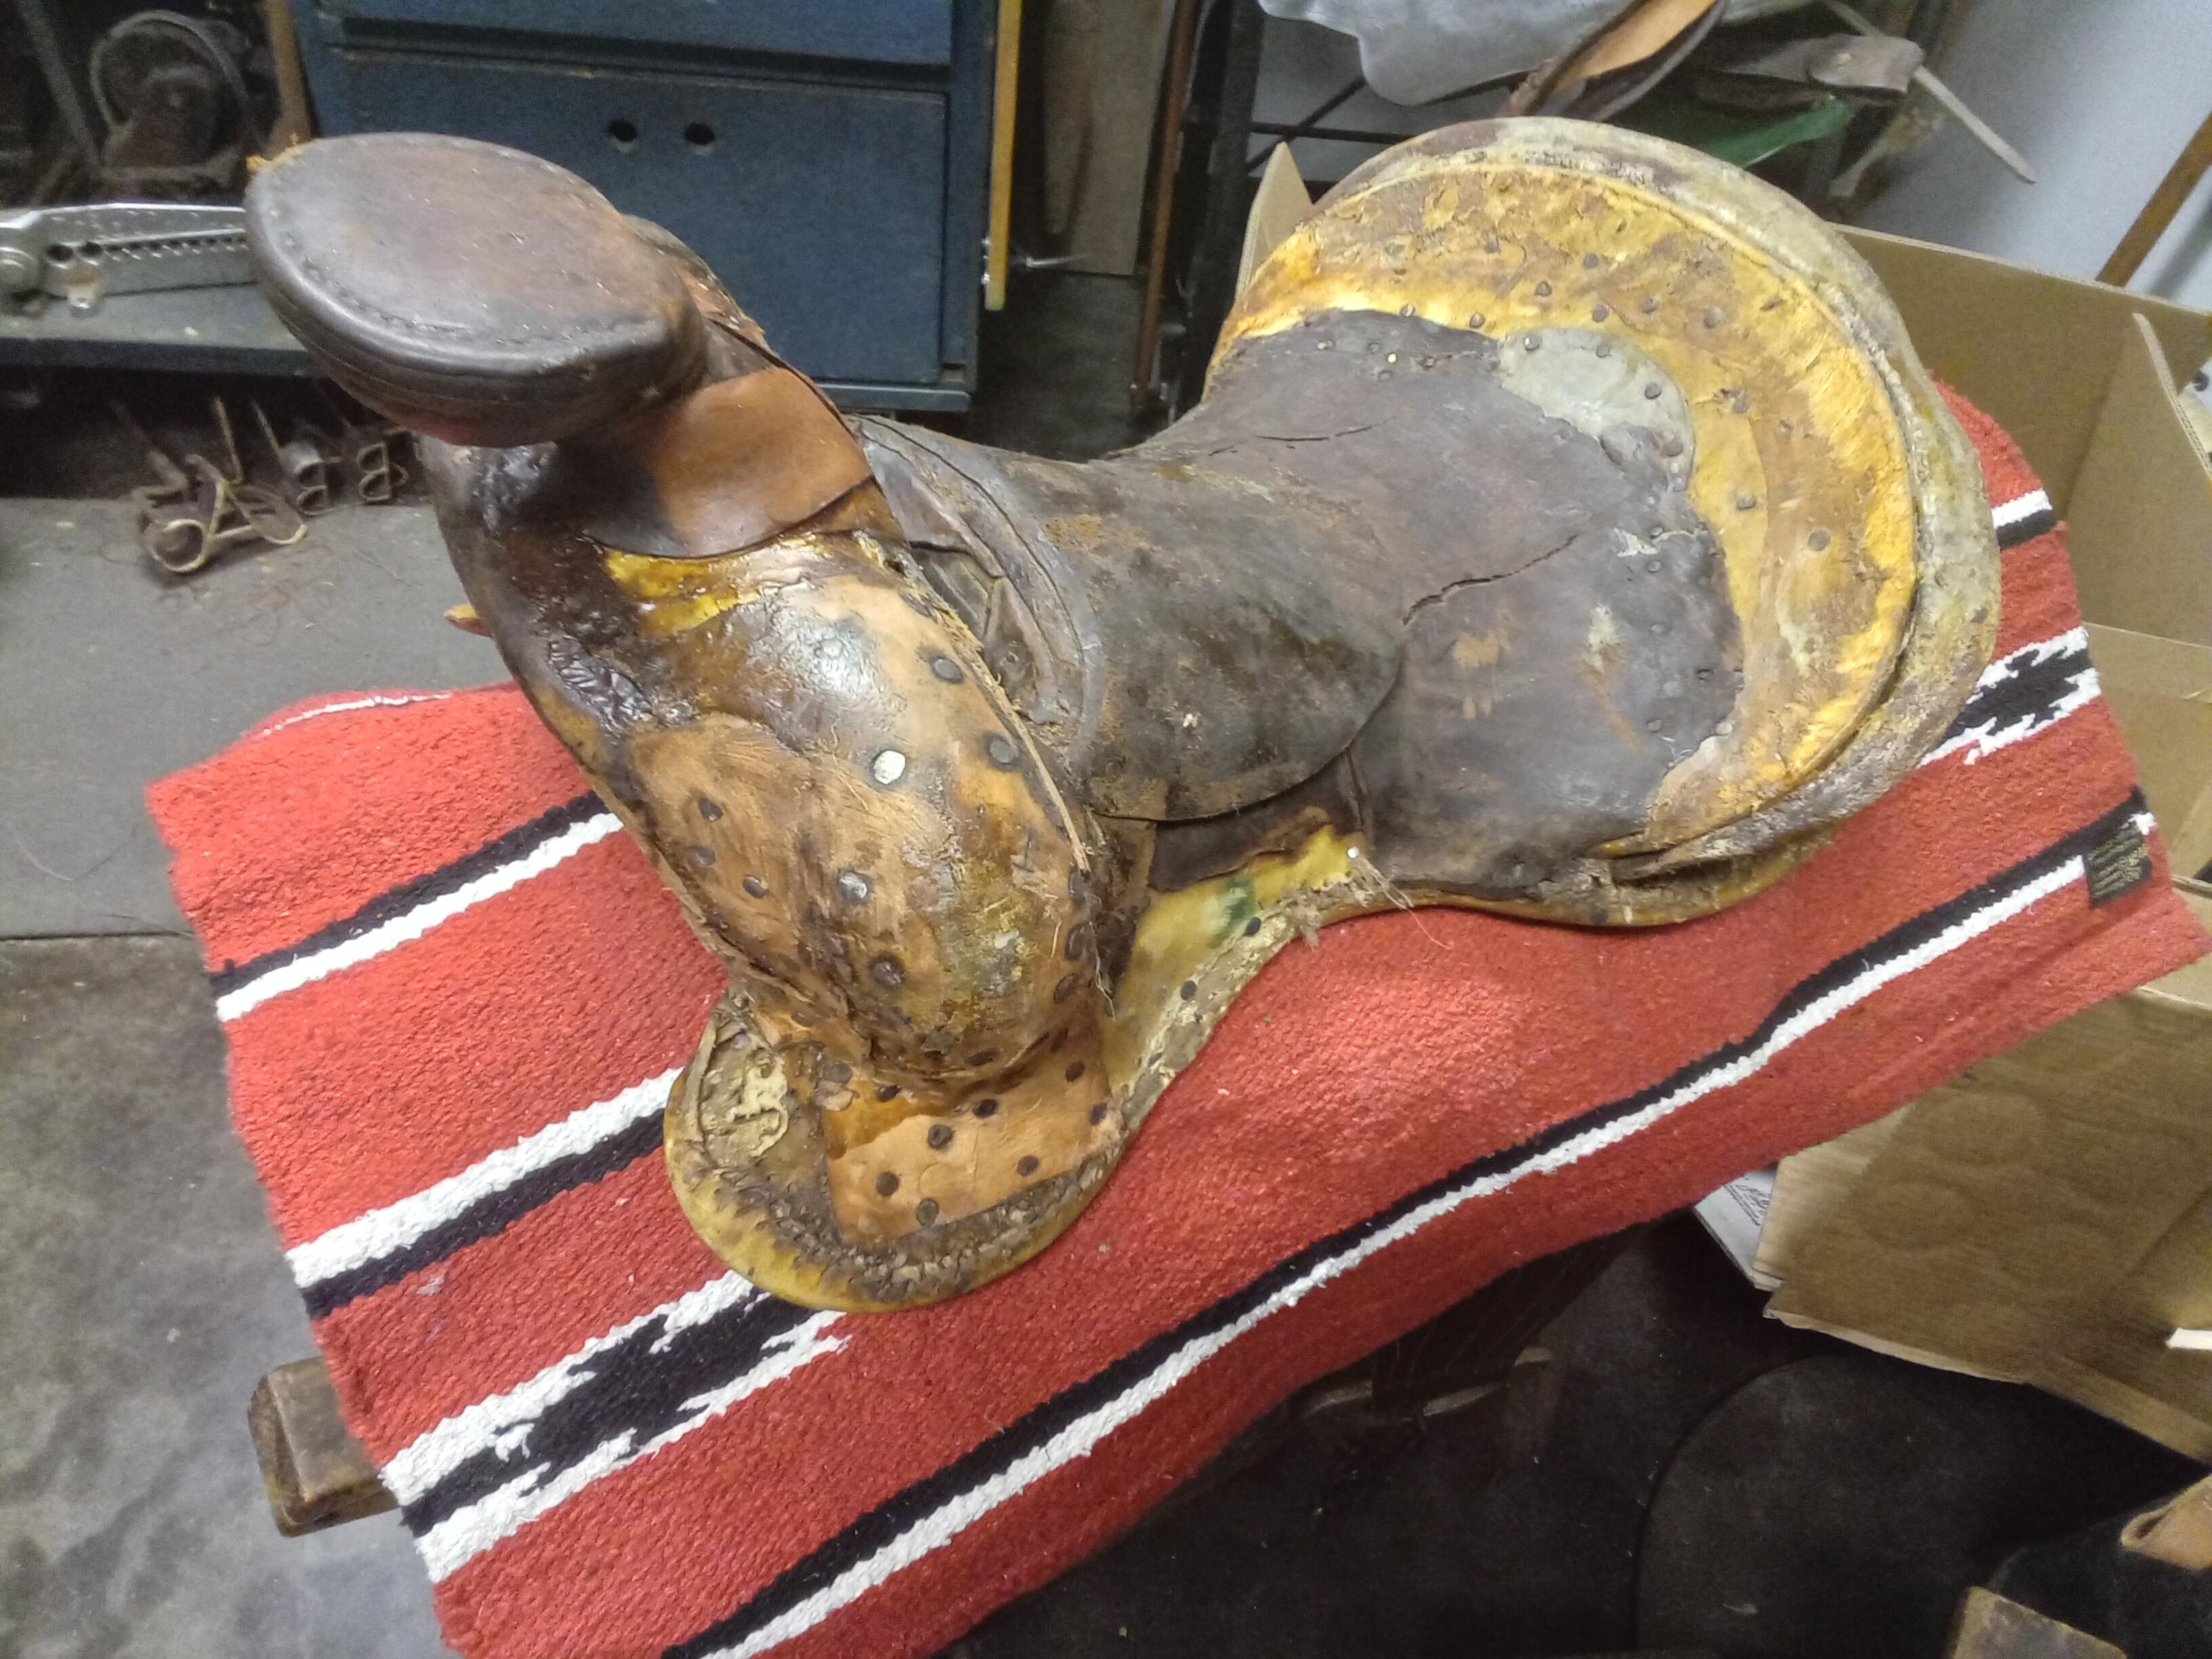
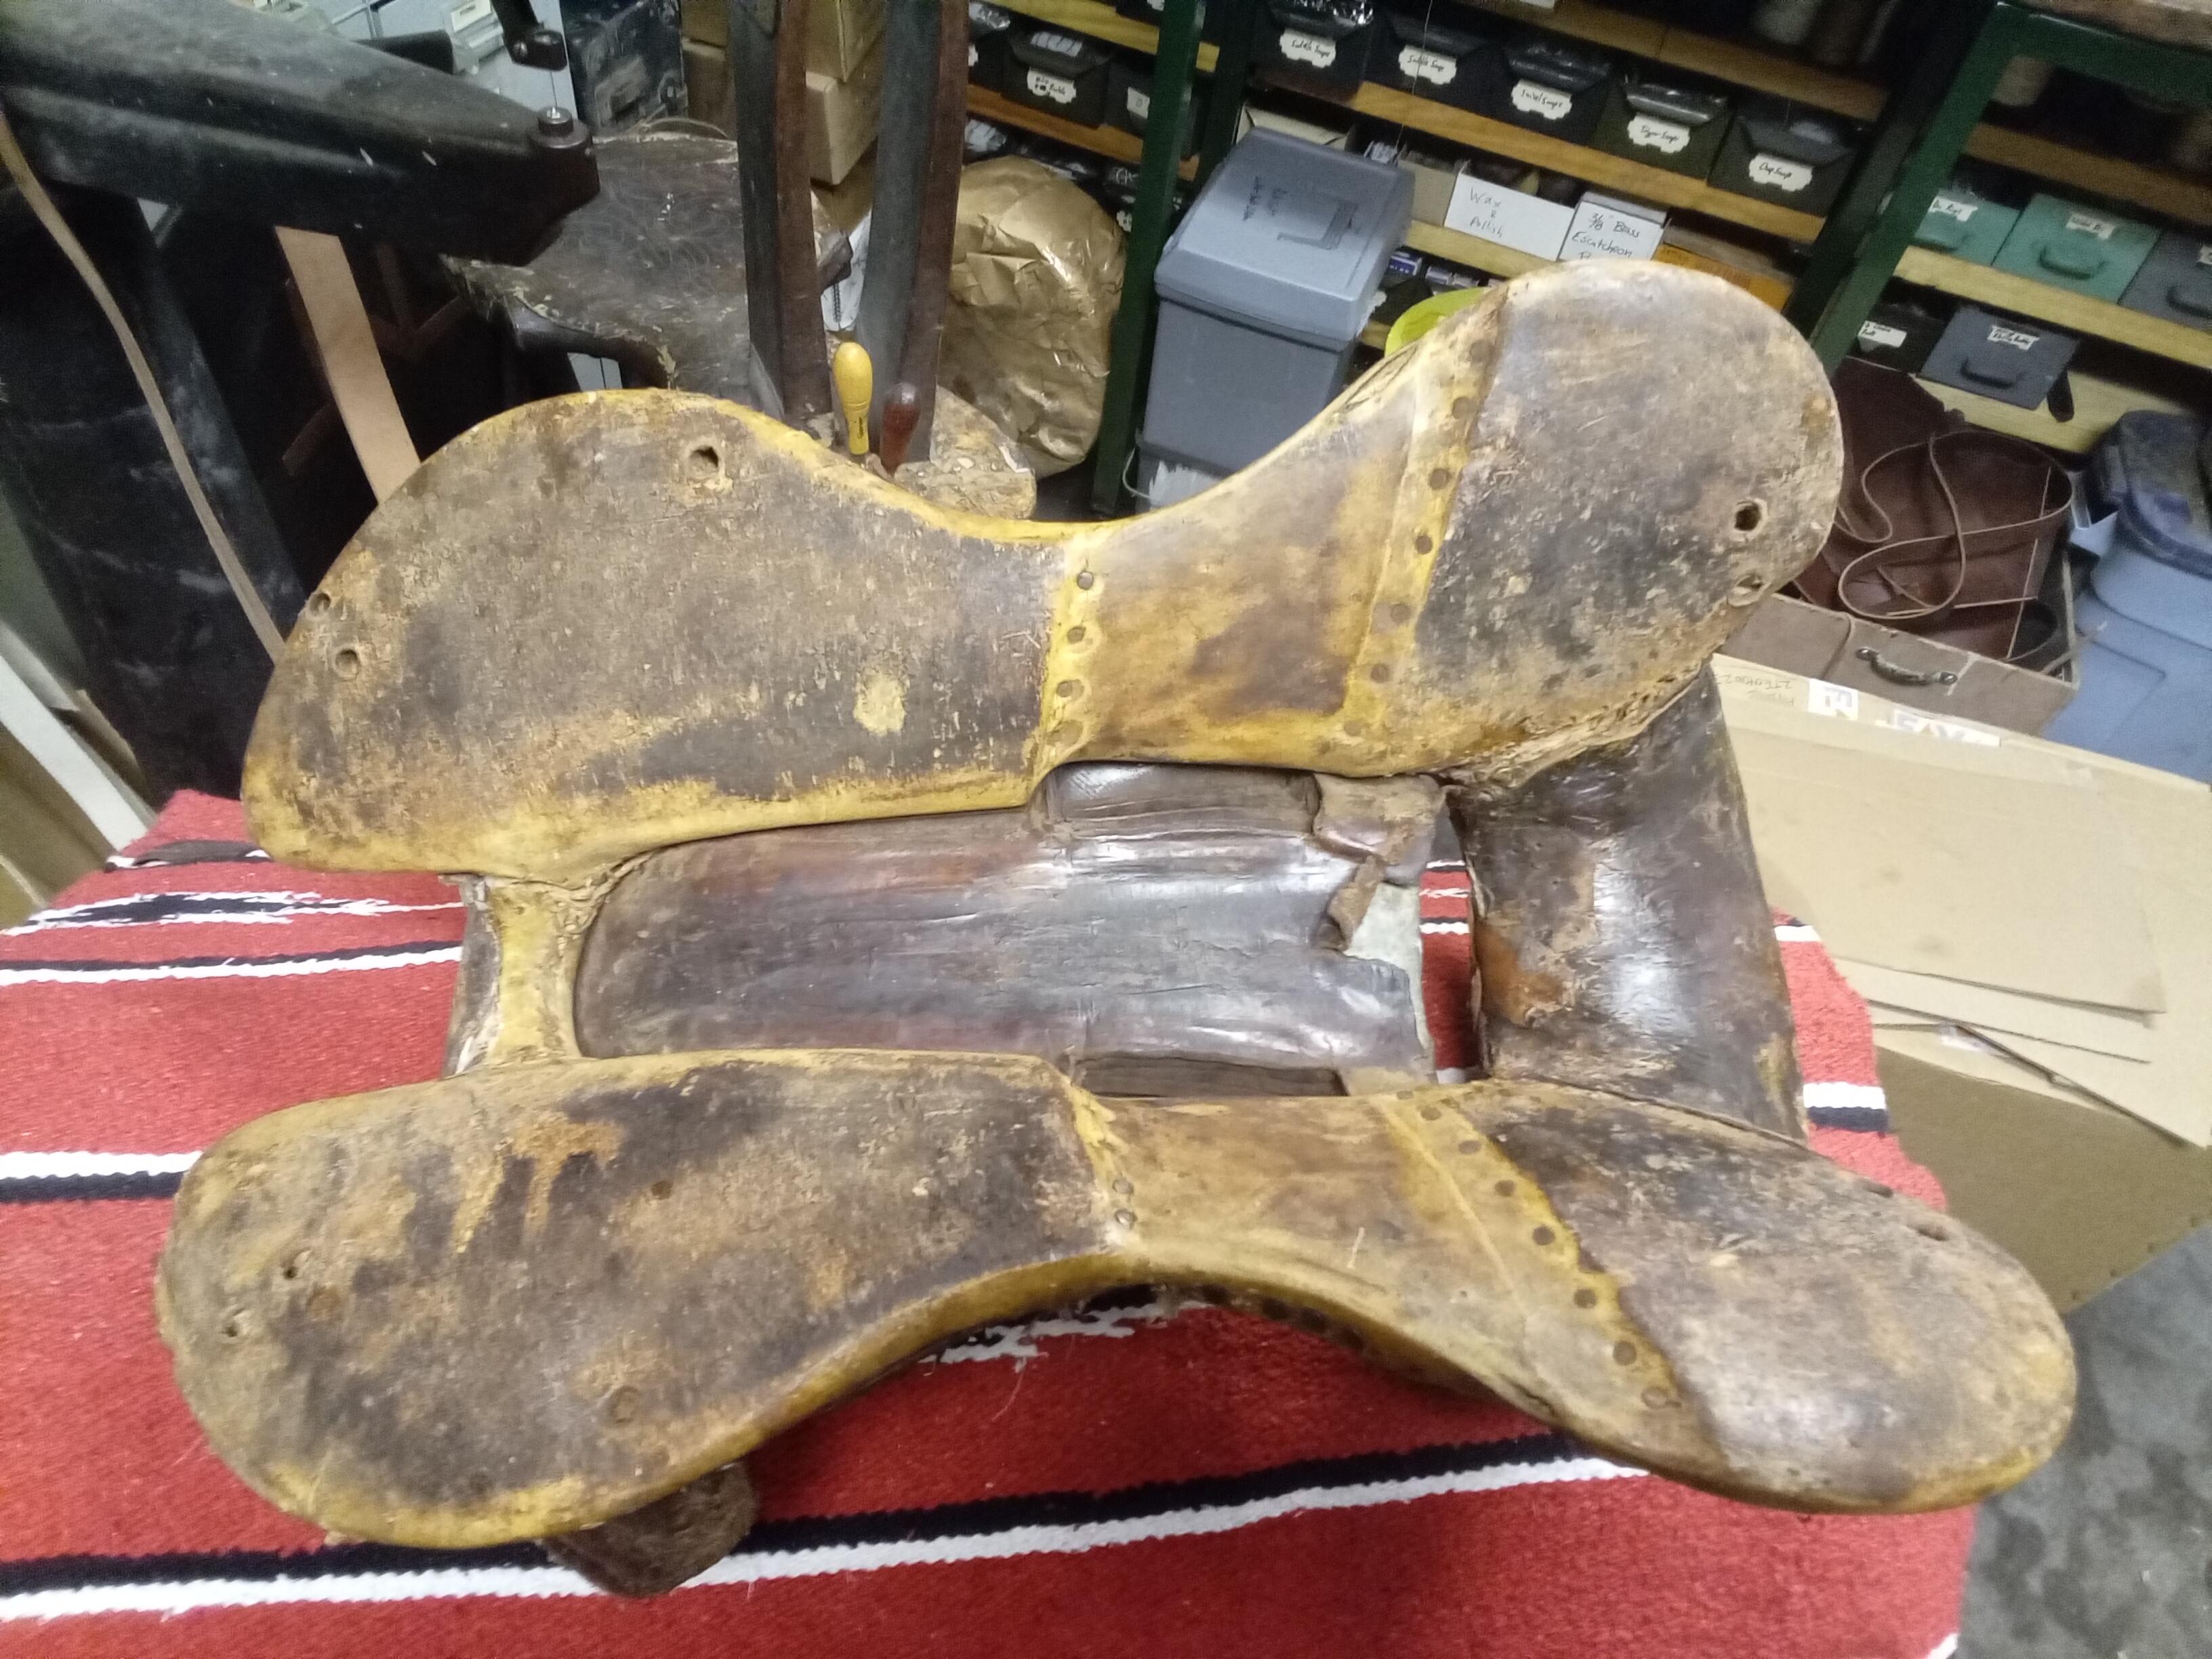
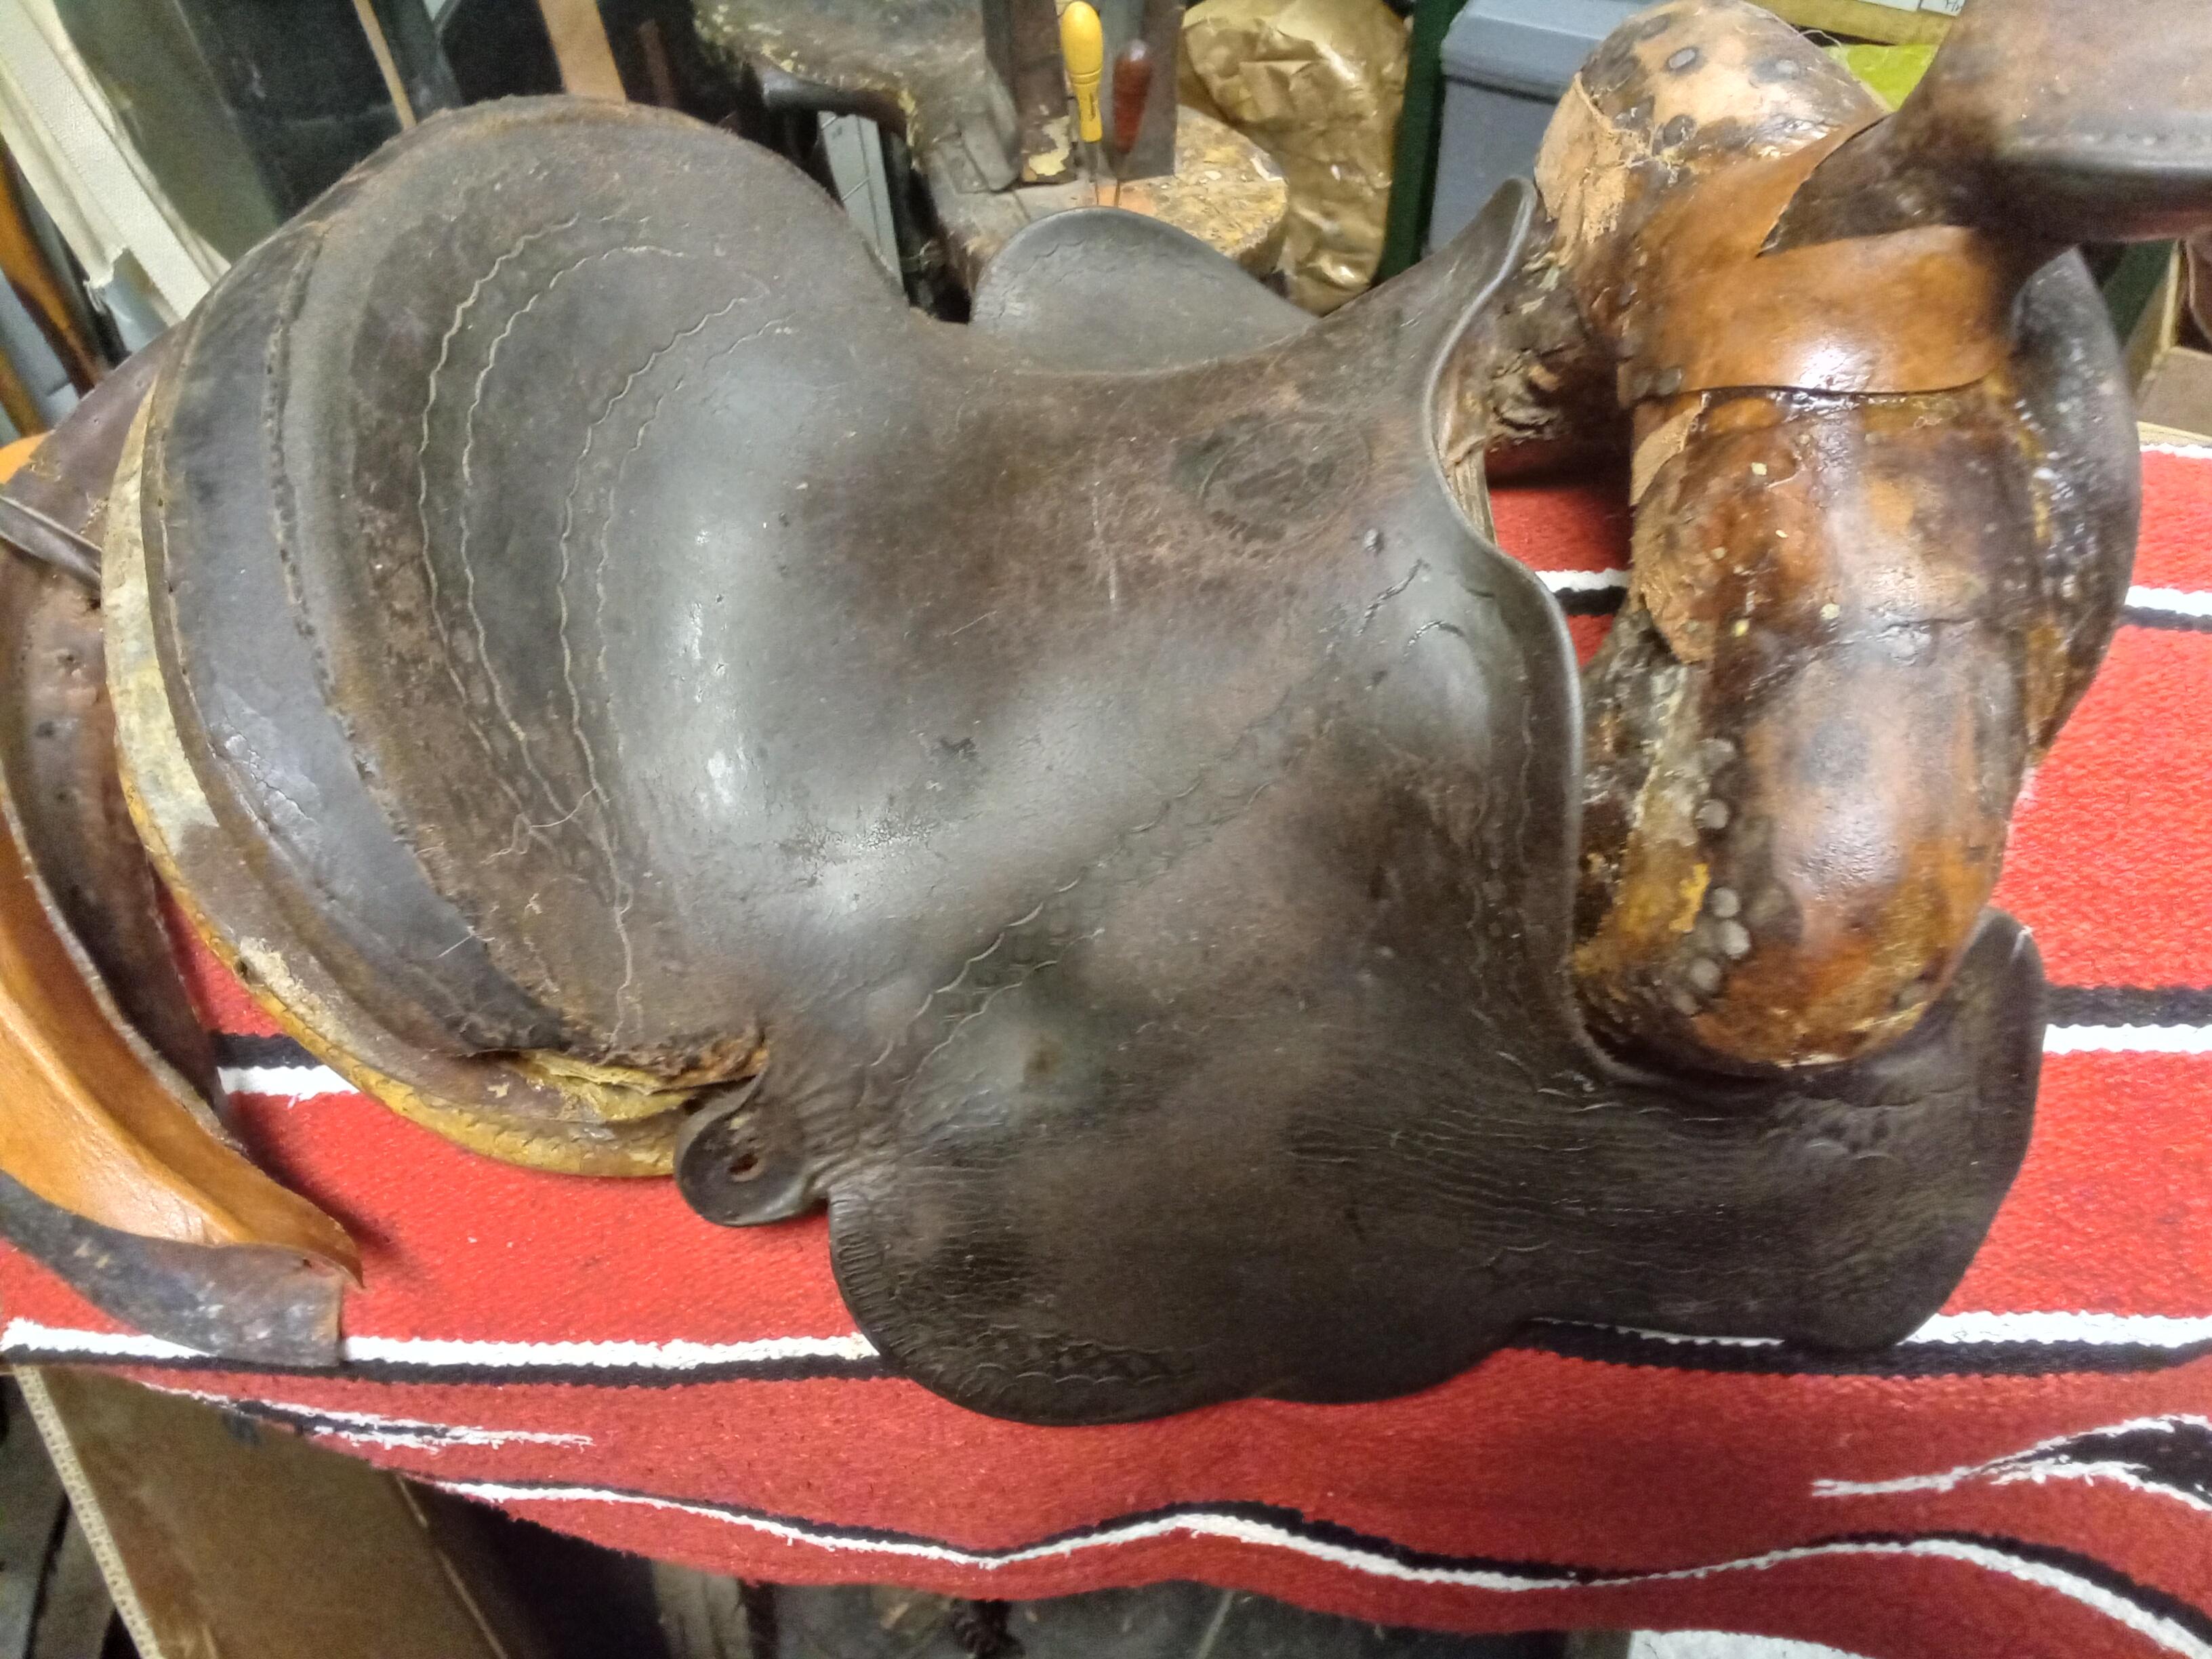
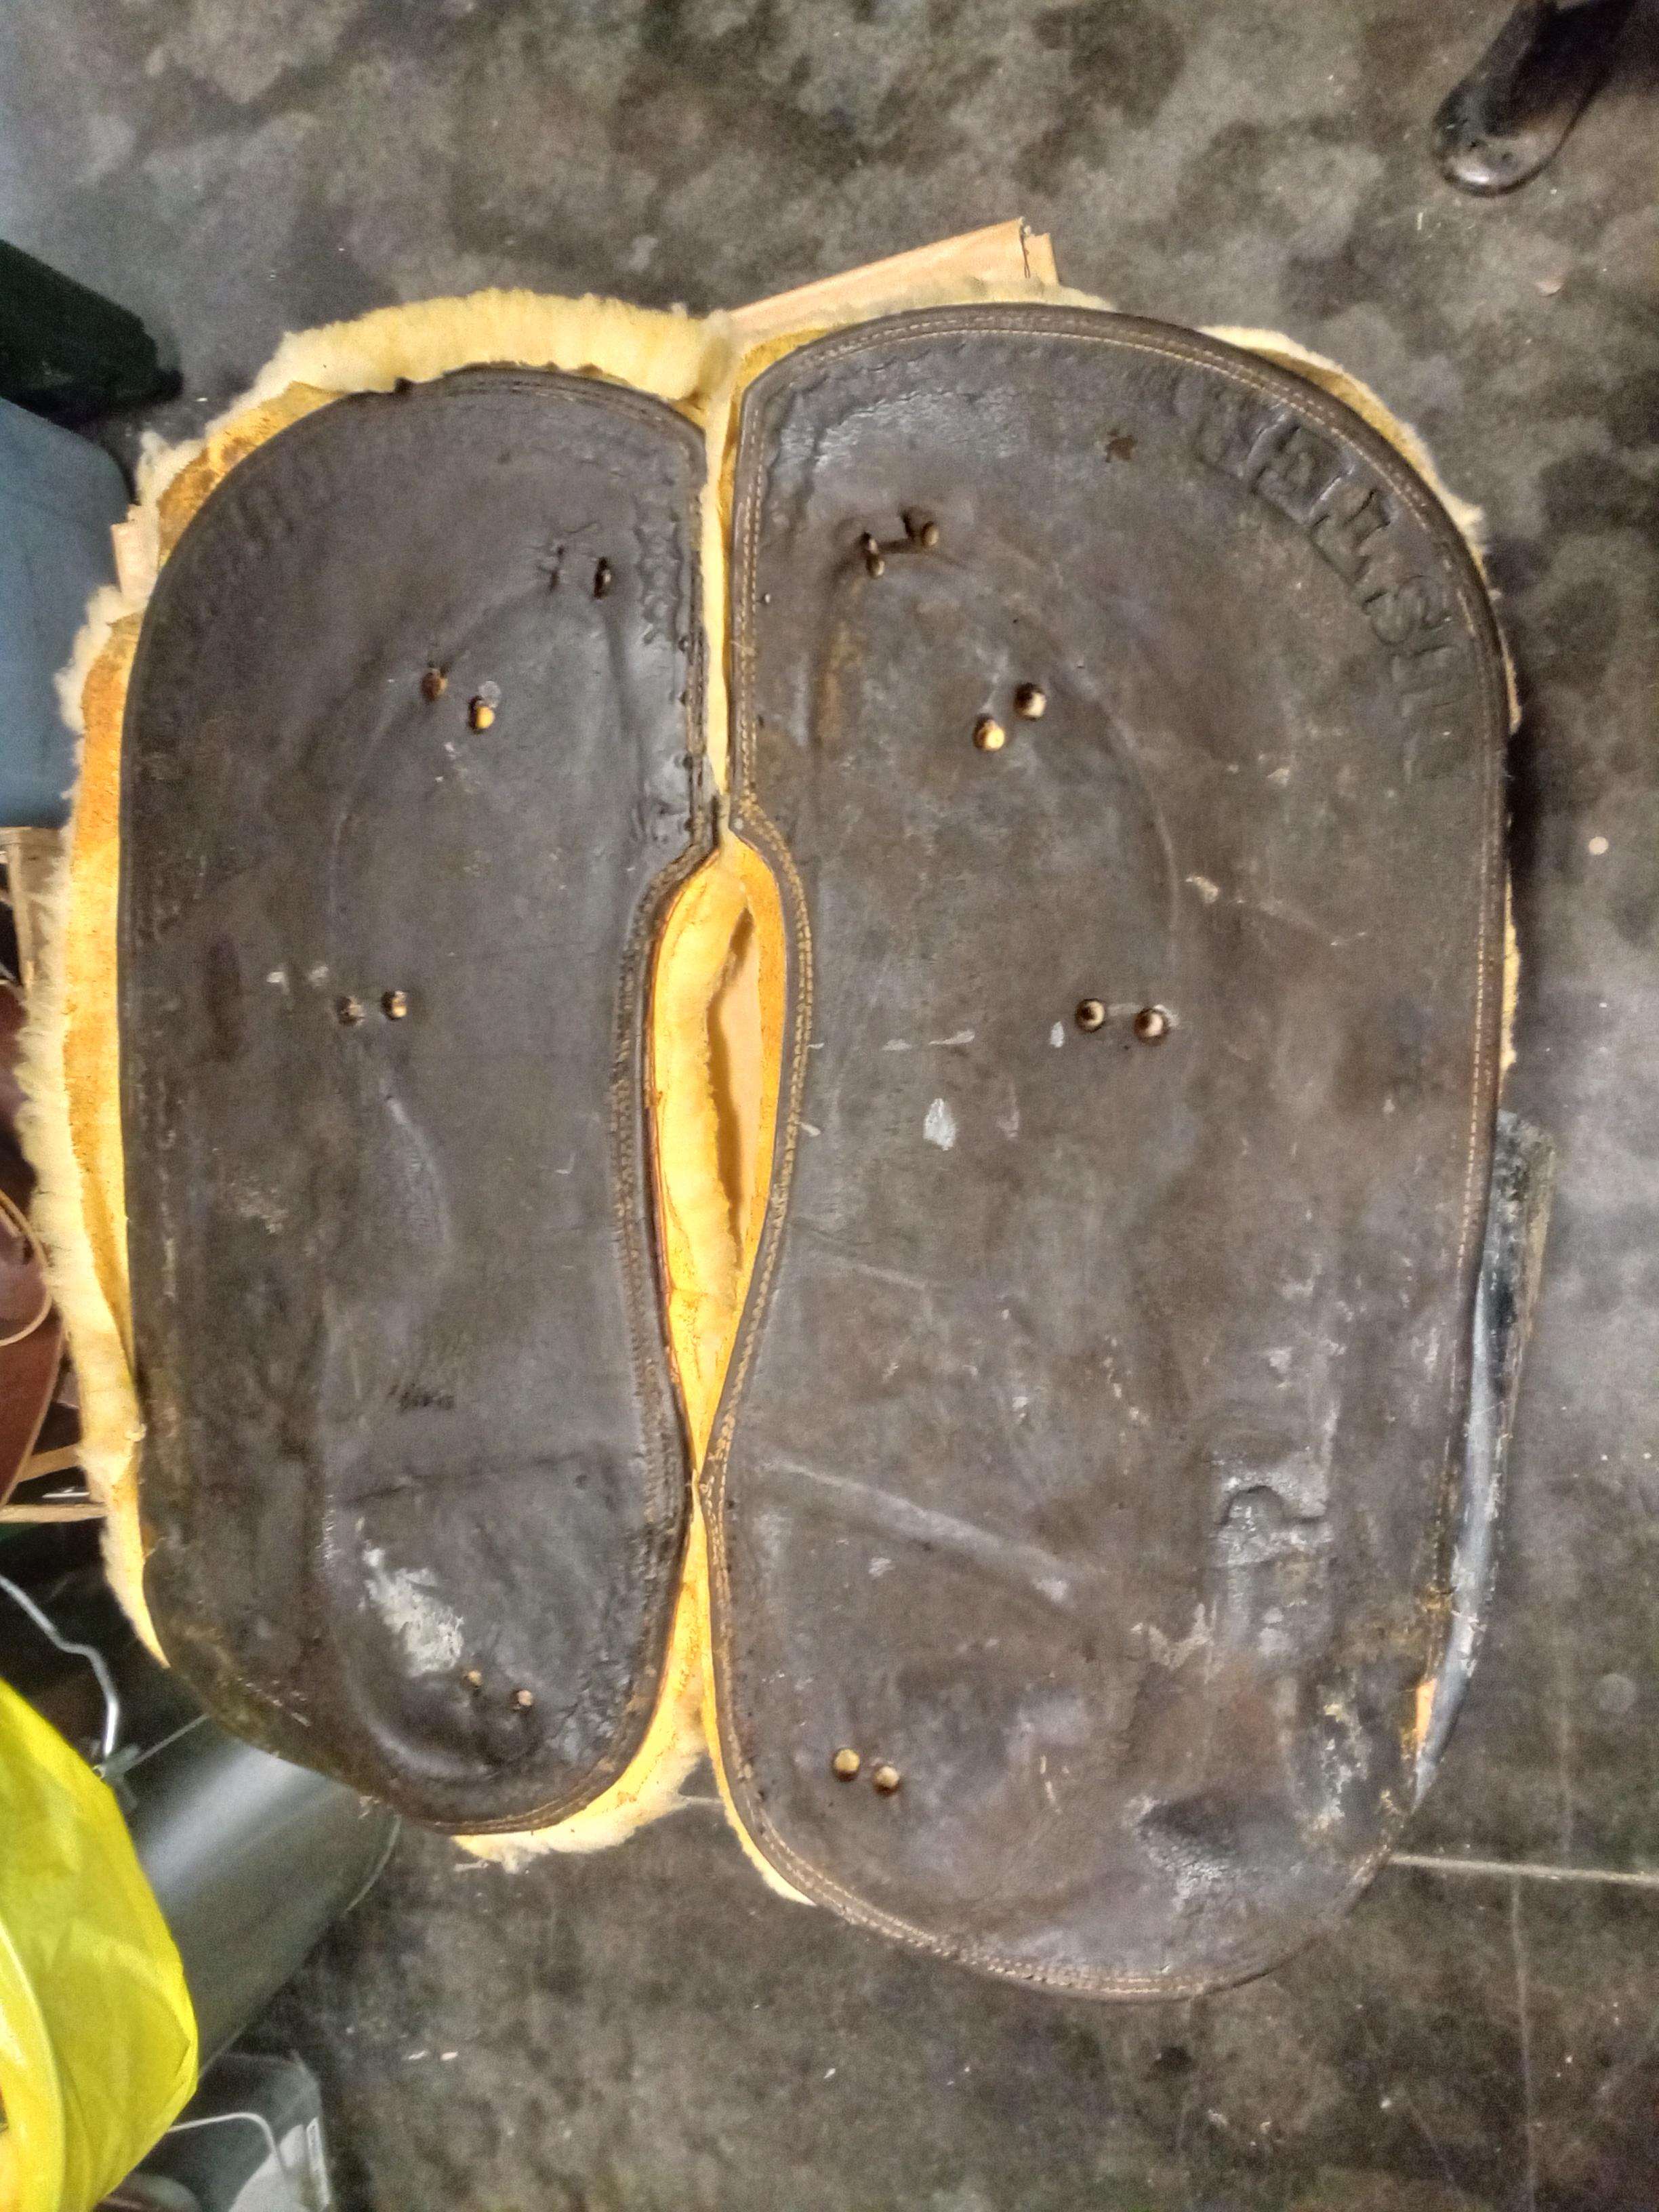
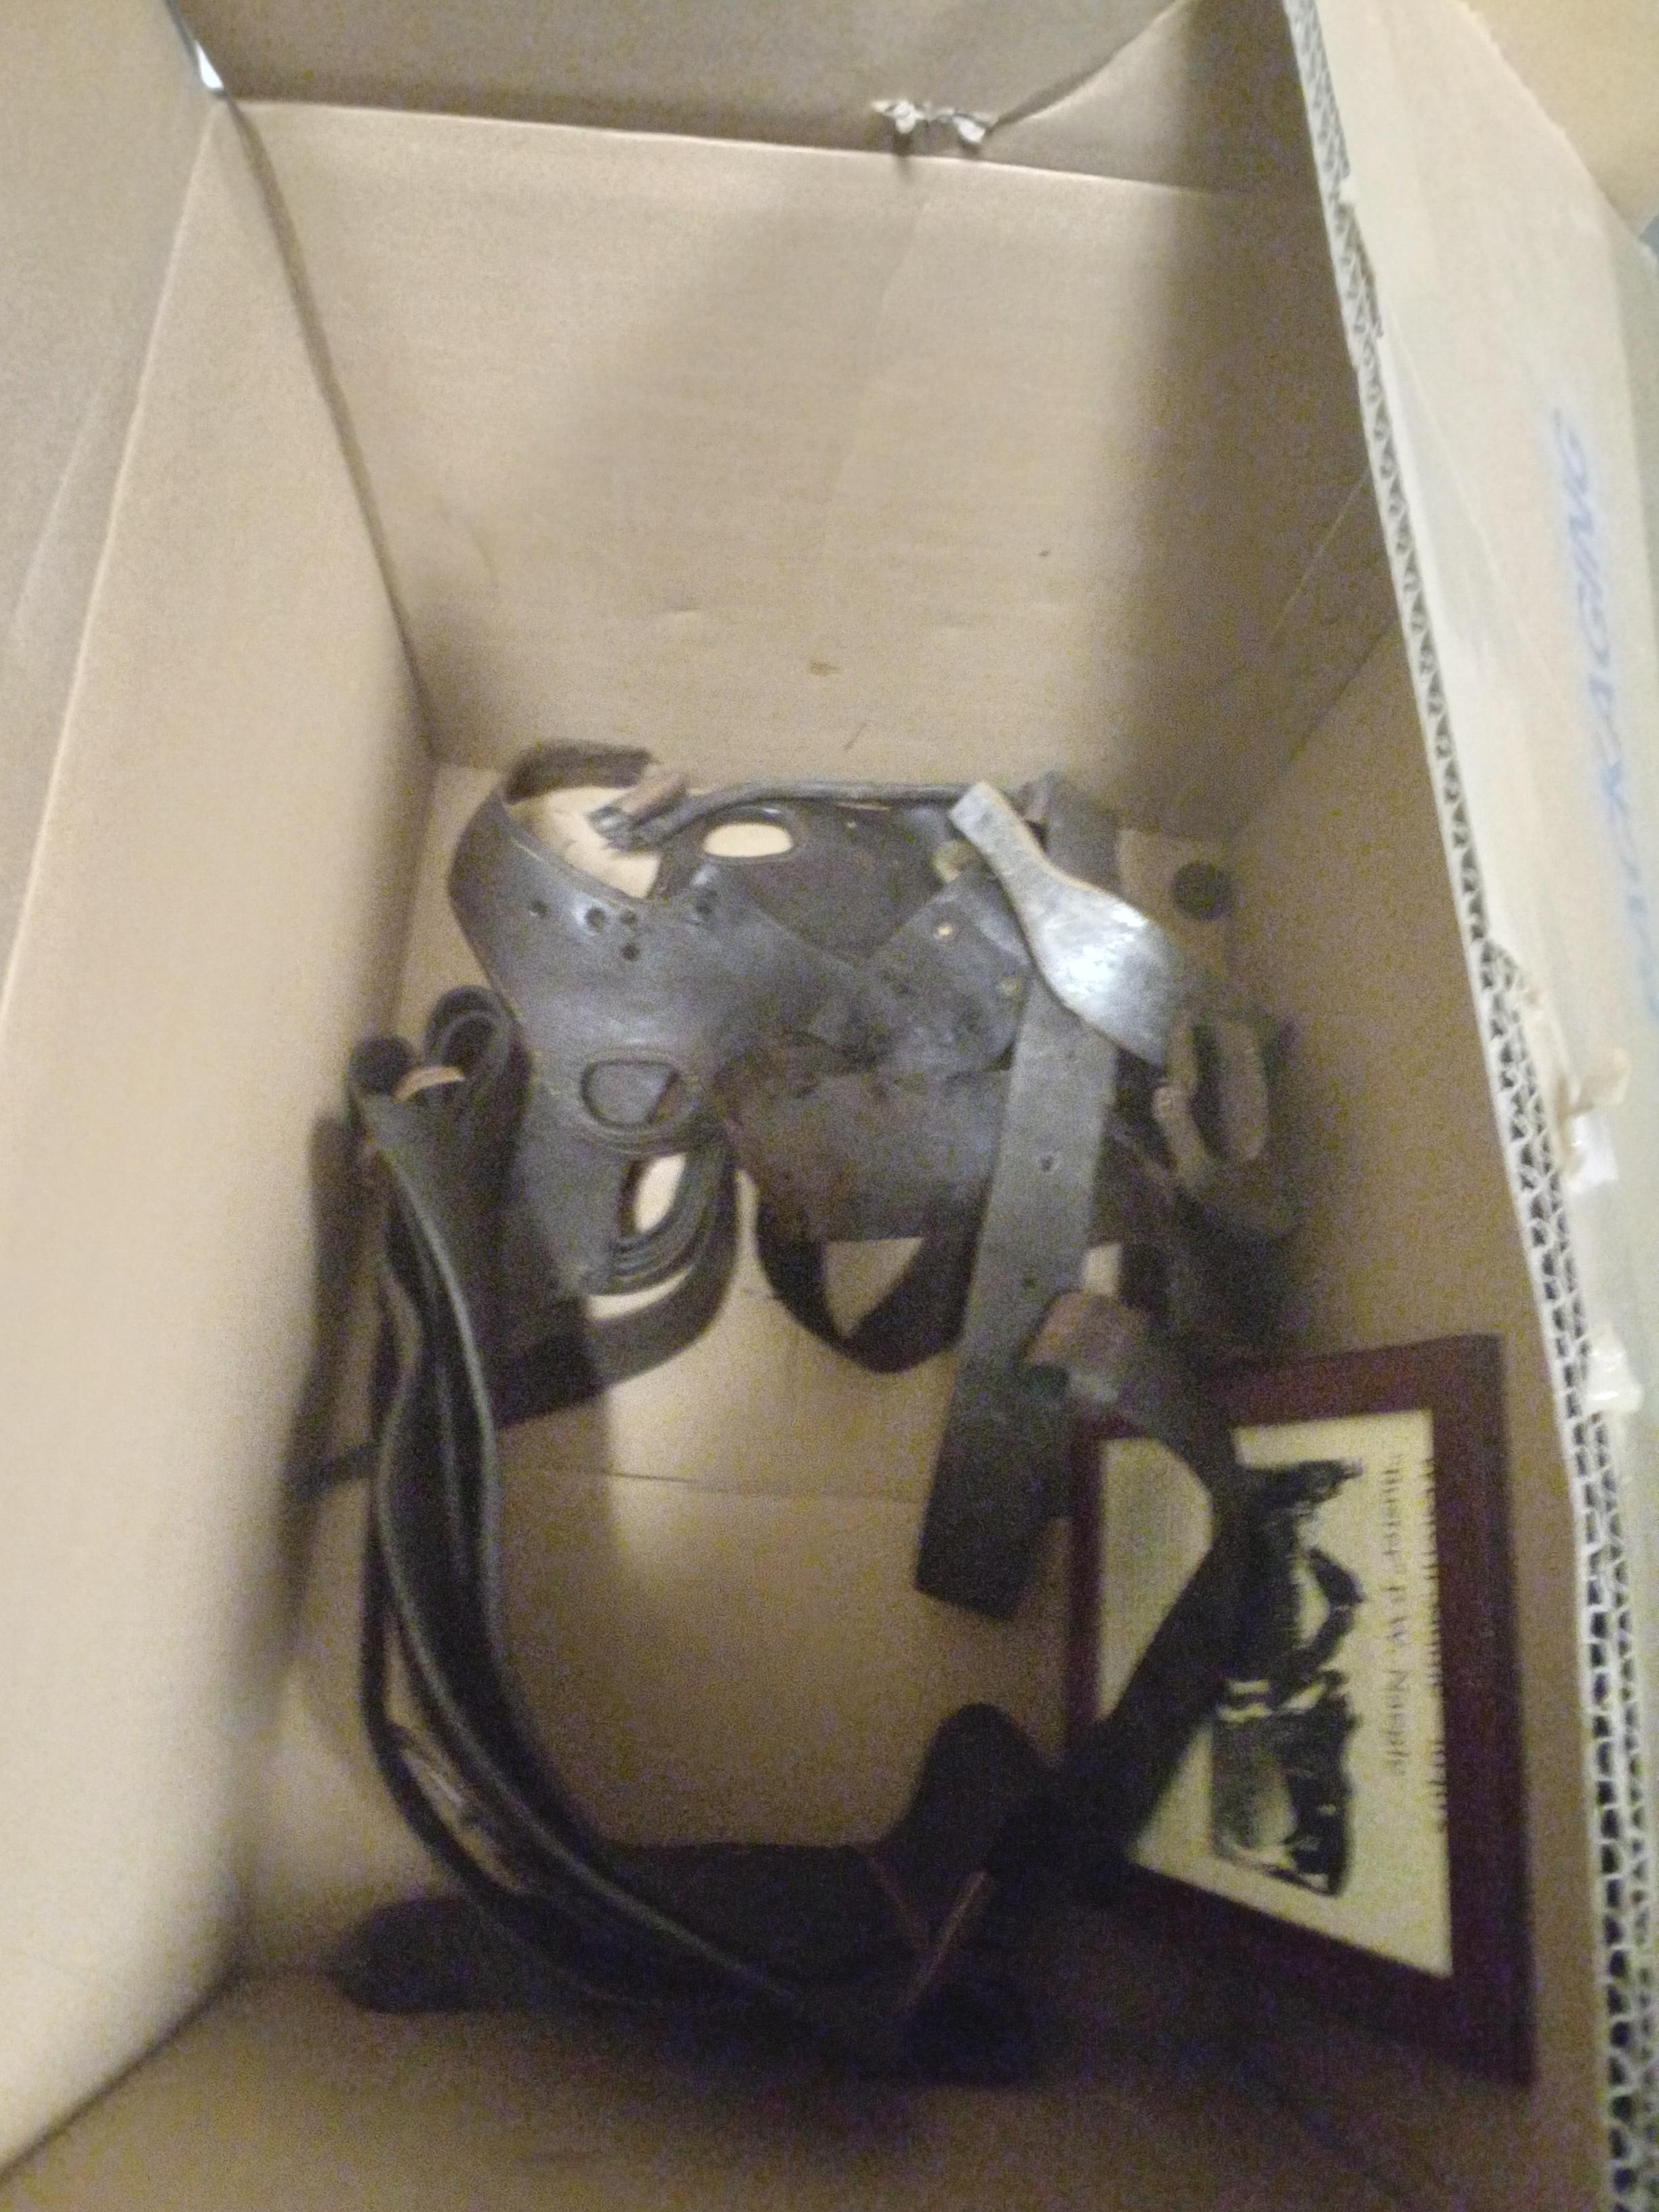
Thanks for the insight. Yep that's about what I found when looking for other examples of squaw saddles. Same concept, only this one appears to be more geometrically square and the cantle and swells seem to be slightly more "western" in nature. The brass tacks seem to be unusual, but it would make sense that they were traded for. I wonder what the stirrups would have looked like? I imagine they would be similar concept to western saddle stirrups with the straps wrapping around the sides of the tree, only being exposed instead of under a leather seat (I imagine some kind of loose blanket padding was used between the saddle and the rider?).
- Today
-

Want to get started on this craft
wizard of tragacanth replied to revilop's topic in Getting Started
Is your thread waxed or un-waxed? Is it Linen or Nylon? Linen is more difficult because it can bunch up behind the leather when pulled through a hole. I recommend Nylon/Poly. I'm wondering if your thread has enough wax on it, or if you are un-twisting the thread as you are stitching in the air while turning your work around. Stitching in the air is not a problem if you maintain the twist in your thread. Can you see the cords separating just as you are about to complete the stitch? To prepare the thread for use, use the same motion that you would if you were waxing it. Grasp one end of the thread with one hand and draw the thread between two fingers of the other hand. The tension and pressure on the thread consolidates the cords. Nick -
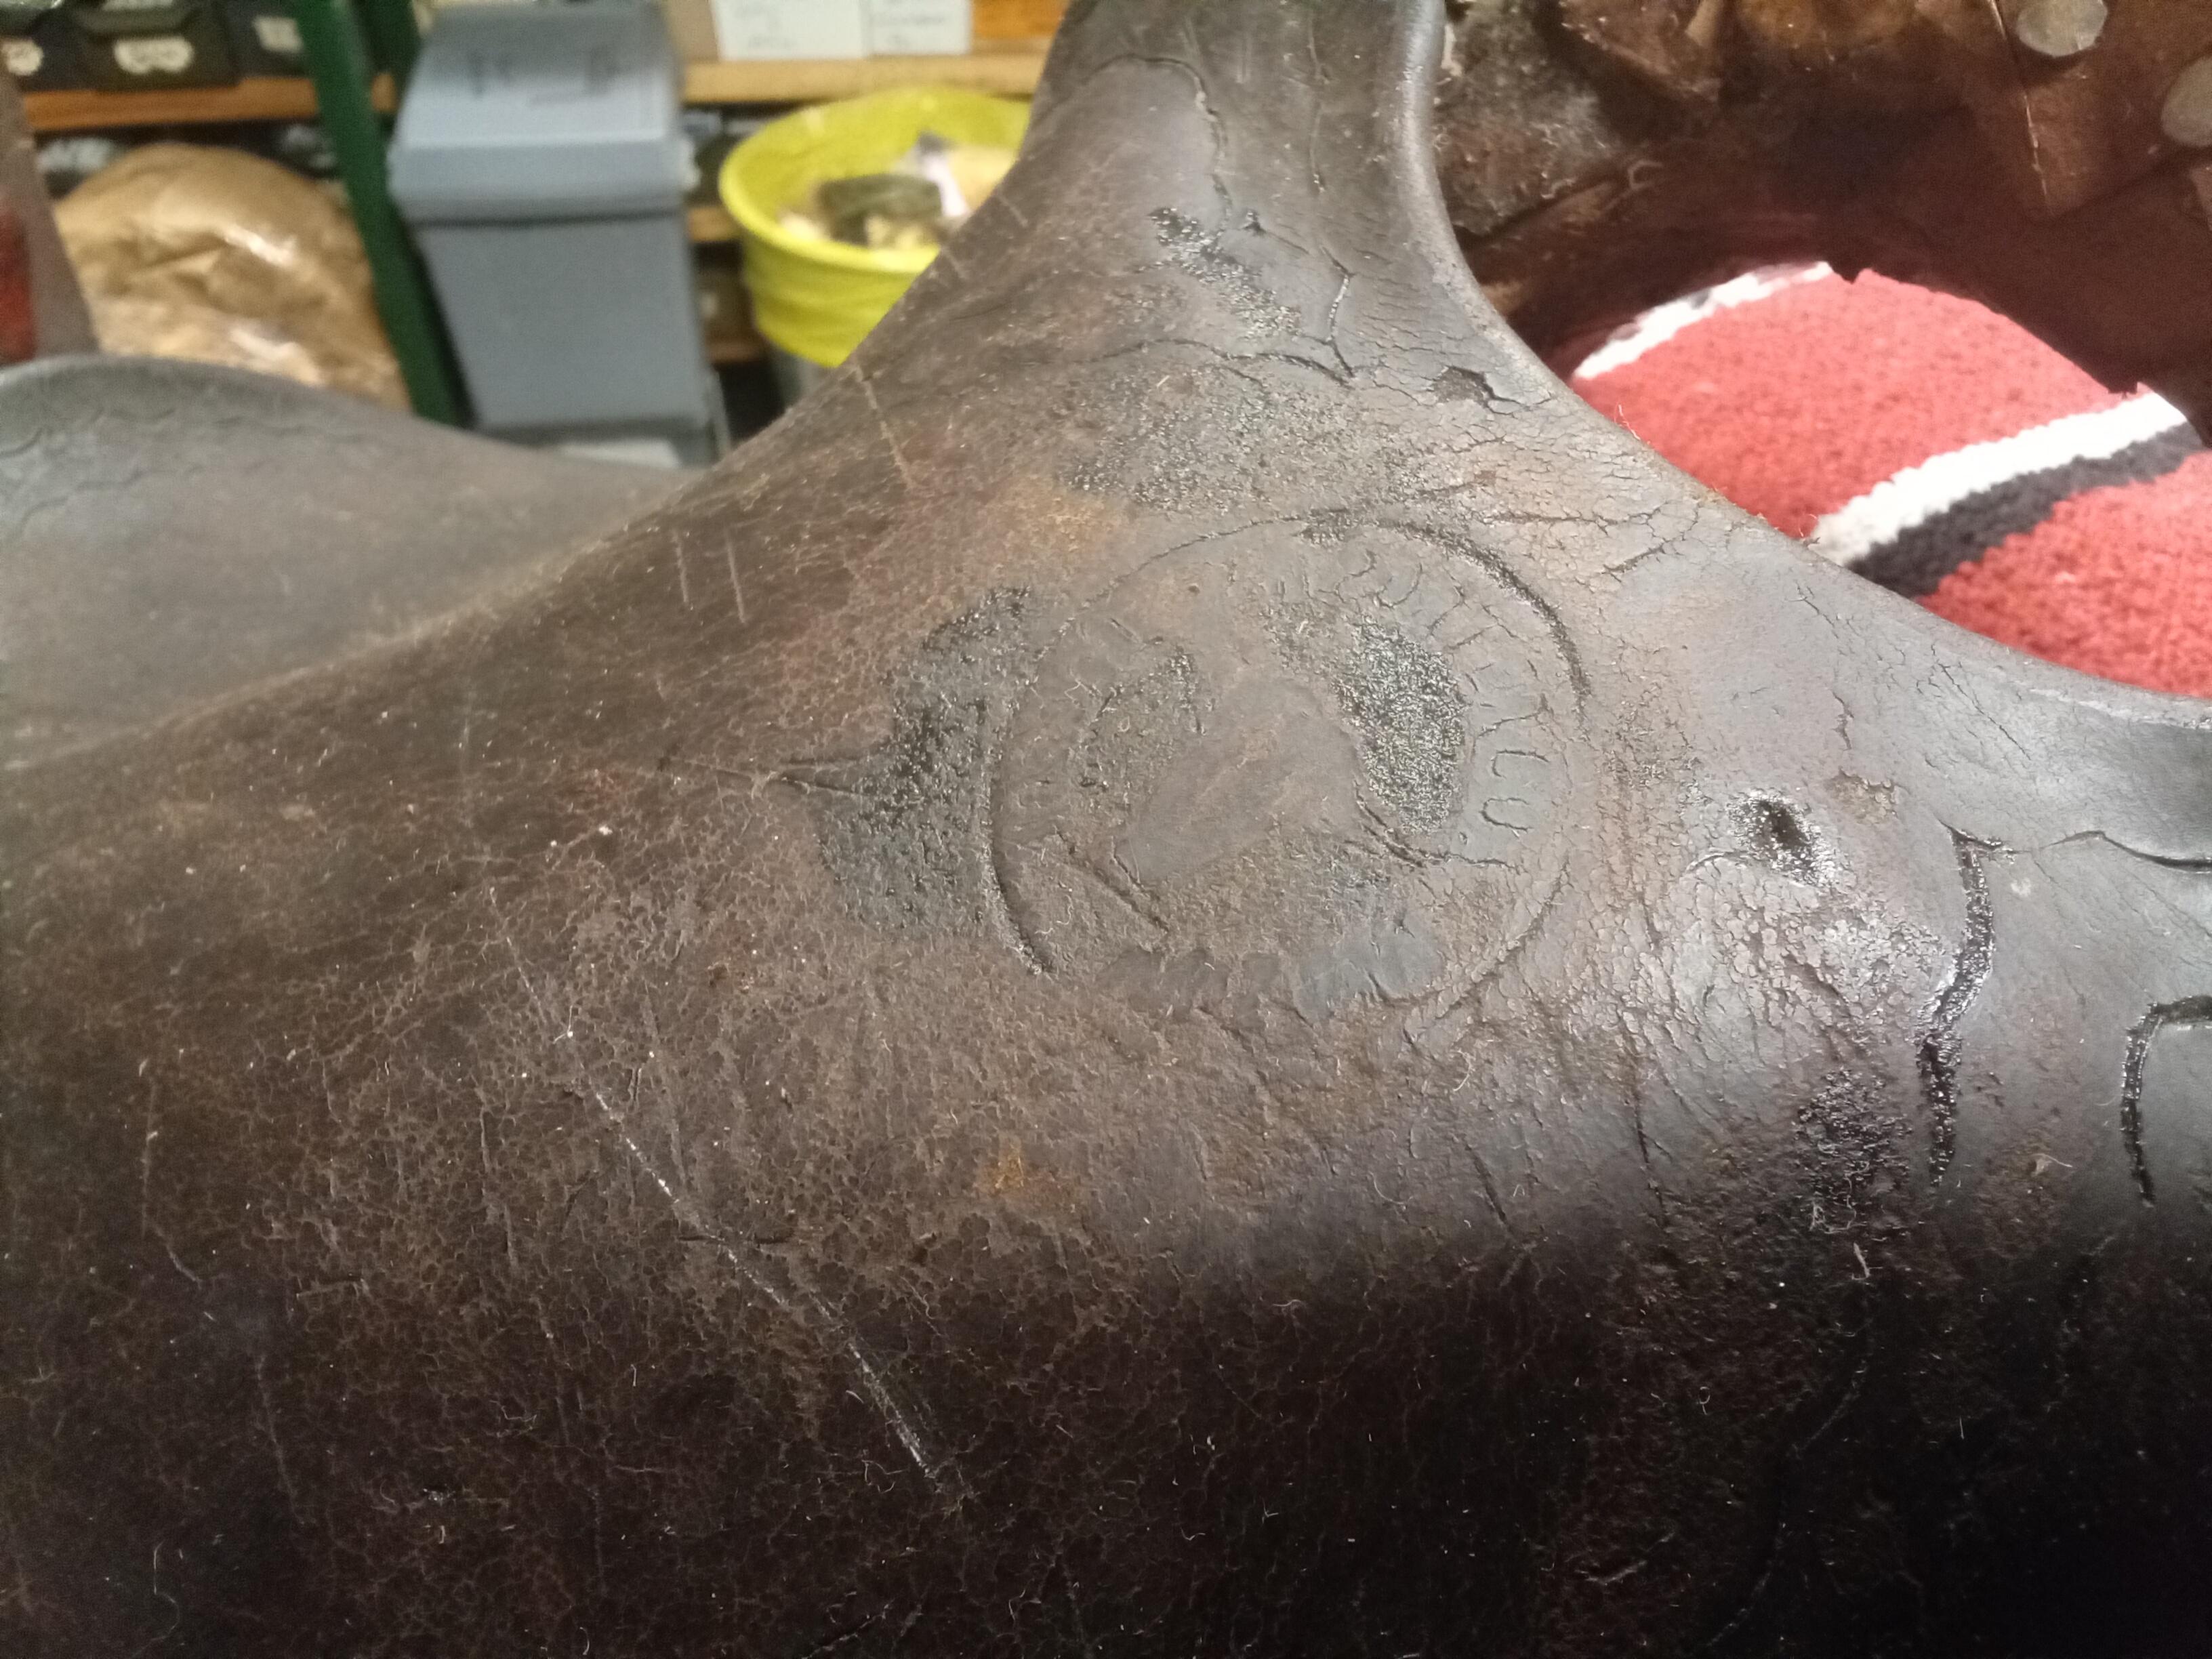
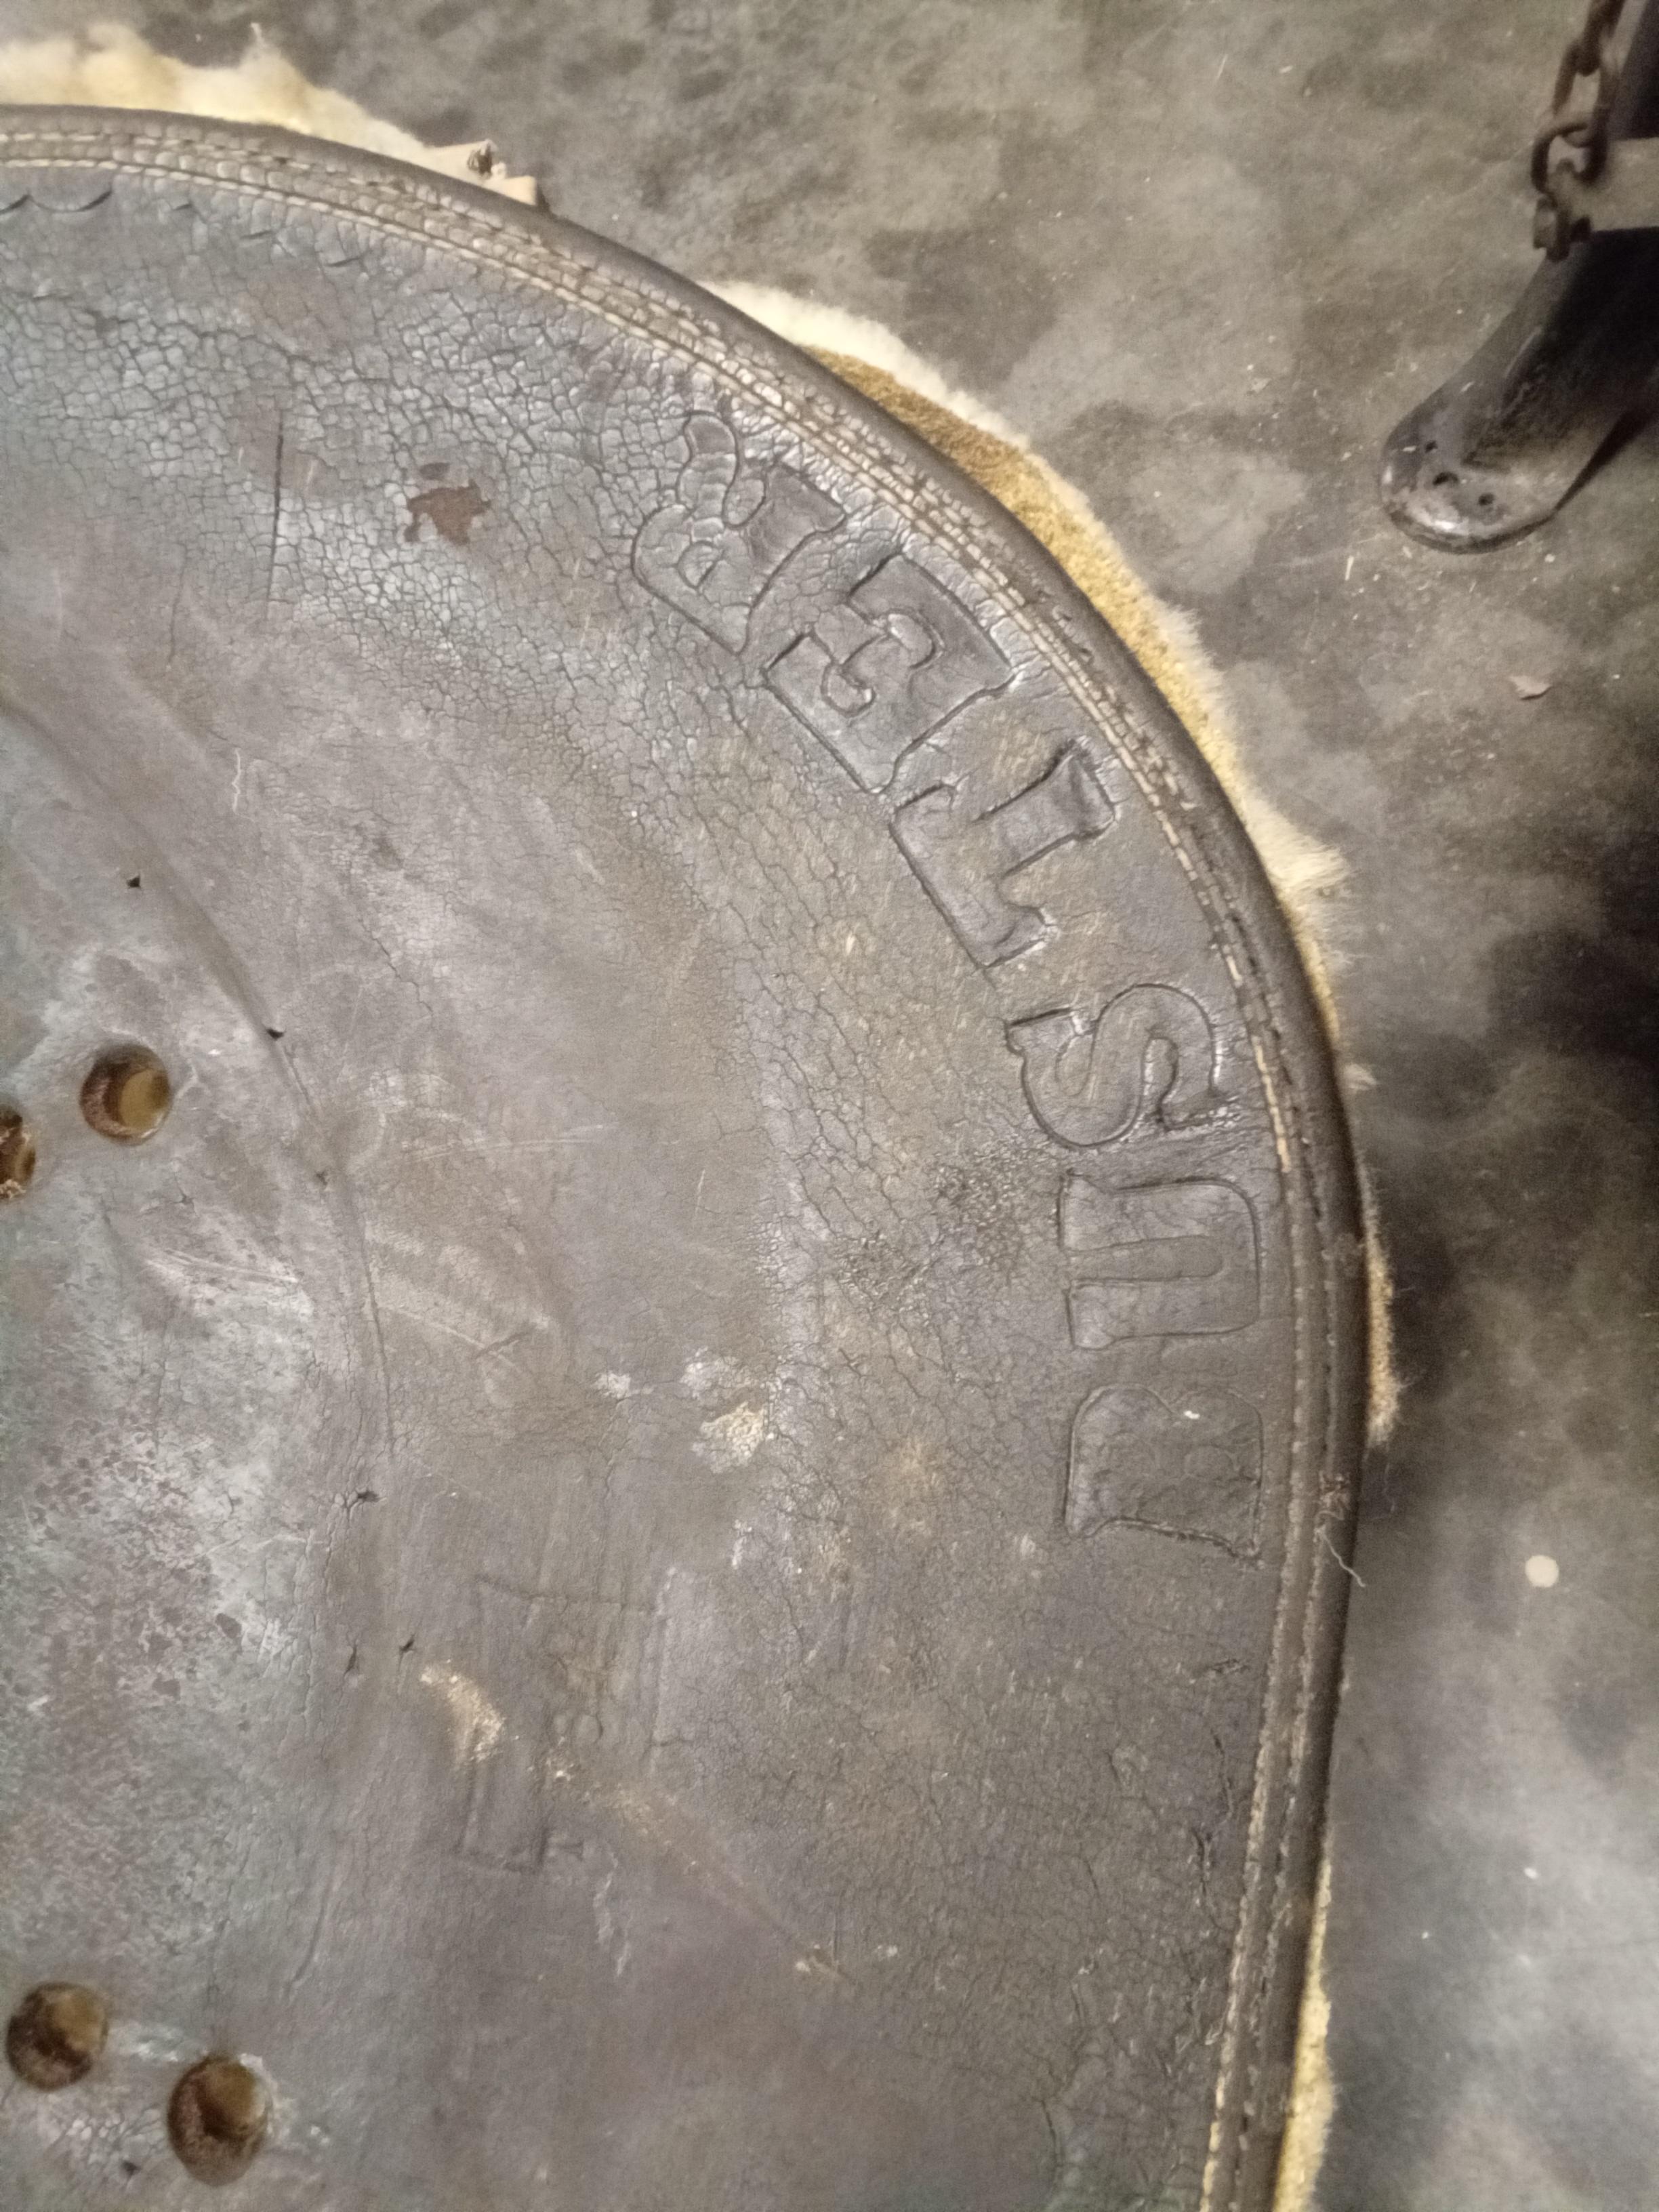
I put the saddle into Grok. The information from AI can be suspect but you'll have to do more research to determine if what Grok put out is reliable. This is Grok's result; Based on the photos you shared, this appears to be a Plains Indian woman's saddle from the 19th century, commonly referred to historically as a "squaw saddle" (though that term is now considered outdated and derogatory toward Native American women). A more accurate and respectful name is "prairie chicken snare saddle," named after the shape of the high pommel, which resembles snares used for catching prairie chickens. These saddles were used by tribes like the Blackfoot, Sioux (Lakota), Piegan, Nez Perce, and Crow in the Great Plains and Rocky Mountain regions. ### Key Features Matching Your Item - **Structure**: It's a frame saddle with wooden sidebars (bars) covered in rawhide or leather. The high pommel (front) and cantle (back) are typically made from bent elk or deer antler (softened in water and shaped), forming an arched, U-shaped loop with an open hole at the top. This design provided stability for riders and allowed for securing loads when used as a packsaddle. - **Decorations**: Yours has brass tacks or studs along the edges, which were a common embellishment on Native American gear from the period, often traded from Europeans. While basic versions were undecorated, variations included tacks, beads, or quillwork for aesthetic or status purposes. - **Stirrups and Straps**: The attached leather-covered wooden stirrups and rigging straps (for cinching to the horse) are typical. The overall worn, aged leather suggests heavy use and antiquity. - **Size and Use**: These were lightweight (around 20-25 inches long), all-purpose saddles for women, children, or older men. They doubled as riding saddles for long journeys and packsaddles for hauling buffalo meat, camp gear, or attaching to a travois (a drag sled). They were quick and inexpensive to make compared to pad or full wood saddles. These saddles became widespread in the mid- to late 1800s during the buffalo hunting era but fell out of common use after 1850-1870 as tribes adopted more Western-style saddles. Women in these cultures were often the saddle makers, using local materials like antler, cottonwood, and buffalo rawhide stuffed with grass or hair for padding. If this is authentic (which it looks to be from the craftsmanship and patina), it could have collectible value—similar examples from Crow or Blackfoot origins have sold at auction for $1,000-$5,000 or more, depending on condition and provenance. I'd recommend consulting a Native American artifacts expert or museum (like the Museum of the Plains Indian) for authentication, as reproductions exist. For visual comparison, here are some examples of similar saddles:
-
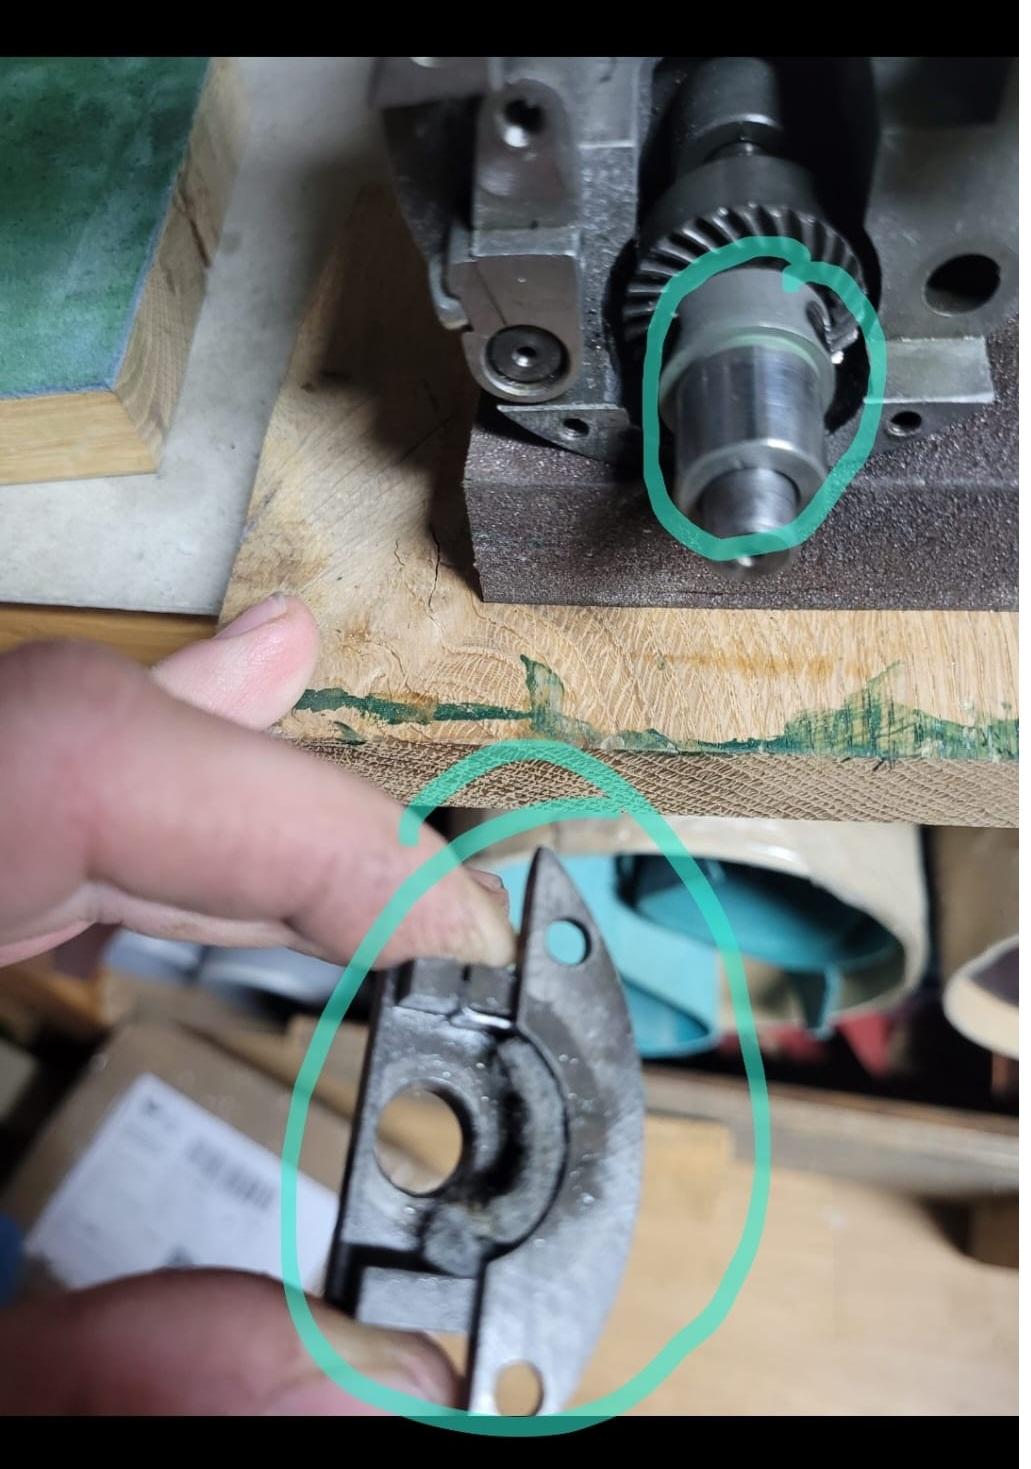
Hello everybody, I am looking for the feed dog eccentric and the end support for the hook shaft. For an Adler 169. I am guessing that the parts are similar for Adler 269. Attached photo. On this second 169 I have, the machine was initially equipped for binding so it lacked the eccentric. So the end support of the hook shaft is thicker compared to the one for up and down movement. I can let this part go if somebody is interested. I can buy the parts from DA, new. But they cost a small fortune. So I thought asking around here, maybe somebody has them and can sell them cheaper...maybe. Thank you!!! M.
-
Awesome
-
I can see how the front arch of the saddle might be used as a handhold by a passenger, while the horse is being led by someone else, a workaround for someone that doesnt know how to ride a horse.
-
 Ballistol is my go-to CLP for all my guns. Its relatively high pH counters the acidity of rust quite well. I see no need to use NFO on the inside of my holsters aside from the initial conditioning in construction. Yes, I use a light application of NFO before assembly to condition the leather, but that's all. I have never encountered any issues of corrosion or rust, nor dry leather inside the holster. Incidentally, I grit my teeth any time someone recommends using suede to line holsters. I don't want the fuzzies getting into the works of my handguns. Some claim the suede helps in retention. I disagree. The fuzzies soon wear away, some of it into your gun. Chrome tanned suede is corrosive. Best to line the holster with veg tan and use wet molding and/or physical retainers like a strap, flap or chicago screws to secure the gun.
 -
 I ended up grinding the edges round on mine to get it to not be as bad about that.
 -

Flatbed Table Attachment For Adler 69 Machines
Uwe replied to Uwe's topic in Leather Sewing Machines
Yes, it is :-) -

spring flowers and good food
Darren8306 replied to chuck123wapati's topic in All About Us and Off Topic
When I was a kid, we had a family celebration for my first communion. Mom served rappie pie to everyone, which is a traditional Acadian dish requiring a huge prep and beloved by all the attending family. I was upset, and remember insisting that it was MY first communion, and we should be able to have hot dogs instead! -

spring flowers and good food
chuck123wapati replied to chuck123wapati's topic in All About Us and Off Topic
The first thing I learned to cook besides a marshmallow, lol. Cooking the lowly hot dog on a willow stick was the greatest achievement in my child's mind at the time. Gently simmering, sizzling, and turning brown over a smoky fire, man, i couldnt wait to get a bite of that meaty goodness wrapped in a bun and smothered with ketchup, mustard, and that sweet pickle relish!!, Sitting by the campfire in the brisk mountain air, smell of the pines and the quiet little stream we camped at every 4th of July. Hot dogs have a special place in everyone's memory lol. -
So pure water is good for your guns? Its pH is 7. See what I'm sayin, PH is only part of the equation. your trying to protect your weapon from ????? oxidation/rust and abrasive action/wear more so than ph. A razor strop, for example, is oiled leather just like your holster, and the oil can be ph 7, it will still polish a blade or wear the finish on your fine firearm if done enough times. But someone had to try it to see if it worked, so we don't have to now !! Lol, Guns and leather, and oils of every kind have shared the world far longer than either of us, and those who shared the world with them through the ages have found the answers long before we ever drew a breath; that's why you know about the problems with chrome tan, it isn't a new discovery either. To answer your question. I use balistol on my guns, really good stuff and highly recommended by Hickok 45 lol, I'm sure I'm as picky about my firearms as you or anyone else is. I don't use it on leather because it's not a gun and its to expensive. You can if you want to its just an oil. so might make your holster soft if you use too much because that what oils do to leather, no matter what type of oil it is. Life is good!!
-
 Use that tool with a very small/light maul. It sounds like you are using too much force or too heavy a maul when you strike the tool.
 -
Some leather just doesn't sand well. Also, that's fairly thin leather, which I've had trouble with, too.
-
 Yes, I know most people would classify this as overthinking, but I try to keep the exposure of my guns to acids and salts as low as reasonably achievable, to borrow an existing acronym. Also, in my way of thinking, just because people have used something for a long time, that doesn't necessarily mean that it won't cause problems. Case in point is the fact that holsters with chrome-tan suede linings have been used extensively with blued and nickel guns for decades by people thinking that the suede is protecting their fine gun finishes, when it is in fact abrading their finishes and exposing their guns to chromium salts. I do of course use oil on my guns, namely Ballistol, which has a PH of 8-8.5, making it entirely alkaline. For an unlined holster, I wouldn't apply Neatsfoot oil to the interior of the holster, only to the hair side, as the oil will level out through the entire thickness of the leather. But for a lined holster comprised of two layers of veg-tan, SOP is an extra light application on both the inside and outside, since the holster is made of two layers of leather separated by contact cement. I also meant to ask if any of you have used Ballistol to condition a holster before finishing, as the cans of Ballistol list leather conditioning as one of it's uses. I know a lot of people say not to use petroleum products like mineral oil, which is Ballistol's primary ingredient, as a leather conditioner, but I figured someone here has probably used Ballistol to condition a holster.
 -
 I have been trying to use the Craftool B997 double bevelling tool as shown in the book Pictorial Carving Finesse, page 8, 12 and 13, but no matter how I use it I get the edge or corner impressions from the tool. This makes the stamping look very choppy. I tried to "walk" the tool and tilt it, have it upright, but no matter what I do I can't seem to get a smooth effect as shown in the book. Is this tool flawed or am I? I'd appreciate any advice on how to use it. Thank you. Paul
 -

Flatbed Table Attachment For Adler 69 Machines
Tastech replied to Uwe's topic in Leather Sewing Machines
Is the Bamboo top a repurposed cutting board from IKEA ? -
Pedersen 309 Bobbin case wires question
Tastech replied to Einherj's topic in Leather Sewing Machines
You are correct , Its a heater for the wax pot . Modern threads come wax impregnated which makes the wax pot pretty much redundant . You can still get un-waxed thread but the right wax is hard to get . If you only use the machine intermittently for the odd repair then use the pre-waxed thread. If you are doing a large production run then heated wax is more economical in the long run . If you are going to use the pre-waxed thread get the braided polyester type because it is much more durable than the linen/flax type . While you are at it give the machine a good clean using kerosene and a paint brush . old wax can clog up the machine and makes parts sticky and not move properly . The rapid is a very good machine when it's working smooth. -
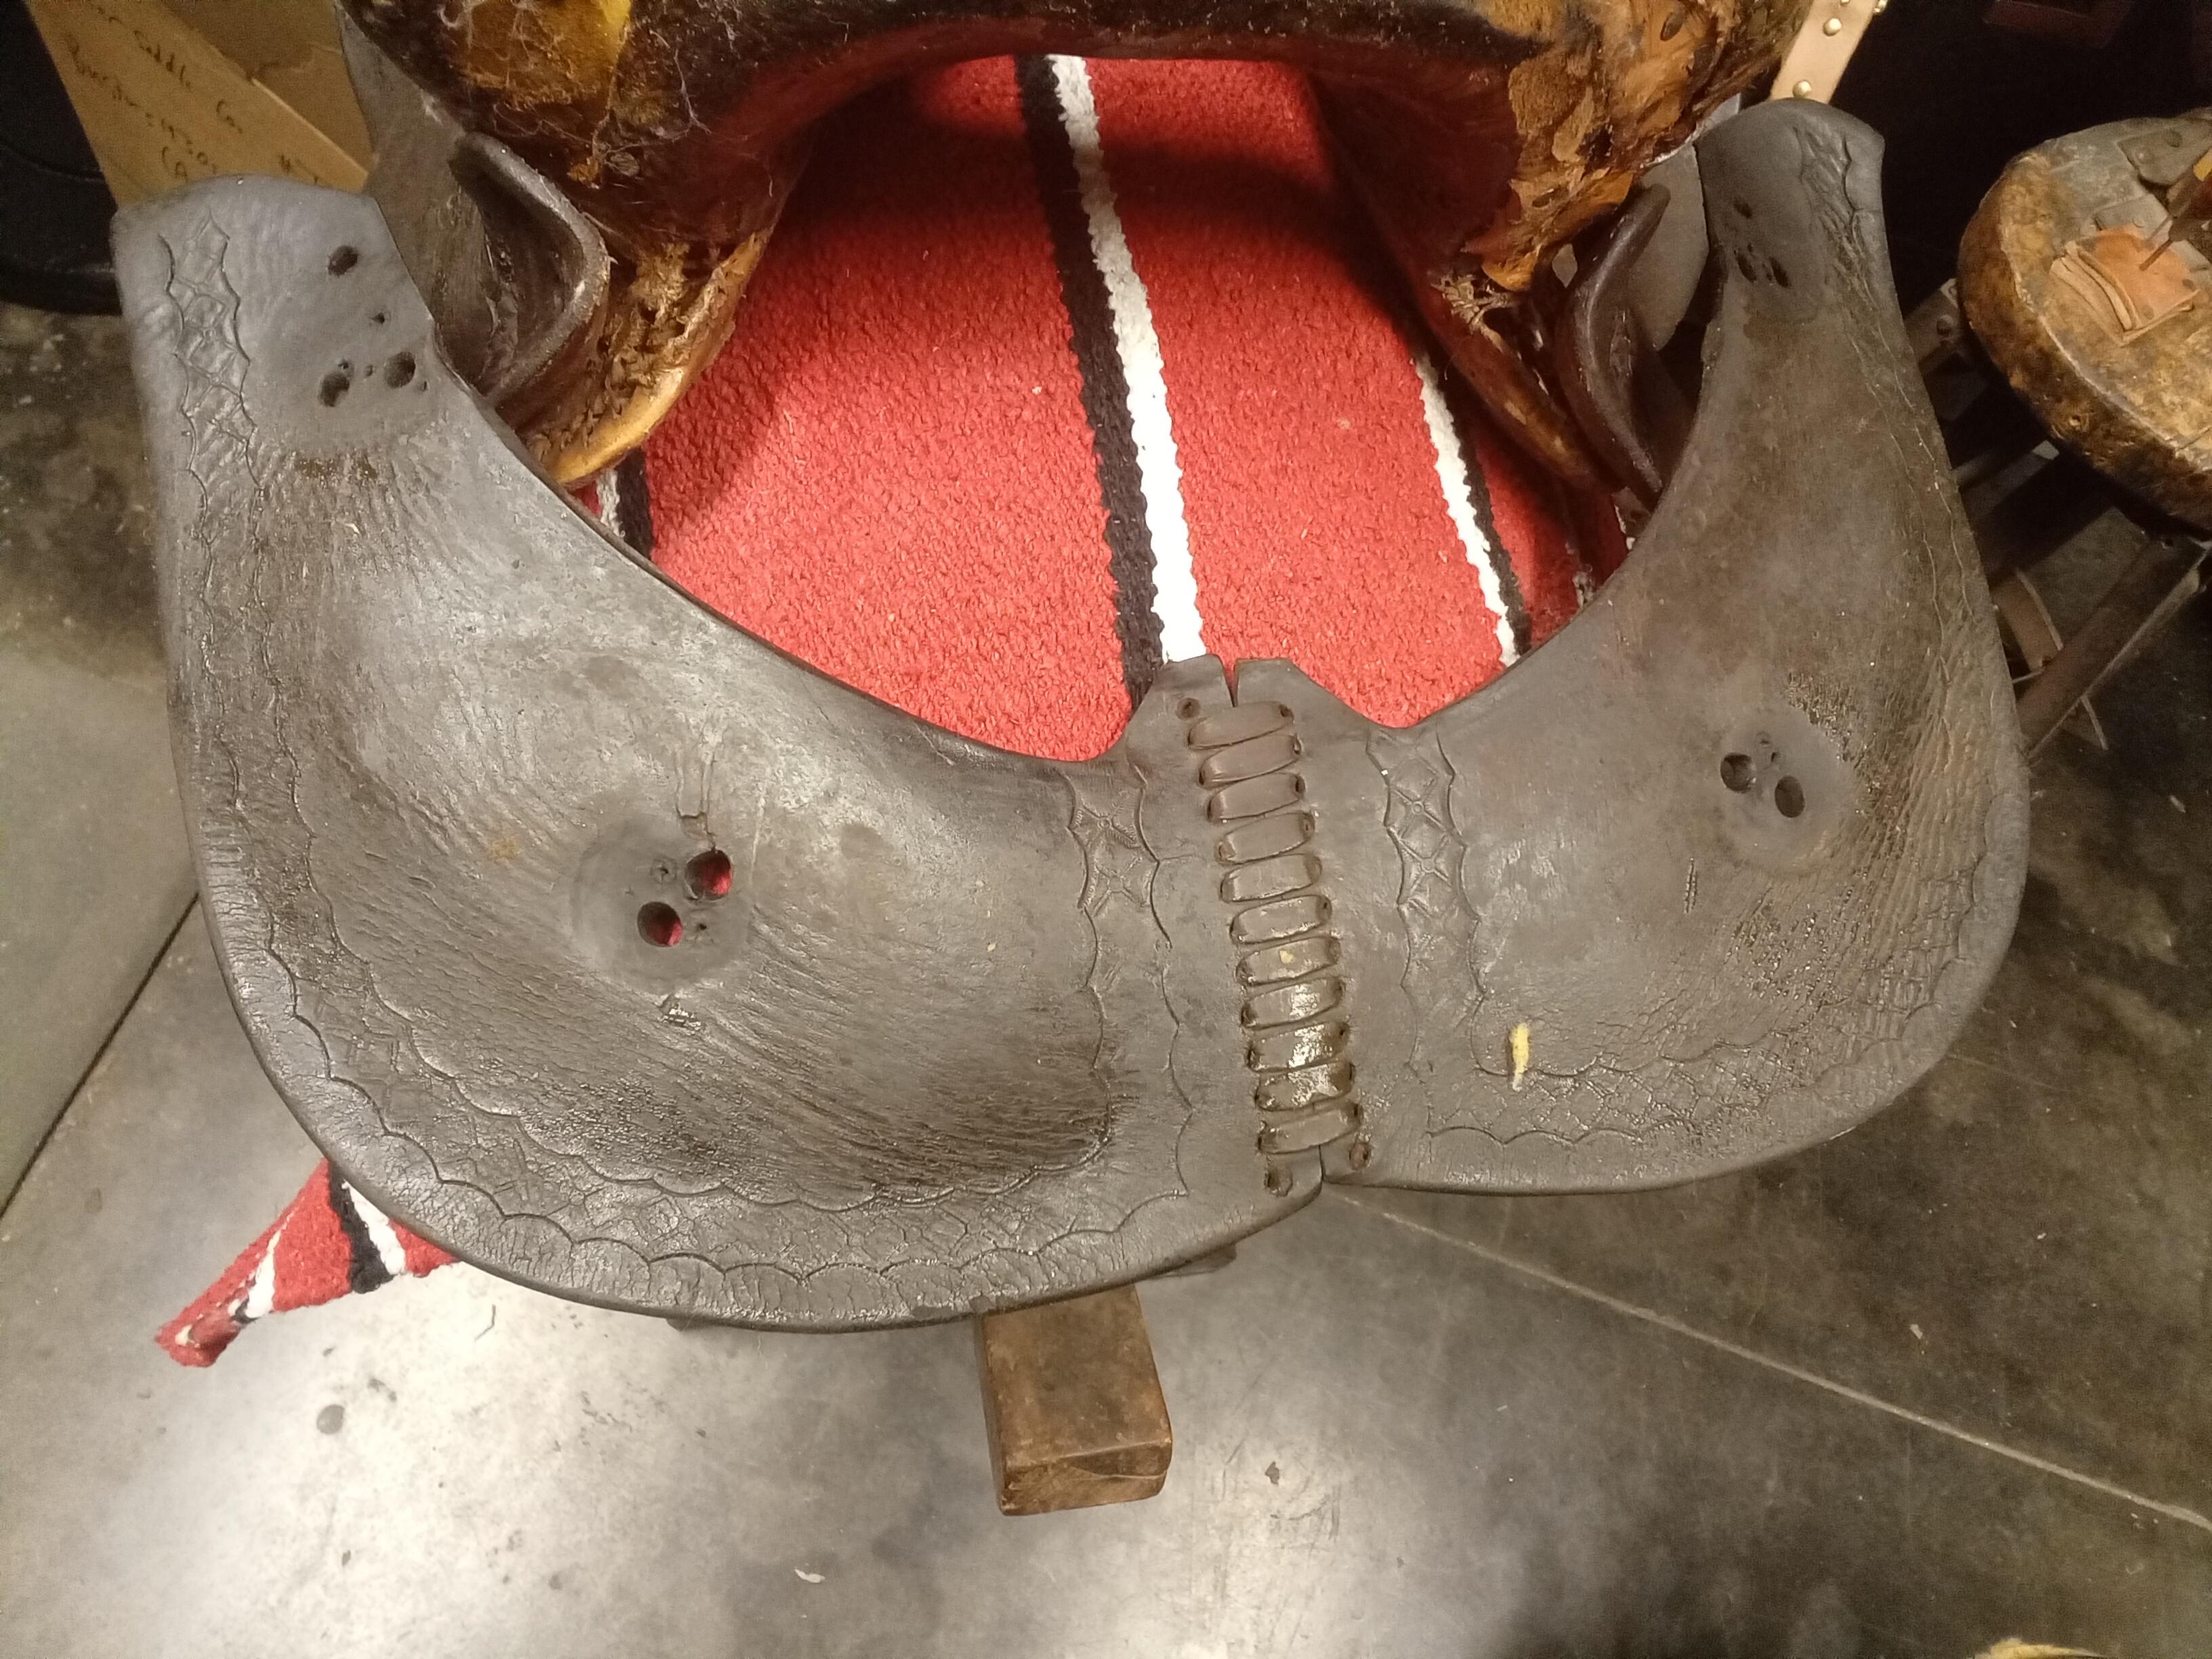
Here's another Pic showing the rigging from the Porter saddle thread. This is interesting as it's similar to Al Stolemans style of double rigging, but also has an additional reinforcement of having the leather for the front rings wrap clear over the swells. This kind of makes sense as the front rings have so much more holding responsibility than the rear, which seem to mainly stabilize the saddle. I don't want to detor too much from the standard saddle design for this build, but I'm wondering if the very basic leather tabs that held the rings previously contributed to the bottom ears of the tree breaking off? If so, it would be good to go a step further in how the rigging is mounted to the saddle. I did some sketching tonight and am thinking about doing a simple hybrid of the Stoleman double ring design, and the Porter design. The Leather would need to have the edges tapered and skived so it dosn't mess with how the seat, jockeys, and swell cover mounts, but it could help the geometry of the tree. I'm going to stick with the welded rigging rings, but carry the leather for the front rings over the swells, and the leather for the back rings around the back of the seat with the same strap continuing forward in front of the rear rings to make the connecting strap. It shouldn't radically alter the appearance and outer design of the saddle, but improve how their holding is distributed across the tree. I'll make a card-stock paper pattern first, and will make patterns for all the other pieces as well which might help one day to eventually build out the unused saddle tree and rebuild the junk store saddle pictured previously. This saddle didn't have a metal floor panel, and there was no hand hole under the swells, but both I plan to add when I do the ground floor leather.
-
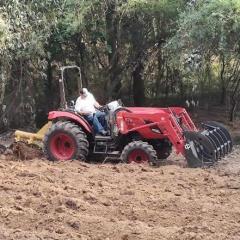
Was able to work on another tonight.
-
Thanks for all your advice yes it tangled I stitched in the air lol didn't have something to hold it steady... I saw a few videos and most people has a table with a clamp to hold it steady while stitching I saw one of her videos they are good. And I believe I might have already some hand problem my ring finger and pinky started to numb lol. I tried sanding to even put but it felt like I was just damaging the leather
-
 CD Milam joined the community
 -
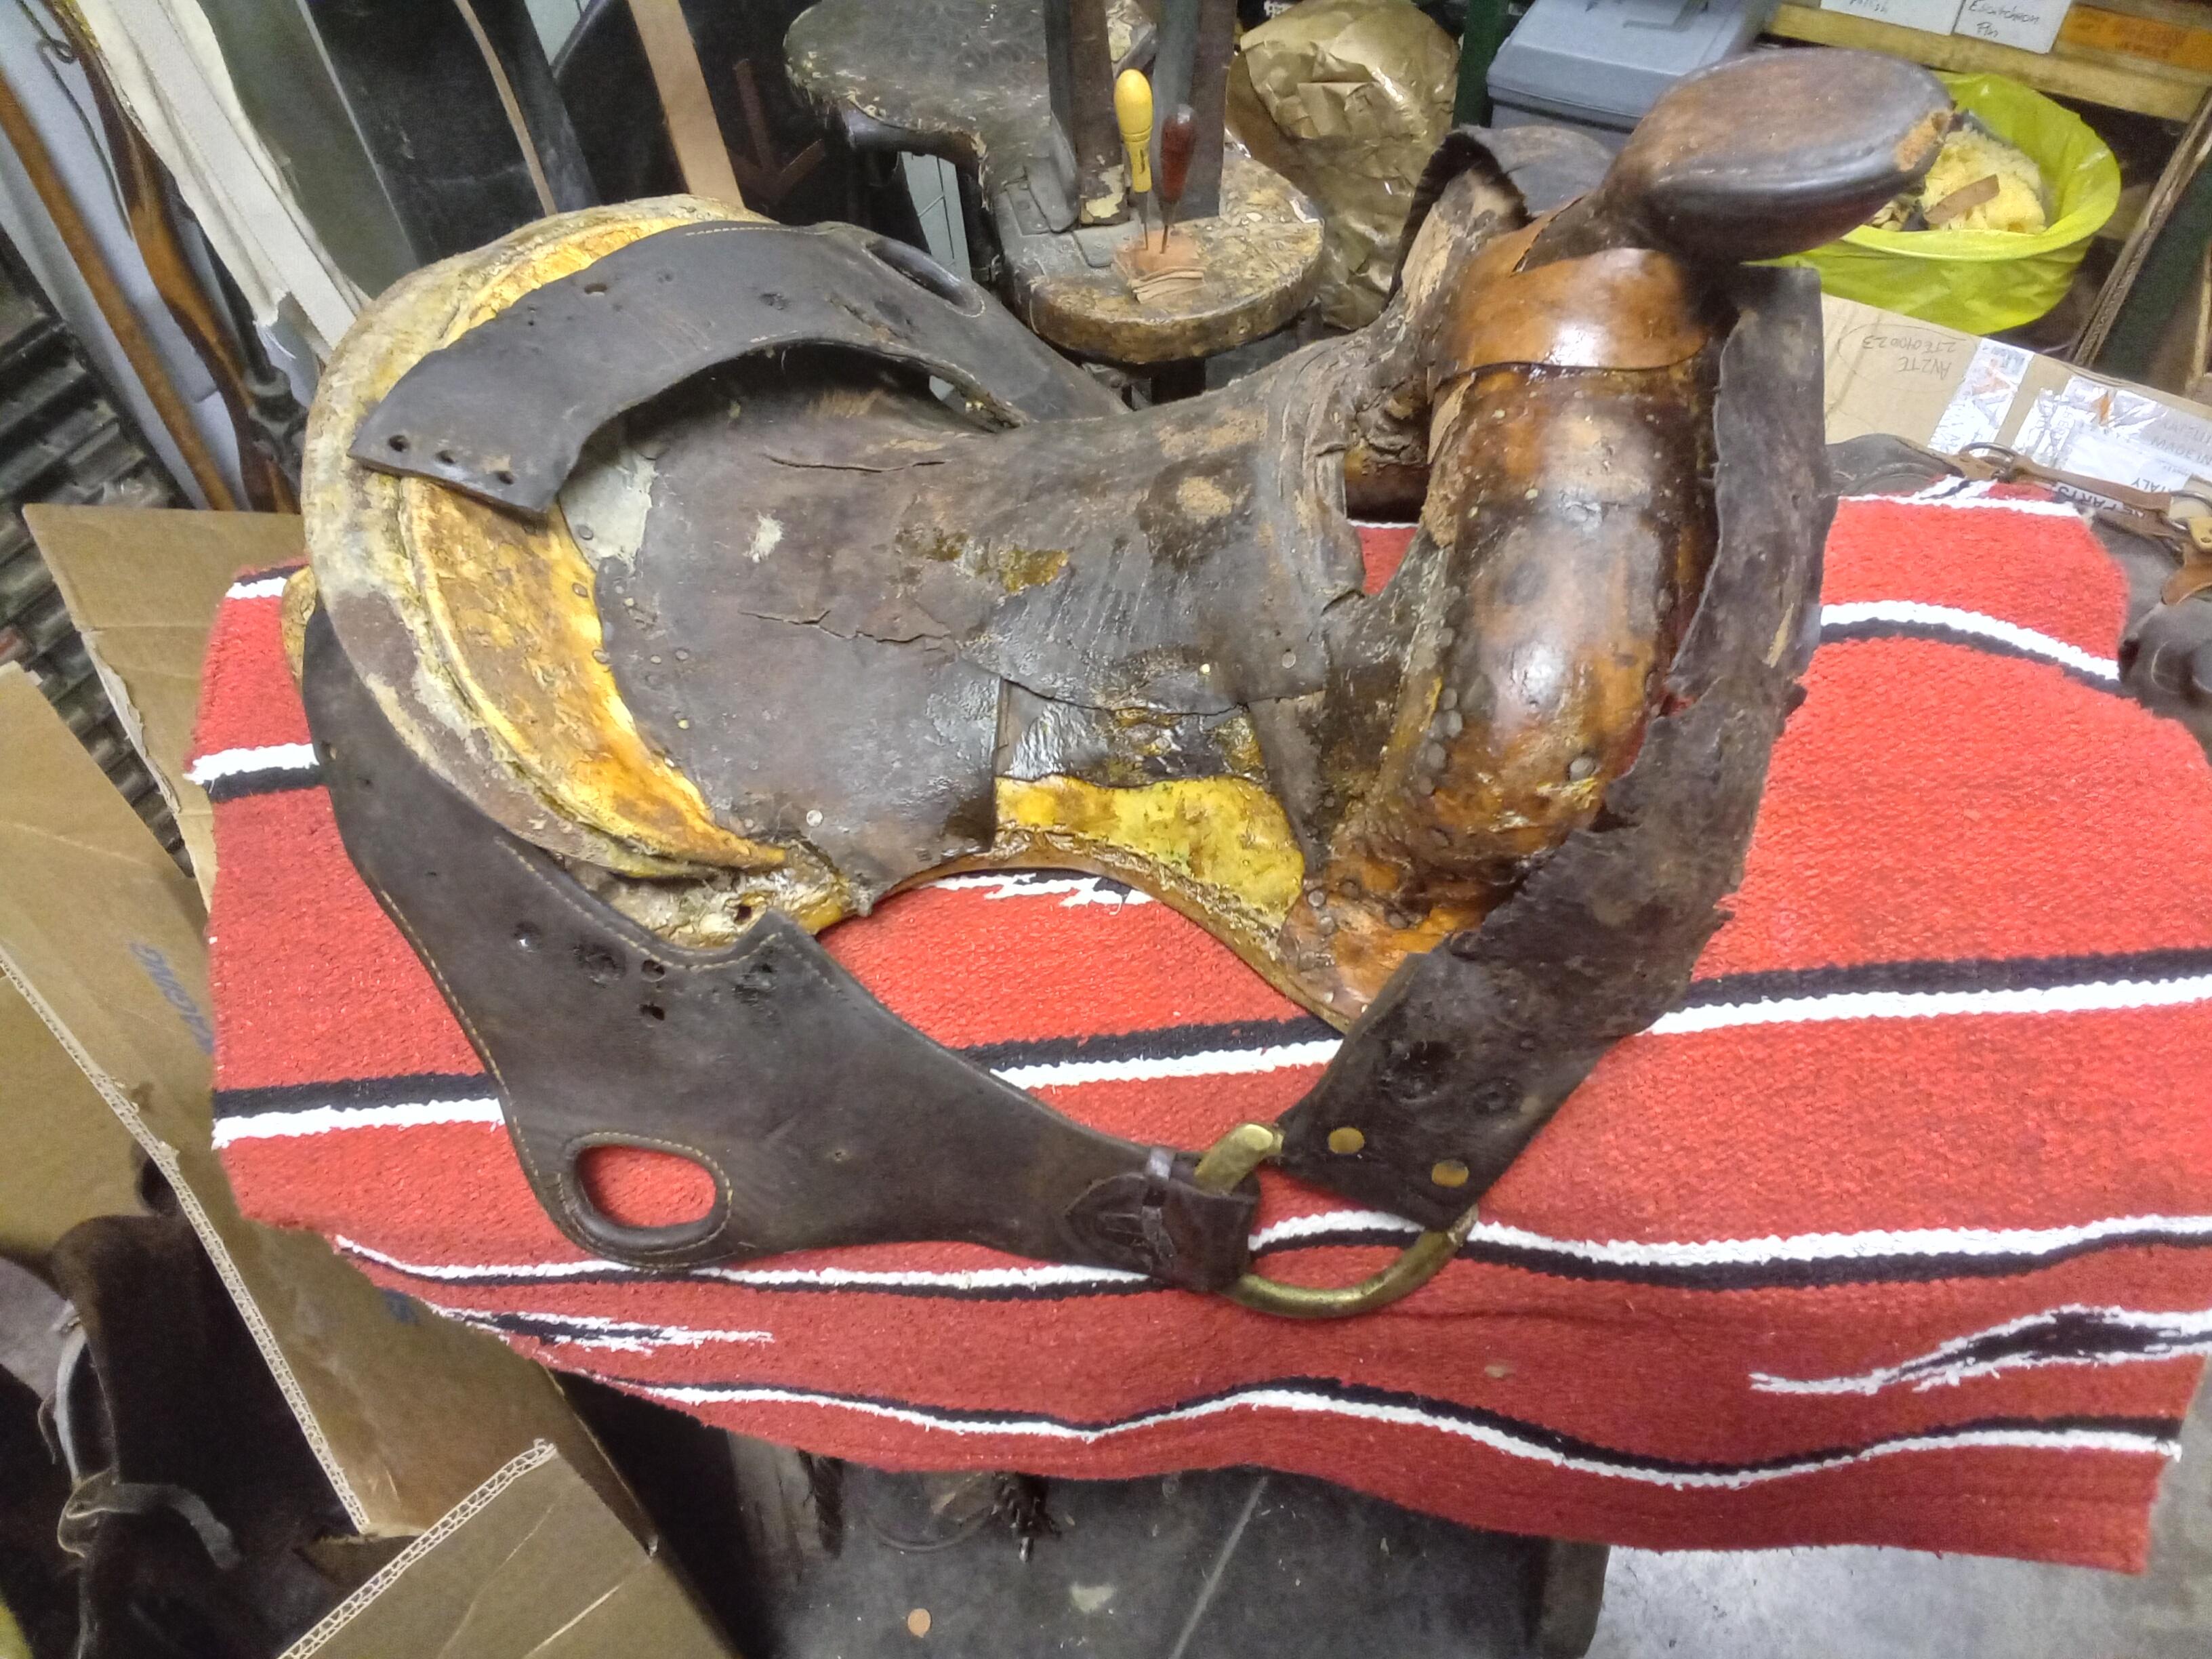
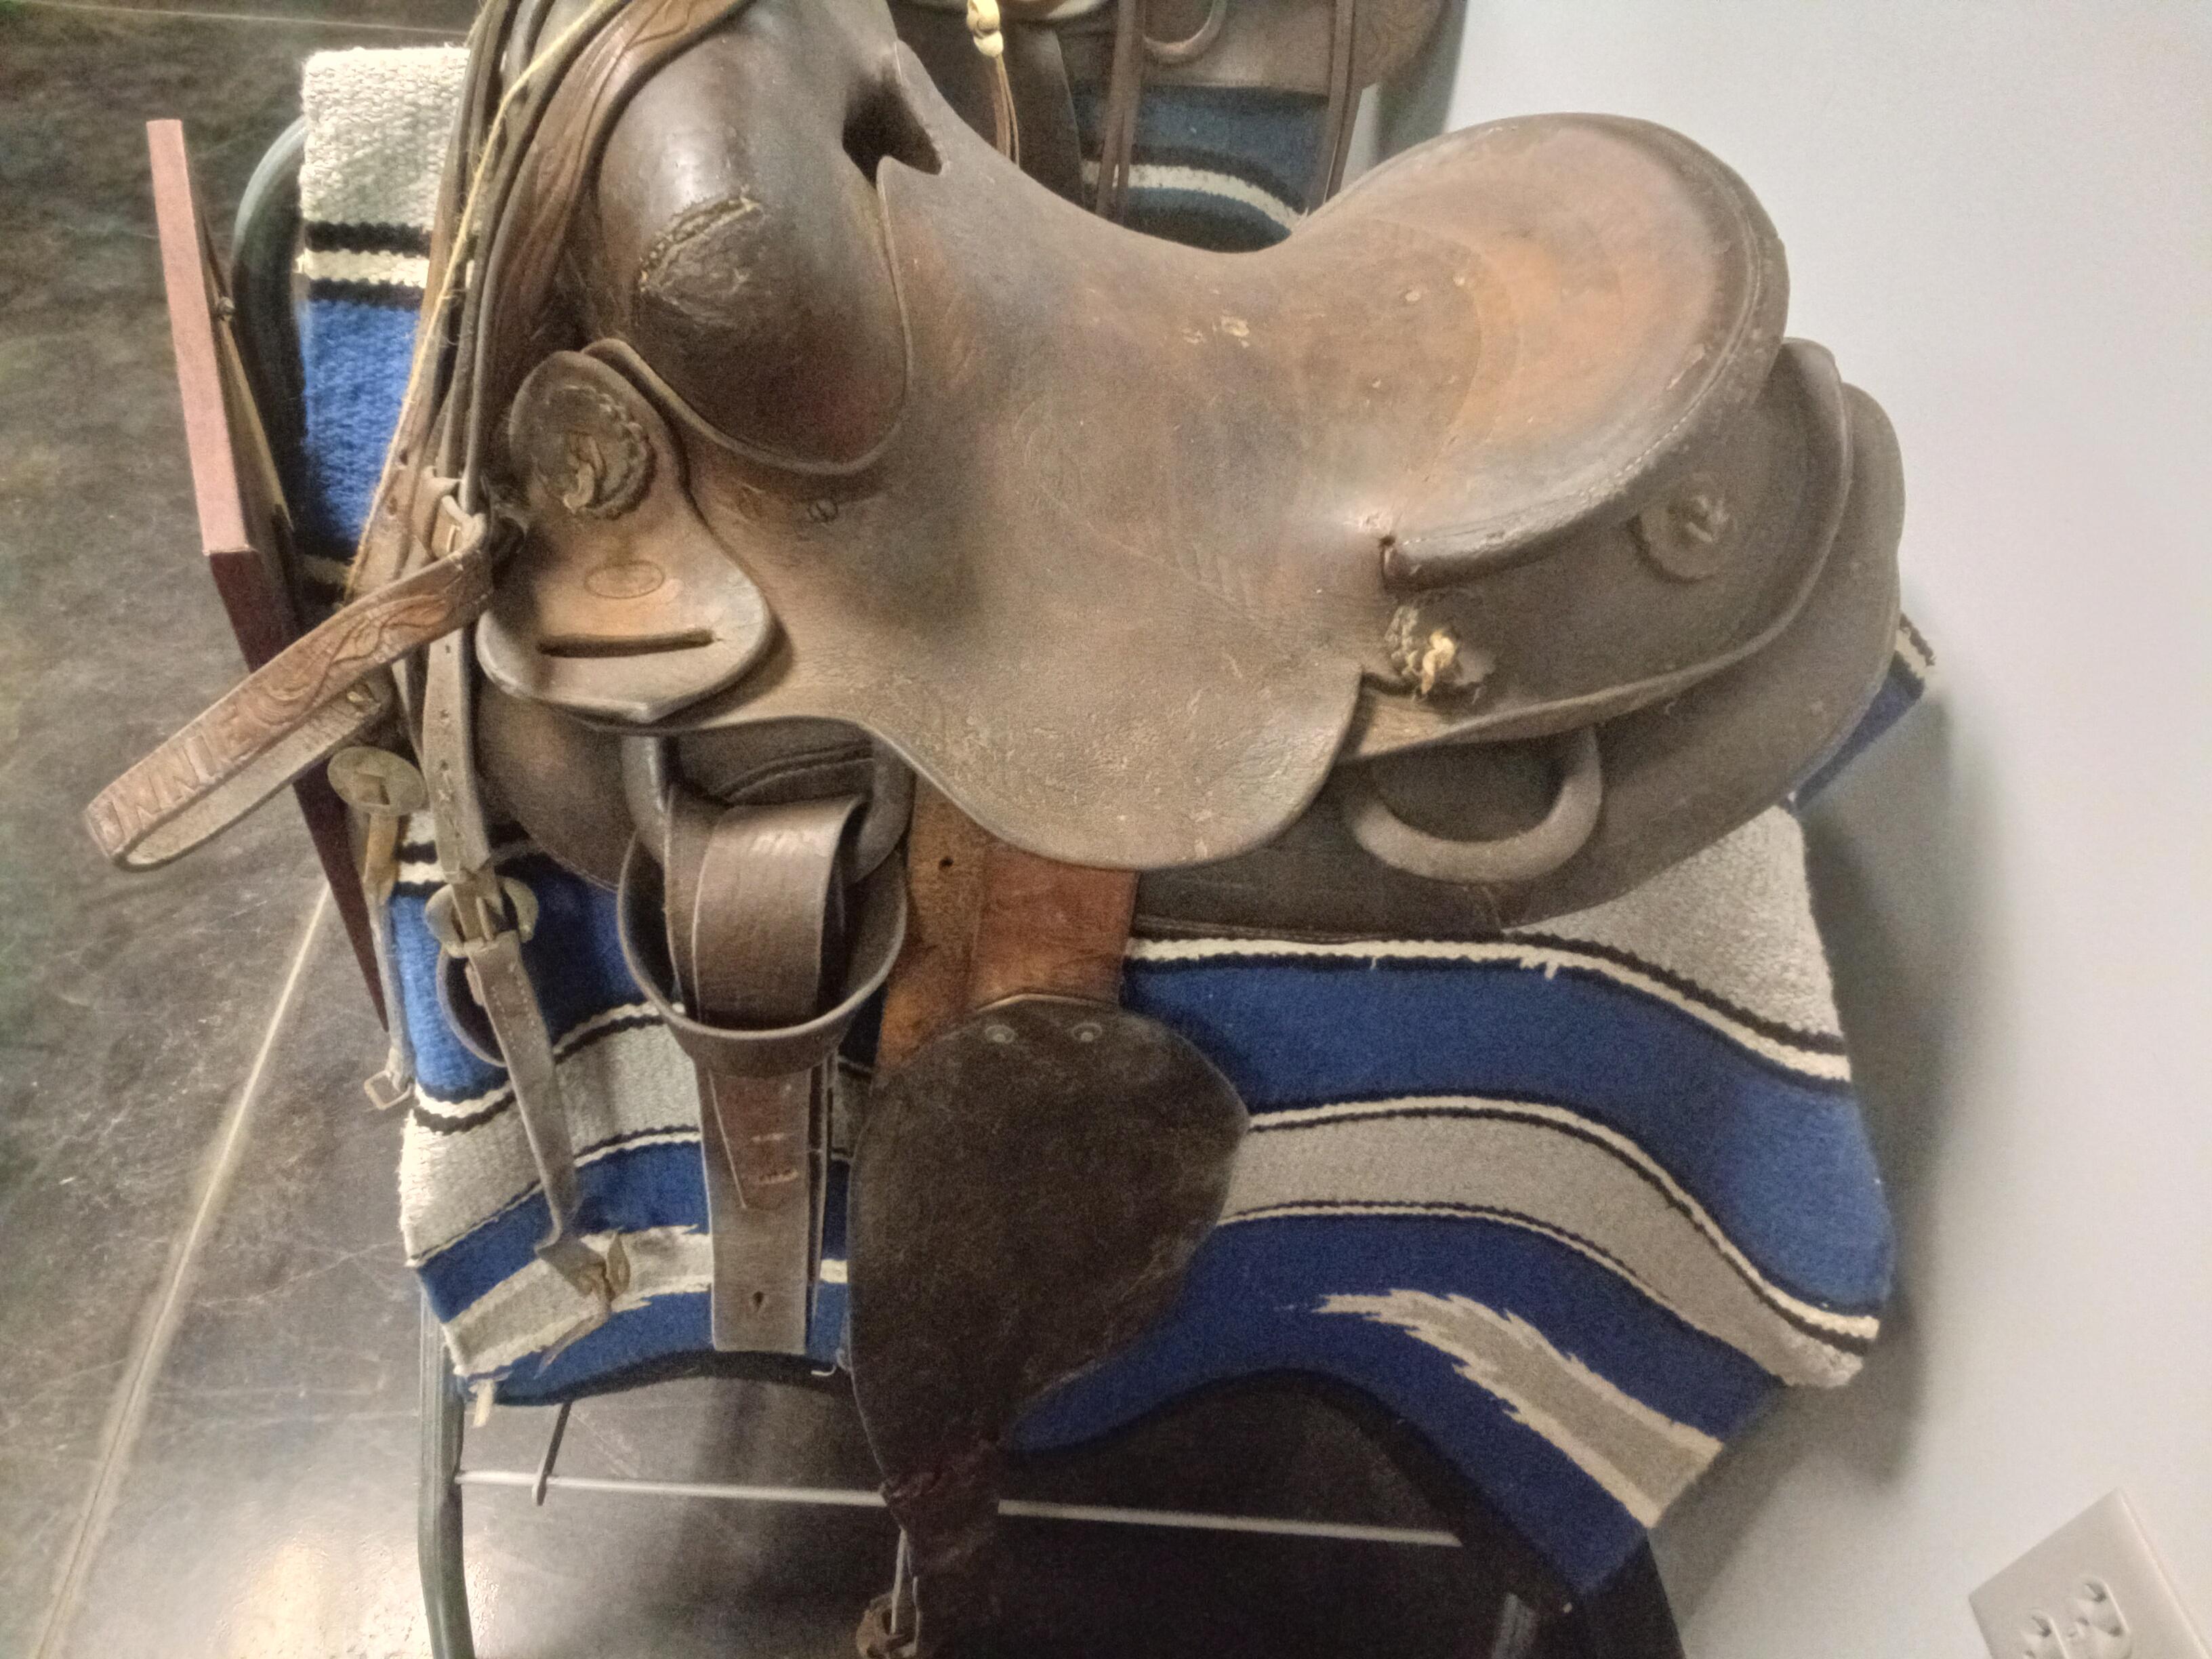
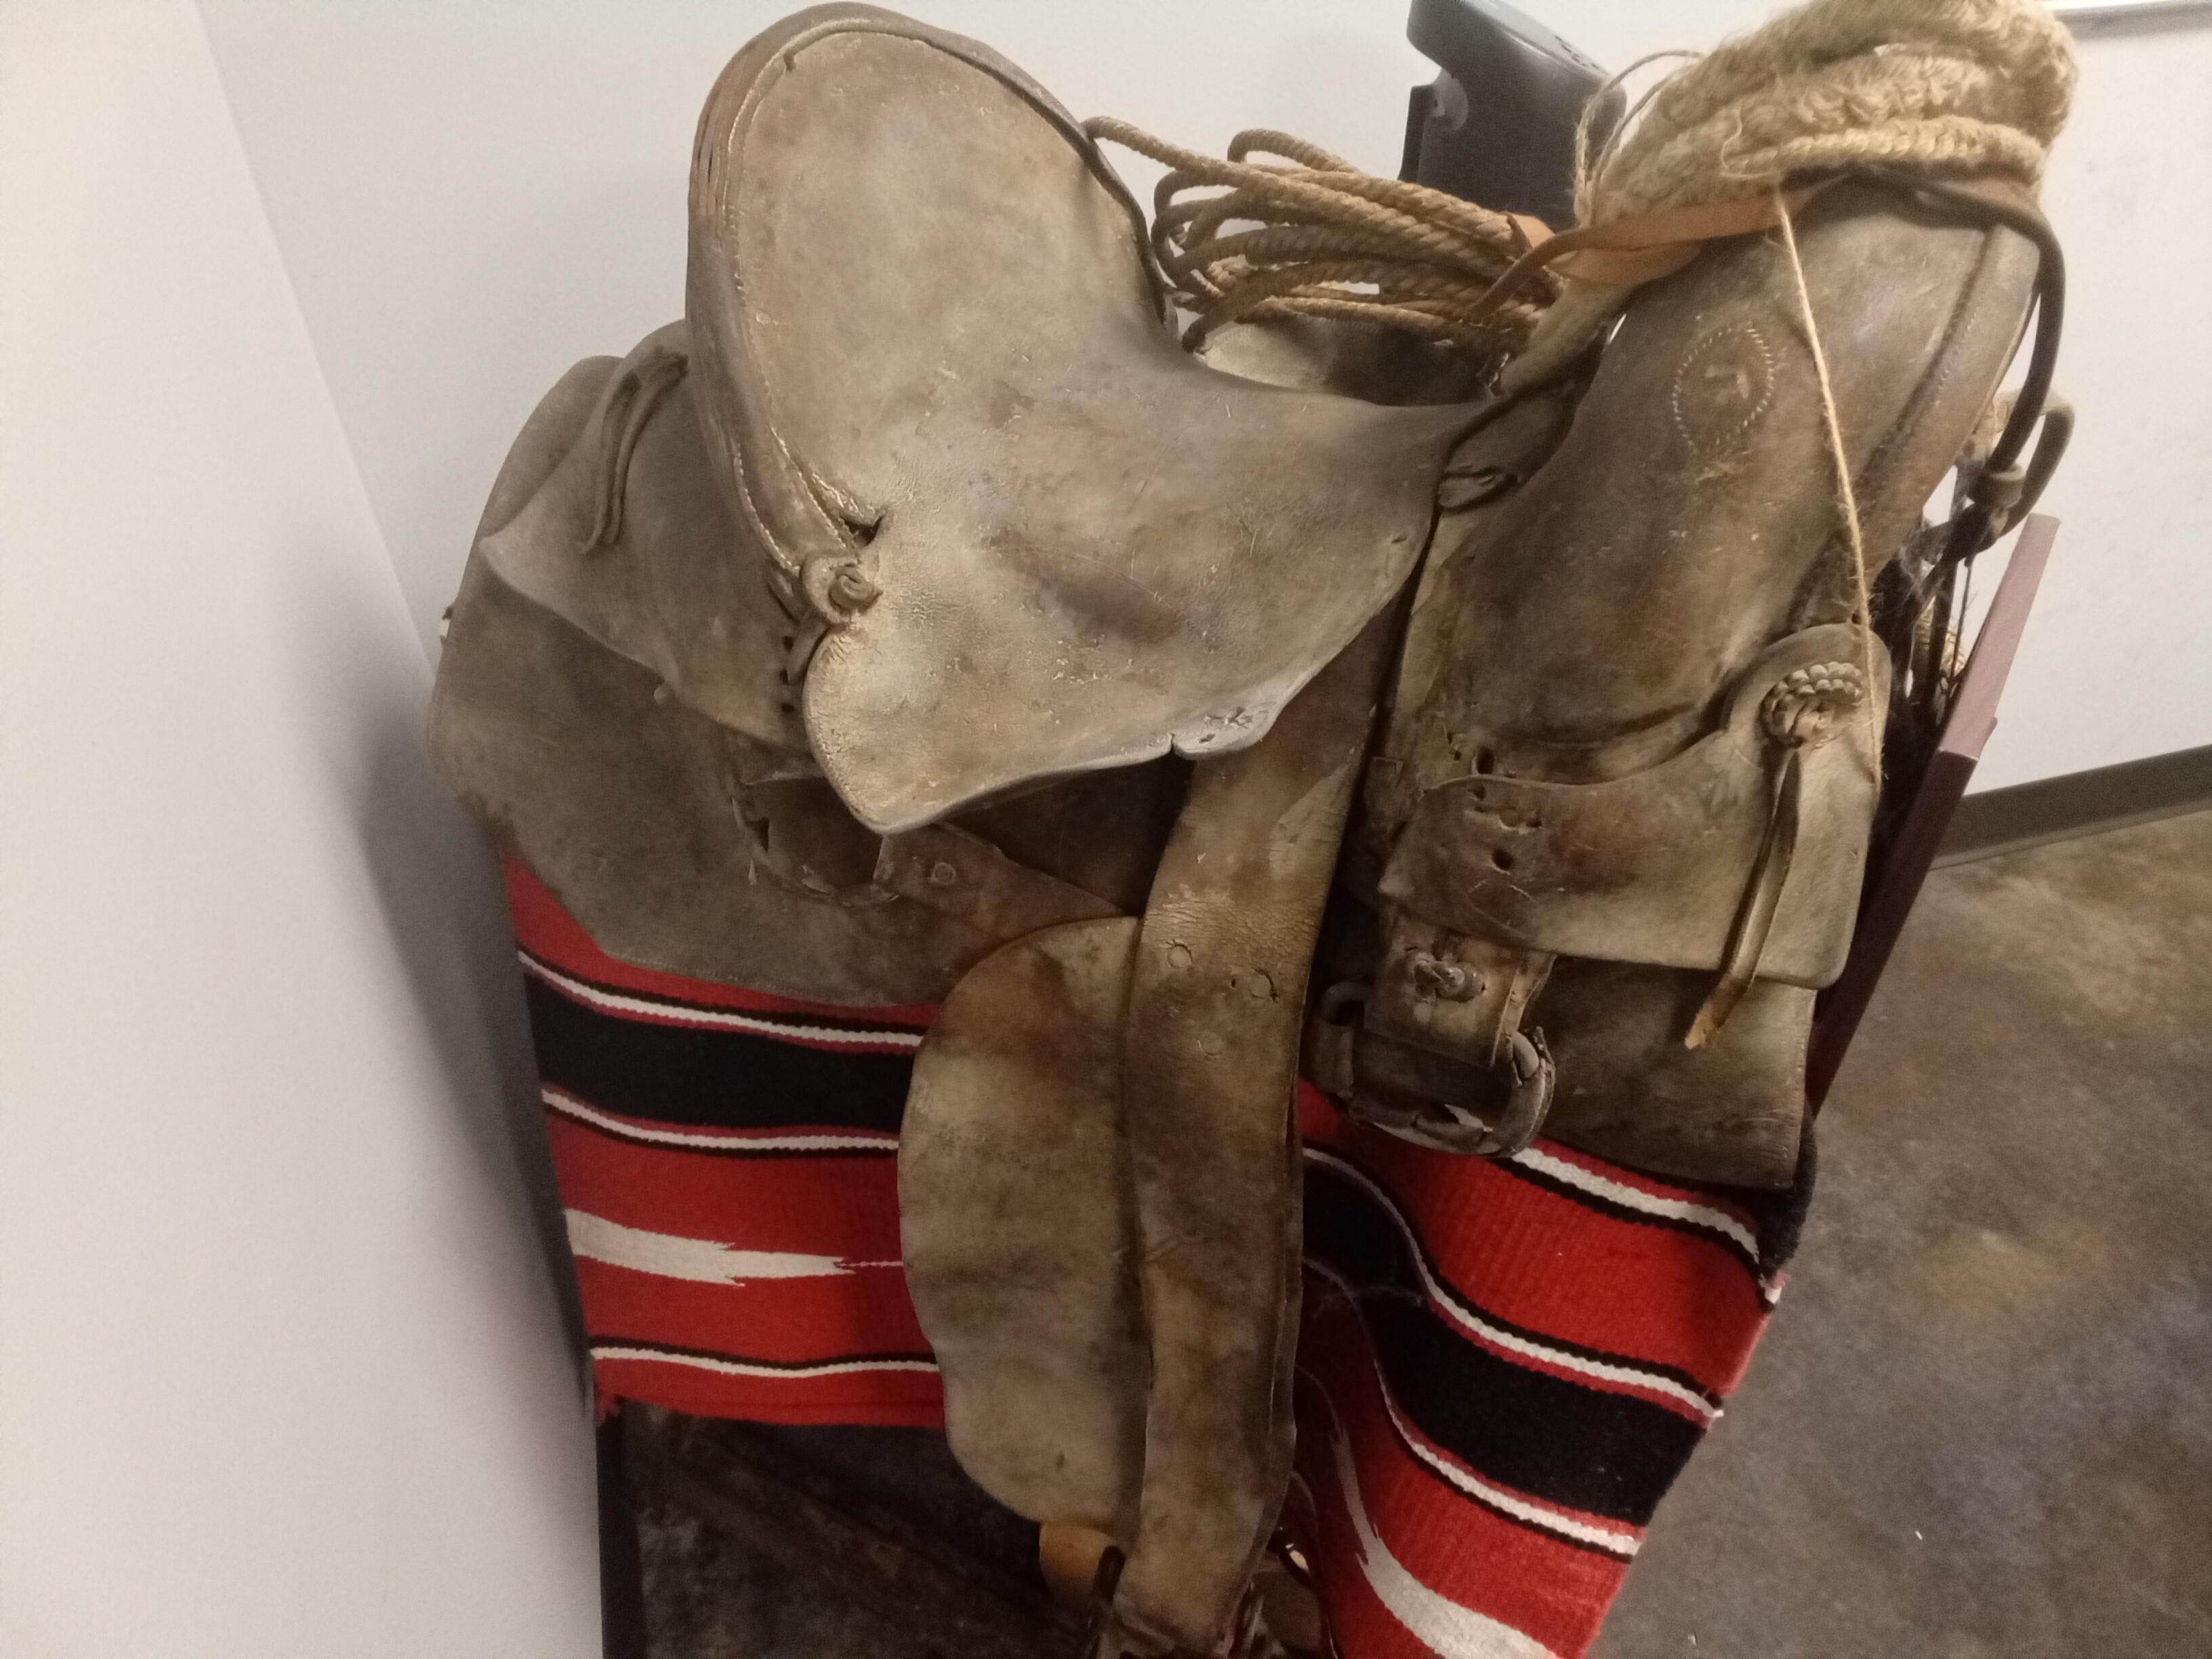
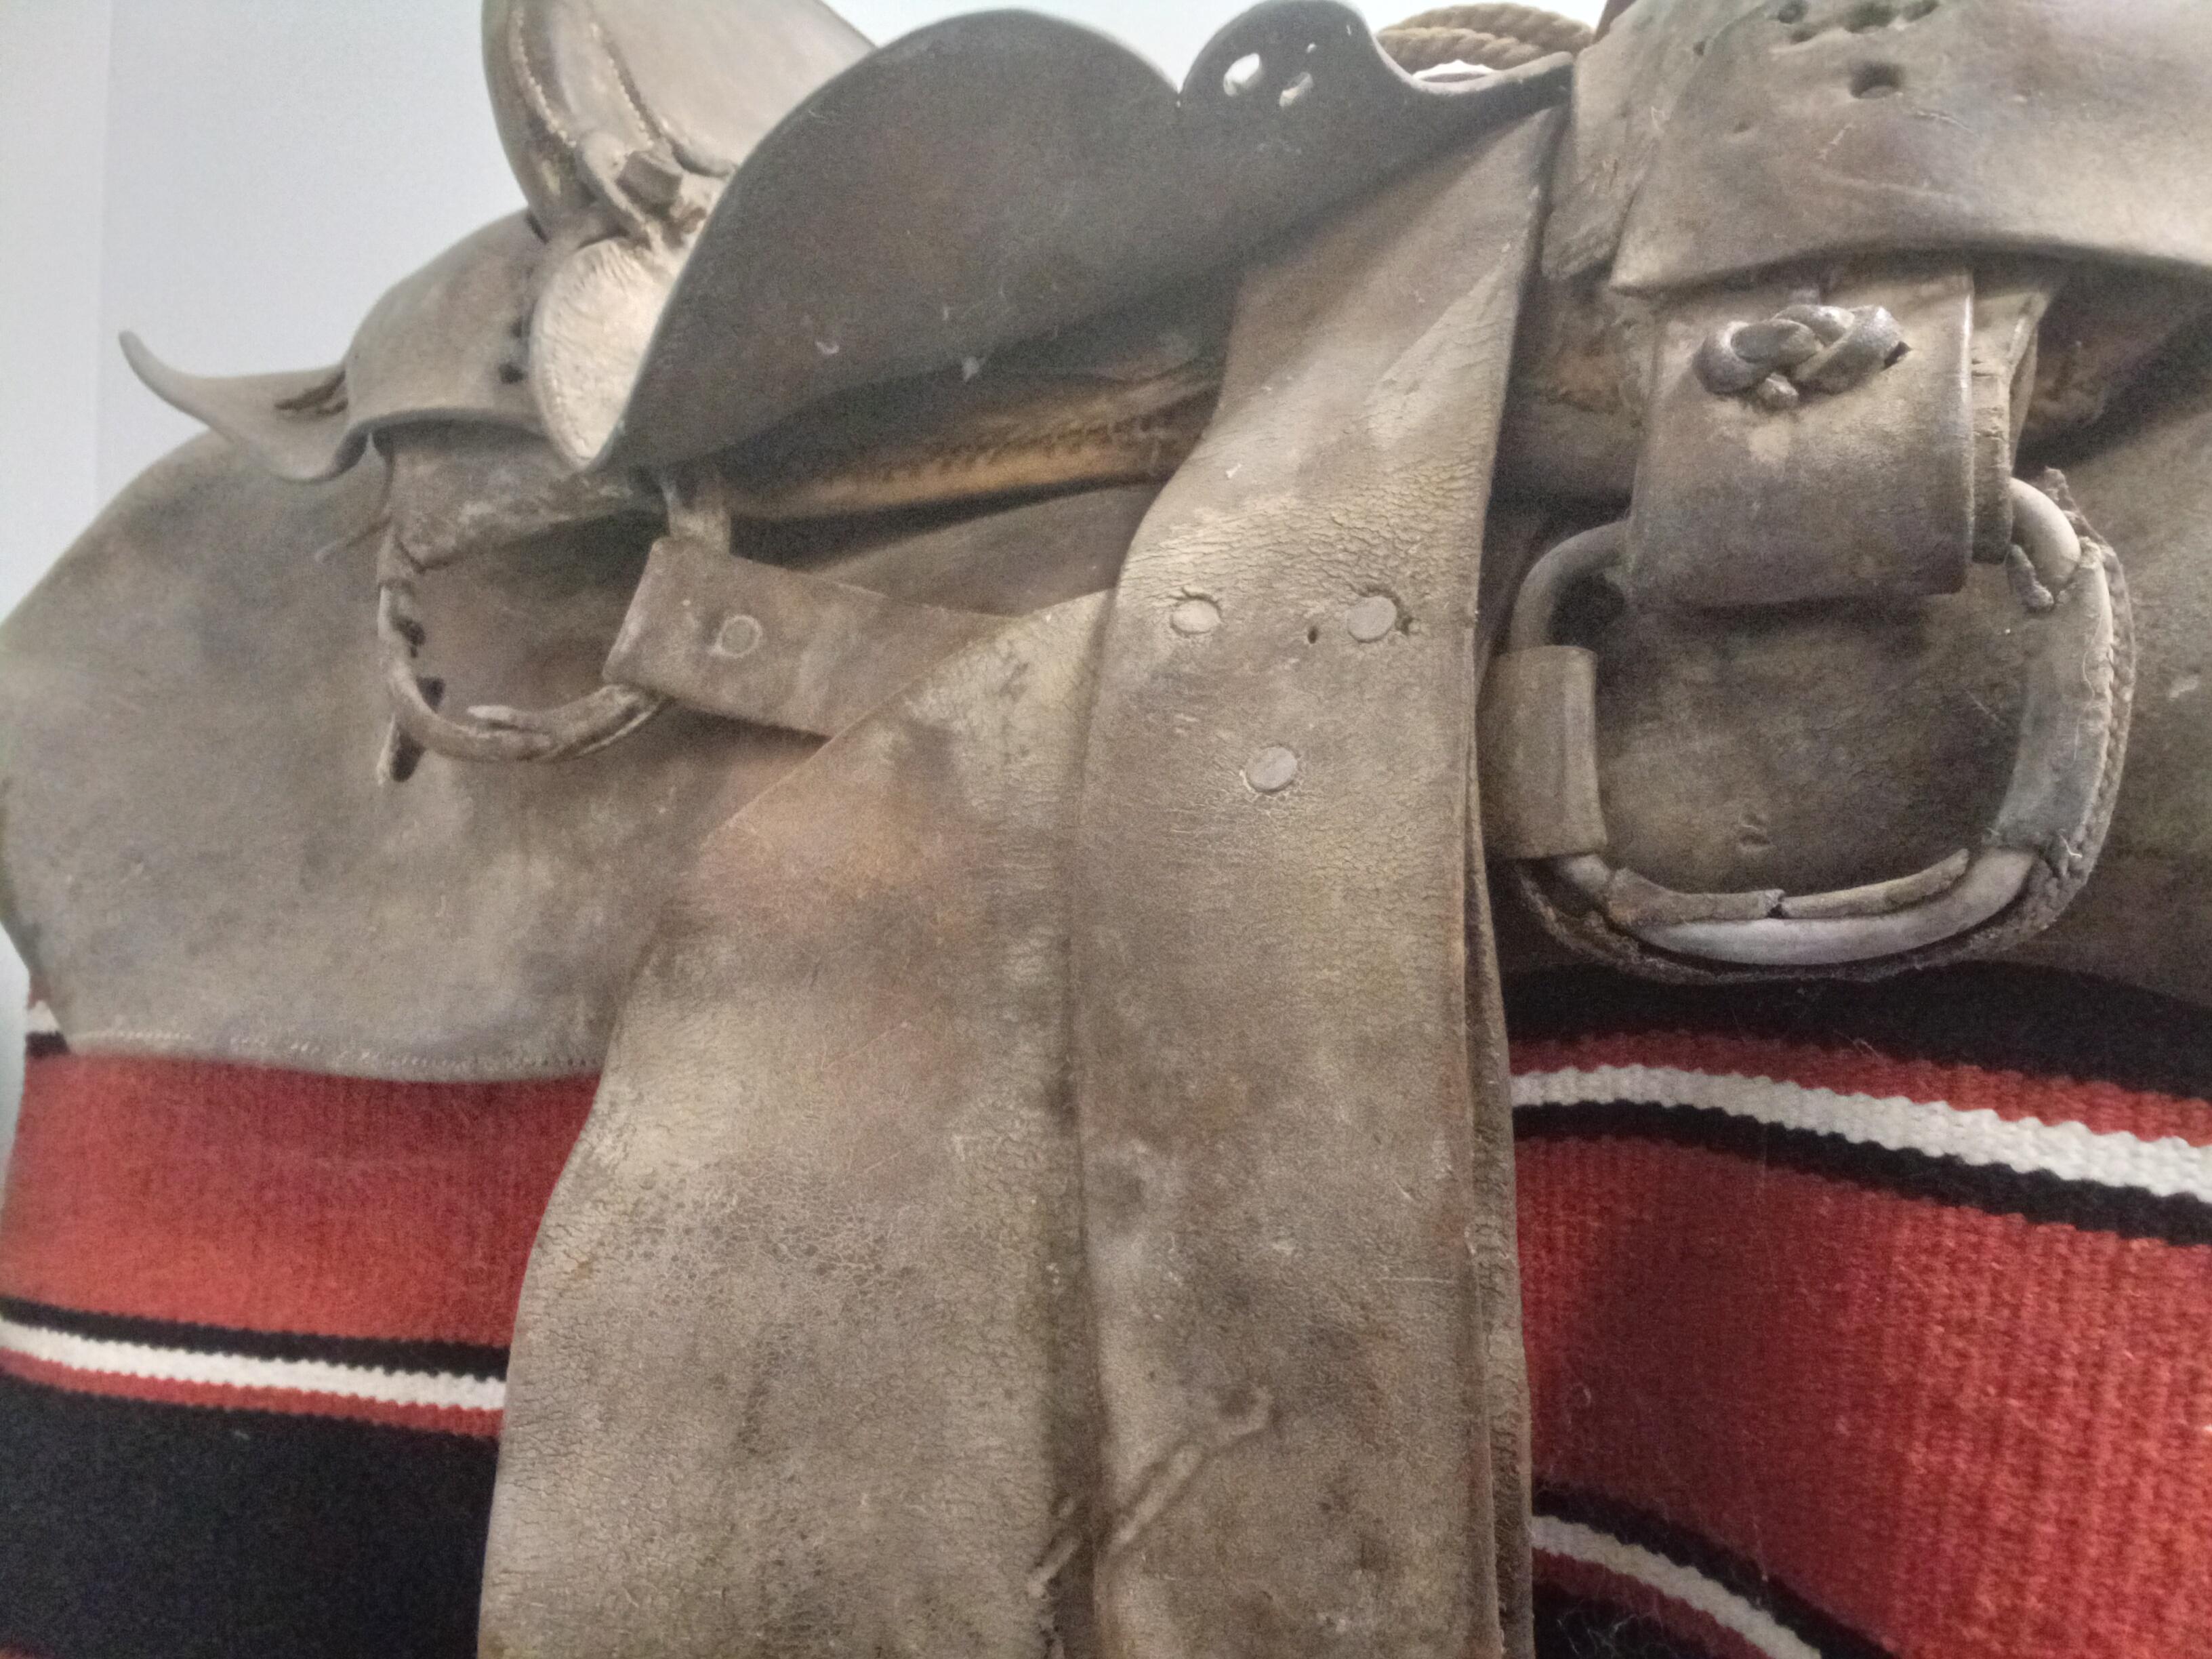
Just to give some perspective, these are some of the family saddles I'm taking inspiration from, and eventually want to repair, restore, or preserve. This saddle my grandfather had made in the 60's and was one of his general use working saddles. It's one that's still usable. This one was a general use saddle on grandpas ranch, though it was mainly used by my Dad in high school. He had a drop calf he raised on a bottle and eventually trained it to ride and do circus style tricks as a rodeo act, and from the pictures I'm 90% sure this was the saddle he used. This saddle was my great grandfathers and goes back to the 1880's. It's one we've decided to preserve and not restore, as every piece would need to be replaced, and the tree's shape wouldn't fit modern horses anyway. The wear and tear on it to me speak volumes of hard life in the west and give me gratitude for what I have, so I wouldn't want to lose that restoring it. As you can see, these are all standard double ring rigging, and I'm thinking I'll use their ring placement and proportions on the youth saddle in this thread. I also started a thread for a saddle my Dad started before he passed, and I hope to complete. Restoring a Porter Saddle I'll also start threads for each of these and some other saddles eventually.
-

Cobra NP4 Leather Skiving Machine - bad presser foot mechanism?
Tommy217xxx replied to NeilMott's topic in Leather Machinery
I agree. Fixing new stuff is insane. -
I'm still extremely early in this process, but wanted to start a thread for this project as it's technically already in motion. My Dad, Conrad "Connie" Naegle, was a saddle and harness maker and leatherworker for half his working life, before pivoting towards the machinery side of the industry where our family currently makes it's living. He had inherited several family heirloom saddles and had planned on restoring them eventually (of course life gets in the way). Half are currently in OK shape needing some basic work done, and the other half are far enough gone that they would need to be totally rebuilt. His health went downhill in later life (Alzheimer's and dementia) and he passed away in 2023. Being a working man his whole life, he didn't take well to having his body degrade, and his decline in memory and mental understanding of things we never really learned to cope with. I grew up partway between his leather shop and his machine shop, though my carrier has been on the machine side of things. I worked with him a bit on the saddles, but often found myself having to hold him back from getting in too deep. In his mind he knew what to do, but somewhere between there and his senses things would get scrambled and he rarely recognized it. The saying "He's forgotten more about it that you'll ever know," comes to mind, but in a sad and discouraging way. His original plan was to restore all of the saddles to be ridable again and I think this intent was a way to put his skills to work righting the wrongs of himself and past family members who had let the saddles fall into disrepair (the saddles were all ridable in his lifetime), but we quickly found that doing so would remove a lot of their history and authenticity, especially in the oldest saddles, so we decided to preserve some (such as my Great Grandfathers 1880's saddle) as they were, and make others ridable. This Porter saddle my Grandfather Buster Naegle got sometime in the 1930's in southeastern Arizona before he went off to school and then enlisted in the army during WW2. He went through boot camp down in Ft Bliss, but was transferred to Ft. Reno in Oklahoma where he trained horses and pack mules for the army. At some point after arriving there, there was some problems with their military saddles so with permission he had his family send him this Porter saddle to use and in some way it was a model of the kind of saddles they needed, and I think the guys in charge even ordered more from Porter to use at the fort (I'm hoping to eventually get in contact with someone at the fort to corroborate this, and I've already sent a message to the guys who have the old Porter card file website). I remember in the mid 90's my dad did some minor repairs to this saddle and rode it around our place in northern Idaho. As a kid I didn't make the connection, but my Grandfather died around this same time and I'm certain this saddle was particularly special to my Dad. When we started digging into it, the hope was to soap it up, replace the sheepskin, and do some other minor repairs, but the more it came apart, the more the pieces crumbled and stitches ripped through the leather. In retrospect, I think it should have been preserved as a static display, but at this point I think the can of worms is open, and my choices are to replace 90% of the leather, or call it a loss (not really seeing that as an option). The original leather is heavily worn, which would have been nice to preserve, but I think the alternative is to reproduce the pieces as closely as possible. I'm going to need to reproduce the Porter makers mark somehow. I think hand tooling it will leave too much room for error, so I'm hoping I can have one made without getting in any copywrite hot water. I had considered handing the project off to someone with more skill than mine, but I think these kind of projects always have a level of "artistic license" interpreting what details matter and which ones don't, and it's hard to turn that license over to someone else. Also, since my Dad was the family leatherworker and the saddle is a family heirloom, I think it best to keep the process in the family, even if it takes years to complete. My leatherworking skills have always been better on the technical process side, but I have a lot to learn of the craft and wisdom it takes to build a saddle. I'm starting by rebuilding some saddles that are less sentimental (thread about the first one *here*), but my end goal is to finish rebuilding this saddle (and others I'll post about later). Fortunately, all the pieces are there and give good patterns to follow. Even the tooling I can already see how to replicate. Thankfully it's simple old-school boarders and nothing too artistic, which is how I like saddles personally. Starting with the tree, I don't think I need to remove every bit of leather. I think the floor and other reinforcing pieces will continue to work. There are a couple of places that the wood under the rawhide has degraded, and I'm considering using some modern epoxy filler to fix those points (more on that later). Part of the challenge I think is that I want the saddle to be 100% original, even though so much of it has to be replaced. I can make a new seat and skirts that look exactly like the old ones, but then getting them colored right and formed together right can be a challenge. I don't want to artificially wear or weather anything other than dying the leather to match, but I also don't want the new parts to stand out against the old. Like I said, I'm starting by practicing on some other saddles, but with this one I'm going to take my time. One of my favorite mantras is to "Avoid permanent solutions to temporary problems." History deserves preservation, and I think keeping things functional as they were originally intended to be used is always the best approach.


.thumb.jpg.be873fe3cafed424774b187cfb1a470f.jpg)