

All Activity
- Past hour
-
 I’m sorry to hear about your medical issues. I’m new to the craft and need tools and hides so post it up sir and I’d be happy to help.
 -
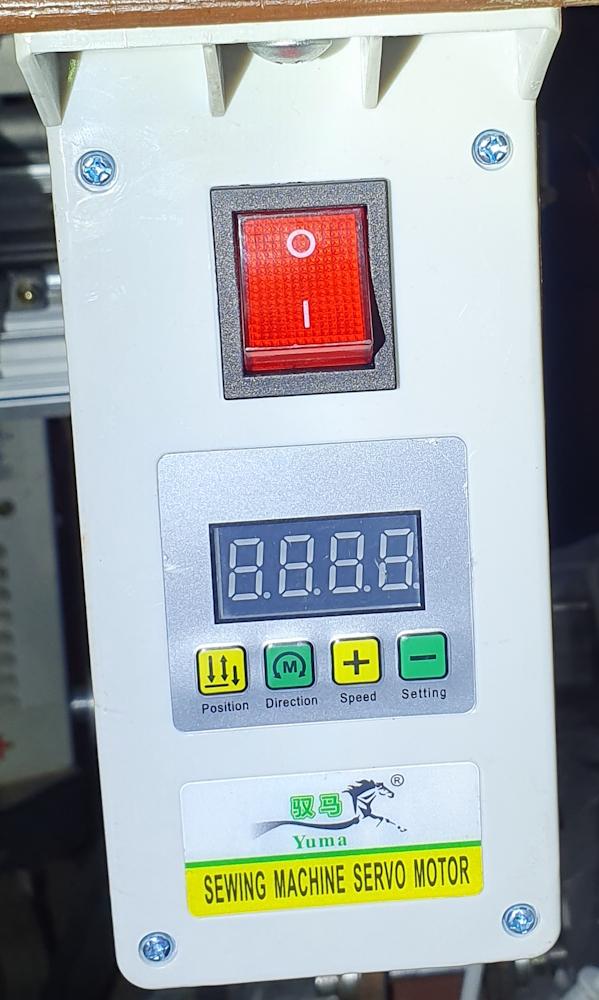
 What happens when you hold down the needle positioner button (far left) for 3 seconds, then release?
 - Yesterday
-
 Spent five days in hospital up to almost Christmas. Too many things going on to elaborate at this time. I desperately need to get rid of lots of leather tools etc, I have including hides. Going to hang onto my electric sewing machines. I have quite a few Kangaroo hides of different colors. Will try to list them as I can get them suitable for photos. It has been a long journey for me since 1953. It has come time to make it possible for someone else to enjoy what I have been blessed to obtain. Will try to make the items attractive in price without giving away the house. Ferg
 -
 Thanks Toxo, initially I had no idea what you were telling me but after seeing this thread and Uwe's reply (post No5) I now understand why this may happen. It's a safety feature of some controllers where they only allow a limited number of turns of the servo motor when the foot pedal is released. The controller is expecting to see the needle positioner signal "real soon" after the pedal is released and shuts the machine down if too many many revolutions pass without seeing this signal. Of course with the pulley reduction the motor may spin multiples of times before needle positioner signal is seen. With my servo system being el-cheapo it may work in my favour if such safety features have not been implemented LOL. Keith
 -
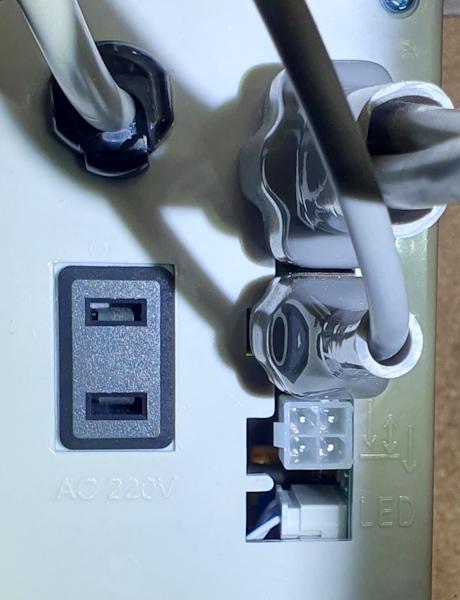
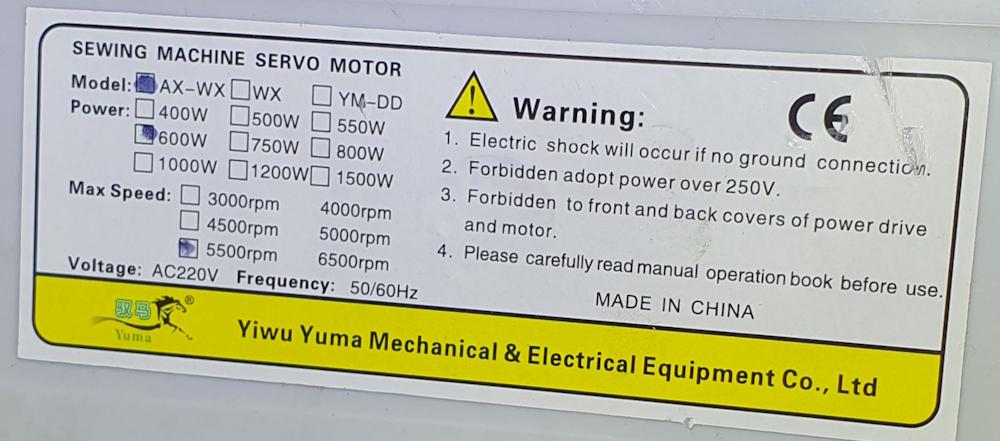
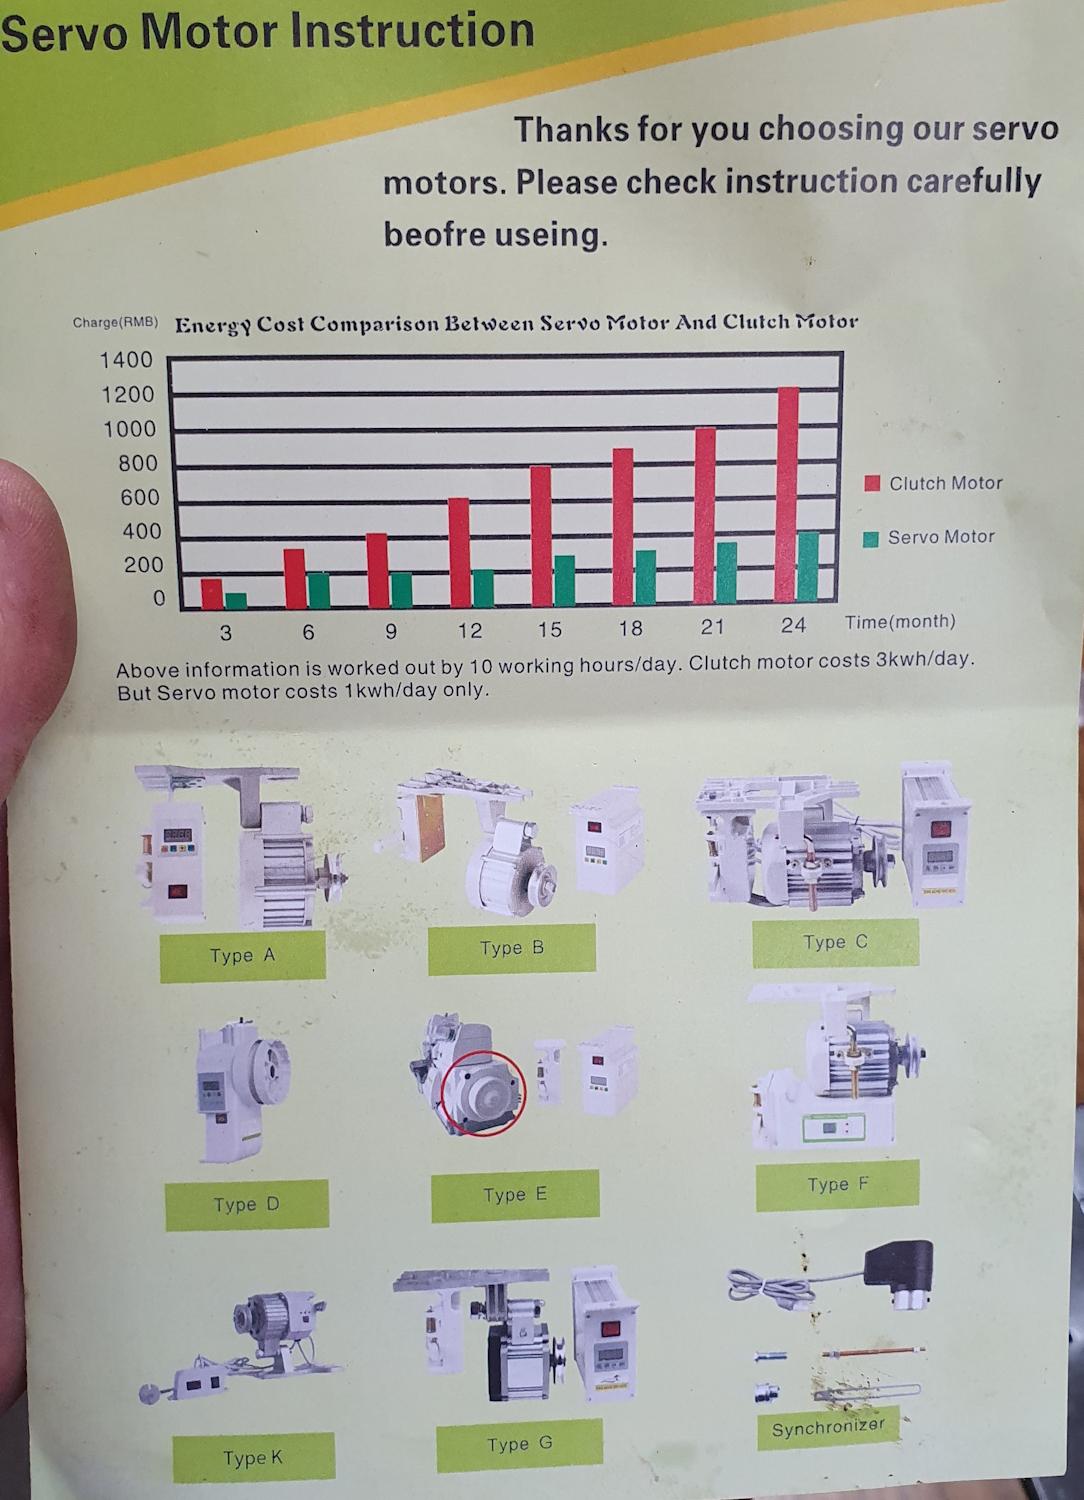
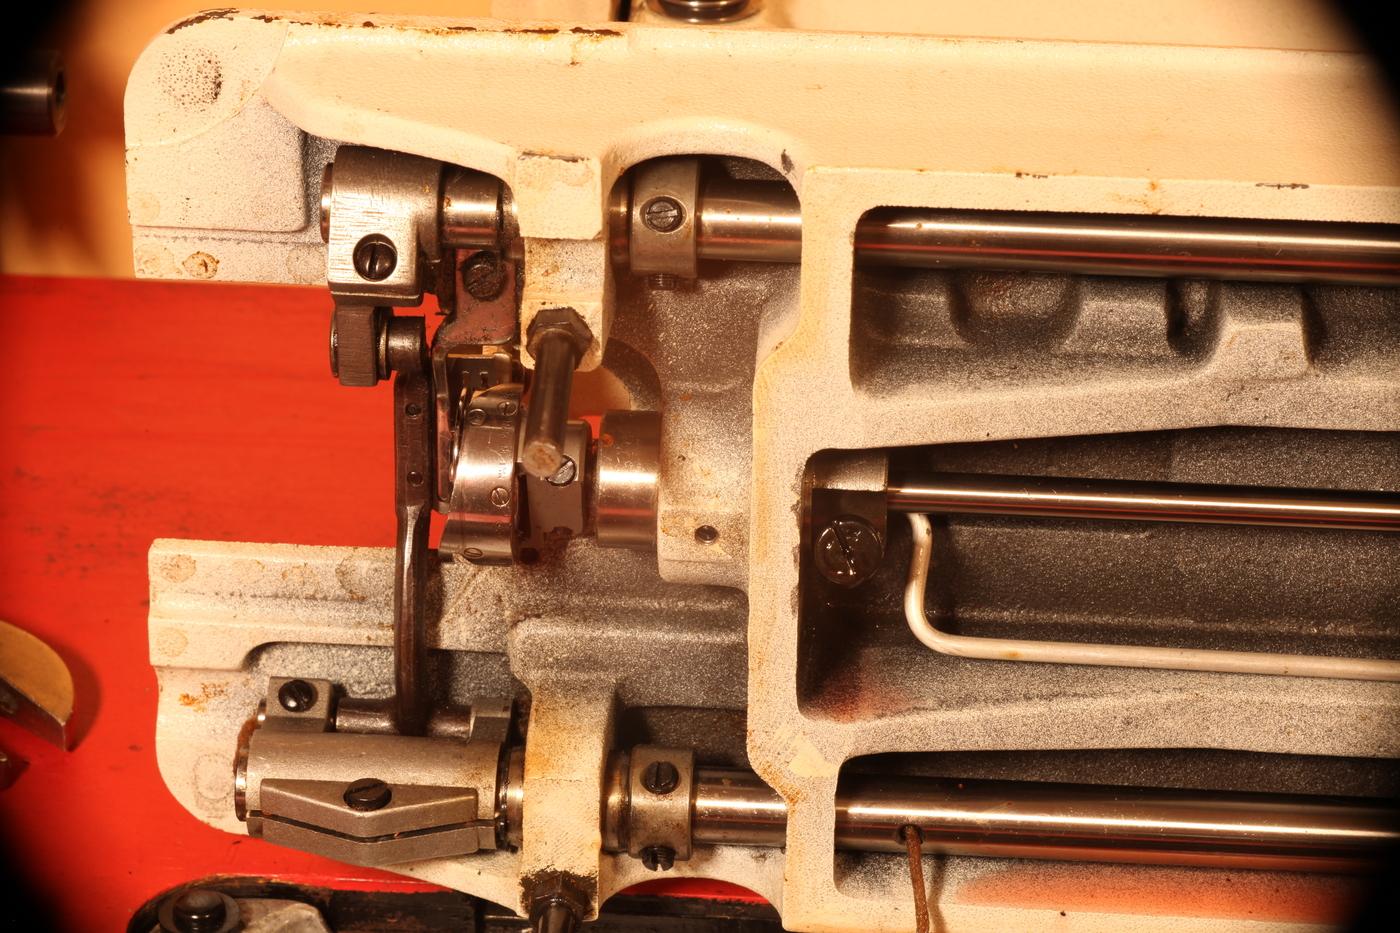
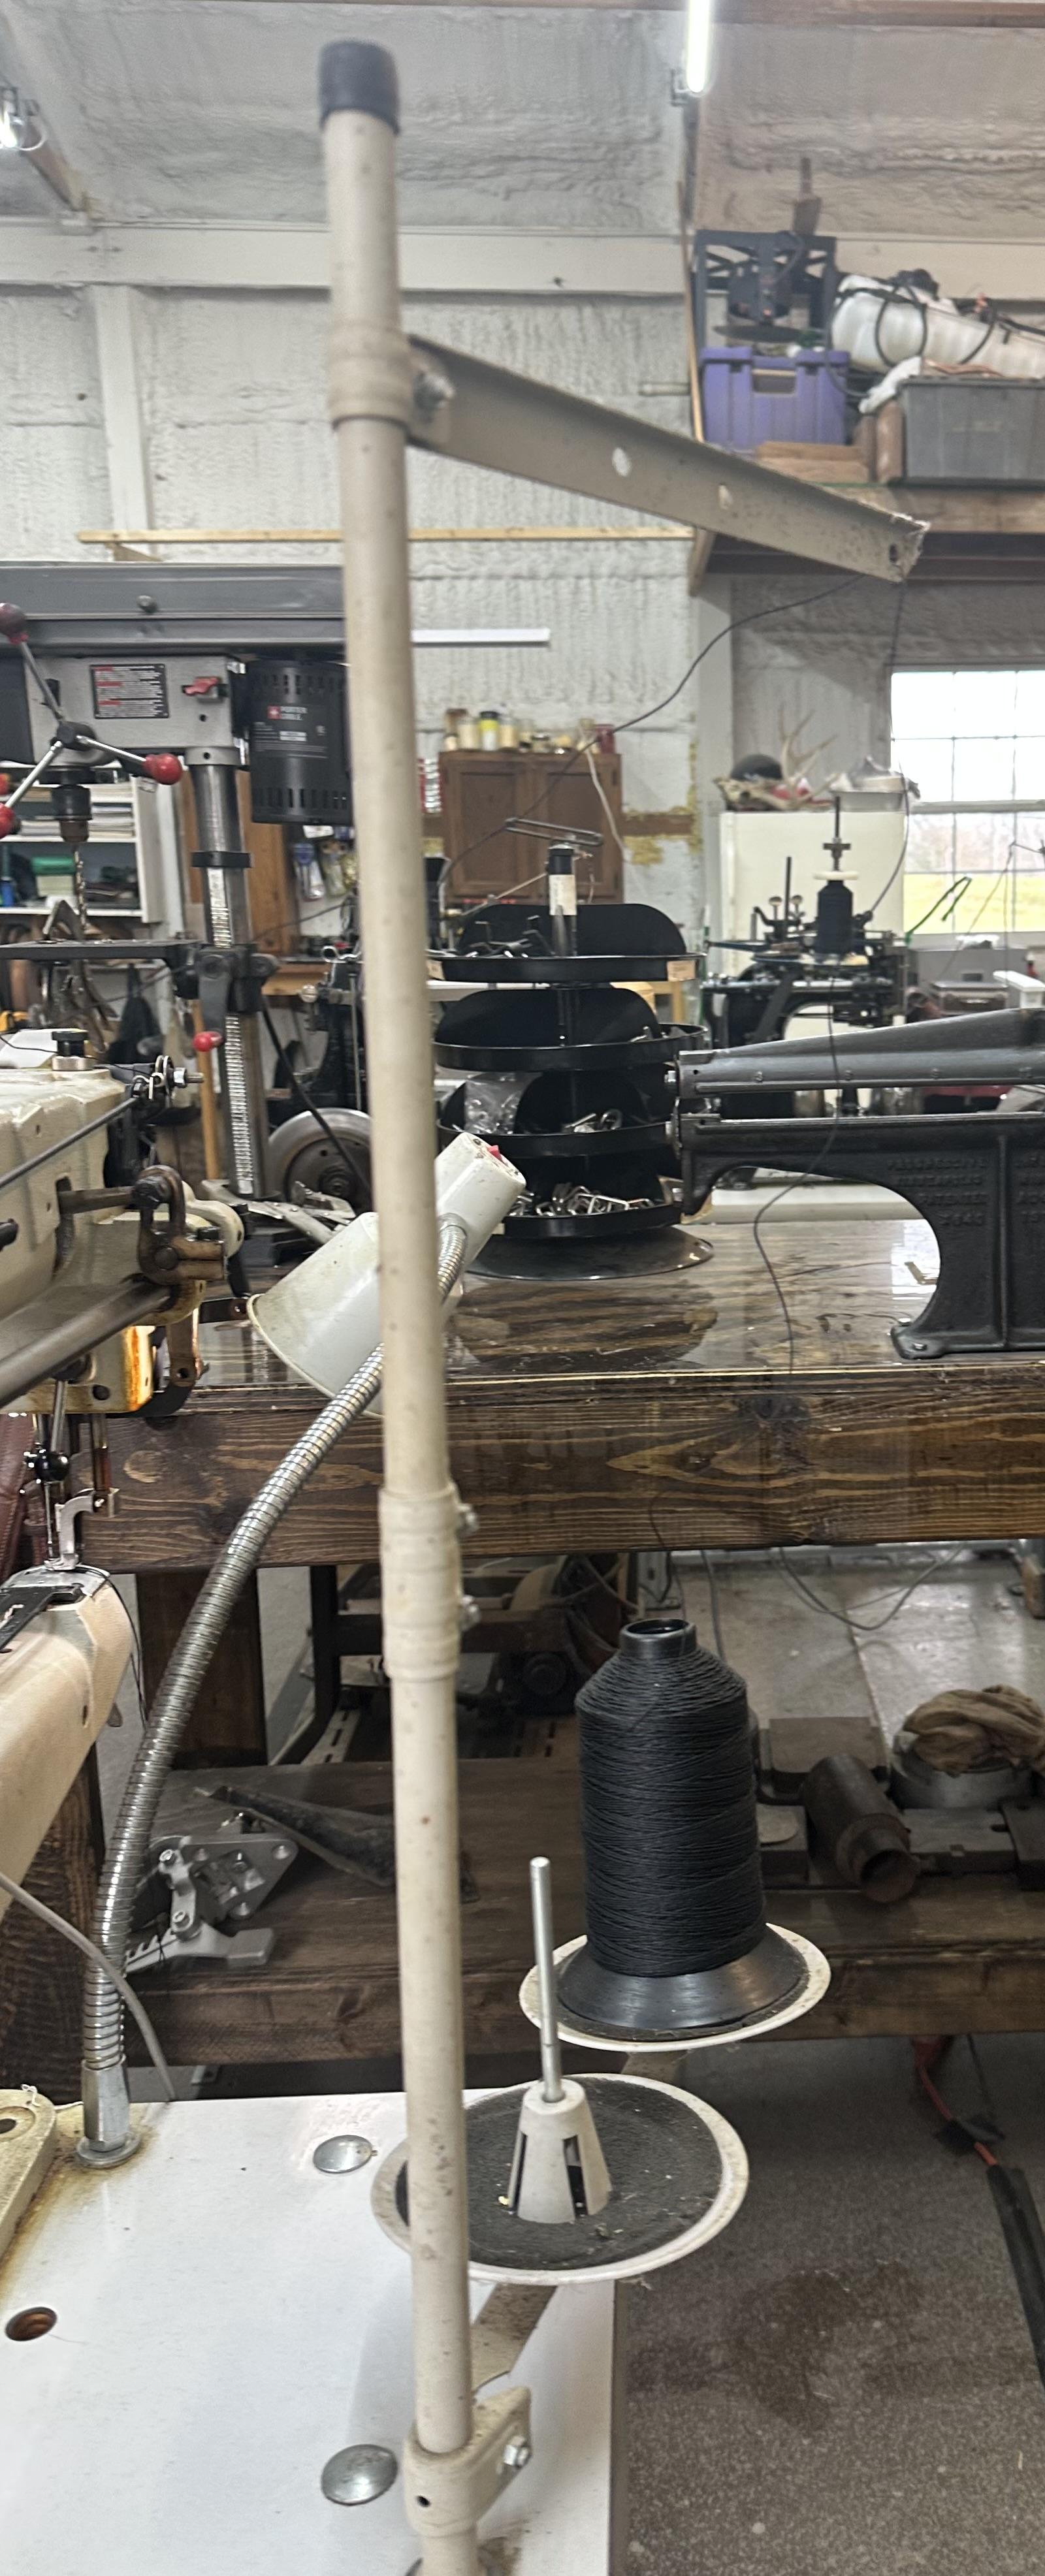
Thanks very much guys. I found pinouts for another servo brand on this thread so I checked mine and I got +5v at pin 2 of the needle positioner connector (referenced to pin 1), so it appears this may be a standard for these types of drive. I've sent a message to the Ebay seller telling them I cannot access the needle positioner settings so I'm currently at the mercy of their service and knowledge of the product they sell. According to the pinout on the above referenced thread if I can access the settings I may be able to test the positioner operation with a simple switch to inject signals onto pins 3 and 4. I've attached a few photos of the drive and the instructions. Keith
-
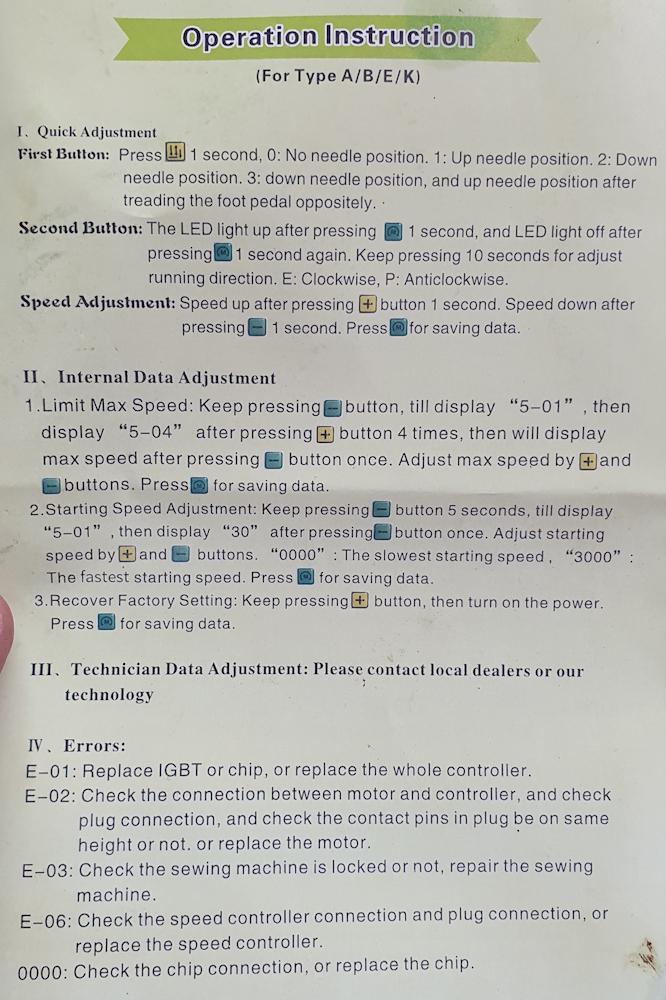
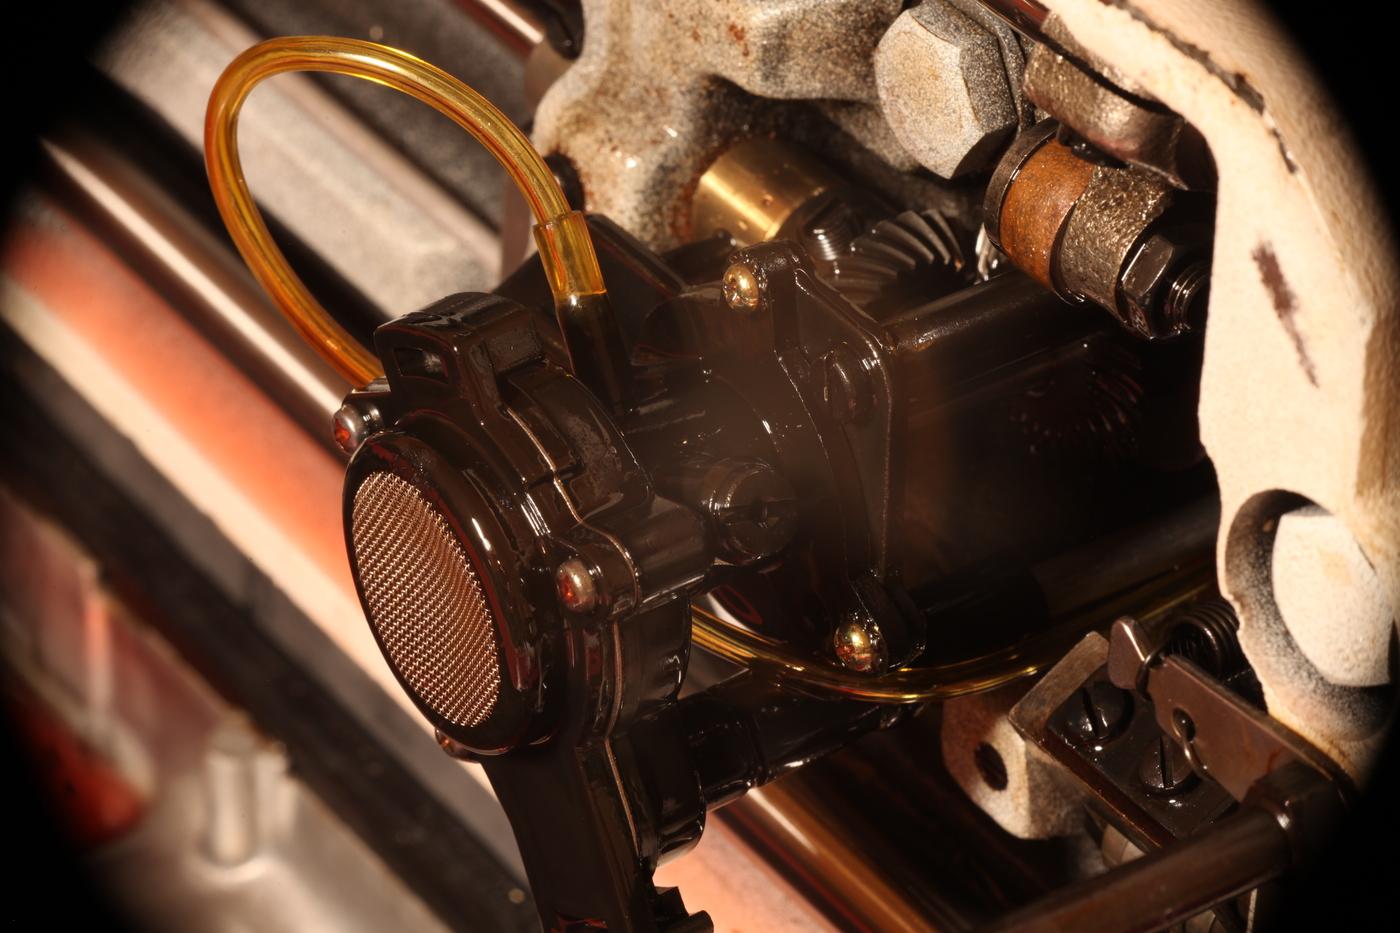
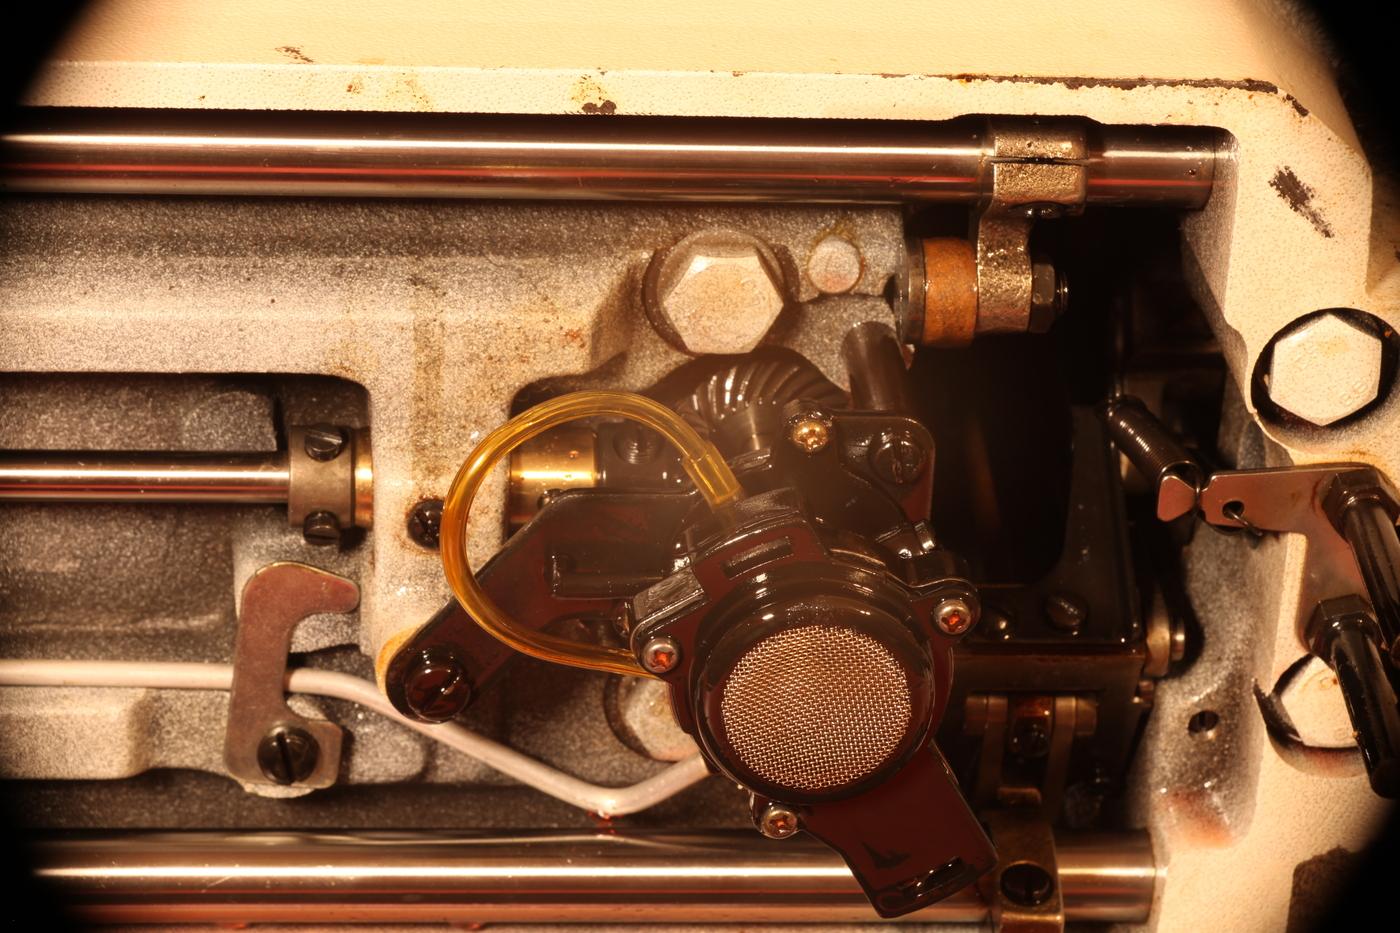
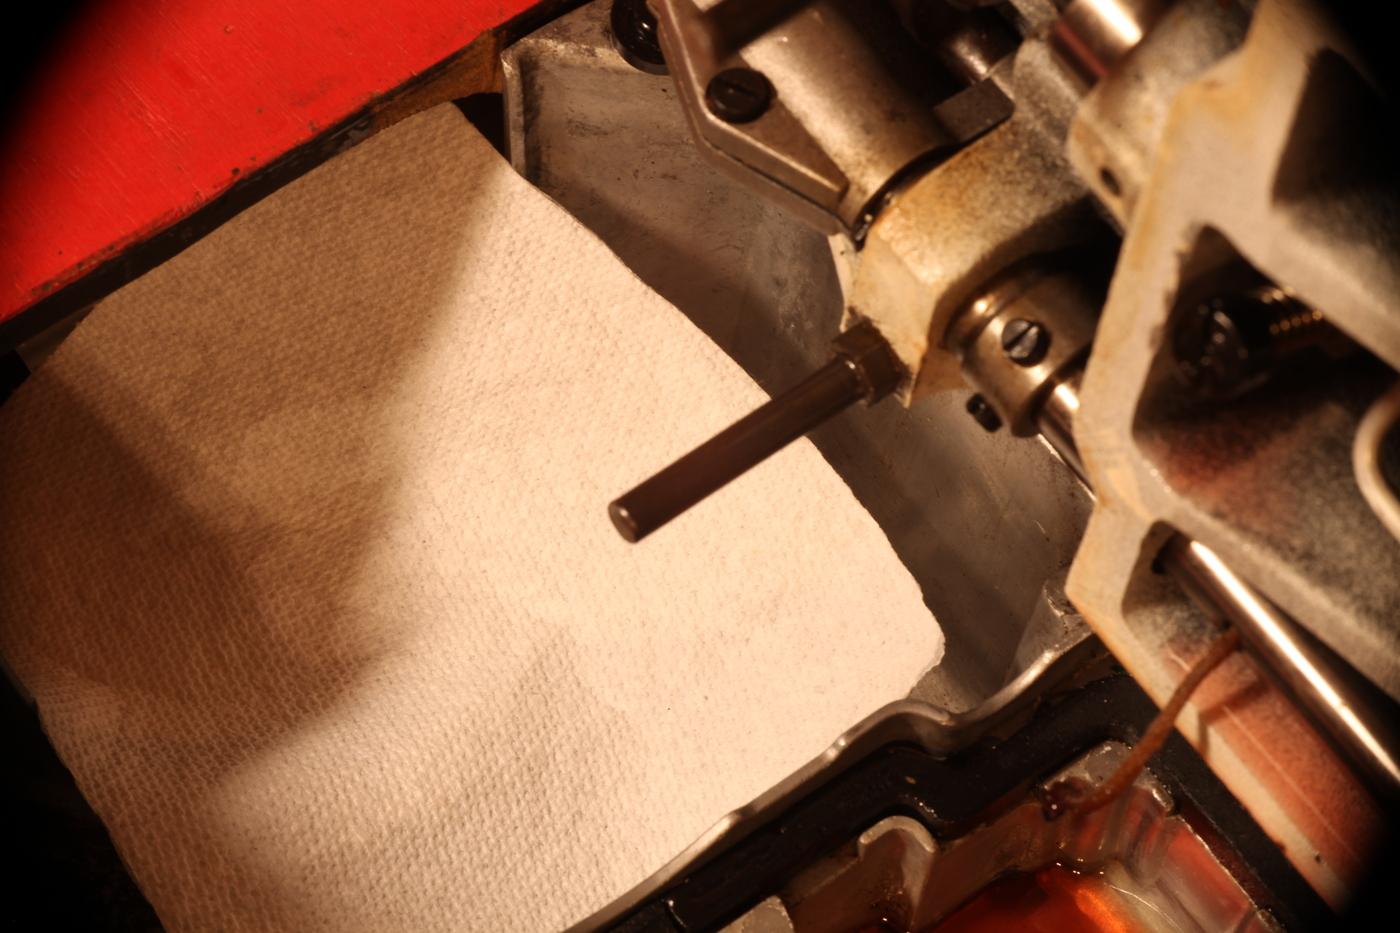
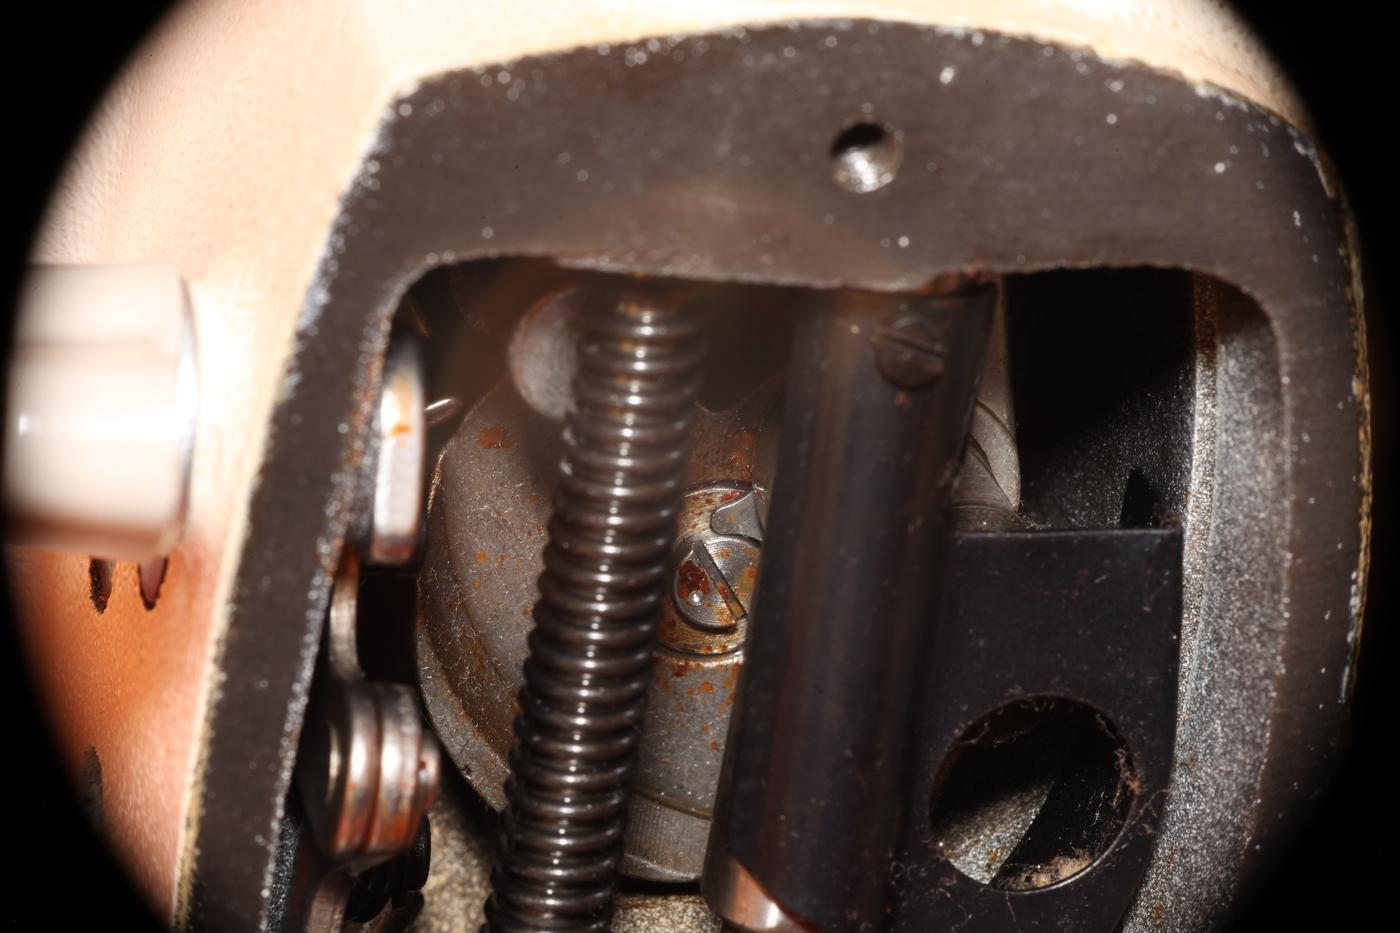
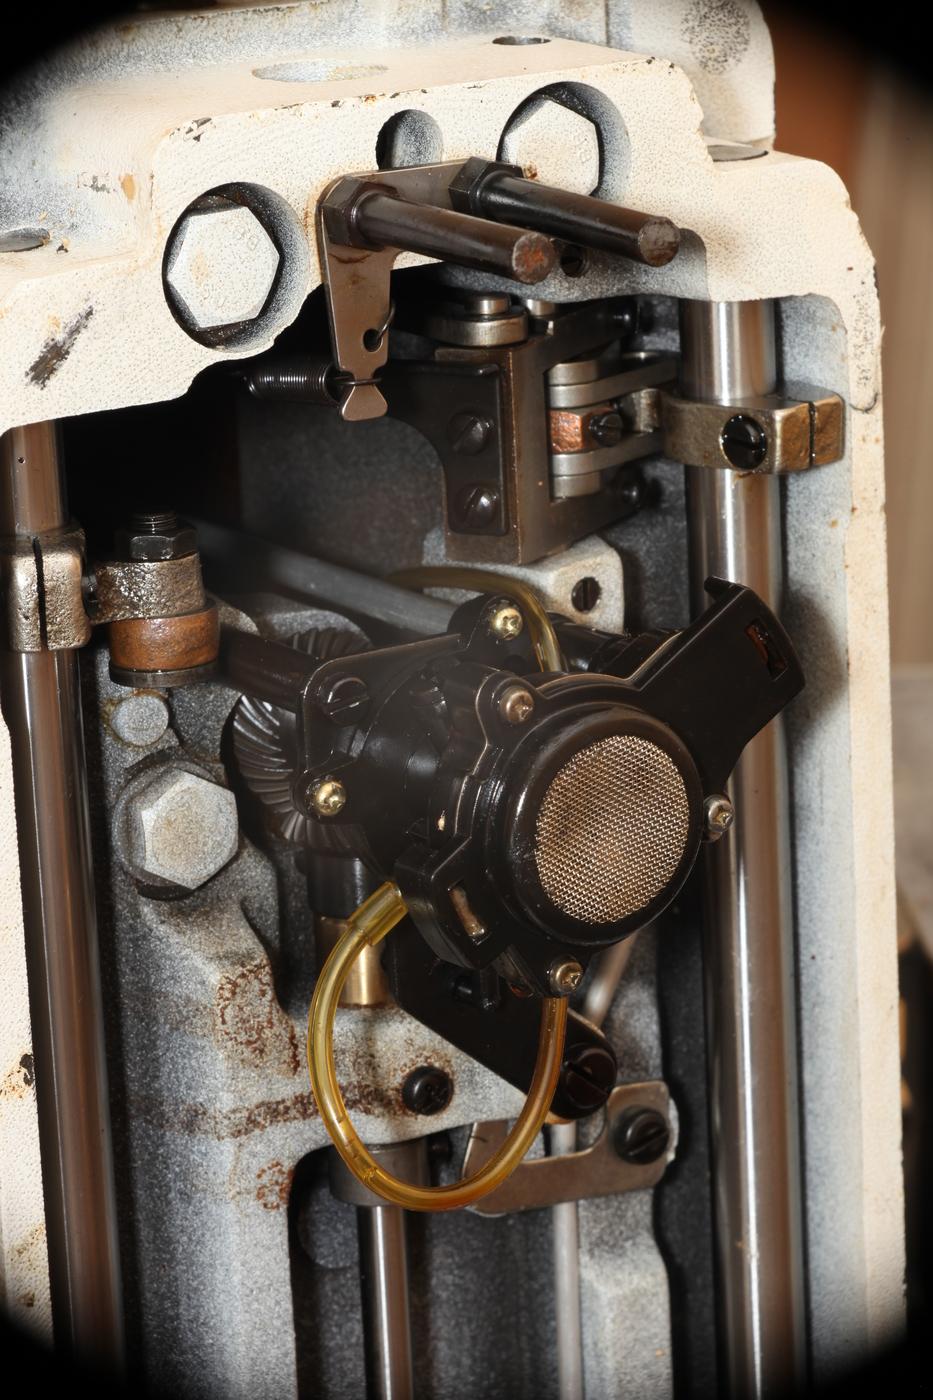
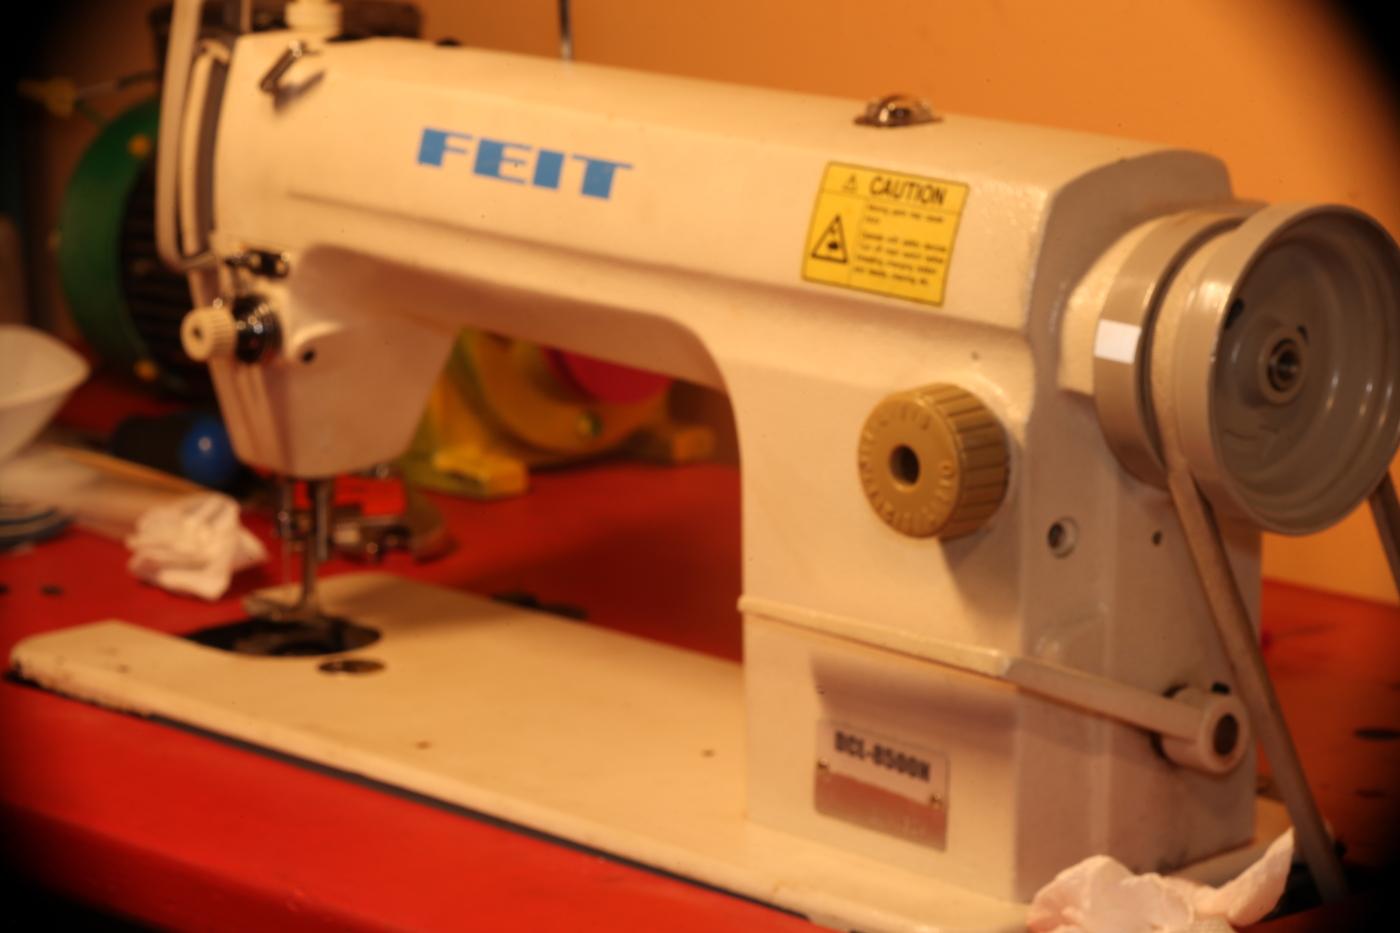
How to unclog the oil system on this cloned Juki DDL-8700? This is the first pumped sewing machine I've worked on. Machine has been sitting for about five years. Actual model number is FEIT DCL-8500N. Pump The oil pump appears intact. At low speed (200 rpm) it appeared to not pump at all, so I disconnected the vertical output pipe at the top and kept increasing the speed until around 1700rpm oil started spewing out the top of the vertical pipe. So there's at least oil now on the upper hook bevel gears. Splash Test But there's another tube that feeds the hook, and I'm not seeing any evidence of oil near the hook yet. In this video the man does a splash test with a paper towel to check how much oil is reaching the hook: https://www.youtube.com/watch?v=hQCUZs1-vUY&t=163s Here is my paper towel, still dry: Valves I have opened the valve that regulates oil to the hook: and also opened the valve that regulates the oil to the needle bar crank assembly: but still not seeing any on the hook or on the needle bar crank assembly. Tthe user manual says that when machine is new or anytime after it's been sitting idle for a long while to run the machine at 3000rpm for a period of 10 minutes. So far I've run the head unit a couple minutes at 2400rpm (checked with tach). I want to see evidence of oil flowing before I run it enough that it really needs oil, if you catch my 22. Filter? Earlier in this same video the man cleans out the filter in the pipe behind the hook: https://www.youtube.com/watch?v=hQCUZs1-vUY&t=59s so perhaps that will be my next move. As for the needle bar crank, I'm not sure sure what to disassemble to clear the way. Water Worth noting perhaps that I did find evidence of water in this machine. The oil pan drain plug is rusted in place and I did not manage to free it. Not even with mild application of a kitchen torch, a few hours soaking in diesel, and an impact driver. 🤷♀️ Also the old oil looked milky. And in part of the presser bar I found a couple drops of water concealed within some drops of oil. But I don't really expect water in the past to clog the oil pathways Manual I'm using this as a manual: https://www.juki.co.jp/industrial_j/download_j/manual_j/ddl8700/menu/ddl8700/pdf/instruction_eg.pdf
-

Cowboy Outlaw question on accessory compatibility
dikman replied to bigsig11010's topic in Leather Sewing Machines
A couple of washers under the edge guide to level it maybe? -
@KyLeatherMan, I moved your post to our Marketplace area. Please review the rules, linked here and be sure you're in compliance. For sure we need a price and location and you need to address your willingness to ship. Thanks for listing it here and good luck with your sale!
-
Got a picture of one??? May God bless, Dwight
-
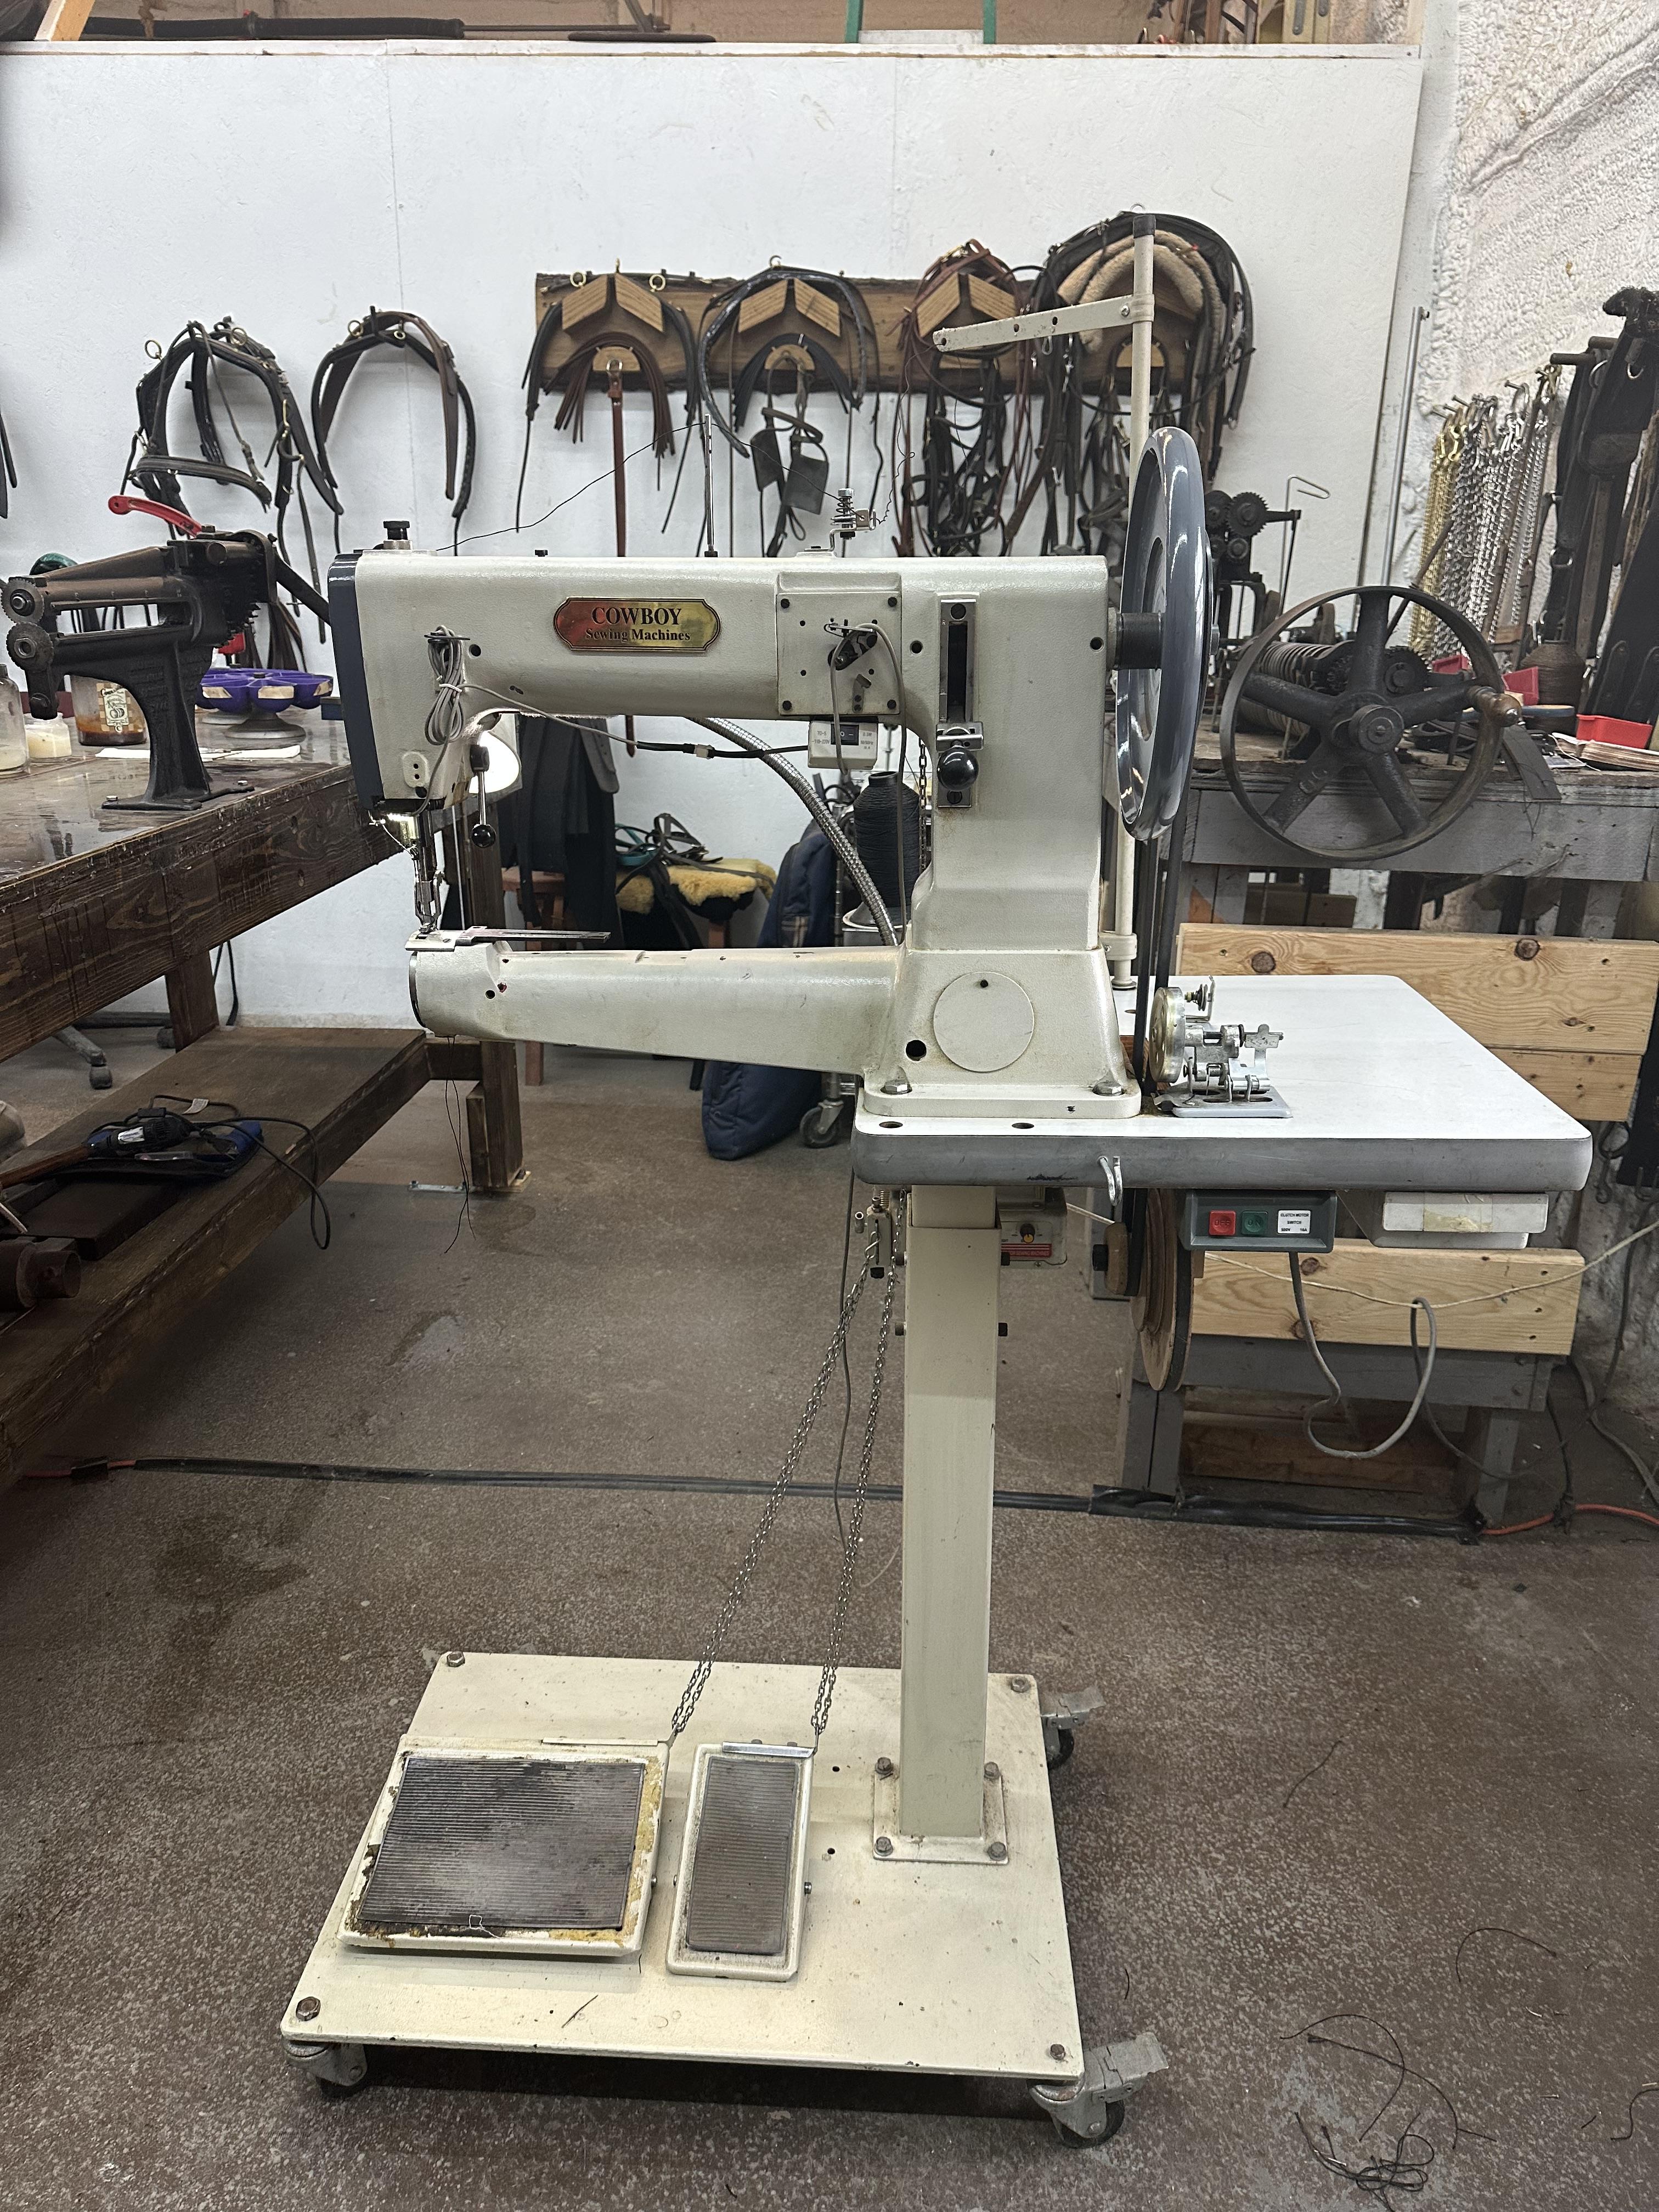
Used Cowboy leather sewing machine has been taken excellent care of! Reason for selling needed a bigger machine for specific use. Please contact me at (502) 295-6683 for more details. Can send video or FaceTime how it works.

-
Mighty nice looking. Good hand stitching. The handle looks good, too. It looks to be rigid enough to not fold when you have a heavy load. All around good work.
-

Cowboy Outlaw question on accessory compatibility
Constabulary replied to bigsig11010's topic in Leather Sewing Machines
or you make a flat bed attachment where you can screw on an edge guide or modify yours. I once made this FBA for my Singer 45D91 but on mine I cannot use the 441 roller edge guide but the OEM Singer 45K edge guide that mounts on the flat bed steel plate insert. Note the 3 holes in line. Thats where I can mount guides and accessories. -
Cowboy Outlaw question on accessory compatibility
Constabulary replied to bigsig11010's topic in Leather Sewing Machines
The guide appears to be for the JUKI 441 + clones. So w/o knowing the CB Outlaw but knowing Singer 45K´s, Adler 5 / 105 and so forth I´d say either flat bed or edge guide. A suspended flip up edge guide probably is the better option when working with a flat bed. maybe something like this https://de.aliexpress.com/item/1005008728390412 or check this thread: -
 If they all have the same connector, then I would say they are probably interchangeable. However, this is also similar to saying are all digital servo motors the same. While the positioner is really nothing more than a switch to mark where the needle is in the up and down position, there is the issue of quality - much like servo motors. I recently purchased a Kinedyne motor and positioner, the positioner when compare to a less expensive model actually feels better. When opened up to dial it in for my machine, it's obvious the quality is much better. I should also say that there are separate dials that are adjusted for the needle positions and an optical sensor for those wheels, whereas with the cheaper model, you rotate the hub that connects to the handwheel to dial in the needle positions. Just my experience with a couple of them .....
 -
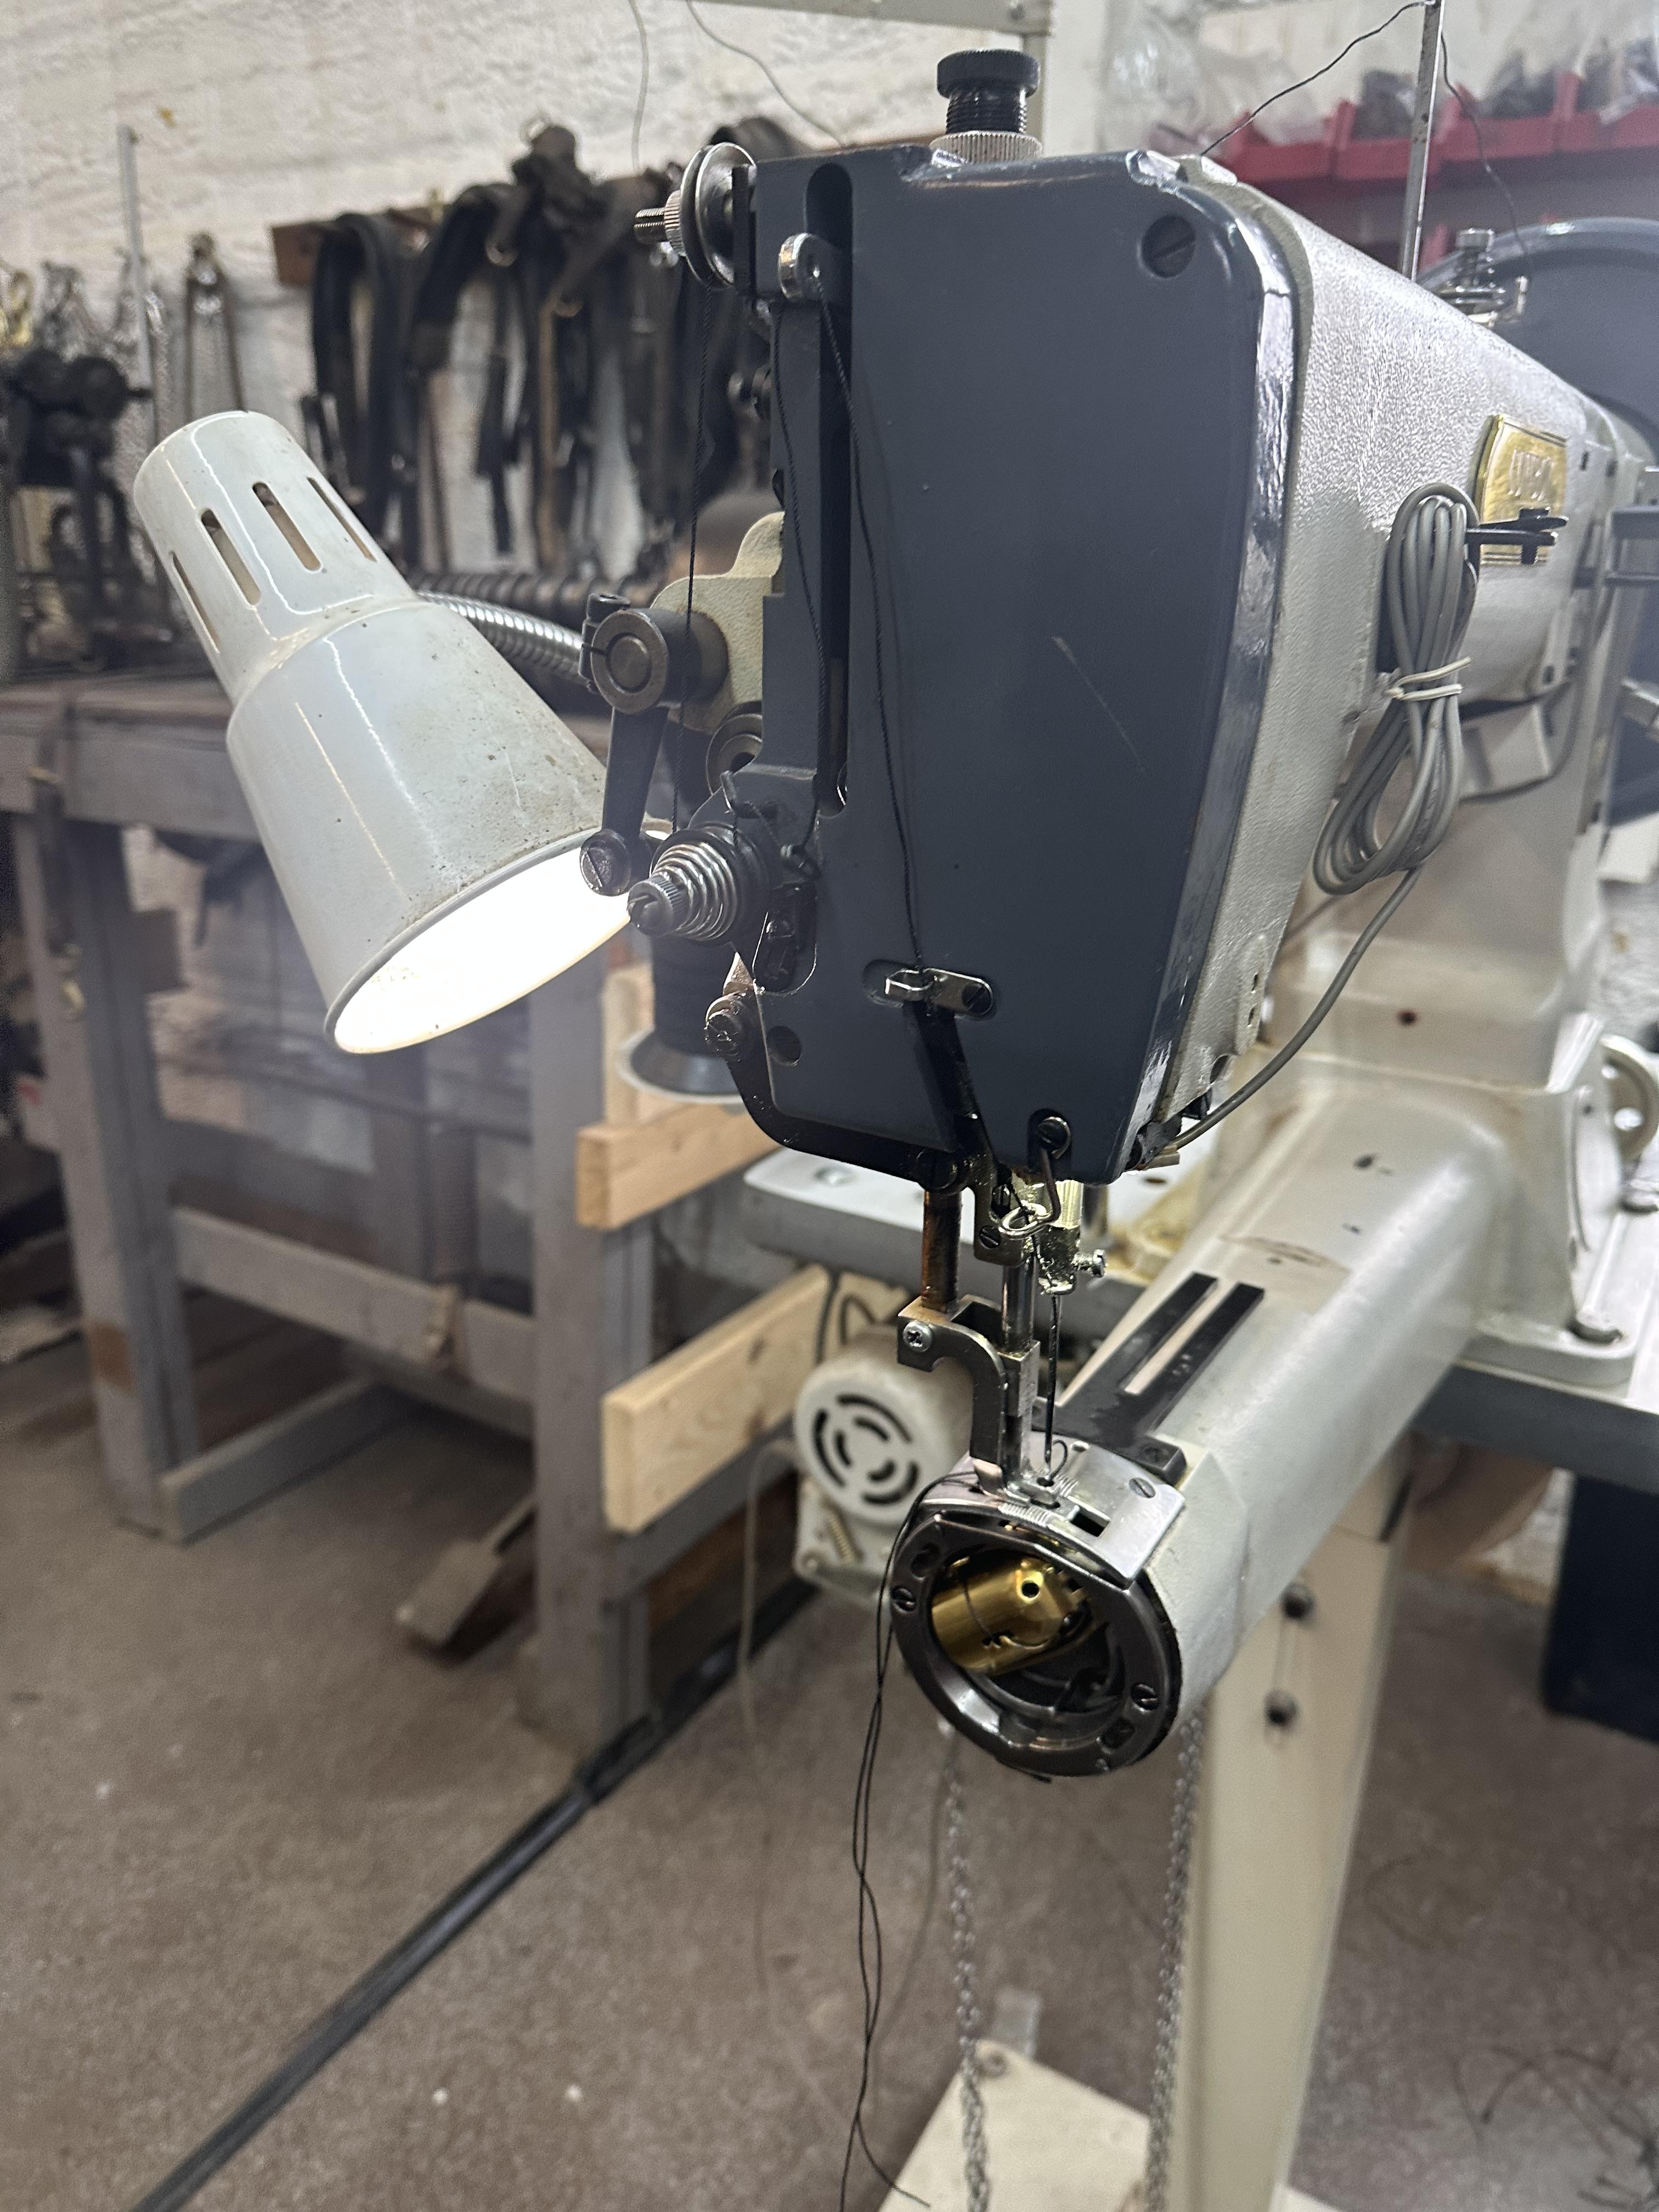
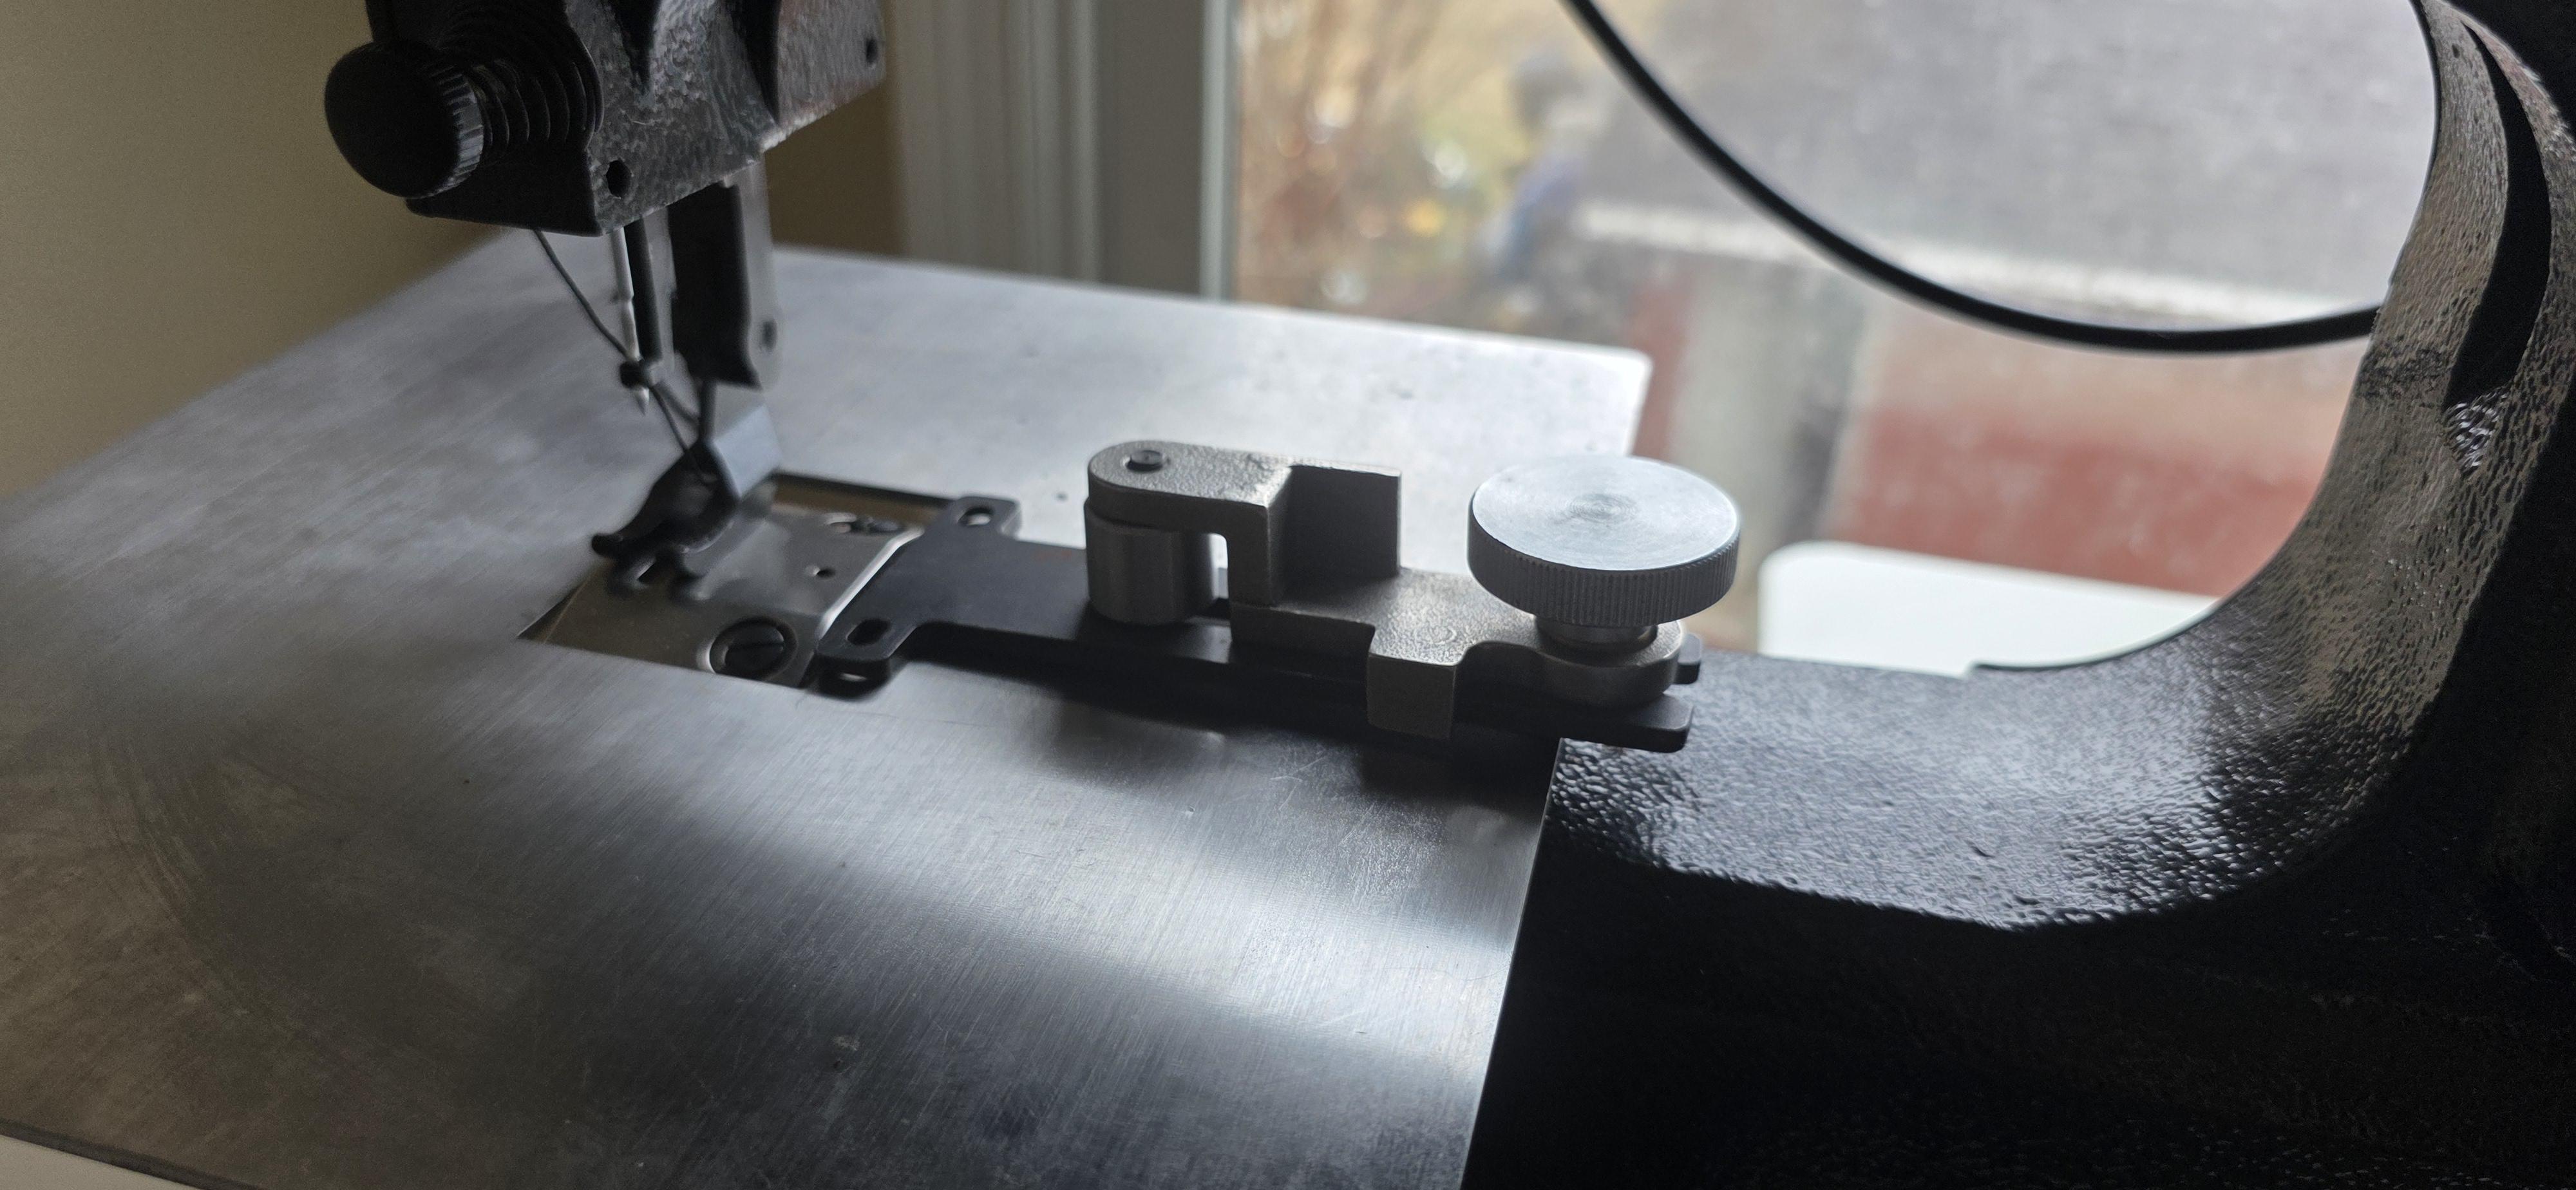
 I have the steel flat plate on my Cowboy Outlaw. I also have the edge guide. When the flat bed is installed it makes the edge guide tilted to one side. My question then is are these two supposed to work together or are they mutually exclusive? Any help and guidance greatly appreciated. Pics attached i hope
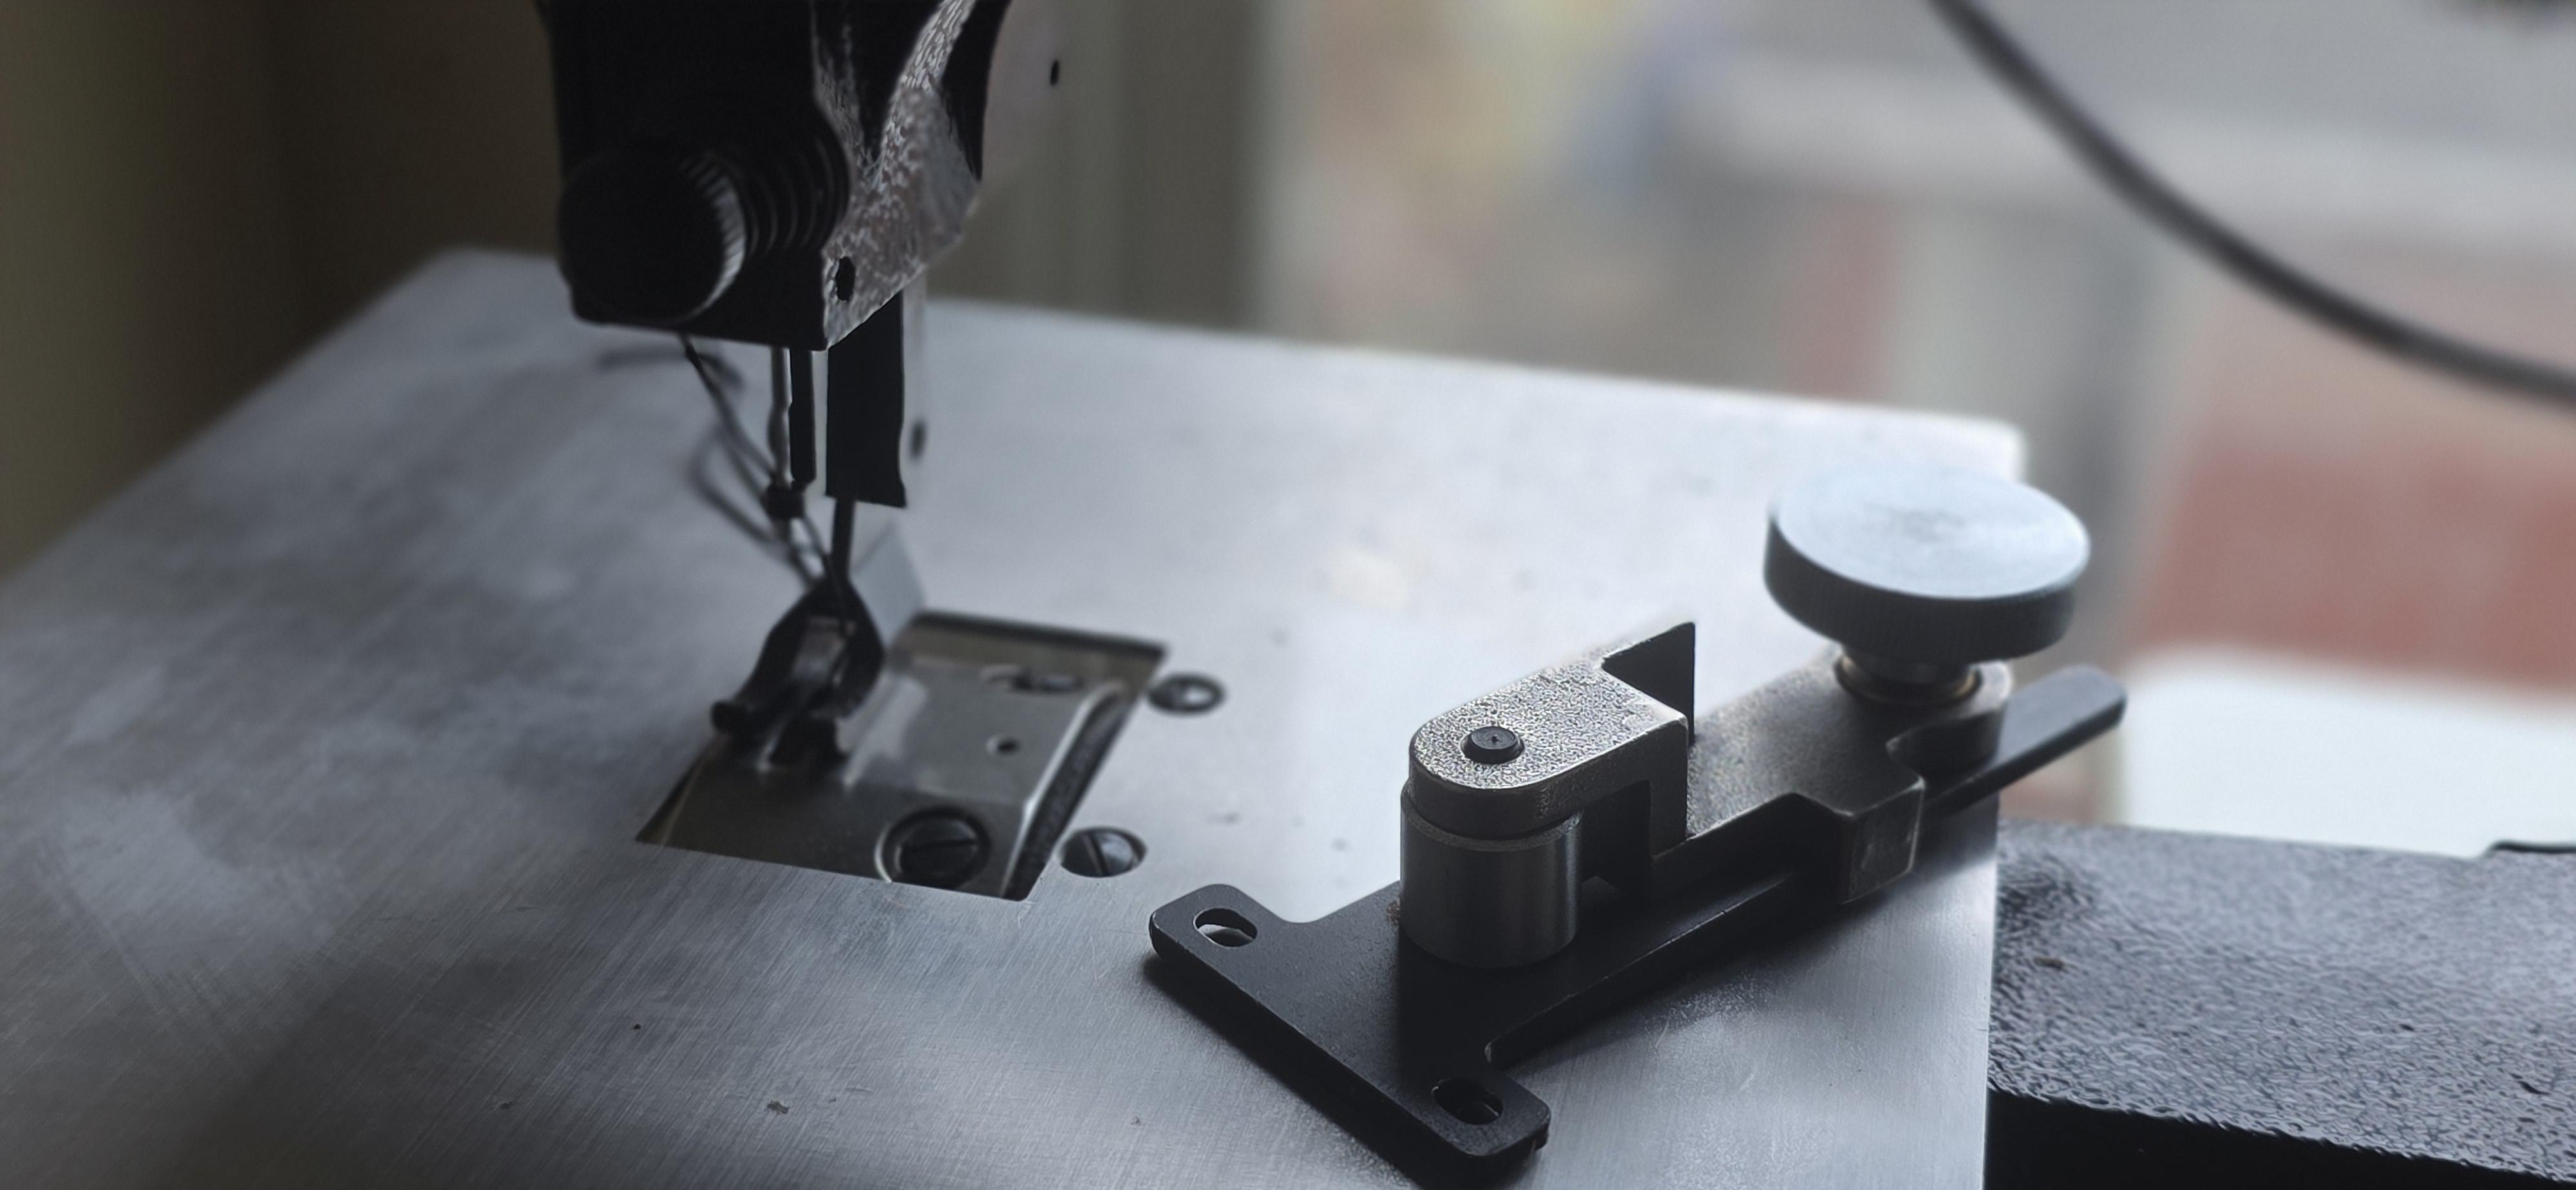
-

To sand the edges or not to sand
Dwight replied to ThisIsMyFirstRodeo's topic in Leatherwork Conversation
I've used 120 for 20+ years . . . never had one complaint May God bless, Dwight -
I'm not sure. I've seen two different sized 4-pin connectors used for needle positioners. Have not tried mixing and matching.
-
No, this is not typical from the 3-4 models I've used. Are you able to view the other settings? Can you upload the user manual that came with the motors? Is there a 4-pin connector on the back of the controller to accept a needle positioner?
-
 KyLeatherMan joined the community
 -
 Very well written. I think you might have made a small mistake in: A breastplate on a horse prevents rearward movement. Looking forward to seeing how you are doing the actual measurement. Good luck with the Internship in January Brgds Jonas
 -

Are needle positioners for brushless servo motor drives all the same
toxo replied to beefy's topic in Leather Sewing Machines
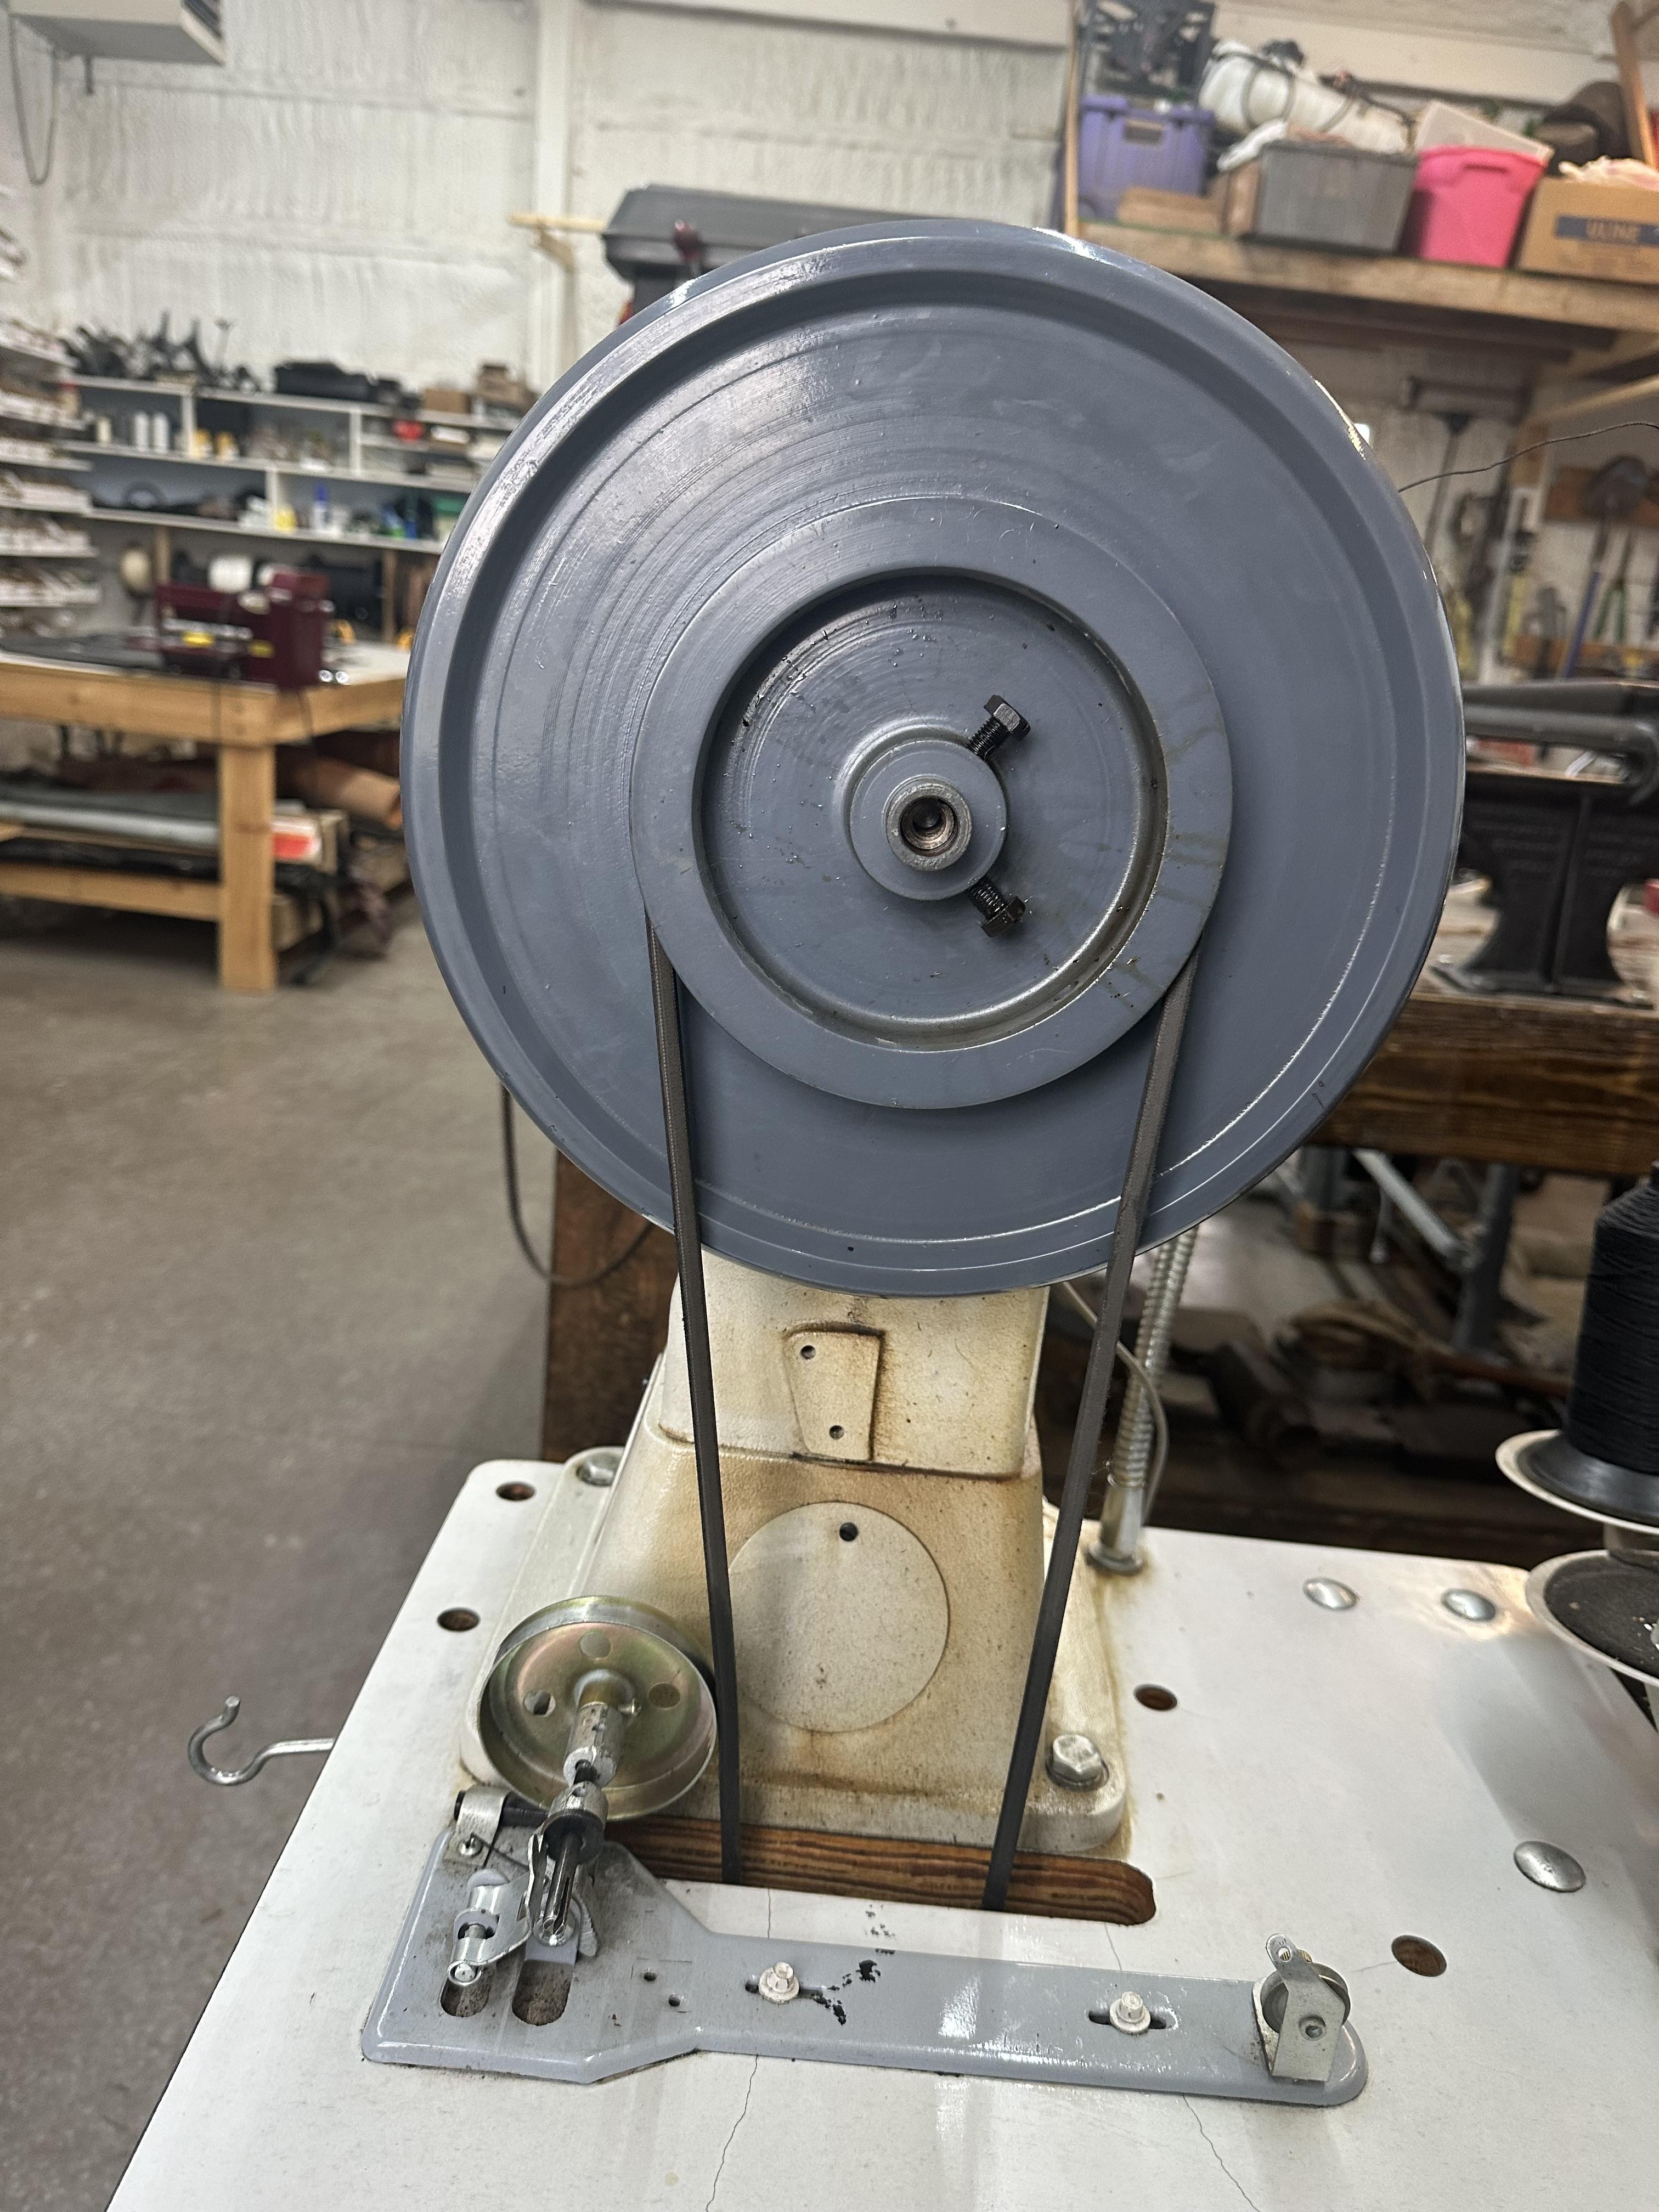
On my previous machines I slowed it down by changing the size of the handwheel and the motor pulleys and the N/P worked fine. The new machine came with a speed reducer and the N/P doesn't work as it should. However, I've read somewhere that the N/P can be adjusted on the servo motor. I've tried this briefly with very limited success but I haven't tried it to death and it goes slow enough for me to keep putting it off. One day..... -
 Tommy1wide2high joined the community
 -
I've bought a couple of these cheapy Chinese brushless servo drives for my industrial machines. https://www.ebay.com.au/itm/145766877894 They both work (at least for now LOL) and coupled with the 4 pulley reduction systems I've fitted, make life absolute heaven. However, the instructions are the typical useless "Chinglish" where you have to attempt to work out what you are being told. Nothing happens when I attempt to check the needle positioner setting, so my questions are: 1). Is it typical that without a needle positioner connected, you cannot enter the setting for needle positioning. 2). I cannot find a needle positioner in the seller Ebay store, so will any needle positioner that's meant for a brushless servo drive work.
-

Saddle making books and DVD’s
FrankHester replied to Bren2736's topic in Books/Patterns/Periodicals/Videos
I bought the Harry Adams Manual and would like to say that @Bren2736 is a great seller! The item was as described, and the packaging was excellent! Shipping and communications were excellent also! @Bren2736 is a great vendor. Thank you for the transaction. -

To sand the edges or not to sand
ThisIsMyFirstRodeo replied to ThisIsMyFirstRodeo's topic in Leatherwork Conversation
At this particular project, I guess the sanding is to level 2 layers for burnishing? I did get a pretty decent burnish with it, but I don’t know if that’s from sanding the edges or because I’m finally becoming more competent. Anyway, thank you for the various reasons to sand. When you do sand, is there a particular series of grits that you use? I feel like there’s a limit to how finely you can sand an edge before it’s pointless. I definitely saw results with up to 600g, but I don’t think I saw anything whatsoever with 800g/1000g. -
 leonardo joined the community
 -

To sand the edges or not to sand
TomE replied to ThisIsMyFirstRodeo's topic in Leatherwork Conversation
Reasons to sand edges include leveling multiple layers, removing excess glue before finishing the edge, and smoothing the fibers as part of the burnishing process. What are you trying to achieve? I routinely sand to level an edge or remove glue, and I avoid it when burnishing. If my regular burnishing methods don't produce a smooth enough edge then I'll sand and do more burnishing. Depends on the tannage, moisture content, the part of the hide I'm working with, thickness, etc. - Last week
-
 Carlus Doggett joined the community
 -
Ok, so I’ve noticed that a lot of people recommend sanding your edges down, presumably for a cleaner, more professional look. But most people seem either to not sand, or they don’t mention it. I’m thinking there has to be an obvious difference between the two, but does anyone have a side-by-side pic or such to point it out to me? I have experimented, but I’m not sure what I’m really looking for… May you never burn your bacon, AZR

