
Beehive
-
Posts
204 -
Joined
-
Last visited
Content Type
Profiles
Forums
Events
Blogs
Gallery
Store
Everything posted by Beehive
-
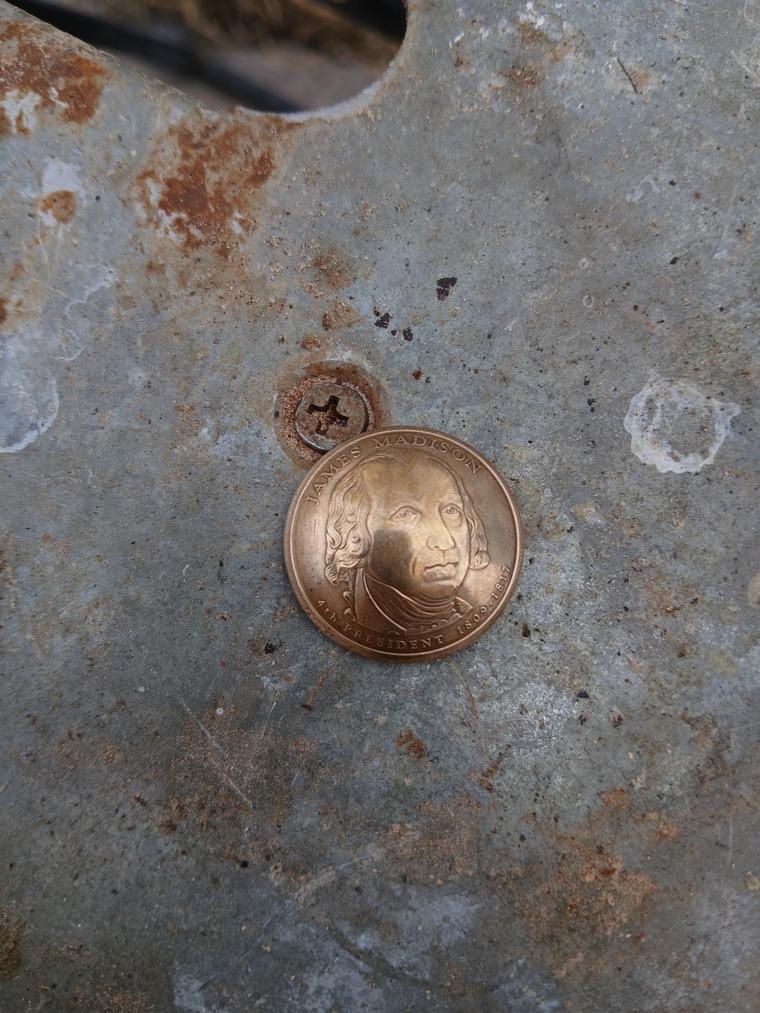
Here's the same treatment on a dollar coin. It's nowhere near as dark but it does bring out detail.

-
Thank You. It's black oxide from overheating the coin. I used a propane torch on low. Cleaned with acetone before heating it (or your finger prints will get burned in). Heat it with the flame. Removing the flame to see how dark it has become. It won't change color until you remove the flame. It'll continue to look bright as it's heated. It's a fairly durable finish. Not easy to remove. Once it's done and cooled off. The rear of the coin is cleaned bright and a Chicago screw is soldered to the back. It takes less heat to melt the solder then it does to blacking it. I used a rag and Simichrome to polish the high spots. Leaving the oxide in all the little crevices.
-
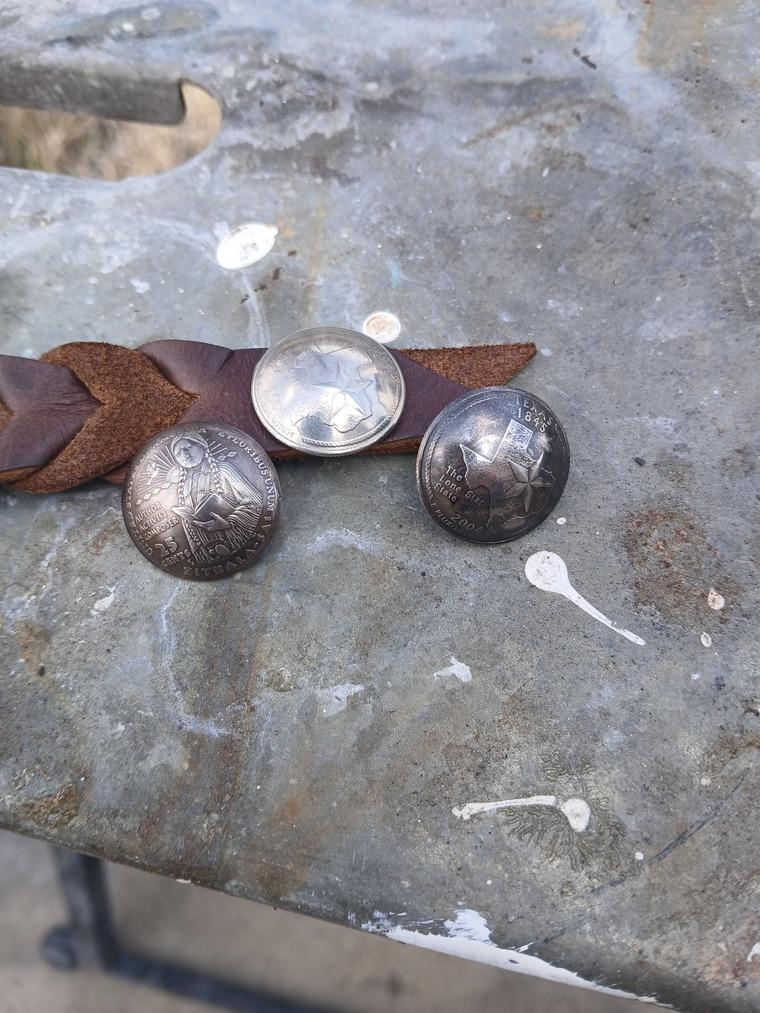
I need to order more Chicago screws. Ive narrowed down my antiquing methods for repeated results. All coins pictured are US quarters 25cent. The one on the braided strap is without any antiquing. The other two have it. It really brings out the detail of the coin. Verses washed out bright nickel, to where it looks like a plain domed disk. I used regular old silver solder meant for copper pipes. I have never had a concho come apart or fall off using plumbing solder.

-
I believe the mold is feeding on whatever the leather was oiled with. It'll continue to feed on it. Since it's already a mess. Spray it down with lemon juice and lay it in the sunlight. Rotate it around for a day. Or apply a mold killer like, "Mold Armor". Let the item dry out. Afterwards apply a conditioner and store in a ventilated area. Stuff the bags with brown paper to absorb any extra moisture. If that doesn't work, either burn it or bury it. Just keep it away from other tack.
-
I was a young man exploring tailoring. I'd hem my own pants. Fit my shirts. The home, plastic, sewing machines were common. Using one was an awful feeling. Then I found a Singer at a garage sale. Then the Pfaff at an antique store. The Pfaff machine was trashed but the base was excellent. Cleaned it and painted it. Even replaced the gold paint accents. Replacement top and the Singer. Layers of thick denim was a breeze. Light cotton was smooth. It made every home machine look and feel like junk. I've owned a couple of Juki industrial machines. As for a treadle machine. You have to make friends with it. Learn the flow of using your legs while you're using your hands. There's a learning curve but once you get use to it. It's a really enjoyable machine. Romantic in a way. ( I can still hear the clicks it'd make)
-
You're in good company.
-
That's incredibly nice! I bet that took you awhile.
-
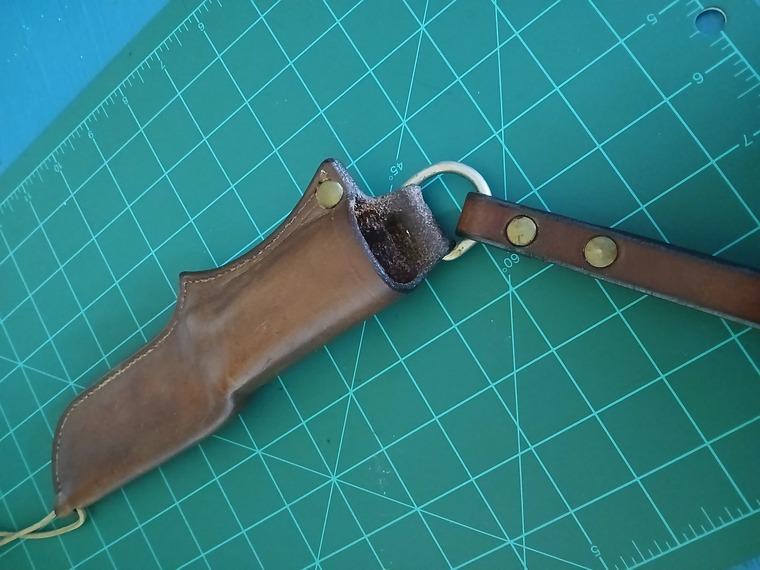
I'm assuming you're talking about a bush craft style sheath with a belt ring to allow the sheath to pivot with your leg. Like this? If so, use a "D-ring". (This sheath was made for a Benchmade bushcrafter #162.)
-
Well in that case. Punch the holes after you dye. Fiebing Pro is bad about getting on the thread. Especially if you've dyed after punching the holes. Leaving globs of dye that get on the thread. It's not bad with the alcohol based. But still. I punch my holes after it's dyed. When you pound or roll the stitch line. It'll snug up the holes around the thread. You won't see anything except clean thread.
-
I dare you to build a shirt. Or a duster coat. Using the old school patterns that come in a paper packet. That's what I did with mine. I can legitimate say, I've made clothing. You're going to really enjoy that machine.
-
That's an old one for sure. Has a shuttle instead of a bobbin. I've put a Singer on a PFAFF base. Made the top out of poplar. Found a replacement round leather belt. Did the machine up nice. To this day, I can't use an electric sewing machine and not think it's the biggest POS that's ever existed. The feeling, power, and control you get from a treadle machine is impossible to replicate in any modern sewing machine.
-
Yep. My old edgers I made, weren't made to a specific size. They were made to fit the project. I stamped numbers on them, 1,2,3. And they mean nothing at all. I just felt like numbering them.
-
Thin plastic sheeting glued to the back of the soft chrome. Weaver has a roll of plastic advertised for making patterns. You can use that to firm up a panel. Keeping the purse from collapsing into a big clump of leather. Basically any flexible material you can cut and attach. Cut piece from a two liter coke bottle. Plastic jug. Neoprene to some extent. Or using stiff veg tanned behind the chrome. With plastic sheeting, you can go thinner. Verses having extra bulk from the veg tanned.
-

What leather craft has given me in life.
Beehive replied to Beehive's topic in All About Us and Off Topic
Thank You to you both. I'm a military vet. I still have a few ghost that haunt me. I'm currently getting help as it's a never ending process. Just remember, someone in this world Loves you and cares about you. With the hardest part being, allowing them in. I sure have been eyeballing some Stingray. Wondering what a OTW holster would look like in Stingray. -
What do the letter prefixes on Craftool stamps indicate?
Beehive replied to AEBL's topic in Floral and Sheridan Carving
My various stamps carry a V, D or an X prefix. One with no prefix. Every stamp I have came from Tandy. 2004-2006 era. I also have a bunch of stamps marked, "US Stamp". -
I wanted to send this out to the internet. Call it the leather community or your pick. When I was a young Texas kid. Every stereotype that has been projected onto Texas. It's pretty much true. Cowboys, cows, and the occasional goat. A specific, definable, culture. One aspect was leather. Through my life, I've stood and stared at gun belts and holsters displayed at the Texas Ranger museum. Other influences was cowboys themselves. Leather and conchos are a poor man's jewelry. I've never made things to sell. I made/make them out of need. I've made holster after holster. Knife sheaths. Spur straps. Handcuff cases. Flash light holders... Then life hits. Hits you hard. Taking you to some horribly dark places. Takes things from you and doesn't give them back. I speak of injury. Life is getting more difficult for me. My memory is slipping. I act like I'm still young. Thinking I'm not broke and can still do the things I did. Then one day, you have to come to terms. Stop lying to yourself, accept yourself, and most importantly. Love yourself. I've gone from being able to knock out a project in two days. To needing an entire month to finish. I've kept and keep personal journals. I record my thoughts. And I still keep up the fight. I can still do it and do it strong. I have worth. It just takes me a hair longer. Leather craft is a passion. It's how I'll a leave a mark on this world. A little piece of myself that's still there. The key is perfect stitching. Thank You and Thanks for the website. I enjoy being here. God Bless.
-
I wouldn't trust a single glue to hold it for age. Glue, either contact or white glue will start to give up after 10years. You usually don't notice anything because the places that got glue are backed up with stitching. I have an old piece of belt scrap that had a suede liner. I used the best contact cement I had back in the day. I didn't play around. I was using c-clamps to press things together. I'd almost crush things. Rough side to rough side. Coming across that belt scrap recently. After 20+ years. The contact cement has degraded to powder. Other items with two part epoxy are still doing ~ok. Long story short. If you want it to last. Back up the glue with stitches.
-
Lacing chisel or round hole punch for leather lace edging?
Beehive replied to AEBL's topic in Sewing Leather
Round holes and lace remind me of the leather moccasin shoe kits that come in a bag. It's a, "crafty" look. What you also see, when you don't have the right tool. -
The Incredible Shrinking Checkbook Cover
Beehive replied to Gosut's topic in Leatherwork Conversation
Buy better leather. I've found an Old Timer knife in a sheath on the tin roof of a shed. Looked like kids had been playing up there. I couldn't estimate the age of the sheath. But it was a USA made knife. The leather had almost turned black on the side exposed to the Texas sun. It experienced temps as low as 25°F up to 110°F and that's just the air temp. The tin it sat on, probably reached temps of 130°F to 160°F. It didn't shrink. Are you sure what you used is real leather? Nowadays it can be difficult to tell. -
Did you oil it before applying the dye? Like giving it a rub with neatsfoot. Letting it set over night until you don't see blotches of oil. To where it looks just like it did, before you started. Just a tiny bit darker? I find oiling the leather before dying evens out the dye. It's my standard practice when using alcohol based dye. Oil based already has the oil in it.
-
I'm not sure exactly what you're asking. Dying the skin side with bleed not showing on the edges?
-
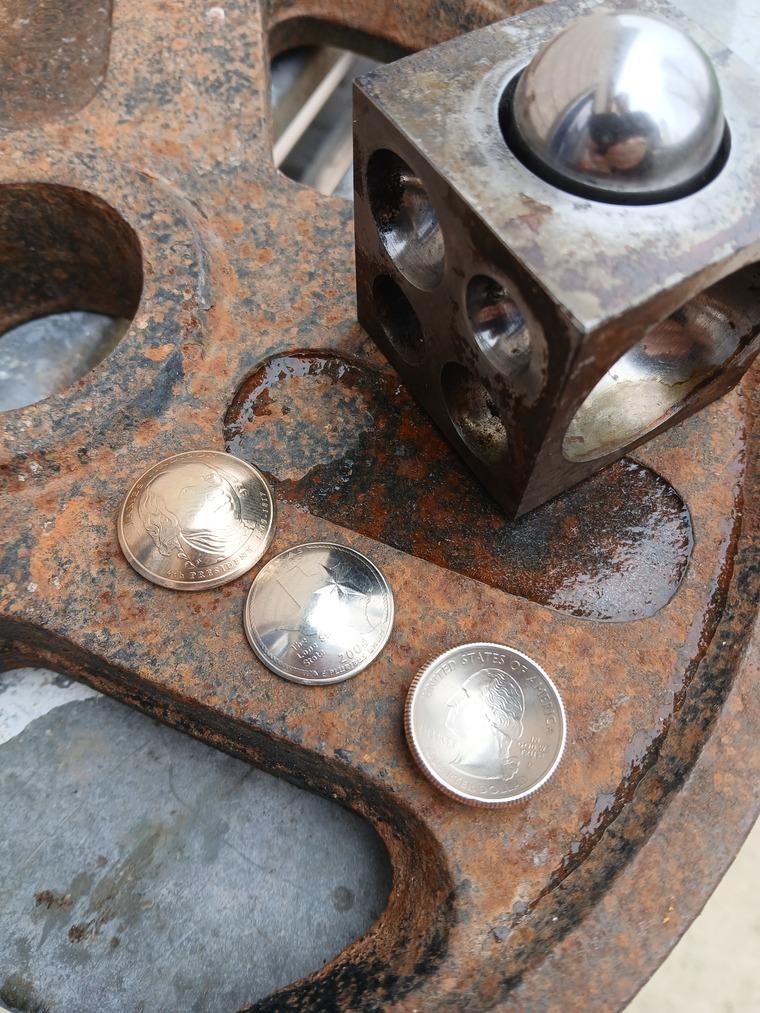
Doming blocks come with ball end punches. I just happened to have a ball bearing a hair bigger. Buffalo nickels are also popular. Indian head facing out. On Mexican coins, the Mexican eagle faces out. I'm only using the Texas quarters pictured. The dollar coin was practice for other, different dollar coins.

-
Yes. Dome any coin you want in a doming block. But instead of soldering a Chicago screw to the back of the coin. Solder the coin itself to the buckle. It also looks good on a bare brass Zippo lighter. Nickel, bronze, and copper coins will take solder. Would you like to see a dollar coin and a Texas quarter that's been domed? Your thread, so I'm not posting pictures unless I get your go ahead.
-
That's awesome! I like that! I've made buckles myself. But in carbon steel. Once you build one. You find out it's rather easy to do. I dare you to make a concho from a Mexican coin and solder it to the front of your next buckle.
-
Box fan motors are brushless. It's an electromagnetic type deal. That's why the motor can run for years. Oiling the two bushings, decades. If you're spraying enough, to where the air is saturated to the point of spark ignition. Steps need to be made. I spray in my kitchen. Next to an open window. For me to fill the room enough. That the stove pilot light ignites the air. Forgive the pun, but I'd be burning through big money in paint. Using more then a tiny airbrush spraying it.