-
Posts
934 -
Joined
-
Last visited
Content Type
Profiles
Forums
Events
Blogs
Gallery
Store
Everything posted by KnotHead
-
Hey Buckwhip. Thanks for the kind comment. I did the base knot with a grid and a mandrel with pins stuck in it. I have included some of the working photos I took while working the knot. If you don't find it difficult to work with a grid and pin method, it should not be difficult at all. Brian... Thank you megabit for the very kind comment. Brian...
-
This was an experimental knot. The base knot is a 23part by 10 bight gaucho mixed pattern knot. The base knot is not of my own design. But the stitching was added by me. Brian...
-
Here's how I solve the issue of the un-even sides or the bights of the braid. I use a cut piece of scientific grid paper. I use the grid squares to help or aide my eye balls in seeing how straight and even the outside bights are or are not. I will run about an inch of braid at a time and then check it against the grid paper. This is how I developed a more even handed braid with flat braids. Brian...
-
You could buy a pink hide and then cut your own lace from that. That's what I'd do. B...
-
Thank you Buck. Brian...
-
Thanks Joe. Brian...
-
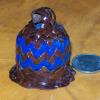
Well. This is my first time posting any type of raw hide work. I am not completely done with this necklace. I have one more base knot to do on the other side yet. This is goat raw hide cut at 1/64th width. The casa knot is a 9part 8bight knot. I'm using plumbers putty under the knot. Under the plumbers putty is 4 Spanish ring knots done in .09mm Venetian blind cord for a core. Brian...
-
Are you building a quirt or a whip? Brian...
-
Your blade may be out of alignment.. I have found that if the blade in mine is not properly aligned where the blade should be either pointing inward toward the area of where the string is pulled in and out the upper hole, it will turn itself outward cutting the string off after a short cut. Pull the blade out and re-position the blade so it's either straight with the pull or a little more inward. Brian... That's what I have is several cutters in different sizes. But to beat that, I went and got a really good parring knife so that I am not having to grind down stanley blades to replace dull with sharp. I just pull the parring knife out and sharpen it. Brian...
-
A little key chain like in the attached photo. Just turned upside down and pulled down to just where the lace can get through.
-
I use stainless steel magnetic clasps. That particular clasp is a friction mag lock type clasp. All that means is with the weight of the pendant it adds pressure to the clasp causing a friction lock inside where the magnets meet up. Brian...
-
Source: Beveling Lace.
-
One of my students went to a leather shop one day. He talked to the old guy and the old guy showed him a clever way of beveling lace with tools that most of you probably already have in your shops. Here's the youtube video that is provided by my student. http://youtu.be/G_70INLsFGA Brian...
-
If I may inject here. I have been using two books over the years. I started out using Tom Hall's book Introduction to Turks Heads book. It has full illustrations within his book. Using the illustrations in this book is a key to learning the turks head knots along with the interweaves. Sold here is the cheapest I could find, http://www.ubraidit.com/supplies-detail.php?item=41 You'll have to google this next one for yourself. I have also been using Ron Edwards book Round Knots Advanced Leather Work Volume 2. This is sold through Ram Skull Press out of Australia. This is not cheap by all means. But is a great book to have along with Tom Hall's book. These are the two books I refer back to the most, even over the years I still use them. I have to get another one of Tom's books because of the use and abuse I have inflicted upon it. LOL... Brian...
-
Sorry for the delay folks. But this is very slow going along with a few mistakes in my sequence. But all is corrected and moving on with it. Since the strings are at 1/16th the process is very slow with type of side(edge) stitching. Thanks Brett. I will post the completed project as soon as I can get both sides done. Brian...
-
Super nice work Buck.
-
Thanks all for the very kind comments. A 1 to 7 pattern just means from hole 1 to hole 7. Essentially creating a pattern of over 1, under 2, over 2 thru the hole in front of the last pass. coming back to the main pattern would be over 2, under 2, over 1 and thru the hole. This produces herringbone sides with a 3 strand braided pattern on the edge itself. Brian...
-
This is going to be a necklace for my Aunt. A very special person in my life. I'm did a trenza de doce style for 18 inches in 1/16th black kangaroo string. Now I'm doing side stitching in a 1 to 7 pattern. This will go the whole way down the necklace on both sides. It will also get some sterling silver puffy hearts and a reconstituted turquoise pendant. Below is some of the work in progress. That fid I had to make for this project. Brian...
-
I found this video via Facebook. Pay special attention to the stitching guy. WOW!!! He's at warp 10.5 and I'm still pushin impulse... Crap I wish I could stitch that fast.
-
While I can appreciate the very kind comment. I am still in deliberation with myself about continuing KHWW, or not. I am taking my time with this for the simple reason that I have my own braiding that I would love to explore more deeply. Running KHWW and my own business was proving to be quite exhausting and then be able to braid. I am still alive and have had the sister group for KHWW on Facebook for quite some time. I know it's not the same. I am still working at putting up some of the same information that was on the site itself. This will take some time of course. The grid maker program is still alive and well. I have a browser based version for all here to download and use. Please make sure that you give Tim and John Allwine due credit for their hard work on this project. The grid maker is an ever changing project by John Allwine and will be updated as John has time to do so. You can find John Allwine on Facebook as well. He does post his updates to his page when he makes changes to the grid maker. Otherwise, be blessed and may the joy of braiding be apart of your every day life. Download the grid maker below. This one is the advanced version of the old one. There will be a learning curve. This works in browsers; Firefox Google Opera The apple browser. This will NOT work in Internet Explorer. GridMaker2.0-BrowserVersion.zip Best regards, Brian...
-
I will sometimes use Neat Lac from Tandy.


