TomG
-
Posts
1,024 -
Joined
-
Last visited
Content Type
Profiles
Forums
Events
Blogs
Gallery
Everything posted by TomG
-
After you taper them, can you use any sort of glue or adhesive before you sew them together? I need to make some 15' latigo leads, 1/4" wide, and would like the splice to be as invisible as possible. I'm just not sure whether contact cement or Barge cement or something else will stick to the Latigo. Thanks Tom Sorry for the dupe question - I posted this as a new topic and planned on deleting this one, but can't figure out how.
-
Why not go on his thread and asking HOW he does it. It may be the way he does it that is different
-

Fiebings Oil Dye And Sponges
TomG replied to TomG's topic in Dyes, Antiques, Stains, Glues, Waxes, Finishes and Conditioners.
Never thought of the natural sponge. I'll pick one up today. I don't use a dauber because it just holds so much dye, that I found it hard to get a light coat without bleeding off a bunch of the dye it holds onto a piece of paper or a piece of scrap... too wasteful. Yes, I'm really familiar with the lightening effect of the dyes. I think it might be one of the hardest things for newbies to learn... patience.... Saddle Tan oil dye is one of my favorites. I can finish it with either brown or neutral leather balm depending on if I want to keep it light or darken it slightly. I have an airbrush, but only use it when I have a larger piece to dye. -
Fiebings Oil Dye And Sponges
TomG replied to TomG's topic in Dyes, Antiques, Stains, Glues, Waxes, Finishes and Conditioners.
And I just tried it with full strength spirit dye and it did the same thing. Are there different types of "kitchen" sponge? Tom -
I ran into a weird problem recently and wondered if anyone can explain it. When I was taught to dye my projects, the old time leatherworker i learned from used Fiebings spirit dyes and water to dilute to the shade he wanted. Worked well. He used as damp regular kitchen sponge (cellulose?).to apply it in a circular motion. So this is basically how I did my dying for a long time. As I experimented and learned, I switched to denatured alcohol for diluting and really liked the better color control I get. I have recently begun switching over to Fiebings oil dyes and am very happy with them. I also began doing either dip dying or using some foam sponge material I get from my day job... it's actually foam packing material..It works well for these small jobs. Just this week, I picked up a couple of the cellulose sponges. I rinsed them in clear water and put them away until I needed them. I used them a couple of times this week. The minute the oil dye hits them, they turn hard. I pre-dampend one with denatured alcohol and it turned hard. I never noticed this with the spirit dyes and they are supposed to be alcohol based as well. I dampened one with water and it was nice and soft. Until I put the oil dye on.... then hard. Has anyone run into this? Other than airbrush or daubers, what do you folks use to apply your dye? Tom
-
How To I Properly Apply Finish To My Leather Projects?
TomG replied to nicholas482109's topic in How Do I Do That?
I do the following: Case Stamp Dry Resist if needed Dye Dry Leather Balm with Atom Wax - apply and buff it dry andglossy. Antiquing if needed Dry Finish Dry Mink oil paste to the flesh side. I get good results with this. As for finishes - I've used Super Sheen, Resolene ande Saddle Lac Super Sheen (100%) and Resolene (50/50) give me about the same results. I apply them LIGHTLY with a piece of trimmed wool. If you apply them too heavily, a couple of things happen. You pull the antiquing out of the recesses and smear it onto the leather. Plus, you can get cracking and crazing when you bend the leather. If I have more than 3 or 4 items to do at a time, I might use the airbrush to apply them.... just have to justify the cleanup time. These will all clog an airbrush if not thoroughly purged. If the item is going outdoors - dog collar, leash etc, I use the Saddle Lac spray. 1 or 2 LIGHT coats is sufficient. Mink Oil Paste will turn a stiff price of leather into a limp piece of spaghetti <g>.... But if you use too much, it's just like too much of any other oil and will darken the leather. I use the Kiwi that you can get at grocery stores, hardware or camping stores. I've tried the Feibings but it is too soft and is too easy to put on too much. The reaso I put the mink oil on last - after the finish -is that I've had a couple of times that if I oil paste the back first, and them spray on the saddle lac, when everything dries, the saddle lac flakes off. Try a bunch of combos. and go light. You can always add stuff. You can't easily take away too much... One last thing... One of the coloring leather books from Tandy has a cross referecne chart showing which products can be used with which and the effects. Good luck Tom -
Help!: How Do I Avoid/fix This Dying Issue?
TomG replied to LloydtownLeather's topic in Leather Sewing Machines
You can dilute the dye with denatured alcohol. I have few Fiebigns dyes that I don't have to dilute to some degree. they all seem to come out darker than what I feel the bottle label says. For example, with browns....What I have done is taken a small plastic (Nalgene) bottle and put a measured amount of DA in it. Say 100 ml. than I add 10 ml of Medium Brown dye. I took a long strap of leather and marked it off on the back with the percentage of dye. I just apply some to that section. Then add 10 ml and dye the next section.. and so on. Of course, you will probably want to use smaller amounts... I just used the 100ml as an example. You can use 10ml of DA and 1ml of dye increments depending on how carefully you measure. But you get the idea. Then just mark your bottles with the color anf mixture to remake it every time. Now, I'm sure there are limits to the amount of dilution you can do and still have a durable dye job, but I have some stuff I've made for my dogs that get daily wear, and at 50/50 mix, they have held up well for years. -
Did you hand stitch or machine stitch? Tom
-
Pink ?
TomG replied to lowlife's topic in Dyes, Antiques, Stains, Glues, Waxes, Finishes and Conditioners.
Agreed... Dilute red with alcohol,,,,,,, LOTS of alcohol... Start at 50 parts alcohol to 1 part red spirit dye. -
Tandy also carries them in limited sizes and only in nickle I believe Tom
-
I sent photos of one with and one without the ripples and they liked the rippled one. Personally, I did as well. Gave it character. Tom
-
Here's one I can't explain but would like to know other's opinions. I made a couple of straps (collars) the other day. One of them developed a ton of fat ripples along almost the entire length after I applied my mink oil paste to the back side. The other strap had no issues. I am 99% sure it is just this piece of leather, but would like opinions. I applied Tandy professional water dye. 2 light coats of neutral leather balm with atom wax on top. A good coating of mink oil paste on the flesh side. The other strap was made exactly the same except I used Fiebings spirit dye, diluted with denatured alcohol, dip died. Again, I am not 100% sure they were from the same side, . My assumption is that the mink paste made the fat deposits in the leather swell. Would that be accurate or a possibility? Tom
-
I have some Superior Suede Lace from Tandy/Tejas (biege color) and want to dye it in a variety of colors. I did a sample using Fiebings oil dye (green) and let it dry 24 hours. I cannot get it to stop rubbing off as I pull it through a cloth. I've tried sealing it with neutral leather balm/atom wax, mink oil paste and Resolene. All seem to make it rub off more. Anyone have tips, or answers on how to do this? I really don't need a dozen spools of lace if I can dye it in the small amounts I need right now. Thanks Tom
-
One of the reasons for the 6 foot leash in many cases, is AKC regulations for some events.. Just as an example, Rally Excellent does (or did) require an extended sit, at the end of a 6 foot leash, in a marked area, while the competitor who follows you completes their course. Also, I have seen instructions somewhere on how to take a side, round the 4 corners and use a hand held strap cutter to cut a continuous strip around the perimeter to produce 30+ foot straps. I think it was for Latigo and veg-tan. If I can find the instructions, I'll post them here. Tom
-
I'm looking for the 3/4" Tandy Script set and the Leather Art set. I don't see me using them a whole lot, but would like to have them to work with. If you have a set to sell for a decent price, I'd be interesated in it. Thanks Tom
-
Hi All, I have really not done much braiding so consider me a dumb as a rock. I need to make a key fob for a lady's service dog to pick up. She is asking for a braided fob about 5 inches long and the diameter of a nickle or quarter. I'm really not sure how to proceed. I was thinking of trying to get or make some 1/4" round lace and doing a 4 strand braid. Will this make it the diameter I need? Also, I'm not sure how to end it and tie off the bottom end. If I use a core, I'm not sure how to tie off both ends so that the top holds the key ring. Any suggestions, tips or ideas? Thanks Tom
-
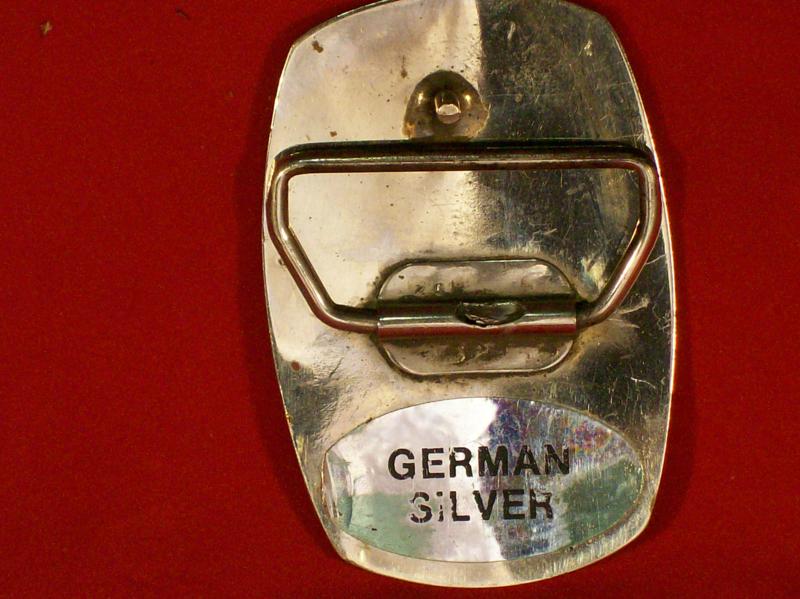
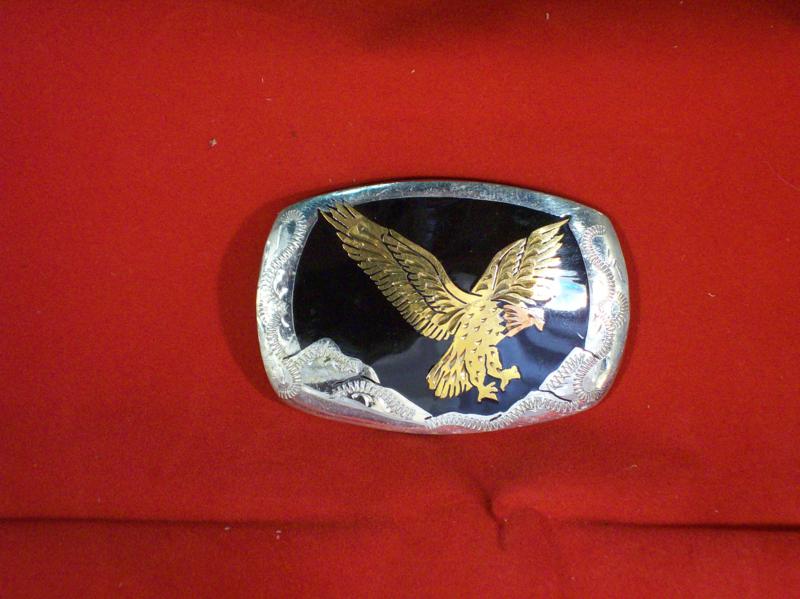
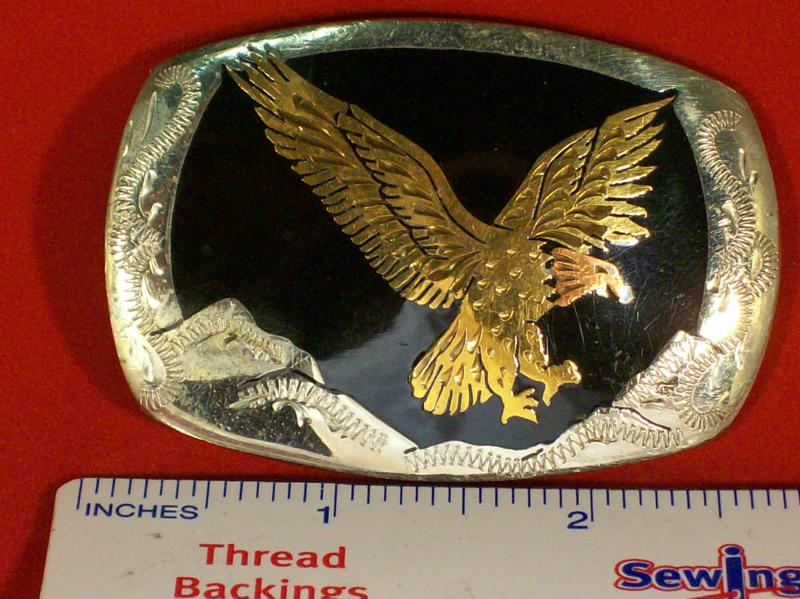
I picked up this buckle and need to figure out what it is and its value. it looks like silver around epoxy resin with brass and copper or bronze inlay. The back has a paper tag that says German Silver. Any thoughts or opinions? Thanks Tom


-
Smells like ammonia... Be sure to cut it 50/50 with water. No sub that I know of other that the standard toppings Look in the Dyes section of the forums and you'll see hundreds if not thousands of posts on various methods and type of finishes. You can get the leather balm at Tandy in Neutral which works for all colors. Other sites may still carry it in brown. black and a few other colors, but I herd Fiebings was going to discontinue most if not all of the colors ones... I could be wrong on that though. I prefer Fiebings dyes. Tom
-
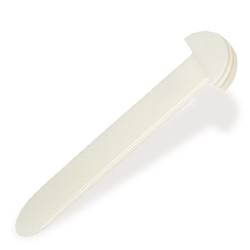
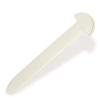
winterbear hit it pretty well. I use Supersheen if it's gotta flex a lot. Resolene if it's flat... OR, I dilute the Res a little more and apply VERY thin coats and then constantly flex the item as it dries, then let it dry for 30 minutes before adding the second coat. remember.. you are not trying to put a plexiglas type surface on it..... just protecting the finish. I use 50/50 or full strength Resolene for blocking, which is what you are describing as a negative effect. I use the leather balm right on top of the dye after it's dried. Then I apply the antiquing after the balm dries. Then after the antiquing dries, I apply the sheen or res... The Sheens tend to smear with the antiquing paste and allow the paste to affect the dye... at least with the Fiebings that I use... the leather balm doesn't... The plastic blade is probably a plastic bone folder. See picture I'm attaching. they are pretty cheap. I've seen some of those satanbarber vids. Not bad, but he's kind of "chatty". Tandy has over 80 free videos on their site that will give you some step-by-step directions on stuff. Check them out. the only issue I have is some of them are choppy on my PC... but that's probably on my end. I get chatty to, though.... In a nutshell: 1) Block 2) Dye 3) Balm 4) Antique 5) Finish Later
-
I haven't used a lot of these, but decided to try some out this evening. I applied several coats, buffing lightly between coats to get a darker stain. I like the fact that the leather's texture is still visible. I used a Thistle Green, which came out like a light green. I applied my normal Neutral Leather Balm with Atom Wax and it lifted about 2 - 3 coats off. Pretty much took it back to the color of a single coat/application of the stain. So, either I'm wrong in thinking stains can be darkened by repeated coats like dyes can, or I need to use something else to finish. Any suggestions? Thanks Tom
-
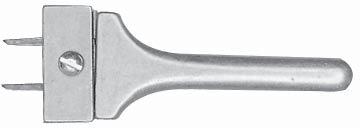
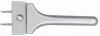
Ohio Travel Bag sells a slot punch tool pretty cheaply. I think it was under $10, and they do have minimums. I'm attaching a picture as well. It does have a few issues: 1) The pins are pretty thick. Punches a pretty thick slot - really too thick for smaller spots. I have seen instructions somewhere on how to thin and narrow them. This should make it a lot better. 2) The pins are soft. They usually have to be repositioned every spot or 2, and you do it with finger pressure. I've also done some reading on how to harden metal. The thinning and hardening are on my "to-do" list 3) When you put the pins in the closest together slot in the center, they are a bit too wide for the smaller spots. You can put the pins together in 2 slots on either side of center for closer spacing, but then you are punching off-center. Not much you can do about that. OTB does have minimums, but they MIGHT sell you one as a "sample".. They've been good to me about lowering minimums at times, when necessary. If you'r ewilling to do these improvements, it's worth it. Especially if you have a lot to place. Until I can make the mods, I just use my dividers and a small lacing punch. Tom
-
Yeah, but Bobby is right. The rubber cement will leave splotchy residue. If you want to dye the flesh side, it makes for an ugly job. Of course, I've only dyed the insides once or twice after using RC,and found it looked better leaving it alone Tom
-
I am relatively new to leatherwork compared to a lot of folks here, but can share what I've learned. First, as you search and read through the various posts and forums, you're going to find that like most things, there are as many different ways to skin a cat as there are cats. And some products don't play well with other products. As an example, I've seen posts where people reported using EcoFlo dyes and when they applied the finish (I think it was either Satin Sheen or Resolene, not 100% sure though), it took the dye and made it muddy and smeared.. That being said, here's my general procedure, say for a belt. Cut strap... punch holes and tongue slit on buckle end....Cut grooves if I'm using them... Bevel edges if needed (I almost always edge the flesh side).... Case strap...Tool as desired... Apply Resolene to any places I want to mask from dyeing... let dry overnight Wet small piece of sponge and dilute dye if needed and test on a piece of same leather scrap. It usually lightens up a little as it dries. Use a circular motion to apply the dye to strap. Let dry for an hour or more... Apply Leather Balm with Atom Wax... let sit for a few minutes and vigorously buff to a sheen. If needed, apply antiquing with a dauber in a circular motion, getting into all cracks, grooves and crevasses. Almost immediately, I use a coarse, stiff piece of something like canvas folded into a pad to wipe it off. I use it like a block to get all the surface stain off and leave the stain in the indentations. I then let this dry for at least a few hours... usually overnight. Next, I use saddle soap on the edges and burnish... let dry for a while.Then I usually use an edge dressing on the edges and let dry. Apply a couple of very light coats of Resolene diluted 50/50 with water, drying between coats for 15 minutes or so. If you apply it too heavily, you'll pull the antiquing out and smear it on top of the leather. Plus, it will crack when flexed. An airbrush is the ideal method, but if I just have 1 item to do, I'll use an old piece of thin cotton cloth, like a dress shirt fabric, as it holds a lot less liquid than tee shirt type material. Let dry and buff it. Finally, and I get laughed at by some about this <g>.... But, I rub Mink Oil Paste into the flesh side and then run the leather through my hands, flexing it front and back. The strap usually becomes soft and limp as a dishrag after that... And.. it doesn't have the odor that you get with Neats Foot Oil. Anyway, that's basically how I do it. I'm sure there are other and better ways to do the same thing, but this is what works for me. Do a lot of reading and experiment with other techniques and see what works best for you. Tom
-
That sounds right. I do know the oils seem to penetrate better and in my limited experience with them, they seem to have better out-of-the-bottle color matching than spirit.
-
Dustyn: Read the whole thread here and/or look up the Peter Main method of casing - I think it's outlined in this thread.- don't have time to search through 4 pages for it <g> He uses some sort of artist board. It's a bit expensive to keep replacing though. I use a sheet of acrylic that I got from Hobby Lobby for $2 and use rubber cement to attach the leather. Wet, let dry to the proper level and cover with a piece of taped up window glass. Works OK, but I think Peter's method of using a larger piece of thick plate glass would probably work better to help distribute the moisture better. Tom