TomG
-
Posts
1,025 -
Joined
-
Last visited
Content Type
Profiles
Forums
Events
Blogs
Gallery
Store
Everything posted by TomG
-

Another Edging Thread - How Do You Paint Your Edges?
TomG replied to KandB's topic in How Do I Do That?
Some folks use a piece of 1/2" felt, dip in dye or edge dressing and pull along the edge. I usually use a modified wool dauber. I take it outside and use a lighter to burn it until it's about 1/4" in diameter. It's not critical. Once it's the size I want, I blow it out and knock the shell off. This leaves a hard, roundish ball with a handle. Dip into dye or edge dressing and apply to the edge. I usually use the edge dressing as if I miss and get a little on the front, I can wipe it off as long as I do it immediately. All of this is after I do the edge burnishing stuff. -
Before you order from China or Germany, check with Gregg here first. I won't quote prices he gave me here, but he might be able to meet or beat that and not make you have to worry about adapters, screws, etc... And customs, overseas shipping, etc. I was advised by the Kwokhing guy to look at one of 3 models... The GB series. They look identical to the KG767 series devices. I was quoted just under $20 USD for the device. Not sure what S&H would be.
-
Try here: http://www.kwokhing.com/guide/ Look at KG767B or the GB6 I contacted them but the guy who answered didn't seem to be 100% sure which one would fit the Singer. He said the guy who knows these machines was out until next week some time. I seem to recall someone a while back on the group here had put one on the W155 but I can't find that post.
-
I have a "T" shaped guide, but the only place I can see to attach it is the bobbin cover...Those 2 holes in the cover on that Pfaff photo above are the same as the Singer cover I've attached it to. But, as you can guess, a movable cover is NOT what you want an edge guide hooked to. AND, I had to make very sure the screws didn't get in the way of the hook, bobbin or thread... The one on the Pfaff would be perfect. I have no problem drilling and tapping a couple of holes. I figure between the crew here, someone can point me to the right one. Would that model fit the 155? Thanks Oh.. Gregg... You might have some better solutions. I am not familiar with some that you mentioned, like roller guide on plate. Recommendations?
-
I was looking at Kwokhing.com for an edge guide. I emailed tham as I didn't see this machine listed. Does anyone know which one will work? Or is there a US source for a good guide? Thanks
-
Hahah That's what I've been doing both at times. I seem to have better results with stitching a couple in the reverse direction and then spinning the piece around. If I stitch 2 or 3, pull forward and stitch, I seem to miss the first holes about 50% of the time. Need to improve my lighting, I think!
-
Yeah.. Saw the vid. Looks fairly straight-forward. Looks like a variable resistance optical switch on the control. The problem with the CSM-550 I have now if that it has what looks like a very poorly designed speed control circuit. It uses a magnet on the end of the pedal control link and the link moves it closer to a magnetic switch to activate the motor. I've found that if the speed switch is at max, I can feather the pedal and vary the speed, but it's touchy. That tells me that the mag switch is probably not a simple on-off magnetic reed switch like they used years ago for stuff. But if it has the ability to vary the speed at max settings, it should also be able to vary the speed at lower max speed settings. The control is an epoxy sealed module so I can't see the circuitry and no one seems to have a schematic, so I am assuming a lot here, based on 45 years in the electronics fields in one form or another. It just puzzles me why a company would produce a motor that you can not control the speed of with the foot pedal, and then sell it for use on an application where foot control is almost essential to it's function. Off my soapbox now <g>
-
Yea... Figured it was something like that. If I start using the W155 more, I'll probably trade it in for a Consew or something. Thanks.
-
I'm sure the answer to this is a resounding NO, but figured I'd ask to eliminate that 1% of doubt I have left. Can the older Singers, like the 111W models, have feed reverse added to them via a mod? Thanks
-
As an FYI update, I contacted the store I bought it from and they are going to let me return it for some amount of exchange on a true foot controllable servo. Not sure which one, but I assume a 1000 or 1001. Thanks for the input folks.
-
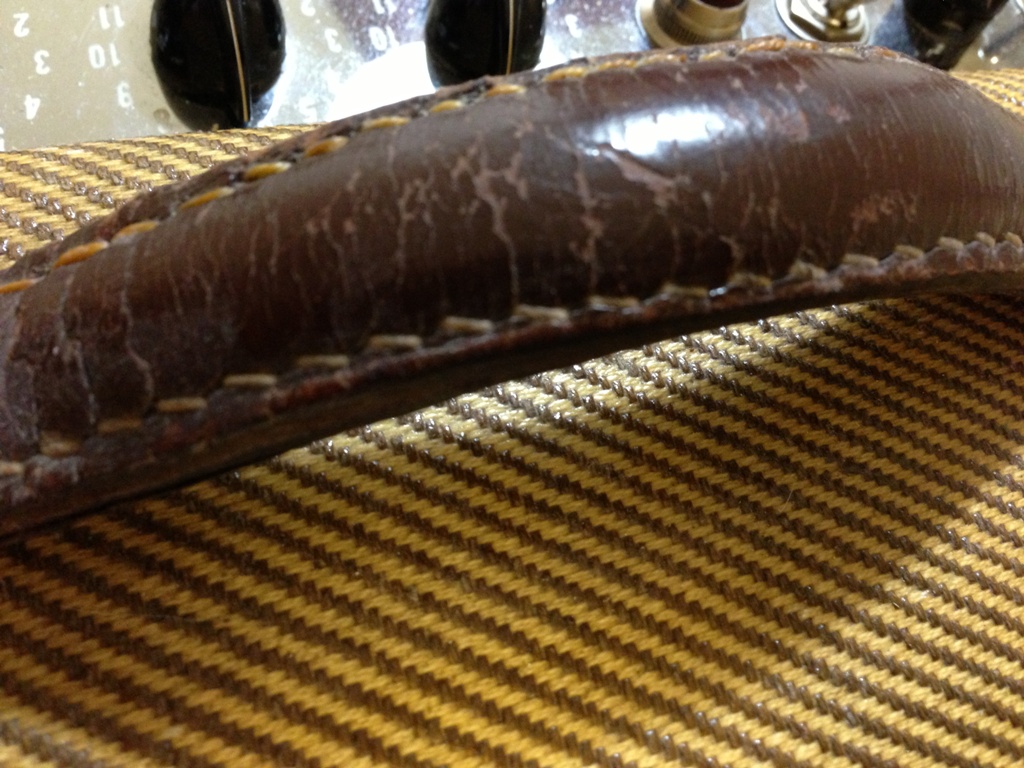
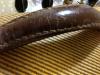
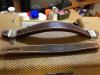
Hi All, I have a gentleman that wants me to make some handles for his vintage fender amps. I'm going to hand stitch, but not sure what this stitch is. Also, it looks like the originals used a buckstitch type hole. Any clues tips or suggestions? Thanks
-
Black Turned White
TomG replied to rundogdave's topic in Dyes, Antiques, Stains, Glues, Waxes, Finishes and Conditioners.
Did you fix the white issue? -
Black Turned White
TomG replied to rundogdave's topic in Dyes, Antiques, Stains, Glues, Waxes, Finishes and Conditioners.
Dipped both and dried just fine. No white residue. Tom -
I must be missing something. You need to reach out to one of the pros. I am just going by what I remember seeing when I took my Singer clutch motor apart once. Had to replace a cork ring. My observations come from seeing nothing but threads and splines on the motor shaft and no keyway on either the pulley or the shaft. I know there are motors with the clutch mechanism between the pulley and the motor body, but I am thinking they are all smooth on the motor side of the threads with a keyway and nut to secure them. But like I said, I am in no way a pro at these.
-
That answers that. When you or whoever screwed that set screw in, it probably grabbed into those threads. Look at them and you'll probably see indentations in the threads. When the pulley came loose, it may have galled the threads and also either damaged the set screw tip or rolled the aluminum of the inside of the hole over the tip. Like Scott said, it may not be going all the way through to grip as tight as it used to. The clutch assembly that fits there has a pulley as part of the assembly. It has a lever that links to your foot treadle. The arm pushes a pin into the center of the motor shaft to engage that clutch. All I can think of it to replace the motor with a good servo, or if you just want to use it like it was, make sure that set screw is not damaged and that it can go all the way into the shaft hole and possibly drill a small engagement hole in the shaft for the set screw to engage... BUT, you'll likely find that the shaft is hardened and may be hard to drill Good luck Just saw your last post after mine... How are you starting and stopping the motor? Am I missing something? With a clutch motor, you should be able to feather the pedal to sew from almost a single stitch at a time to full out with some practice.
-
I hate to say this, but I just zoomed in on that picture and I definately see a splined shaft and what looks like a threaded end. How have you been controlling the speed?
-
Black Turned White
TomG replied to rundogdave's topic in Dyes, Antiques, Stains, Glues, Waxes, Finishes and Conditioners.
That stuff contains some waxes and I suspect that may be what's showing up. The video on how to apply shows you rubbing it in until almost dry, it seems. I've used the Tan and Bordeaux but I apply with a sponge. Haven't tried to dip dye it. Since it's water-based, try taking a damp rag and rubbing a small spot and see if it comes off. If not, try some more of the dye on a damp sponge and run a small section with it and see if that takes it off. I'm going to dip a small piece of veg-tan scrap and see if my colors do that. Let us know if it works. -
I'm not a pro at them and my 111W155 now has a servo motor, but that looks like a clutch motor with the clutch assembly missing. I don't think that is the right pulley. The motor shaft looks like a splined shaft with a threaded end that the clutch assembly would slide onto and screw down. Maybe Wiz will check in. He's one of the pros.
-
Separating Glued Paper Backing From Leather Wallet
TomG replied to aussiejohnno's topic in How Do I Do That?
Ohhhhhhh.... I don't know if you'll ever get it all off. Usually you use rubber cement, not contact. Contact cement is meant to be permanent You may be able to peel some of it off and then glue on a fabric liner. -
I'm not a pro, but I'm pretty sure the Pro's will advise you to post some pictures of it.
-
Dark Purple?
TomG replied to Effuse's topic in Dyes, Antiques, Stains, Glues, Waxes, Finishes and Conditioners.
I've used Fiebings Oil Dye in Purple and it can get towards the black end pretty easily. -
I Want To Make "manly" Belts, However I've Got Many Questions!
TomG replied to lambboy3487's topic in Getting Started
OMG Katsass. I just looked at your photobucket. You have a Safety Speed holder? I wore one for almost the entire time I was a cop. Loved it. Fasted rig in the world. At least at the time. -
I'd try a different model or brand for sure. I'd recommend mine, if I knew what it was <g>... It was given to me years ago and is still ticking along.
-
Have you tried sharpening it so it goes in easily?
-
I Want To Make "manly" Belts, However I've Got Many Questions!
TomG replied to lambboy3487's topic in Getting Started
Here you go. First one of many. As I said, there are many variations on how you get to the finished products but these are the basics. For a plain belt, you'd leave off the grooving, highlighting, etc. http://leatherworker.net/forum/index.php?showtopic=4416