-
Posts
226 -
Joined
-
Last visited
Content Type
Profiles
Forums
Events
Blogs
Gallery
Store
Everything posted by Peter Darby
-

Biker wallet
Peter Darby replied to Peter Darby's topic in Purses, Wallets, Belts and Miscellaneous Pocket Items
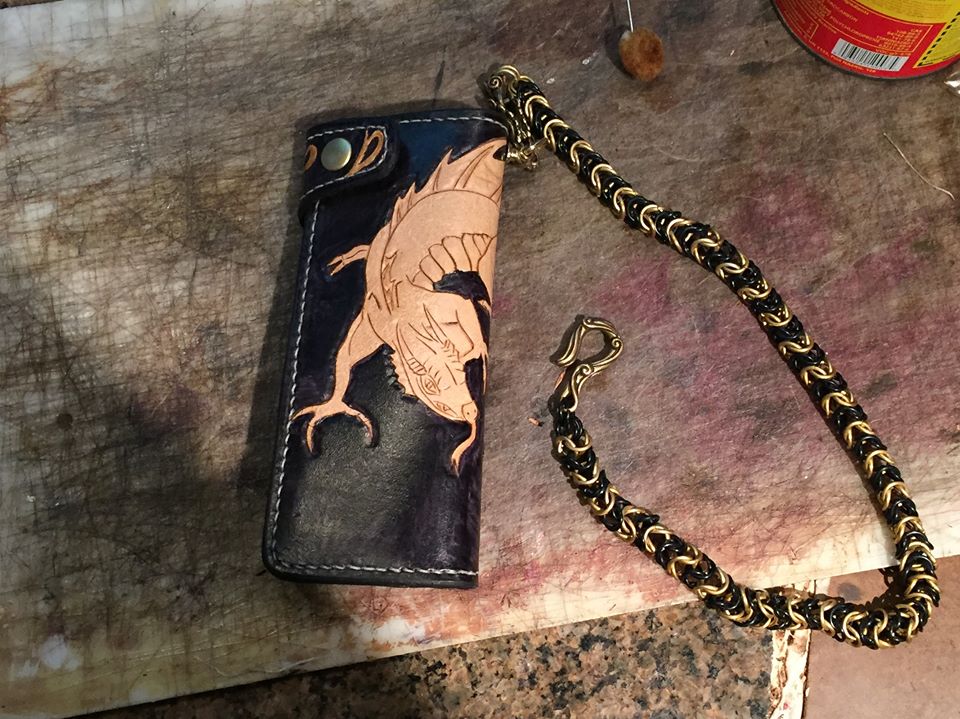
It is stainless. My friend has developed quite a little hobby/business with his chainmail. He does vest fasteners for bikers, keep back chains and various other biker paraphernalia. -
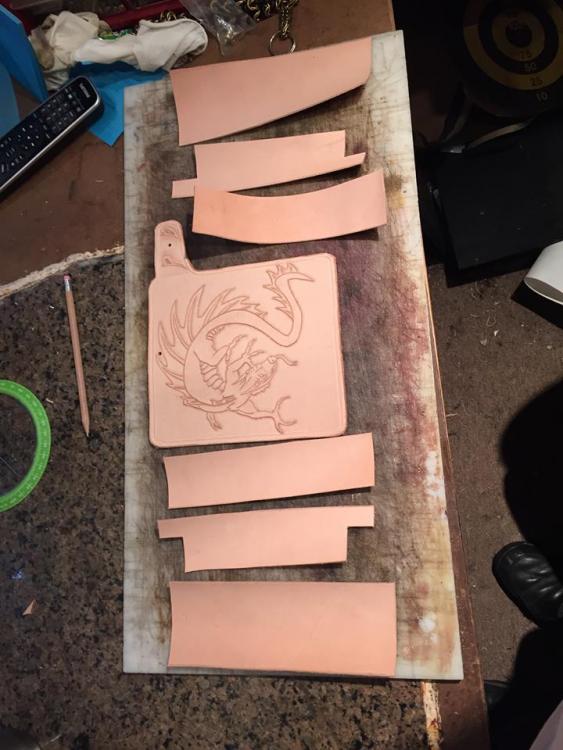
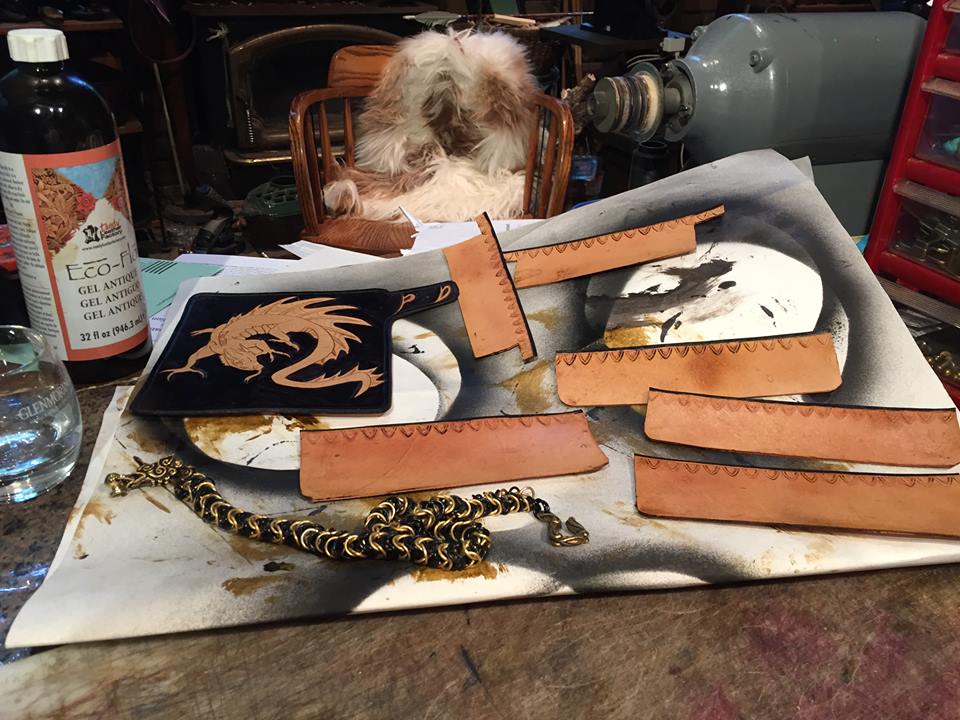
Finally finished a project I have wanted to do for at least a year or so. I asked a friend to make the chainmail chain and got the dragon head and tail from Crafty Welts. I have been wearing it for a week or so and really like it.
-
Finally finished a project I have wanted to do for at least a year or so. I asked a friend to make the chainmail chain and got the dragon head and tail from Crafty Welts. I have been wearing it for a week or so and really like it.
-
Purses in Pieces is probably the best source for Pouches and a few other leather items. The books based on the York archeological dig cover sheaths and shoes from the angelo-saxon and Viking era. You just have to spend some time googling and there is quite a bit. Some are out of print but many are not.
-

Mare's Leg rig
Peter Darby replied to plinkercases's topic in Gun Holsters, Rifle Slings and Knife Sheathes
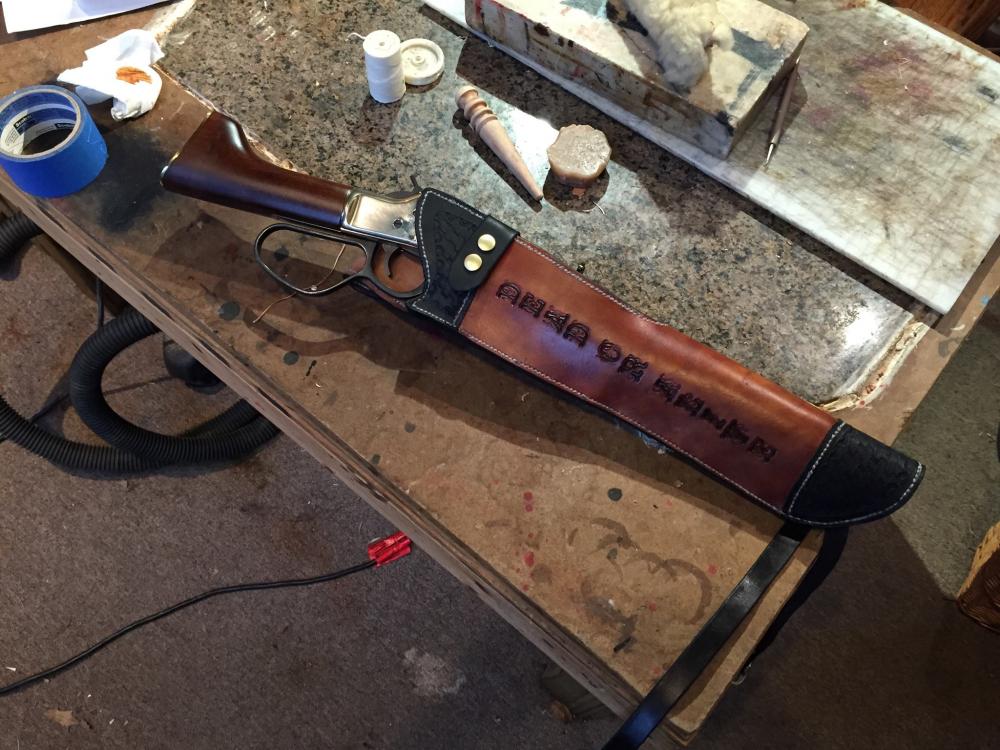
Nice job. They are fun to do no matter how impractical the gun is. This one has an open front down to just below the rear sight and attachments so he can wear it on his belt or attach it to his four wheeler. The double snaps keep it in the holster but can be undone so he can roll it out of the holster with minimal lift. -

leatherman Pouch
Peter Darby replied to Peter Darby's topic in Purses, Wallets, Belts and Miscellaneous Pocket Items
Neither. That is why the stitching isn't evenly spaced. I used a small drill bit. Then I went over it with an awl to give me the diamond shaped hole. -

leatherman Pouch
Peter Darby replied to Peter Darby's topic in Purses, Wallets, Belts and Miscellaneous Pocket Items
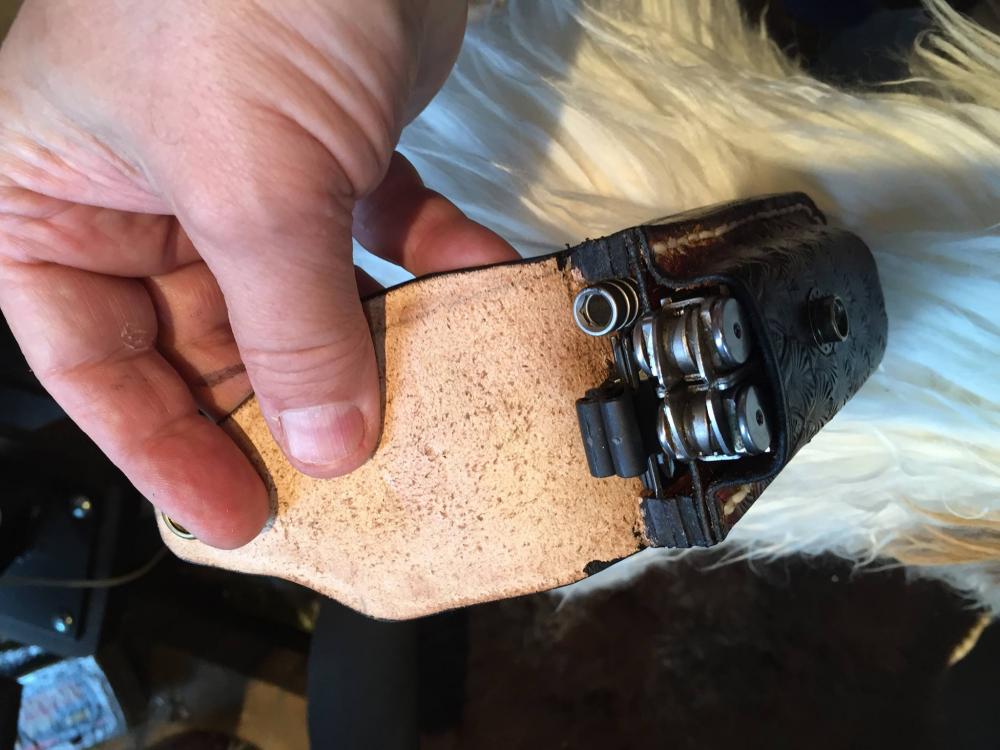
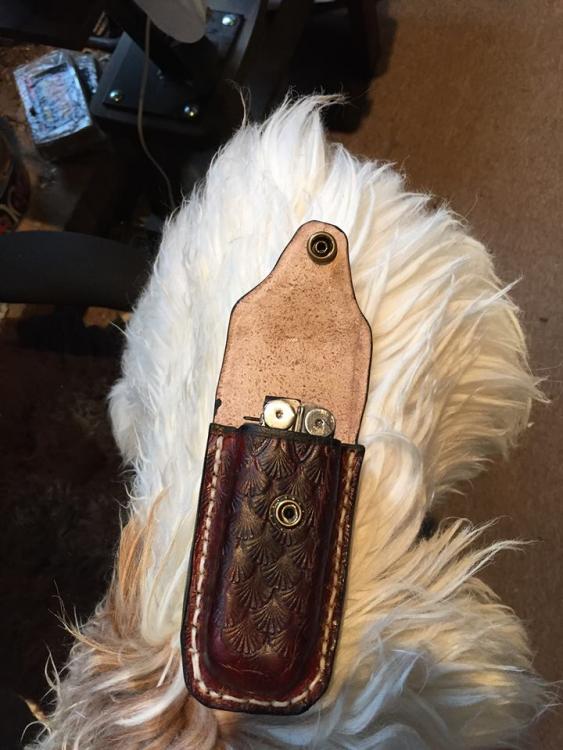
No real problem putting the layers together. I Molded the top, cut it to size than as I glued up the U shaped layers for the accessories I had the outer size. than one final full piece to separate the accessories from the tool and I was ready to drill the holes. -

leatherman Pouch
Peter Darby posted a topic in Purses, Wallets, Belts and Miscellaneous Pocket Items
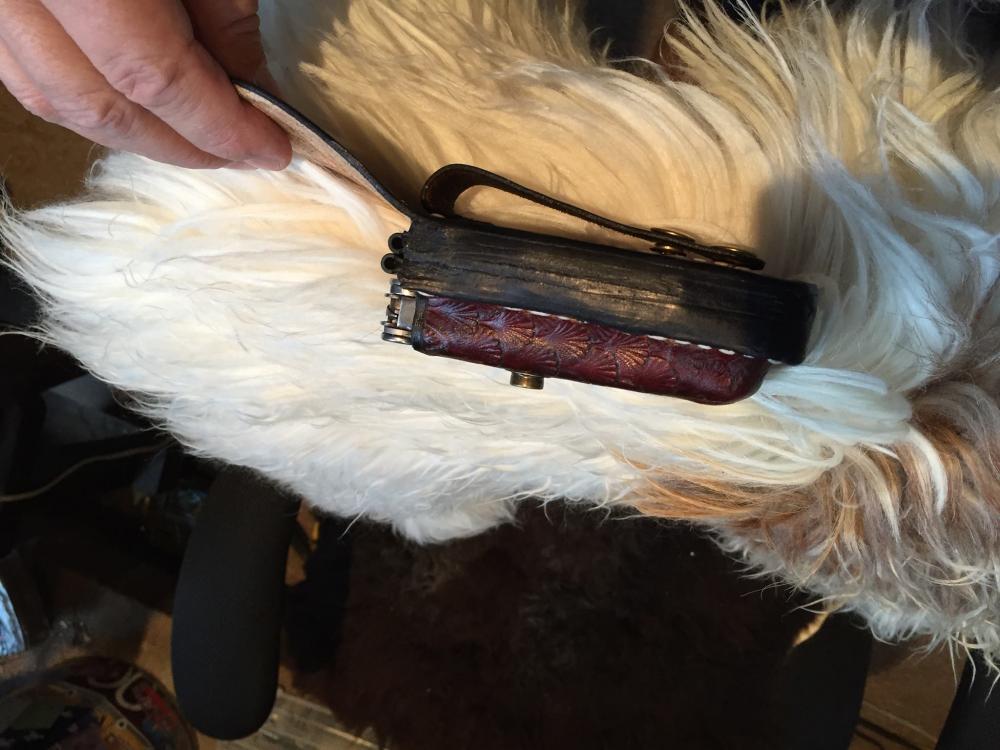
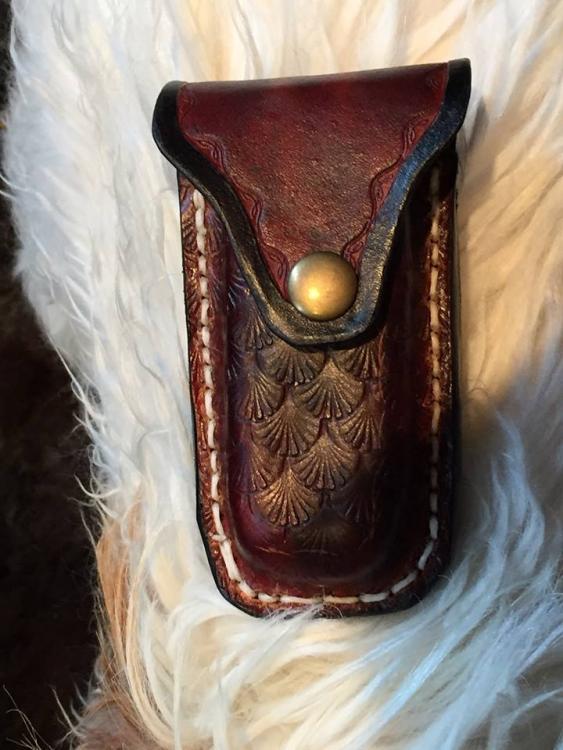
I bought the accessory pack for my leatherman wave. But quickly realized that I probably wouldn't have the accessories when I would finally find a use for them. My cure was to make a pouch that would contain the leatherman, two tool packs and a screwdriver extension (very handy). To ensure that I could keep to the stitch line from front to back I clamped a straight piece of wood to my drill press and used a long but less diameter drill bit than my awl. I freehanded the spacing of the stitching so it isn't as even as it would be if it was a commission or for a friend. In a picture it shows, on my belt not so much. I used snaps on the belt loop so I could remove it from my belt without undoing my belt. Being left handed my belt buckle makes it harder to put on and remove things on the left side of my belt. I used two snaps to make it harder to come unsnapped by accident and harder to slip off if it does come snapped. -

Glock 42 holster
Peter Darby replied to Thines's topic in Gun Holsters, Rifle Slings and Knife Sheathes
no picture yet -
-

First Knife Sheath
Peter Darby replied to bmalugin's topic in Gun Holsters, Rifle Slings and Knife Sheathes
You can include the welt in the wet molding stage. It will allow for a tighter fit although I would sew up the sheath then wet it down and mold it around the handle. Without the welt you run the risk of the knife blade edge cutting the stitching. Usually at a very inopportune time such as when wearing it and sitting down or bending over. -
It looks good to me.
-

Buck Knife Sheath
Peter Darby replied to tclaridge's topic in Gun Holsters, Rifle Slings and Knife Sheathes
I also use a drill press. I make sure I elevate the stitching line with some leather or wood so it is perpendicular to the drill.<br /> -

A Western Gun Rig For A Celt
Peter Darby replied to MattW's topic in Gun Holsters, Rifle Slings and Knife Sheathes
LOve it. -

My Best Sheath Yet
Peter Darby replied to stu925's topic in Gun Holsters, Rifle Slings and Knife Sheathes
I like it.<br /> -

Journal Cover With Pen Lock
Peter Darby replied to tclaridge's topic in Purses, Wallets, Belts and Miscellaneous Pocket Items
I really like the pen as a closure Nice job overall. -

Valet Tray
Peter Darby replied to AndyL1's topic in Purses, Wallets, Belts and Miscellaneous Pocket Items
II may have to try some of those designs. Here is my unfinished version. I do the pinch the corners and secure with chicago screws or rivets style . I put the flesh side up so I can carve a design. It is the first time I put them in a celtic themed craft show and they all sold. -
Welcome, Your kit is a good choice. It is how I got started years ago. It will give you a solid set of tools that you can add to as you need them.
-

Finished A Commision This Week
Peter Darby replied to Peter Darby's topic in Gun Holsters, Rifle Slings and Knife Sheathes
-
Here is a holster I made for a customer. The holster is cut down so that the front sight isn't enclosed. While the retaining strap holds the gun tightly in place. Everything is hand sewn. I had to put the belt loop close to the holster since any longer and the holster would have hung below his knees. I put a leg strap through a slot in the back so he can strap it down or strap it to his four wheeler. He liked the final product so much he tipped me an additional $60 to the original price.
-

Its Been Awhile Since I Posted....
Peter Darby replied to JRLeather2's topic in Gun Holsters, Rifle Slings and Knife Sheathes
Excellent work all around. I like them both. -
I made a copy of the Hedeby Quiver for an art competition. Based on the recovered pieces found on the island. At first I though it was rather awkward but when I tried it I found it was incredibly efficient. I made one for everyday shooting and will never go back to those bandoleer type back quivers.
- 6 replies
-
- rolled wallet
- purses in pieces
-
(and 3 more)
Tagged with:
-
I like it. I think your going to love the book also. I also do a lot of medieval reproductions and find it amazing how often a medieval everyday item will fit into modern life with little or no change. I make a Viking back and side quiver that is so much more practical than the modern bandolier style we use in todays world. As an aside once you make one, the quivers on the Bayeux tapestry make sense.
- 6 replies
-
- rolled wallet
- purses in pieces
-
(and 3 more)
Tagged with:


