radar67
Members-
Posts
165 -
Joined
-
Last visited
Content Type
Profiles
Forums
Events
Blogs
Gallery
Store
Everything posted by radar67
-
-
And the scrap metal places.
-
Adding Semi Precious Gemstones To A Piece
radar67 replied to Leather Girl's topic in Collars, Cuffs, Leashes and Leads
E6000 is the glue you are looking for. -
No offense to the right handed crowd, but it has been studied and left handed people are usually more creative than right handed people, something about the right side of the brain being the creative side and left handed people are usually more right brain dominant than right handed people.
-
There is a long discussion thread on here about pricing. One of the suggestions, that I find works very well, is to charge 5 times the cost of materials used to make the item.
-
Tandy has several of Al Stohlman's books on leather belts. They are loaded with patterns and ideas. You can also check some of the craft aids they sell.
-
Beeswax
radar67 replied to BWL's topic in Dyes, Antiques, Stains, Glues, Waxes, Finishes and Conditioners.
Tallow is the fat rendered from beef or mutton. If you have ever made lard from a hog, you can do the same with beef. At room temperature, tallow is solid. -
I like the timber brown Eco Flo dye for my light brown colors. I mix it with water 50/50. If you dampen the leather with water first, the dye flows on smoother. Another way to keep the color light is to use an airbrush to apply it. If you want to antique the piece, let the dye dry for 24 hours, buff the crap out of it and apply Acrylic Resolene mixed 50/50 with water. Let it dry for 24 hours, buff, then apply your antique. Let that dry 24 hours and re coat with resolene. There are many different techniques to use, but this is what works for me. I tried the satin sheen and it wasn't good at all for my needs.
-
The stamp is an O85, item number 68085 at Tandy. It looks like the finish job was done with an airbrush.
-
Clear packing tape followed by sponging the surface is all I do. After you apply the clear tape, you can run water over the surface to case it if you want.
-
I experienced the same results the first time I tried wet forming. I stretched that piece of leather back to size over the form and the project turned out okay. I have a armor grade, hardened, miniature pirate hat though. You can literally knock someone out with it since it is so hard. I was going for a miniature pirate hat. I'll try to get a picture up tonight.
-
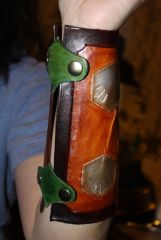
Iron Pounder, it sounds like the product may be going on too thick. I tried resolene straight from the bottle and it appeared thick to me. I started mixing with water and use the cheap bristle brush Dwight mentioned on most of my projects. I have airbrushed the resolene on and got good results. I had a leather arm bracer autographed by a band I like and sprayed over the Sharpie signatures to protect them. Hectron, I started out with Satin Sheen and was very disappointed with it when I tried to use it as a block for antiquing. The project came out okay, but much darker than I had planned. As was stated earlier, I think the "Sheen" products are good "starters". However, there are many other finishing products on the market that are much better. Resolene is the product I am comfortable using and it does what I want it to do for end results i am trying for. There are many people who bad mouth do not recommend the ECO Flo products. I use the dyes, highlighters, cova colors, and antiques and am pleased with them. I have used the "all in one" while helping a friend with a class and was not impressed with them, neither was my friend, a 17 year leather veteran. I think experimenting with the different products to find what fits your needs is the best practice. I still have a few products I want to try eventually, but for now the resolene and Eco Flo dyes work for me. A thought on the "plastic" look. I think I may try the resolene mixed 25/75 with water to see if I can produce a satin finish with resolene.
-
Dump the Super Sheen down the drain and get a bottle of Acrylic Resolene. Mix it 50/50 with water. For the edges, after I dye the project, I use a canvas cloth or a burnishing wheel (Tandy) to slick the edges. I don't use the Gum or anything other that the damp dye or water. After the dye dries for 24 hours, I buff all surfaces until they have a sheen to them, then I apply the resolene and let dry 24 hours and buff. I use a piece of scrap sheeps wool for all my buffing.
-
I've read everyone's comments about Eco Flo and I continue to use it. I seal my projects with Acrylic Resolene mixed 50/50 with water (another water based product). I don't have issues with dye coming off. After I dye the project, I let it dry for 24 hours, then I buff the crap out of it until there is no transfer to the buffing cloth. I seal the project and let dry 24 hours then buff again. I seal both sides as well. During Mardi Gras, I was caught in the rain with a leather arm bracer. It was soaking wet, but the water just rolled off. There was no dye transfer, no discoloration, no problems.
-
I got into this as a hobby as well. This is the second year I have joined the wholesale club (Elite) and have more than saved the membership fees for both years. Last year I saved over $1000 with the card. This is not a "cheap" hobby to have, the leather alone will take a big bite out of your wallet.
-
I have found that the eco flo products do a much better job if you let them completely dry (24 hours).
-
Tooling Custom Design Transfer Tutorial
radar67 replied to Kevin King's topic in Patterns and Templates
Have you tried printing to card stock? Most printers will handle that (100 LB paper). -
I use the Square Up device on my 3G Android phone. It does what it is suppose to do and the fees are not outrageous. Just don't get fooled into paying for the device, it is free from Square Up, all you have to do is ask for it. I know Best Buy and Radio Shack sell it for $10 or so. I got mine through the mail in about three days. Square Up will send your customer a receipt to either their cell phone or an email address (their choice). The customer also signs for the charge on your screen with their finger. 2.75% transaction fee for swipes, .15 cents and 3.5% transaction fee for inputting the number manually. Hope this helps.
-
When I get my leather in, I figure how many square inches I have. When I cut a pattern out, I figure out how many square inches I charge out. ie, if I cut a 10 inch circle out of the hide, I figure a 10 inch by 10 inch square of material to cover the waste. Now, I may be able to use some of that waste for a key fob or something. Those piece I get out of scrap are figured the same way as far as charging out of the cost of material, even though they have already been "paid" for. It works for me. As for the liquids, I figure .25 per unit of dye, clear, paint, etc that is used. If an item has 2 dye colors and two coats of clear, it gets charged 4 units. That makes my liquids more than pay for the cost of the bottles. I haven't really figured out how many units I get out of a bottle, so don't really know how to count it in inventory. If you have 3/4 of a bottle, count it as .75 in the inventory.
-
New To Leather Need Advice On The Tools I Need
radar67 replied to nichovaladez's topic in Getting Started
To finish the edges, you can get them damp with a small sponge and use a piece of canvas or denim to rub the edge. Fold it up a time or two and buff the edge rather hard. You want to heat it up a little. The plastic burnish wheel sold by Tandy does a nice job too. -
New To Leather Need Advice On The Tools I Need
radar67 replied to nichovaladez's topic in Getting Started
Just to cut it out and put it together, a utility knife, hole punch, and a rivet setter is all you need. -
Check out a product called Bluecreeper to get that screw freed up. It has been used on heavy equipment to get tracks off, and it is not harsh on your hands or tools. American made by a small mom and pop company.
-
Good Metallic Paints?
radar67 replied to Amanita's topic in Dyes, Antiques, Stains, Glues, Waxes, Finishes and Conditioners.
I use the Folk Art as well. I usually mix it with water to thin it. Thinning it helps it bond to the leather's pores better, it does take more coats though. I seal with a 50/50 water/resolene mix. Two coats with a good amount of dry time in between coats. FYI, do not attempt to seal before the paint has a chance to completely dry. -
Have you looked in the Leathercraft Library that Tandy has online? Many of their older patterns are there.


