Josh Ashman
-
Posts
1,183 -
Joined
-
Last visited
Content Type
Profiles
Forums
Events
Blogs
Gallery
Store
Everything posted by Josh Ashman
-
Lone Ranger
Josh Ashman replied to Forester's topic in Gun Holsters, Rifle Slings and Knife Sheathes
Great job Forester! Thanks for sharing! -
I use a 14 oz poly mallet as shown in the link below for punching slots and holes and one of the smaller versions of the same thing for tooling. I use a maul I picked up from Weaver for my makers stamp which is fairly large at roughly 1" x 1-1/2". I prefer a mallet for most things but that's what I mostly use, someone who uses a maul more often would likely prefer them, just whatever you get used to I imagine. I have had good experiences with the poly mallets. They last for years are relatively cheap. The ones from SLC in the link below are made in the USA. https://www.springfieldleather.com/Mallet-Poly-14oz Good luck with your projects. Josh
-
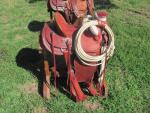
Great looking saddle Randy! Nice job!
-
Very nice!
-
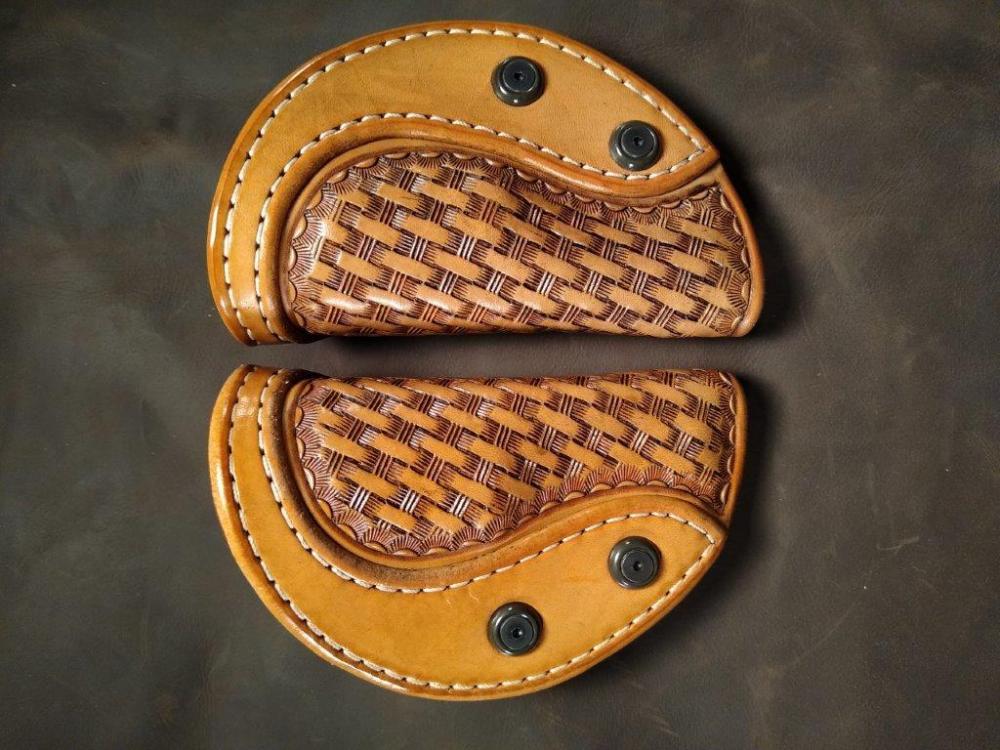
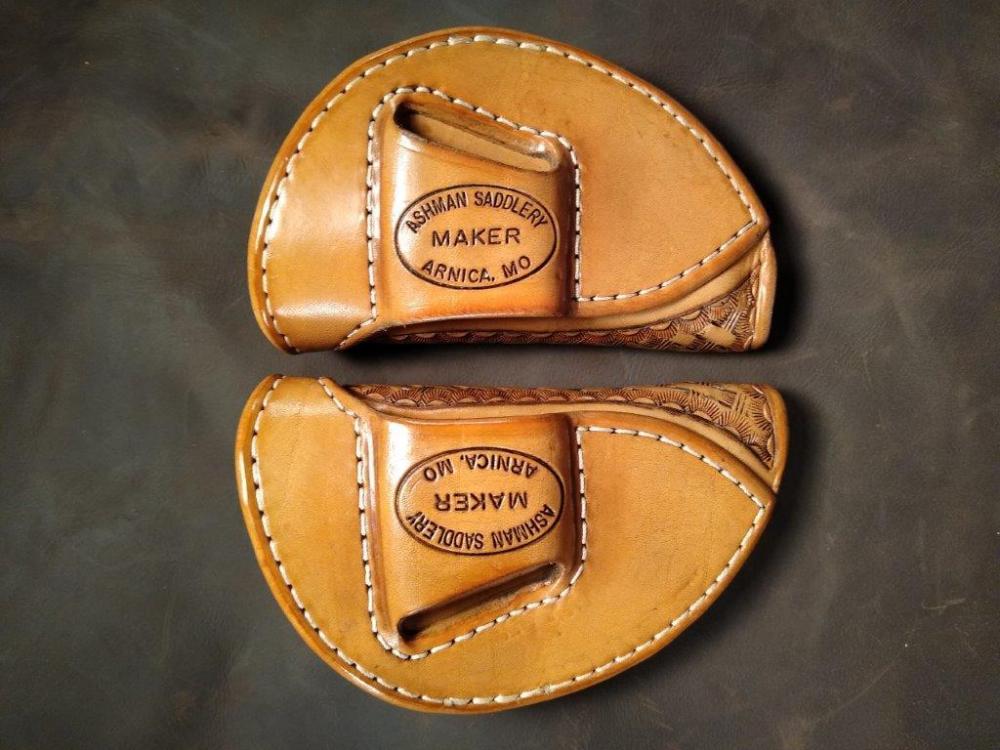
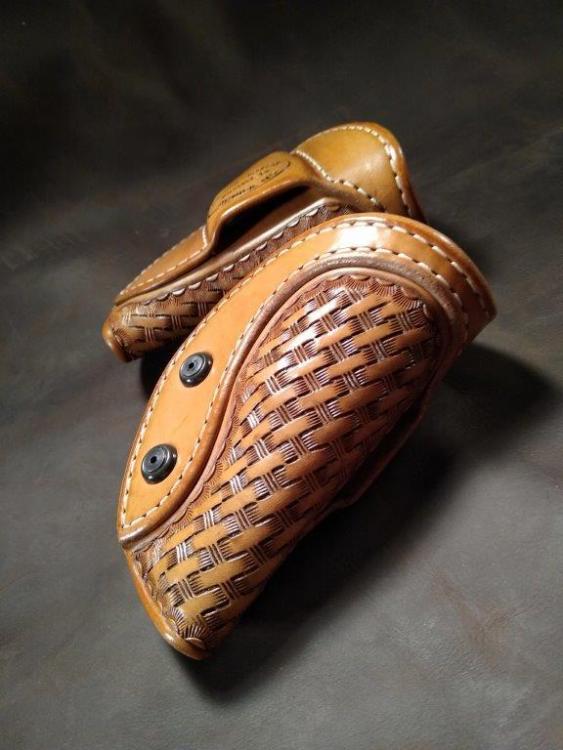
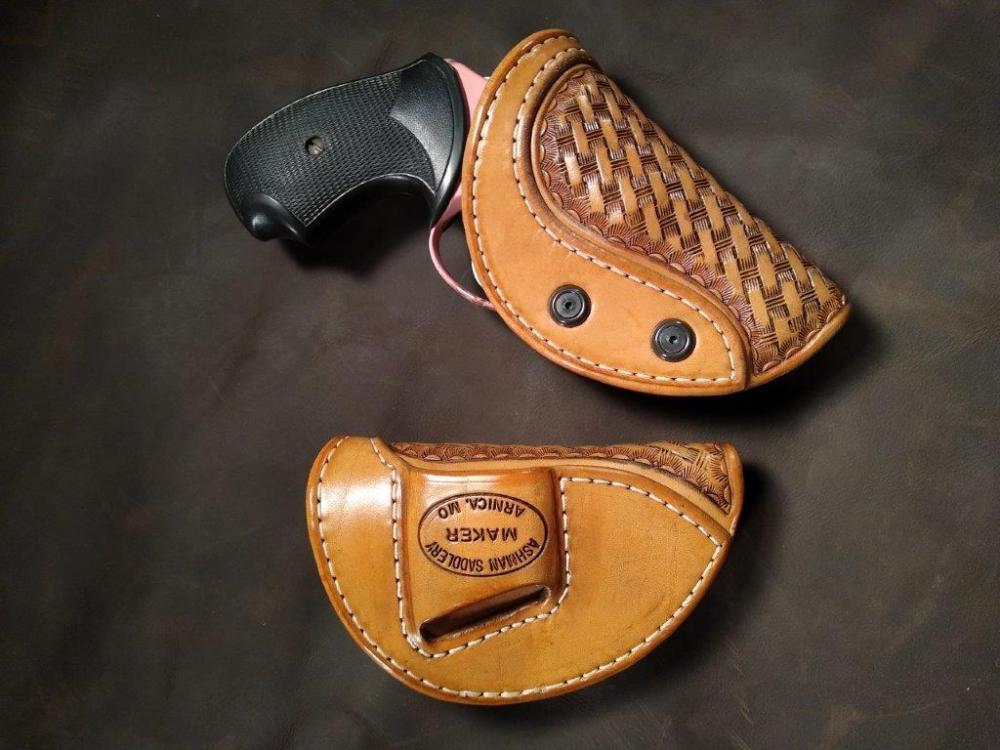
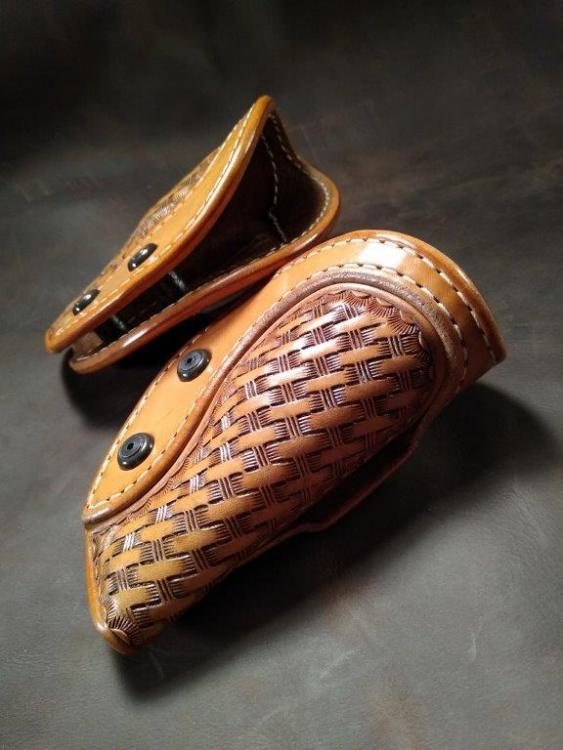
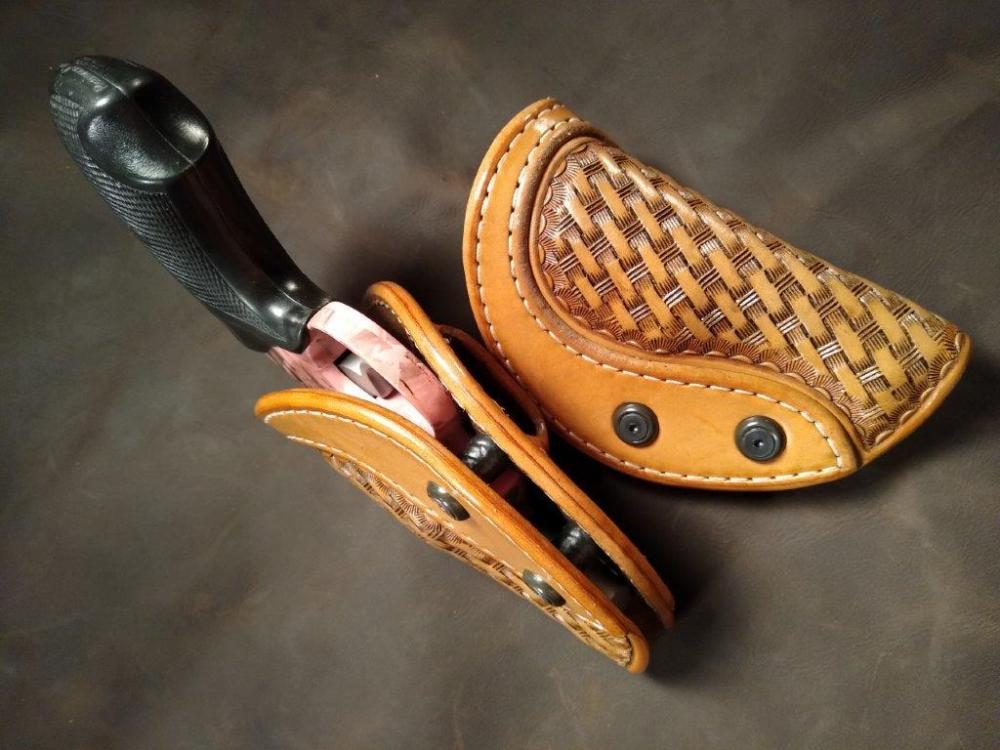
Matched Pair for J Frame S&W
Josh Ashman replied to Josh Ashman's topic in Gun Holsters, Rifle Slings and Knife Sheathes
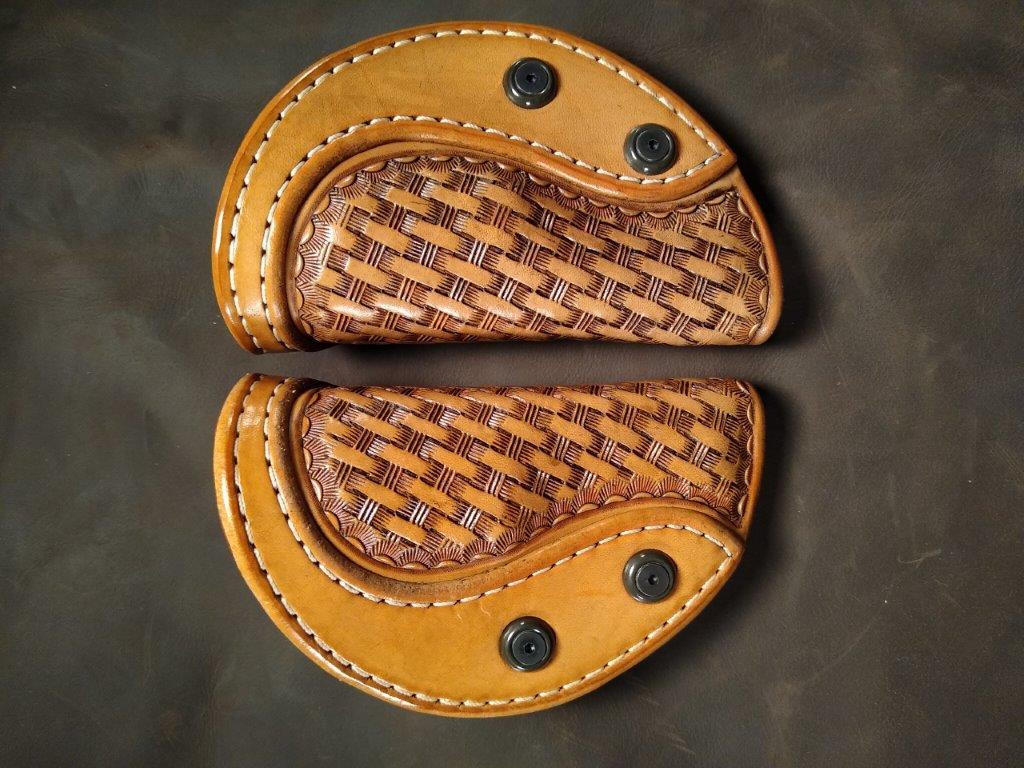
Thanks Sturme! Exposed triggers on revolvers or SA auto's don't cause me much concern, but I respect that other people have different ideas on that. I appreciate your comments! Thanks Ehvhram! Thanks Bruce! Thanks Stetson! They are spacers that are used in place of a sewn mainseam and they are adjustable to increase or decrease the tension. The parts are a stainless T nut, a 8/32 screw, a finish washer and a length of fuel hose to cover the screw between the leather. Thanks AZ! All the best everybody! Josh -
LR & RH matched pair of holsters for J frame S&W's. Built from 7 oz. HO. Finished with Fiebings Hi-Liter after a light coat of NF oil then top coated with M&G cut 50/50. After that dried I put a little Kiwi neutral on and buffed it off. The pistol in a few of the pics is a Colt Cobra as it's close enough to fit and I didn't have a J frame handy. Have a great Friday everybody! Josh
-
Hey Craig, I've built more than a few of these in a crossdraw for customers and they've been quite happy with them. I don't however have any personal experience to share. I would recommend adding a hammer thong if you removed the strap just for insurance that the pistol would stay put for the long haul. The thing about building one and seeing for yourself what you think about it is that if it isn't 100% perfect the first go around you can adjust what you don't like and get it on the next try. Good luck on your holster! Post some pics when you get it done. All the best, Josh
-
Thanks Bruce!
-
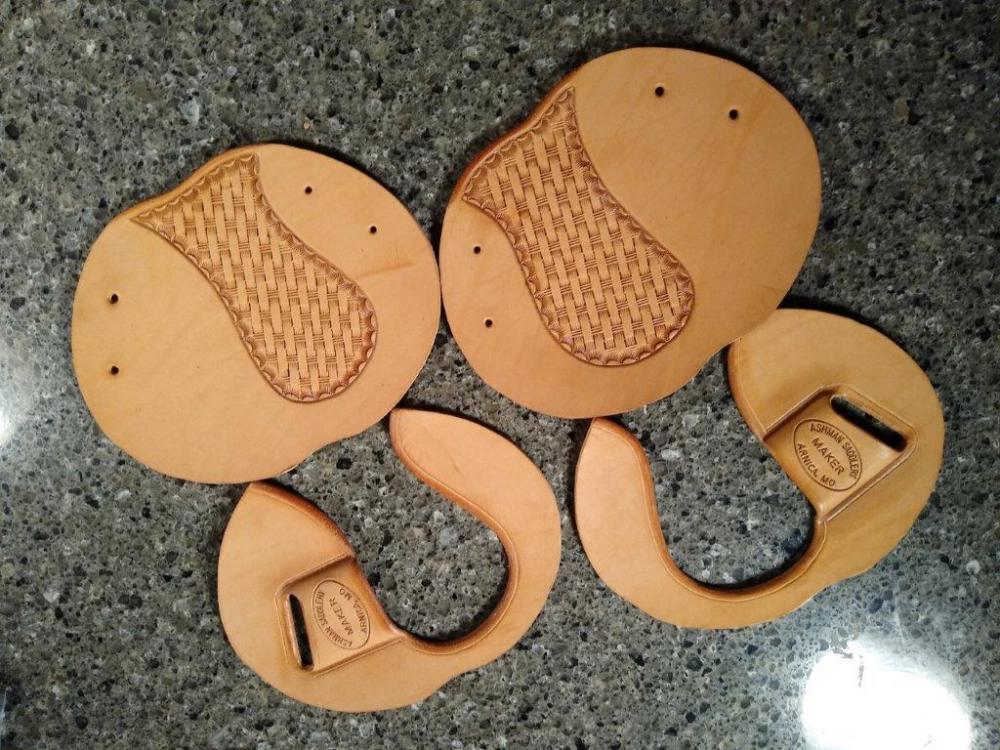
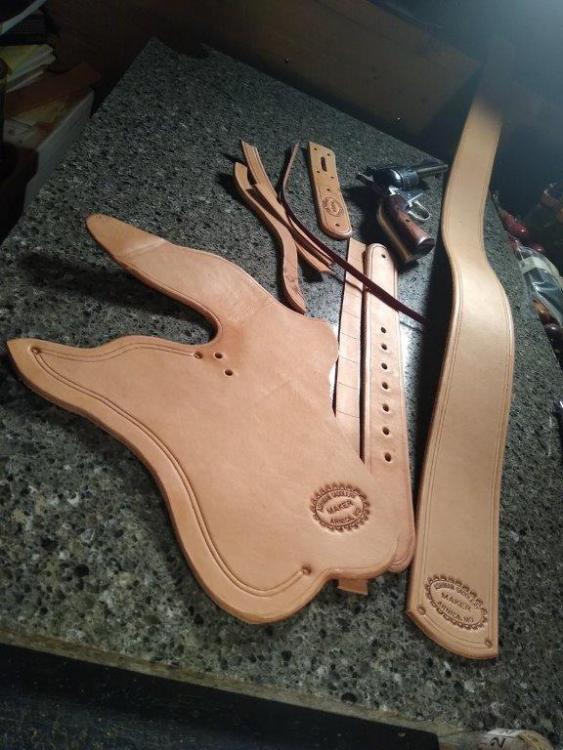
Hello bcraig, Here is a picture of a finished holster and of the leather before it was dyed and assembled. The more the belt loop portion angles in towards what will be the top of the holster the steeper the cant. this was built for a wider cartridge belt but it's the same for a pants belt. As to your other questions, as always personal preference will dictate however here are some of my thoughts; figure your paper patter prior to ordering your precut and you'll know for sure if your OK. My guess is 10" square is probably OK for a 4-3/4" SAA clone. I'd use 10/11 but a good 8/9 is probably fine. I usually try to have the belt loop portion 2" to 2-1/2" wide at the top of the fold. I like a hammer thong for retention. Easy to add it in and easy to not use it if you don't want it. I use a full welt on this type of holster, nothing wrong with a partial welt, just preference. Hopefully this is helpful, good luck on your project! Josh

-
What hardware and tools to find at hardware shop
Josh Ashman replied to Kj86's topic in Saddle Supplies, Tools & Trees
A few suggestions; 1) I use a regular horseshoeing hammer as a saddlers hammer. It works fine for me. 2) I've seen where others have welded flat bar tabs to the self adjust pliers similar to channel locks to make a workable set of home made cantle pliers. 3) Not sure if you're building a "western" saddle or an "english" one, but the hardware and contact cement for a western one is likely available from a hardware store. You'll want cut tacks of various lengths, SS screws with finish washers, drywall screws or box nails, copper rivets with burs and a handful of other items which are relatively easy to come by in the US at a decent hardware or farm supply store. Not sure if that's the case down under. I have no idea what's required for an english saddle. Good luck! Josh -
Thanks Mike! Good luck with your money belt project! Post some pics when you get it done. All the best, Josh
-
1911Colt v. Springfield
Josh Ashman replied to spurdude101's topic in Gun Holsters, Rifle Slings and Knife Sheathes
Should be the same as long as neither the Springfield or your Colt mold has a rail. Good luck with your holster! Best, Josh -
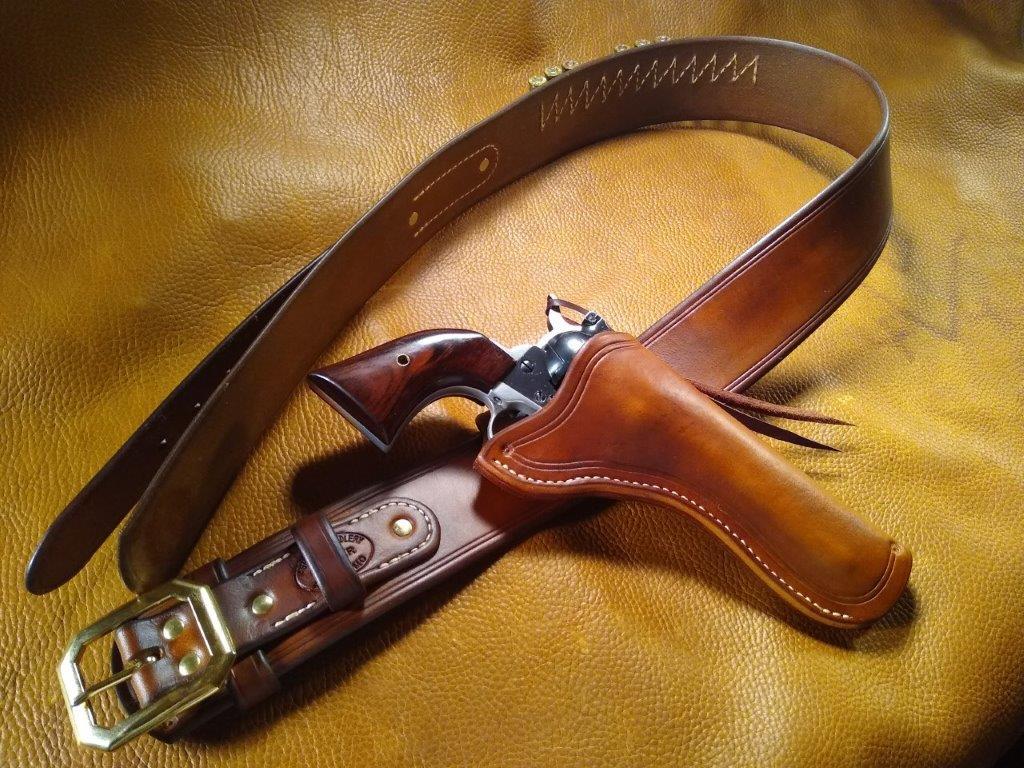
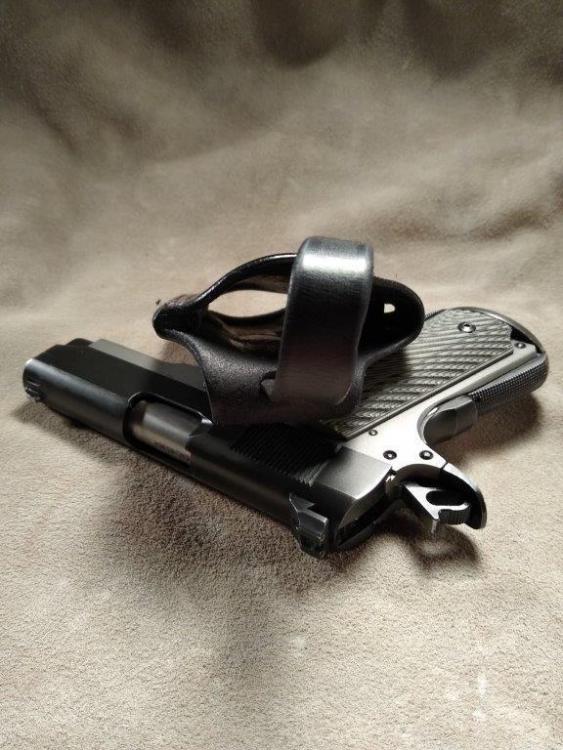
Thanks Samalan! Hello Mike, A "Threepersons" holster is folded around the "front" or "top" of the pistol with the main seam on the "bottom". They also have the trigger guard exposed and a closed "toe". It's great design and I build a fair amount of them. I've pictured one below. The "Rhodesian" is folded around the "bottom" of the pistol with the main seam running along the "top". This makes a nice built in sight channel. The trigger guard on a "Rhodesian" is covered and the "toe" is open. At least that's how I understand it. Have a great day everybody! Josh

-
Thanks everybody! Hope you all have a great day! Josh
-
Nice! Thanks Chuck! Have a great day everybody!
-
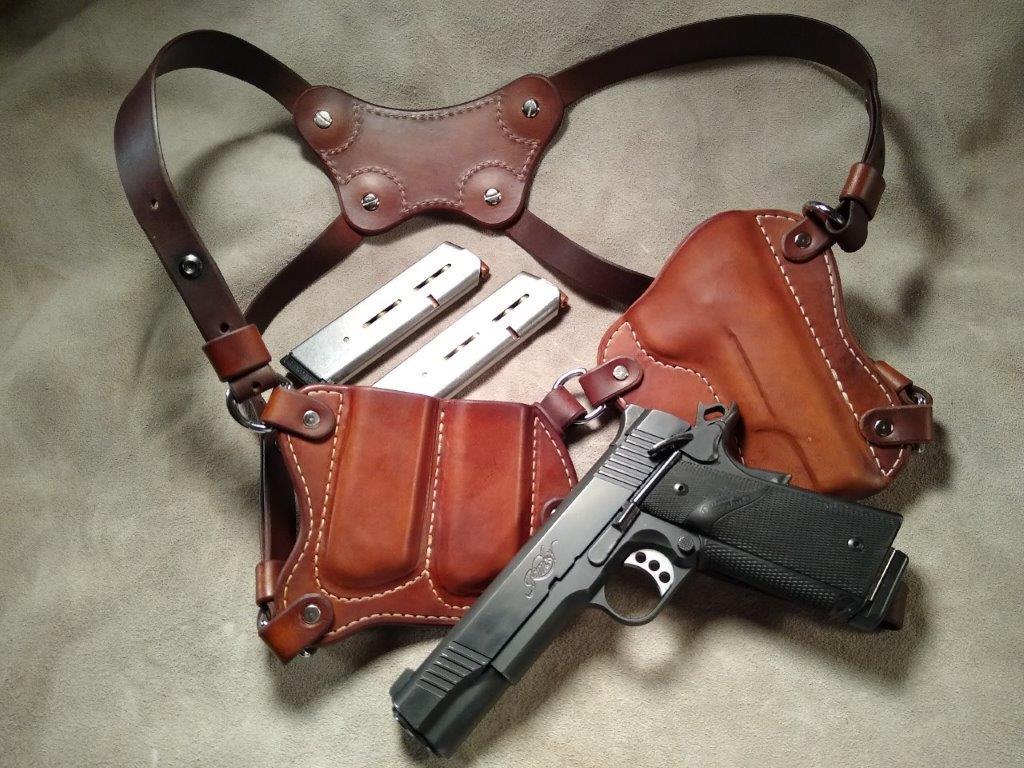
Just for fun (it's not possible to hijack your own thread is it?), here's a pic of the horse holster I recently molded. the rig is something I made for myself years ago, but with a "Commander" sized holster. I'd been meaning to make a full size (Govt. Model) holster for it for a while and put it back in use and finally got around to it. So, the mag pouch, back center piece and straps are all from back when, just the holster is new. Chuck, this Kimber would be the likely recipient of those elk grips should that work out. Have a great afternoon folks!

-
Thanks Fred! I may be guilty of typing in secret code Thanks Sideforce! Thanks Chuck! By the way, I'm still up to get a pair of elk antler grips for a full size 1911 from you if you ever have a set up for sale. Shoot me a message anytime on that! Thanks Dave! In this case HO is for "Hermann Oak". They are my favorite tannery to use for cowhide skirting or tooling leather. I have used horsehide several times and do generally agree that it is less likely to absorb sweat. After recently "molding" a horse holster it seems fair to say that it barely absorbs water at all even if dunked and held under for 20 seconds.
-
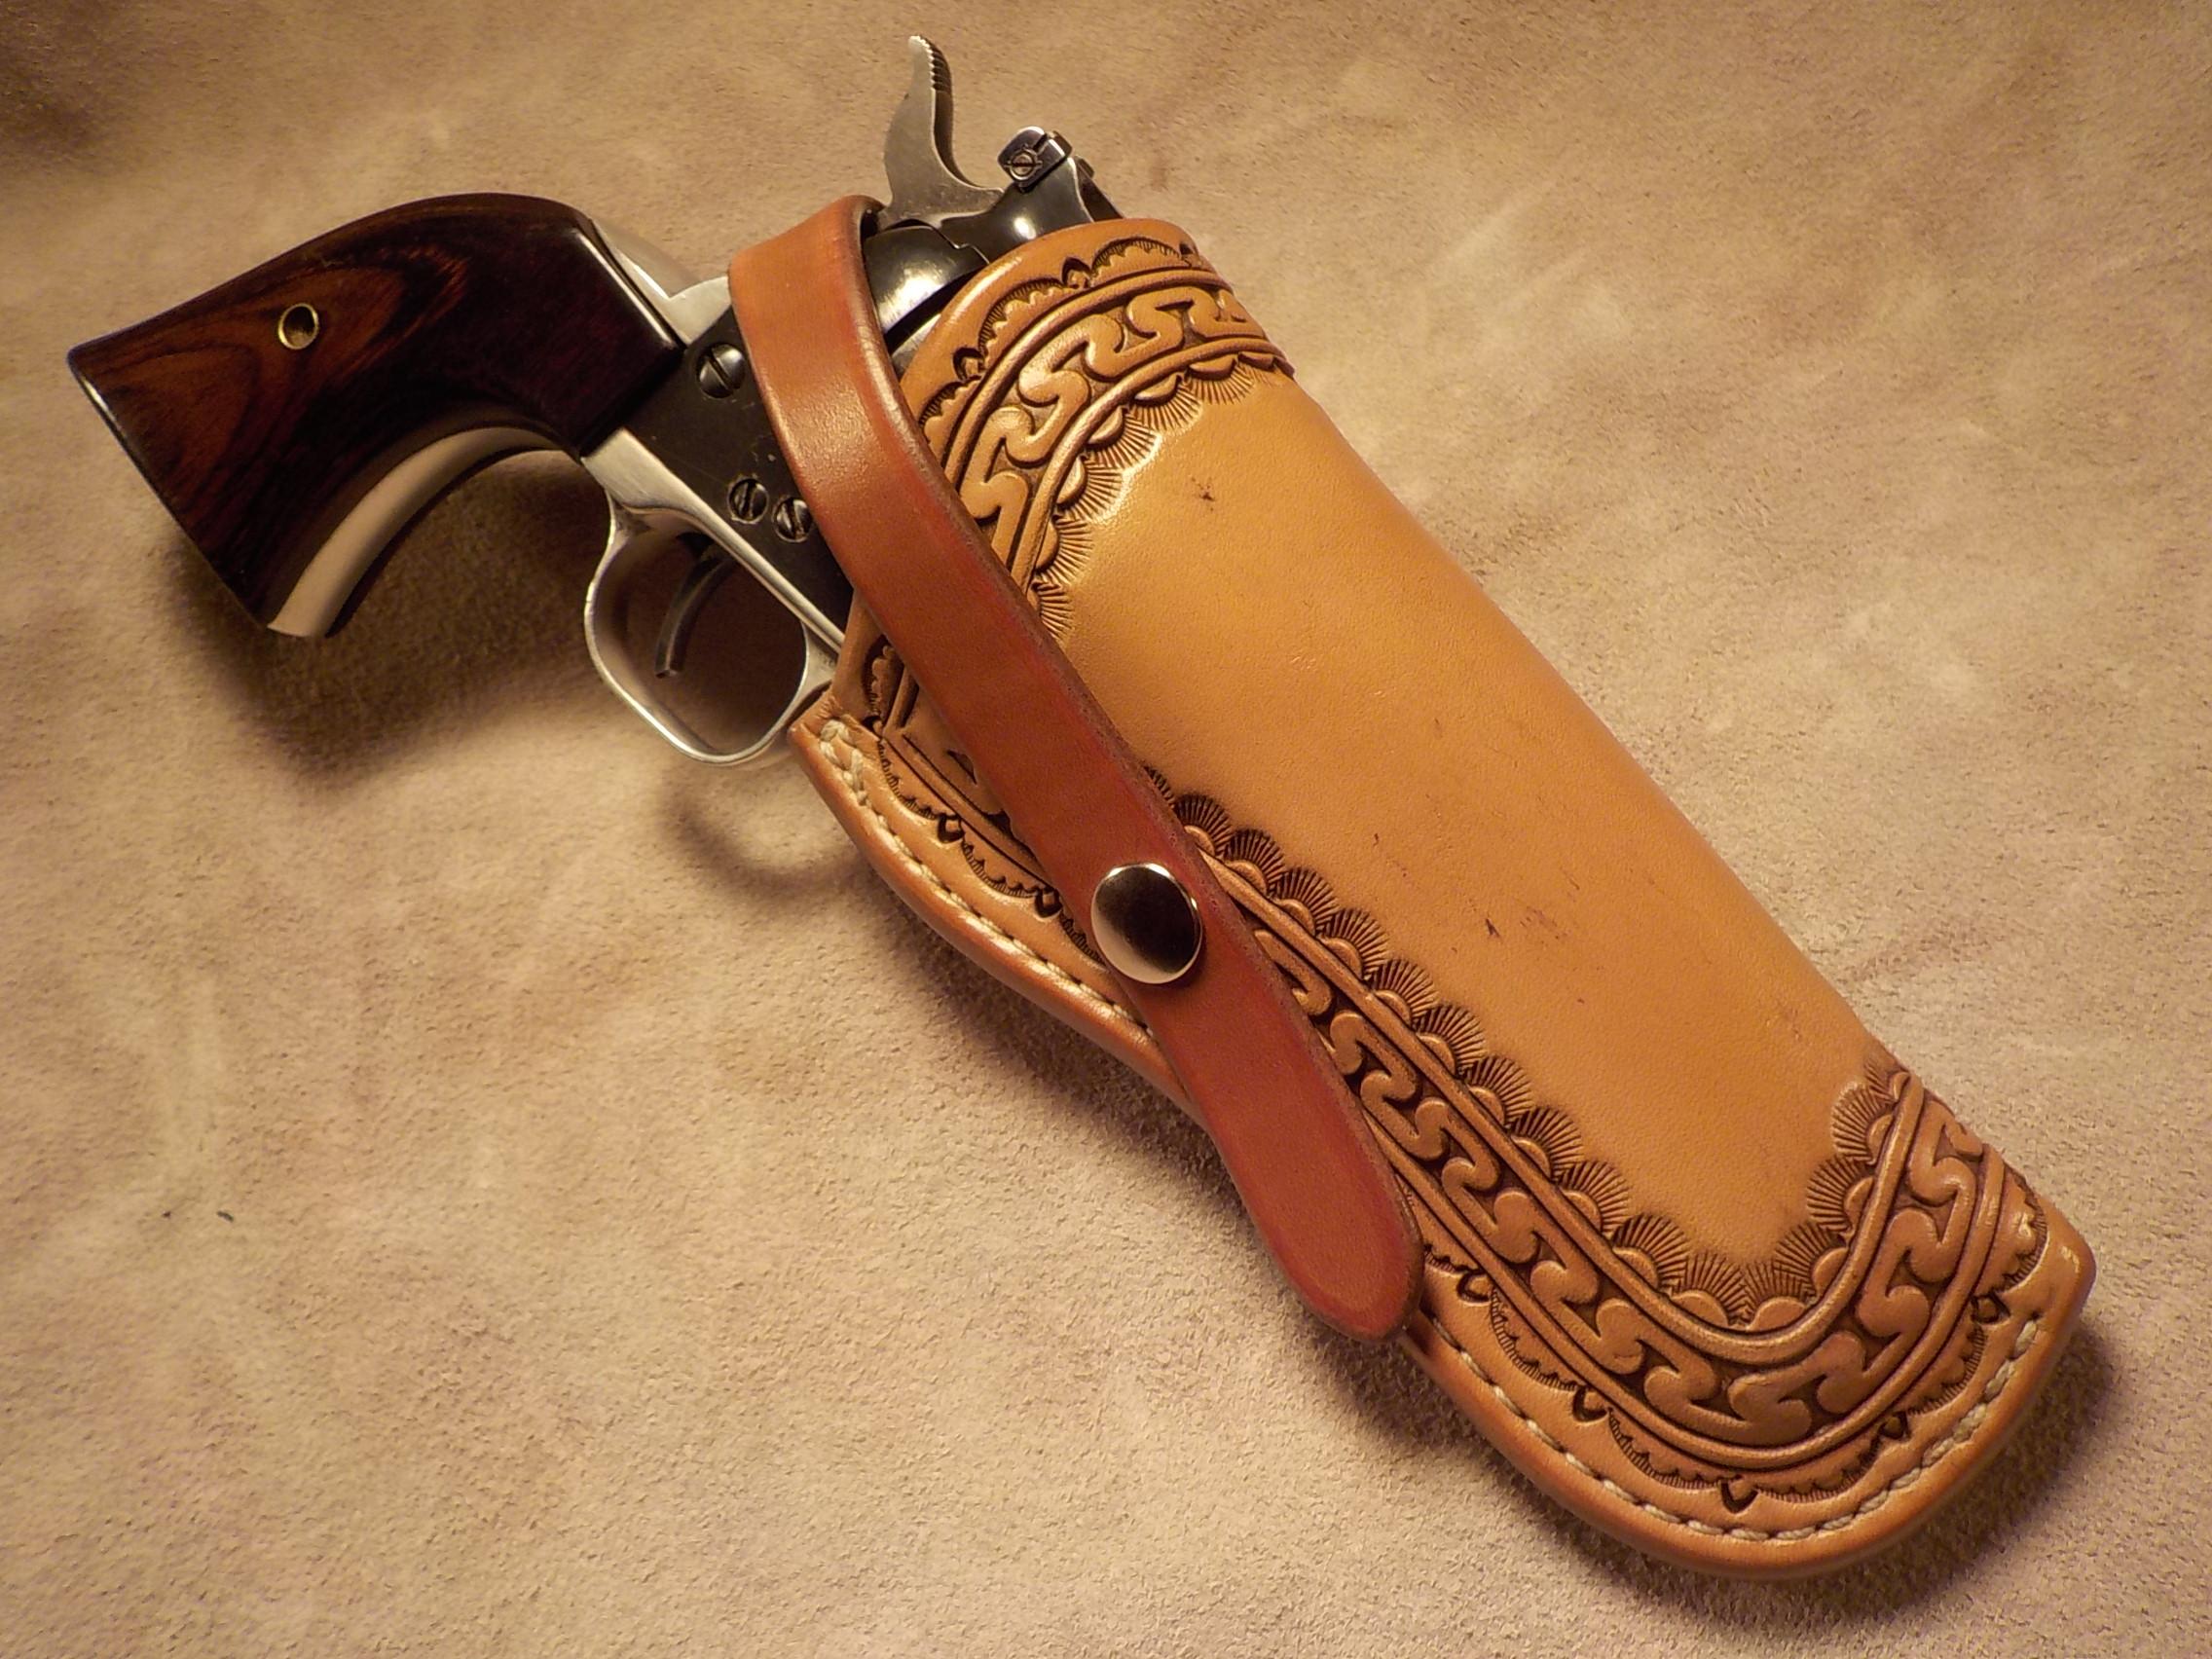
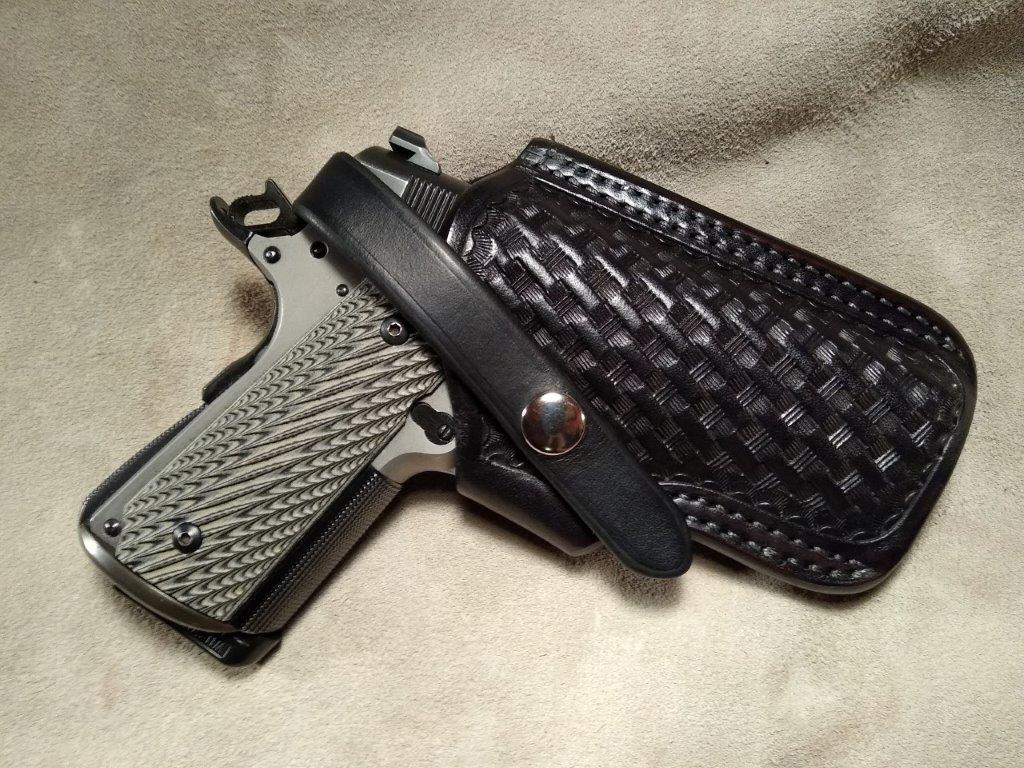
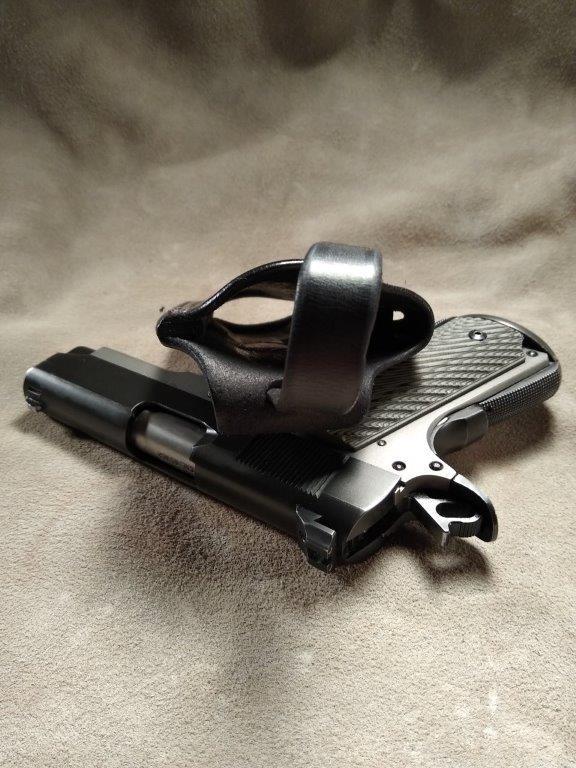
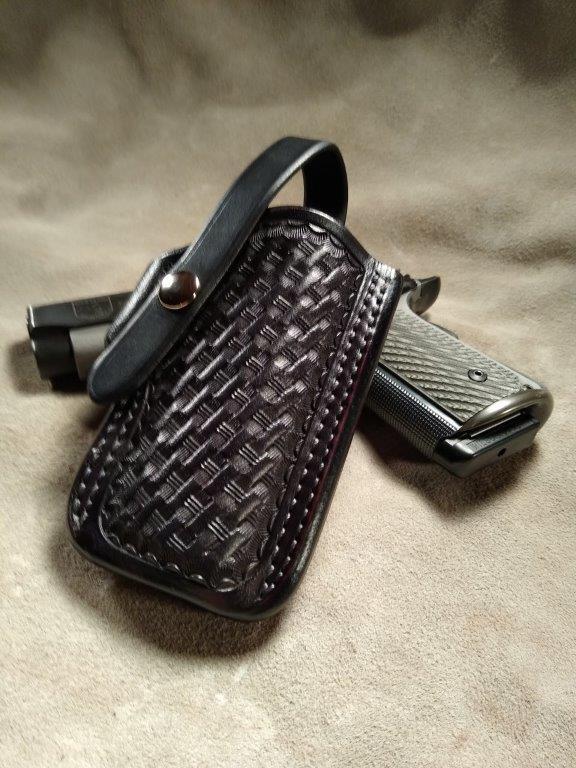
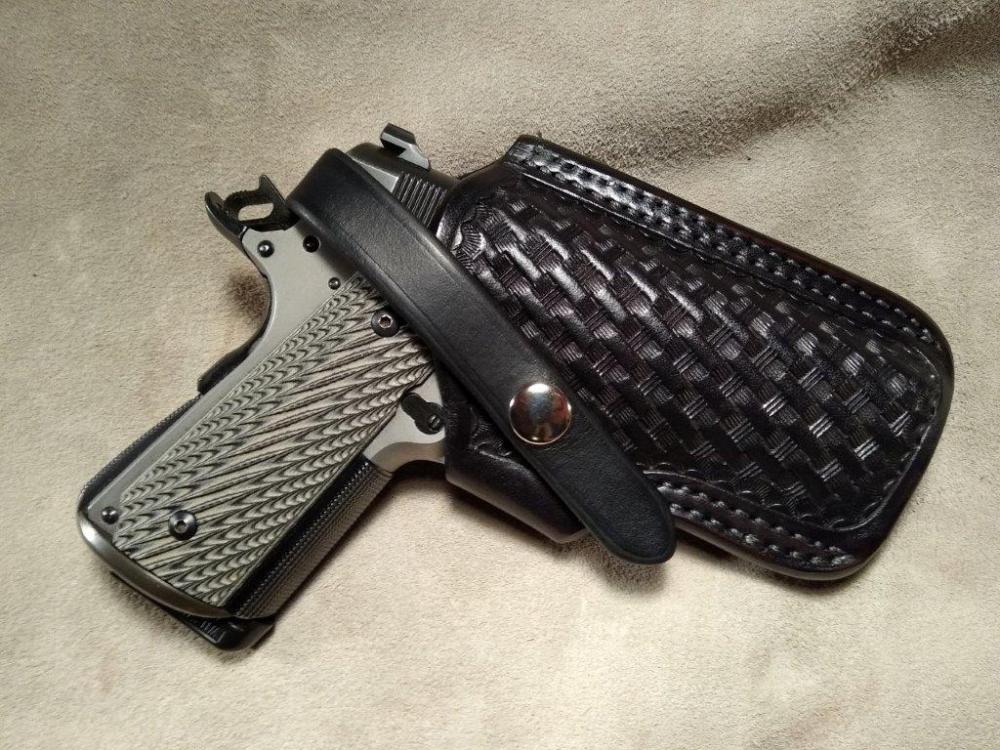
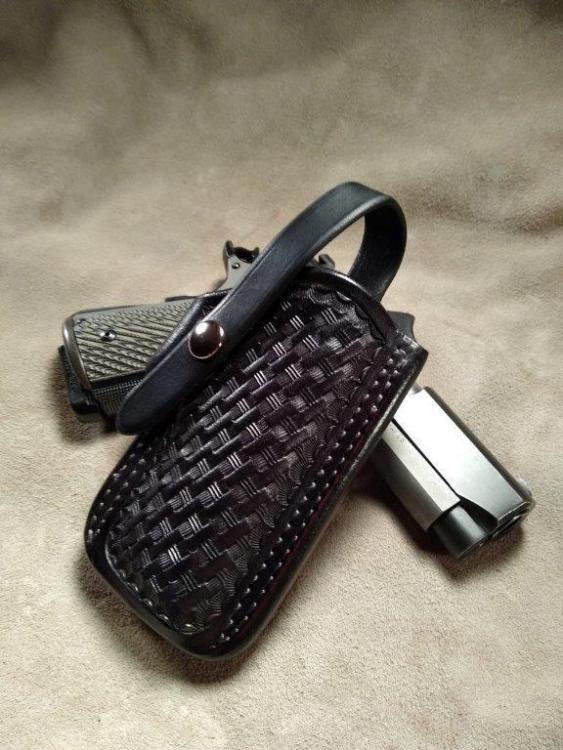
to the best of my knowledge Thad Rybka came up with the "Rhodesian" style holster that is a favorite of 1911 guys. Certainly, I'm a huge fan of the holster style in general and of Thad's work in particular. While no where near an "exact" copy this little OM holster is heavily influenced by the basic Rhodesian design. I've added a retention strap and basket stamping as this is a holster for my Dad for Father's Day and he's a fan of both. Built out of HO 8/9 Crafts man and dyed with Fiebings Pro Oil black thinned down with iso alcohol. Heavy coat NF oil then topped with M&G mixed 50/50 with water. Kiwi neutral for the final buf and to make it smell like a holster and not a freshly cleaned floor Have a great day everybody!


-
My take on a Western Gun Rig
Josh Ashman replied to KrisQ's topic in Gun Holsters, Rifle Slings and Knife Sheathes
Very nice, great job! -
Quick Change Stirrup Buckles
Josh Ashman replied to gothcowboy's topic in Saddle Supplies, Tools & Trees
Sounds like the 2nd set you mention might be Superior Buckles. You can get the full set or just replacement slides from Weaver here "https://www.weaverleathersupply.com/catalog/item-detail/65-2360/quick-change-stirrup-adjusters/pr_55931/cp_/shop-now/harness-saddlery/saddlery/miscellaneous" I'm not sure what the 1st set you were talking about is. Good luck finding them. Best, Josh -
B Movie Classic
Josh Ashman replied to Forester's topic in Gun Holsters, Rifle Slings and Knife Sheathes
Very nice! -
Dual SA Cowboy Rig
Josh Ashman replied to MLGilbert's topic in Gun Holsters, Rifle Slings and Knife Sheathes
I thought that might be the case. A few "draw" related things I've noticed; 1) the tighter you make the "loop" of your holster with the cartridge belt the less play there is with the holster riding up on the belt when you draw. 2) if you fasten the skirt and the holster you can avoid having the holster pull up from the skirt during your draw (I use a bleed knot that runs through the back of the holster body and skirt). 3) a tie down works but makes sitting with the rig on a bit of a nuisance. Again, great job! Best, Josh -
Dual SA Cowboy Rig
Josh Ashman replied to MLGilbert's topic in Gun Holsters, Rifle Slings and Knife Sheathes
Very nice! It looks like you might have the liner on the belt "roughside out". Is that correct? If so I'm curious as to why. If I had to guess it would be to give it a little more "traction", but I'm just not sure. Not that any of that detracts from the great job you've done, just something I was curious about. All the best, Josh -
My $0.02. Worth just what it cost you No need to remove the swell covering. Rivet or screw (grind the bottom of the screws off after their in) the filler to the metal horn in at least 3 places. When you sew the top with wings and bottom to the filler it will all be secured to the horn with these rivets/screws. Wrap the wings and trim them just below the swell cover then tuck them into the horn hole as Ron noted above. Or, you can cut them short of the bottom of the horn, once it's wrapped with mulehide, latigo or whatever your choice is it won't be visible anyway. Mulehide and similar horn wraps let you slip your dallies easier, rubber inner tube wrap has the opposite effect. Roping style dictates which is better, or if you're not doing much (or any) roping, whatever you think looks better will determine it. Good luck with your project! Josh
-
Hello Randy, I'm certainly no expert as I'm a novice maker at best, however my process for rough out saddles is to oil the grain side and use Aussie Wax from Fiebings on the flesh side. I put the Aussie Wax on fairly heavy by hand and then set the saddle (or un-assembled parts) out in the sun on a warm day to let it soak in. If the weather doesn't cooperate leaving the saddle near the wood stove with regular turning works as well, but sun is the best. This produces a finish similar to what Ed describes above (This finish will be darker, slicker and may look a bit blotchier initially but it will be a super durable finish that can take the weather.). It was recommended to me by an actual "real" saddle maker and mentor of mine and has worked well on the 3 rough out saddles I've built as well as several rough out saddles that I've worked on for others and countless numbers of tack items. All the best, Josh