-
Posts
1,183 -
Joined
-
Last visited
Content Type
Profiles
Forums
Events
Blogs
Gallery
Store
Everything posted by Josh Ashman
-
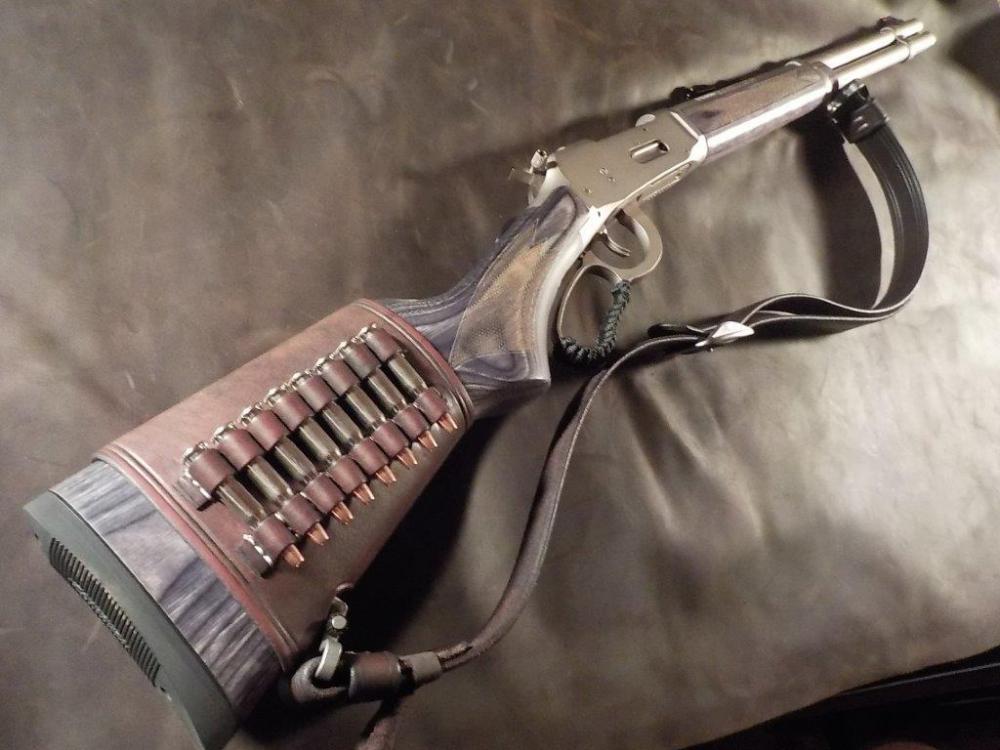
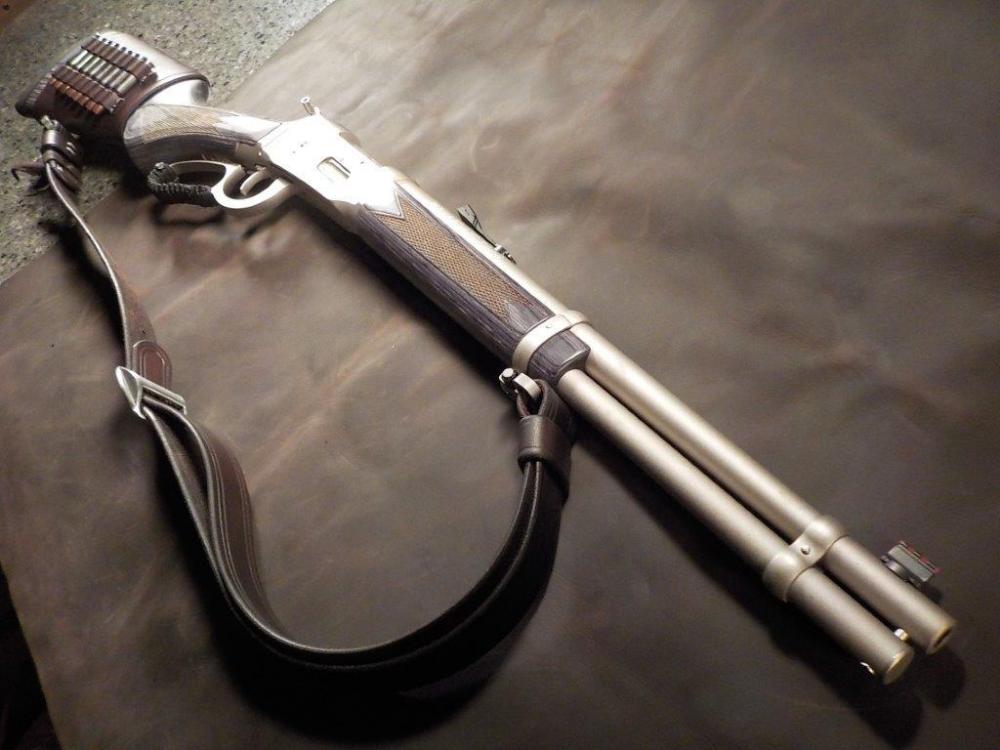
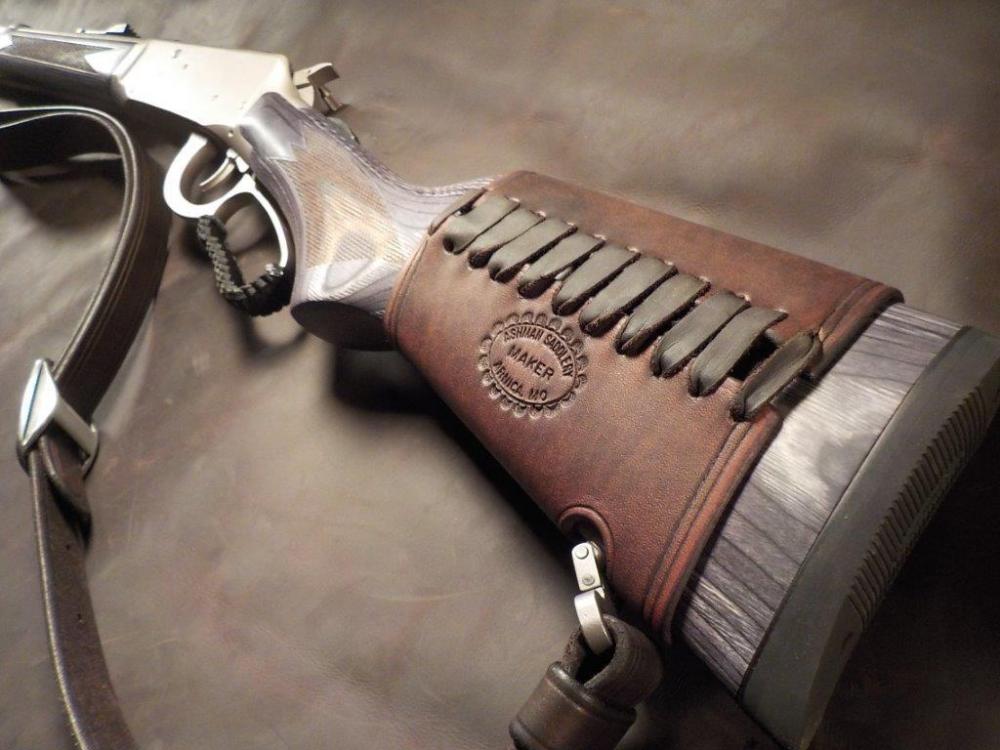
The title pretty well says it all. I was less than thrilled with how the lacing finished out on the ammo sleeve, but it's one of mine so I'm not going to bother re-doing it. HO 8 oz for the body of the sleeve with 4/5 oz bullet loops sewn on. The sling is 10/11 oz HO. Both were dyed with an old bottle of Tandy cocbolo water based eco dye that I have watered down several times. 2 coats of NF oil after that and then some Aussie wax and a day in the sun. Pretty fun little rifle! Anyway, thanks for looking and have a great day folks! Josh
-
I'm in stitches !~
Josh Ashman replied to SShepherd's topic in Gun Holsters, Rifle Slings and Knife Sheathes
Very nice! I often use both NF oil and antique. When I do, I always put the NF on first, then follow up with the antique. Not saying that's the "right" or "only" way, just the way I do it. Great job on the sheath and knife! -

Tapering a welt
Josh Ashman replied to SShepherd's topic in Gun Holsters, Rifle Slings and Knife Sheathes
Looking good! +1 to Dwight's comment, "Success is always good, . . . no matter how you get there." Looking forward to seeing the finished knife and sheath! All the best, Josh -

Tapering a welt
Josh Ashman replied to SShepherd's topic in Gun Holsters, Rifle Slings and Knife Sheathes
I use a head knife. Cut your welt out of 12/14 oz heavy skirting (or multiple layers of lighter leather), dunk it under water for 10 to 20 seconds, let it sit or "case" for a little while, 10 minutes or so, lay it flat on a glass cutting board and make 1 long sloping cut from full thickness down to a feathered edge. It takes a little practice, but if you have a head knife I think it's the easiest way to skive anything. I don't have a lot of good pictures, but this one shows a holster with a full welt plus a skived 2nd welt at the top. You can see that 2nd layer of the welt runs from full thickness down to nothing. Anyway, that's how I'd do it. The tools you have on hand and your work space dictate what works best. Dwight's method with a belt sander is probably great as well. I have a head knife and don't have a belt sander. I also work in the loft in my house and any power tool sanding sends leather dust down to the living room, which according to my wife is NOT desirable. Good luck with your sheath! As others have said, your blade looks great! All the best, Josh -

Knife sheath
Josh Ashman replied to Dave Richardson's topic in Gun Holsters, Rifle Slings and Knife Sheathes
Good looking sheaths for sure TargetRock! -

Cross Draw Knife Sheath
Josh Ashman replied to Josh Ashman's topic in Gun Holsters, Rifle Slings and Knife Sheathes
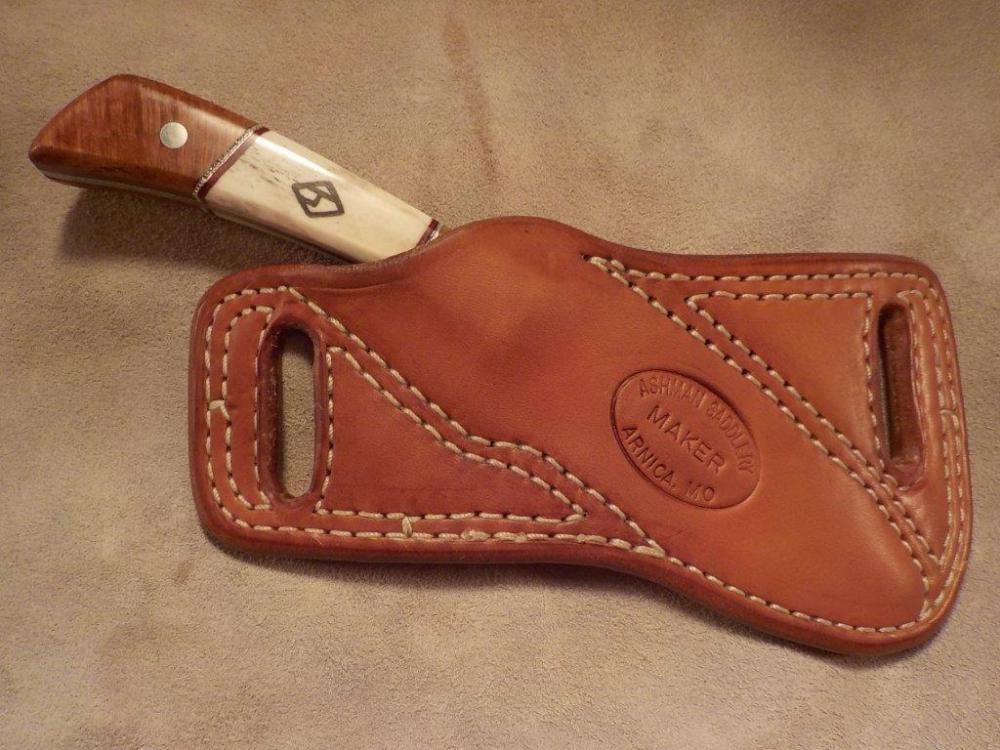
Thanks Biker! Dikman, Thank you! The handle is bone, and the knife maker did do a very nice job! As for my stitching, that was me avoiding stopping and starting more than I wanted to. Start on the inside row, go around until you cross 3 or 4 stitches, go sideways to the outside row and go around it until you cross over it 3 or 4 stitches. Then you have 2 rows of stitching with 1 start and 1 stop point. No real reason besides me being lazy Have a great day folks! Josh -
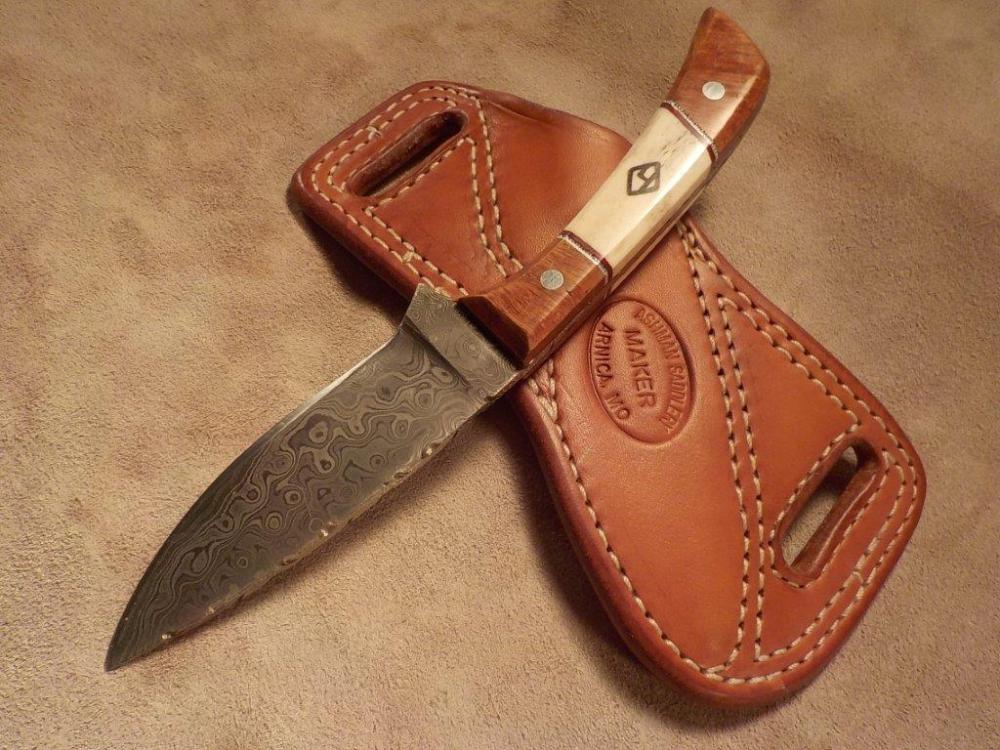
Little cross draw sheath I made for myself! The knife was a gift from my wife and custom made by a friend. I believe he buys the Damascus blades "pre-made" but the handle is all him. The inlay is our brand. For the sheath I used 8 oz HO. It has a full welt around the knife which has been skived from full thickness to nothing at the outer edge. The finish is NF oil, followed by Aussie Wax and a day in the sun then topped off with a little glycerin saddle soap. I've only had it done for a few days but so far the design seems solid. All the best, Josh
-

Knife sheath
Josh Ashman replied to Dave Richardson's topic in Gun Holsters, Rifle Slings and Knife Sheathes
Hello Dave! Good looking knives and sheaths! I know just what you mean about having enough welt to keep the guard from pushing the belt loop over, which in turn has a tendency to push the knife up a little in the sheath. I think what TexasJack was suggesting is that you could have skived the welt fillers down as you moved away from where the guard sits. They need to be full thickness at the top, but an inch or two down and 2 of your 3 - 8 oz welts could taper to nothing and just leave the 1 full welt which should match the thickness of the blade. Another thing you could have done would be to use a larger beveler, like a #4 or even a #5 to really round out the edge. Both things are a matter of personal preference. Tapered welts to reduce the overall thickness or edges that are more rounded wouldn't make your sheaths any better, and not having them certainly doesn't make them any worse. Speaking for myself, I like thick leather and heavy duty gear, which of course leads to thick edges. I built my first saddle with my only beveler being a #3. When I see that saddle now the edges all do look pretty chunky, which is fine, just different that having them more rounded. Anyway, good job to you and the knife maker! All the best, Josh -

Thumb Break snap protectors
Josh Ashman replied to HDL's topic in Gun Holsters, Rifle Slings and Knife Sheathes
I looked at the link and it's not stated clearly but the deal is 11.98 for 12 of them or $29 for 100 of them. Of course the 100 for $29 works out to $0.29 each, but that item is for lots of 100. -

Farting around with leather.
Josh Ashman replied to hawgrider's topic in Gun Holsters, Rifle Slings and Knife Sheathes
Regarding the cracking, it seems like lesser grades of leather (read Tandy bargain bin) is often more susceptible to this than better grades (read Hermann Oak or Wickett and Craig). Some neatsfoot oil may help. In my experience, both the Fiebings pro oil dye and regular Fiebings alcohol based dye dry out leather and require NF oil after dyeing. The regular, alcohol based, dyes just require more oil. Regarding rivets on knife sheaths, it's your sheath and you made it the way you like. This is just the way it should be and I don't presume to tell you what you like or don't like. However, if you look at your old bowie sheath you'll notice the leather has a tear in it at the top corner of the sheath, right there by that rivet. Look around at old knife sheaths and if they have rivets they very often have tears at them. Just one man's $0.02, worth exactly what it cost you. Have a good day and nice job on your various projects. Josh -

Hand of God Holster
Josh Ashman replied to Forester's topic in Gun Holsters, Rifle Slings and Knife Sheathes
Awesome work Forester! -

Beretta 92FS Magazine Question
Josh Ashman replied to steelhawk's topic in Gun Holsters, Rifle Slings and Knife Sheathes
Using Dwight's info that a standard 92 mag is 1-1/4" wide x 3/4" thick I'd start measuring the mags you have and see if you have one that measures the same. There is a difference in double stack mags and a Glock 17 mag likely won't work as they are staggered wider (I think). However there isn't that much difference and leather isn't an exact material so you may find that a High Power mag will make a fine substitute. I'm not at my shop so I can't confirm that's the case, but if you have a bunch of double stack 9mm mags there is likely a fine candidate in your collection. If not a wood block would work great. I've also duct taped layers of leather on to mags I did have to get the correct thickness. But then again I also use real mags to form leather all the time, same for real guns. In my opinion wet leather with steel isn't an issue if you dry the steel off then wipe it down with gun oil. But maybe I just like to live dangerously Lots of ways to tackle the issue, none of them are wrong. Good luck on your project! Josh -

speedloader pouch
Josh Ashman replied to tardis86's topic in Gun Holsters, Rifle Slings and Knife Sheathes
I recently built my first ones and although I don't have the patterns with me now this sketch shows how I did it. In addition to the "T" shaped body I had a separate belt loop piece. You can figure the lengths to make the sides and flap by measuring the leather you're using and your speed loader. To assemble it I installed the male snap, then riveted and sewed the bottom of the belt loop, then riveted the body of the pouch together on an anvil, then I sewed the top of the belt loop and lastly I located where the female end of the snap needed to be on the flap and set it. Takes longer to type than to do it. Well, almost Anyway, that's how I did it, good luck! Josh -

Chest rig for a revolver
Josh Ashman replied to Josh Ashman's topic in Gun Holsters, Rifle Slings and Knife Sheathes
Thanks Dwight! The 1911 is my favorite as well! All the best, Josh -

Chest rig for a revolver
Josh Ashman replied to Josh Ashman's topic in Gun Holsters, Rifle Slings and Knife Sheathes
Thanks everybody! Dwight, I had to dig a little but here are some old pics of one I made myself for a 1911. Same design for the rig, aside from the holster difference of course All the best, Josh -

Chest rig for a revolver
Josh Ashman replied to Josh Ashman's topic in Gun Holsters, Rifle Slings and Knife Sheathes
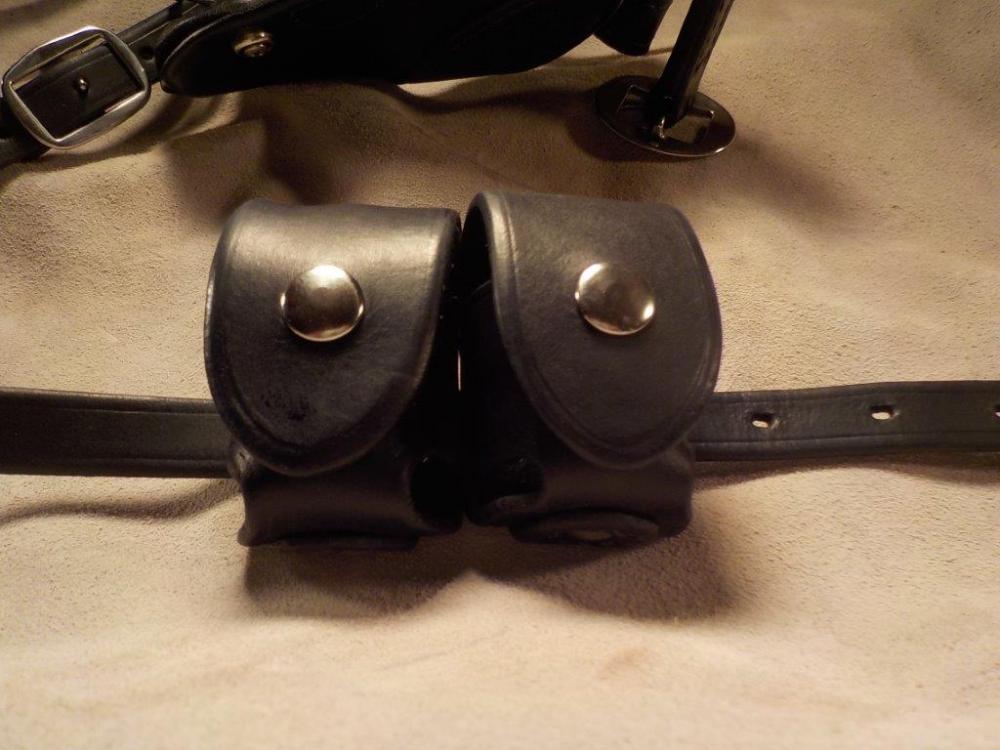
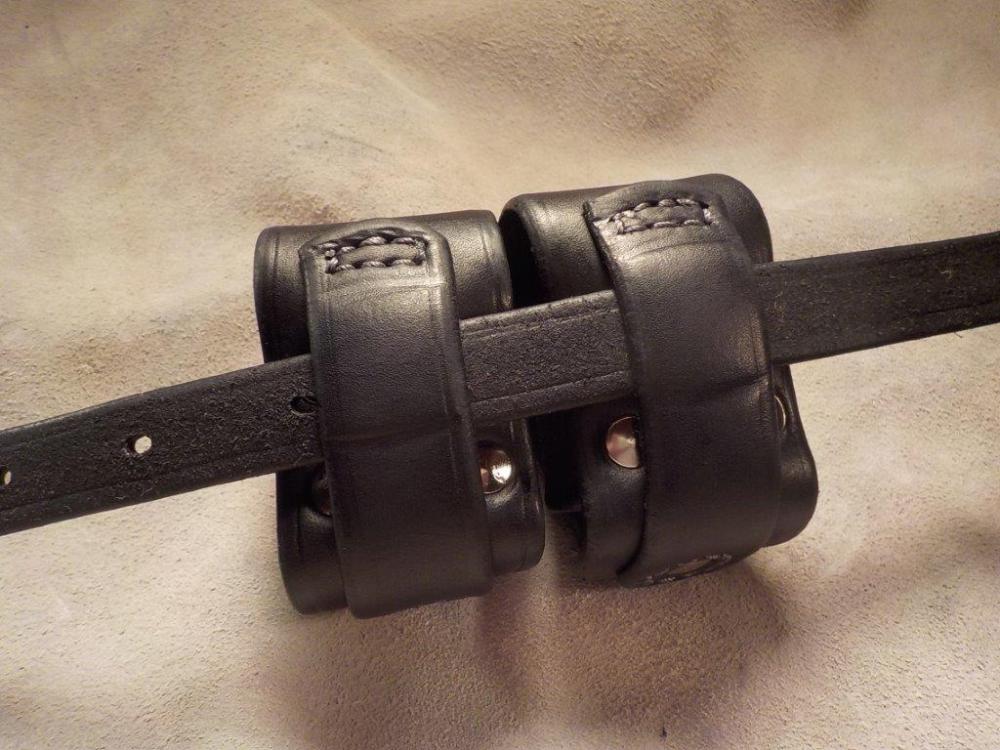
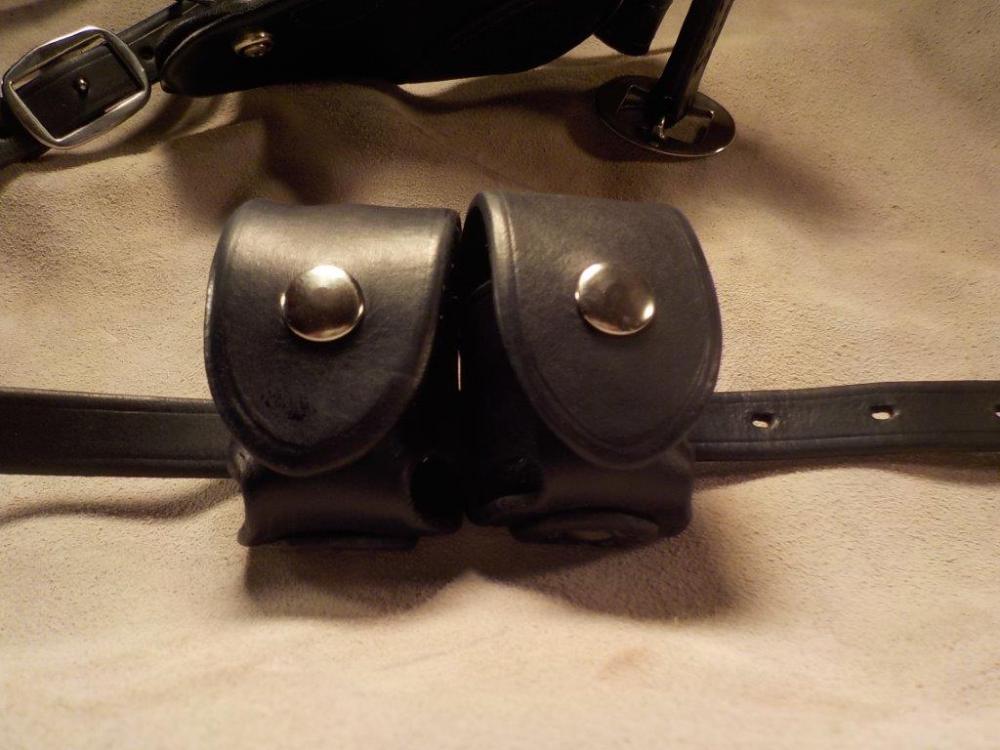
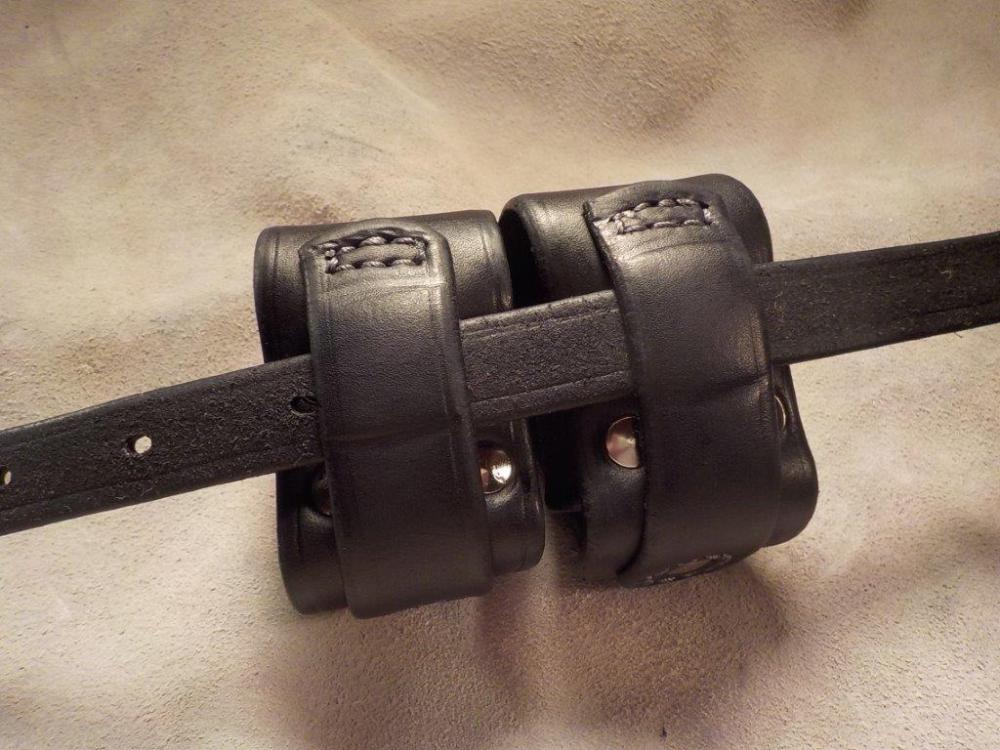
Thanks folks! I appreciate the comments and Dikman, it's a fair point! Those are my first speed loader cases (after a pair of prototypes fit for dog chews) and I decided at the last minute to try and form the strap loops. Like most of my last minute forming it ended up a little wonky. You'd think I'd learn All the best, Josh -

Chest rig for a revolver
Josh Ashman replied to Josh Ashman's topic in Gun Holsters, Rifle Slings and Knife Sheathes
Thanks Samalan! Good luck on the one you're building! -

Chest rig for a revolver
Josh Ashman posted a topic in Gun Holsters, Rifle Slings and Knife Sheathes
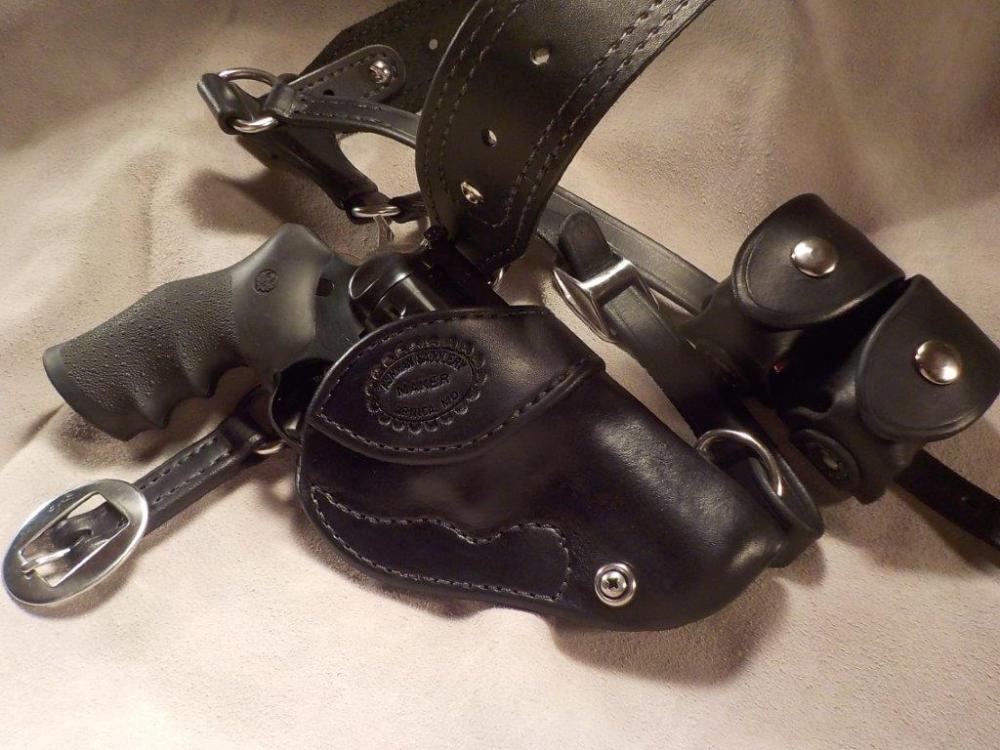
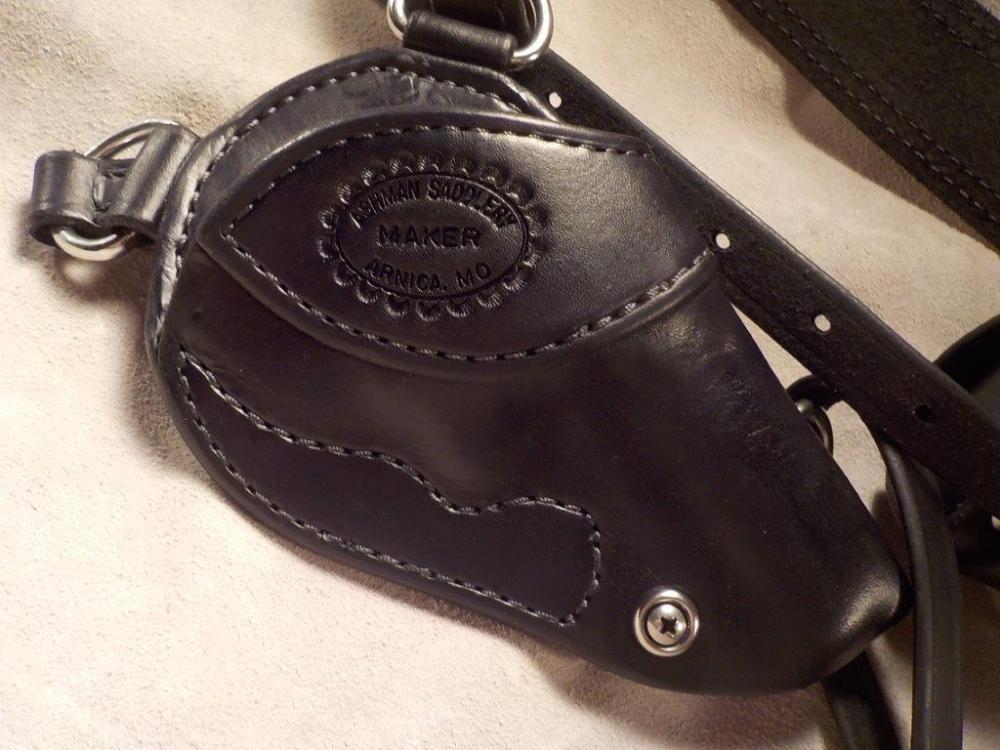
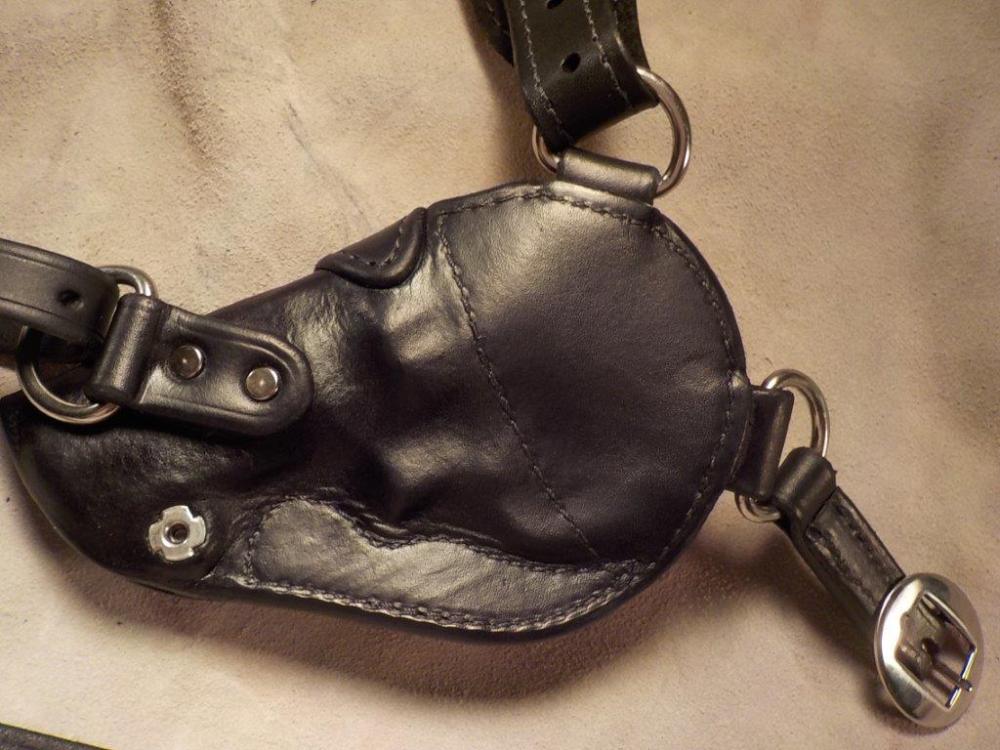
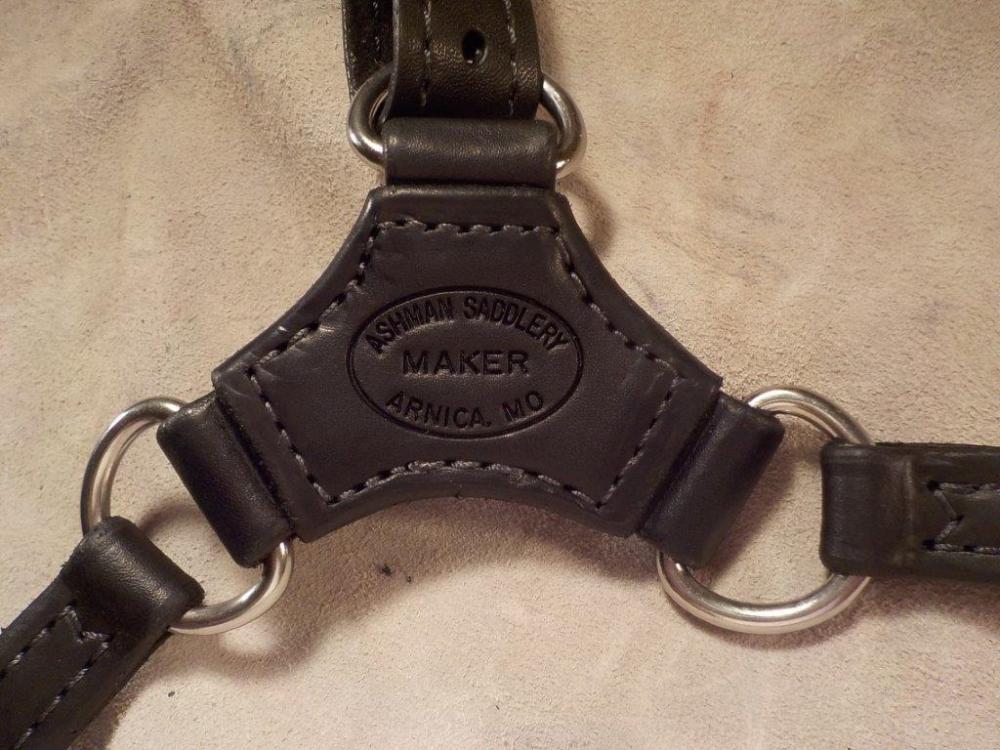
Chest rig for 3" revolver. My 4" GP-100 is filling in for the customers S&W in the pics. Built out of 7/8 HO and dyed with Fiebings Pro-Oil black cut about 75/25 with alcohol. I added some front and back pics of the holster and speed loader pouches as well as a close up of the back piece. All the best, Josh -
Hey Jerry, It seems to me that items finished with acrylic wear and break in over a period of time. Going with this and understanding that the stiffness crated by the acrylic finish is your main concern I'd see about speeding up the break in time. Throw them in a bucket of water and let them get thoroughly soaked. Pull them out and let them dry a little and flex them around this way and that. Then let them dry some more, then flex some more. Once they're completely dry see if you can get the leather to accept a little NF oil. If it does, great. If not just wipe it back off. After all that I'd think you'd have more flexible leather. If not then maybe try Dwight's stripper ideas. Good luck, Josh
-

Glock 30 flapjack
Josh Ashman replied to Stetson912's topic in Gun Holsters, Rifle Slings and Knife Sheathes
Different folks like different things and place their priorities accordingly. Dwight and Jeff's commentary seems pretty fair to me if you're looking for critical feedback. The angles of the pictures can make something look tighter than it is, but it does appear to me that it'll be difficult to get the grip with the wing of the back belt slot so close. The angle of the holster does seem pretty steep as Jeff had mentioned as well, although maybe the guy requested it like that. Wrinkles on the back don't bug me that much, but Jeff's not wrong to say it'd look better without them. The area I see that could be improved, which was also noted by Dwight, is to smooth out the outside shape of your pattern, round out the sharp corners some more and even it up a bit. My $0.02 that hasn't already been mentioned is to maybe consider getting either a new, or better edge beveler. I'm not sure what you're using now, but it doesn't appear to be giving you great results. For 2 layers of 7/8 I like a #3 Bissonette, I get the safety ones from Weaver here "https://www.weaverleathersupply.com/catalog/item-detail/67-4001-3/bissonnette-safety/pr_9486/cp_/shop-now/hand-tools/edge-bevelers" there are better (and more expensive) options, but these work OK for me and the cost isn't too bad. For a single layer of 7/8 I like a #2, but if I only had 1(and for a good while I only did have 1) it'd be a #3. Anyway, all that to say that it is a good looking holster! Especially considering that it's for a Glock, which in my opinion don't lend themselves to good looking holsters. All the best, Josh -

longer stitching punch?
Josh Ashman replied to archeryrob's topic in Gun Holsters, Rifle Slings and Knife Sheathes
When hand sewing I always use an awl. -
It's a good way to learn for sure! Good luck!!


