-
Posts
1,183 -
Joined
-
Last visited
Content Type
Profiles
Forums
Events
Blogs
Gallery
Store
Everything posted by Josh Ashman
-
Flat versus Curved for Pancake holster
Josh Ashman replied to bcraig's topic in Gun Holsters, Rifle Slings and Knife Sheathes
Hey Bcraig, First off, welcome to the forum and good luck with your project! It seems to me that your question on the difference between a flat backed and curved back has been better defined and well answered between JLS and Chief Jason. When it comes to which is better for comfort and retention you understandably get into person preferences and everything is subjective. Since you asked the questions and this is an open forum I'll share my $0.02, it's worth exactly what it cost you Most slide widths on semi auto pistols are in the neighborhood of 1". Most concealed carry holsters are made of leather in the neighborhood of 8 oz, or 1/8" thick. Running with these dimensions, a true 50/50 molded holster will have 5/8" of molding pressed into the backside of the holster from the center of the holster. A true 80/20 would have 1/8" of molding on the backside, making a difference of 1/2". I generally carry IWB which puts the full width of the pistol along with multiple layers of leather for a width of roughly 1-1/4" under my belt. I don't find this to be at all uncomfortable, so it's probably not a surprise when I say that I can't tell the difference in comfort between a OWB pancake style holster with 50/50 molding and one with 80/20 molding. I've built, and used several personal holsters of both types and I just don't feel there is any appreciable difference in comfort. Since all people are different, somebody else may have a completely different opinion. As for retention, I have found that a 50/50 molded holster will pull the holster a little flatter when worn on a belt, just as JLS has previously noted. The only thing I would add is that in my experience it's a very modest amount that has no real impact. If you build your holster too tight to draw whether it's 100% flat backed, or 50/50 or even molded 100% on the back for a flat front, you can stretch the holster to make it fit. This is because all leather stretches, it doesn't care how you molded it. So, if the sight gets a little bound up on a new 50/50 holster and you wear it around for a week or so then it fits well you can call it "break in" or you can call it a "design flaw", either way it now draws well and works fine. That the leather stretched to where the pistol draws well isn't an indication it will continue to stretch, just like when an 80/20 holster has the leather stretched when being formed doesn't mean that it will stretch more later either. In my opinion ride height, grip accessibility, cant, leather quality and construction quality (no particular order there) all greatly outweigh how much is molded into the back or front panel. These things will determine whether you have a good, great or poor holster. Whether the molding is 50/50, 80/20 or 100/0 makes more difference in function than the holster color, but no much more. Again, this is just my opinion. Have a great day folks! Josh -

Transferring Floral Pattern on Swells
Josh Ashman replied to rktaylor's topic in Saddle Construction
Very nice! Thanks for sharing! -

WIP Custom Cowboy Rig
Josh Ashman replied to hashtagartz's topic in Gun Holsters, Rifle Slings and Knife Sheathes
Stunning work, thanks for sharing it! All the best, Josh -

Rough out IWB step by step
Josh Ashman replied to Josh Ashman's topic in Gun Holsters, Rifle Slings and Knife Sheathes
Thanks Doug! I always wear an undershirt myself so it's not an issue for me. If a person didn't wear an undershirt the rough out could be a problem. Although using 8 oz leather the backside is quite smooth as it's been thinned down however the tannery does it. It also tends to smooth up with use making the "rough" side only slightly more textured than the grain side. All the best, Josh -

Rough out IWB step by step
Josh Ashman replied to Josh Ashman's topic in Gun Holsters, Rifle Slings and Knife Sheathes
Thanks Chief! I've been slow so I'm building some things for myself that have been on the back burner for a while. I've been using a Summer Special for all my IWB for some time and wanted to give this style a try. A week isn't much of a trial period, but so far I like it a lot! I wouldn't go so far as to say that it's "better" than a Summer Special, but it does seem slightly narrower and slightly more rigid. With having to straddle belt loops I don't have as much freedom to position it exactly where I want, but it hits pretty close to 3:00, if I didn't have a belt loop in the way I'd slide it an 1" or 2" forward. but, all in all, so far I'm very happy with it. You'll have to post your AIWB Sidecar when you get it worked out so I know what one is! I get the AIWB, but got lost on the Sidecar part! All the best! Josh -

Rough out IWB step by step
Josh Ashman replied to Josh Ashman's topic in Gun Holsters, Rifle Slings and Knife Sheathes
You're welcome! Thank you! Have a great day folks! -

Rough out IWB step by step
Josh Ashman replied to Josh Ashman's topic in Gun Holsters, Rifle Slings and Knife Sheathes
10-4, thanks Jeff! 26 it is! Have a great day! -

Rough out IWB step by step
Josh Ashman replied to Josh Ashman's topic in Gun Holsters, Rifle Slings and Knife Sheathes
Thanks Bobby! I'll pick up some #26 needles as well then. Semper Fi! -

Rough out IWB step by step
Josh Ashman replied to Josh Ashman's topic in Gun Holsters, Rifle Slings and Knife Sheathes
I've thought about trying some 346 myself, when I need to re-order thread I'll have to get some. Do you guys use the same size needle on your machines as you would for the 277, or do you have to go up a size? I'm currently using #25 needles for the 277. Thanks Dwight and Chis! Hope it's a great day everybody! -

Rough out IWB step by step
Josh Ashman replied to Josh Ashman's topic in Gun Holsters, Rifle Slings and Knife Sheathes
Thanks Jeff! That's a valid point on the rough-out loops. I like to mix up smooth and rough-out but all one way or all the other does make for a smooth looking job! Thread size is 277 top and bottom. I use it almost exclusively when I machine sew. I keep a little waxed 207 for hand sewing when I can't find a way around it and have a spool of 138 for light weight projects. I'm lazy enough that I've stitched up 2 pieces of 4 oz with the 277 to avoid changing thread, but then I like a hefty looking thread I need to mark my pattern to adjust the stitch line closer from the trigger guard down. It gets a little wide by the end of the barrel. It's a personal holster and being an IWB I'm sure it won't ever be a problem, but it doesn't have that super close, pretty looking stitch line you always have. Always something to do better on! All the best, Josh -

Rough out IWB step by step
Josh Ashman replied to Josh Ashman's topic in Gun Holsters, Rifle Slings and Knife Sheathes
Thanks! and thanks for the link to the Tandy tool, it does look like a nice tool! All the best, Josh -
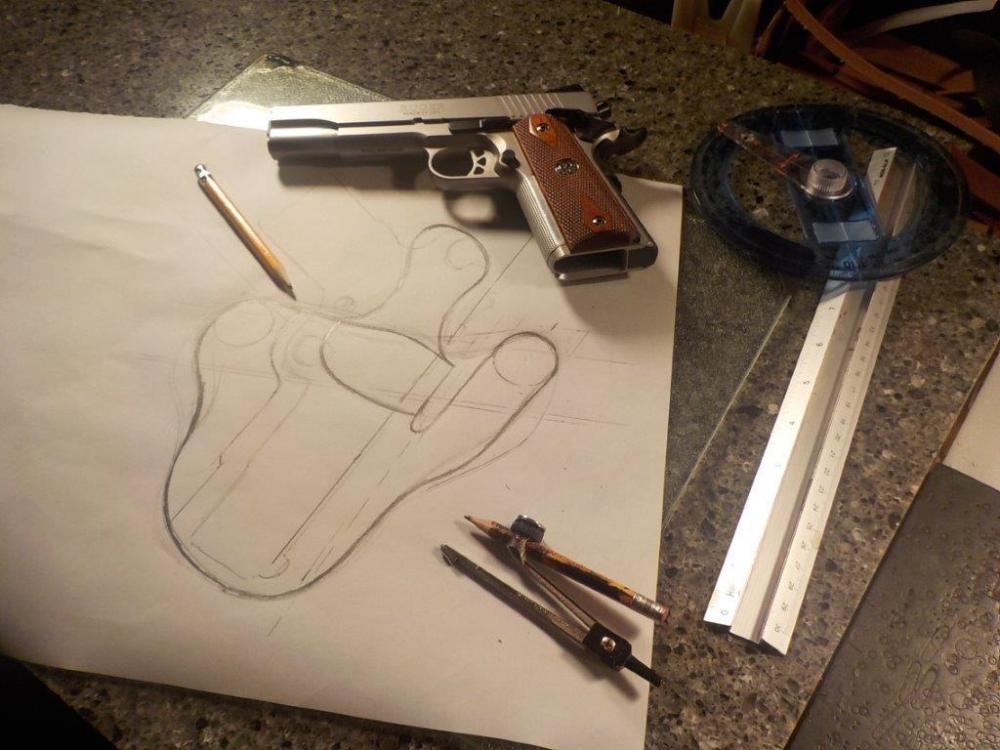
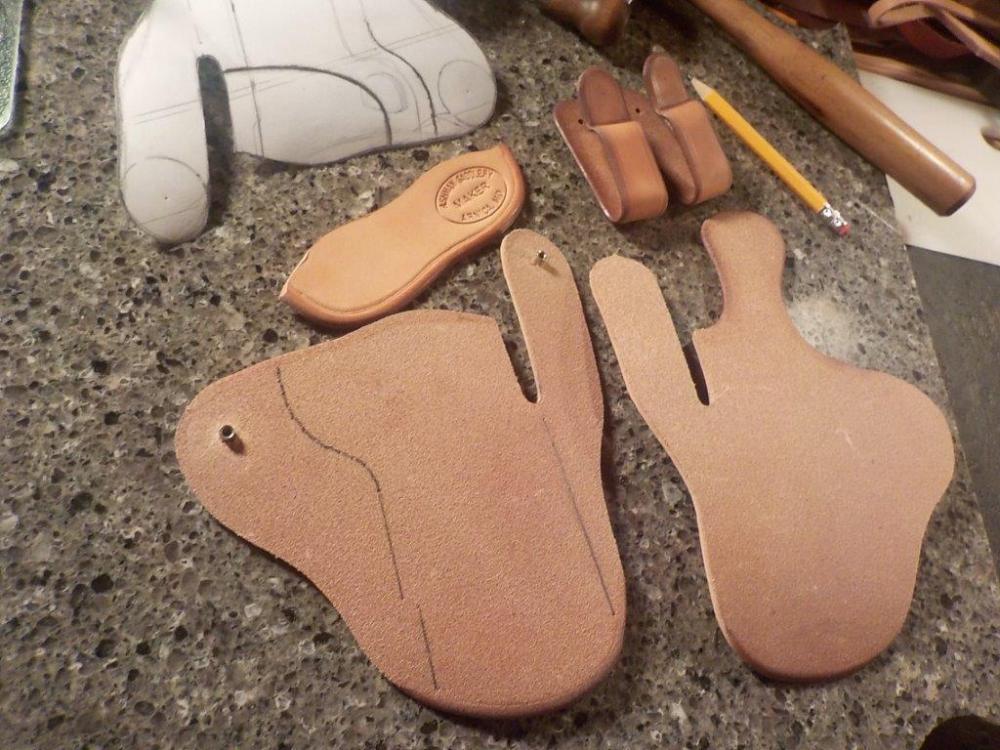
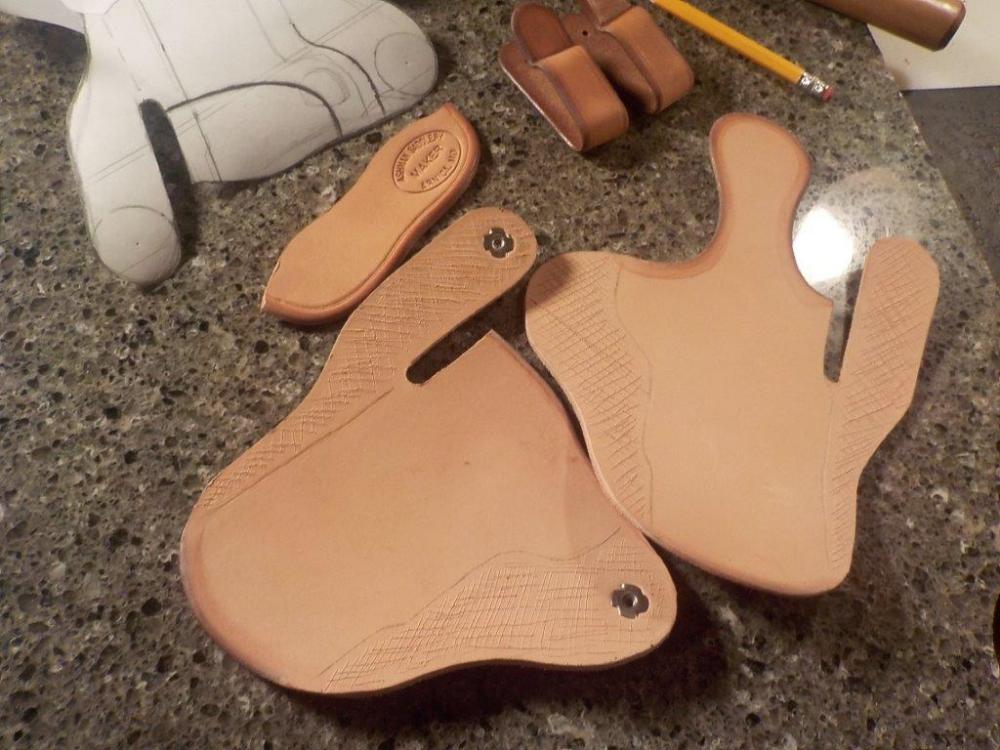
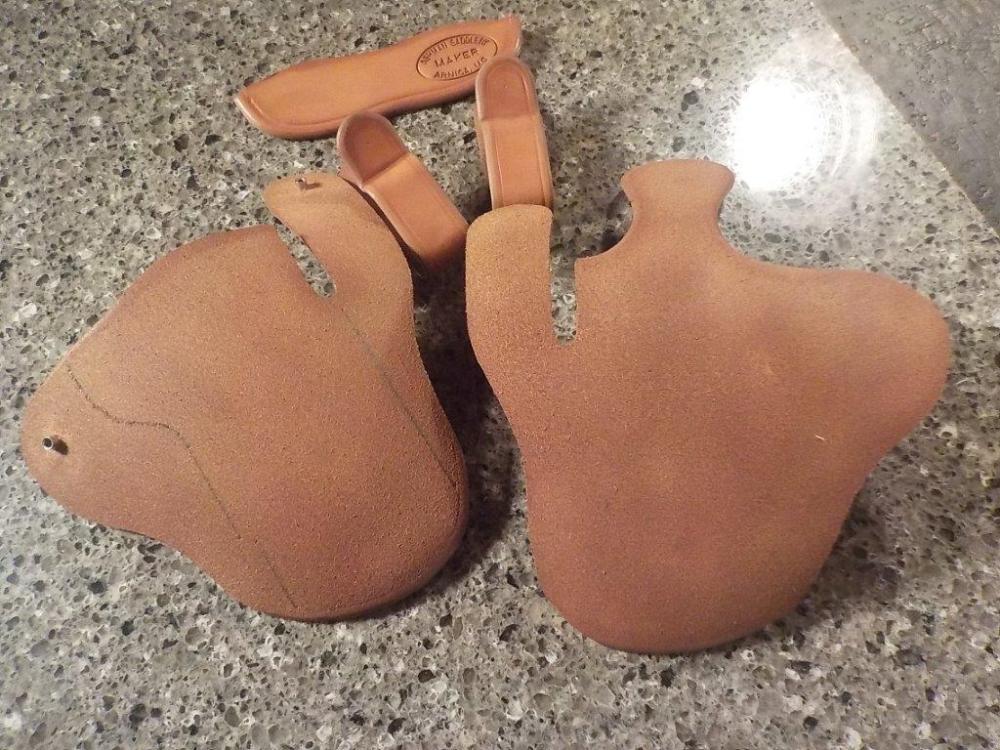
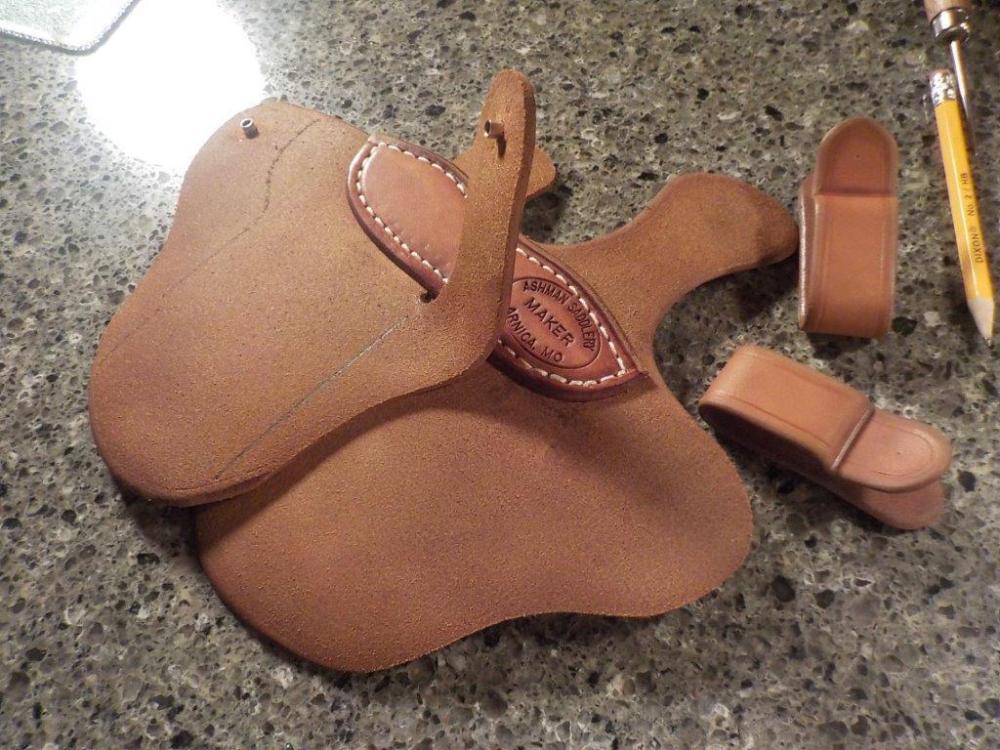
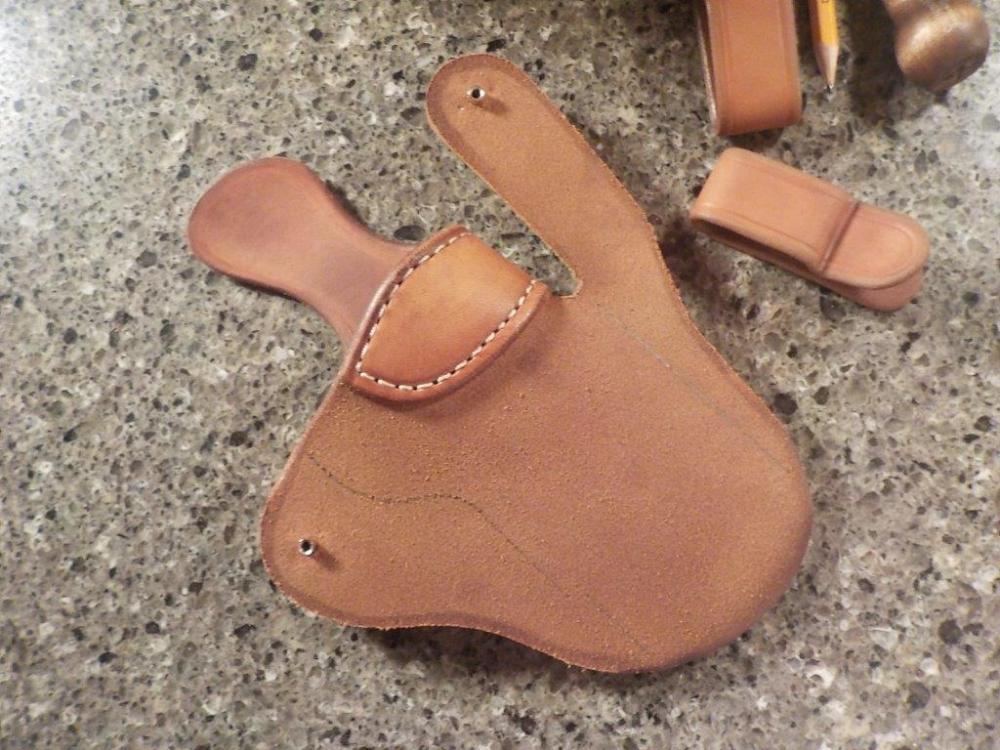
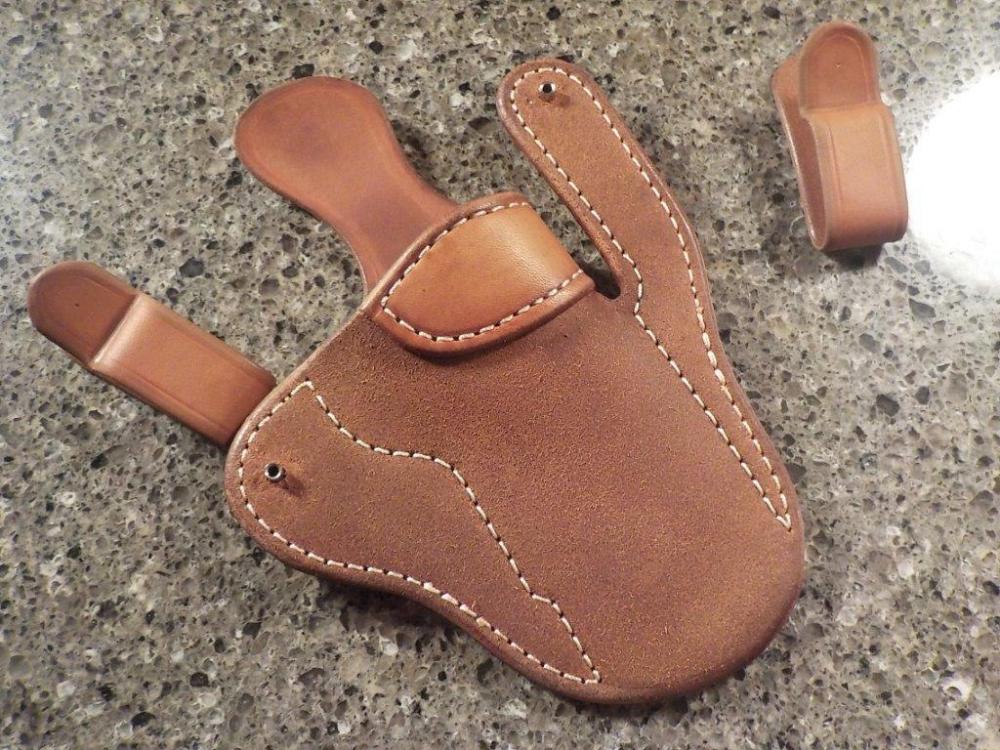
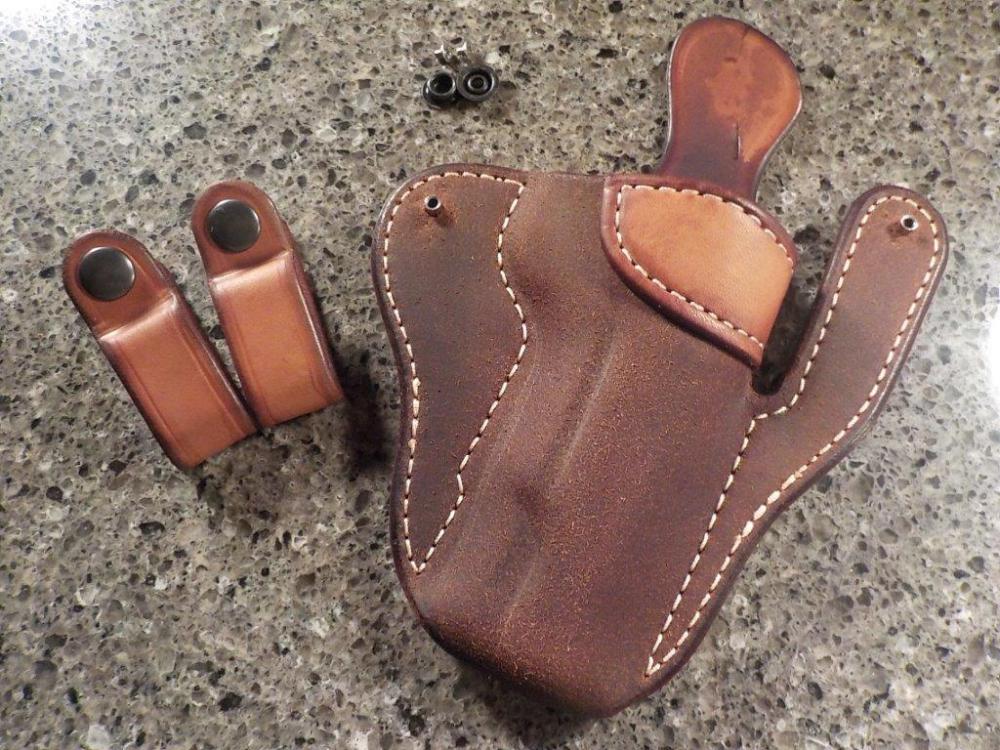
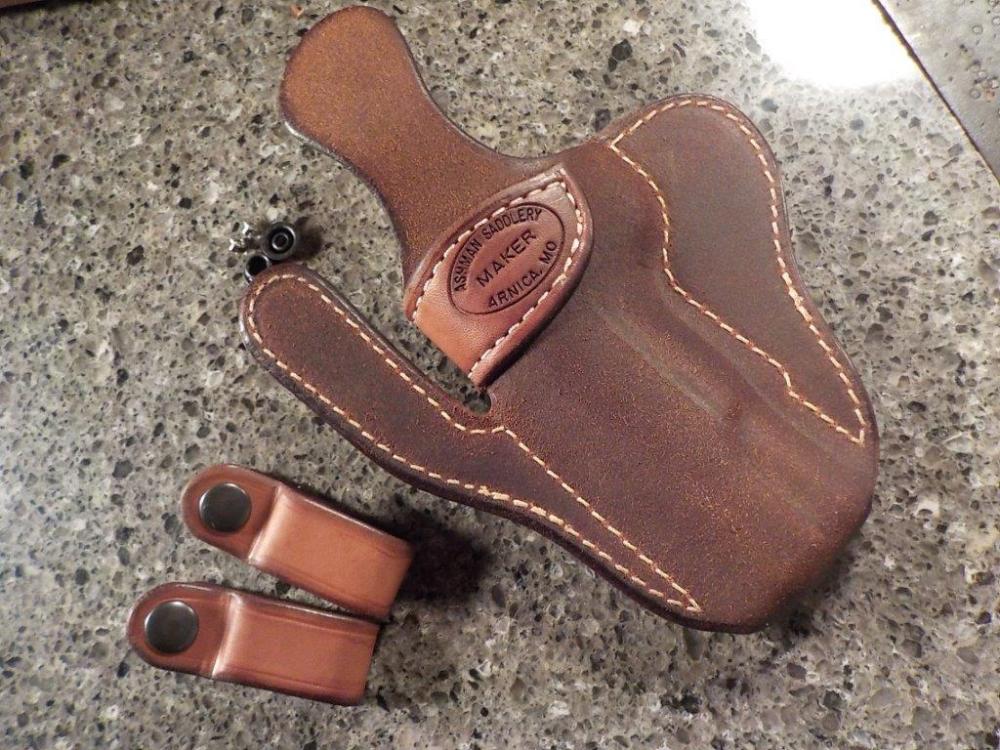
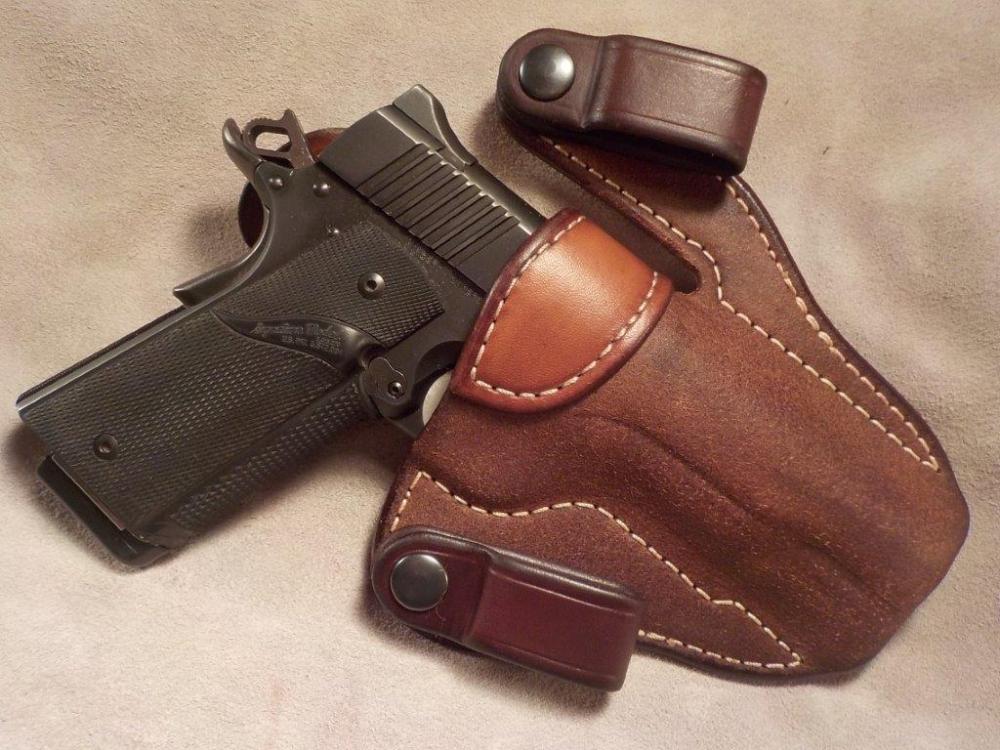
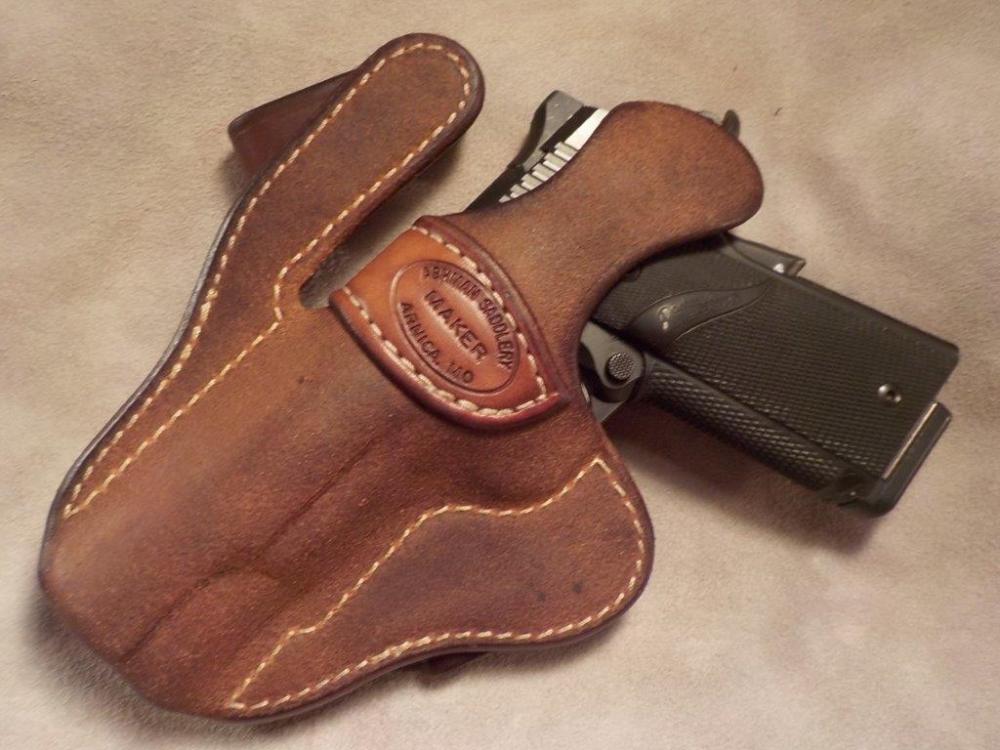
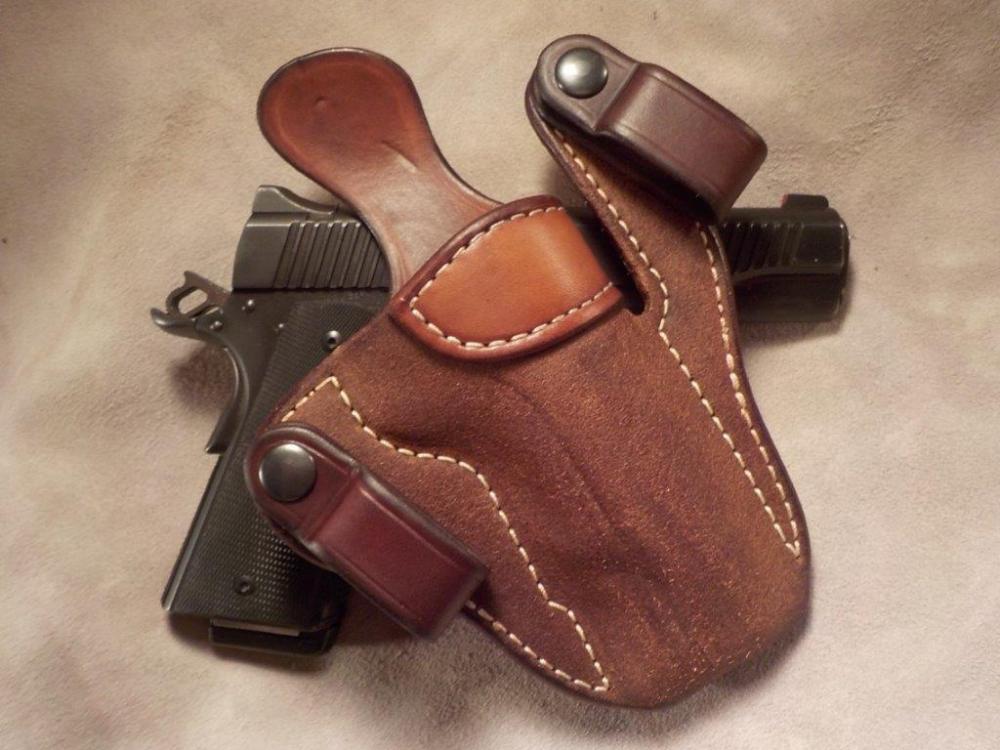
I just finished up this rough out IWB for a 5" 1911. It was the first time I'd made this type of holster for a 1911 and I took pictures at the main steps along the way. It's built from 8 oz. HO and dyed with Fiebings brown pro oil. Top coat is M&G cut 50/50 with water. Step #1 - draw it. Step #2 - parts cut out, stitch lines laid out, T-nuts set in cover piece, straps formed, glued surfaces roughed up, edges that won't be able to be finished later slicked. Step #3 - dip dyed and dried. Step #4 - glue and stitch reinforcement, glue main body, sand edges, stitch main body, edge and slick. Step #5 - wet mold and install snaps on straps. And, Step #6 - top coat and dry, final touch all edges and done!
-

Single action army
Josh Ashman replied to blue62's topic in Gun Holsters, Rifle Slings and Knife Sheathes
Great looking holster! Well done! All the best, Josh -

Lining part of fenders with fleece
Josh Ashman replied to Mathilde1981's topic in Saddle Identification, Restoration & Repair
I'm no expert, but Big Sioux most certainly is! Plus 1 to everything she said. -
Thanks again everybody! DougFergy, I picked that braid up from Bruce Grant's excellent book Leather Braiding. It's surprisingly simple and easy to do. I'd take a picture of the page where he shows how to do it, but that seems like a disservice to him and likely violates copyright law and forum rules. The good news is that with a quick Google search you can find his book which is very affordable and I think also downloadable. Becca, as Doug noted HO = Hermann Oak. Excellent leather and surprisingly affordable in their Craftsman grade. All the best, Josh
-

Cross Draw Knife Sheath
Josh Ashman replied to Josh Ashman's topic in Gun Holsters, Rifle Slings and Knife Sheathes
Haha, hey guys, sorry to come in late! Yes, on machine stitched. I hear you on the stamp, if it were for anyone else it would have gone on the inside. That it even got a stamp was an afterthought, I stamped it after it was already stitched up. Not on purpose, just getting forgetful I guess. I'm a western transplant to Mo. Grew up in central UT and spent several years in northern AZ after I got out of the service before coming to MO. Thanks to you both for your input and for taking the time to comment. All the best, Josh -
Thanks NoobLeather! I just used my own pattern. I've built a number of these over the years and just use the stock and a piece of paper to make a pattern. I'm happy to try and walk through how I make mine if it would be helpful to you, but there's really not much to it. Also, by using paper you can fuss with it until it fits right with nothing more than scissors and tape. I will note that once you get a piece of paper to wrap around the stock just how you want and have the edges come together perfectly you'll need to add some length to get leather to do the same thing. To figure out how much to add use a piece of scrap leather the same thickness of your sleeve. Wrap it around the stock at one end of the sleeve and mark where it comes together. Then measure your paper pattern at the same edge. Add half the difference to each end of the paper pattern, minus 1/8". At least, that's how I do mine. Good luck on your project! Shoot me a message, or reply here if there's anything you'd like to ask. I don't know that I could be helpful, but I'm fine to give it a try. All the best, Josh
-
Thanks everybody! The braided is better, no two ways about it! I better get back to making orders instead of personal gear so I can afford to buy a new hide to cut lace from ! BillMossePaddles, I can see why you would miss a Winchester Model 86! They are an excellent rifle! Have a great day folks! Josh
-
Good morning folks! I think wider lace would have done the trick. And really, if my lace hadn't have stretched out at the working end (getting narrower in process) I would have been able to let it be. The hole size was fine for 1/2" lace and really OK for 5/8" too. It takes a little more work to pull it through, but it'll still pull. I did go ahead and re-do it. I went with a braided lace this time. I cut it from the same hide, and it stretched again, however it's less noticeable with the braid. It's quite a bit more work to braid them, but they do look nicer! Thanks to everybody for taking time to look and comment. Have a great day folks!
-
Narrower lace, or a bigger round hole, or oval holes as Brian suggested would all work fine. With each you get a different look, none "right" and none "wrong", just different. I'm certainly no lacing expert (obviously, if I were mine would look better!), but what I was looking for on this was lace that touched at the edges, or at least was close to it. I missed that, so to me it doesn't look right. With the hot weekend forecast (100 + for SW Missouri) I may cut this off and re-do it just as an excuse to stay inside under the AC I absolutely love model 92's! yours sounds great! All the best, Josh
-
Thanks Chris! I sure love the lever guns myself! Thanks Brian! Elongated holes would have helped. Although, I think the main issue I had on this project was that the lace, which was cut at 1/2" had stretched out to where it was only 3/8" or even a little less out at the tailing end. Since I started wrapping at the pistol grip and finished up at the end of the stock it leaves more of a gap as you move back, with the last wrap being the worst. Adding to that, the last wrap is also leaned "out" from pulling the slack back under the previous wraps making it look even worse. The lace I used was cut from the hide that's under the rifle in the pictures. It's getting pretty low on the side. I think that a better lace, cut closer to the spine and more consistent tension on my wraps would have gone a long way towards cleaning the lacing up. Elongating the holes would clean up the "bunches" where the relatively wide lace goes through the much smaller hole, although those "bunches" are fine with me if they lay flat enough. Making the holes elongated would also have given the lace a little more room, which in turn would have made for less stretching. It's a good suggestion, thanks for making it! Have a great day folks!


