Matt Alsaker
-
Posts
186 -
Joined
-
Last visited
Content Type
Profiles
Forums
Events
Blogs
Gallery
Store
Everything posted by Matt Alsaker
-
 That's a sweet rig....and I checked out your gun leather photo album on Facebook....all very nice.
 -
I can't say for sure. Everyone seems to make it with two layers, so that's the way I've always made them. I never tried just a single thick piece. I have read some opinions that say two layers is better than one layer of the same thickness. The reasoning was: 1) the contact adhesive adds rigidity, 2) the grain of the two hides gives strength (similar to how plywood gets its strength), and 3) the act of stitching adds strength and that's why some people other two rows of stitching (for additional strength). I don't know the validity to any of this. I've always done two layers of 6/7 oz with a single row of stitching. I've been very happy with this setup and never had any complaints for those who wear my belts. Hope that helps, but it's just my opinion.
-
7In Wallet
Matt Alsaker replied to LeatherLegion's topic in Purses, Wallets, Belts and Miscellaneous Pocket Items
Did you do the liner yourself? I've been afraid to try my own. That looks really nice. -
A Few Rifle Slings
Matt Alsaker replied to MADMAX22's topic in Gun Holsters, Rifle Slings and Knife Sheathes
You did a really nice job on those slings. I'm getting ready to make my first attempt at a sling. Thanks for all the information you put up here, it'll make it easier for me to get started. What length should I be looking at for the rifle sling? I know they are adjustable. I have the kit Tandy sells and was going to base my length off of that, but it looks really short. I've never been hunting and the only sling I have is a nylon tactical sling on the rifle I carry at my LEO job. That sling is attached on a swivel on the right side of the collapsible butt stock and then just in front of the bolt about a third of the way down on the left side of the hand guard on another swivel. I believe most hunting rifles attach to the sling further down the barrel. -
New To Exotic Hides
Matt Alsaker replied to Matt Alsaker's topic in Gun Holsters, Rifle Slings and Knife Sheathes
Thanks for all this information. I'm cutting it into a Word document so I can find it again. I really appreciate the input. -
When using these liners, are they something that I just stitch on the outer leather (veg tanned) to the liner and finish the edges? Are they that easy?
-
I've been considering trying my hand at a purse using a Chaylor-Fenneli interior. I wouldn't know where to being making my own interior at this point. I've never seen on of these interiors in person. You must stitch these another piece of leather that makes the outside of the purse. I'm guessing veg tanned is okay to use for the outside so I can carve on it? Are there other acceptable leathers people us if I'm not going to carve on it? Is there anything in particular I should know before I purchase one of these interiors? Thanks
-
I've never used any exotic hides or done any inlay work. While I'm trying to figure it out, which hides would you recommend I start with that are not terribly expensive and are easiest to work with? Ostrich? I use a round knife to cut veg tan leather. Are exotics cut the same way or do you use something more like a utility knife? I use a Resolene mix to seal my holsters. Can I use that on exotic hides or don't you need to seal the hide? I found a post Katsass (Mike) put up a little while back on inlaying, so I think I'll have a pretty good start on that. Thanks in advance for the advice.
-
Finally Back - A Few New Rigs
Matt Alsaker replied to DHopper's topic in Gun Holsters, Rifle Slings and Knife Sheathes
Those are very cool. Nicely done. I love the decorative work on the avenger style holster. -
Thanks for all the input. I wore the original holster around for a day and the break-in loosened everything up making the retention great. The firearm holds firmly in place, but I don't have to fight to get it out of the holster. I still went ahead and moved the belts slots each about a 1/4 inch further from the firearm. The idea of a flat or flatter back panel is very appealing to me. Dwight - regarding the top piece of leather - do you still use a template to cut it prior to assembly to get the proper shape or are you molding a rectangular piece of leather and then cutting it into shape after molding? I would image trying to cut leather after molding doesn't work. The back plate seems easy enough to make up a template for, but the front plate seems like there could be a lot of trial and error. I'm going to give this a shot for the next one I make.
-
Ostrich Leg 1911 Cmdr
Matt Alsaker replied to mmirob's topic in Gun Holsters, Rifle Slings and Knife Sheathes
Thanks very sharp. I like it a lot. I've never worked with exotics, but I'm going to give it a try in the spring. -
+1 what renegadelizard suggests. I've watched Eric's video's dozens of times. Search and read everything you can find on this forum...finishing edges, inlays, tooling, finishes, etc. I've been on here regularly for almost a year and still find new stuff.
-
I put this pancake holster together for a Springfield XD Sub-Compact 3". I need to fix the pucker that developed at the bottom near where the front sight post would be and need to make the reinforcing piece bigger so it comes over the top of the slide some. I need suggestions on how to fix a retention issue. The retention is great, while the holster is not on a belt. Once I put the holster on, the pressure from the belt curving the holster around my hip tightens the leather and makes it tough to draw the firearm. Will moving the slots for the belt loops further away from the firearm help reduce this or should I move on of the stitch lines off the firearm a little? I'm hesitant to move the stitch line since the retention is so nice when the holster is not being worn, but darn thing needs to be wearable and functional.

-
My Belt Hole Punch Is Anemic
Matt Alsaker replied to renegadelizard's topic in Gun Holsters, Rifle Slings and Knife Sheathes
I only dye the outside layer of the belts I build. So I build the outside layer first, cutting all my holes and slots. I then dye the outside piece. I then glue it to what will be the inside piece. Once the glue dries, I cut the ends. I then stitch it all together. I then go to the holes I'd previously punched in the outer layer of leather, drop the punch in, and only have to punch through the inside piece of leather. It has worked well for me. -
Cold Weather And Dying Leather
Matt Alsaker replied to Matt Alsaker's topic in Gun Holsters, Rifle Slings and Knife Sheathes
I actually had not considered this as an option, but it's at the top of my list now. I think this will be the way to go for me. Thanks. -
Cold Weather And Dying Leather
Matt Alsaker replied to Matt Alsaker's topic in Gun Holsters, Rifle Slings and Knife Sheathes
I just saw the typo....love your reply...that's pretty darn funny...made my day. -
I sand with a Dremel and for the most part follow Bob Parks article on burnishing. Instead of canvas, which I use occasionally and gives an awesome edge, I find myself using a wood burnishing wheel attached to my drill press most of the time.
-
I live in south central Wisconsin and am entering my first winter where I need to be able to continue dying my projects. I'd like to keep making holsters, belts, and accessories over the next 4 - 5 months until things warm back up. I tried using a sponge, cloth, and other methods of applying dye by hand - never really had any luck. I've been using an airbrush this summer out in the garage, wearing a mask, and keeping the big door open. I'm pretty sure that is going to come to an end in the next month or so as the temperature drops. I don't have a particularly good room in my house that I can easily ventilate (one single window) and even then, I'm not sure what I should be using to ventilate. I've read concerns about Pro Oil Dye being flammable and don't want a fan motor turning into a blow torch out the side of the house. I've been considering dip dying, but have never had enough dye on hand to fill a small tub. I think I can dip dye inside with the minimal ventilation I have and not have the same concerns I do about using an airbrush inside. Any thoughts on how to safely work with Pro Oil Dye in a semi-confined area over the winter????
-
I have tried several methods of dying leather, but never dipping the leather since I've never had that much dye on hand at one time. I'm ready to give it a try. What types of tubs or basins do you use - what's easiest? Do you pour the dye back into the original container or are the tubs you dip in sealed? To dip a belt, do you just wrap the belt up on itself dunking it all at one time or do you try to pull it through the tub? I've been using Fiebings Pro Oil Dye. Any other advise would be great. Thanks.
-
Thanks guys. I'll stop back at the automotive place and get some fuel line. Camano Ridge you're correct, I picked up vacuum line. Thanks again.
-
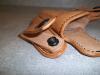
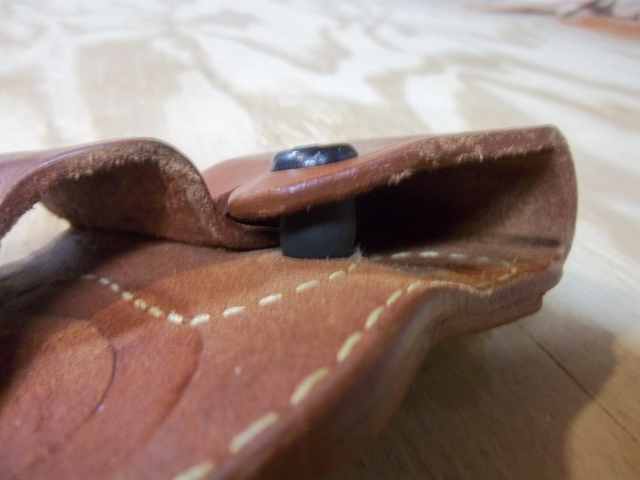
I'm attempting to make my first combination magazine / handcuff pouch. Along the magazine side, I'd like to install an adjustable tension screw with a rubber hose / spacer. I've attached a picture of what I'm trying to accomplish. The part I can't figure out, what to use for the rubber spacer? I've checked several hardware stores and just got back from an automotive store. The automotive store had the closest stuff, but the hose is very stiff making it not work very well as an adjustable spacer. Any suggestions? Thanks Matt
-
A Couple New Iwbs
Matt Alsaker replied to particle's topic in Gun Holsters, Rifle Slings and Knife Sheathes
I use PTD snaps. With the press / dies I have not needed to make a slot for the tab. The dies hold everything nicely in place. The die presses the tab into the leather, keeping it from turning. I bought the press and dies from Weaver. The dies Weaver sends are from Tandy (I didn't know that at the time). I love the press, there is plenty of leverage and it is easy to get a feel of when the snap / rivet is set properly. I love the dies also, but if you are a member of Tandy's Wholesale Club you can get the dies cheaper directly from them. -
A Couple New Iwbs
Matt Alsaker replied to particle's topic in Gun Holsters, Rifle Slings and Knife Sheathes
I broke down and bought a press for setting the snaps a few months ago. I was having the same trouble and kept bending posts. I love the press, no more problems. I'd been using 6/7 oz leather for the straps until recently. I made one with 8/9 oz straps for a LEO friend, everyone who has seen the two prefers the 8/9 oz leather. I've permanently switched to that now. Your holsters are awesome as always. -
I purchase t-nuts and SS machine screws from the local hardware store. The t-nuts are 6-32 x 1/4" and the screws are 6-32 x 1/2", although a 3/8" screw will work. My t-nuts are NOT removable, as I sandwich the t-nut between the two pieces of 6/7 oz leather I use to make the body of the holster. The back of the t-nut is not exposed on the outside of the holster. I know some guys make their IWB's with the t-nut exposed on the outside of the holster. I've read a couple posts on this forum discussing the merits of both. The riser I use between the belt loop and the belt loop its self are made of 6/7 oz leather., so I have about 3/8" of leather I go through (3 layers of 6/7 oz). I use PTD studs (92-BS-18303-1C) that I ordered straight from the manufacture. The stud adds approx another 1/8", for a total of approx 1/2" of thickness. It sounds like the material you are going through is a lot thinner. I don't recall seeing a t-nut with any shorter post than I am using, but I could be wrong. I don't have any pic's of the construction process and don't have an IWB laying around right now. Hope this helps a little.
-
I'm not sure if this is what you were looking for, but I use PTD snaps on my IWB holsters. I insert a t-nut between the two pieces of leather on the body of the holster. I then secure the belt loop with a PTD stud to the t-nut with a SS screw. I use removable loctite to secure the screw into the t-nut.