bruce johnson
-
Posts
4,401 -
Joined
-
Last visited
Content Type
Profiles
Forums
Events
Blogs
Gallery
Store
Everything posted by bruce johnson
-
When you get to tight turns you need an edger with the cutting edge out in front. Some examples are a round bottom edger, turnback edger, or vizzard edger. I use whichever is handiest.
-
If they are only getting 10% to sell it, but $10-$30 a month to rent shelf space then they really have no incentive to sell it. The longer it sits, the more they make. The only way this would work is high dollar things that don't take up much space and sell themselves within a month.
-

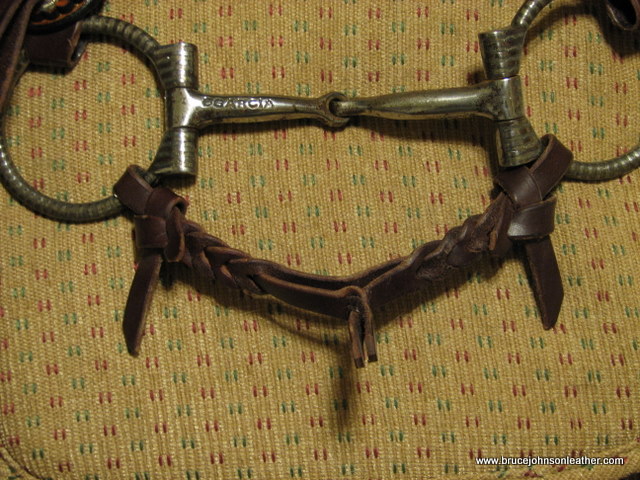
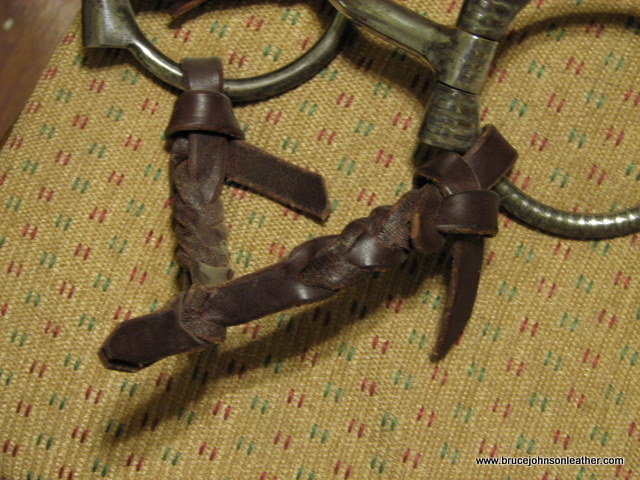
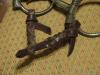
Curb Strap From Latigo/saddle String
bruce johnson replied to Tibbiecow's topic in Saddle and Tack Accessory Items
Here's how I do the scrap latigo snaffle bit straps with no ring knots or loops. It uses up three short pieces of latigo. The bit rings are secured with the slit knot like a hackamore hanger,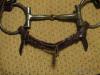
-
Charlene, Everytime I have tried to fix a minor wreck I made it worse. If it was me I would tool some generic looking basket stamped corners and peddle it or donate it to a benefit auction. . If I was getting more custom orders in the pipeline, I would wait and have it for an order. Trying to remove contact cement from fabric isn't easy. I have a shirt that has had some on it for a couple years. The thinner took the color out, and just thinned the glue enough to spread and make a bigger spot.
-
Johanne, I think it is OK to use the name. Some of the trainers/clinicians who sell their own line of tack stay with one supplier pretty steady and others seem to bounce around some. You can pretty well be assured that whoever may not tell you exactly who is making it for them. They want to keep sources confidential and not have a customer bypass them. That is a real sticky area for the maker who sells retail and wholesale too.
-
I added more tools today to my website. There are a couple new knives there (CS Osborne and Rose), several draw gauges, and quite a few hand tools. If everything goes well, I will have a really nice 10" Chase splitter ready in a couple days too. Thanks, Bruce
-
Metal Draw Gauge Or Wooden Draw Gauge
bruce johnson replied to redcell7's topic in Leatherwork Conversation
Well I do cut a lot of 3 inch and wider straps. Most of the stirrup leathers for roping saddles are 3" and I do a fair amount of repair work. I cut blocks of heavy latigo for reins and depending on the side, I may be able to cut 6 inch wide blocks to glue back to back and then cut my finised rein widths from the doubled blocks. First off I straighten the side with a long rule and knife. From there is depends on what I choose to cut with. The Wooden strap cutter - It depends on how good it is. Some are not square with the blade and handle. If the blade is sharp, it will do up to 4" widths. Like a draw gauge, it tends to drag and more torque the further out you get. It is limited in thickness. Some skirting is thicker than the capacity of some cutters, and will bind when you get to heavy areas. They won't cut doubled up pieces. You need to tension the strap as you pull. Either reach forward and hold it yourself, have someone holding the end, tack it to the bench, or use a clamp like a "third hand" cam action clamp. I do cut some heavy leather with the wooden strap cutter, but not much. I use razor blades in it, and break off the excess sticking up. The razor blade will last a while on vegtan, but a new one is great for me cutting softer leathers like chap. I use it mostly for that. Advantage - pretty inexpensive. Draw gauges - I like them for narrower straps and still might cut some leathers with them if one is handy. The blades can be sharpened up well and the sharper they are the better they stay straight. Stock blades from Osborne are pretty decent for the price but requir esome work. I thin them down some and sharpen them up to get a better cutting profile and edge. I put a new blade in every draw gauge I sell and sharpen them up in batches. Draw gauges for me are a little more ergonomic than the wooden strap cutters. Still they will have more torque the wider you are cutting. Three inches is max for me and I have to really watch the cut to make sure the leather is staying up next the handle and maintaining width. Leather can ride up the blade. You also need to tension the strap like the wooden strap cutter. You also need to have the leather off the edge of the bench to have clearance underneath. The little handle on the blades can be reached for with your left hand and two hands used to help counteract the torque and stabilize the cut. Advatnages - cheaper than my next option. Disadvantages - there are several makers and choices in handle materials, beam widths, handle shape and materials, and desirability factors with old line ones. They aren't one size fits all in terms of makers, new vs. old, old in as-found condition or refurbished, gibs installed and blade condition, and price can be all over the scale depending on those factors. Plough gauges - I use them for anything over 3" and most stirrup leathers are cut with them. They are pushed into the leather. The blade is in line with the handle and there is no torque. I have them in widths up to 20 cm and have cut very well that wide. I like them a lot. They are much more commonly used in Europe and those areas influenced by them. Since you are pushing the strap is tensioned from the rear. I push down with my left hand and push with my right in a cross arm motion. If I have the clamp, I just walk away pushing. There is roller in front of the blade that keeps the leather from riding up the blade. The leather lays flat on the table. Disadvantages - biggest one is cost. They are and to my knowledge always were made in Europe. If anyone has any info on any USA maker in the past, please let me know. Dixon and Vergez-Blanchard still make them, and the guys selling the Barnsley have their old found stock. They are not as commonly found in the US, and bring a pretty good price. I like them and hunt them up pretty hard. I try to always have some choices around for sale. That is my experience with the wider straps. -
Brent, I use the side window from a car. Some guys that do really thin skives use a turned over glass bowl or a 1 gallon glass jar in a rack to hold it steady. The push skiving blades are called a few different things and I suspect it is a regional thing. Some call them paring blades, English parers, skiving blades and they may or may not have anything but just the blade. Some wrap tape on them, and some glue leather to build them up a bit. They also make skiving knives like that with handles. Most of these are European influenced and Vergez-Blanchard, Dixon, or the outfit selling the Barnsley tools would be sources. Some are home made from saw blades. I've had a couple that were good.
-
I am with Kevin, that coloring is pretty cool. I don't know how much work you have done and this is the "Show Off" and not the "critique my work" my work section, but here goes with three things deal. The stitching needs some help. Shortening the stitch length up by using a stitch marker of some type will help them to be even in length, closer together and look cleaner. The edges are a little wavy and you know that. Circles are really hard to cut and not get a flat spot. The smaller they are the harder it is. If I try to fix them with a knife it usually makes it worse. I don't know what you have for equipment but I am sure not above using a dremel or power sander with coarse grit and taking down the high spots in the outline and feathering them in. Double beveling to round up the base of the thistle will make it kind of "pop'' and not look as flat. Double beveling round things gives them some dimension. There is some good stuff going here. Good job with the coloring. I don't do much color work, but like mostly what I see there. Drawing your own patterns is stepping out there. Ending up with something functional but admitting right off that you knew there were areas to improve on means that you will improve.
-
Saddle Conchos And Their Removal
bruce johnson replied to Dwight's topic in General Saddlery Discussion
I'd post a picture of my most reached for concho convincer, but if you,ve seen one pair of Channel-lock pliers, you've already seen it. Wrap the jaws with a bit of tape. Don't squeeze too hard and taco-shell the thinner conchos. I have the Pro Concho Turner and it works alright from the point of "got them started" to "almost there". -
Tippman French Box Stich Attachment
bruce johnson replied to Kieran's topic in Leather Sewing Machines
Yep, it took two hands to hold whatever ever you were sewing in the sewing attachment and you used your third arm to crank the handle to make the stitch. -
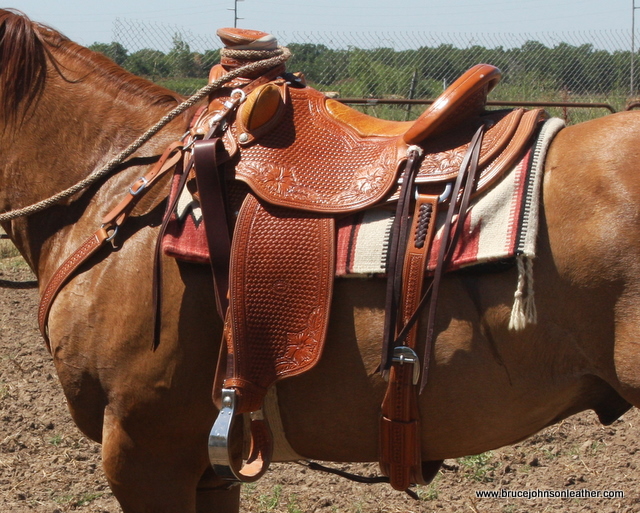
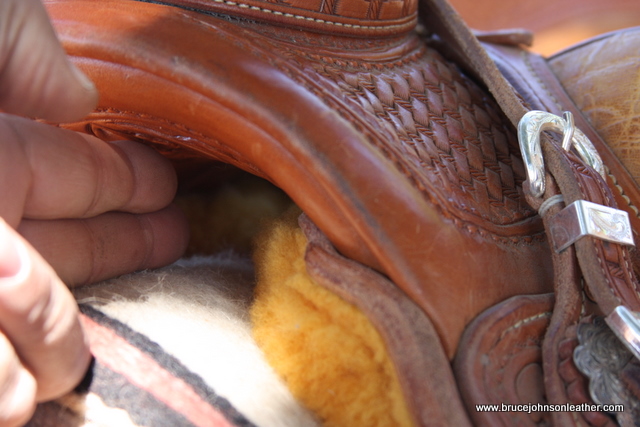
Packing Down The Shearling
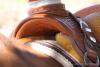
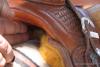
bruce johnson replied to Rod and Denise Nikkel's topic in General Saddlery Discussion
This is far from a scientific study, but this is a progression of my own saddle. The constants are the same horse and same pads. The left side view is after the first ride. It had about 3-1/2 fingers of clearance. The gullet views were last week and it has now had about 30 hours on it. The clearance is right at 2 fingers. The shearling is a Lazy M, tree is 6-1/2 finished gullet about 4-3/8 handhole width. The geometry in me says that just packing the wool should not allow that much of a drop. Other things are at work here - skirts spreading? plate rigging pulling in more? Latigos pulled tighter? Just from my impression, the saddle rode a little looser for the first five rides or so. More side to side maybe, and that has gone away. Pretty even sweat too.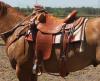
-
I'd clean it up and try it. I only I use one round/head knife that isn't probably a hundred years or better.
-
One factor with the crank splitters and Ferg sort of brought it up is the type of leather you are splitting. The commonly available crank splitters are designed to split shoe sole leather - firm leather and the blades on most are 6" wide. There are wider splitters that can do up to 18" and some a tad more. They get into way bigger bucks pretty fast. These will do firm leather pretty well because they are pushing the leather into the blade. Softer leathers can wad up against the blade and end up in uneven splits, especially once the blade loses a keen edge. One thing to watch for is to make sure the blade is set against the front stop to set the position. Even firm leather can get squirrely if the blade has slid back. Crank splitters also go as fast as you turn the crank which is not rocket science to figure out. On long lengths this may not be a plus, it gets tiring and kids and wives strike for better pay. A pull through splitter will split as fast as I can rip it through. On the Americans and Champions crank splitters they feed from the back. Sometimes I will start a stirrup leather through with the crank and then grab it and walk away to let handle free wheel to get the job done faster and easier. One advantage of those particular style of crank splitters for me is using them like a pull through if need be.
-
If these scraps are really small you will be much happier with a crank splitte. Like has already been mentioned you can start in the middle go one way, then turn it around and split the other way. You are limited by only being able to grab and pull on what extends beyond the front to back width of the blade. With a crank splitter if they feed well you just turn the handle. As far as pull through splitters there are some lengthy threads on the advantages and disadvantages of the different makers and styles. I like Chase and Krebs pattern splitters for leveling and do most of my lap and edge skives on a hand crank skiver. If you are shopping Ebay, there is a member here with a crank splitter on right now - here's the auction link - American crank skiver . I have an American I am using right now and have had some other Americans, Champions, and a Landis. The Americans are sure alright.
-
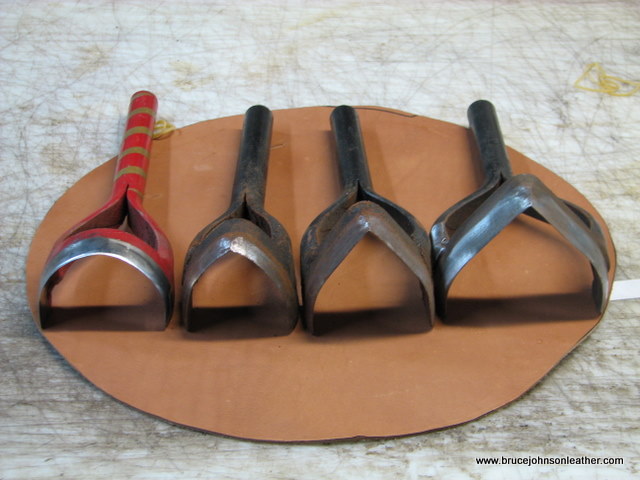
2 1/2" English Point Strap End Punch Wanted
bruce johnson replied to Missing Strap's topic in Old/Sold
I learned the same trick Art did, but from an old guy. Until I got a decent set of smaller end punches I did that on everything. A couple years ago a buddy made me up a 2-1/2" round end to do the cutout above the rigging plates on a flat plate rigging. Last year he was messing around in the shop and made me up some point punches in 2", 2-1/2" and 3". The 2" is an English point and the larger ones have more point to them. I use the 2" on wider back billets and the bigger ones on leathers. They are great for shortening stirrup leathers on the saddle and getting the ends right the first time. I usually nip the very tip off straight across once it is punched to length.
-
Alvin, I can't be of much more help. I got some in a deal a few years ago in set I bought. They were in a parts drawer labeled "bolts". I have seen longer ones in Weavers or Beilers catalog and I think they call them bolts too. They are a solid cast piece, not threaded with a post and screw. Maybe Ohio Travel Bag?
-
Ricky, I got home and checked my stamps. The Barry Kings are indeed a #45. As far as the Billy Woodruff bargrounders, my wife really tried. The Billy Woodruffs are size 30 and smaller than the BKs. The 5 hole one she happened to pull out was size stamped a bit off. He double struck the "5" but that was the one stamp of the set stamps that didn't have the "- 30" clearly stamped on it. It really did make someone assume that was a size 55. The rest are all stamped with the number of holes and then the size.
-
Kind of little word of caution. I use the Walmart/Kmart cutting boards to make up press forms for molded cases. The material works good for that. They are alright to cut on also. Where I had problems was using them for a punching surface for end punches or round punches. Most would crack or break in pretty short order. YMMV, but if they are going to be used for pounding on a stamp, it might be an issue.
-
Ricky, I can't keep track of the sizes either. I called home and had my wife check. She says I have #45 in 3 and 5 hole. I have a set of Billy Woodruffs and she thinks they say 55, but the size stamping is pretty small and hard to read for her. I know there is a size difference, but she can't see it just looking at the stamps. I will say I had some smaller BKs and the only place I got along with them was small areas on thin leather which would make sense.
-
I think ShopTalk is selling this book too.
-
2 1/2" English Point Strap End Punch Wanted
bruce johnson replied to Missing Strap's topic in Old/Sold
I'd try Texas Custom Dies or one of the other die makers. They should be able to make you one up and put a handle on it. -
I bought two bags and they varieid. Both had about 1/3 quilled and the rest small quills or smooth. One had several big pieces (4-5x8 or so) and a nice mix of browns and blacks with a couple of burgundy usable pieces. The other had two large pieces and lot of smaller irregular pieces. They might work for magnetic money clips. Mostly burgundy there, with a few black and less brown. For the price it seems like a good value for what I needed pieces for.
-
Leather Guru, Thanks for posting the pictures. I like looking at the old stuff. Kevin, Sad to report that it isn't just the handles on the knives. I have seen plastic rollers on some other new plough guages instead of brass. They just lack class and soul.
-
Ben, I do a variation of "A" for the ones I have done in the last few years. I sew the spine on. I do my sewing on the edges in sections. For the cover pieces I leave the threads long and then handsew back to flush with the edge of the spine piece so there is not that gap in stitching. I have tried to do it with the machine but the center presser foot can leave a mark on my finished edge of the spine that is hard to work out. Also sometimes the center presser foot can slide off that edge and leave a longer stitch there. I do a single piece cover more often and charge more for a three piece. I also do some in a two piece where the back side wraps around to the front and has the scalloped edge there.