bruce johnson
-
Posts
4,401 -
Joined
-
Last visited
Content Type
Profiles
Forums
Events
Blogs
Gallery
Store
Everything posted by bruce johnson
-
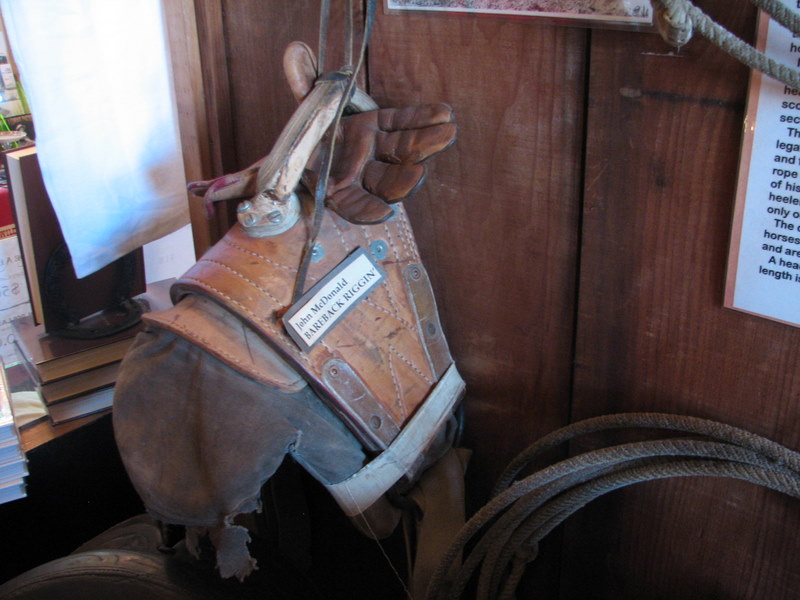
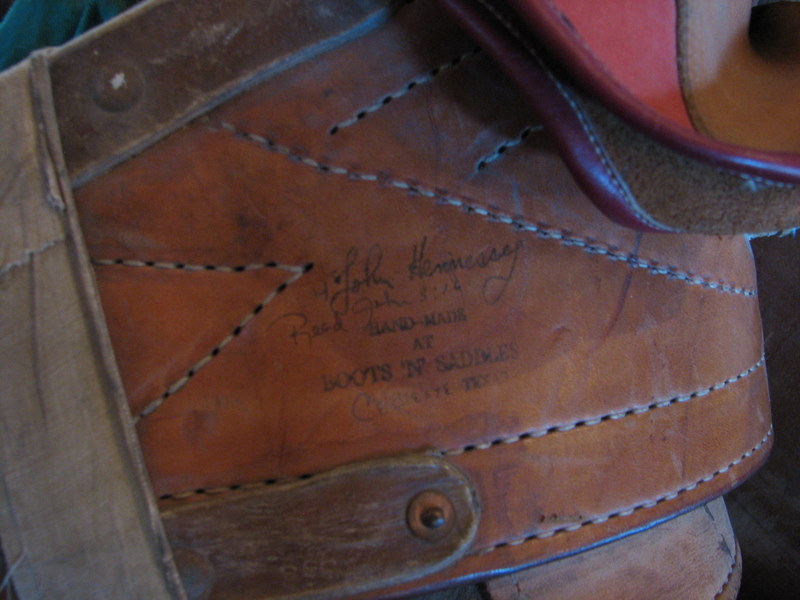
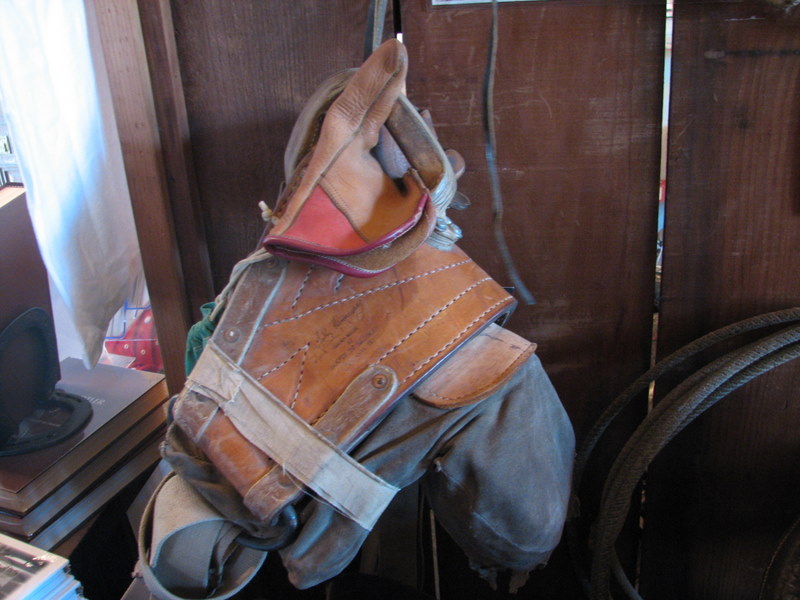
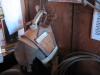
To clarify for some of the people reading this thread and wondering what the heck these guys are talking about - here are some pictures of a bareback rigging that belonged to one of my good friends. Pete made it for him and Pete is being kind of humble here. He was THE maker of these and when you arrived, it was usually in a Hennessey rigging.


-

Looking For Anteater?
bruce johnson replied to leatherman1457's topic in Exotics, Reptiles, Furs and others
I was looking for some last year. One of the exotic sellers in Texas told me it was on the ESL. CITES issues aside from that, he gave me some more insight. His take was that there are still some older hides trading. His advice was that in his experience anteater gets brittle faster than some other leathers and depending on the quality of tannage and how it was stored tended to break along the seams between scales. Also it is a popular pattern for embossed cowhide and may be one of the more common leathers being sold as genuine when it is not. You just have to know your seller and trust them. -
If you only have one, you will like the one on the bottom a lot more. If you have never used a round knife before, you will like it to be about 2/3 the size of the one on the bottom. The top one is called by a few names. Some people call it a French pattern head knife (different from what Osbornes call a French head knife) and others call it an Enchancree knife. The top can be sharpened on the hook and it can be turned over to cut curves. The long trailing edge on the bottom makes it really track greatt for long straight cuts. It also makes it pretty impossible to get back on track if you get off just a bit. It has the advantage though of really making a nice knive for push-skiving down an edge. I like them to cut fringe with - not much rolling, just heel-to-toe rocking. They look cool and generate questions when people see them. The bottom one is a nice pattern - can do curves and straight cuts pretty well. Some people prefer a large knife like that. I think I have a little better control with something around 4-5" for general use on the bench. A wider knife puts me a little higher above my leather and just not quite as comfortable for me. I use a large knife for rolling. One of the safety deals is that if you roll a knife to never get past vertical. If you do it can kick back and that point can bite your wrist. I like a wider knife for push-skiving an edge too. They also work well for doing some trimming off the bench.
-
Terry, they are on the second page of cutting tools and blades. Here's a link > Strap cutter
-
Head Knife Handle Replacement? What Would You Do?
bruce johnson replied to tostrap's topic in Leather Tools
My thoughts on it - fix it up to be safe to use. If that means a new handle - enjoy the time spent making it and then use it the rest of your life. There are other makers who are probably more historical than Rose. Rose knives are not particularly rare. They were a production company and as far as I know the only leather tools they made were round knives. Their big deal was masonary tools. I am sure they probably sold some directly, but CS Osborne had Rose knives as a listed item in his catalog. Rose knives are really good. I like them a bunch. Make a handle that is commensurate and somebody's grandkid will be cutting with that knife. -
I got your back on this. Tell everyone I said it looks clean to me. Good looking tools and machinery there too!
-
The wooden strap cutter pictured is the real thing and they are available on a quick search from Springfield Leather - one of the banner advertisers at the top of the page.
-
The last I checked the Dixons are about the USD equivalent of $610 for a 5 inch from Abbey's and about $1100 ffrom Leffler's in Australia. That probably accounts for the reason why I had a backlog of Australians looking for Dixons. I heard from a guy in Florida a couple months ago that bought a new Blanchard from someplace for $550. Edit - I had an email that today the Dixons are just under $500 USD equivalent and the Vergez-Blanchards are within a few dollars on website pricing.
-
I hope I haven't missed anyone but I think I have finally cleaned up the want-list of people looking for rein rounders, and have listed two recent ones on my website today. I also just got a couple more Dixon plough gauges, some knives, and a few handled tools on today. Here is a link - Leather Tools For Sale . I do send out an email announcement when I list fresh tools, and just send me a PM with your email address and I can add you to the list if you are interested. Thanks, Bruce

-
I rough up the can first. I use two thin layers of contact cement on the leather and one on the can. I let the second layer almost dry, hit it with some heat to tack up and stick down. I weight them at least overnight.
-
Why Is Leather So Expensive?!?!
bruce johnson replied to Mactechbri's topic in Leatherwork Conversation
Part of it is supply and demand. Cattle numbers are near or at record lows in major cattle producing areas here and abroad. Sustained drought has affected several areas. Some cattle ranches are being sold and turned into orchards and vineyards here. They will never see cattle again. I had a really nice talk with a guy from Argentina a month ago, Apparently the same thing is going on down there in what used to be cattle country. On the flip side, cattle prices are pretty much at great prices if you have them to sell. -
Way cool!!! I sit on Charles Collinsstitching horse when I hand sew. Mine is a saddler's horse and not the more common harness stitching horse. He had a lot of colorful history.
-
How To Modify A Shop Press Into A Clicker Press
bruce johnson replied to azrider's topic in How Do I Do That?
I left the ram on mine to still be able to use it as a shop press if needed. I use a piece of steel large enough to cover the die and center it under the ram. That works for what I need to use it for. Texas Custom Dies has a shop press with a top plate, but I am not seeing a picture of it on their website. Weaver makes a benchtop one also with a top plate that bolts onto the ram. -
Looking really good, Calvin. I lke the button mix and the colors.
-
Wyoslick or somebody more in tune with Craftool history probably has the answer. I looked at a large set of tools a few years ago from a closed down summer camp. They had several sets of stamps that had that brass finish. There were a few still in sets in bags and boxed with low end swivel knives and wooden mallets. I assumed they were made for bulk sales or entry level craft programs.
-
I've got a few of the "combs" and the bent piece that go on one. PM or email me.
-
Hazards Of Boiling Beeswax For Medieval Leather Bottles
bruce johnson replied to UKRay's topic in Leatherwork Conversation
Art. It was one of those "seemed like good idea at the time" deals. I was mixing my beeswax/parafin mix in the pyrex cup on the stovetop. I thought "Hey they make a wax that has dye in it, how hard can that be?" so added about a third again of dark brown dye and let it go a bit swirling to mix. When I poured it into the muffing papers it stayed separated. That would have been the point where a prudent man would have stopped and left hot solvent and melted wax to professionals. I was not wanting to waste my $3 worth of beeswax and probably 50 cents worth of parafin. I went on and cooked off solvent while she was gathering important papers and family heirlooms for evacuation. Like I told my wife when I was done "No flame - No foul!". -
Hazards Of Boiling Beeswax For Medieval Leather Bottles
bruce johnson replied to UKRay's topic in Leatherwork Conversation
And here's another safety tip. If you decide to add a bunch of dark brown dye to make brown wax for edges, you will need to gently boil the solvent off to allow the dye particles to disperse throughout the wax sort of evenly. It is a good idea at this point not to tell your wife exactly what you are doing on her new stove over the recently laid laminate flooring. It can be done, but the safety tip here is - if you tell her then wear proper hearing protection. Wives tend to yell really loudly at that point. The real lesson out of that whole deal was that the brown dyed wax didn't really make my edges that much darker, but I am not admitting that to her. -
Maverick Leather
bruce johnson replied to PHIPPS CRAFTED LEATHER's topic in Gun Holsters, Rifle Slings and Knife Sheathes
I occasionally use horse butts and finally used up what I got from another supplier a few years ago. I have been to Maverick Leather a couple times in the last six months and have looked at them. They are bigger and cleaner than what I had, and look worth the money to me. Maverick has a good selection of leathers that come directly from Horween. Good folks to deal with. -
Michael, I am with you. I don't cut a lot of lace, but occasionally need some. I like the Australian strander much better than the plastic stick Tandy cutter. The strander is adjustable, and just is more comfortable for me to use.
-
Really??? I finally find this out now about the active topics?? I guess I can now forget about my little hand written notes about posts I want to go back to. I've been here how long again?
-
I use both about every day. With the blade sharp enough, both will cut belt width straps. The differenece between the two is in the design. The draw gauge is pulled. The blade on the end of the bar means the wider the cut, the more torque there is on your wrist to keep it straight if the leather is hard or the blade is dull. You should be able to easily pull the blade into the leather. If you have to push it in to get a start, the blade is too dull. The leather has to be off the table to use a draw gauge. The plough gauge is pushed into the leather and the blade is in line with your wrist. No matter the width, there is no torque. The roller in front of the blade keeps the leather from riding up the blade also. The leather lays flat on the table with a plough gauge.
-
Thanks Tony and Clair, I had a guy who bought a plough gauge tell me he could buy three for what one new would cost him. When the second guy told me that I did get curious then. Lefflers were the only ones I could find online selling plough gauges.
-
I have a question for the Australian members. I had heard from a couple of you some of the prices for new quality leather tools in Australia. I got around to checking one mentioned and it was dead on with what I was told. Are there any other suppliers with published website prices other than Lefflers to check out?
-
Swivel Knife Blades Ceramic Or Steel
bruce johnson replied to sierraleather's topic in Leather Tools
I think overall steel is the best choice. I have some good ones from Chuck Smith and Barry King. Henley makesa good one as well. I have got a few ceramic blades in some Tandy knives that were so-so to really draggy. I recently bought some tools and with them was a Chuck Smith knife with a ceramic blade. I was not expecting much out of the blade because my experience was about like dirtclod's. It is a heck of a good blade. I am not sure that Chuck made a ceramic blade so this might be one somebody stuck in it. Whatever the case either this was a good blade to start with or somebody worked it over to be good. Sorry I left one off my list of steel blades. I have one from Leather Wranglers that is the longest lasting of the steel blades I have.