bruce johnson
-
Posts
4,401 -
Joined
-
Last visited
Content Type
Profiles
Forums
Events
Blogs
Gallery
Store
Everything posted by bruce johnson
-

T M Lumly Saddle?
bruce johnson replied to corinowalk's topic in Saddle Identification, Restoration & Repair
Interesting history here in the "Old COwboy Saddles and Spurs" book. 7th edition. "T.M. Lumley, Cushing, OK 1920-40. He moved to Medicine Lodge, KS & married Bess Read. She did much of the tooling and stamping. TM died in December of 1951. Bess continued the business for many years. She died at age 100, Feb 25, 1994." -
Not to butt in here, but I didn't know Barry King made a hollow ground blade. He has about as many blade options as anyone who makes knives. I have had a few and use one now that is not hollow ground. If you don't mind, please post a picture of the blade because I might be interested in ordering one. Thanks,
-
Bison Leather Developing A Whitish Material On It?
bruce johnson replied to rmr's topic in All About Leather
It looks like waxy surface spew to me. Have him hit it with a little heat from a hair dryer or fan heat gun and see if it melts in. Waxes melt and molds don't. -
If the leather is already glued to the lining and sewn, there will be no way to get in there to reliably bend the prongs between the layers. It would be pretty hard to set rivets inside a lining, and if the socket part of the quick rivet hardware is big enough, it would be in the stitchline anyway.
-
The cleaner way to set the spots on the top layer and leave room for stitching outside them. That said a lot of stuff has the spots applied afterwards like these are done. If the leather is thin enough they will clinch through on the back side of both layers. If not, they just stick in. Heavy work that is used and abused like breast collars can have somne spots woirk loose and fall off eventually.
-
Hard to put an exact number on it. It looks to be an older style harness stitching horse in pretty good condition. Factors on price would be how much it rocks or is it solid? It looks like it is only missing the foot bar and the plate to hook the comb. Any other condition issues? As a range I have paid from $75 up to $200 for comnplete stitching horses in good condition in antique stores. I bought a saddler's stitching horse with some history for $300.
-
Just a question here. Are the CraftJapan tools any relation to the Craftools and are they even sold by Tandy? I thought they were mostly sold by Hidecrafters recently. The ones I have are superior to any Craftools I have bought new. In some cases the ones I have are superior to even some handfmaker's versions of a particular stamp.
-
Leather Skiving Machine "nick-O-Sew 801-St"
bruce johnson replied to philippe's topic in Leather Sewing Machines
If I am understanding your question right, you need to control how far into the leather to make the cut? There should be an adjustable edge guide to set that. The height adjustment on the presser foot is a knob at the top. That will control the width of the cut somewhat and allow for different thicknesses of leather. There are a lot of adjustments on these, and once you figure them all out it is fairly easy to change things. -
Seat Rigged Bluestem Will James
bruce johnson replied to jwwright's topic in Saddle & Tack Maker Gallery
Joel, In my vernacular it means "cowboy cool". Kind of derivation of cowpuncher that has taken on a meaning if its own. Most of the time I hear it from the KS. OK, and west TX area. I had a guy email about some spur straps a few days ago, The email was "pull through leathers, barbwire and brown iron buckles, and stamp them kind of punchy" . I did a Bible cover last fall and asked what pattern she wanted on it. She said " no flowers, but punch it up some. It's for my husband". -
Seat Rigged Bluestem Will James
bruce johnson replied to jwwright's topic in Saddle & Tack Maker Gallery
There is "punchy" and then there is "PUNCHY". Then there's a level just above that reserved for stuff like this. This saddle is PUNCHY!!!! -
One thing to watch for on bisonettes is the width of the blade stock. Some makers use the same width for all sizes they make or at least use stock that is too wide for the smaller sizes. That means on the small hole ones and thin leather, you have excessive width on each side. You can't lay a strap flat on the bench and run the edger or else you have to hold the edger almost flat with the surface. To run them at a 45, you have to have them on the edge of the bench. Not very handy. You can also grind them down to narrow them up.
-
Bill, I use a fine napped paint roller and a tray. I pour my oil in, then roll it off on the ramp until I get the amount I want on the roller. If you really squeeze it out you will get a pretty light coat. Then roll it on the piece. That is pretty much how I do everything that can lay flat. I don't get swirl marks and what little overlap there is evens out pretty fast.
-
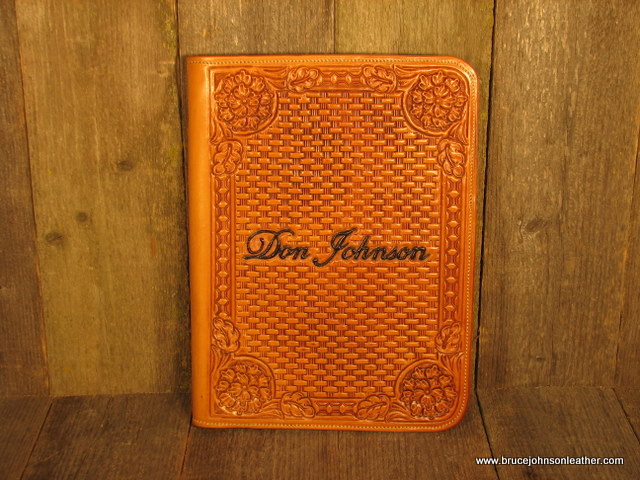
I am attaching a picture of a pad holder I did that folds double. It was for my uncle who is a cattle buyer. He wanted it to fold over so he could stick it into the steering wheel and write contracts. It needed to be stiff and I used a clipboard clip inside the back cover and stiffener on the front to make an edge to break against. The cover is made from 7/8 that was thinned to about 4 oz at the fold. The lining was 4 oz so it could staned the stress of folding a little better. Adfter a few years of daily use it has held up well.
-
Some of us would fall short of raw materials there.
-
I have a set of Bob's and sure like them. Unless something has changed with the new guy who bought Ron's business, Ron didn't make bisonettes. Of the old line makers, I have some favorites. I have a set of Rosecrans bisonettes, and believe they might have been the first to make them. I really like them, followed closely by the older Osbornes.
-
Duly noted and the previous post has been edited and corrected.
-
Anchor Stamped Hardware
bruce johnson replied to Mechanical Cowgirl's topic in Hardware and Accessories
Dirtclod is correct. It is North and Judd - New Britain, CT. Here is a link to some history about them - North and Judd . They were a real player in the day in lot of fields. It is surprising to me how much anchor marked unused hardware still shows up today in some old shops. -
Kevin, Yep a guy or gal always can use more tools. I use the 2/3/4 sizes of push beaders, but have the range for edge creasers from regular creasers up through layer creasers. The layer creasers are a 1-5 larger sized set of creasers that begin where the regular creaser sizes end. Thanks for the compliments on my ride. He's pretty nice but probably won't see many show pens. That was my first ride last year on him in a new hackamore I got from Jack Armstrong. He is a stopper. I found out I needed to get some skid boots on him just to play around. We need to talk some time. I grew up in Indiana and the Congress was a big deal for me every year. Saw some of the legendary horses and trainers now when they were just another duck in the puddle. Same way with the cutters too. I worked a bit for a guy who was hauling Docs Starlight.when I was in college. Doc Olena, Dry Doc, Little Peppy were showing, I was pretty blessed to see that era.
-
Kevin, An edge beader has one side longer than the other to ride down the edge of the leather and keep the inside line parallel to the border. Basically they are a creaser that rounds. A push beader has both legs the same height to make a beadline freehand, like you'd do framing some stamping or carving away from an edge. They both have way more control in my hand than beading blades for long or sweeping lines., For tight curves then a beading blade is easier. Some push and edge beaders are pretty sharp and some are dull. Here's how I do them. I don't like a beader that is really sharp. I run a light line with the push beader or creaser on cased leather. I take a swivel knife and cut that line to an appropriate depth. Then I go back and round up the bead with the push beader or edge creaser. In my hands a sharp beader is more apt to keep cutting deeper when I go over the line to rub it up. They also tend to cut a new line and you say bad words. The duller ones stay in the track better for me. Guys that are handier than me can take a sharp one and cut and round all in one pass. They can probably ride unicycles too and I am still trying to master an exercize bike.
-
Joe, This has changed a bunch. Some charge a lower percentage. They make up for it in monthly fees of around $30, fees for the terminal/reader (lease or buy), supplies like paper for the terminal, processing fees for batch reports, contracts, etc. Now with rewards cards it adds another twist. They can charge one rate for debit, another for credit, another for rewards cards, etc. Then add in MC at one rate, Visa another, another for Amex, another for Discover and each card can vary from 1.75-4% within the same processor. It never penciled out for me to commit to a processor before Square. Square has no monthly fee, no reader fee, no supplies. On the downside they currently only accept cards within the US and receipts are sent to the customer's cell phone or email - no direct printing unless you do it on an IPad as I understand it.
-
I use Paypal a bunch and will continue to offer it. After reading Ferg's experience I just went back and looked at four sample transactions off Paypal this week to see exactly what I was getting hit for in fees. Two are international and two are in the US. International #1 - $375 invoice/$14.91 fees = about 3.96% International #2 - $426 invoiced/16.91 fees = about 3.7% US transaction #1 - $278 invoiced/$8.36 fees = 3% US transaction #2 - $221 invoiced/$6.71 fees = 3% I can live with that.
-
I too have recently signed up with Square and been happy. A guy from Square called a couple weeks after I got it to see if I had any questions since he noticed no activity yet. That is a plus, I don't HAVE to use it and doesn't cost me anything. . I won't be swiping many cards, but that added percent still makes it about even with Paypal fees I have had. The international guys still are going to have to do Paypal or wire transfers.
-
It was an Osborne #86. Looked very clean and worth the money.
-
For my heavier mauls on bigger stamsp no doubt the tapered is the way to go. On the lighter stuff, I don't see as much difference. I would also add that having a stamping bench that is a correct height for stamping standing up or sitting is a real benefit. I have had rotator cuff problems with both shoulders and the standing option makes it much easier with the heavier weights than resting my elbow and reaching.
-
David, There are some newer glues that are not as toxic. They behave a little differently though. I have not tried them because like you, I know how my current glue works and work around the problems. I do most of my glue applying outside. I am lucky that the back door out of my garage-shop opens into a covered deck. I do my glueing and oiling out there. I let the fumes offgas before bringing them in and sticking them. If I am glueing in the shop, then I use a respirator mask and ventilate.