


Samalan
-
Posts
1,570 -
Joined
-
Last visited
Content Type
Profiles
Forums
Events
Blogs
Gallery
Store
Everything posted by Samalan
-
Croc overlay holster and mag pouch.
Samalan replied to immiketoo's topic in Gun Holsters, Rifle Slings and Knife Sheathes
That overlay doesn't suck! -
Croc overlay holster and mag pouch.
Samalan replied to immiketoo's topic in Gun Holsters, Rifle Slings and Knife Sheathes
NOW THAT'S A NICE JOB MY FRIEND! -
That's why I said 90 twice 77 will not work it's 90 or like Dwight said weldwood it's just that weldwood is a bitch to use on foam if you have a lot to do but again don't use 77 I cant talk about gorilla glue I don't use it at all.
-
Lets talk about sales (or lack thereof)
Samalan replied to Spyros's topic in Leatherwork Conversation
Yep it sure is and more often than that more than full time I remember sleeping on the saw table then get up in the middle of the night and start all over those were the days. -
Welcome from Boston hub of the universe.
-
Lets talk about sales (or lack thereof)
Samalan replied to Spyros's topic in Leatherwork Conversation
Business is one of the greatest Crapshoots of life. Samalan -
Lets talk about sales (or lack thereof)
Samalan replied to Spyros's topic in Leatherwork Conversation
Yes you are right the world is a crazy place . You said the main factor is luck even if you don't Realize it, meaning me LOL you have know idea what I realize or don't realize. To be honest it sounds like your not so sure of yourself ,after all how many things can one control,, 4 or 5, or a war, or maybe a financial crisis, or skyrocketing fuel cost, and COVID who could know , a brain tumor, a fall down the stairs, cancer , a car accident, and the big one DIVORCE wholly shit, and what if I'm just not lucky, Wow I know I'll read my horoscope every day. Just get out and do something before it becomes a real problem for you, that's what I hear in what you wrote. but that's just me. -
Lets talk about sales (or lack thereof)
Samalan replied to Spyros's topic in Leatherwork Conversation
So charge by the hour and be wealthy. When you charge what you think is a fair price who is it fair to. who are you Santa Claus. -
Lets talk about sales (or lack thereof)
Samalan replied to Spyros's topic in Leatherwork Conversation
It's true as long as what you love is building a business, and except all of the life changing aspects of that. Business building can be good and bad it's a lot of very hard work and long hours. You get to find out who you are or aren't . blaming others for your own short cummings is not a good idea, bottom line it's up to you. don't get angry try to be that successful businessman, find out for yourself . Its an experience like no other. -
some people have even used sh_t it works don't think I would use it but the old p_ss on steel wool works to just two ideas .
-
3M Spray 90 contact cement is the best but it must be 90 they have others 90 is best for your application .
-
You mean like when I wear my trump hat! and it has no fur on it they want to look let them.
-
Welcome from Boston.
-
Yes spirit based dye with the exception of the black roon, that is steel wool and vinegar but still done after assembly . last one I promise wet mold then dye this is dye not roon.

-
Yes spirit based dye with the exception of the black roon, that is steel wool and vinegar but still done after assembly .
-
And that's for sure in total agreement !
-
Lets talk about sales (or lack thereof)
Samalan replied to Spyros's topic in Leatherwork Conversation
Business is a money eating monster that can bankrupt you, and eat you alive if you don't treat it right! -
Outlaw Archive
Samalan replied to GrayHallidayJr's topic in Purses, Wallets, Belts and Miscellaneous Pocket Items
Nice work -
Roon blackening and finishing after wet mold I realize it's not the only way to do things it just works for me sorry for all the pics just wanted to show you how it works hope it helps .

-
Dyed after wet mold and did some toning around the edges on the belt and holster but not to dark I don't like the dark toning look.

-
Holster before dye on left after dye and finish on right.
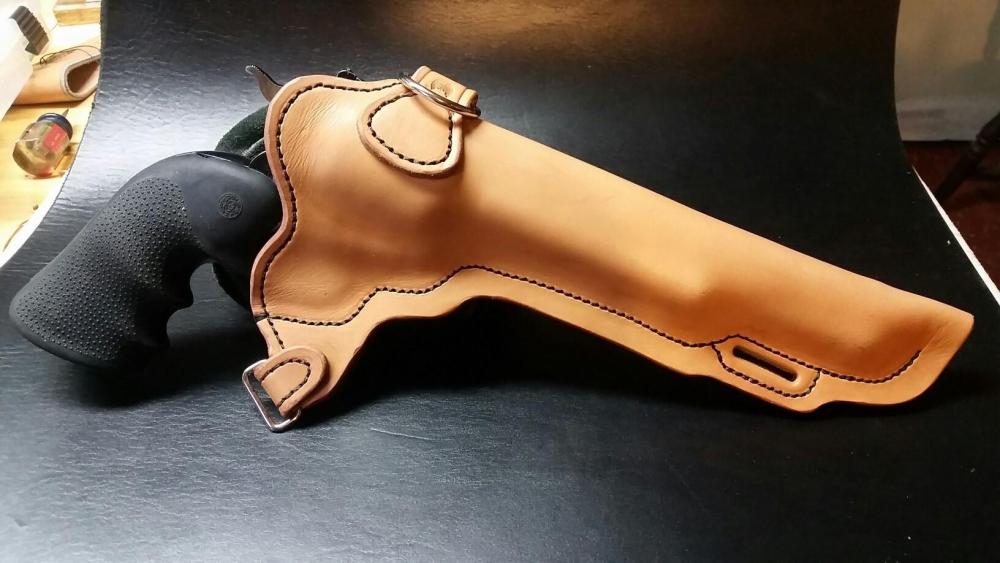

-
Yes that's exactly what I'm saying to do. let it dry somewhat on the mold with air movement like a fan you don't need heat just the fan then remove the mold let it dry some more then revisit the mold once more make sure it's good don't wet again just put the mold in dry.
-
I've made a lot of things. Wet mold then let it dry, then dye and let that dry, then wipe it real good with a cloth, then three or four light finish coats, this has never failed me, its all the drying time things must be very dry before the next step so if you have a lot of work you can set things aside while you work on something else. And all I just said is just my opinion, because it works for me. Hope it helps you.
-
Those are some good thoughts Chuck cant say I've ever herd of a gardenian LOL are they from the Gardenieae tribe. Anyway this morning I made a wonderful French press coffee with toast butter and molasses that coffee aroma stayed all day. First name came to mind for me was Dion O' Banion .
-
So if I say Gardenia who is the first person to pop into your head LOL,


