

Basically Bob
-
Posts
584 -
Joined
-
Last visited
Content Type
Profiles
Forums
Events
Blogs
Gallery
Store
Everything posted by Basically Bob
-
My apologies for the duplicate post .... Moderator please delete. Thanks!
-
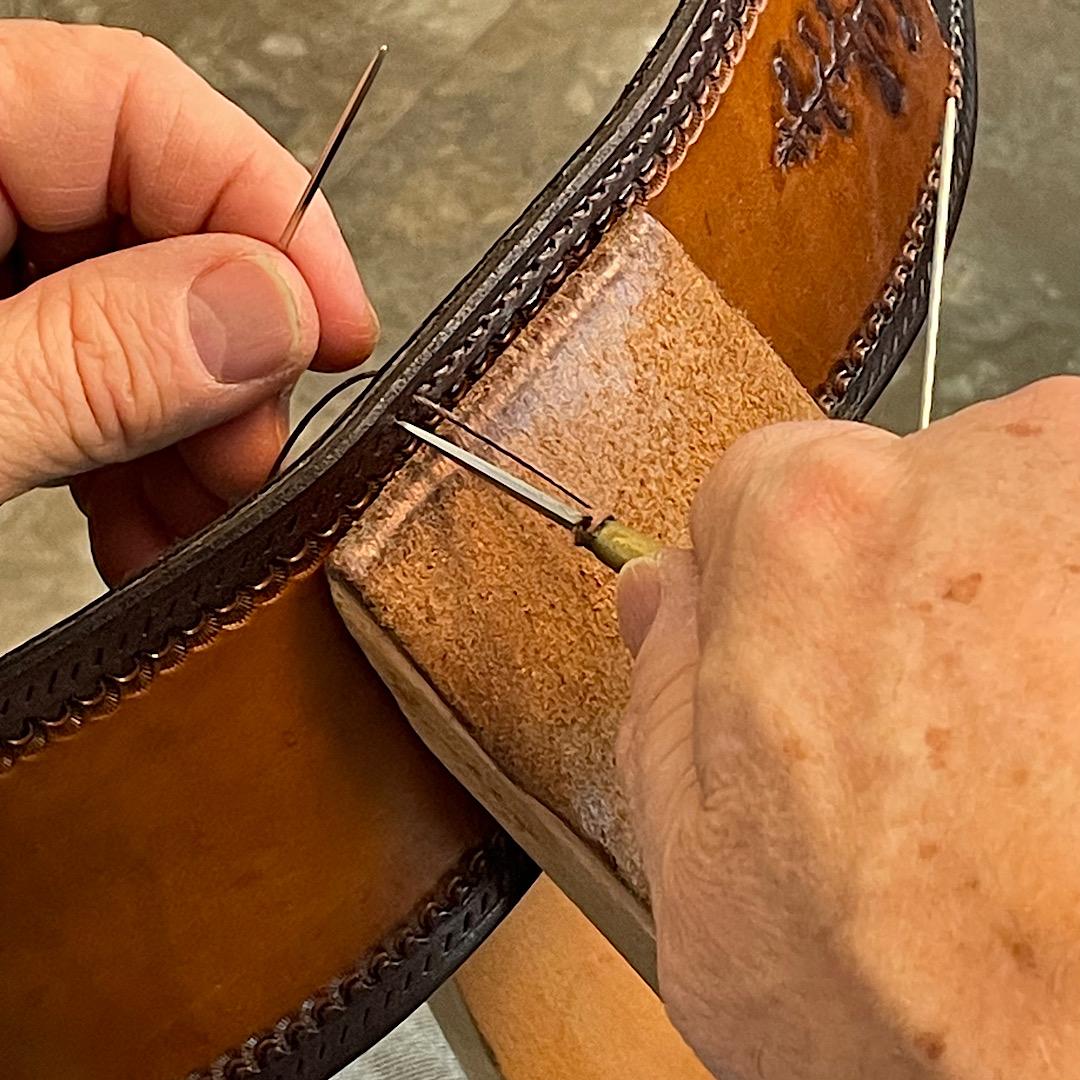
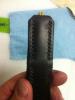
I thought that some of you might like to see the banjo strap hook I designed. The player insisted on a snap and rather than use the mass market cheapies I decided to take another route. I have used it on three straps now. The players love it. I use 3/32" brass rod, bend it to shape, make up a pigskin loop to "hang" the hook inside the leather turn-over, glue it up and stitch. That hook ain't going nowhere! A shot from the front It's a labour intensive solution but it works and looks great!
-
 Thanks for the input, Tom.
 -
Scabbard From 1890
Basically Bob replied to Brushpopper's topic in Gun Holsters, Rifle Slings and Knife Sheathes
Looks great! -
I make a 3 piece guitar strap with a tailpiece and tongue stitched to the main body and am applying resolene as a finish. I am thinking that it would be best to apply the resolene prior to stitching rather than after. Do any of you resolene fans have thoughts on this? Here's a pic of one of my straps.

-
Looks amazing! Just curious ... What do yu use for a sealer after dying?
-
They look great! Thanks for sharing,
-
Wallet With Applique
Basically Bob replied to Chief31794's topic in Purses, Wallets, Belts and Miscellaneous Pocket Items
Well, Chief .... I sure like the looks of it. -
Thanks, Chris!
-
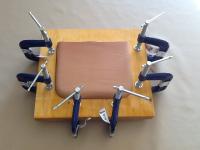
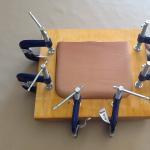
25b, sorry I don't have a pic of the underside. The customer has picked it up. What I will tell you is that the stitching on the back is not as nice as the front, LOL. One thing that I forgot to mention is that I glued it up on the round. Used a roll of masking tape as my form
-
Thanks, guys! Dan28, glad that you noticed the shielded strap. Labour intensive, for sure but I feel that it is worth it. It is a detail in workmanship that is and will be included in every strap I do. Makes my work recognizable, like a signature. Bob
-
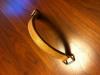
Thanks, Thanks Monica, I used one, 3/4 strip, 16 - 17" long, skived about 1" of each end to a feather edge. I folded the strip so that the ends were overlapping, created three layers in the middle. ("The Leatherworking Handbook" by Valerie Michael) 9tpi, it was 6/7 oz. I chose to leave the leather natural but conditioned it with Montana Pitch Blend leather dressing.
-
This was a quick project I put together for a lady who wanted a leather handle for a wooden case she uses to keep craft supplies in. Hand stitched at 7 spi. 5/18 barbour linen thread.
-
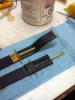
3" straight strap designed to tie on the guitar just below the headstock. 6/7 oz veg exterior with a soft, 2/3 oz chap leather (horse) liner. Hand stitched at 7 spi with barbour 5/18 linen thread. I used 7/8 oz veg. For the shielded tail piece. This was so much easier than the custom cut, contoured straps I normally do.

-
Minimalist Wallet
Basically Bob replied to Hi Im Joe's topic in Purses, Wallets, Belts and Miscellaneous Pocket Items
I'm thinking that at 8 spi it would look pretty good. Be sure to post some pics Bob -
Minimalist Wallet
Basically Bob replied to Hi Im Joe's topic in Purses, Wallets, Belts and Miscellaneous Pocket Items
Looks good to me, Joe and your stitching is just fine. Keep at it. Here's a quick pic of a credit card wallet that I made and have used daily for about a year. Stitched at 7spi, Dixon pricking iron, 5/18 barbour linen thread. Just thought you would like to see how the thread/spacing works. My apologies for the upside-down photo.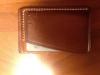
-
Belt Dye
Basically Bob replied to BigMatt's topic in Purses, Wallets, Belts and Miscellaneous Pocket Items
BigMatt, the best suggestion I can give you is to go to the Dyes, Antiques...subsection of the forums, and start searching, reading and then start making up sample pieces to try various techniques ro find what works best for you. I apply the dye, heavily, with a thin sponge and let it sit for 24 hours. Others dip-dye their work. Then I buff the heck out of it. Next, I apply neatsfoot oil, let it sit for 24 hrs and buff the heck out of it again. In terms of a finish and/or conditioners - again, read and try some. There are lots of different options and you are just going to have to experiment to find something you are comfortable with. -
Belts, Holsters, Cases
Basically Bob replied to Treed's topic in Gun Holsters, Rifle Slings and Knife Sheathes
Sweet! -
I really like the colouring on that strap! Thanks for sharing!
-
Two Dress Belts
Basically Bob replied to tossik's topic in Purses, Wallets, Belts and Miscellaneous Pocket Items
Thanks Tossik, The stitching traditional "British" style and since my stitching and assembly methods are heavily influenced by Valerie Michael's book, that's what I use. It takes a while to get comfortable with stitching the belt loop in but it gets easier after a while. I don't feel that it is the best way, but rather, just the method I have decided to use. In terms of dying the leather, I am quite comfortable with purchasing a pre-dyed product ... I don't buy belt blanks. Rather, I have my supplier cut strips 6" wide from a side for me and then I cut them to the appropriate width, depending on the customer's order. I like doing this because it gives me consistancy and the colour is stable so I don't worry about colour transfer. -
Double Gusset Brief, Hand Sewn, Saddle Stitch
Basically Bob replied to 9tpi's topic in Satchels, Luggage and Briefcases
Sweet! -
Two Dress Belts
Basically Bob replied to tossik's topic in Purses, Wallets, Belts and Miscellaneous Pocket Items
Here's a photo of one, to show you the stitching.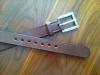
-
Two Dress Belts
Basically Bob replied to tossik's topic in Purses, Wallets, Belts and Miscellaneous Pocket Items
A nice clean look, for sure. Here are some thoughts, perhaps ideas for you to consider ... (Not criticism) . I make plain belts with no tooling & buy "belting" that is colored on the back. No bleed from the dye. For a dress belt, i would finish the edges, including the loops. Rather than using rivets, I stitch the buckles on & use it as a selling feature. -
Horween Essex Briefcase
Basically Bob replied to thefanninator's topic in Satchels, Luggage and Briefcases
Ditto to the comments above. That project is on my list of things to do, for sure.


