Basically Bob
-
Posts
584 -
Joined
-
Last visited
Content Type
Profiles
Forums
Events
Blogs
Gallery
Store
Everything posted by Basically Bob
-
 Lookin' good!
 -
Pancake Sheath For A Leatherman
Basically Bob replied to krappstein's topic in Gun Holsters, Rifle Slings and Knife Sheathes
Excellent! Great job! -
Welcome!
-
Very nice!
-
Awesome work!
-
The art is great!
-
Nice work for sure!
-
Sunburst Color Belt
Basically Bob replied to Allan1972's topic in Purses, Wallets, Belts and Miscellaneous Pocket Items
Allan, I guess what I was trying to say is that you belt looks amazing and that you should be looking to the top end of the scale. (And I wouldn't flinch at $200.00. The details that I think would take it to another level is splitting down the buckle turn over and belt loop to reduce unecessary bulk. Bob -
Belt " Birch"
Basically Bob replied to Tatyana's topic in Purses, Wallets, Belts and Miscellaneous Pocket Items
Beautiful work! -
I am not aware of anyone else but have been really pleased with Tundra Leather in Hamilton. Might be worth your while to arrange a one-on-one visit with Sean to discuss your needs. They are good folks and have gone out of their way to help me with anything related to leatherworking. I do know that they ship from their retail location regularly.
-
Finished Another Project
Basically Bob replied to Dan28's topic in Purses, Wallets, Belts and Miscellaneous Pocket Items
Looks great, Dan! -
Sunburst Color Belt
Basically Bob replied to Allan1972's topic in Purses, Wallets, Belts and Miscellaneous Pocket Items
I really like the belt and would love to be able to nail a burst effect like that. When I first started, I sold my projects to friends for just a little more than the cost of materials. I am now confident with my skills and charge 60.00 for a plain belt with nothing on it. (Stitched on buckle and keeper.) i wouldn't flinch in selling that belt for $200.00 if you had one or two of the technical aspects nailed. -
Looking good! Thanks for sharing!
-
Cotton Swab,s They Don't Hold Up Like They Use Too..
Basically Bob replied to Itch's topic in How Do I Do That?
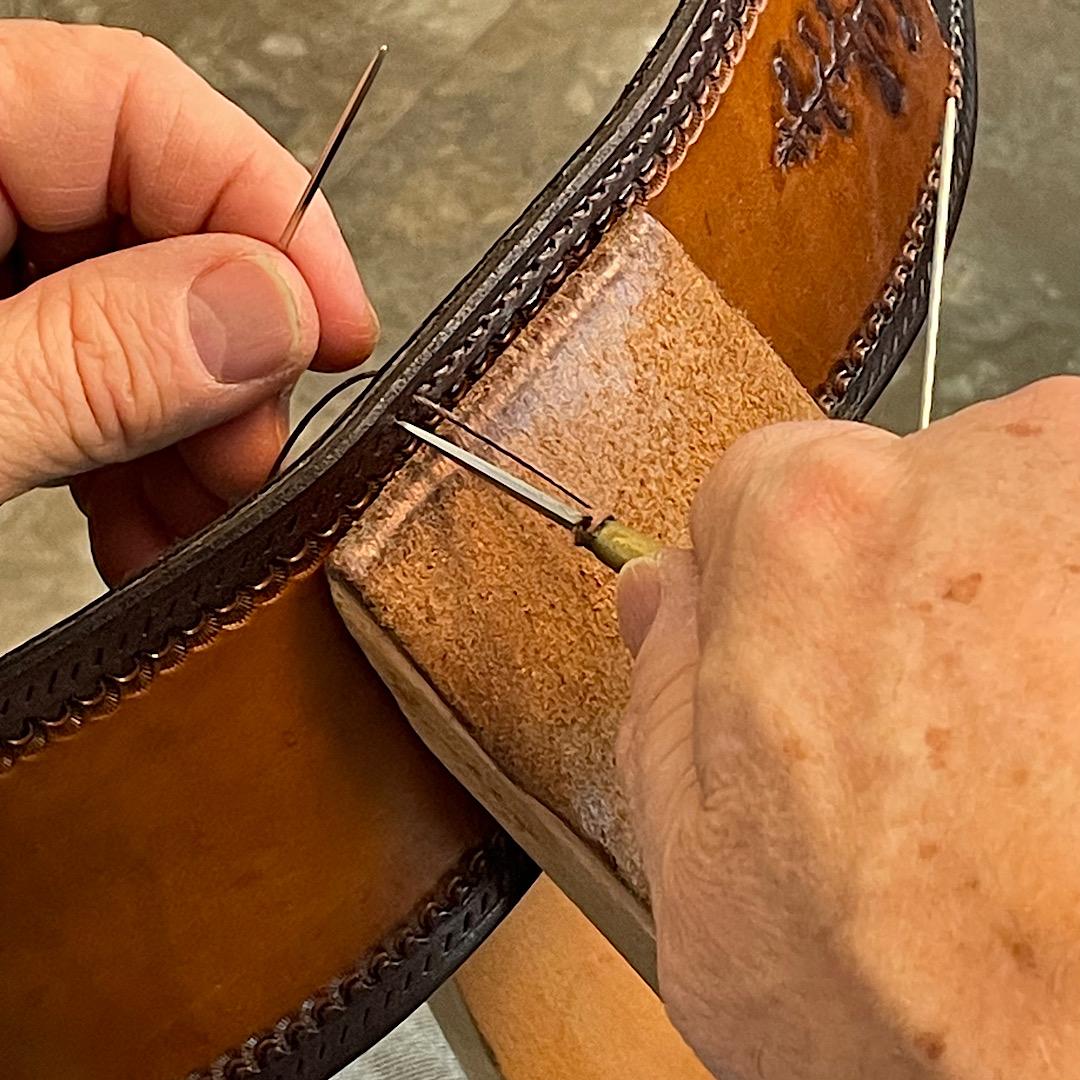
I have found that a tiny rat tail file will give me the cleanest lines without a mess. Just dip the end into a dye bottle - the grooves on the file pick up the dye and when you slide and twist the file into the hole or slot, it releases the dye. The only downside is that unlike an absorbant Qtip you have to reload it several times for something like a belt slot. Might be worthwhile trying it. Here's a pic. Sorry about the duplicate ... Shouldn't post anything before I have had my morning coffee Edit Fixed it for you. Tom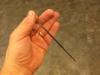
-
Cotton Swab,s They Don't Hold Up Like They Use Too..
Basically Bob replied to Itch's topic in How Do I Do That?
Bill. Be sure to use good quality wool felt. The other stuff just falls apart. -
Cotton Swab,s They Don't Hold Up Like They Use Too..
Basically Bob replied to Itch's topic in How Do I Do That?
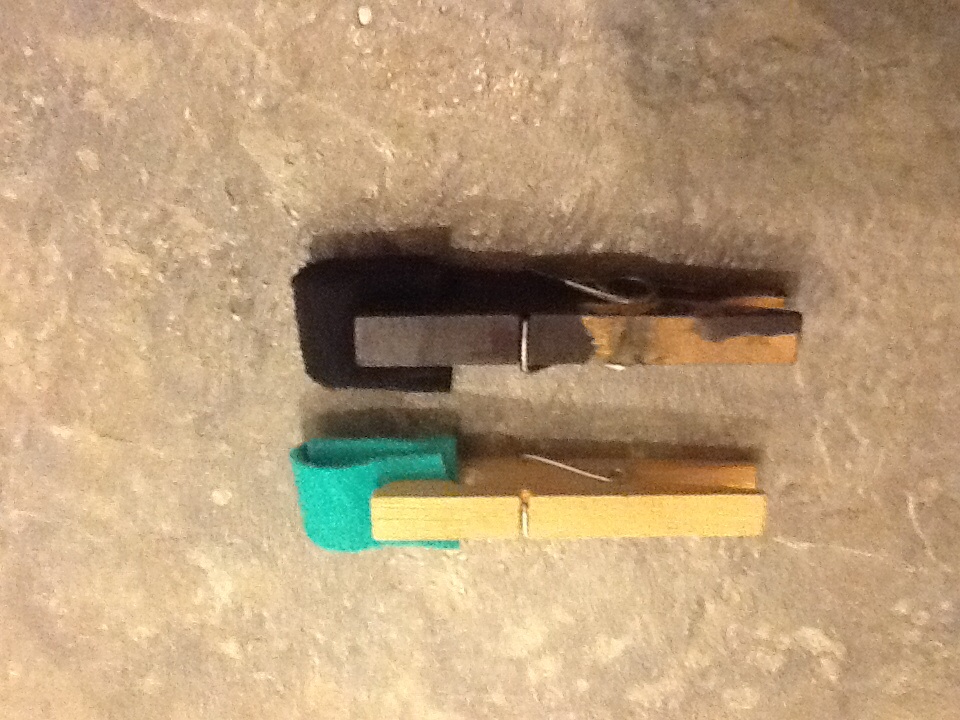
I use a piece off 100% wool felt folded over on itself and held with a clothes pin. When the edge gets fuzzy, I just sear it with a lighter. I found that it works better than any thing else I have tried. Thank you, Al Stohlman!
-
Understood
-
Nice looking axe ... Thanks for sharing.
-
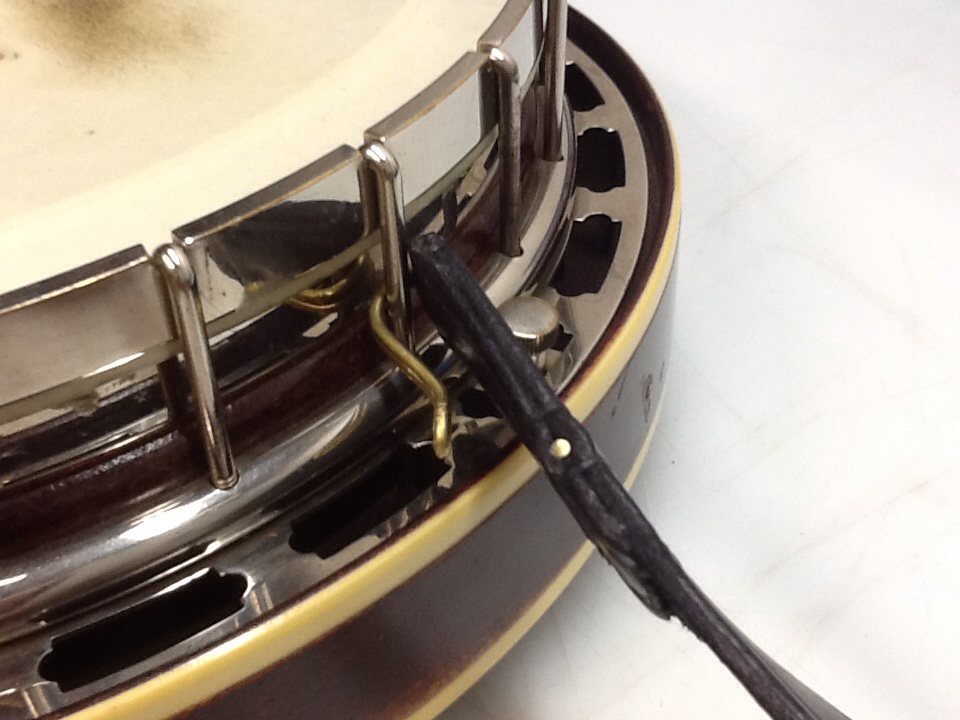
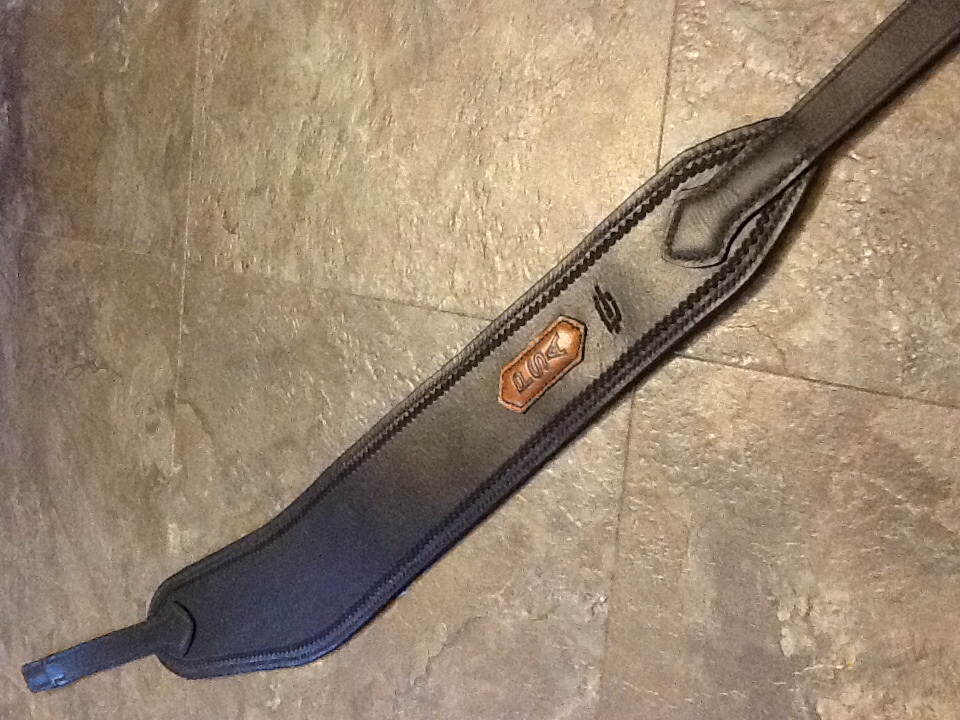
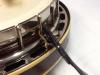
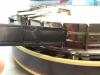
Colt, no, the hooks don't rattle - not even close to the cheap, all metal snaps. The two working musicians that use my banjo straps love them. Funny, the first player I made a banjo strap for is a working musician - he insisted on snaps and I really didn't want to use them, So,I came up with my own design. It took quite a bit of playing to get the dimensions and process down but now they go together fairly easily. That being said, the hook on one end and a shield on the other certainly is not a time efficient design but it makes my work readily identifiable, showcases my pride in workmanship and attention to detail.
-
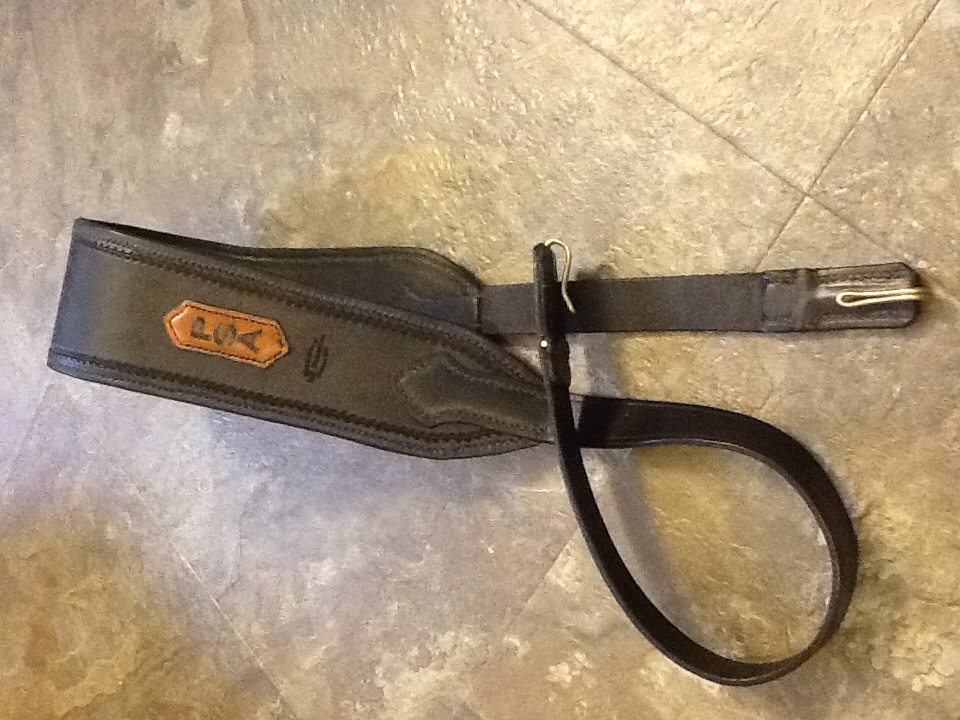
Nice! A photo of the belt loop would be good, also.
-
Here ya go .... Shows the hook from the back and the front.
-
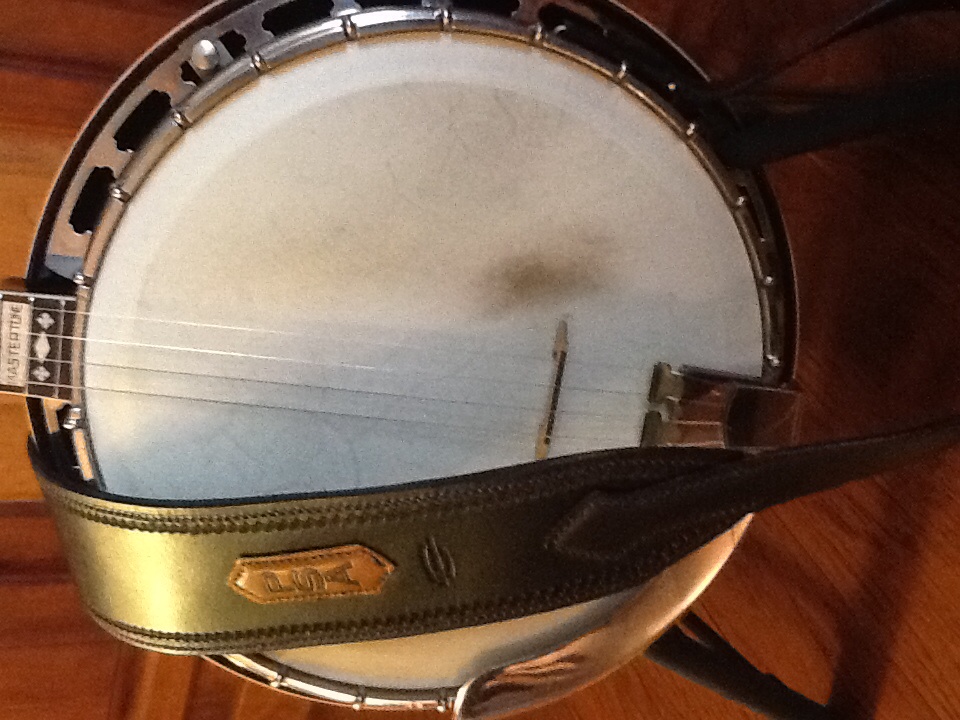
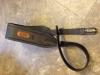
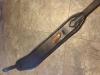
Finished a banjo strap, today, for one of our local working musicians. 6/7 oz. veg tan with a 2/3 oz. soft chap leather liner. Hand stitched at 7 spi.

-
Beautiful work, thanks for sharing!
-
Looks really good ... Nice and clean. Congrats on the Tele build! When you finish it be sure to post a pic of your strap on the guitar!
-
... Photos in my post entitled "Banjo Strap Hook - My Design"