Basically Bob
-
Posts
584 -
Joined
-
Last visited
Content Type
Profiles
Forums
Events
Blogs
Gallery
Store
Everything posted by Basically Bob
-
 You did a great job. I especially like the design; how you incorporated the copper plate - it brings balance and visual focus to the sheath.
 -
Re-Imagined Antique Chair
Basically Bob replied to nicnrh's topic in Furniture: Inlays and Upholstery
Love it! Thanks for sharing. -
I would work on the teeth myself and if unsuccesful would purchase a new one. I struggled with a used, well worn pricking iron and was totally discouraged. I finally bit the bullet and purchased a couple of new irons from Abbey England ... although it cost me a few bucks and it hurt at the time, it made a huge difference in my stitching and I am extremely happy. Abbey has excellent service to Canada and I found them to be extremely helpful.
-
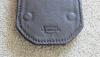
Wow, very. nice! Wondering if you covered the hardware on the inside of the sheath?
-
Talk to Peter at Tundra Leather, Hamilton.
-
Card Wallet
Basically Bob replied to rosiart's topic in Purses, Wallets, Belts and Miscellaneous Pocket Items
I like it a lot. Very clean and the two-tone concept looks great. The creasing is excellent and demonstrates your concern for detail. -
Christmas Gifts
Basically Bob replied to rosiart's topic in Purses, Wallets, Belts and Miscellaneous Pocket Items
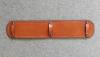
Looks good. I especially like the card holders. Clean, functional. Thanks for sharing -
Wow, that's absolutely gorgeous! ... and what a great company to be associated with!
-
El Welker Leather Wrapped 2 Octave Bass Guitar
Basically Bob replied to eLw's topic in Musical Instruments
Wow ... Looks great! I would love to sit down with that baby for a while. -
Mystery Braid Guitar Strap Solution ...
Basically Bob replied to Basically Bob's topic in Guitar Straps
Thanks, Sporq! -
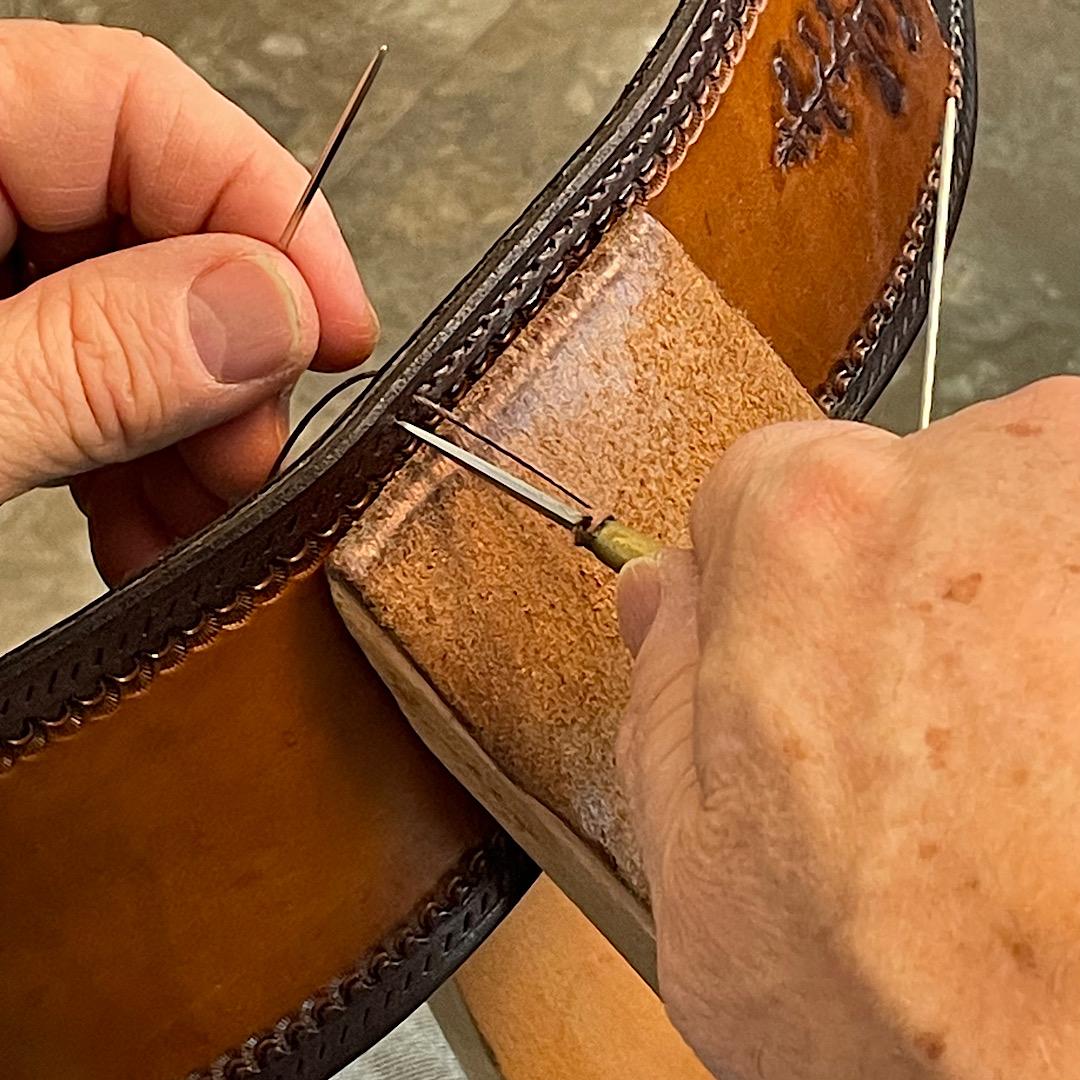
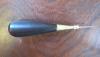
I started off with an Osborne awl but have settled in with a vintage awl. Just feels good in my hands. Overall length is about 5.5". I really like the narrow brass tip which is just 3/16" wide (because it allows me to get very close to the stitching line). The exposed blade length is approximately 1 1/2" long but I have 3 leather washers attached to the blade and this reduces the working portion to about 1 1/8". The leather washers help me control the depth of my strike. The blade is 2.5mm wide. I use Dixon pricking irons; 7 s.p.i. the chisels of the pricking irons are 3mm wide. I use 5/18 line thread. Works for me.
-
Has Anyone Found A European Stitching Clamp Under $150?
Basically Bob replied to DavidL's topic in Sewing Leather
I purchased mine from Abbey England. Their customer service is excellent and I experienced absolutely no problems with shipping across the "pond". -
Interesting ... I have never had this happen after dying a project. However, it always happens after "working" the leather on things like a guitar straps to make them more flexible. To minimize this, I try not to work it more than really necessary and then burnish the surface when complete. After 2 minutes on the video, attached, you will see how he "works" the leather and then, shortly after 3:40 he burnishes the leather to get rid of some of the wrinkles.
-
Few Belts From Poland.
Basically Bob replied to LR Poland's topic in Purses, Wallets, Belts and Miscellaneous Pocket Items
Very nice work! -
Montana Pitch Blend As An Edge Treatment?
Basically Bob replied to Basically Bob's topic in How Do I Do That?
Cyberthrasher, I followed your list and it works great. Good dye penetration and the edge is just fine. I decided to try another variant. After applying the dye, I rubbed and burnished the edge, again, with MPB and then applied another rubbing of wax. The edge with the dye, sandwiched between two rubbings of MPB Leather Dressing with a final rubbing of bees wax looks more polished and is, without a doubt, the best edgeI have achieved. -
Montana Pitch Blend As An Edge Treatment?
Basically Bob replied to Basically Bob's topic in How Do I Do That?
Thanks for the input, Cyberthrasher ... will give that a go, later today, and will post pics and results. -
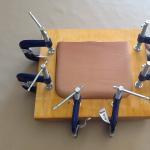
Like most others, here on the forum, I have tried many methods to achieve a professional looking edge and thought that I would share my latest. Frankly, I am blown away at how quick and easy it is to get a really clean, polished looking finish using this technique. I think that the attributes of mink oil/pine pitch and bees wax would make for a durable edge, but perhaps there is something I am missing. If you find flaw with this, I sure would like your input. 1) Bevel edges 2) Burnish the front bevelled edge, lightly, without applying liquids. (thinking that leaving the top and back unburnished will allow the MPB to penetrate the leather better) 3) dye 4) Rub in Montana Pitch Blend leather dressing with fingers 5) Burnish the edge; front, back and top 6) Apply wax and burnish again Here is a quick pic of one of my samples. Natural veg tanned leather with the edge dyed black

-
Mystery Braid Guitar Strap Solution ...
Basically Bob replied to Basically Bob's topic in Guitar Straps
Thanks, skeeter ... much appreciated. -
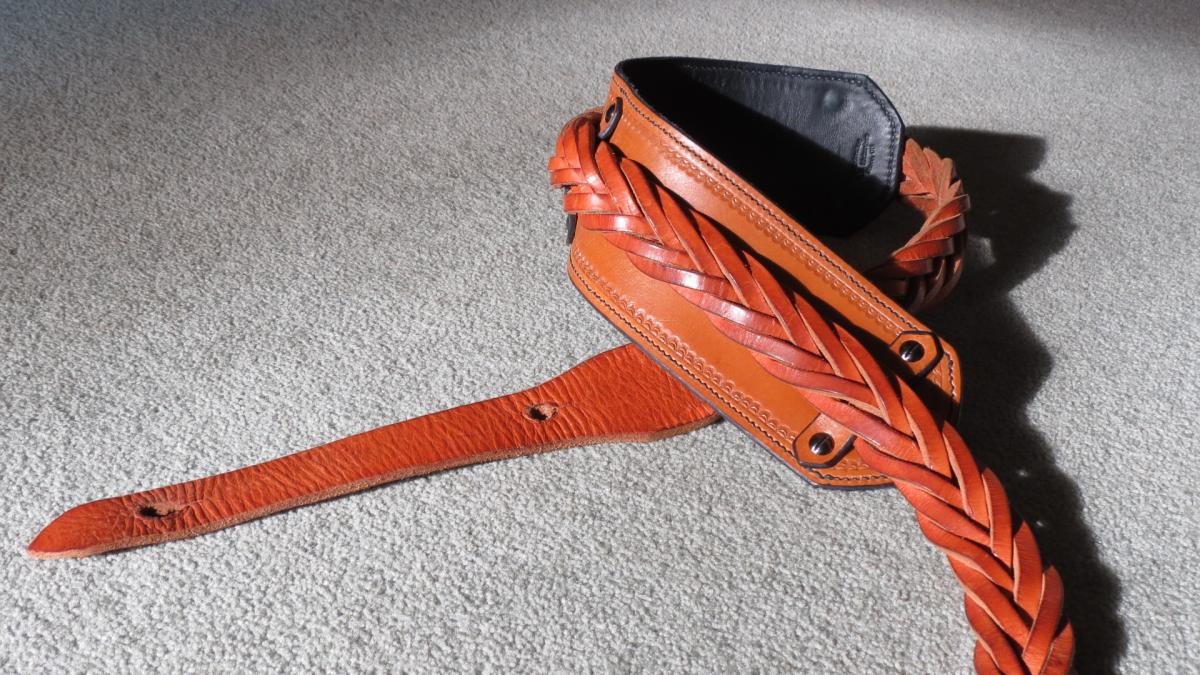
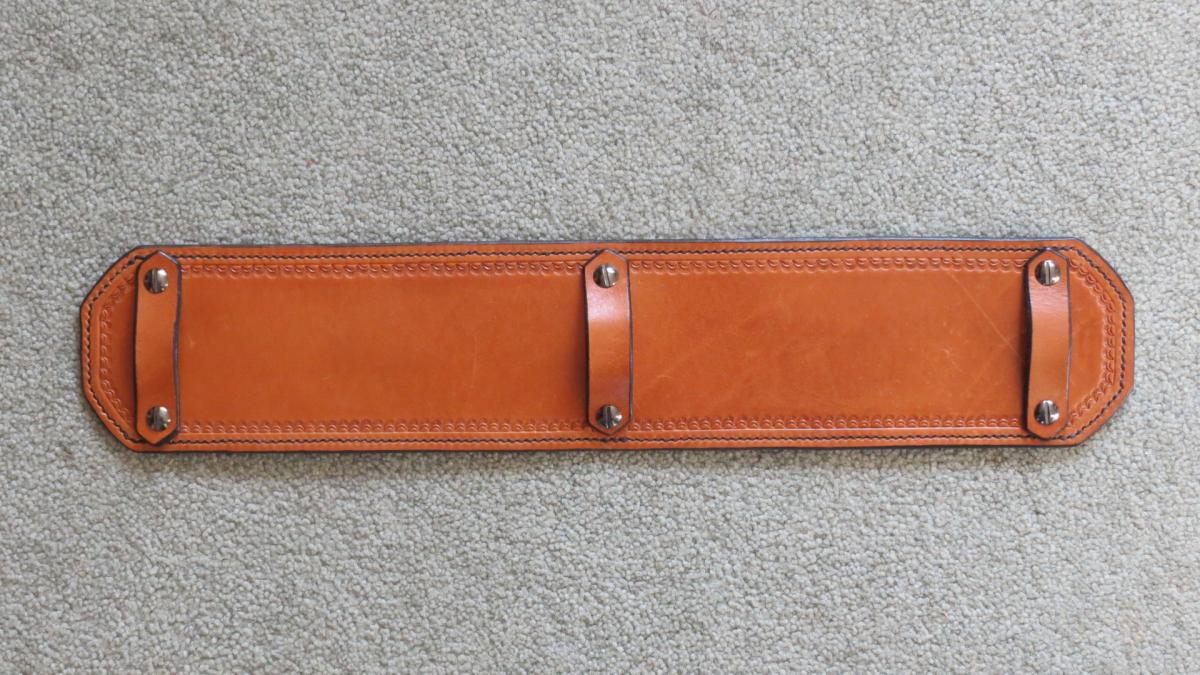
A good friend of mine brought me a guitar strap that was given to him by a close relative, more than twenty years ago. It's a great piece but unfortunately is very uncomfortable to wear because the nature of mystery braid digs into his shoulder. Here's my solution: I put together a hand stitched and 18" shoulder strap that attaches to the original. I used 8oz. veg tanned leather with a 2 oz., supple horse liner. It is quite comfortable now!

-
Thanks for the input! I am on the same page as you in terms of customer satisfaction for years down the road, so I really do appreciate your willingness to share.
-
Cyberthrasher & Lady Eagle, this is a very timely topic for me. Cyberthrasher, I have been using neatsfoot oil with Leather Balm/Atoms wax on pretty much everything I do, but have been wanting to play around with different conditioners/finishes. Just received some MPB oil & conditioner and some MPB leather dressing. Do you use the oil and conditioner or the dressing? (on guitar straps) Also, I use Fiebings Professional oil dye - I have noted on the Fiebings web site that Resolene is an acrylic based product. Is it suitable for the Pro oil dye? I sure like the look and feel of the neatsfoot oil / Leather Balm w/Atoms wax combo but really do want a pro product and happy customers.
-
A Belt
Basically Bob replied to Tanya's topic in Purses, Wallets, Belts and Miscellaneous Pocket Items
Looks good! -
I normally dye, condition and finish leather prior to stitching. I have not had a problem with dye bleeding into the thread, but, like Matt, would suggest that you try it first.
-
My Recent Little Purse
Basically Bob replied to Tuan Hoang's topic in Purses, Wallets, Belts and Miscellaneous Pocket Items
Your work is beautiful. Thanks for sharing. -
Wow! Inspirational, for sure. Love it!