


immiketoo
-
Posts
2,372 -
Joined
-
Last visited
Content Type
Profiles
Forums
Events
Blogs
Gallery
Everything posted by immiketoo
-
Welcome. Carving is the good stuff!
-
You're absolutely correct. Its to transfer a design to leather. The same can be done with a piece of paper and a pencil. Or a stylus or whatever. They are handy if you want to reproduce the same image multiple times, or you have a shaky hand. The quality is up to the carver regardless how the image is transferred to the leather.
-
Cool.
-
Thanks for the heads up about the boost, Johanna. FB is a necessary evil, unfortunately. Jeff, even professional athletes pay for coaches to critique and offer new techniques. Pro golfers have others evaluate their swing to get the hitch out of their giddyup. Leather carvers enter contests to have their work judged by pros in order to get a critique and maybe a prize. If you think you have it all figured out, and you're happy, then so be it. But, you might be surprised at what you could learn from someone else in a class setting. You're using a logical fallacy regarding my statement about carving and content. "But if "carving and content go hand in hand", then everybody who used the craftaid would all look the same, right?" Wrong. Obviously, everyone has different abilities and perceptions. Different TOOLS. Some have finer control of their knife or tools. Some have better attention to details than others, and some are perfectionists, while others are not. No matter how many people carve a craft aid, no two will look the same. Period. However. I will grant you that the results 100 people carving a craft aid will look more similar than the results of 100 people carving a portrait from a photograph. The variances involved in interpreting the image and applying it to leather are much greater than when its spoon fed with a step by step photo carve. Much like the dance steps where you put the shoe outlines on the floor and try to do them in order. Eventually you might be proficient at putting your feet (tools) in the right places, but it doesn't make you a dancer.
-
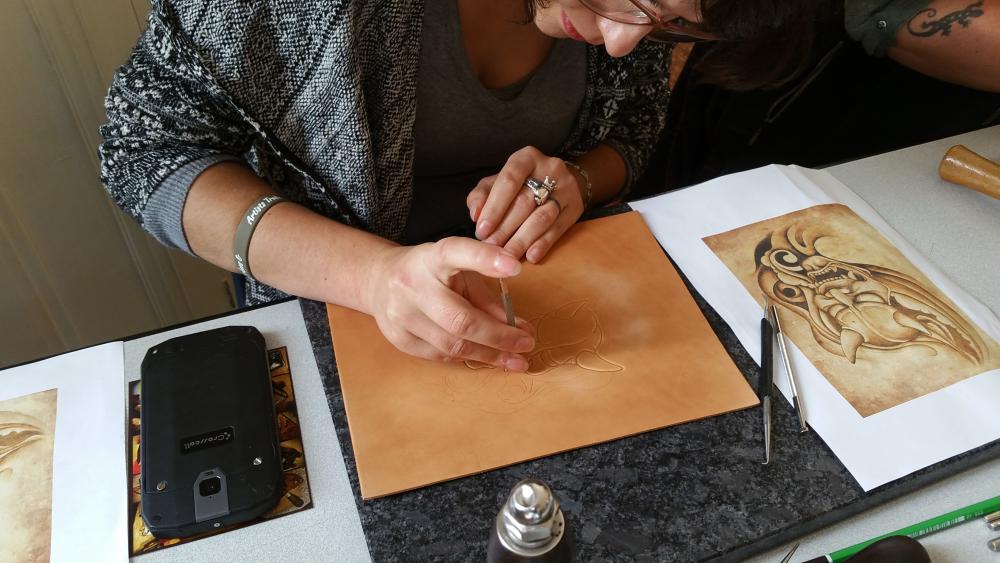
@Railrider1920, here's that quick tutorial I promised you. I hope it helps you on your journey. If you have ANY questions, feel free to ask. Mike
-
No sir. You can find them only from Robert Beard. However, you can get decent figure beveler and checkered beveler from other sources. Barry King and old, pre-letter craft from Bruce Johnson are an excellent place to start for less expansive tools.
-
Me? Defensive? Mmmmmm... no. Not at all, just having a discussion about my second favorite thing I'm here trying to offer my opinion and perspective from things I've learned along the way. Things that you can't find in any Tandy book. That is all. All the extraneous commentary about dating Kathy and originality has nothing to do with this thread, so I'll leave it at that. You mentioned learning to carve without having to bother with tracing and design etc. This, in my opinion is the point you're missing. Carving and content go hand in hand. When you don't have the crutch of a craft aid, you will never learn the carving aspect. Where NOT to cut is as important as where to cut, if you cut at all. You may have learned how to manipulate leather, but that isn't the same as interpreting the image you want to carve from nothing more than a photograph and making it look right. What lines should be double beveled? What ones shouldn't? This is what I mean. How do you interpret what's completely black in a shadow, or completely white in a highlight? How do you make a two dimensional image look there dimensional? Interpreting and applying this onto leather is the difference.
-
Did you know that Bob Park sells edge solution and applicators?
-
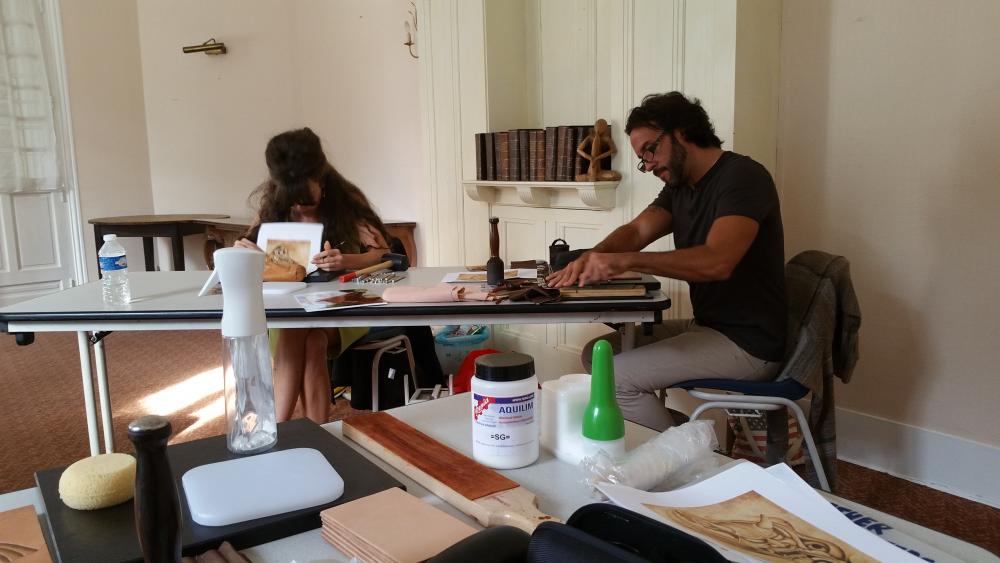
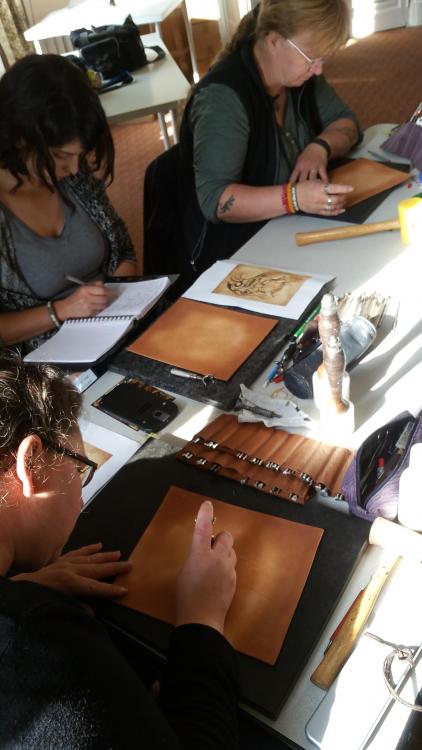
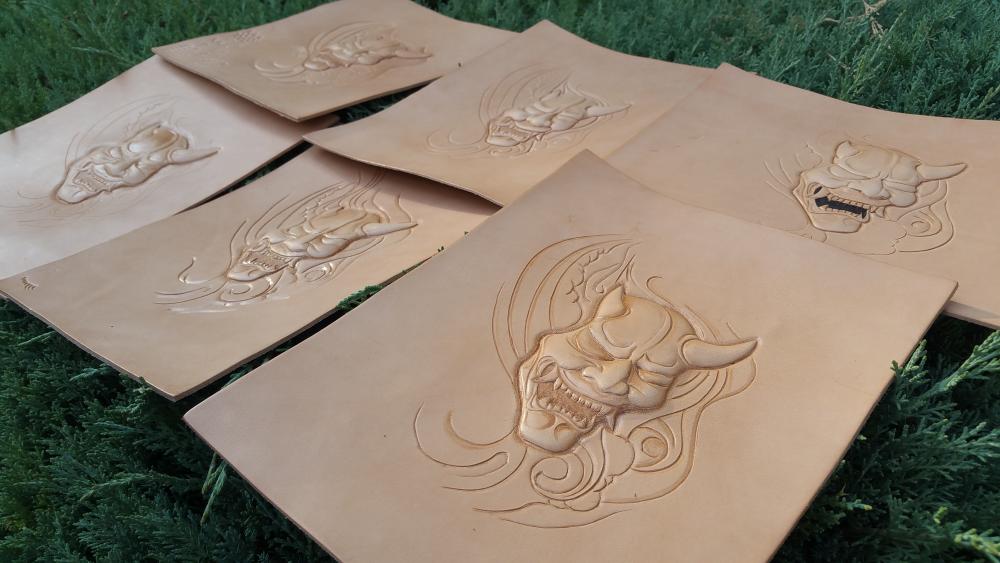
Jeff, you have truly captured the essence of Tandy kit carving. Even the coloring is right out of the book, stroke for stroke. Well done! The only problem with those kits is that they teach nothing about how to interpret complex data and then manipulate or apply it to carving. When you're told where to cut and where not to, you never really learn how to develop the intuition or skill to look at a piece of art and understand it. Sort of like painting by number. You mention Kathy a lot and its funny you did it again here. Kathy is a good friend of mine, and while we were both teaching in France a couple of years ago, we had this exact conversation about interpreting information while on a break. It's one of the the aspects of figure carving I teach in my classes, whether live or online, because its so important. Many people find a piece of art that looks awesome, but they start tracing it without knowing how to interpret the dark shadowy areas where there is NO information. The brain can manage it visually and you KNOW whats there, even if you can't see it. The problem comes in when you interpret it while tracing. Missing data causes all kinds of derpy looking things to appear on a leather carving. This piece was what I taught at ELWATS that year, and it is one of those where the lack of data can get you into trouble if you don't know what to look for. Kathy did her wolf right across the hall. Good times! At the end, you can see all the student's work. I was proud of their accomplishments.
-

Tools From My Grandfather - When are they from?
immiketoo replied to CanuckAmuck's topic in Leather History
They are also pre letter craftool, the best of the bunch of what Tandy has produced. -
Tool questions: good, better & really good
immiketoo replied to Railrider1920's topic in Getting Started
Bruce Johnson usually has a great selection of old tools that are worth looking at. https://brucejohnsonleather.com -
Tool questions: good, better & really good
immiketoo replied to Railrider1920's topic in Getting Started
These are what is known as hollow ground. There is great debate as to whether or not this is a useful feature. I don't think it matters too much, but I have some of Barry's blades and they are quite good. Yes, if they have the letter, they are too new. Look for tools without it. So that tool would be just a 678. Proleathercarvers is a new company that Jim Linnell created after he retired from Tandy last year. They carry a range of tools from other makers, but frankly you can get them elsewhere for less, and his son makes some tools. -
The trick to figure carving is being able to think in 3D. A large figure beveler will make your life a bit easier, but you can do the same with a spoon. Remember to always carve whats closest to you first, and then work your way down to the background. Faces are difficult, and yours is fine. They require a lot less cutting than you'd think. I am not an artist either. I can draw a little, but not nearly as well as I can carve. Like anything, its about practice. When I started I couldn't do anything except smoosh leather. Correct.
-
Tool questions: good, better & really good
immiketoo replied to Railrider1920's topic in Getting Started
If I had to start over knowing what I know now, I'd buy pre-letter craftool from the 50s and 60s. They are fine tools with crisp impressions. -
Tool questions: good, better & really good
immiketoo replied to Railrider1920's topic in Getting Started
Thanks, man. I have so much more than I ever needed, I just didn't know it at the time. On the plus side, I can now tool almost anything -
I totally understand. I commented on your other post regarding tools and how to choose. Its a process, and you need to know what you're getting yourself into.
-
Tool questions: good, better & really good
immiketoo replied to Railrider1920's topic in Getting Started
Rob, as a self admitted tool whore, I have a lot of experience with acquiring stamps. From top to bottom in terms of quality and price in my experience. Rober Beard - Blued tool steel, amazing smoothness and THE tool in figure carving for a variety of reasons. $50-120 Wayne Jueschke - un-coated tool steel (As good or better than Beard but limited to geometric and border stamps) $50-130 Barry King - Polished stainless: Barry has nearly everything you need and has recently ventured out into some figure carving tool. Awesome selection of geometric and BW tools. $30-85 Old Hackbarth - Polished stainless. Great tools from an old era. Hard to find. Expensive but great impressions. $40-65 Clay Miller - Polished stainless: Clay has a great line of tools, with great quality and impressions. Recently added a line of figure carving tools derived from Stohlman tools. $30-55 Craftool Pro - brushed stainless: Decent but very limited selection and generic shapes. Very limited geometric and BW $15-40 Pro LeatherCarvers - made by Jim Linnell's son. Stainless. Average impressions and alignment. limited selection. $35 Old pre -letter Craftool - Steel. Great quality tools, wide variety of shapes and sizes and PROPER figure carving shapes the way Al Stohlman designed them. $4-15 New Hackbarth - Steel. Seen them, don't see a lot of hype but good solid tools $??? Craft Japan - Decent chrome plated metal: A step up from the basic beginner sets, crisp impressions, fairly standard shapes. Good quality. $7-12 Current Craftool - Chrome plated metal: Some decent tools but inconsistent impressions and incorrect shapes for figure carving ok quality $4-7 Midas - Zinc alloy? Good tools, but very crafty shapes for the most part. Almost a novelty item, but I do use mine from time to time. $10-15 I started with cheap tools. I bent shafts, learned about uneven stamps, poor impressions and was generally unsatisfied with the results. Then one day I happened on Barry King tools and my eyes were opened. Bevelers that didn't leave chatter marks and could co around corners. Crisp impressions that aligned with the next one, etc. No bent tools, better knurling for better control. Then I took a few lessons from a Lady Named Silva Fox and she recommended a few tools from Bob Beard, and those literally changed my life. The things those few tools taught me (in addition to wanting more of them) are astounding. My skills improved at a much faster rate with good tools and I learned there was more than one way to use any given tool. I am speaking of figure carving tools by Bob, specifically. Smooth tools that allow me to mold leather how my mind sees it as opposed to how the tools sees it. With the right 15 to 30 tools, I can carve nearly anything, and I would sell all of my other possessions before I sold those handful of tools. The benefits to the higher price tag are that these tools cannot be found at any other level or maker. Its that simple. Now, all that being said, there are amazing artists using the most rudimentary tools available or some modified cheapo tools who pull off amazing feats with those tools. Tony Allen Bernier is one of them. Britt Nantz is another. At a certain level of experience, the tools almost don't matter as the artist can find or make tools to do what they want, complex geometric tools aside. Those are pure wizardry. However, there are many benefits to tools with expensive price tags. For example, consistency of impressions. Some low quality tools leave uneven impressions. So if you had a BW and you ran half your piece holding the tool one way, the pattern may spread, and if you turn it around, it may now converge on itself. This is maddening until you recognize it and learn how to deal with it. Other low quality tools have plating that can chip off, again affecting the impressions. Easy to fix, if you have to tools and know how. The single biggest reason to consider pro level tools, even bigger than the quality of the tool and its ease of use, is style. Pro tool makers focus on one thing. Making tools. Therefore, you have a much wider variety of tools available to you. There is some exclusivity at the higher price point and some tools cannot be found anywhere else. Developing my own style was important to me as I recognized early on I would not be satisfied by carving only Tandy/Stohlman patterns the rest of my life. I started leather work in Chicago, and there's literally nobody who wants the same tired floral/acanthus pattern you've seen a bazillion times since the 1960s on any items they purchase. While there may be a market for that sort of thing, I find it passe, as do my clients. Using a wide variety of tools that allow you to experiment with other ideas, requires tool shapes that can fit in delicate spaces, make impressions other than the standard beveler or pear shader, and help you develop your style. So, find someone who's work you like, and then find out how they do it. What tools are they using? How can you emulate it? Can you make due with what you have or do you need to look past the basics? The choice is up to you. -
William Dawson once told me Perfect Pattern, Perfect Project. Its a mantra of his, actually. After struggling with drawing patterns for years, I learned just how true Bill's mantra was after Dave Skinner created a few patterns for me. Check out the teaser video for his upcoming class and join us on July 11, 2018 to learn just how easy it can be. https://attendee.gototraining.com/r/1501577032464758018
-
For the record, all of my classes are recorded as well and have been for over four years. In fact, Jim modeled his entire web based classes of of the learnleather.com model. I'll see what I can do, Bob. More like starting at 50 bucks and going up.
-
No worries, I used to be. Then I fell in love, retired and moved to the old country. Anything that involves something living other than plants is probably considered figure carving. There are as many debates about this as there are leather workers, but I classify them like this. Geometric and basketweave go together. Animals, people, and many logos and symbols fall into figure carving. Floral covers flowers, plants and acanthus. Pictorial covers scenery, mountains, trees, structures etc. Celtic could almost be its own category, although many viking images involve a bit of figure as well. There may be more I am forgetting and I'm sure others can fill in the blanks.
-
I'm international too. No worries.
-
I'll talk to him and see if I can't get my hands on a few for distribution.
-
The only place is from Bob. He does ship internationally. You'll have to call him or message him on FB. Problem is he's REALLY busy. Like think a year wait list.
-
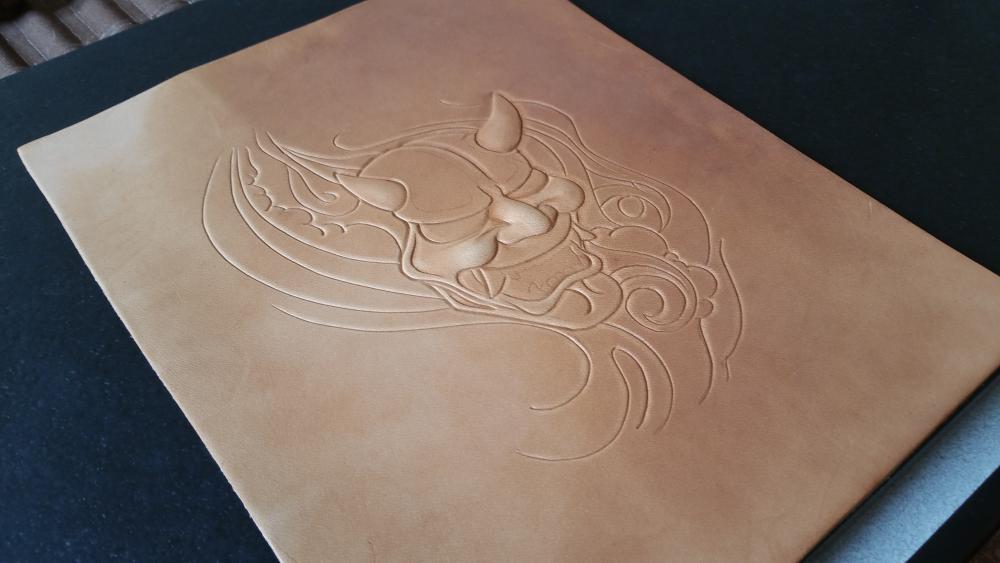
Railrider, Thank you. In the video, I am using a steep figure beveler by Bob Beard. Its the only tool I've found with the right shape for this technique, although there may be others that can do the trick, or you may be able to modify your own to suit your style. I use B2 through B6. If you want to see a close up, let me know. Now, for figure carving, this is the single most useful technique I have, and now you have it too. You can use it to do 80% of your figure carving, and after that, the rest is easy. A little matting and some spoon work and you're well on your way to figure carving mastery. Also, there is NO reason to start with floral carving if you don't want to do floral carving. The techniques have some overlap, but generally, if you can carve a face, you can carve a flower. The converse isn't necessarily true as the beveling techniques are vastly different. Regarding the Eddie or any of the other faces I have done, its all the same as what in my video. This one has both celtic and figure carving with Odin and his crows. Celtic is a pain, but a few simple tips can help. Number one, always cut just outside your lines on knot work so you can see where you're going. Always maintain the same thickness on knot work or it looks bad. On intersections, how you bevel makes all the difference, and a standard steep beveler isn't enough. You will want a figure or shallower beveler to create the appearance of over under on you weave. If you're interested, I can put together a short segment on Celtic carving for you since it's not too complicated, you just need to follow the formula and pay attention to the details.
-
You can use a piece of steel. Many people do. The only issue with steel is that if you touch it with your hands it could leave black marks on your leather. You can clean these with oxalic acid but its easier to avoid than to fix. Now, I HATE counter tops because they are usually irregular, they are thin and prone to cracking if you ever need to walk something with a bit of force. I choose a surface plate. 3 inches thick, come in a variety of grades and sizes, and are frankly perfect for leather work. If you have the strength and space, a grave stone will also work wonderfully, but they're a pain to move around.


