


Boriqua
-
Posts
941 -
Joined
-
Last visited
Content Type
Profiles
Forums
Events
Blogs
Gallery
Store
Everything posted by Boriqua
-
I donated a while back but wanted to kick a few extra dollars in. I love the site .. have learned a TON and want it to continue so others can learn a ton too. BUT as crappy as it sounds I found an extra 10 bucks and wanted to donate but it seems the minimum is 25 bucks and unfortunately I spent to much this month and cant go a full 25 but would like to give something since its been a bit and its well worth it. I think for many people its easy to give up starbucks for a few days or any one of a million other money wasters and can give 5-10-15 bucks and I would like to see the forum get it but in my retired .. making it through state .. getting hold of $25 bucks is a little more pain then "hey I got 5 bucks that I can give a few times a year" Oh and to the married folk that might understand .. I have been married a long time .. I dont have to explain away 10 bucks but 25 .. I gotta ask now that we are old and watching our money.
-
looking for celtic,gothic,fantasy,skulls patterns
Boriqua replied to Hornbag73's topic in Patterns and Templates
This may sound crazy but ... Coloring books! I draw so I have a bunch of skull designs and such but I wanted to learn more about patterns and specifically day of the dead material and my wife comes home with a coloring book she got at good will and it was chock full of excellent day of the dead imagery and the best part is it is just outlined since its meant to color in so you dont have to remove a bunch of extraneous material. Its almost like a craftaid but no ridges. The cover has color but all the stuff inside is solid line work. If nothing else it gives you a starting point http://store.doverpublications.com/by-subject-adult-coloring-books.html As far as various sizes, I kind of cheat and just use my computer. I was never real great at drawing to a specific size so I draw what I want the way god tells me. Then if I need to resize it because its going on a particular article I scan my build pattern, then scan my drawing and then I can place it at the size and position I want and print out the whole thing. This way I can use it as a cut pattern and the drawing is placed and sized. -
The Avenger style of holster is actually the one I like to wear best. As far as sellers the pancakes out sell them a thousand to one for some reason but I prefer avengers in my own carry. Now there is plus and minus to the design. The Avenger breaks in and then for the most part stays that way for many years while a pancake can continue to be affected by the tightness of the belt for quite a while. The downside is the avenger can bobble while the pancake gets glued to your side. Its my very long way of getting to the point .. If you are going to do a sewn on strap on the back and omit a re enforcing panel or throat support then be sure to put a good hunk of material back there. This is one I was working a long time ago but I still do the back the same. My belt loop goes from right up against the stitch line on the right that isnt there yet to about a centimeter or so shy of the center line of the holster. I have found I get almost all the benefits of the pancake that sticks to my body when hiking or doing other activities but I get a ready open pocket that I love about the avenger. Were we voting I would suggest the same as Jeff and say go with a smaller throat support rather than nothing. That extra reinforce piece is nice to have and really makes a wrap around holster perfecter. Maybe you should consider texturing, color contrast and size so it is more appealing to you. Here are just a few throat support treatments and I am sure you can think of a hundred more.
-
I think I prefer the ecoflo book to the Stohlman but they are both must reads. I too work with an airbrush but you can very well achieve the results with brushes with ecoflo. I dont use alot of ecoflo but I do find when blending edges and mixing color its helpful. I usually use it in smaller areas. Start out with your lightest color. So if I were fading Green I get a shot glass and use a eyedropper to put some green in and then cut it in half or more and lay that down. While its still wet mix a higher concentration and go toward your outside but with a fairly dry brush drag the pigment into the light area. The Ecoflo really gives you a fair amount of time to move so keep blending the darker more concentrated into the lighter. If you want super smooth then what I do is use a cheap shaving brush available at any pharmacy and then feather where the two meet once I am happy with the percentages. Dont put any pigment on the shaving brush. Hope that all made sense.
-
Havent posted anything in forever so I thought I would put up a couple of recent ones that were fun to make Some of you regulars have seen some of my "Evils" holsters in various configurations but on this last one the gentleman wanted it a bit "darker" in feel so I went ahead and did some intertwining border that felt kind of like stalactites in a cavern but in addition he had that special 1911 (cant remember Manufacturer) that comes with orange grips and wanted me to see if I could tie it in so I decided to try and create a slightly rusty appearance on the wings as if a black surface were developing surface rust. I did it on the holster and mag pouch. Most important .. he liked it. I brought more black into the design area than usual and layered oxblood with some mahogany and some cordovan before stain. Bunch more pix here if you are interested http://www.boriqualeather.com/Ruger Commander Set/ The "evils" motif is a great seller for me and I get alot of calls to do them. I need to keep them interesting to me so they are always a little different. Here is a cleaner version I did recently http://www.boriqualeather.com/Gallery/index.php/Leather-Holsters/1911-Evils-Holster This one is a simple IWB for a compact CZ. It wasnt cured enough to properly mount the hardware but in the final it has 3/16 spacers that lift the clip off the body and of course .. I made sure the screws pointed in the same direction. But here are some pix that might give you some ideas. The throat support is actually a much darker Mahogany which I think with black is a nice handsome color. Still haven't figured out how to get my camera to recognize mahogany. I personally hate body shields but if asked I do them but I have become enamored with Jeff's (JLS Leather) minimalist style when it comes to the body shields and have drastically shrunk mine and can live with them now even if you wont ever find one on any holster I wear. http://www.boriqualeather.com/CZ Compact IWB/
-
Airbrush Stand
Boriqua replied to Reegesc's topic in Dyes, Antiques, Stains, Glues, Waxes, Finishes and Conditioners.
I haven't been around in a bit since people seem to like my stuff and keep me working like this is a real job and just found this thread. That airbrush holder is AWESOME! I love it! As far as brushes ... I have the harbor freight and it is what I started with and is a work horse but it is not great for finer detail .. at least for me .. and I like to use a lot of layered color and changing colors with a siphon is a little bit of a crush on creativity because its a pain to clean out and switch colors. I still have mine but it is relegated to resolene shooting. I bought an Iwata Eclipse little over a year ago and its been great but I am sure there are lots of other quality gravity feeds. Whats nice is ... I fill my brush using an eyedropper so I shoot one color .. pour out any extra, grab my dispenser filled with denatured alcohol, give a squirt into the brush and shoot it clean and then add my new color. I see you have a gravity and siphon which is the same setup I have but I dont have the nifty stand! Did some rottweiler skulls and some roses with the Iwata and it was such a pleasure. -
Setting Round Spots And Rim Sets Without Tools?
Boriqua replied to BarrelPony's topic in Hardware and Accessories
I dont have a machine but Oh what an awesome suggestion for anyone that does!!!! -
another Flat back question
Boriqua replied to Boriqua's topic in Gun Holsters, Rifle Slings and Knife Sheathes
Thank you SLP but I dont have any problem with tooling 50/50 holsters and making a tight good fitting holster. I have a few hundred out there that have been going strong for years. Not being the keeper of all knowledge I wanted to see if anyone did a flat back and felt comfortable with the security without doing a fair amount of forming to the front. I didn't think it was a great idea but you never know what someone else has accomplished or tried that you didnt think of. Vanity and narcissism is the surest way to get old and stale and stay ignorant. I dont want to be THAT guy. Great looking holster by the way! From what I can see it looks like you have some nice burnishing there as well. Alex -
another Flat back question
Boriqua replied to Boriqua's topic in Gun Holsters, Rifle Slings and Knife Sheathes
Thanks Chief. I am with you 100% and have turned down a ton of custom orders because I didnt think what the person wanted was a safe design and encouraged them to find someone else. This is actually a line from my ad's There are designs I just wont do because forgetting about any litigation .. I am a prideful man and will not be the one responsible for someone getting hurt due to my failure. Sooooo .... I told him it is probably fancy design or solid color. I must have a dozen colors out there and at least half a dozen thread colors and I am sure I can make a beautiful flat back even without the stamping. -
Its funny but when I started I made all my pancake style holsters flat back and some guys "in the know" told me I was doing it wrong. I have long ago found out they were wrong but still 90% of the holsters I make now are 50/50. I have a request to do a flat back but with a design stamped design on the front. On my holsters I do a fair amount of forming and boning to the back of the holster just to get more friction but the front is left fairly smooth. I am careful with my stitch lines so the holsters are always tight and they are in service for many years and work. With a flat back I would normally add the forming and whatever boning to the front to make up for the lack of contact patches on the back. I am torn between trying to sell the individual a 50/50 .. which he doesnt want .. or tell him it has to be designless or .. do you think I can get a good fit, safe holster with a flat back and a somewhat smooth front. Here is what he wants but flat back... this one is 50/50
-
You can get better quality photos using a simple light tent. I posted one on the photography section and you can find HUNDREDS of different variations using different materials on the net and still use your simple camera. One of the things we are missing now is the in store experience. Any of you that were teens in the 60's and 70's remember what it was like when you walked into a leather shop. Man o man that smell. All the cool stuff hanging everywhere. It was most of what got me into doing this. Now all we have is pix that compete with a thousand other pix and no sensory experience. Placing something you hold dear on a purple towel in bright sun doesn't help to tell your story and doesn't show me you value your work .. so why should I. Think about some props and a tent. Below is a not great pic. Kind of out of focus but I wanted a background that felt "expensive" and the black pebbled finish of my old portfolio kind of feels like that to me. Some Arizona plant matter and its half way interesting. Business is hard work and many fail and it has nothing to do with the product. Sometimes I see guys that take pix on their dirty work bench with leather tools ... I think they are cool pix and say a bunch more than your towel. Perhaps a magazine cover depicting the old west. Try and thread your story through your pix. here is another I took in a similar setup. Its Cheap to make. As a single business owner you have to be the photographer, marketing specialist, fabricator and dishwasher. Of course a better camera doesnt hurt but there is a lot you can do to make your stuff shine before investing in expensive equipment.
-
Oh man that is a good one ... I am a sucker for a good back story and Yak wool socks knitted by a Grandma sitting on a stool in a yurt somewhere .. I would be owning me some socks right now and I live in Arizona. We dont even own long pants!!
-
 as usual ... just super clean beautiful work!!
 -
I have made molds from a variety of woods. Poplar was better than the pine. Was smoother. If it was something I was going to do regular though .. I would find a local person with a CNC and have them make it from nylon. MDF is a water sponge, plywood has left unsightly grain marks on my leather, poplar and pine usually only come in certain widths. MDO would be great but its expensive and you still have to seal the edges. There is a Chinese company on ebay that does nylon molds but I think you could get them cheaper and faster from someone locally. Ask on you local craigslist for CNC guys. Display houses, wood shops and a bunch of other fabrication places have em and when I managed a display house we never minded throwing something on the CNC to make a few quick bucks from the machine that might otherwise be sitting there. If you are good with a vector program and you bring a file even better.
-
I dont know that you need to make a direct comparison between your work and what you consider inferior work in order to help people make a more informed decision. Its called marketing for a reason. I dont know how it happened but the larger bulk of what I make and sell has been holsters. I DO try and educate people on what a proper holster is and what they should look for sometimes in the body of my Ad's. I participate in a few gun forums because I like to shoot and I cant tell you how many holsters I see that people are paying good money for that have stitch lines 3/4 to 1 inch from the mold. That is just unacceptable and I dont have a problem telling people that it is something they should look at when purchasing a holster. Now .. perhaps like you .. I am not comfortable saying maker X's holsters suck because of this or that and mine are great because of the other but I think many people just dont know what they should be looking for. I swear so long as you can master boning and make your stuff from 6/7oz leather so you get some really awesome detail you can put that damn sew line 50 miles away and people will buy it. But I wont make something I don't believe in. Extolling the virtues of your product is never a bad thing. That is marketing. Why is your belt $100. If there is a compelling reason then I am reaching in my pocket. I have a few pair of boots from Local boot guys .. Probably paid an extra $100 over buying something similar at Boot Barn but I like things made by a single craftsman that I can talk to and visit. Im willing to pay more for that. On the other hand I will say what I used to say to guys that came to me for a raise and their reasons were often self centered ie: I just had a baby, I need a car .... I would reply .. how is that my or the companies problem? If your not making what you need then it may indeed be time to give it up. Now having said all of that .. I am not in business. I am a hobby guy that makes some play money. I gave up on custom orders .... I was getting all sorts of emails requesting custom work, some of it involved as hell and I would quote it and never hear from them again. I still spent an hour going back and forth though and looking at pix and what have you. Now I just make what I feel like and put it up for sale at what I consider a reasonable price. I cant make enough fast enough! I only take on jobs now that I feel like taking and I quote a price and let it sit. One last bit of perhaps useless advice. If indeed your product is the shizz but you are not finding the clientele you may be fishing in the wrong pond. Once upon a time I had nice luxury items. Wore a Panerai and it was one of a few watches I had at any given time. I wouldnt look for a watch strap for my $5000.00 watch on ebay. Look at some of the stuff you see YinTx post. Man oh man .. just exudes money and quality but .. CEO's and the people that can and will pay for something like that arent shopping ebay. Look harder at your market and where they are. Old motorcycle guys LOVE my stuff. Usually its because they remember saddlebags from yesteryear when you bought a set and it died with the bike or was passed on. I still get a good deal of them and love doing business with them. They grumble at the price sometimes on principle while they are reaching for their wallet!! Last guy threw me $150.00 tip on top of my price. The new cyclist that run out and buy the damn sportster at age 50 .. if it doesn't come from the Harley boutique they wont buy it. Cool .. I go to motorcycle events where there are some guys .. a bit rougher around the edges ... and they eat my stuff up. I know the guy with the Harley patches on his boots isnt my client. Its marketing .. it takes some work. Its a new world order and if you arent the only blacksmith in town then you have to market and ... you may have to bite the bullet and price more competitively so long as you are competing with like quality items.
-
Setting Round Spots And Rim Sets Without Tools?
Boriqua replied to BarrelPony's topic in Hardware and Accessories
Yup I do the awl and old screwdriver bit and measure out with a wing divider. I think next time I will purchase one of these http://www.ebay.com/itm/371165262344?_trksid=p2055119.m1438.l2649&ssPageName=STRK%3AMEBIDX%3AIT The only thing I can add is to be sure to put a piece of scrap leather under your spots when you bend the prongs over so you dont mar the spots. I stupidly scratched one up when just bending over the prongs on my bench. Lesson learned. I see the thread was started a month ago so I am sure the OP has already finished their project but I buy my spots at https://www.behindthewireshop.com/ Some neat stuff you dont find everywhere and great people to deal with. -
A groove will straighten out the stitching but if a groove is not desirable I would probably think about using my scratch awl to make my holes and then there is a braiding technique called stair step applique with one thong but it is transferable to a stitch with thread. Im sorry but I lost my scrap piece with the stitch on it to show you. What is nice when you say pinstrip is that this stitch since it overlaps kind of makes for really smooth looking turns. If you cant find anything on google about it I am sure I can throw something together quick if it is of interest. edited to add Found this pic. This gentleman used some fairly large holes, wide spacing and a heavy thread but its a good indication of a stairstep. His really shows the stitch nice but if you decrease the spacing it will be almost seemless. I have done it where it overlaps creating the zigzag like in his piece but you can also arrange the threads next to each other. Smaller holes and a finer thread and you would have trouble noticing it isnt one long straight run. Just a thought?
-
Thanks Jeff .. that should get me started. It has to have stamping so I was thinking 4oz for the outside and I have some 2/3 goat for the inside.
-
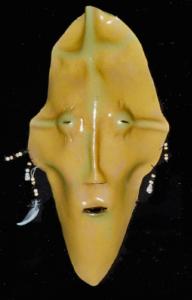
probably not what you are looking for since its not 3d but ... I was doing a little something for a Female Marine and wanted something pretty but not girly and just went digging through my fonts.
-
I think it looks fine. Most especially for a first attempt but having those known working patterns sure help to get you a good looking working product!! I wish there was a thread like this when I started!! The thread doesn't seem to heavy aesthetically to me. Was it just difficult to work with? What size was it? I like Jeff's slot reinforcement technique and while I sometimes mess with the shape of it I think it is engineered well and works and is more pleasing to the eye. I would go back to that and leave off the stitching around the belt slots. All your other stitching looks good though. While I agree the Reenforcement panel does little to reinforce what it does do nicely is hold a stamp. I have found that since it is an extra piece that isnt as affected as the body when wetmolding that the stamps in the reinforcement hold up deeper than when done on the body. I do it both ways depending on my mood but either your leather wasnt cased well when you did the baskeweave or you didnt hit that tool hard enough. Give it a good WHACK on well cased leather and the basketweave will stand out more. Nice job .. imagine what your 10th one will look like!!
-
Man I havent done a check book cover since the 90's but someone who has been a great customer has asked for one so I am certainly going to make him something. So ..does anyone have a pattern. I am sure I could knock something together but it would be nice to start with something that has been proven to work. Also ... I am inserting a badge on the interior but do checkbook covers traditionally have other pockets for cards and such inside or is it simply a flap cover that goes over the checkbook? Thanks for any help and advice Alex
-
I think it looks great! I am a great believer in allowing for happy accidents But ... since you asked I will try and offer some semi useful input. First off .... I am a motorcycle guy from way back and have tried a ton of products over the years to completely water proof and I get really good water resistance but have never actually gotten to water proof. If you can except that life is grand... now what we dont want is for the water to mess up our stuff and make a permanent hideous mark.. that I can help with. Almost all products will mess with your color some. The only one I have ever used that doesn't seem to lighten or darken the color is resolene. It offers a good deal of water resistance, doesnt stink and in my experience if the item does get wet the stain doesn't stay and once dry appears ok. I would be afraid of supersheen on a light leather I know will bend alot like your bag. Having said that ... if you had come to me for an item and told me the circumstances of where you live I might suggest the ol Bee's wax and pure neatsfoot oil blend.You will find a few different concoctions with a search of the forum but I just did a 50/50 by weight split in a simple double boiler setup. When cool it forms a paste about the same as tin shoe polish. I heated my leather slightly with a hair dryer and rubbed it into the leather. I then slightly heated the paste and watched it soak in. When dry I buff. Sometimes I apply again. The up side .. I have never tried anything that offers as good a water resistance. I tested a whole host of different products when designing some leather jewelry pieces and ran bits of dyed leather under water soaked them in cops and what have you. Water runs off of leather treated with the beeswax and neatsfoot oil and any partial staining is gone when it drys. Down side possibly is it will darken your color some. I think it looks attractive as hell but YMMV. You may want to use less dye to account for the darkening. I think its a gorgeous finish, is highly water repellent, easy and inexpensive to produce, doesnt have a foul odor and is easy to touch up. It is a wax though so the possibility exists like with any waxed or oiled garment, like a Barbour jacket, to rub some. I have used this finish for gear I knew would be used heavily outdoors by hunter guys and they love it. Alex
-
Maybe I wont do it for this project but I am going to do some experimenting. No they are different. Its covered I think in a blurb in "coloring leather" as well. If I want white to stay white when I do an antique I cover it in Supersheen. Its not perfect but it is FAR more white than when I use resolene. Try it .. it can open up some creative ideas. Usually I preplan how much I want the base color affected by overlay colors or antiques and want some impact from the subsequant applications so the resolene works great. It allows just enough mucking up to blend nicely but still resist. Here are some pix of a not great holster but .. the design area is black, cordovan, Mahogany, and oxblood dye then sealed with just enough resolene and overlayed with antique. If I used supersheen you would see the transitions more but with just the right amount of resolene I keep most of my color and blend edges.If I wanted and planned for harder edges then supersheen. I'm babbling again!! http://www.boriqualeather.com/CZ Compact/ I will report back with pix after I experiment. Alex
-
LOL !! yea what the hell .. the older I get and the more time I spend alone the more I tend to babble! Simplified version ... will resolene stick to supersheen and not do freaky stuff??
-
I have some stuff out there for a few years that still looks great. I have used acrylics on guitar straps and it seems to hold up fine. I use a variety of types and brands but one thing that is constant is I water my acrylics down fairly substantially and build up the color. The first couple of passes is so watered it acts like watercolor and just tints the leather. The hobby lobby acrylics are tough stuff and my wife uses it on outdoor flower posts and rocks and it stays out in the AZ sun but I would be worried about adhesion glopping it on a piece of leather straight from the bottle.