


Boriqua
-
Posts
941 -
Joined
-
Last visited
Content Type
Profiles
Forums
Events
Blogs
Gallery
Store
Everything posted by Boriqua
-
 I am not sure I entirely understand the dilemma but I will try my best to offer some help. Keep in mind .. I am not an expert. It appears to me that the drawing show a fold over design. While they make great pouch sheaths I think with the interesting hilt shape and your design to have a snap over retention system you will be disappointed. I would be thrilled if you prove me wrong but I think your design wants to be a flat sheath. The down side is that it does add some width. The upside is it will make the retention system more secure and center your belt strap better if that is important. Now there are two ways to do the flap so you see smooth leather. you can add some type of liner. so say you glue a 2/3 oz piece of leather to the inside of your sheath piece so when its bent over you see smooth or you can bend the loop forward. In the sheath below I chose to go forward. It was going on a 3" belt. What I do is give a fair taper to the end of the strap. Go at least 3/4 inch back and taper to zero. I turn my belt loop forward and glue it in position and tap with a hammer. Its important it goes to zero. I then glue my welt and front piece to the back piece. They will override the skived belt loop by about 3/4" Then sew up the sides normally. It works out nicely because it give the very opening of the sheath an extra little bit of clearance and you see pretty smooth leather. When you sew the sides you catch 3/4 inch of the belt loop on either side and you have the backup that it is glued in place. I have a close up of the joint somewhere and see if I can find it. edited to add no good, I cant find the close ups. If you are interested in the tapered loop and dont get it through my explanation I am sure i could do a quick sketch. Let me know .. it may not be the answer you are looking for.
 -
I bought a set like this a few years back https://www.ebay.com/itm/DIY-Leather-Craft-Tools-Arc-shaped-Cutter-Punch-Strap-Belt-Wallet-End10-50MM/263254344611?hash=item3d4b2e83a3:g:ktUAAOSw5VtZ20wm Mine however were very much not shiny and looked to have a bit of rust. Few passes with a sharpening stone and .... I dont know how i lived without them! I have a pattern on transfer acetate that I use to lightly draw the shield onto the leather just by gently pressing through the acetate with the end of a modeling spoon but then cut it out with whichever of these punches fits most closely. They almost look like they were done with a single die but for a lot less. I also get to use these for countless other operations. They came from China so expect a bit of a wait but I am very happy I bought them. They are not pretty fancy tool but they work.
-
Its not a sheath but I wanted to throw this out there as food for thought. This gentleman wanted to go from car, to walking through brush, to ATV and of course be able to squat without his gun barrel touching the floor all while hunting. I did this kind of pivot thing. The leg tie down was eventually changed to a 3/4 belt but the idea is even in a tight sitting position like while riding an atv the gun would pivot up ride along the outside of his thigh. Its been in hard use for at least 2 years and I hear from the gentleman all the time and he still loves it. Just figured .. why not a sheath for a large fixed blade?? The D or O ring could be mounted lower I guess.
-
I don't know of any rules but if someone has some that would be interesting. In holsters and knife sheaths I am always sure to go into some detail about how the customer intends to use it and in what environments. Sometimes its a mater of needing two separate sheaths. If it is going to be something that needs to be concealed I might suggest a pancake approach to a client. I can get it up fairly high and it sticks to the body nicely. If they will also carry a gun on the strong side I might suggest cross draw and then I would put a fair cant on it. Will they be on horseback or in and out of cars. The one below was for a woman that did a lot of horseback riding. The belt is actually just about behind the handle strap. It pulled the knife up on the belt a bit higher so it wasnt in the way when she did horse stuff but still kind of looks like a traditional knife sheath I think its important to have the conversation because many times a customer not being a leatherworker doesn't know what can be done and only knows what they have seen. As mentioned above .. some people are quite happy with the factory setup just not the factory quality so I also do a ton that are the same dimensions and just built better and better looking. You are doing it for yourself so ... just think about how and where you intend to use it. I just did a holster for myself .. something I rarely get to do .. and wanted to try some new ideas and I did a mock up with some glue and 5oz leather I had in my scrap bin and wore it for a week before making some changes and building the final version. In the past I have used cardboard for knife sheath tests. Some rubber cement or duct tape and some cardboard and just live with it a while to see what you think on the cheap. I personally prefer to have the belt at the hilt on stuff I own and carry. I find its the most comfortable. High enough to be out of the way but low enough that I dont have to contort to get at it. Lower and I start to notice its there but I rarely carry a knife w more than a 5 inch blade and usually just at 4 1/2 whether hiking or just for general chores. I have a bunch longer than that but ... I just thought they were neat and had to have them! BTW ... Alpha2 .. Those are pretty damn sweet looking sheaths!!!
-
While there is many ways to skin a cat ... Your issue with dye pickup on waxed thread is a technique and procedure thing and not a waxed thread thing. If you just prefer the look of unwaxed that is an aesthetic decision and every craftsperson has to do what feels right to them. I use light colored waxed thread on dark dyed leathers regularly without problem of pickup. Still even if you dont like waxed thread .. Just waxing the area close to the eyelet should get you what you want.
-
Only in that the belt loops need to be inside your mag pouch sew lines. How much inside is up to you. I like chunky straps so I go as wide as I can but you will be attaching the strap to the back piece first then sewing your mag pouch closed on either end and in the middle. To wide on the straps and you wont have a way to do that. They have to be slightly narrower than you proposed stitch lines.
-
How to use zippers in your leatherwork
Boriqua replied to WilburLeather's topic in Leatherwork Conversation
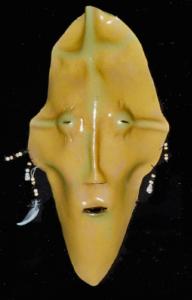
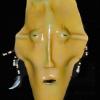
The one shaped like a coffin is actually a back pack! -
How to use zippers in your leatherwork
Boriqua replied to WilburLeather's topic in Leatherwork Conversation
No the stops have 4 sharp prongs on the back side. You just push them down over the last teeth where you want the stop through the fabric and I just bend the prongs down with the side of a screwdriver. You dont need a ton of ribbon after if at all so cut where you need it to end and just pull out a few teeth by prying them off. They are also basically press fit. If you leave alot of ribbon and its at a curve or turn it tends to bunch and create an unsightly gap. Since you installed the stop you can get away with just a mall amount of ribbon. -
Solo Bag , Ridge or Softail Harley Davidson
Boriqua replied to BattleAx's topic in Motorcycles and Biker Gear
I have used Harness, Latigo and Vegtan for saddlebags but never Bridle. It looks like it has a fair amount of flexibility .. are there other advantages to using Bridle? By the way ... very nice work! -
I have the hoover as well .. whew does it save me money on snaps! I think the table top setters might be a little easier to use but I dont have a ton of room so being able to use it and stick it in a drawer when I am done is a big plus!
-
Wow man you nailed the pockets nicely!! I say for a first attempt you are to be commended!! Other guys have already mentioned the stitching and while it is very close to the edge it was well done. I will offer one silly thought that jumps at me. Your wolf. IMHO It might have been more effective putting him in the lower left corner so he were howling into the empty space than it is plopping him in the middle of the space with no other context. Its an art thing though so ... subjective!
-
I love your work. Those look great! I don't intend to do any but out of curiosity .. are you laminating the boot leather to a vegtan substrate?
-
How to use zippers in your leatherwork
Boriqua replied to WilburLeather's topic in Leatherwork Conversation
I just use a bit of contact cement to hold my zipper in place and it works just fine. I find that i like to buy separate zipper stops and not depend on the leather to be the stop. If you are going to be doing a bunch with zippers its far more economical to just get a bag of stops and a long length of zipper but you can add the stop to premade zippers you get at the sewing store as well. After I install the stop at the top of the zipper I remove most of the teeth after it so when I bend it down into the work it is just the ribbon. Just appears a bit tidier. -
Size of Awl for pricking or chisel stitching
Boriqua replied to chrisash's topic in How Do I Do That?
I have the blanchard and it is a very good awl .. Glides through leather out of the box -
That is very very nice!!! are you using calf lace or ??
-
I actually go to goodwill to look for interesting inlay materials. Why do what everyone else is doing .. there was a point there I think every maker in the world was doing shark. Nice stuff but if ten people are already doing it why do it too. I have used palm cloth, leather from old boots, straw from abandoned straw hats. There is plenty cool stuff you can make interesting inlays and overlays with that cost near nothing!
-
I wrote this in response to a question “what do I need to get started in leatherwork” on another forum but thought I would share it here. I am sure its been addressed plenty but I wanted to approach it from bare essentials. The gentleman who asked was disabled, recently unemployed and on a very tight budget so all my suggestions were skewed toward keeping it inexpensive BUT Still making a quality looking product. I modified this some to post here and I hope that others will join in with suggestions for people to get started “On the Cheap”. I think this may also help some early makers in making a bit more of a good looking finished product. Leather I have been purchasing leather from American Leather Direct http://aleatherd.com/product/double-shoulders/ After some 6 rolls I have been happy with the quality of their Grade 1 shoulders and they cost a little more than $5 a square for 7/8 oz. It is usually on the heavier side. If you are looking to pinch pennies as you go, the Tandy Economy Single shoulders come up for around $50 on sale often and you can get at least 6 holsters out of one. I find them to be a bit on the dry side and don't cut as nice but they work. They are more expensive per square foot but it may be easier to come up with $50 at first instead of $100 plus. So now we have some leather to get started Tools ... if you are out of work or just starting you dont want to drop a big nut until you get rolling. You can make beautiful stuff with very little. Leather Craft is first and foremost about the “craft.” Concentrate on making well built pieces first and then add the “art” when you are a little further along. Craft is all about math and attention to detail So here is bare bones You will need the means to make holes. Get a decent awl and if you can swing it a couple of chisels. You can do without the chisels .. but they are nice to have. I bought this chisel set in Oct of 2016 and use them about 5 days a week since then and am still very pleased. I have owned Seiwa and tandy and prefer these. I have one set for 6 spi and one for 5spi. You dont need both .. or either but if you decide to buy one the 5 spi is great for holster and sheath making. $13.00 https://www.amazon.com/CrazyEve-Leathercraft-Spacing-Stitching-Leather/dp/B01EMNI4Q2/ref=sr_1_1?s=arts-crafts&ie=UTF8&qid=1523472428&sr=8-1&keywords=CrazyEve+Leathercraft+1%2F5+Inch+5mm+Spacing+Stitching+Punch+Tool+1%2F2%2F4%2F6+Prong+Leather+Hole+Punch+Kit Vergez Blanchard makes a great diamond shape palm awl and I think it was like 15 bucks but I found that the cross section is a little small for the heavier thread size you will use making sheaths but it works. The siewa #2 awl works great with thread up to .040 Expect to pay about $15 for any number of nice awls and of course they can go up from there. You will need glue and I use regular ol weldwood contact cement you get at the big box. Dont buy the gel. Again its more economical to buy the qt size but they make small bottles with a brush so you can expand your purchases as you sell things without to hard of an initial cash layout. A small bottle of weldwood is $5.50 Stitching One of the things that separates nice work from not so nice is how evenly from the edge you set your stitching. A wavy stitch line is just awful to look at and it doesn't matter if you stamped the finest stamping anyone ever could all I will ever see is that wavy stitch line. You will need to mark an accurate line. There are tools for that and I really like the adjustable creaser and have had and use mine for about 20 years for setting my perimeter stitch line. https://www.tandyleather.com/en/prod...stable-creaser Having said that .. Wing dividers can be had for less money and I often see them used for peanuts at good will. You can also use a simple math compass and almost everyone that has ever had children will have one around https://www.walmart.com/ip/Unique-Bargains-Iron-Pencil-Compass-Practical-Math-Geometry-Tool-Architect-Drawing-Silvery/46718973 Having said that .... If you take 2 sharpened regular yellow pencils and put a rubber band around them with one tip being slightly lower than the other it makes a fine marker almost exactly 1/4 inch in from the edge. Dampen the leather and put the tip of the lower pencil to the outside of your work and press slightly down on the pencil that is on the leather and just trace around. Perfect line with something you probably already have in the house. So far aside from leather we spent a necessary $15 awl $5.50 contact cement Plotting holes For another cost saver .. after you have made your stitching line take a fork and use the tines to mark the stitching holes. Most of my forks give me about 5 stitches per inch. Make sure to put the first tine in the last mark Now you have a nice even line from your edge and you have plotted evenly spaced holes. Time to take your awl and away you go. and you will have nice even stitching so long as your awl work is good and you pull the thread consistently. You need to cut the leather. I use for some 25 years a box cutter. Not the big thick utility knives but the ones supermarket guys use https://www.walmart.com/ip/Handy-Cut...HC900/42452343 Blades are cheap but I strop mine before first use and then strop it every time I use it and the blades last forever and ZIP through heavy leather. Later if you feel the need you can get that nifty round knife but you don't need it to start making stuff for yourself or to sell. You will need to develop patterns and I like manila file folders. Just the right firmness. I have a separate box cutter for cutting patterns because paper is tough on blades. You can also find the large poster board paper at the dollar store and I think its some 36"x30 and I get two sheets for a buck. So so far we are in pretty cheap ... an awl, some glue, I will assume you have pencils, some pattern making material now we need thread and needles If you think this is something you will stick with then I recommend Twin eagle thread. Its tough, beautiful and while it is a big initial outlay the cost per meter is amazing. Get the 1.1mm. I think anything less may look a little dinky on a sheath or holster. http://lekoza.com/Thread/TwinEagle0.8 Again though .. its a big initial investment so … you dont NEED it to get going. I really really like Maine thread too and use a bunch of it and it is far more economical than buying the little spools at tandy. I use .040 for holsters and sheaths and it is 6.60 for 70 yds at Maine as opposed to the little tandy spool which is $8 for 25 yds. I have a whole drawer filled with different colors of Maine Thread but buy a black and you are good to go. https://www.mainethread.com/index.php/waxed-polycord Needles .. I really like the John James Saddlers harness needles. They can be had on ebay for the same price as the Tandy ones but with the tandy ones I have alot of breaking at the eyelet and I have had no such problem with the John james. Expect to pay about 8 bucks but that is for 25 needles so you will have needles forever. Edges Sand those edges down real smooth first. A sheet of 100 grit will make short work of an edge and you can usually buy single sheets at Ace hardware. If you want to really shine get a sheet of 100 and one of 220. For burnishing edges I use an old shoe horn that is actually horn and it is wonderful. Again you can find stuff like that at goodwill for almost nothing. You can also use a piece of heavy denim or canvass and even a piece of wooden dowel with some beeswax applied to condition the wood but I personally am not a big fan of wood burnishers and prefer bone or horn. For many years all I used was water to burnish the edges and .. you can still get it free in most of America. You will need to color your leather. Maybe ... some people like just an oiled finish. Dye is expensive so there is no way around it. I think you can get slightly better prices on ebay than at tandy on Fiebings. I dont hate tandy water dyes but for rugged gear I dont like its longevity. Stick with Fiebings or Angelus. I have used Fiebings for a million years but I have been switching over to Angelus on some colors just because I like the richness of the colors a little more but fiebings is the go to for most leather folk and is easier to find small amounts of. I think a small bottle can be had for around $6 and will get you through at very least 4-5 holsters. DONT buy Fiebings usmc black unless you want to deal with color rub for the rest of your life. Its awful stuff. You can also get black using vinegaroon. It costs pennies to make. Just requires some steel wool and some vinegar and then you need to have some baking soda around to neutralize the action. Takes about a week to make up a batch but I have like a 2 qt container of it for years. A lot cheaper than fiebings to start off with, doesnt rub and you can color 100 sheaths or holsters for about a buck. So we made a pattern, we marked for holes, we made the holes, stitched, colored and burnished. Last step seal ... I use resolene cut about 60%water but .... I know a good many experienced leather worker using ... Mop and glo. You can get a jug of the stuff at any grocery store for a couple of bucks. Cut it with some water and you will have enough for 100 sheaths. I haven't checked recently but I think you can get 32 oz for about $6. If you cut it in half you have A GALLON of sealer. There you have it ... I think I covered an entire sheath or holster on the cheap but still making sure to make something nice. Hope that helps! As you sell things you can start trading out for some fancy stuff but the list I gave you is really all you need to get going. I have tested everything I mentioned and I can make a quality, very marketable piece using the suggestions above. You regulars already know all this stuff but I am sure their are some people in the shadows that maybe kinda dont. Are having better tools nice .. you bet .. but you can get started without them. I hope that was helpful! Alex
-
I dont know what they are suggesting on the bowstock site but with my braided thread I reverse and poke through the thread making a sort of knot but then I take my clump of bees wax and give it a good going over just at the knot or just at the eye of the needle and down about 1.5 2 inches. The bees wax acts like glue and I never have a problem with it coming undone.
-
How did you get into leather work?
Boriqua replied to Rolandranch's topic in Leatherwork Conversation
I had/have a thing for handmade knives. I purchased one from a maker who escapes me now sometime around 1990. I contacted a gentleman whose business name was "Treestump Leather" to ask about a sheath. I had very specific desires and he quoted me a price, if memory serves, of about $60. I thought .. I don't need it made of gold .. just leather and decided to buy the materials and make it myself. I am a pretty handy guy and used to be fairly competitive so figured if there is a man on the planet that can do it .. I can do it too. Ummmm turns out ... NO! I made a complete hunk of junk and by the time I expended all the material I spent at LEAST $60. It was bone stupid to put a $300 knife in a junk ugly sheath worth about $3. I then ordered the sheath from him we had talked about. What arrived was a thing of beauty and built like a tank. Just a fine fine piece of workmanship. It was stunning to me in every way. Being a motorcycle guy from the 70's I was an aficionado of leather work. All it did was make me want to figure it out even more. If he could do it then it can be done! I started selling my stuff early on to a well known saddlery shop in Manhattan and making biker bags but I was determined to figure out how that man made something so tight and beautiful. It helped pay for art supplies when I went to back to school at the School of Visual Arts. I don't know if he is still in business or if someone here knows him. He appeared in some photos to be about mid forties early 50's at the time but if you know who I am talking about and he is still kicking .. tell him he cost me a fortune and led me down a rabbit hole that I am still working through!! If it weren't for his work .. I probably would have dropped it. Tell him thank you! That was 1990/91 .. I only hope that when people get stuff in the mail from me ... they feel 1/3 of what I felt when I got that damn sheath!! -
Yup me too. Last cowboy rig was unmolded and still use vegtan
-
I think it looks great!!! I agree ... pain in the behind. I just redid mine and used godaddy and a wordsmith template but it still took a full16 hours or so to upload everything and make changes. I rarely have much for ready sale so my site is more of a portfolio but it was still a lot of time I would rather have used to do about anything else which is why my site was down for months. I want to add more descriptions but .. I am kinda websited out so it will wait another month!
-
So cool gig came up. Local gentleman and his wife officiate weddings in different locals in AZ. Part of their thing is they dress kind of cowboy for the affairs so he wanted something for his 686 but didnt wanted handsome but not to ornate. He also preferred flatter browns so this guy was dyed in with Fiebings Russet and what doesn seem to show up in the pix is there is some dark brown ghosting here and there and along the edge. He was happy ... through me an extra $20 which made the wife happy! Of course it wouldnt be complete without some belt
-
Flat back holsters .. Pricing?
Boriqua replied to Boriqua's topic in Gun Holsters, Rifle Slings and Knife Sheathes
I asked for thoughts and I am very happy to have received them all whether they support what is going on in my head or refute it. I will add though just for the sake of anyone else having a conundrum on pricing. Material cost is usually not the driver of final cost of a product. I recently had to repair the AC unit in my car. The local guys quoted between $750 and $900. I decided I would just repair it myself and it cost me about $100 in parts. So what was the other $800 it would have cost at the Mechanic.... their skill, time and education and I personally don't fault them that. I dabble in pinstripe and recently watched an artist do some work on a gas tank. It took her about 15-20 minutes for which she charged $200. Material cost was probably about $1. Duly impressed with her work I asked her how long she had been at it. She informed me she had been doing pinstriping for about 4 years. So that tank didn't take 15 minutes .. it took 4 years and 15 minutes and was worth every penny. My prices are so reasonable I have people who buy from me that throw me extra or tell me I don't charge enough and if I were simply a shlub throwing together pieces of leather than I agree it might not be worth more to use more of my time but ... I sweat the details and try to make every piece beautiful. I have been at this for a couple of decades. If my method for producing a flat back I think is the best method and it takes me 30 minutes more time to do it ... should I not be compensated? Or should I resort to another faster method I don't think is as good? Sometimes an internet board isnt the best place to explore these issues because you cant get a persons inflections but I assure everyone .. I am not looking to argue and truly value all the input but ... I think it could use discussing and just want to throw that out. I dont think anyone is paying for the $8 dollars worth of leather and dye when they buy from me .. they are paying for my time and experience and what little skill I have. Thanks for the kind words Jeff.. I rarely get to make anything for myself. I am going to try and get some better pix today but its a plain jane double layer holster but I bet you can see some of your influences in there. Alex -
Saa cowboy holster
Boriqua replied to blue62's topic in Gun Holsters, Rifle Slings and Knife Sheathes
The stamping is amazing and I love the color. My second reaction though after going wow look at that stamping was I felt the loops were a little low. So I looked and you have a second hump under the trigger guard. Was there something on the gun that necessitated the additional bump out? -
Flat back holsters .. Pricing?
Boriqua replied to Boriqua's topic in Gun Holsters, Rifle Slings and Knife Sheathes
I am not sure I get it. Did you get it backwards in the description and you are using a 8/9 oz back and lighter front? Here is a double layer glock holster with flat back. I have modified my pattern so the front is designed to fit . This is 4/5 oz glued back to back to 4/5 oz for both the front and the back. It gives me a nice smooth interior which I feel draws nicer and is a bit nicer to the guns finish. It also maintains its shape better and longer. My front piece is longer than my back of course but I glue the pieces from the edges in.What happens is the back piece is bent on an inward curve when dry. I can still plot all my holes and hand stitch it just fine. The trick is .. I only wet and wet well the front piece when I go to wetmold and I use a press with foam on top and a hard backer. I also mold in a sight channel which I dont really have to do with a 50/50 This particular holster is my own and I wear it most of the day. Most comfortable holster I have ever worn and its several months old in that picture.