


bladegrinder
-
Posts
514 -
Joined
-
Last visited
Content Type
Profiles
Forums
Events
Blogs
Gallery
Store
Everything posted by bladegrinder
-
Thanks Chuck!
-
Thanks folks!
-
A sawsall blade with the top of the blade ground down to fit in the hole will work as a broach.
-
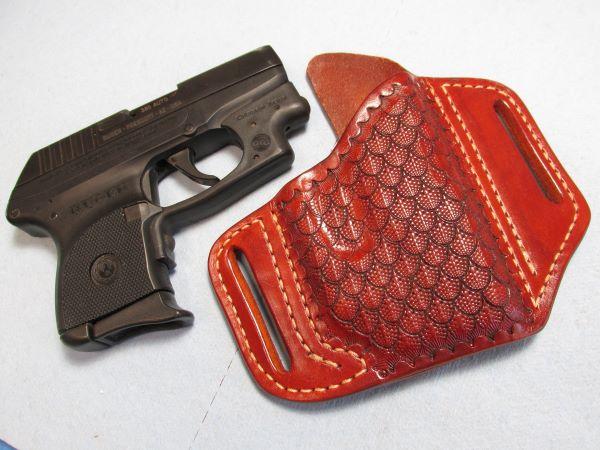
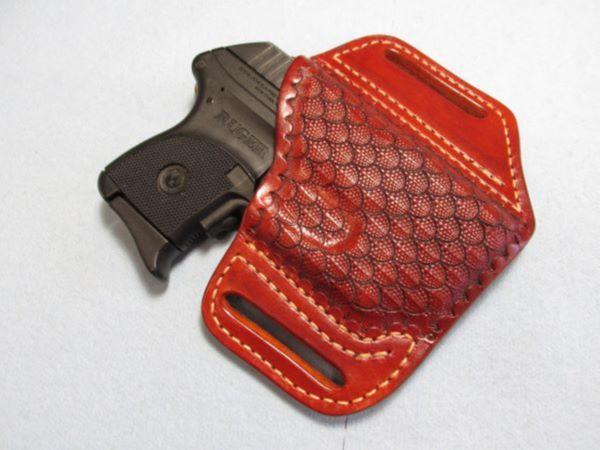
Believe it or not, they both have Fiebings British Tan. the top pictures were taken in a light box, so the lighting was diffused, the bottom one was taken outdoors. they both actually look more like the top one in person.
-
If you use that Coco Bolo be careful, some folks are allergic to it. I won't go into what it did to me a couple times but I stopped using it around twenty years ago.
-
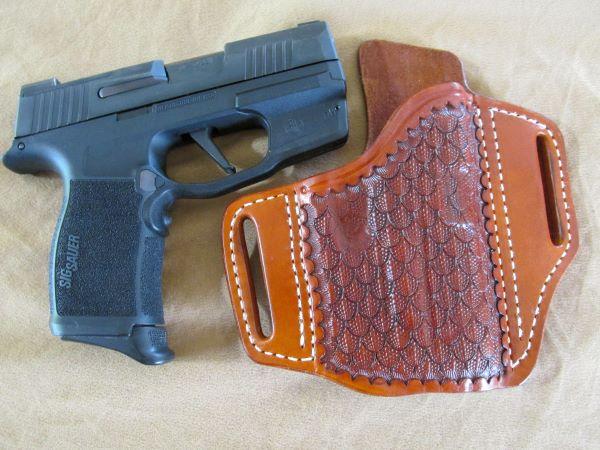
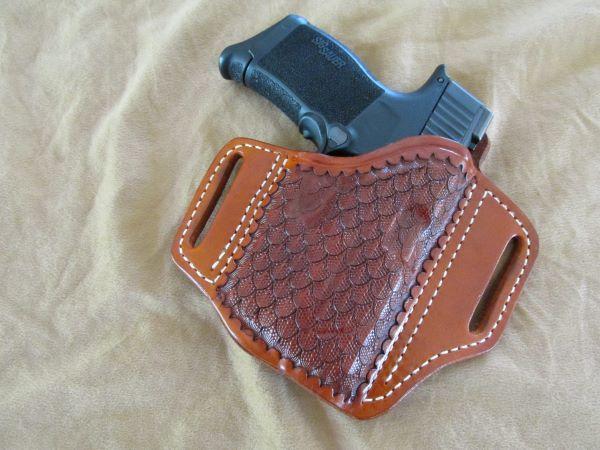
My neighbor asked me to make him a holster for his Ruger LCP with a Crimson Trace lazer so I made this for him...the two top photos. then I made another one for my Sig 365X after I put a Sig Lima lazer on it to fit for the added lazer. I've been wearing this one the last few days before photos so it shows a little wear. bottom photos.
-
It’s always nice to wake up in the morning and still be on the green side of the grass, on the other hand sometimes there’s things worse then death.
-
Those are some nice looking scabbards.
-
I also have a 8500 Kw portable I bought years ago to run my well in the woods when I just had a camper there. Then I converted it to run on natural gas and had a hose connected to my meter at the house in the city, to the back yard where my electrical panal was and back fed the panal thru a 50 amp breaker. One time it ran for two days non stop
-
Ok, I forgot you were in Canada so the price would be higher. I also didn’t take into account the propane tank or piping, at the time of my install I worked for a natural gas utility that also did LP and I got the tank, piping and fittings from there at a good price. I did all the installation of the tank, underground piping and final connections myself so I saved a lot there.
-
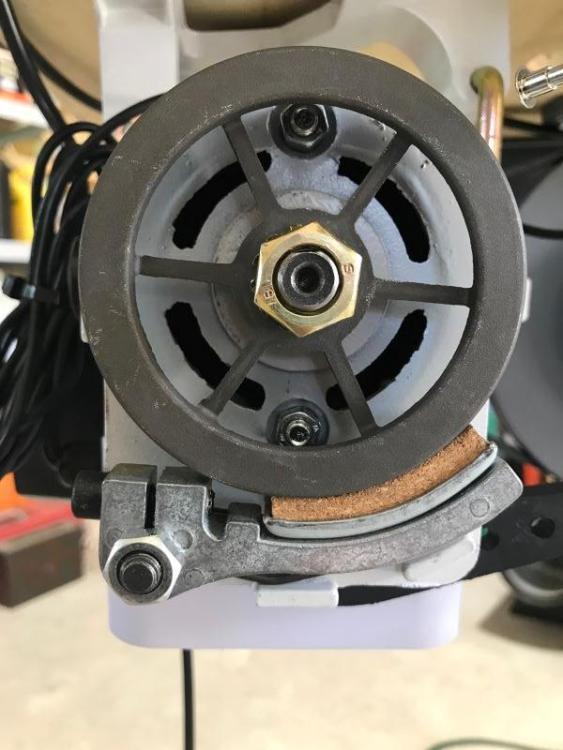
My machine is the Cowboy 4500 with a servo motor. taking off the back cover you can see the brake shoe and bracket it's attached to. I just removed that nut and took the bracket and shoe out and readjusted my foot petal. now with the machine at rest I can turn the flywheel. and there's no foot play, when you hit the go pedal...it goes.
-
$20,000 wow, how big of a generator were you looking to get?
-
Yep, one of the first things I did when I moved here was install a Generac 2200 KW whole house generator and a 250 gallon LP tank. when hurricane Michael came thru my area didn't have electric for over two weeks. my line comes thru my woods about 1500 ft. with 100' pines on both sides of it. Haven't had any of them fall on it since the hurricane but when it come thru I had about a dozen and it took over two weeks to clear the downed trees and string new wire, only about 300' is under ground going from the last pole to the house. but honestly, I lost power during storms living in the city more often then I do living in the woods.
-
Landis Model 12 F coming back to life
bladegrinder replied to FDC's topic in Leather Sewing Machines
I know nothing is of that machine, but man does it look awesome! -
Fudging stitch length @ a border/corner: Cobra class 4
bladegrinder replied to DieselTech's topic in Leather Sewing Machines
Like Uwe said, I use the flywheel by hand, slightly raising the foot then drive the needle home by hand with the wheel. but like JL said if your to close to the edge it's going to stand out. -
Retiring from the gas utility trade I can't tell you haw many cables I've seen cut. most times their marked but bad things happen, even a fallen tree can uproot and break cable. fibers always in conduit but that's no match for a back hoe. but then satellites fall from the sky too, ha, ha. Right now I feel the less I'm attached in anyway with anything past my driveway I'm better off.
-
I'm in the same boat, moved to the deep woods three years ago. my cell phone service is good but for internet I use a Verizon hot spot. it actually works great for internet, can watch Netflix with computor's running with no interruption''s and it's cheap, connected to my phone plan BUT...it's not on 24hrs. and even with the plan I'm on if I hacked it to work 24hrs a day I think I'd run out data on occasion. Probably next year I'm going with Starlink, it just became available in my area a couple months ago. a little over a hundred bucks a month and six hundred for the equipment that you buy....that you set up yourself. my locale cable company wanted $9000.00 to run to my house, then two weeks later they were nice enough to give me the friend price of $7,500.00, no thanks. After researching the satellite services available, Starlink came way out on top compared to Hughsnet.
-
Those look great.
-
The threads I've bought came from Toledo Industrial and Superior Threads.
-
I got a cowboy 4500 last year and I’ll say this, it’s going to change your life! I wish I’d have bought mine 20 years ago. As for thread all I’ve used so far is 277 top and bottom. I just make sheaths and holsters, I haven’t done any inlays yet.
-
Nice, beautiful work right there!
-
Yea the one I got came with the PID and a solid state 40 amp relay, works great on my electric smoker too, that thing had some pretty big swings in temperature too.
-
The PID I got was around $35 I believe off Amazon, it worked so well on that little oven I bought another for my smoker. The toaster oven got a blanket of Kao wool packed in between the oven and the outer shell that I had around my shop
-
I just carefully measure my stitch spacing so I know where the first back stitch will end up, put a tiny start mark on the leather and drop the needle on it, then back two then forward.
-
I back stitch two stitches then switch to forward, continue to the end, then back stitch two stitches, there’s no triple stitch.
