

Reegesc
-
Content Count
444 -
Joined
-
Last visited
Everything posted by Reegesc
-
Holler if you have any questions. Happy to help.
-
A small, stiff brush
-
Crafty, you ought to check out Abbey England. They have a fairly deep selection of linen threads including Barbour and are often recommended as a source for otherwise hard to find supplies here in the U.S. Several years back Ritza "Tiger Thread" was all the rage and incredibly hard to source. Abbey England was the go to vendor back then. They only sell to the trade so you have to register before you can buy anything. Just a formality as best I can tell but it does take a day or so until you are "approved". You can peruse the site, just won't see any pricing until you get admitted to the club. If nothing else It's fun to have a look at a proper Upscale British Leather Supply Shoppe where all things equestrian are taken quite seriously so it seems. One other tip you ought to at least entertain are the Chinese eBay vendors selling waxed braided poly for a mere $4 -- that's for a 260M spool of 1.0mm thread. What's cool about that is for $20 you can have five colors that you otherwise wouldn't have on hand because who can afford $30-$50 a pop per color? I have 10 spools of various colors myself and for the money couldn't be more pleased with these threads. And while they are not my go to thread, they are when I need Red, Yellow, Orange, Peach...etc. Several of the threads in the Thread Comparison were donated by me.....from these very vendors. Heck, if you like, PM me your address and I'll send you some samples and throw in a roll of SLC linen thread that I'm never gonna use (I've got like five of them). Seriously, take me up on it. Happy to help.
-
Hey Madmax,
Saw your reference to Maverick Leather. Have you checked out Acadia Leather? New outfit with some terrific deals including free shipping. I've placed a couple orders and am impressed so far with price/quality. Only negative is no veg tan. Check 'em out...
-
Sorry, was referring to their white linen thread. And yes, totally agree that linen threads vary greatly in terms of quality. Barbours is an excellent linen thread....but pricey and not readily sourced here in the U.S. Shelf life of braided poly? Mmm gotta say forever. As a synthetic material I can't think of anything that would cause it to naturally degrade, certainly not as quickly as a natural product (cotton or wool versus poly or rayon), but that's just a guess. I couldn't say definitively. It's a good question though and I'm curious what made you think of that? I've never thought about threads having a shelf life. Interesting. A forum buddy of mine put together a fairly exhaustive thread comparison sometime back. Might be some worthwhile info for the OP. Ha, this is funny. He states that SLC's linen thread is .7mm. Goes to show what I know...
-
"Best" is a subjective superlative (hey, there's a word combo you don't see everyday) and I agree with all the previous suggestions -- they all are good adhesives if applied correctly. But if the criteria is "Best Value", then I gotta go with Weldwood which is half the cost of Barge and available at any hardware store ($30/gal versus $60/gal). That said, if they were the same price and could be purchased within a 15 minute drive until 10:00 pm any day of the week (or 24 hours if you count Walmart), then I would buy Barge.
-
How to make veg-tanned leather NOT change color.
Reegesc replied to CraftyNick's topic in How Do I Do That?
Resolene, Super Sheen, Tan Kote, Leather Sheen, Bag Kote.....they all darken veg tan. But I'm with you on that search. Hopefully one of the masters here will share their secret. -
Yeah, it's real thick. Just guessing and in comparison to my other threads, I'd say SLCs linen thread is 1.25-1.5mm thick. But I like that it's thick. What I don't like is that that it frays....a lot. It also takes on dye, which maybe you want and maybe you don't. This is the thread I started off with years ago until I got turned on to Tiger Thread (braided polyester) and its lower cost variants. I HIGHLY recommend Lekoza Twin Eagle thread for hand sewing. It's much cheaper and far better than the SLC linen thread -- like night and day better, like Black and White to Technicolor better, like gruel to bacon eggs and hashbrowns better, like a lump of coal to..... However, it isn't a fair comparison if you are intent on linen threads only.
-
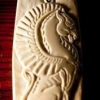
This is a really easy project where the result far exceeds the effort, IMHO. I couldn't find other examples of carving a crocodile pattern on this site (or anywhere on the net for that matter) and so am reposting this from the Show Off section in the hope of (a) helping someone who is looking for some ideas to snazz up the basic belt design and (b) to build up karma credits. This is a 1" wide pattern that will work with 1.25" - 1.5" belts once you add borders. But you can easily modify these dimensions by either shrinking or stretching the image to suit your needs. Or heck, just draw your own. Not much to it really. The belt on the left was finished using Fiebing's Tan Antique Finish which I mixed with a splash of Dark Red Oil Dye. The antique finish does a great job of highlighting the carved lines and tooling impressions. Surprisingly, however, the carving and tooling looks just as good without the aid of antique highlighting as shown in the solid black example (Fiebing's Oil Dye). Just guessing that with such a basic pattern and where all the cuts and impressions are deep that it holds its own regardless of the finish. Seems like there's no way to screw up on this one. I think you can get by with any finish you want. EDIT: I just remembered that for the belt on the left with the mahogany finish I first painted a resist stripe down the middle using Super Sheen, then applied the antique finish. That's gives it a fade look. I also hit it with black on the borders using an airbrush. If you don't have an airbrush, get one. They are super easy to use. Just like painting with a can of spray paint. Easy easy easy.
-
Faux Croc Belt
Reegesc replied to Reegesc's topic in Purses, Wallets, Belts and Miscellaneous Pocket Items
Here is the same pattern in black and with a narrower width. Makes for a more formal look I think. -
Hey Monica,
Hmmm. Well I'm confused. I thought I saw a post by you asking about storing leather in plastic bags and the risk of attracting mold and I went to respond to tell you about another thread that might address your question, but it doesn't appear that it was you who asked the question and now I can't find the post. Weird. But I was also going to tell you about an email I received from Acadia Leather, so let's move on to that.
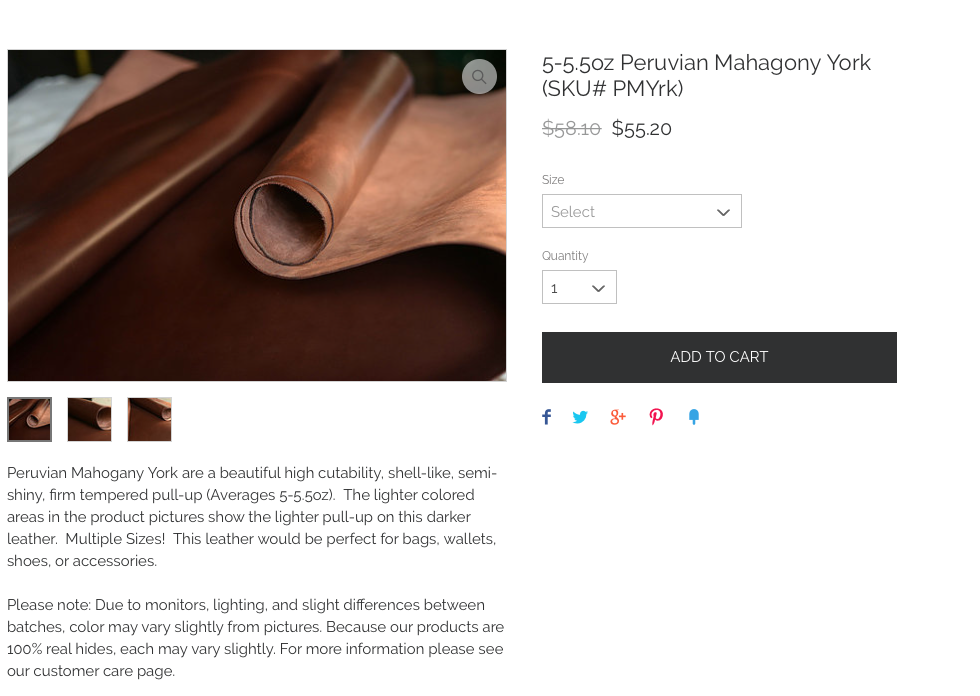
So they are advertising a restock of their "Peruvian Mahogany York" leather. (Man, talk about getting carried away with branding, lol). I thought it was gorgeous and ordered a $58 side which is on it's way to me. As I was eyeballing this fancy-named good-looking leather I was reminded that you're always on the lookout for horse fronts and this just struck me as a similar type leather and thought you might like to know abut it.
So, now you know. :-)
Clyde
ps. You've been really quiet for like....forever. Things going your way?
-
Nope! Wasn't me! I've already got my leather stored in roles in horizontal rods all up one wall. NOT in plastic bags.
Wow, the PMyork looks sweet! I'm definitely drawn to thin, shiny (but not too shiny) leathers right now, and that looks perfect. Thanks for the headsup.
Oh, not much going on. In fact, that's pretty much the problem. I haven't really made anything new, just more of the same, and not as much of that as usual because I've been gone on a lot of family trips and then obsessively reading through my latest lengthy book series find.") What have you been up to? Still working on shoes? I've been keeping up with things via e-mail a bit, since I'm subscribed to various parts of the forum.
What have you been up to? Still working on shoes? I've been keeping up with things via e-mail a bit, since I'm subscribed to various parts of the forum.
-
Hey Monica. As it turns out I had also ordered a piece of Horween Chromexcel Horse Butt from Springfield around the same time just to see what all the hub bub was over the Horween. They both arrived a few days ago and I tell ya I can't tell the difference between the two. So that's $25 for a piece of Horween (about 2 sf) versus $58 for ~ 15 sf side of the PMY. Can't beat that price for this quality. Really amazing. I'm going to order a couple more sides myself.
As for what I've been up to, I came with a cool imitation croc pattern for belts that turned out really nice. Check it out.
-
-
Consequence of posting your email address in plain sight
Reegesc replied to Wizcrafts's topic in Help Wanted
I was going to praise the gmail system myself but you beat me to it. I have the same results, nary a spam message to be found. In fact, I get so few emails that sometimes I'll peruse through the spam pile just for something to read and pretend there are lots of people who want to converse with me. lol -
Airbrush Stand
Reegesc replied to Reegesc's topic in Dyes, Antiques, Stains, Glues, Waxes, Finishes and Conditioners.
Yeah, great idea. Thx *THAT* is an excellent point and a terrific example. -
An airbrush is absolutely one of those DOH! tools and I'm loving the cheapo Master kit I bought off Amazon for a mere $80. Well, I love the cute-as-shit gutless compressor, but not the airbrush so much. Instead I've matched the compressor with a cheapo Harbor Freight airbrush that I've owned for years but never used because (a) I didn't have a particular reason to use it and (b) I thought it was going to be yet another difficult set of skills to master, like hand sewing was, and tooling, and edging, and burnishing....and just about every damn little thing there is to know and master when it comes to leather working. But that all changed . Over the past however many months I've become a big fan, a green-with-envy covetous voyeur of Boriqua's finish work. It's to dye for, as they say. Finishes so gorgeous it hurts your eyes to look at them. His finishes are like gambling in Vegas. Once experienced, you are not the slightest bit impressed with some hokey ass river gambling boat or even the biggest small town, Reno and its hick schtick. Nothing will ever measure up... not even close. I finally cornered him one day and asked him point blank: "What's up with those finishes you're churning out Pops?," ya know, in that intimidating street tough kinda way. Sure enough he gives me the Clueless-Old-Guy Routine: "Aw shucks, I dunno? Just lucky I guess." But then he slipped and mentioned he was using an airbrush. I KNEW IT! It wasn't Voodoo after all. It wasn't even alchemy. It was just a special tool...one that anybody could purchase and I already had one......which I couldn't hook up to my pancake nail gun compressor because I needed fittings and an air hose and those little bottle thingys not to mention all the research time to figure it all out.....OR I could just buy my way in. $80 was a bargain. So I get my kit and I let it set for a day or two to mentally prepare myself to devote the big blocks of time it's going to take to learn how to do this airbrush stuff. And on that day I spent several hours unpacking it, clearing a spot on the workbench and building a little rack for the little bottles and filling the bottles, then labeling the bottles, then making a little holder where each bottle is secured and safe from accidentally being knocked over. Just dancing around and around and not actually doing anything with the airbrush until there were no more tasks left but to hook the damn thing up. And that was all straight forward enough -- hook up the hose, attach a bottle with some liquid in it, turn on the compressor, adjust the PSI.....and that's when I had to set the airbrush down so I could use both hands for concentration, and that makes no sense at all but we all do it to take focus on an important task -- put down the beer, put out the smoke, stop voices from talking to you with the universal traffic cop Stop hand gesture. And when I went to set the ever-so-delicate airbrush down on the bench I quickly discovered how unwieldly it is once out of your protective hands. What with the front loaded up with a bulky glass bottle full of liquid and tilted at an odd angle and the back saddled with an uncooperative, fully compressed air hose, the little guy instantly flopped over hard on its side and cleaning fluid begin leaking out out of its orifices. Oh no, this won't do. This won't do at all. I need a proper stand for this special unit. The piece of crap metal holder thingy that it came with was... well it was in the trash. So I spent the rest of the day making the coolest and cutest little airbrush stand you've ever seen using copper tubing (another medium I work with and get some really interesting results). Yeah, hours and hours I spent on this thing, not the fabrication part but rather the hours upon hours of legos/lincoln logs iteration design time because I have every friggin' copper fitting there is from 1/2" to 3/4" and a decent inventory of 1" on up and you have to try out all the combinations. The next day I finally give it a whirl and right off the bat I got that DOH! feeling. You see, the funny thing about this whole "airbrush club" dealeo is I already knew how to operate an airbrush. You do too. All the mystique that surrounds airbrushing is a a bunch of elitist hooey. I never read this in any review and nobody ever mentioned the obvious as hell example that I'm going to tell you and it will completely demystify how to paint or dye with an airbrush. Ready? It's just like painting with a can of spray paint except that you pull back instead of push down. That's it. To be honest, I'm a little disappointed it wasn't harder. And yeah, I should have started using one years ago. Hey, if all your do is spray solid colors, you'll save a ton of money on supplies because using cloths and daubers is very wasteful. An airbrush lays down exactly what you need and where you need it with half or less as many coats and without all the streaking issues etc. Get one as soon as your can. Consider it part of the basic tool kit.
-
Faux Croc Belt
Reegesc replied to Reegesc's topic in Purses, Wallets, Belts and Miscellaneous Pocket Items
Yes, it's lined with 3 oz Chromexcel. Here's a tracing pattern and tooling instructions. Not much to it at all. -
Actually it's a copy of faux croc belt. So that would make it a faux faux. Whatever it's name, here's an easy carving project for folks like me who are challenged in the carving department. Really pleased with how it turned out and how easy it was to make. Cool Christmas gift for someone.
-
Lois, I bought some eucalyptus oil but I'm unsure of the amount to use. 1 tsp per what? Since it's a concentrate, I'm assuming it's 1 teaspoon per a sizable qty like a pound each of beeswax and paraffin and that you just size down from there. Is that correct?
-
I think that tooling the soles would work as I did with my recent pair of flip flops. But I think you would be better off using a gouging tool instead as you can cut deeper and wider channels for the tread. That's what I use when I make rubber soles. You don't have to use rubber, leather will work just fine, it just wears out quicker. Just be sure to cut the channels all the way to the edge of the sole. Here's two types of leather gouging tools that are readily available and an example of a tread I cut in rubber sheeting using a gouger. It's easy with gouging tool to cut those deep channels, but you could use any number of cutting tools to make those channels, like a swivel knife and an edger. Yeah, that's called "the crack" I believe and I don't know how to do that, but I have made some basic wood shoe lasts and they work just fine. I have an eyebolt screwed into the top of the ankle area and just pull, twist, pull, curse, and pull some more and they come out. What I did was start with a piece of 2 x 6 for the bottom and then stacked two pieces of 2x4 on top of that and glued them together. From there you just spend a lot of time on the belt sander and after a couple hours you'll end up with something like this. Use a pair of shoes as your guide for fit. You mean the distance from the tip of your toes to the tip of the shoe? I don't know if there is an exact amount, but I would think that 1/4 - 3/8" inch is about right. You probably already know this but you can buy lasts off eBay. One of the benefits of using real, professionally made shoe lasts that it has those sorts of measurements already factored in. A last is not a model of a foot, instead it represents the negative space inside a shoe. In other words, for any given size last, the foot is smaller than the last. Professional made lasts are not cheap though, certainly not as cheap as scrap wood, but all the work is done for you and it's not easy sculpting out a pair of lasts from raw wood. Well.tThe technical part is easy, but the working part isn't. If you do buy a pair of lasts, be sure to get a pair that doesn't have a heel lift built into it, in other words a tilted last. As for adjusting for the size and uniqueness of your feet, that is easily accommodated by adding duct tape the last areas that need to be built up. Pretty simple. The other thing that is tricky about making shoes is the pattern. You can make your own pattern using masking tape and your lasts (Search shoe pattern making on YouTube). I've not done that however. Tried a couple times, but it's really hard to do properly. So I've abandoned making my own patterns and instead just copy existing ones by taking apart shoes I want to reproduce. That gives you an instant pattern and one you can easily modify to fit your needs. Used shoes are dirt cheap on Shopgoodwill.com. I know you said you want to make lace ups and this screen shot doesn't have any of those. I'm just showing you an example of how cheap the shoes are, There are lots of styles to choose from. And if you don't find the style and size you like, wait a few days and they will be more listed.
-
Excellent. Copy on it's way. Btw, just received the Oscar Branson book and I must say this is the best book on jewelry/silversmithing I have ever seen...and by that I mean far and away better that the rest. Thank you for turning me on to this book.
-
Btw, those new flip flops I made are the most comfortable "just-off-the-bench" pair I've ever made. In this case it was horse hide for the straps. Broke in nicely and quickly.
-
Both. The idea just came to me. These are just for around the house otherwise I would have put a rubber sole on them. But yeah, it actually does provide some traction. I don't know about the hydroplaning but I'm going to test that right now....be right back... So I poured some water on my concrete shop floor, which is a slick surface and tested it by holding on to the workbench and I got pretty good traction. Then I tried different angles and it would hydroplane at shallow angles but gripped not problem with steeper angles. With the bottoms wet I tested again walking back to the PC and no problem. Good traction. The tooled tread is not very deep, but it is a tread so I guess I would have been surprised if it failed the hydroplane test. Were you wondering because there wasn't a tooled channel all the way to the shoe edge? But now that I think about it, leather dress shoes don't have a tread....but they do have a heel By the way, are you an actual cobbler, as in shoe repair. And if so, do you also make shoes? Here's a pair of shoes I made just a few days ago. Ha..Just occurred to me that these don't have a tread either. But once they get stuffed they should be ok. How about you? Any shoe projects to share? I'm a novice at best, but I do enjoy making them
-
Cool,thx. Just now ordered a copy
-
Here's a nicely summarized "How To" found on Pinterest. T
-
I do the same, and yes the colors can be very nice. Just recently I had a request for a pink dog collar. I experimented with diluting Fiebings Red to see if I could get a pink dye The mix was approximately 1 part red dye 10 parts water. It worked. Depending on the leather I tried it on (various scrap chrome whites) I got light pink, hot pink and even a lovely shade of lavender. Those were the successes. The failures were ugly oranges and weird peach colors.