.jpg.d60258221c476480a6e073a8805645bb.jpg)

leatheroo
-
Posts
1,568 -
Joined
-
Last visited
Content Type
Profiles
Forums
Events
Blogs
Gallery
Store
Everything posted by leatheroo
-
sweet work chris, thanks for the pdf, one day i will work out how to apply these instructions to a round object lol
-
new wallet
leatheroo replied to chocolateducttape's topic in Purses, Wallets, Belts and Miscellaneous Pocket Items
great tooling, love the color -
My second Belt
leatheroo replied to TwinOaks's topic in Purses, Wallets, Belts and Miscellaneous Pocket Items
sweeeet! -
The skull ate my change....
leatheroo replied to Spider's topic in Purses, Wallets, Belts and Miscellaneous Pocket Items
so cool, did you form over a skull shape, i forgot to bid on the one on ebay, damm!!!! -
yeh, another aussie....great to see a banana bender join the ranks....beware, this forum is very addictive. welcome wow...just checked out your website, you have some great, i mean GREAT stuff.
-
great use of the little bits of leather we all have left over
-
wow, fancy quiver, love the colors
-
nice six pack
-
New Elephant Wallet
leatheroo replied to badLoveLeather's topic in Purses, Wallets, Belts and Miscellaneous Pocket Items
sweeeeet wallets, love the red lacing -
hi dreams, the leather i use is usually 1mm veg tanned calf skin, but this was made from 2mm, i have found sometimes the 1mm is too thin, though the thicker is harder to work.
-
this looks like a great result, is this the veg tanned leather? if so any wrinkles left could be smoothed out with a modeling tool after the vacuum process. i find with the veg once it is stretched it says there. the picture above would make a great wall hanging, i can just see it hanging in a frame!! thanks again for all the work you have put into this process. can we see a close up of the face?
-
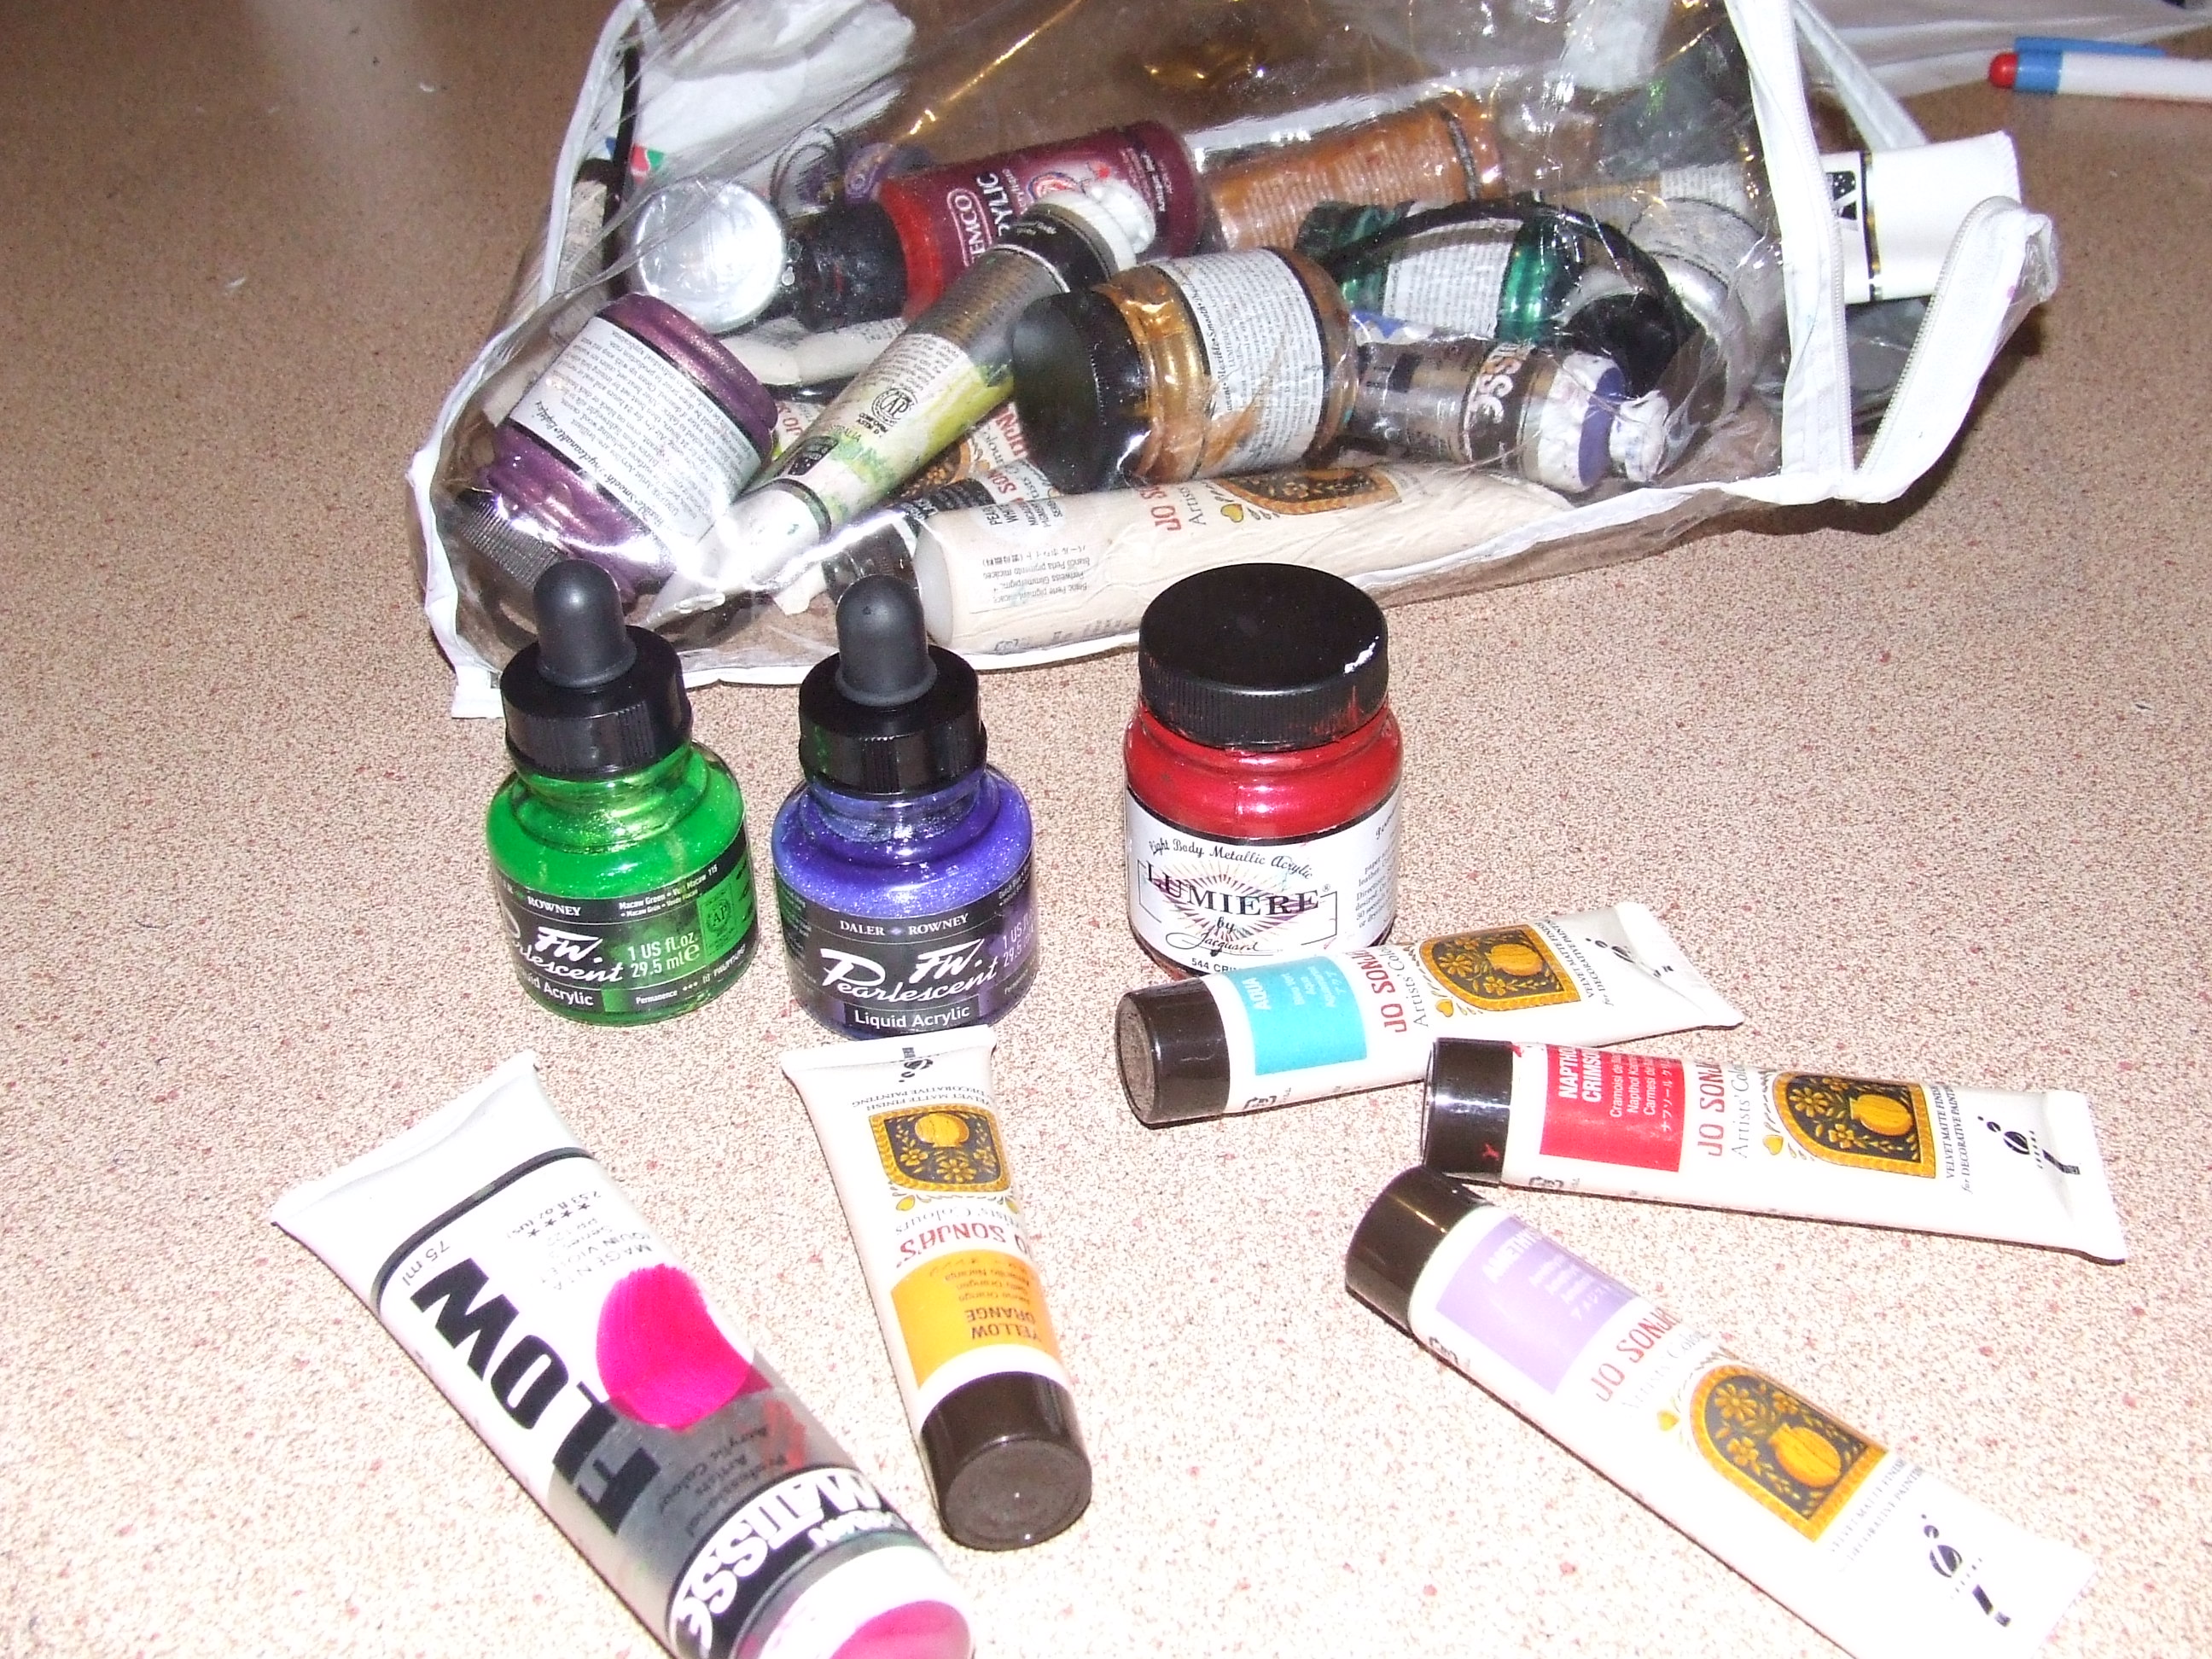
hey tom, as i have trouble getting colored dyes in australia, i have always uses acrylics from the art stores..any good quality paint seams to work and there is a huge range of colors, lots of iridescents and pearescents and metalics, and if it is airbrushed on it retains the flexibility of the mask. I find i have to water down the paints for the airbrush but this doesnt seem to effect the mask. I use thin hat elastic for the masks. I would like to use leather but find if you want a good comfortable fit elastic is the way to go...i get it from sewing shops. I always put two small holes on either side so the elastic is double stranded and the two strands can be separated with one worn high on the head and the other lower. I get a spray sealer from the craft shop, you can get matt or gloss, it protects the paint and leather, but i encourage mask wears not to get the mask wet if they can help it.
-
wow, great tooling!!
-
i love this boarder, on my list to get this tool
-
so classy very sleek
-
ha ha, what about a leather patch to cover pimples?
-
i always use sheep skin to apply dye on small projects that dont need the airbrush...i dont trim the wool
-
Another purse finished...Mucha
leatheroo replied to Tina's topic in Purses, Wallets, Belts and Miscellaneous Pocket Items
Sweeeeeeeeeet work tina -
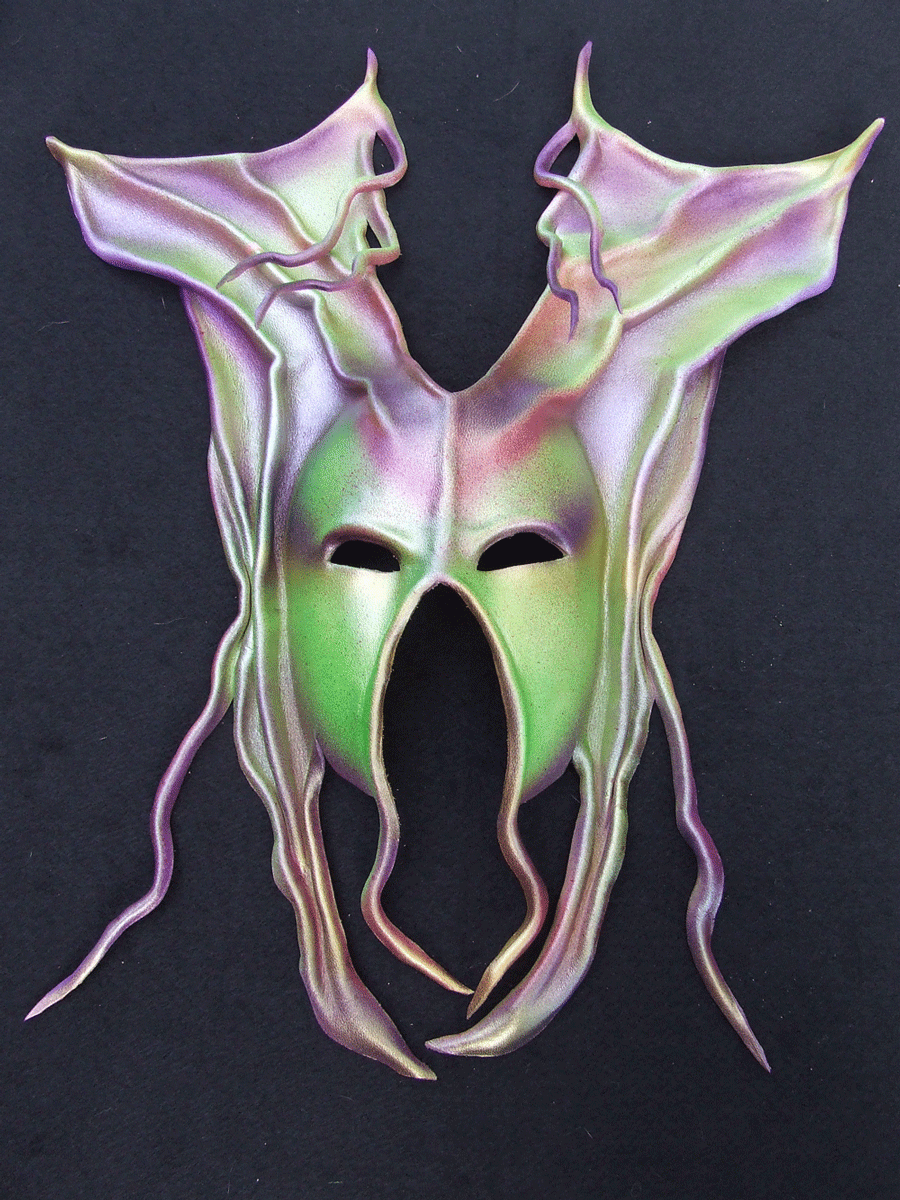
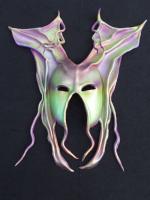
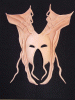
thanks everyone, TOM..yes i airbrushed the mask with pearlescent paint, though i do have trouble photographing this type of paint.
-
IFoLG Columbus Show Entry
leatheroo replied to Beaverslayer's topic in Clothing, Jackets, Vests and Chaps
Sweeeeet piece of work....beautiful tooling... cant wait for the next post -
hey spider, wheres the spider crawling on the flower?
-
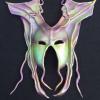
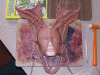
Here is the finished mask ready for drying. Note that i have removed the clamps. The leather will stay in place now and if the clamps are left on you will get marks as the leather drys. Note that i have cut off two of the danglely things at the bottom, they werent working so off the went. I often cut and trim as the mask forms. Sometimes you have these great ideas but they dont always look right. As the mask drys i tend to fiddle a bit, fixing edges, improving curls. I find the half way point of drying is a good time to get the modeling tool out and smoothe the leather where needed. Below you can see the finished mask all dry, just waiting to be painted. And here she is, all finished. My 14 year old son is always telling me my masks are 'dum' and not very good. I showed him a photo of this mask that was made while he was at school. I told him that someone from this forum made it and he said.."That is soooo much better than the ones you make mum, why dont you make them as good as that!" What a golden moment when he walked into the other room and saw it lying on the table!!!!!!!!! Cheers Caroline

-
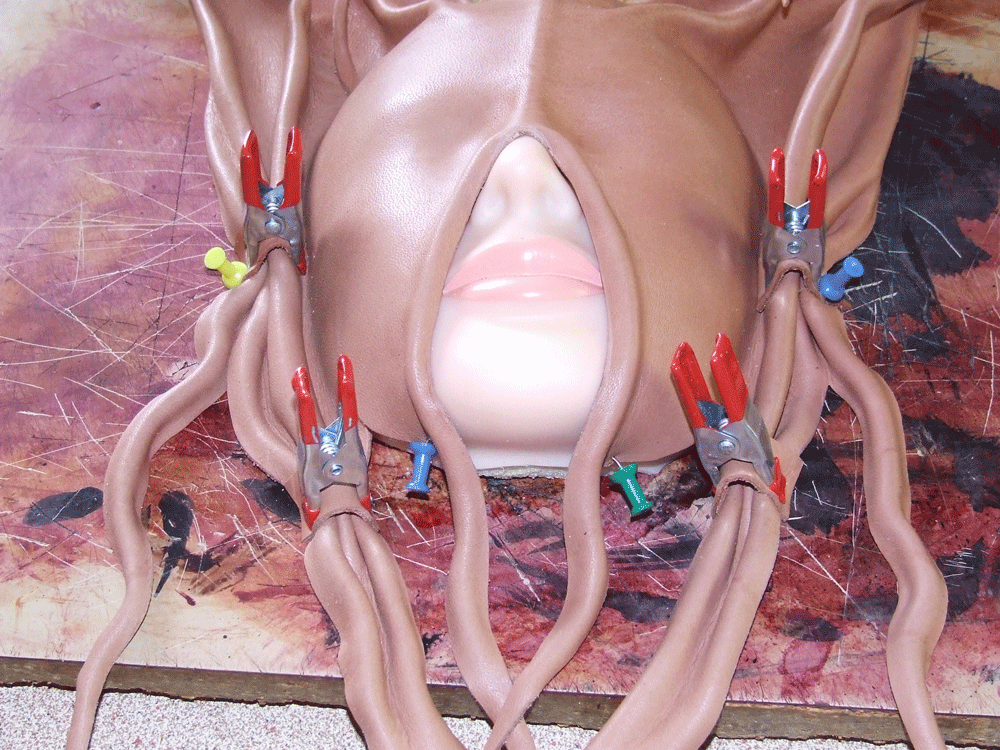
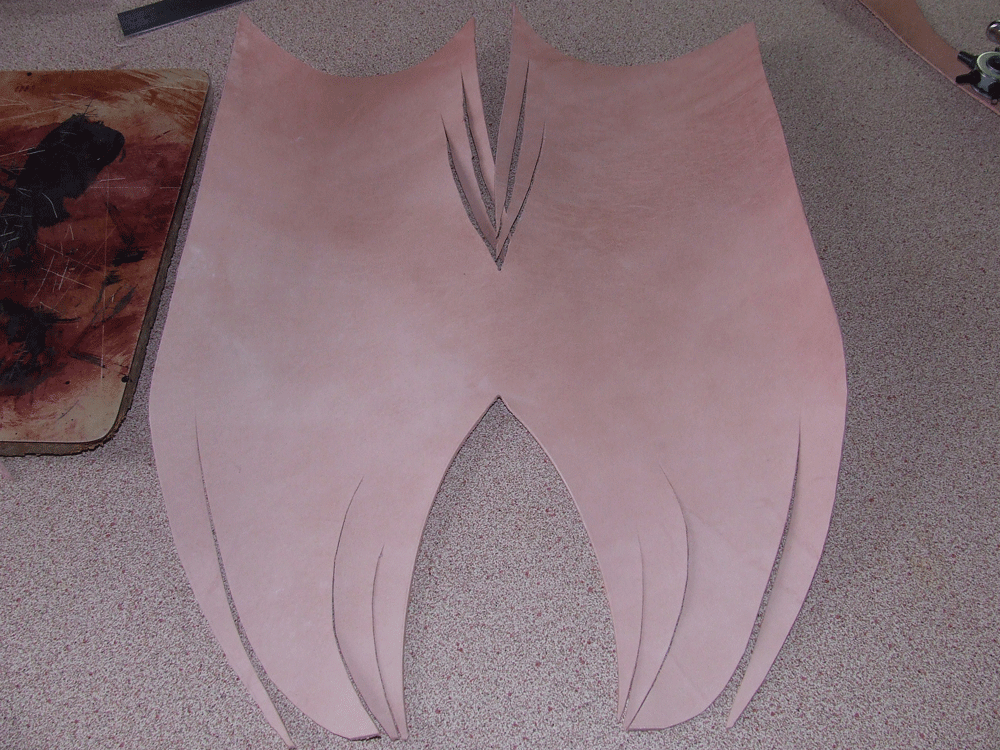
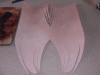
The photo belows shows the half way mark of the shaping, note the little claps and pins, these help keep the folds where you want them until they dry a bit. Remember to use a strip of leather under the clamps so you dont get marks on the leather. Here is the mask with both sides done. It was quite hard to get both sides the same and have made a note to self when doing a mask like this to work each side as i go and not to complete one side and then have to work to get the other the same continued next post


-
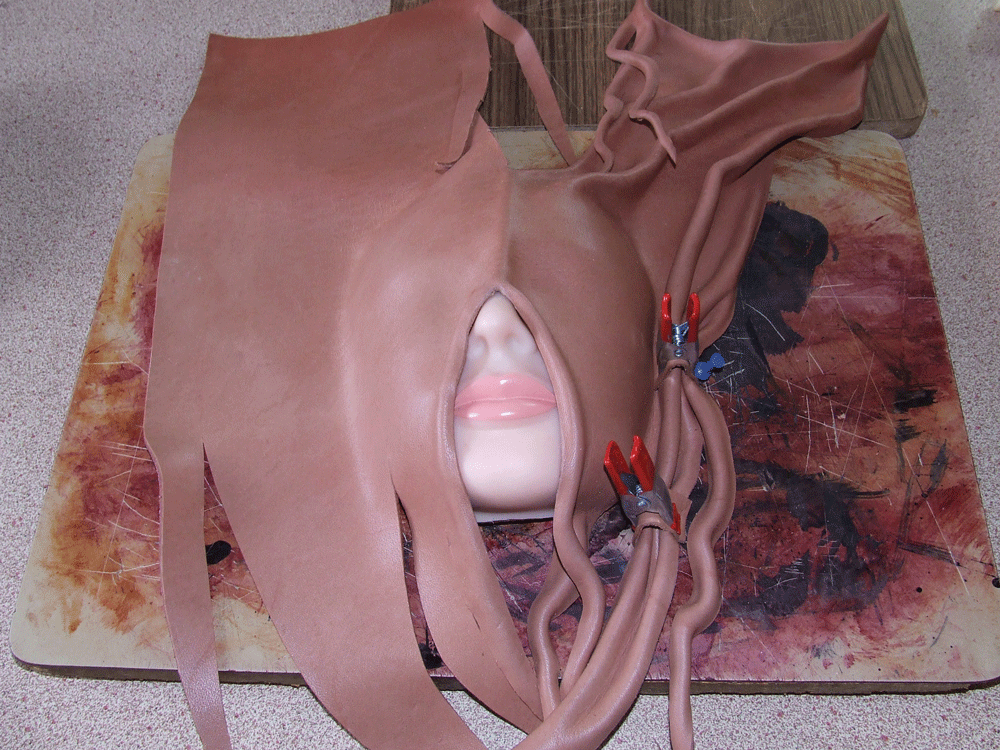
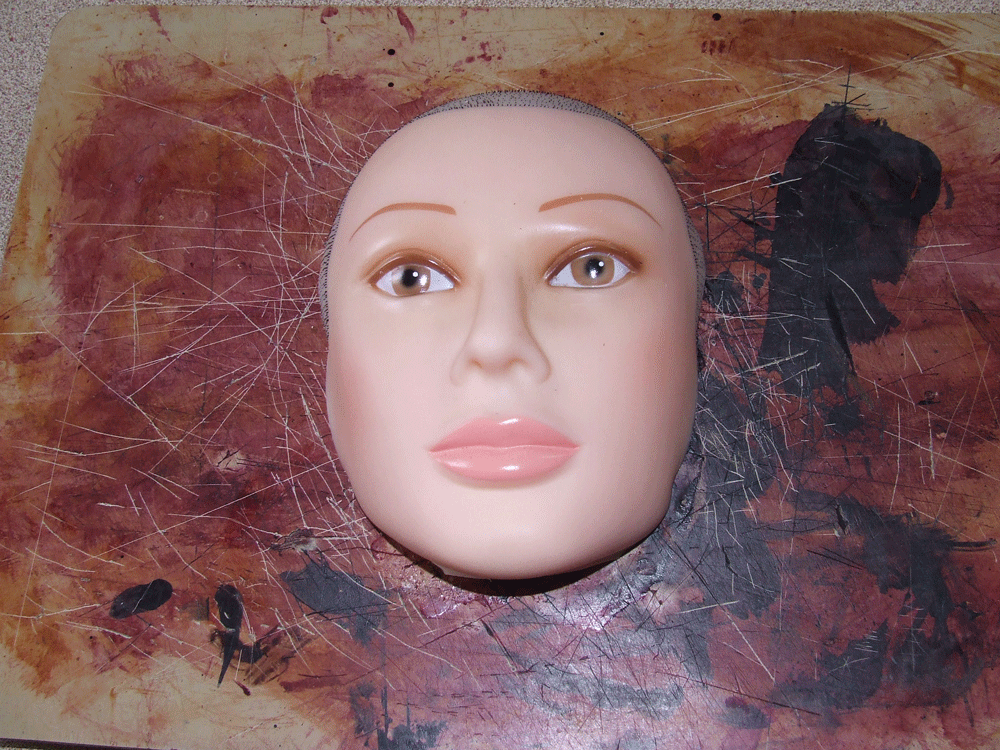
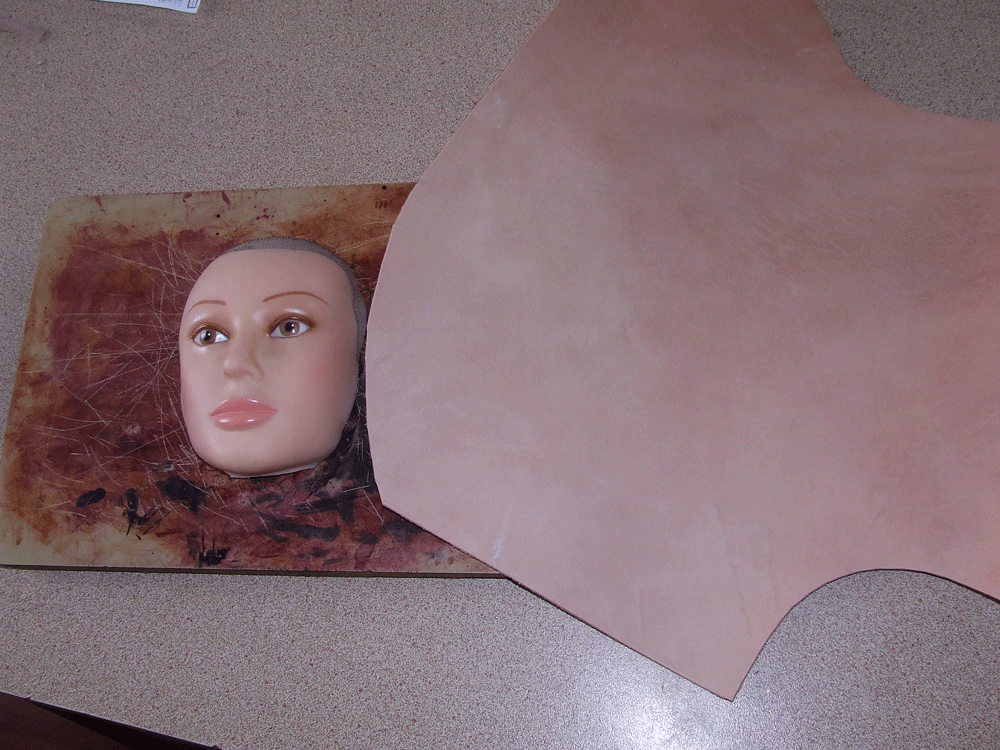
I decided to make a new mask today so i thought i would grab the camera and take a few pickies. This mask is planned as a wall hanging although it could be worn. As Mrs Head had a twin, i decided to cut her in half and glued her to a board, i find this better for wall projects. Using 2mm leather, i cut a rough shape of leather, this depends on the shape of the mask...big..small....wide...tall.. With this mask i had a general idea of what i wanted, so i cut the basic shape and then cut some long skinny bits and the section for the nose and the split that i knew i wanted at the top of the head. Time to wet the leather..i give it about 30 secs in warm water until no more bubbles appear. Now comes the fun part..time to pinch and bend the leather into the shape you want. Sometimes the leather dictates where the folds and flaps and stickie out bits will be...i find this also depends on the begining shape you have cut. continued next post


-
busy boy spider...lots of great work here, love the way you get the wood effect