rktaylor
-
Posts
500 -
Joined
-
Last visited
Content Type
Profiles
Forums
Events
Blogs
Gallery
Store
Everything posted by rktaylor
-
Seeking Input on Sheath Design
rktaylor replied to rktaylor's topic in Gun Holsters, Rifle Slings and Knife Sheathes
DieselTech, Thanks for the compliment. He calls this a straight trapper. I've used it on anything from leather work to field dressing deer. I also think it could be longer and have some thoughts for other changes. I thought I would get input before I made the next one. Randy -
I have two of these knives from a local maker and want to make a sheath. I made this real quick based on a similar sheath for a folding knife. I'm open for suggestions to improve the design for function and comfort. Thanks, Randy


-
I just looked at a few saddles and most of mine are tied with 1/4 to 5/16 wide lace with about a 3/16 hole. The lace is either 3-4 oz latigo or kangaroo that is really thin. Randy
-
I would split that to 3-4 oz and use a 5/16" hole. Randy
-
Thanks. I appreciate the compliment. The hole size depends on lace thickness and width. 1/4" seems small to me. Depending on your lacing pattern, two holes could have three pieces of lace going through. Randy
-
I use 346 on top and 277 on bottom. RT
-
My good buddies would drop off a 30 pack and call it good. I have trouble pricing items, so I'm not the best source. You can price a set of billets online or at the local farm store and realize there is no way you can make them for that. You'll either give away your labor or materials or maybe some of both. However you'll make a higher quality product. Thus, I try to price items 40-50% above production items and realize, it's not going to be my bread and butter. Randy
-
I have used everything from 6-7 ounce to 9-10 ounce latigo. It depends on the expected use. You could just double the saddle skirting if that's what you have on hand. 1.75" is pretty standard width. Randy
-
I use fairly stiff veg tan lined with latigo. It shouldn't need reinforcement at the holes. Randy
-
Help identifying a saddle stamp
rktaylor replied to stavey's topic in Saddle Identification, Restoration & Repair
I agree with Bruce. I don't think Terry is a member here, but he shouldn't be hard to find. Randy -
With so many great saddle making resources available, I would caution against trying to learn much from tearing one apart. Actually, this caution is mentioned in the Stohlman books. I have had the chance to work a few production saddles that left me scratching my head over their methods. Randy
-
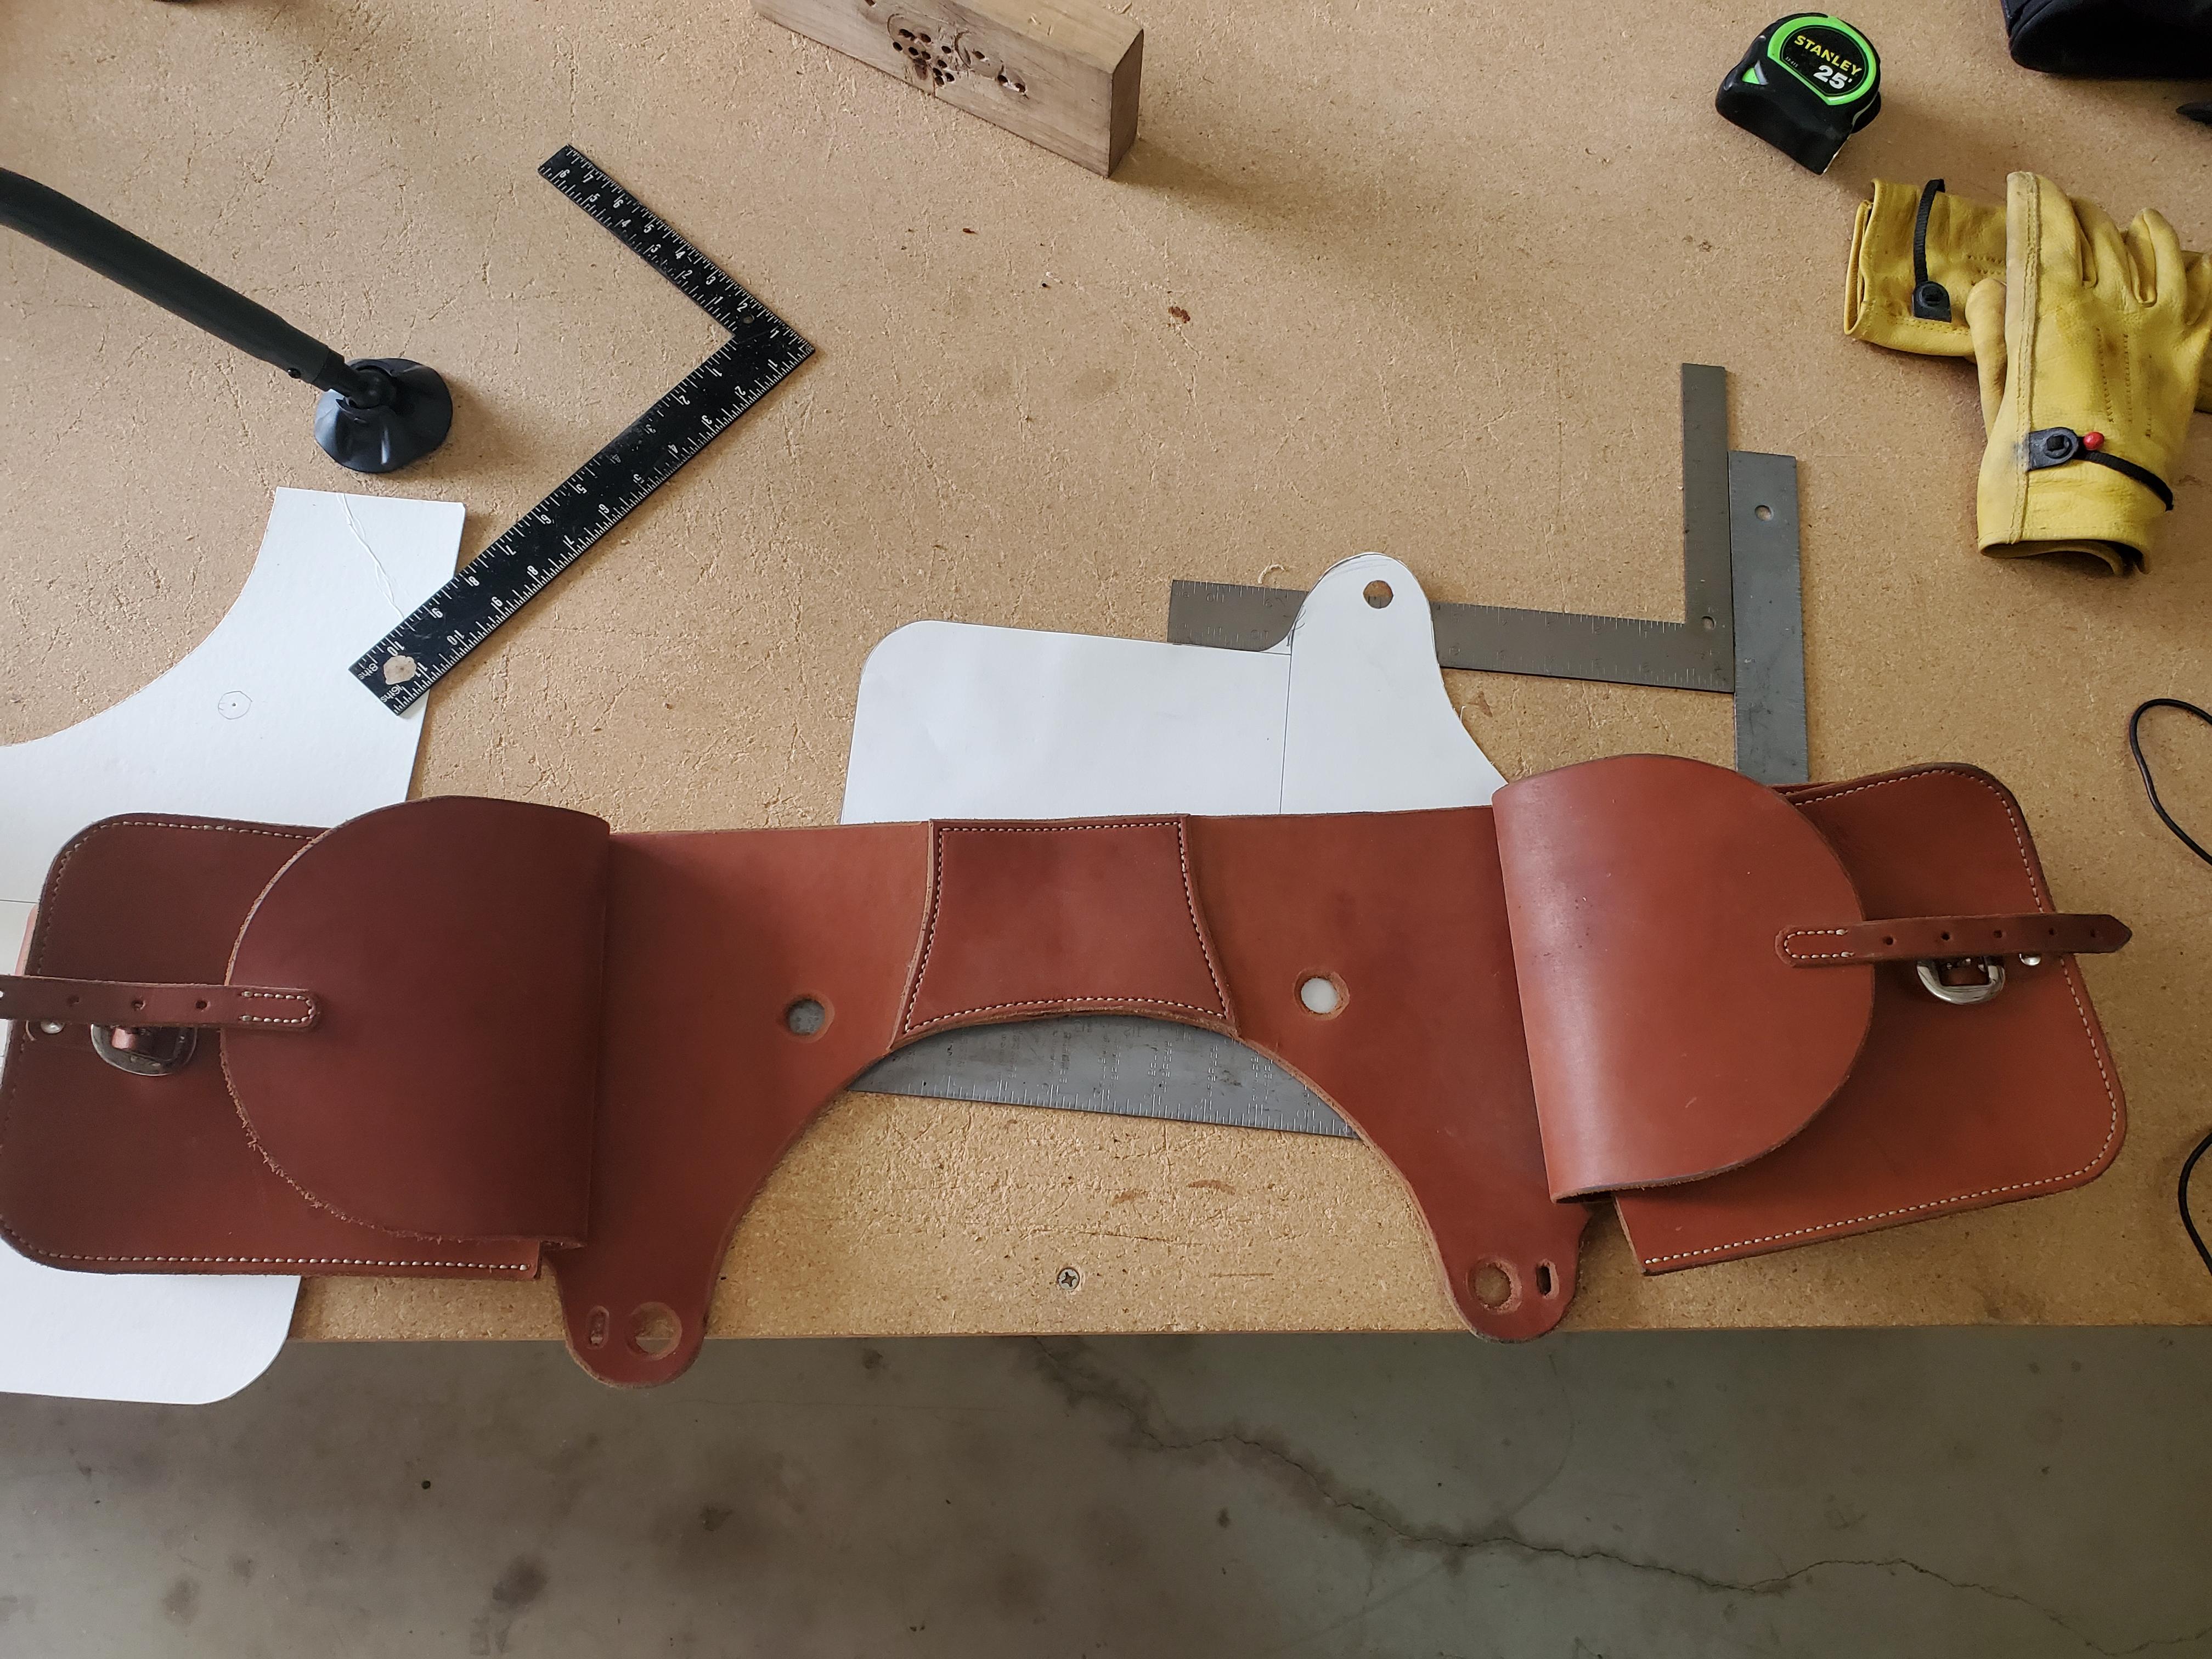
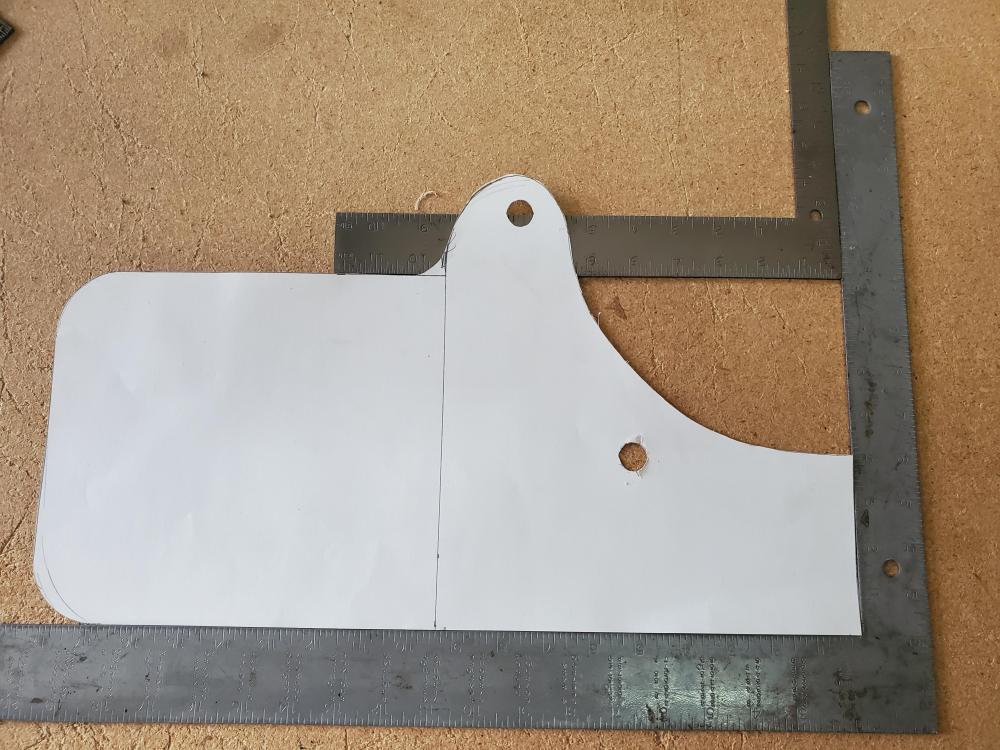
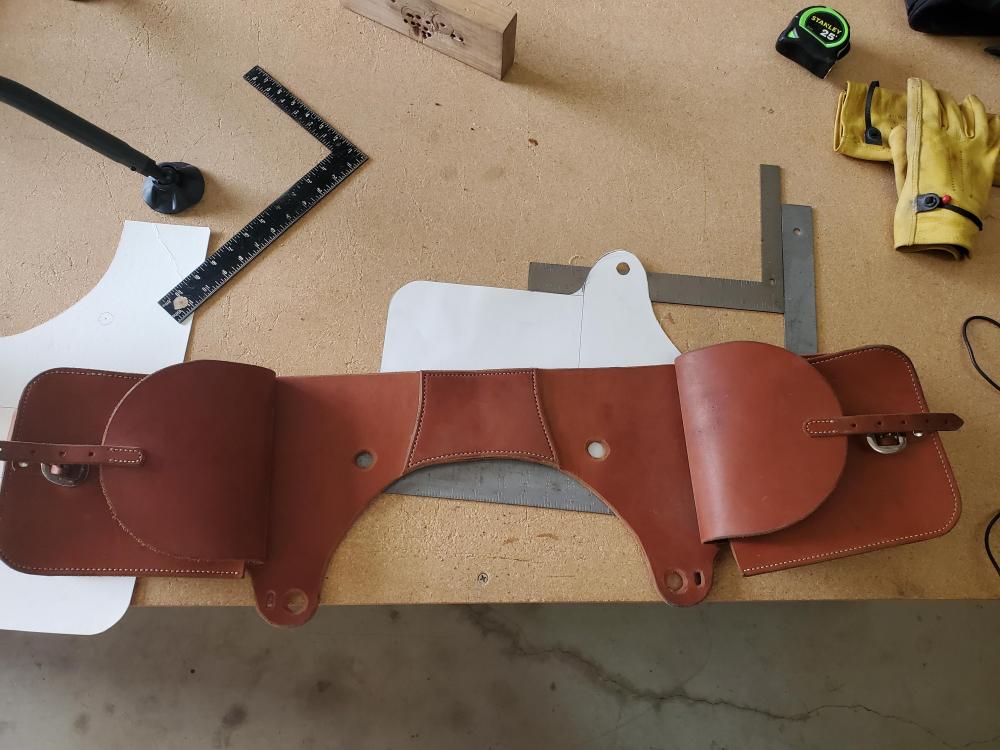
Dwight, I'm a little late to the game, but this is my pattern. The holes match the strings on saddles I build. That curve should fit a lot of saddles. You can leave the front ear off if you want. I use it to attach the bags. The saddle bags in the photo are really heavy leather. They were my first attempt. Best, Randy
-
Saddle rigging plate (2 rivets enough?)
rktaylor replied to andrewmcal's topic in Saddle Construction
Do you have a photo? -
I have not used Tokonole, but the comments on Weaver's web page are positive. I will order some. Weaver only has brown at this time. I just received some tragacanth and Edge Kote that I need to test. Thanks for the tip, Randy
-
Here's an option: http://www.pikespeaksaddlery.com/id293.htm Randy
-
Those look good. Nice job. Randy
-
There's a lot to like about that. Can't wait to see the final product. Randy
-
I wanted to resurface this question. I looked at the Giardini paint and am considering an order. However, I wonder if anyone considers Fiebing's Edge Kote as a similar product? Thanks, Randy
-
I really like the basket weave in the scroll heart. Nice touch. Thanks for sharing the progress. Randy
-
I hand stitched my first five saddles before I bought a sewing machine. There's no real trick to it. It just takes a lot of time. I learned to wrap my pinky fingers in athletic tape because you are pulling a lot of stitches. Make sure your stitching pony has deep enough jaws to handle the skirts. Good luck. Randy
-
I'll start with saying, I have only made one set. My comments are based on what I learned in that process. I think cotton balls wild work. High density foam rubber is another choice. I have boxes of scrap woolskin so it was an easy choice. You want them to be fairly stiff with a little give. Good luck. Randy
-
I seldom get a light that green. Randy
-
Thanks, Randy
-
Ron, I already have two of those. I need to work on the selling part. Double L is the rebirth of Quality Mfg. It was a really nice tree and they were easy to work with. I made one tap with less than ideal leather just to practice. The lower string runs underneath the stirrup and above the stirrup tread. These are on 4" stirrups, so there isn't much room. Thanks for commenting. Randy
-
Sorry. I missed this question. The snarky answer is too many and too long. It took 3 sides for the saddle, tapaderos, and a scabbard. I probably have about 80 hours in the entire project but I'm not very efficient and some of that time was learning to make tapaderos. Randy Thanks. I appreciate the compliment. Randy