rktaylor
-
Posts
500 -
Joined
-
Last visited
Content Type
Profiles
Forums
Events
Blogs
Gallery
Store
Everything posted by rktaylor
-
That looks great. I have used that same craftaid but it didn't look that good. Your detail on the head is impressive. Randy
-
Ron, Nice looking saddle. What stamp did you use? I couldn't find a vintage Hamley rose when I wanted one, so bought the JW flower stamp. Randy
-
Thanks Ron.
-
Thickness depends on material. I use kangaroo from Y-Knot. It's pretty thin. If I'm using latigo, I cut the lace from the back portion of the side. I'll split it down to about 3 oz. It has to be high quality to be that thin and maintain strength. Randy
-
I use kangaroo or latigo. I prefer kangaroo. I have used the lacing pattern from Harry Adam's book. I have not used a double diamond, but I'm sure you could. Randy
-
The saddle before this was for me. Maybe I'll buy a gun and make a holster for it. Or make a purse for my wife. Randy
-
Thanks for the compliments. I don't need another saddle, but I would sure like to keep this one. Randy
-
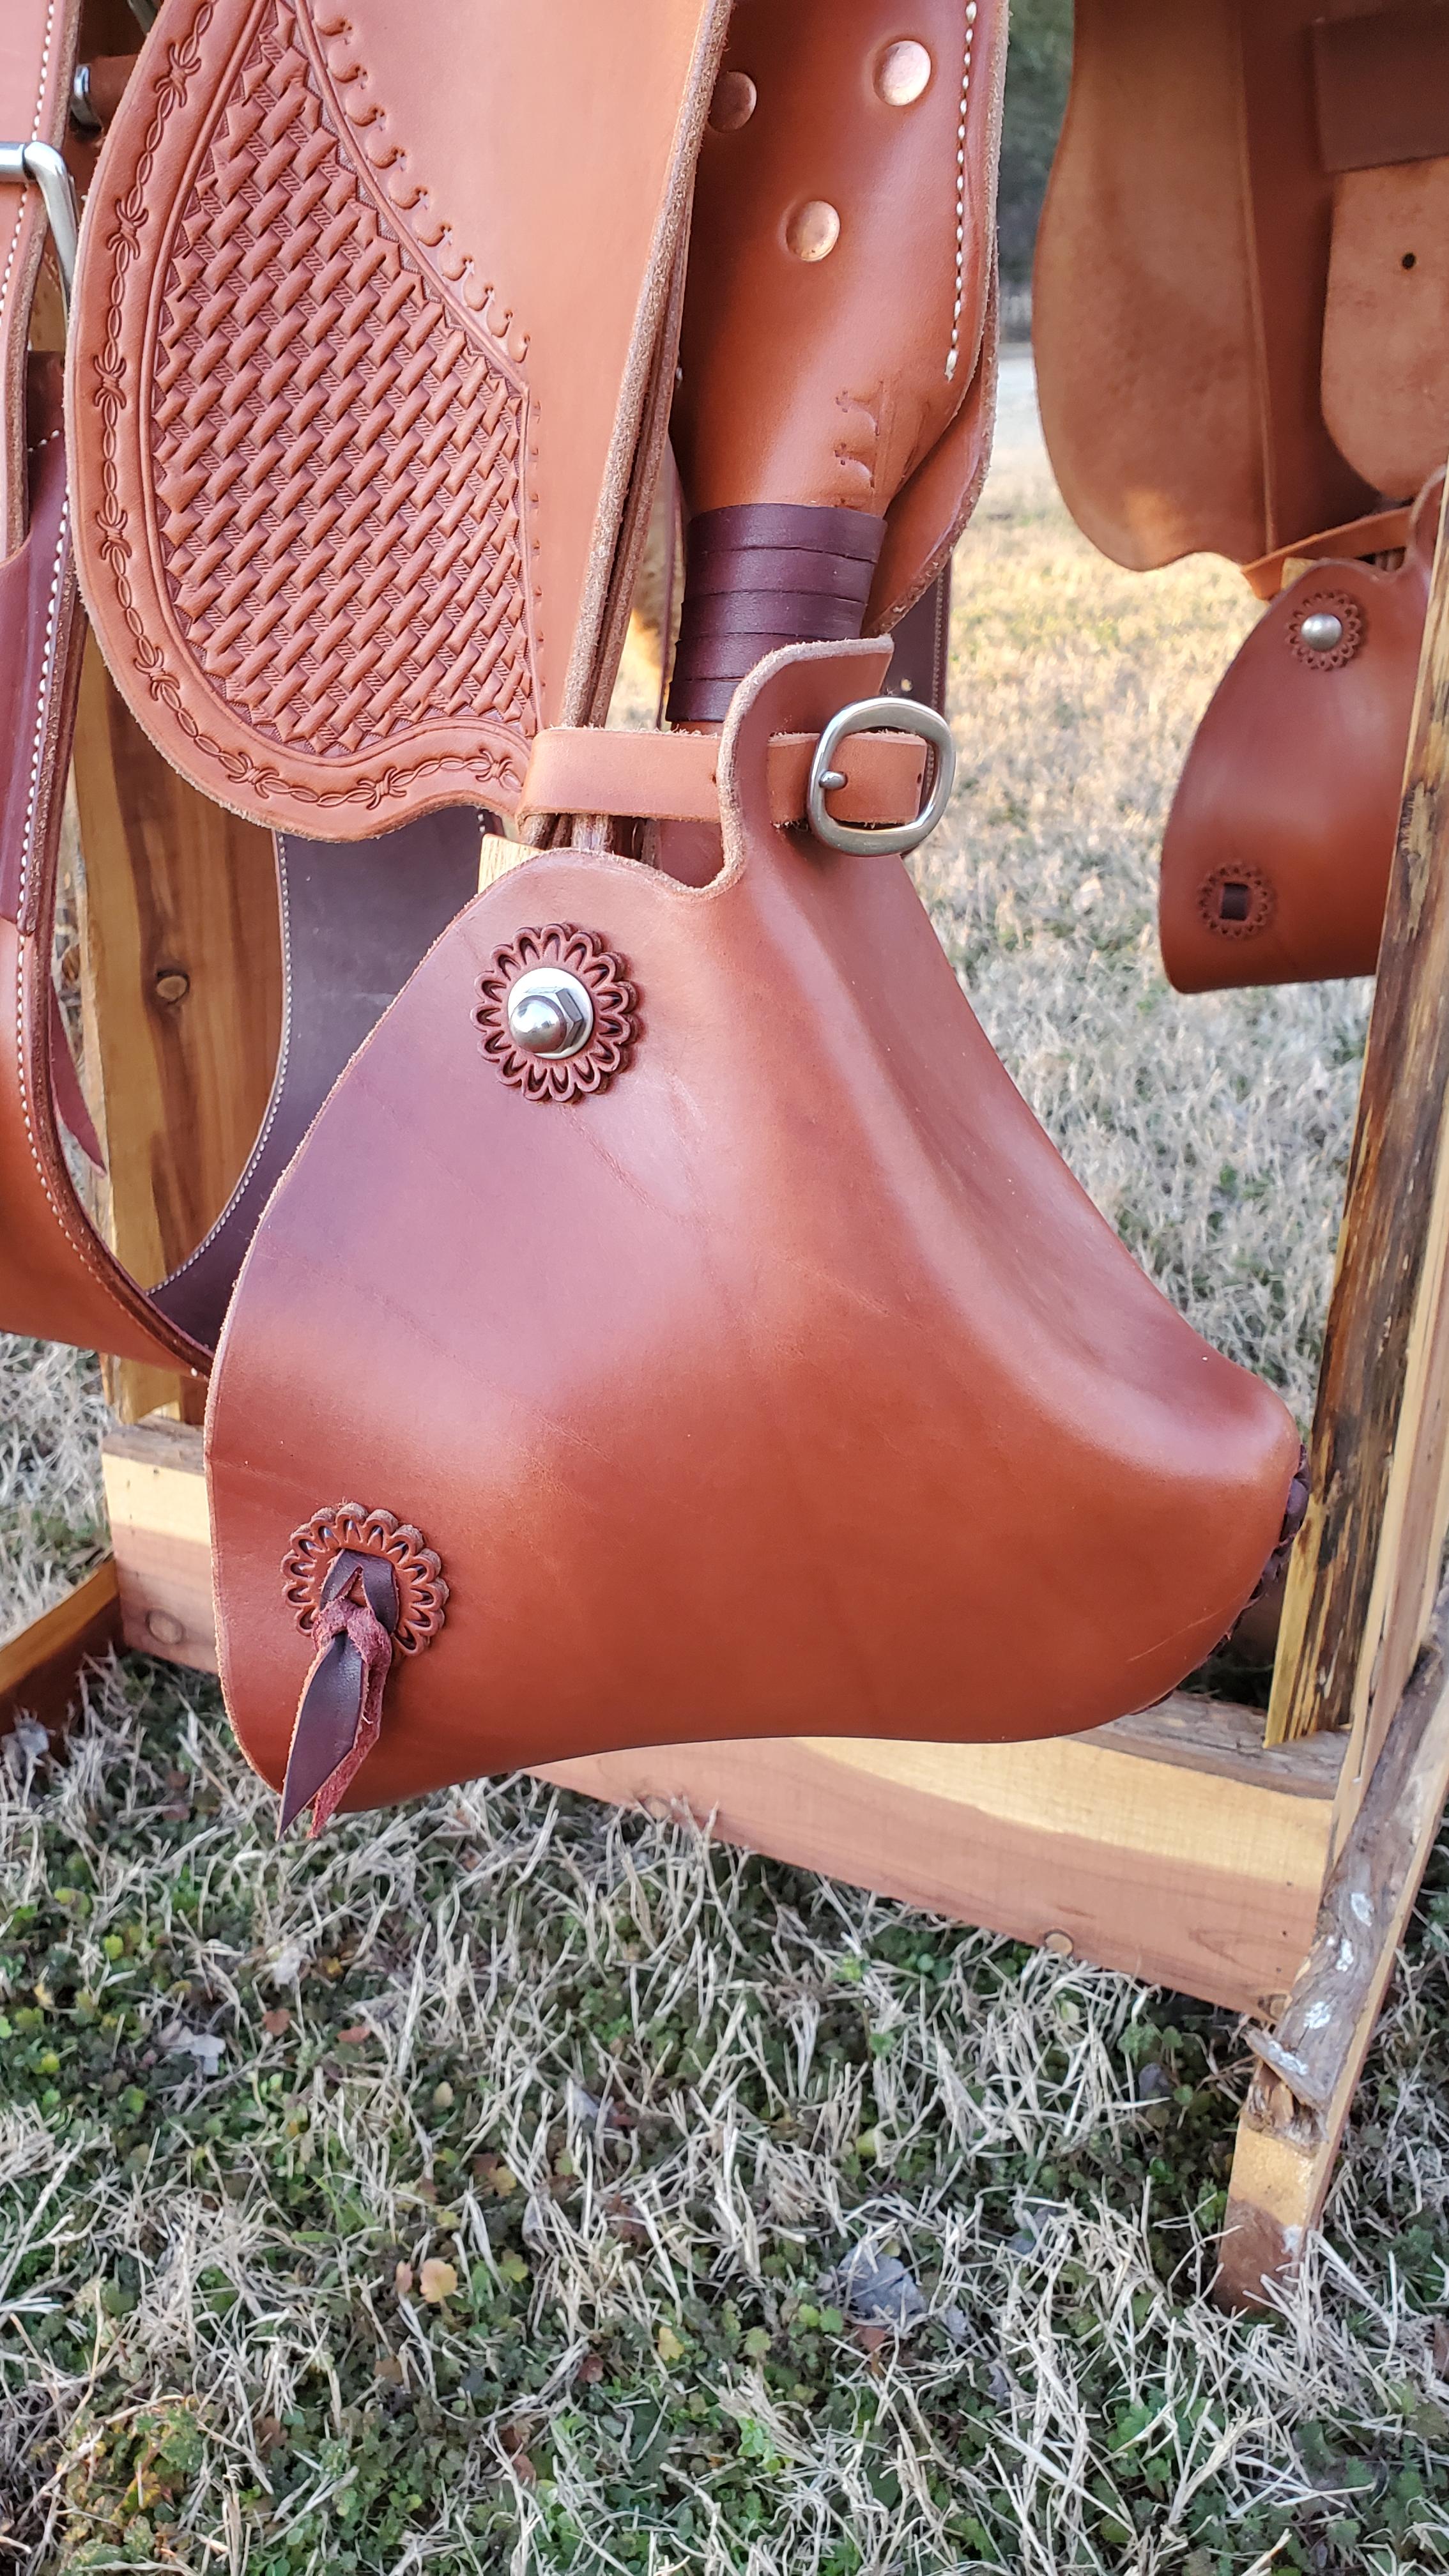
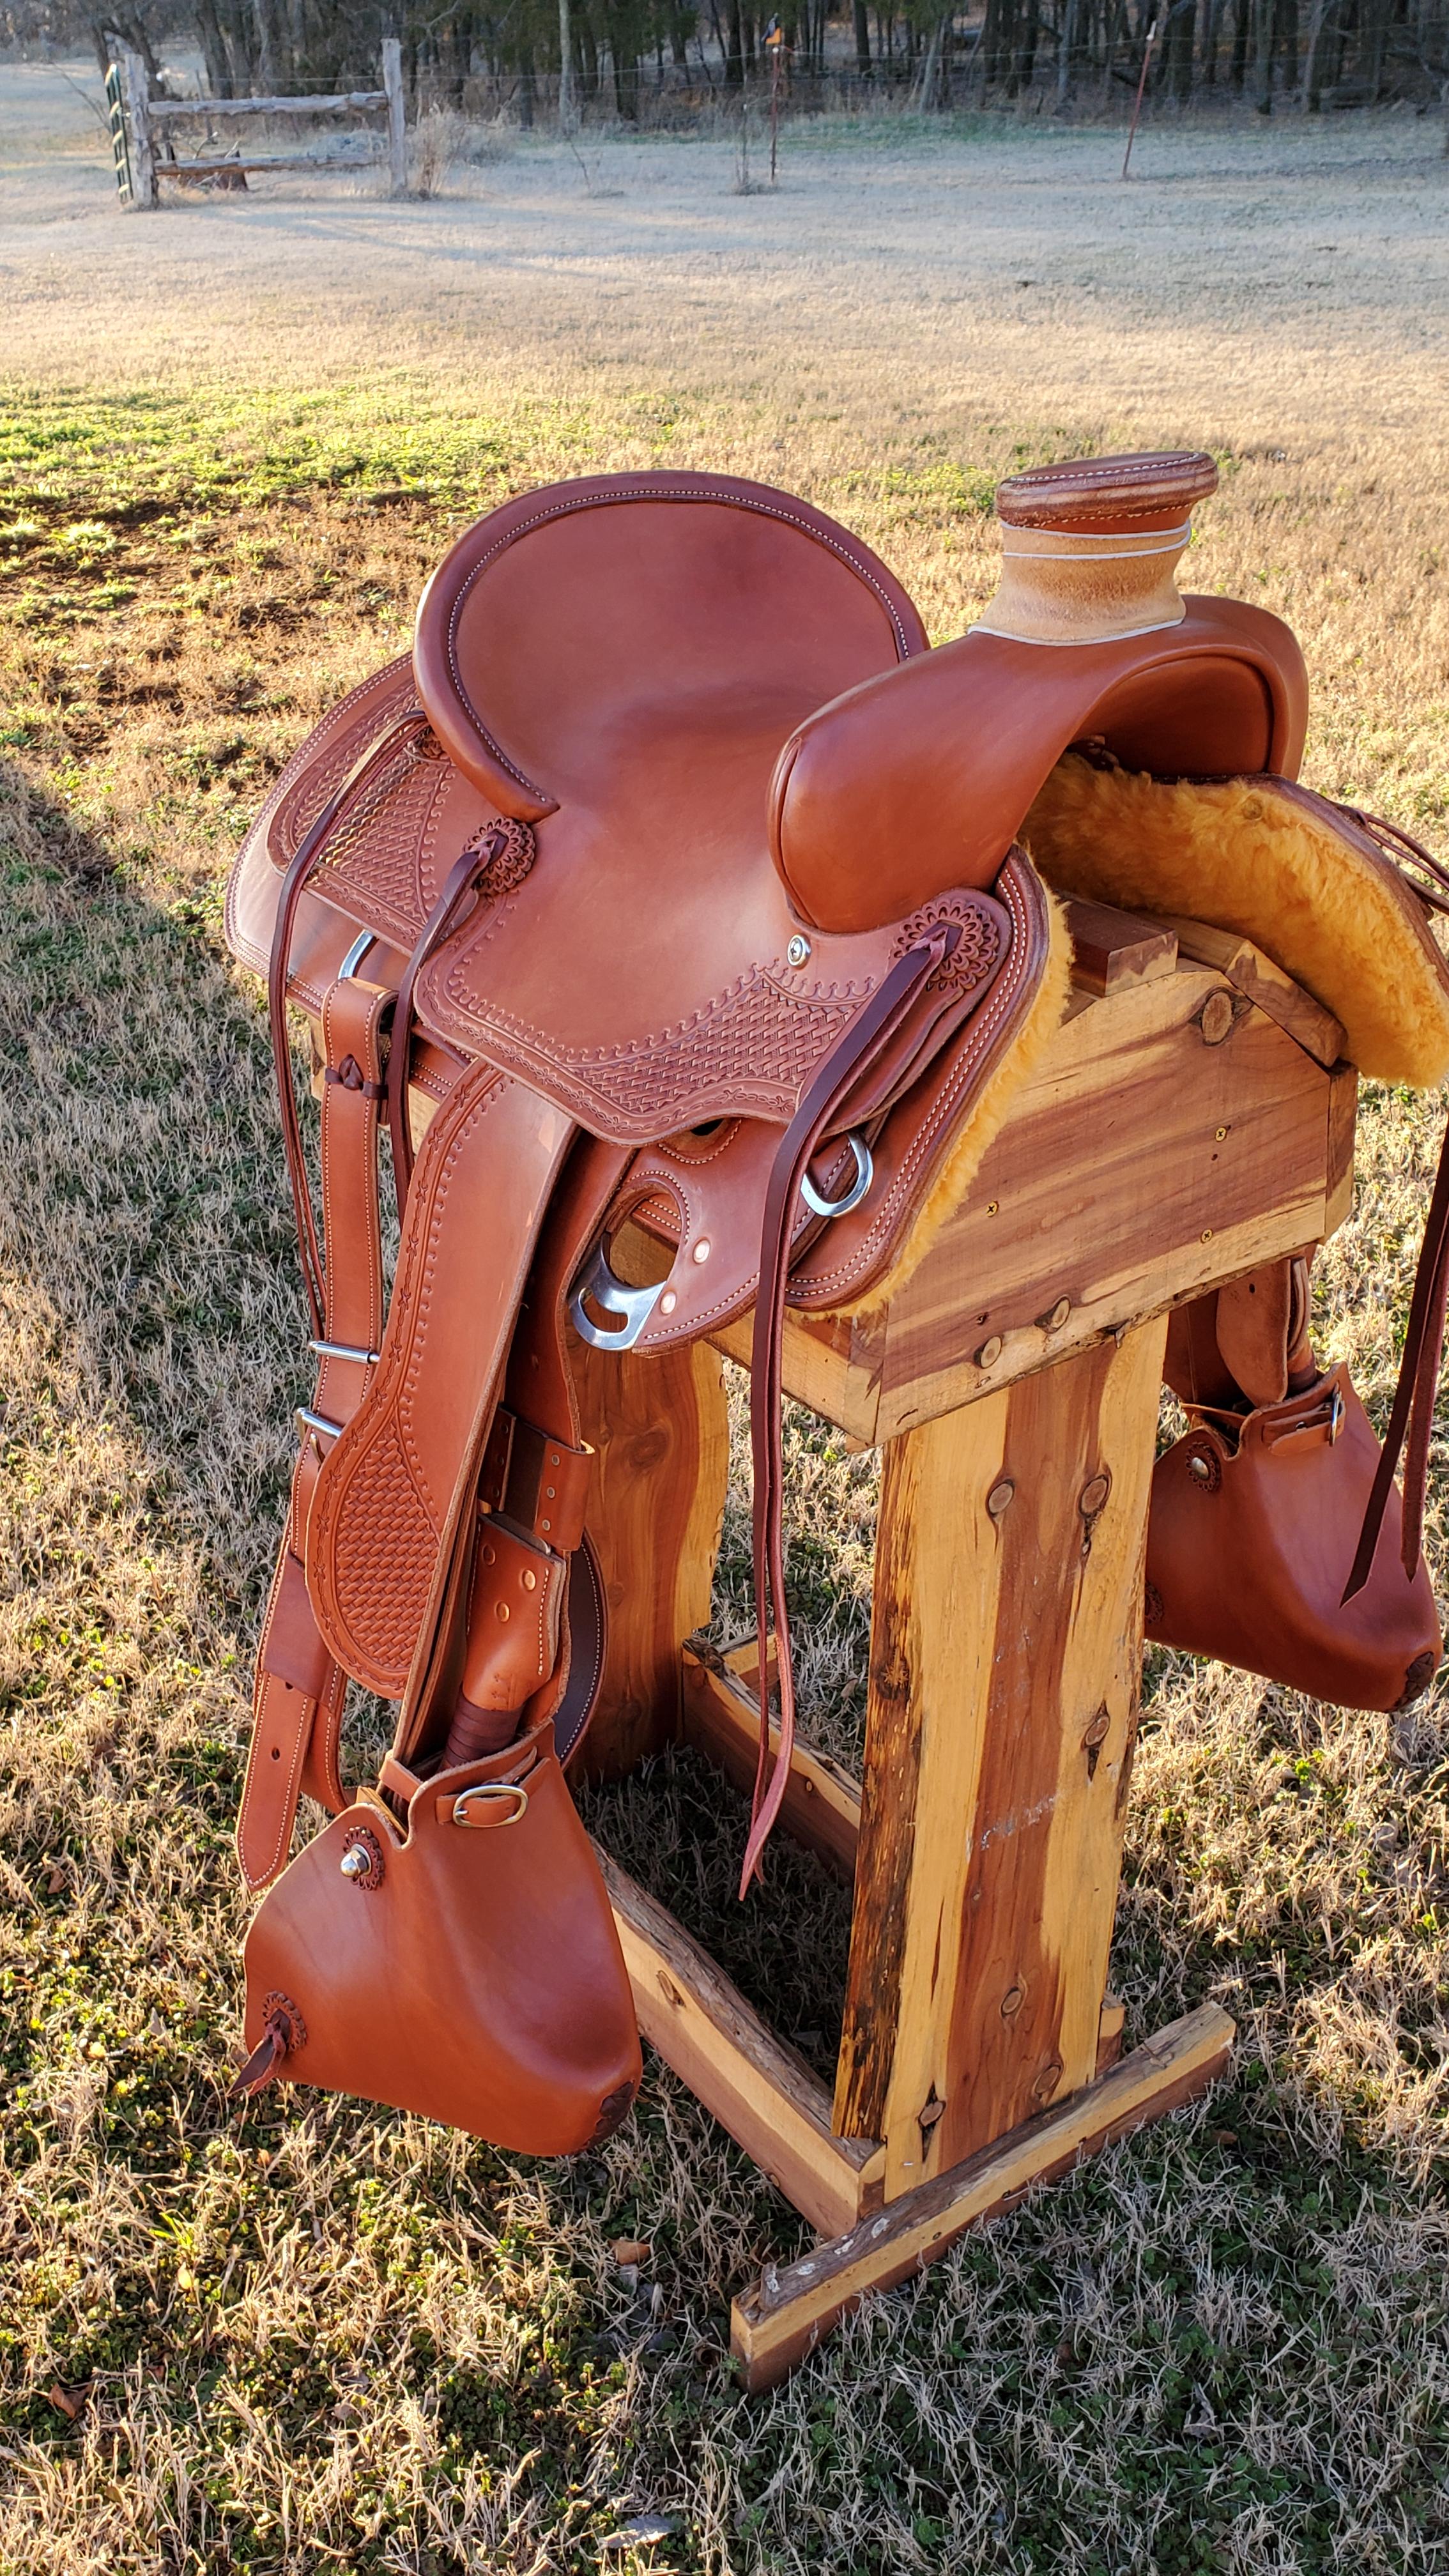
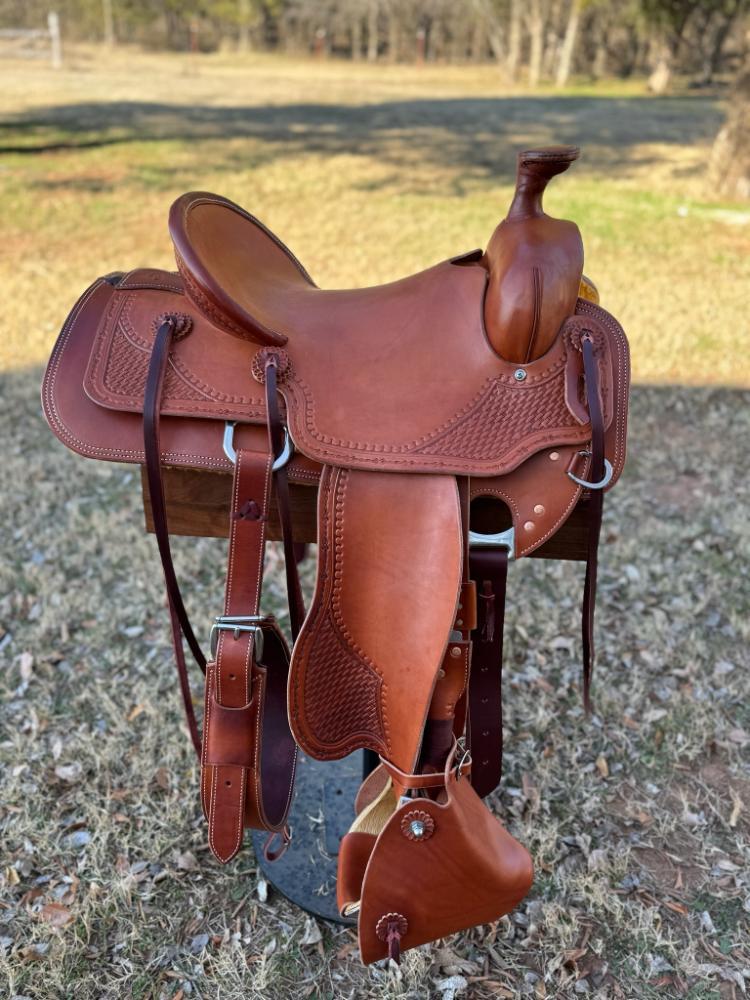
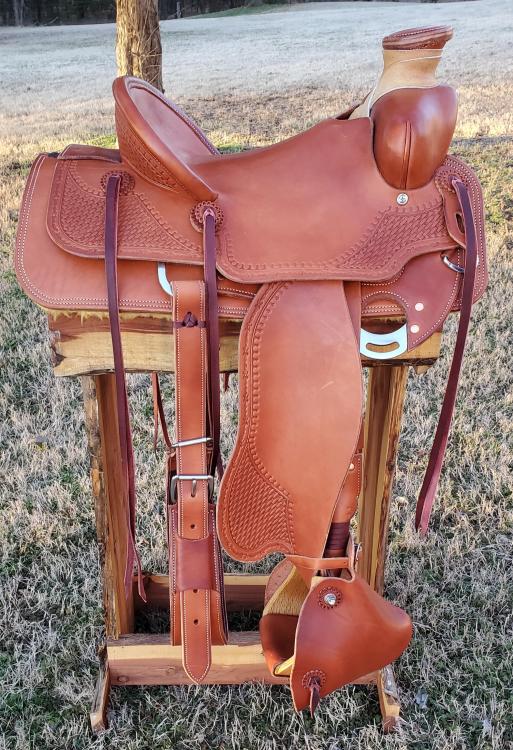
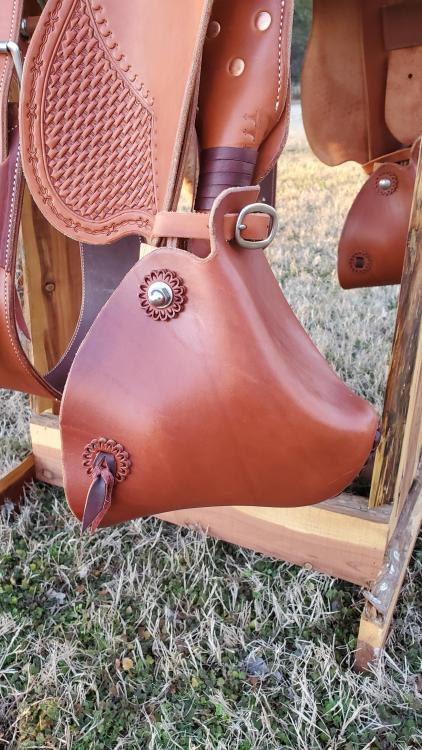
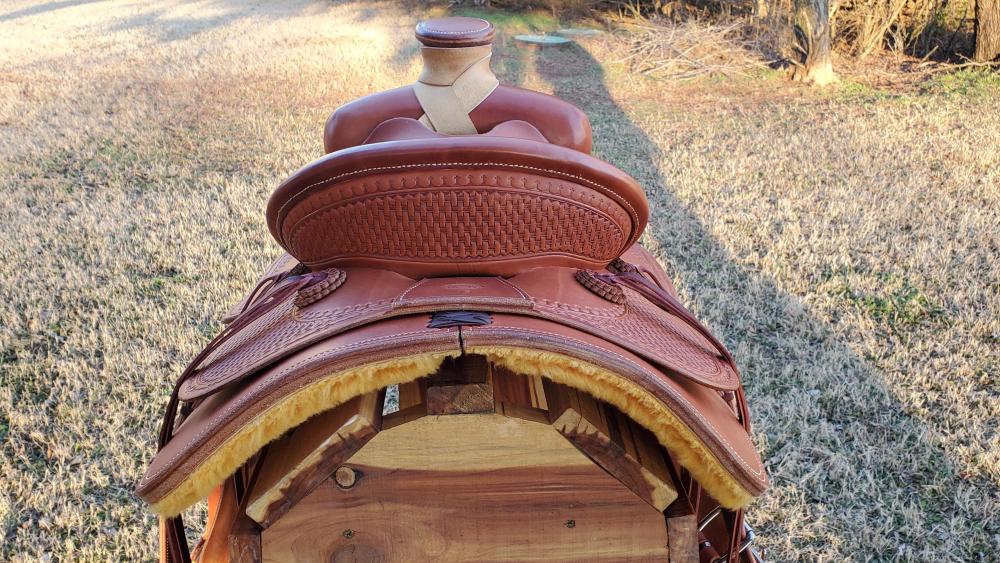
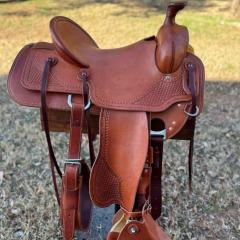
I just finished this saddle. Double L tree, Will James. Chestnut HO leather. The tapaderos (my first set) are from Bob Klenda's pattern in Leather Crafter's Journal. Randy

-
@bruce johnson, what grit do you have in the file? It looks like it's 1/4" diameter. Thanks, Randy
-
Thanks Bruce. I appreciate the advice. Randy
-
Does anyone have instructions for sharpening rosette cutters? I have two punches from Weaver that are woefully dull. Thanks, Randy
-
I have this stamp and been there, done that. I echo Bruce's comments on antiquing. I'll share a photo if I can find one. Randy
-
Thanks. I'll try that. Randy
-
That's true, but I don't have easy access to a laser engraver. I'll do my best carving it and see if it works out. Randy
-
Thanks. It's supposed to go on the back of a saddle and carving is the only option I have. Randy
-
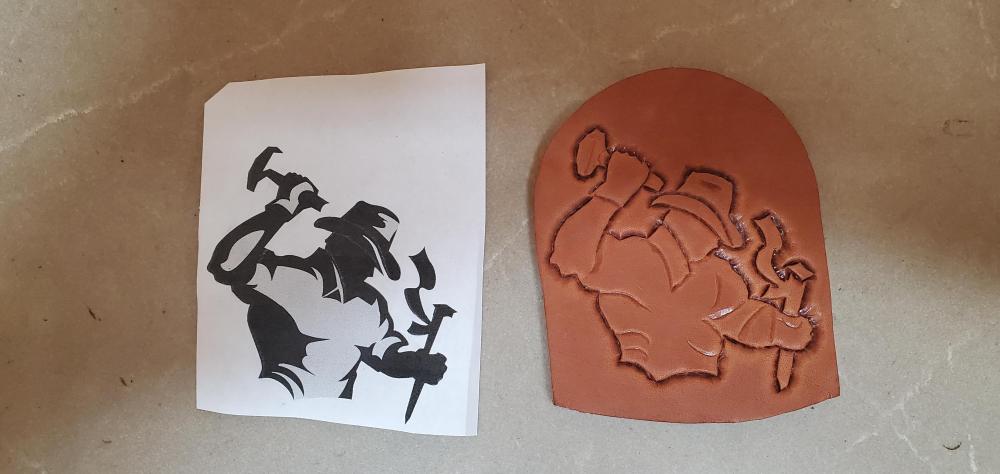
I've been tasked with carving this logo. This is my first attempt. Any tips are appreciated. Thanks, Randy
-
While I'm far from a swivel knife expert, I would use my 1/4" angled blade on something like that. Randy
-
I really like those oak leaves. Well done. Randy
-
First Formed Holster
rktaylor replied to rktaylor's topic in Gun Holsters, Rifle Slings and Knife Sheathes
I appreciate the new comments. I don't make many holsters, so it seems like every one is the first one. Randy -
That's a really nice pistol and the holster is classy. At the risk of being 'that guy' I would offer that matching the pattern on the pistol with simple swivel knife cuts on the holster would be really cool. You have it for a month ... Just saying Randy
-
Those look really classy. Did you make your own pattern or purchase one? Thanks, Randy
-
Pure craftsmanship. Thanks for sharing. Randy
-
Jerk Steiner Saddle
rktaylor replied to rktaylor's topic in Saddle Identification, Restoration & Repair
Thanks for finding that. I suppose I was using the wrong (or not enough) search terms. Sounds like he was an interesting guy. Randy -
Jerk Steiner Saddle
rktaylor replied to rktaylor's topic in Saddle Identification, Restoration & Repair
Thanks for the observations and tip. It's mostly curiosity for me, so I was taking the easy way out by asking and not searching. Randy -
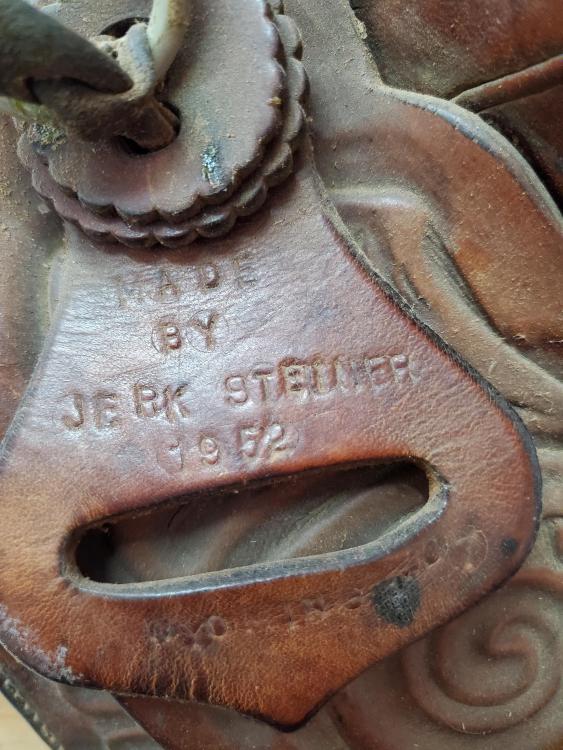
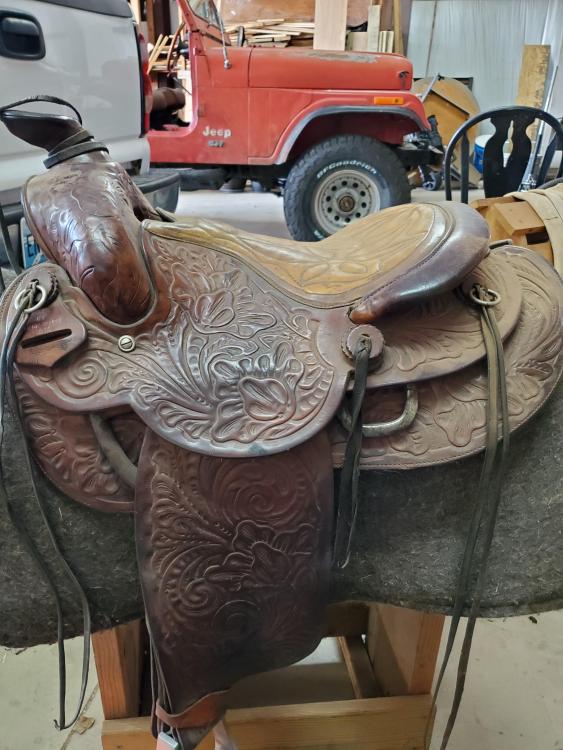
Curious if anyone knows anything about this saddle or maker. The latigo holder says MADE BY JERK STEINER 1952 WYOMING. The seat is harder than a math test, but otherwise the saddle is well made. Thanks, Randy