rktaylor
-
Posts
500 -
Joined
-
Last visited
Content Type
Profiles
Forums
Events
Blogs
Gallery
Store
Everything posted by rktaylor
-
Just found out they went out of business. Randy
-
I just called Quality Mfg. (435-587-5070) and got a "number no longer in service" message. Are they still in business? Do they have a new number? Thanks, Randy
-
Thanks all. The stirrups will be delivered later. Randy
-
Thanks for all the compliments. Regan, I hope your staying warm up north. I need to make the trip to Sheridan, but it won't be this year. Ron, I'm getting there, just a little slow sometimes. Still a lot of room for improvement. Take care, Randy
-
Thanks for all the compliments. I under estimated the time required for tooling by quite a bit. As with most good friendships, the luckiest is a matter of perspective. Randy
-
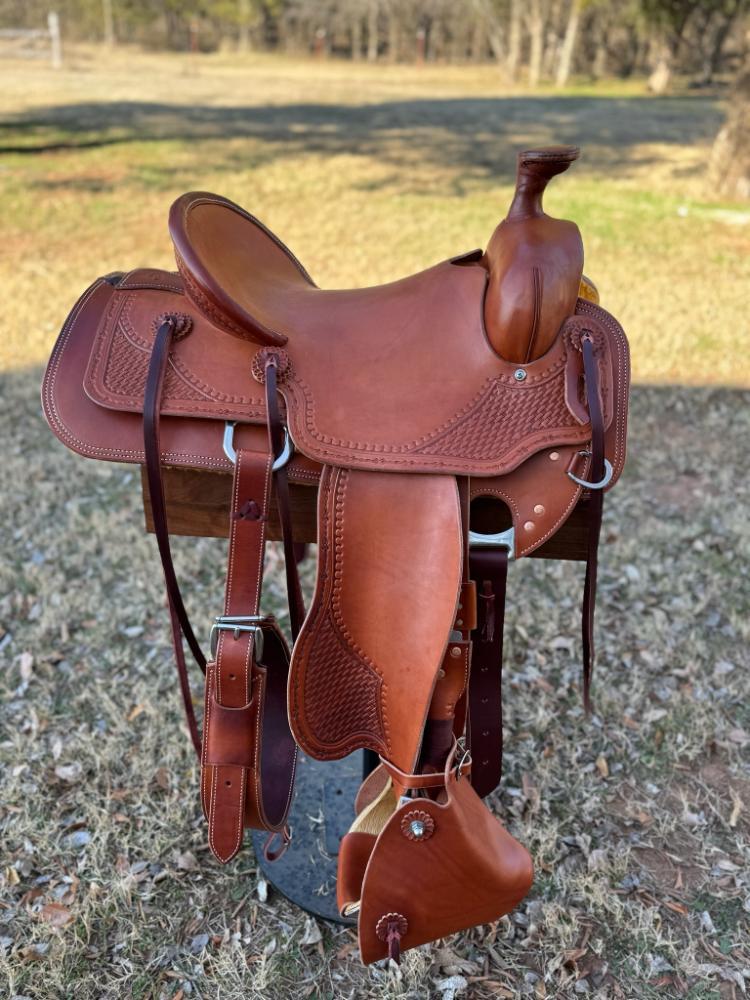
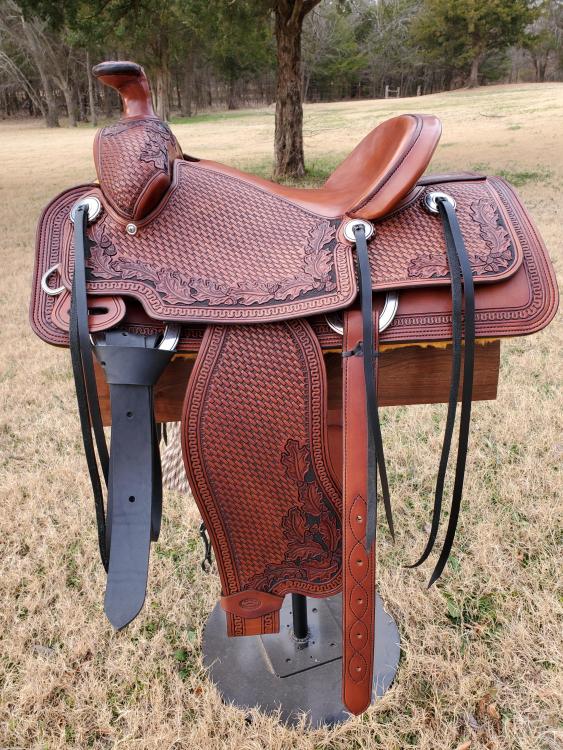
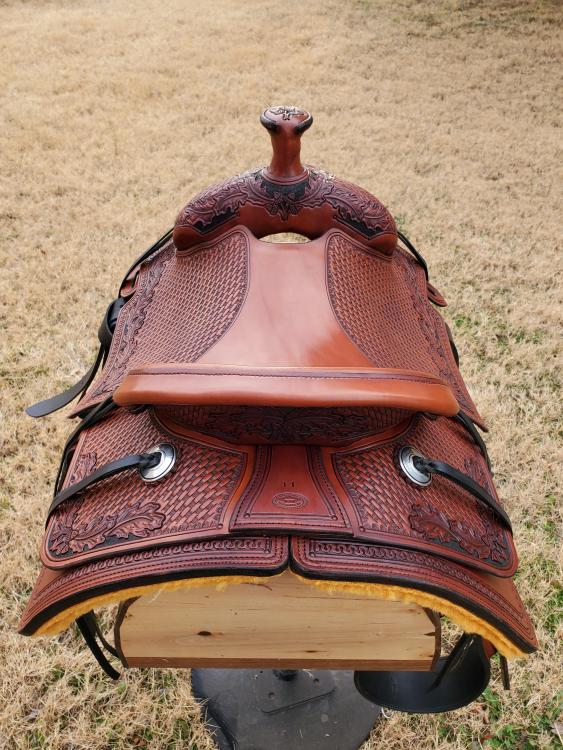
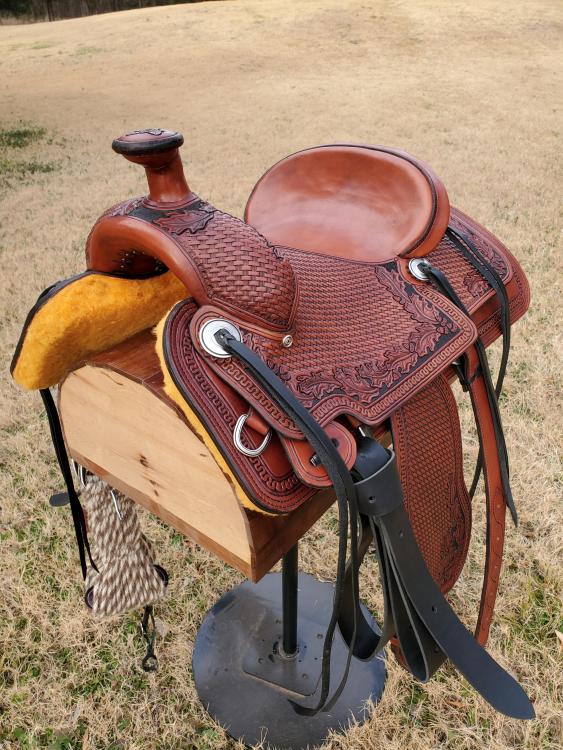
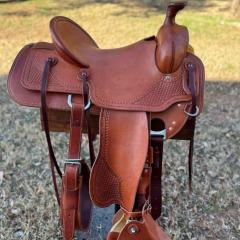
Finished this just in time. It'll be under the Christmas tree on Saturday. Timberline tree and chestnut HO leather. This is the most tooling I've ever done in a saddle, but it was for a good friend. I have so much left to learn, but I'm thankful for everyone willing to share their knowledge. Merry Christmas to all. Randy
-
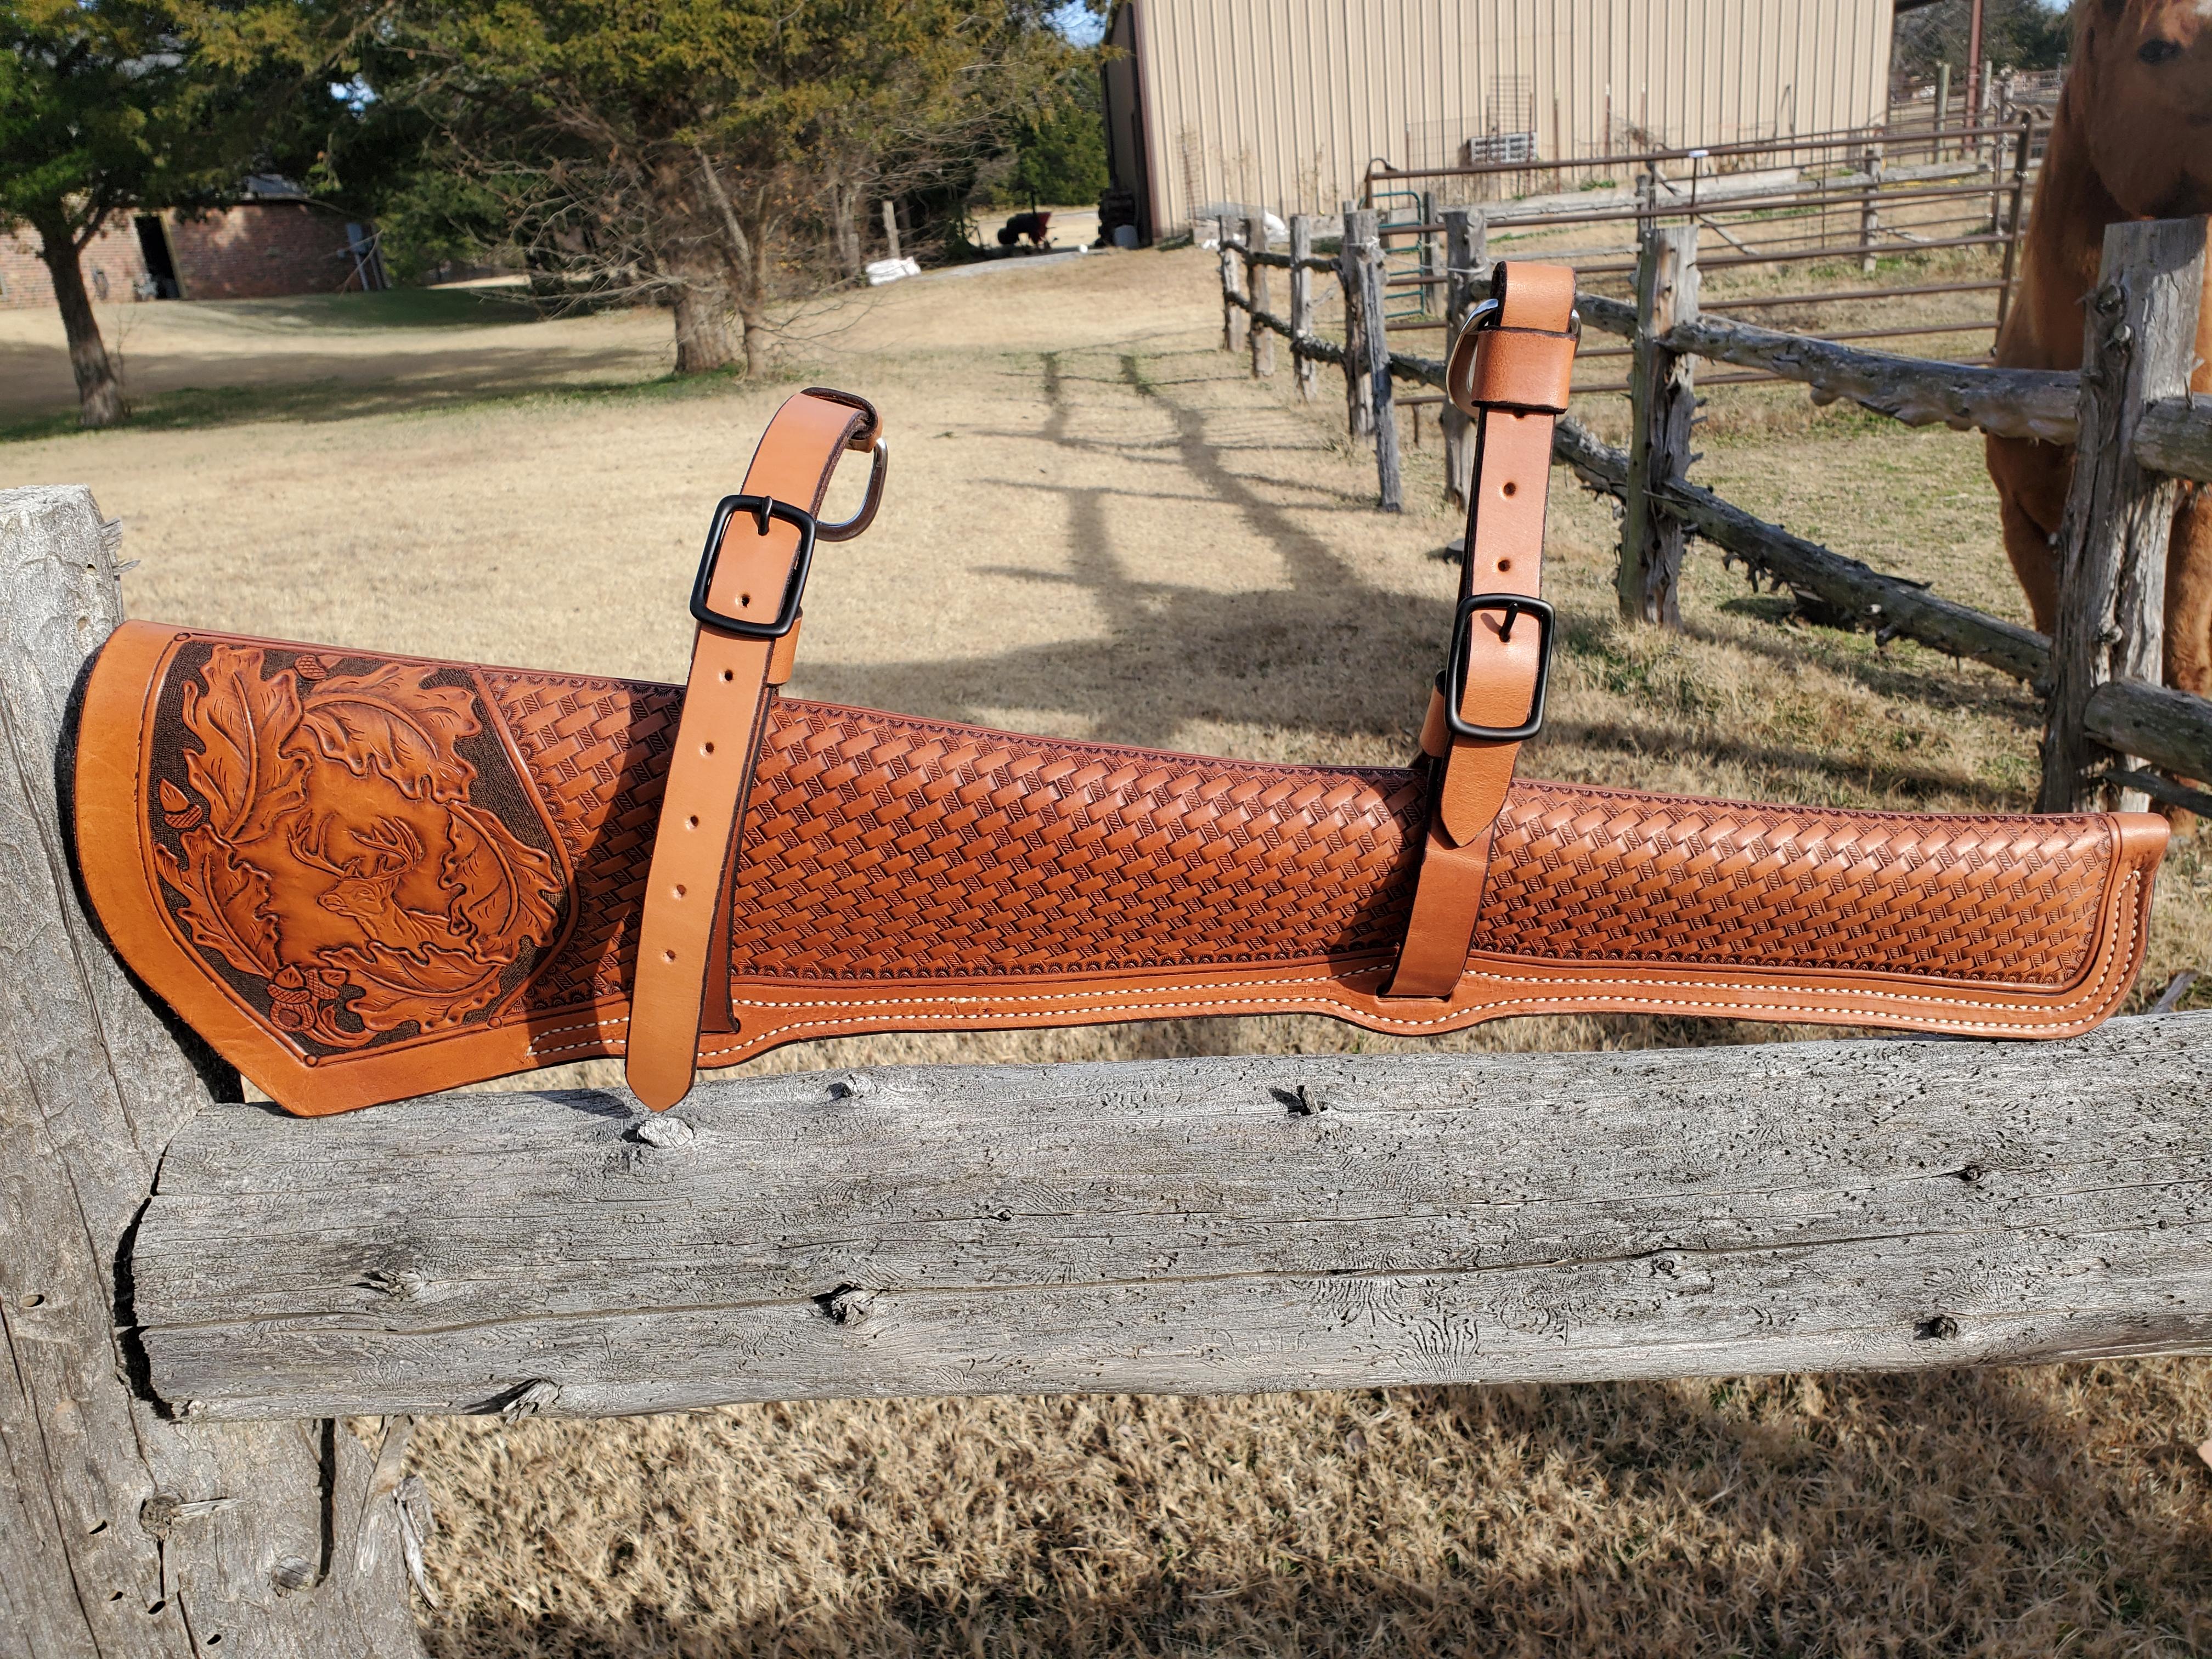
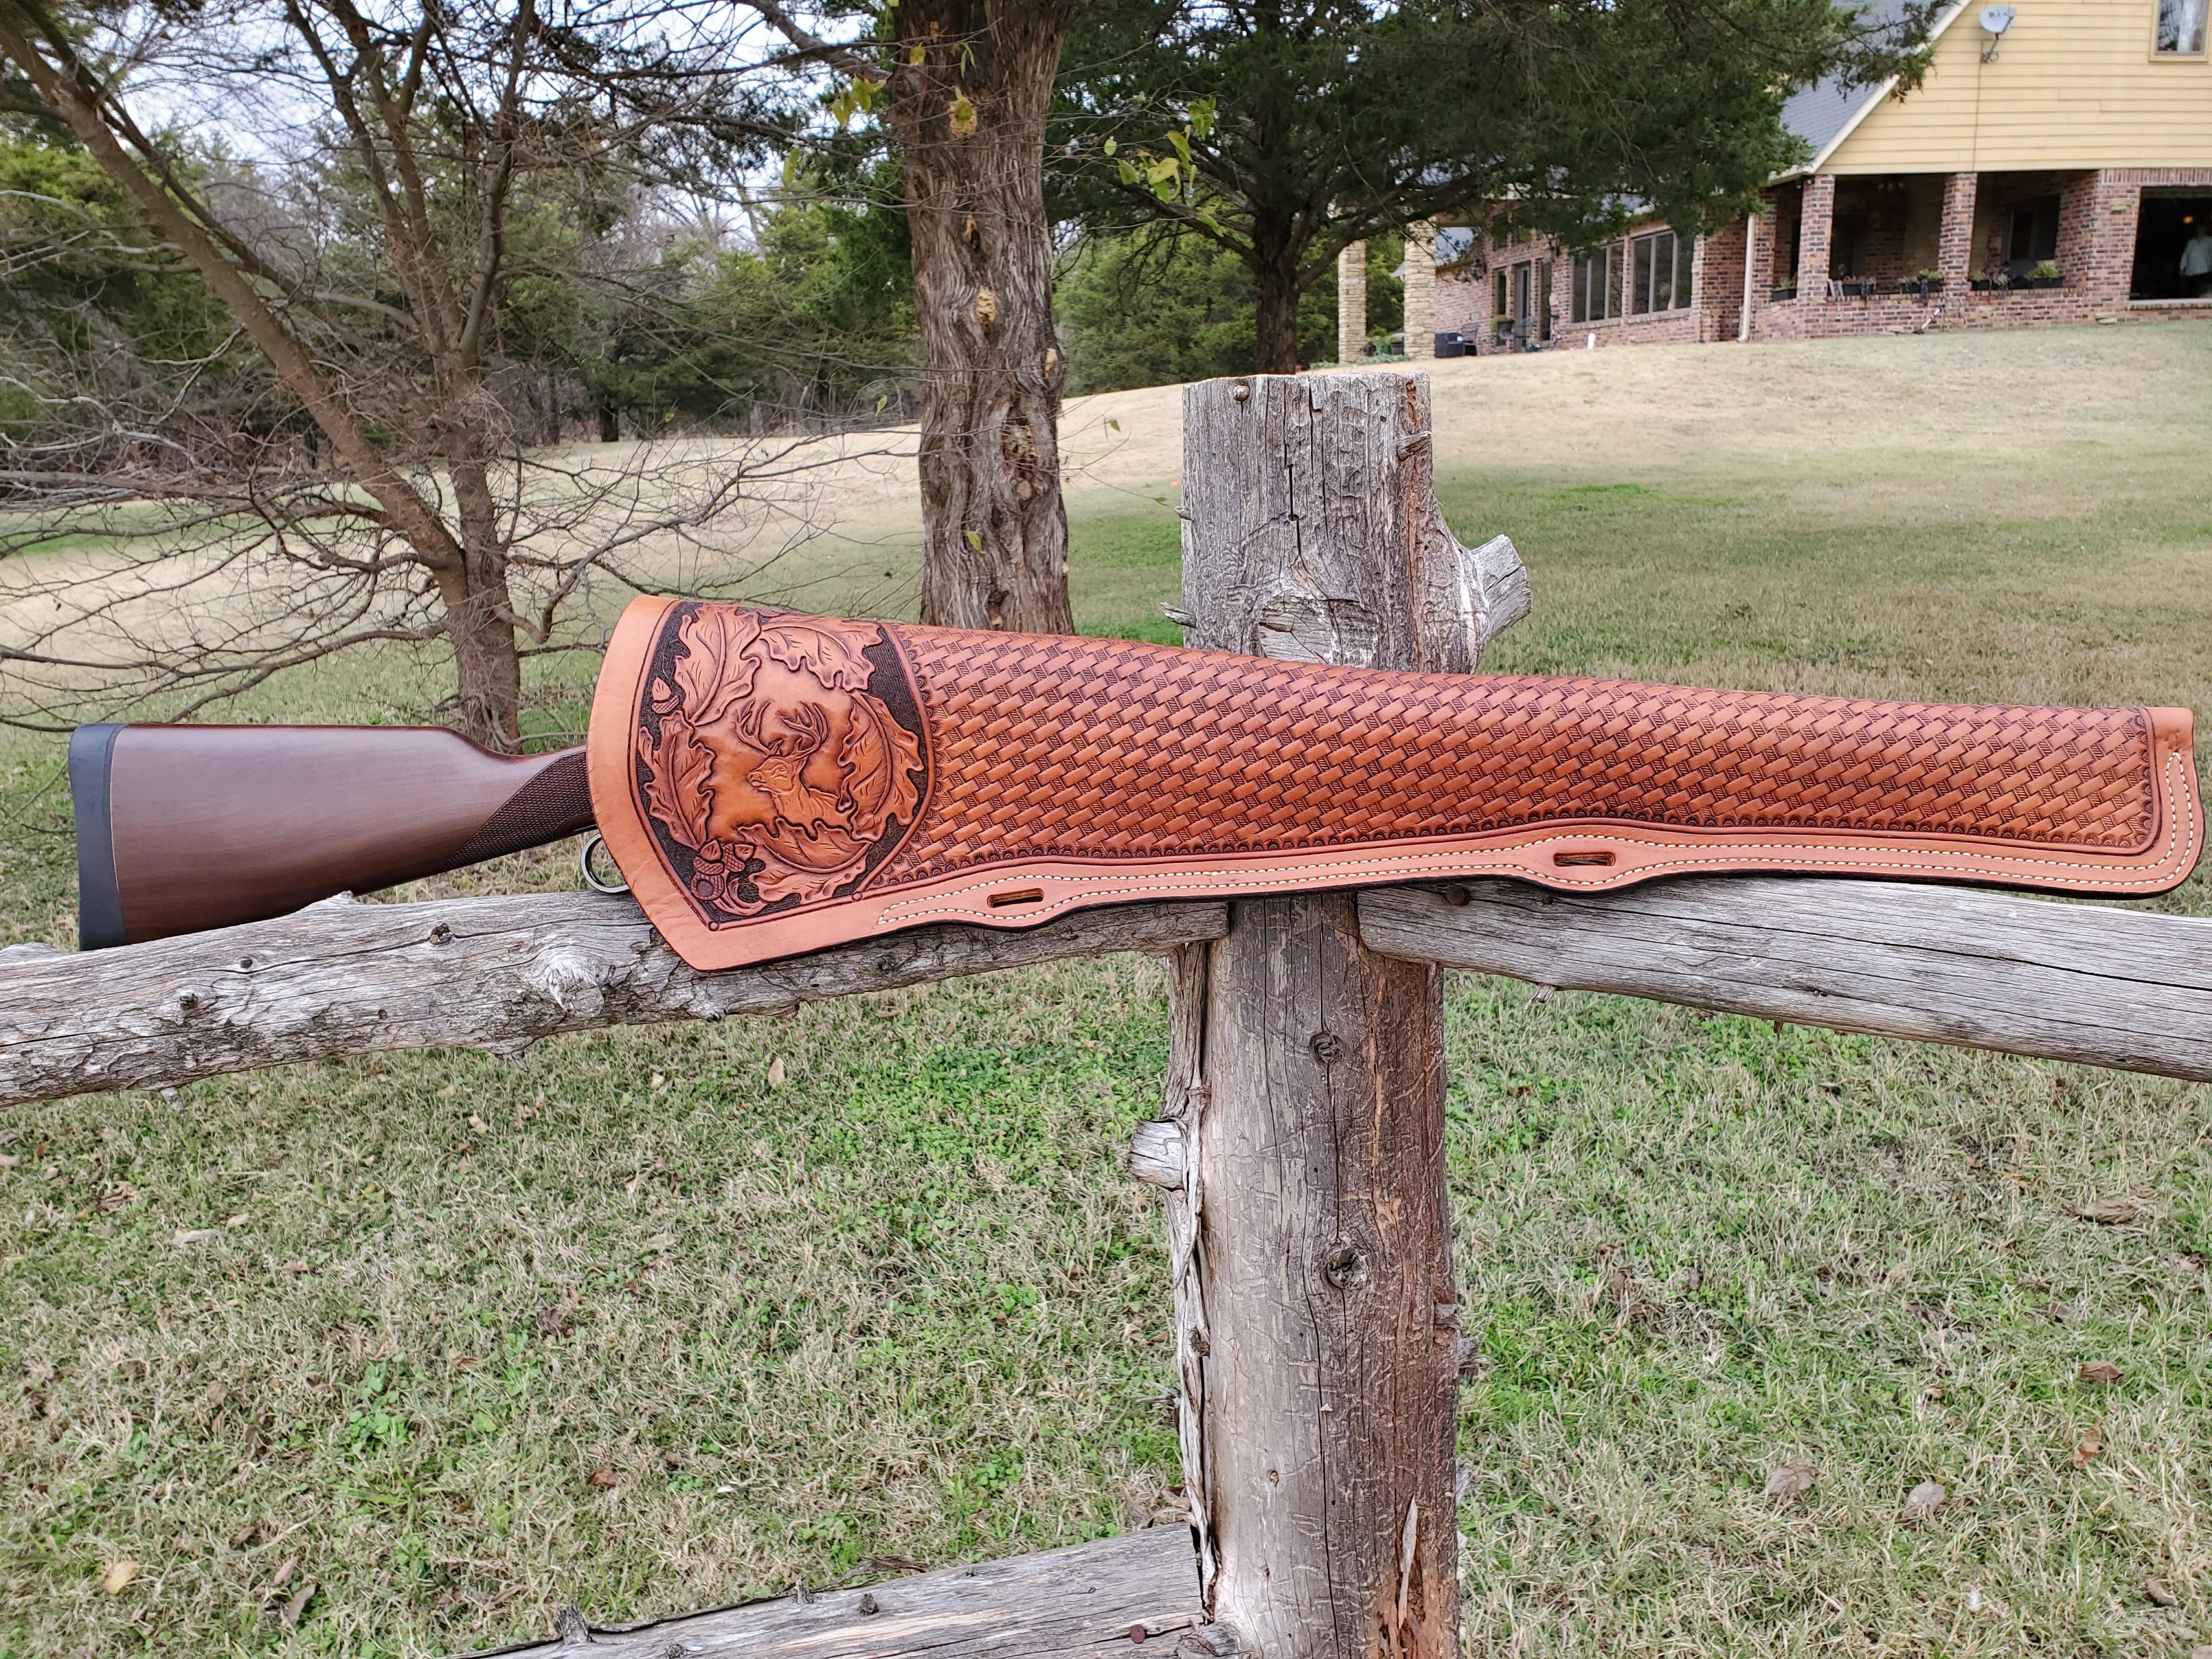
First Scabbard
rktaylor replied to rktaylor's topic in Gun Holsters, Rifle Slings and Knife Sheathes
Thanks -
Rifle Scabbard Question
rktaylor replied to JWheeler331's topic in Gun Holsters, Rifle Slings and Knife Sheathes
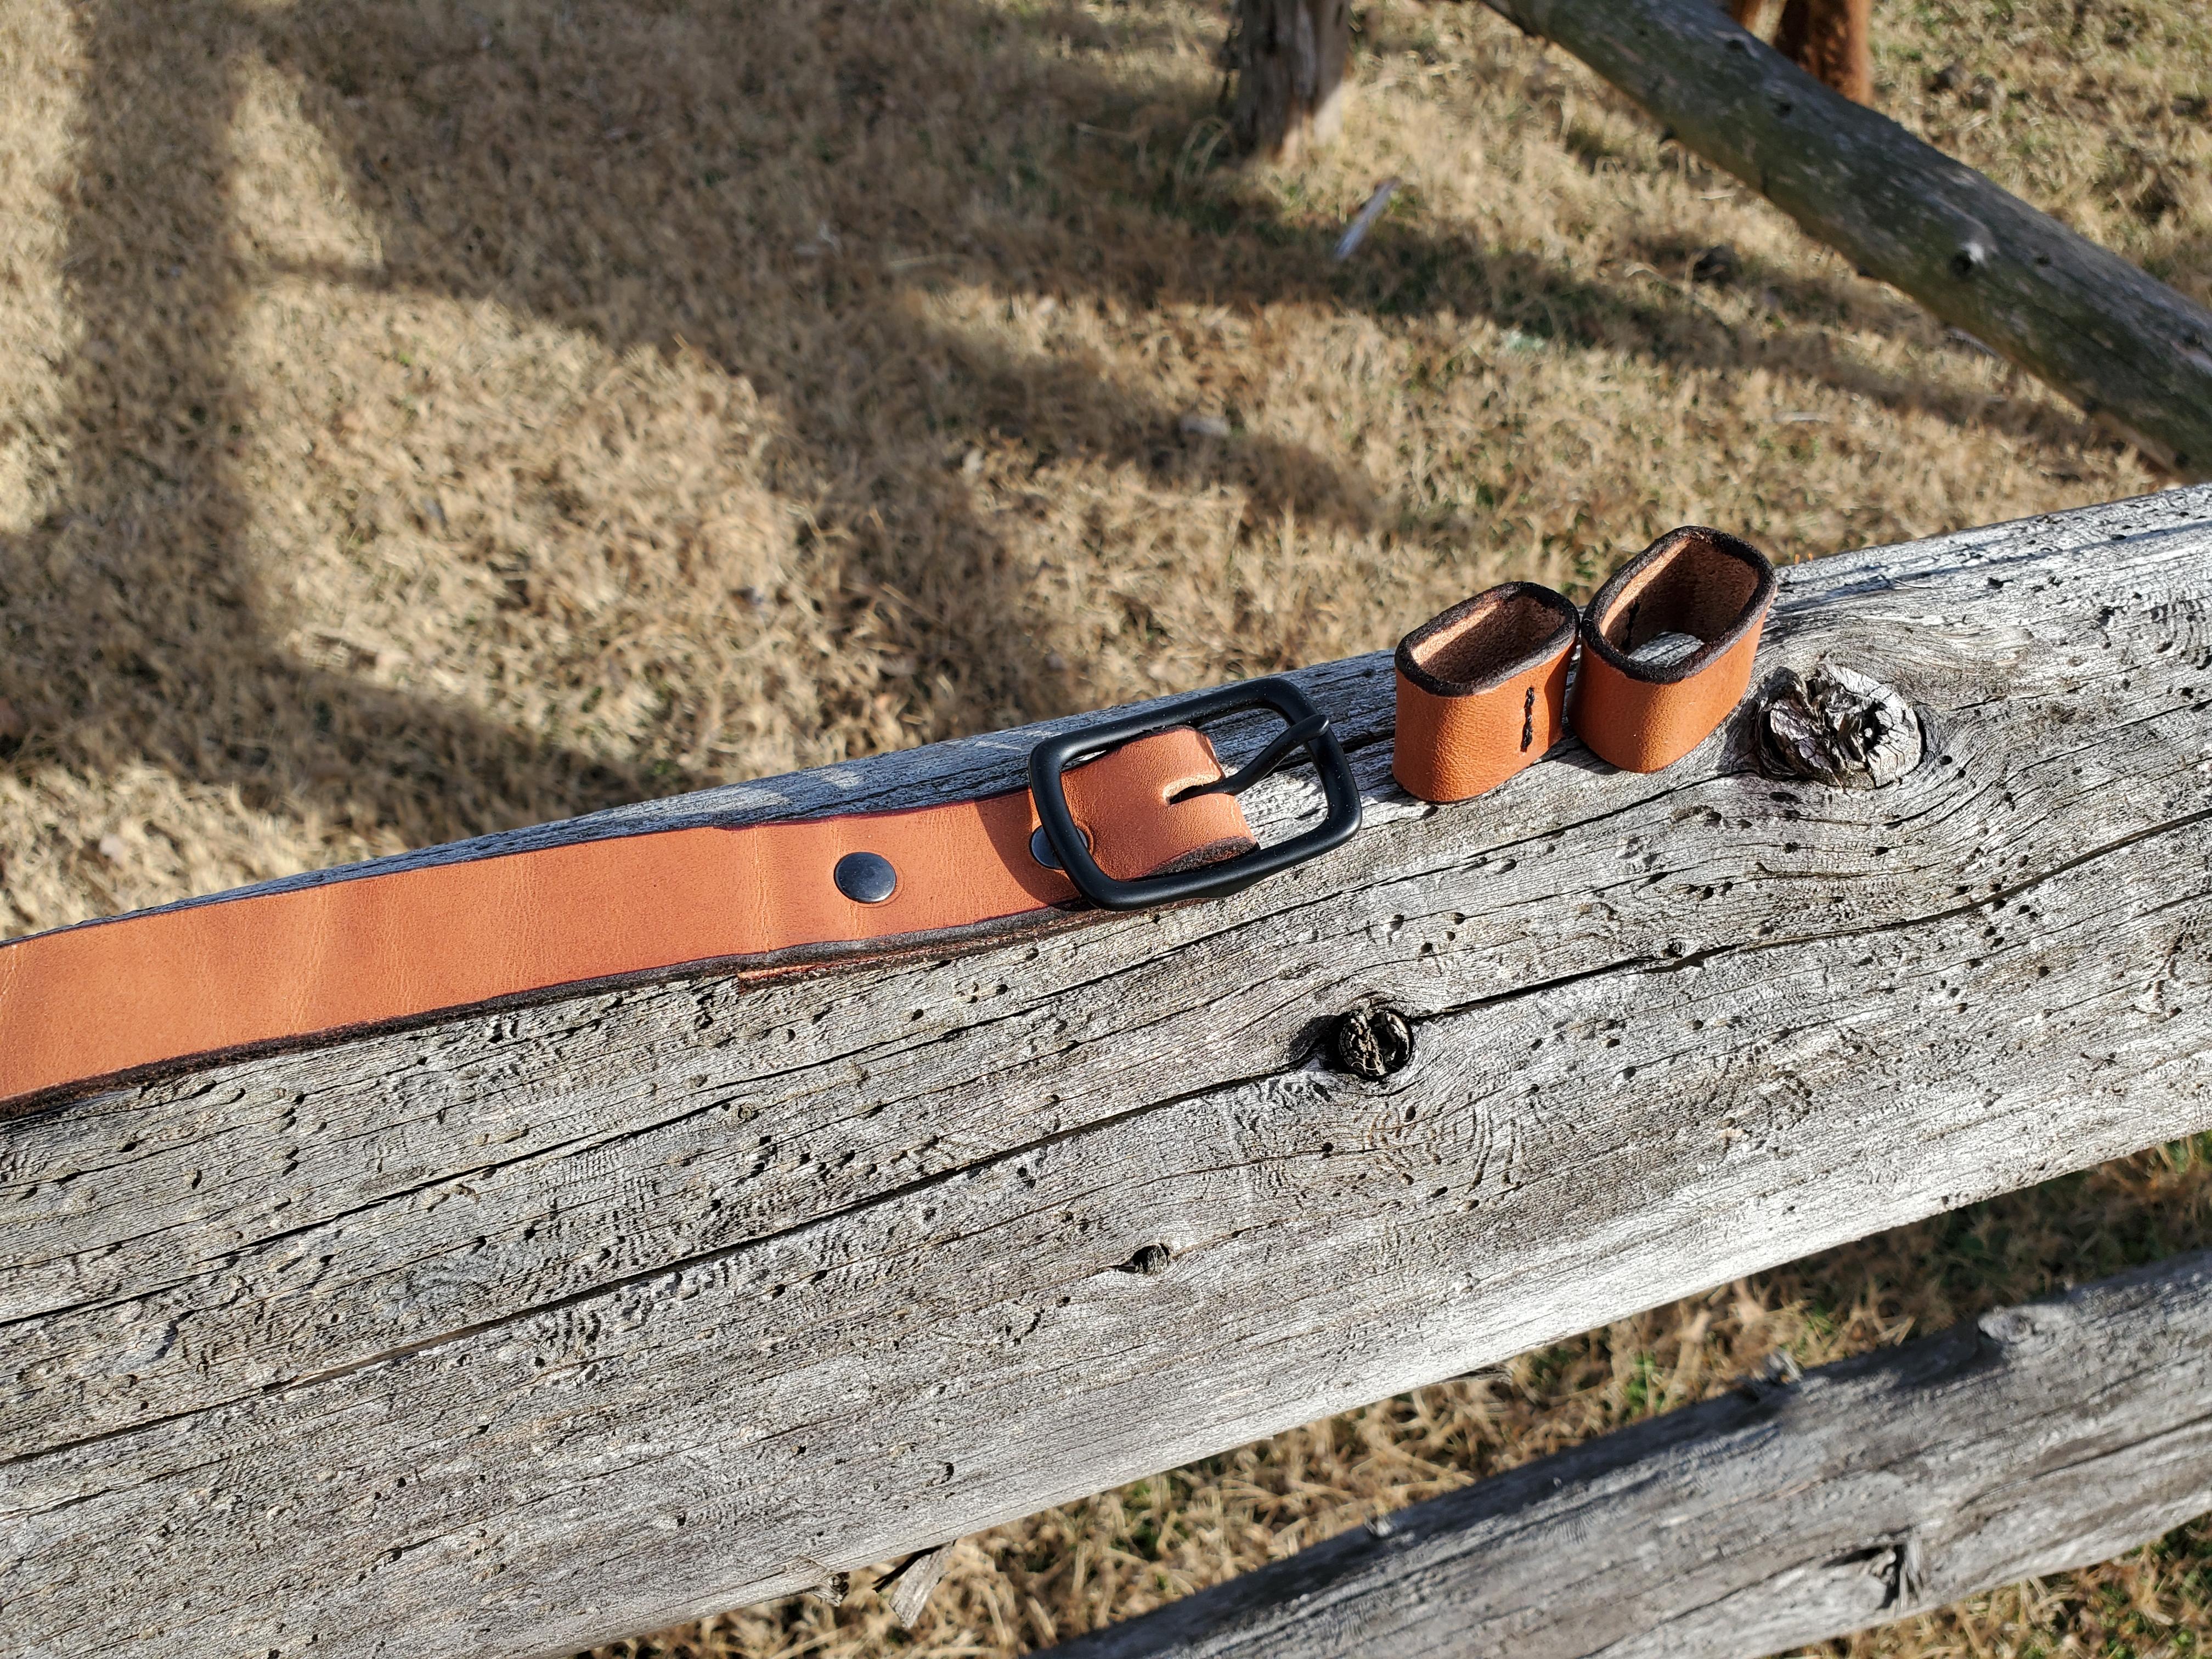
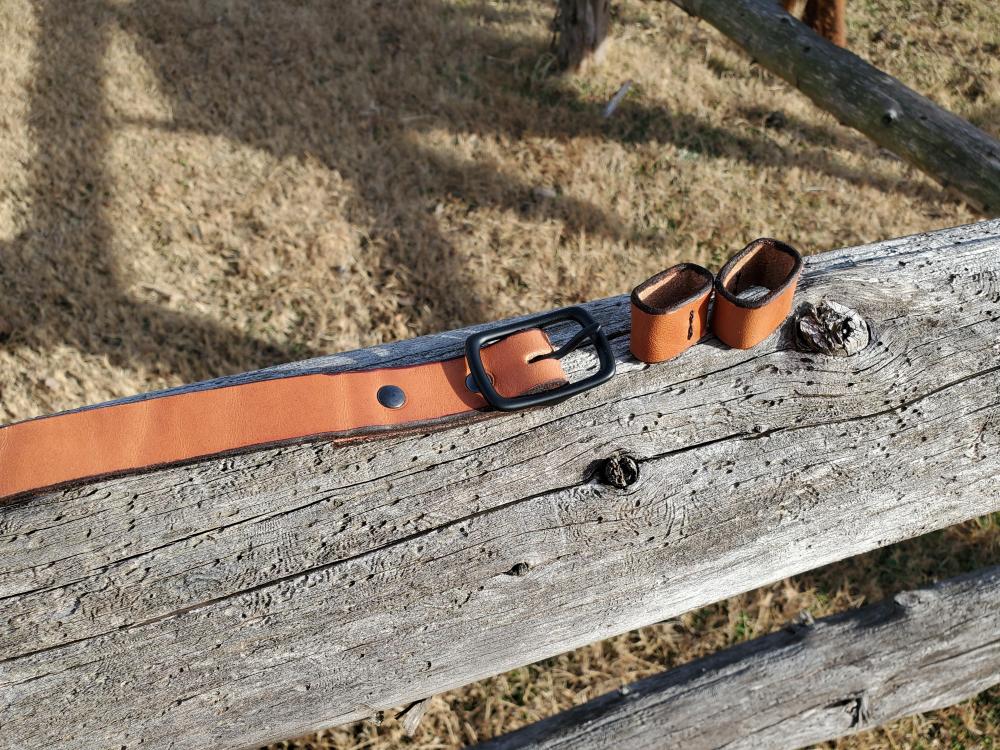
Here's the straps I made. It's pretty straightforward. There's probably other methods. Randy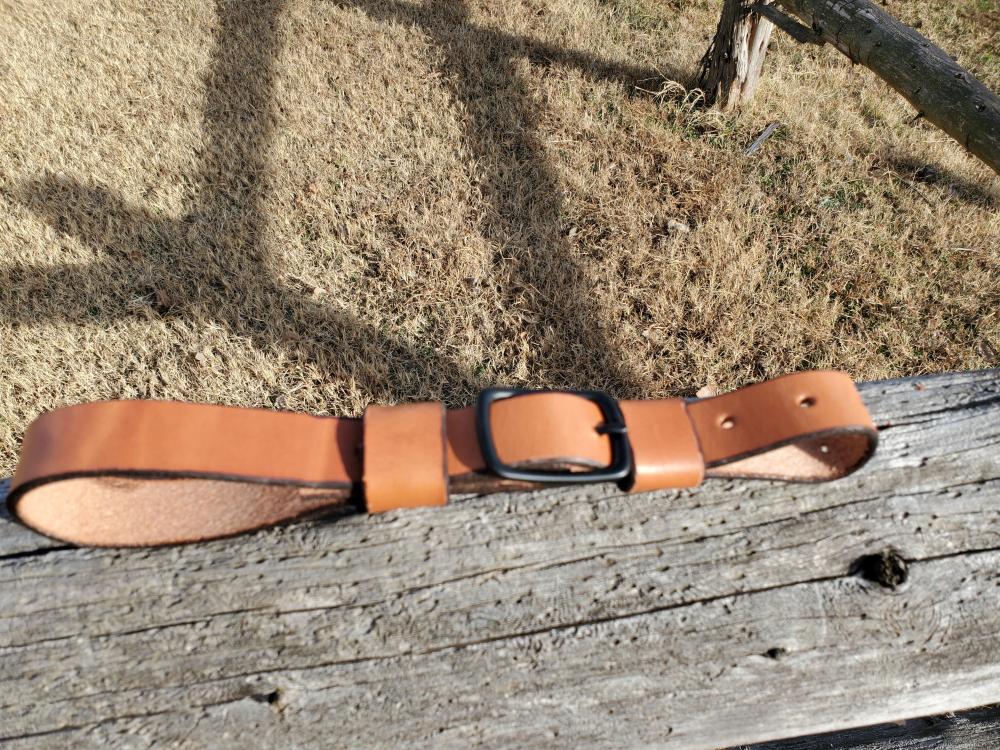

-
First Scabbard
rktaylor replied to rktaylor's topic in Gun Holsters, Rifle Slings and Knife Sheathes
Thanks Ron, The BW is a Barry King and the border is a Hackbarth Gomph. I need to quit pampering myself with items and get to work on this saddle. Randy -
First Scabbard
rktaylor replied to rktaylor's topic in Gun Holsters, Rifle Slings and Knife Sheathes
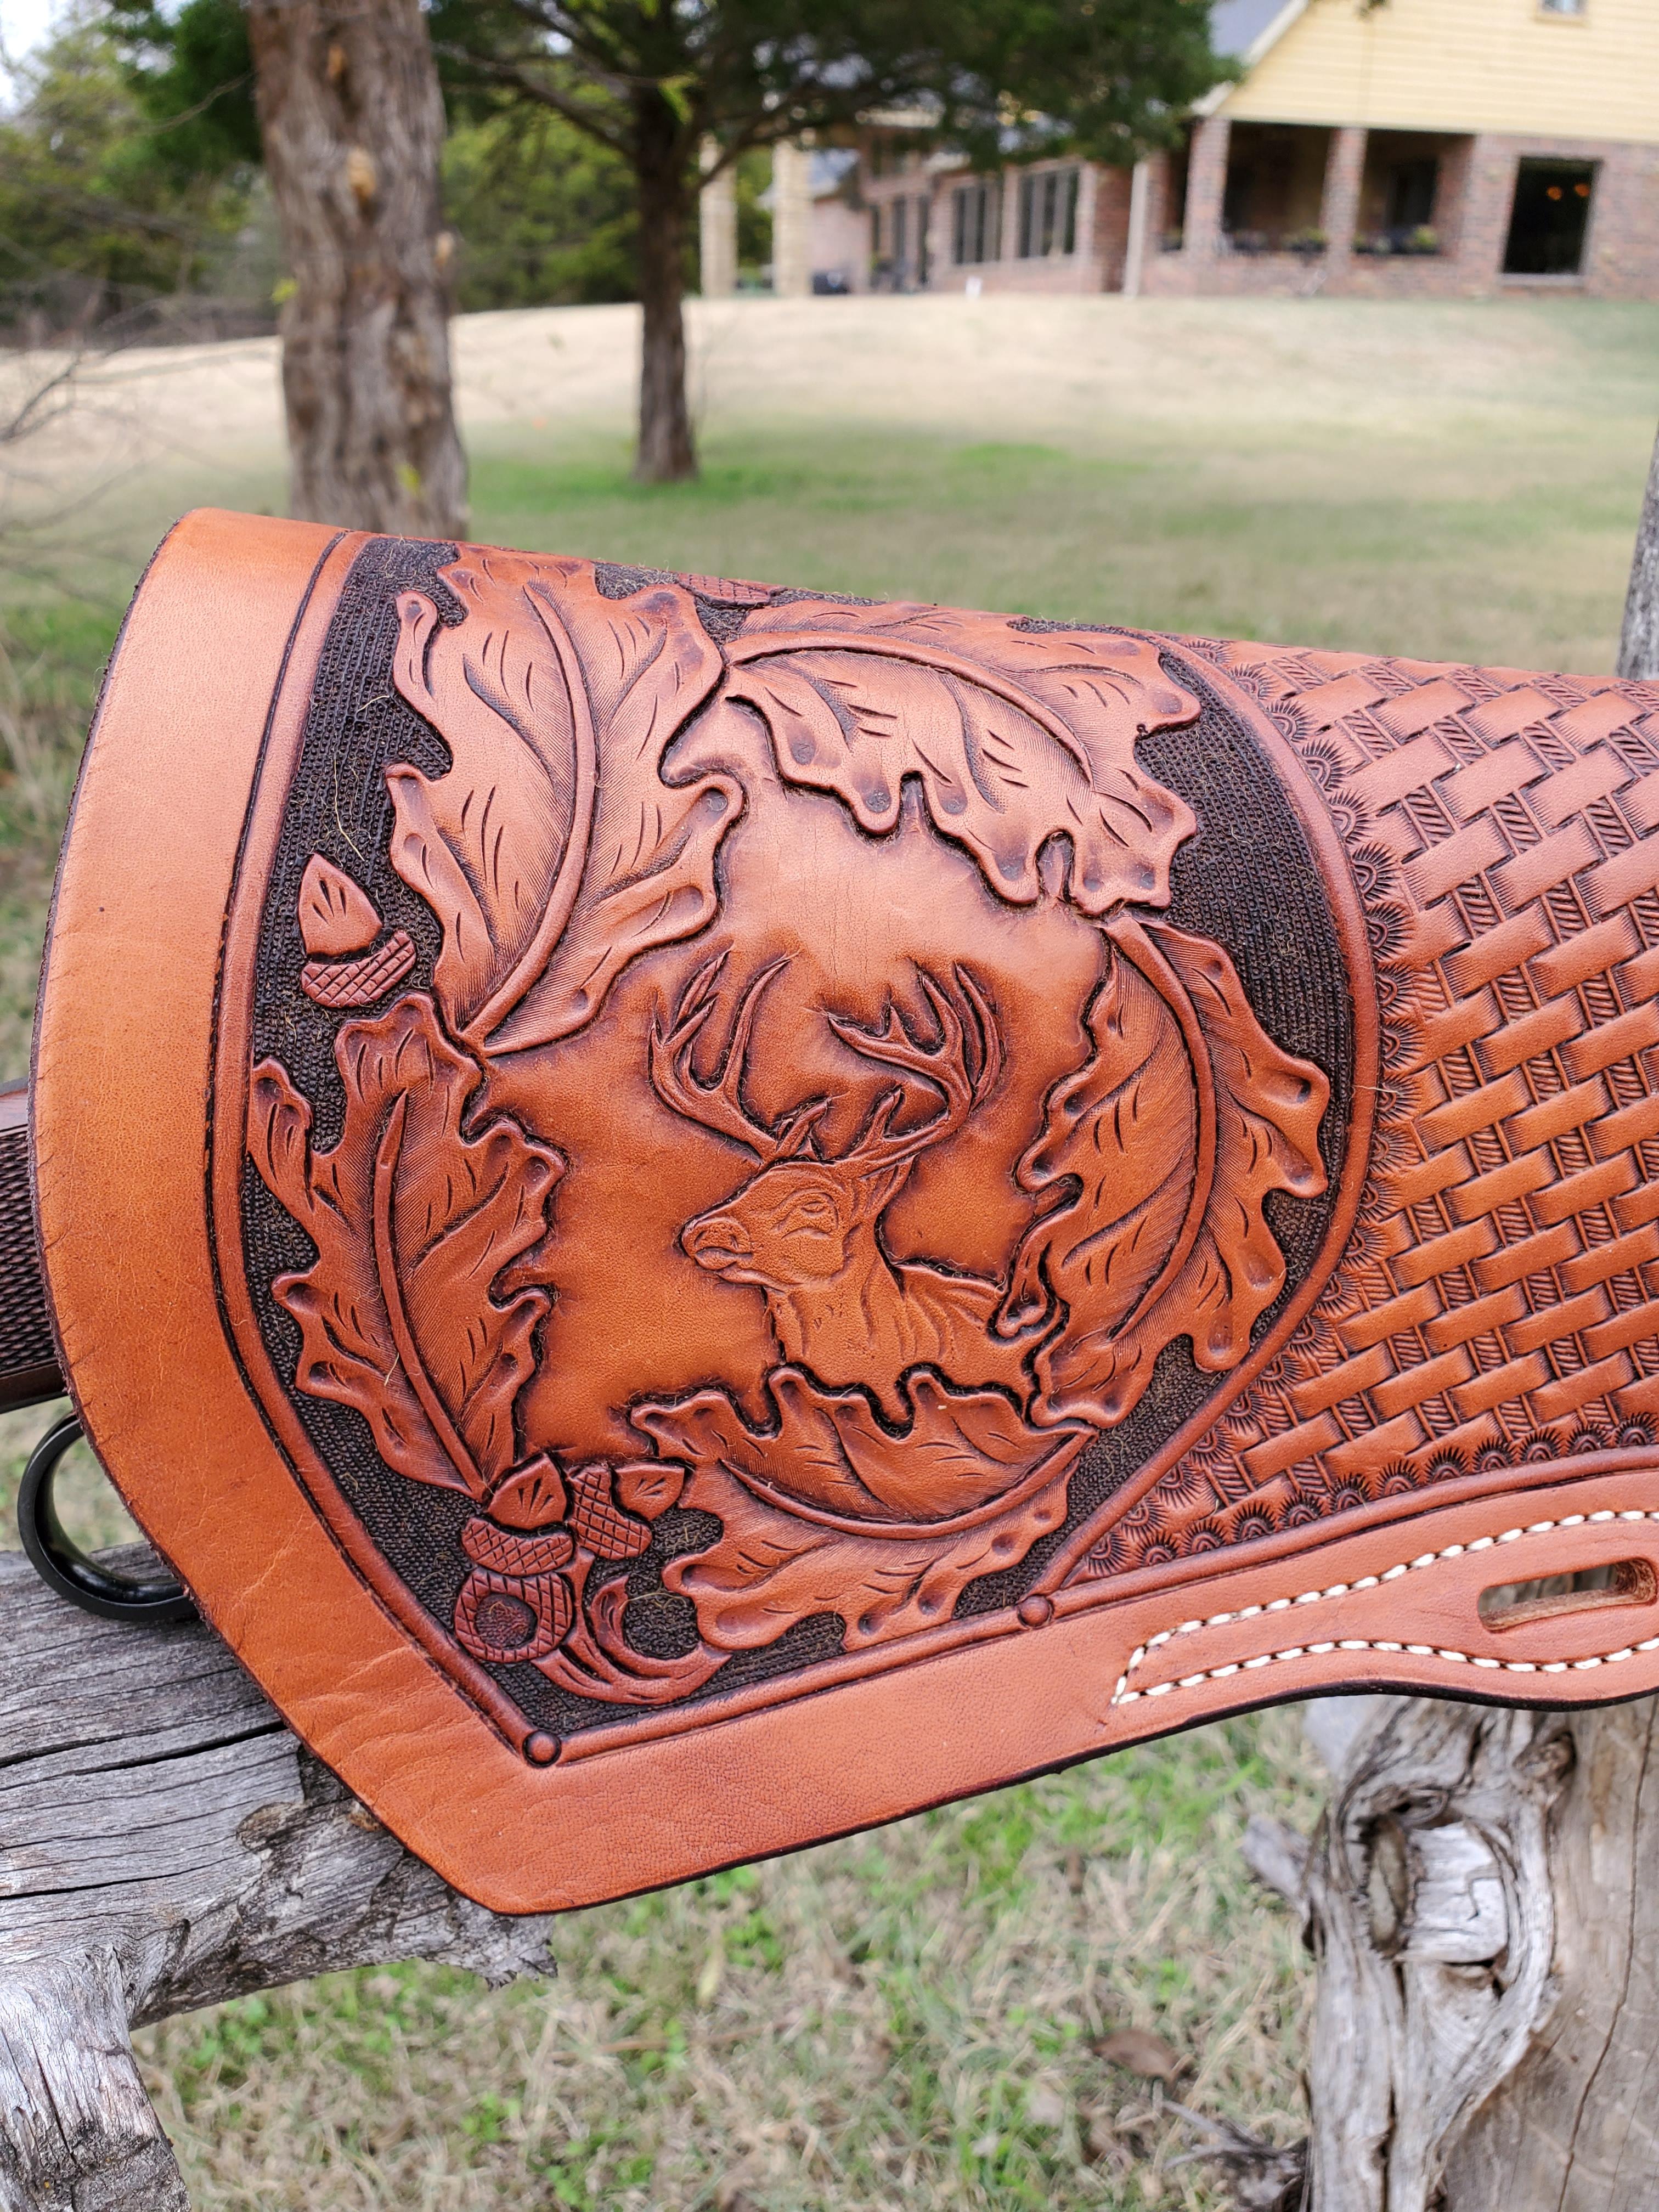
Thanks for all the compliments. Response to some specific questions are below. Sorry Dwight, I know the description is short. It is really a combination of methods Bruce Johnson describes here. https://leatherworker.net/forum/forum/17-stamping/. I have some photos, but need to write some steps to go with them. I haven't made that effort, because I am not sure if it would add anything to the previous posts. Maybe I'll get to that someday. As was pointed out, it just takes some patience and attention to detail. Plus, I have basket stamps a lot of projects. It is not lined. Its just 13/15 HO saddle skirting. I dyed the bar grounded areas with Cordovan brown and then used Sheridan tan antique on the entire piece. A couple coats of neatsfoot oil and some time in the sun. Dyeing and finishing is not a strength I possess. All is well here @Rbarleatherworks. I hope you are staying safe up north. Thanks to all for the discussion. Randy -
First Scabbard
rktaylor replied to rktaylor's topic in Gun Holsters, Rifle Slings and Knife Sheathes
The short answer is 2. The centerline down the bend is a straight line. I used that to set my angle (I wanted the stamp to be even along that line). I drew a reference line across the area to be tooled at the predetermined angle. Then I work both directions from that line. I try to stay focused on keeping the stamp relative to the centerline. Let me know if that helps. Otherwise, I can probably take some pictures to illustrate the process. It's nothing earth shattering and is used by a lot of people. Randy -
Sometimes I just cover the project with a plastic bag with weights and leave it on my tooling rock. Other times I just wrap the entire project in a plastic bag like tsunkasapa. Randy
-
First Scabbard
rktaylor replied to rktaylor's topic in Gun Holsters, Rifle Slings and Knife Sheathes
Thanks. I think I have about 3-4 hours in tooling. I finished the oak leaves and deer one evening, covered it up and did the basket weave the next day. I took a couple break during the basket weave, but it took about an hour and a half of tooling. It's oak leaves and white tail down here. It might be a little fancy for my Jeep. Randy -
First Scabbard
rktaylor replied to rktaylor's topic in Gun Holsters, Rifle Slings and Knife Sheathes
Thanks for the compliments. Randy -
First Scabbard
rktaylor replied to rktaylor's topic in Gun Holsters, Rifle Slings and Knife Sheathes
Thanks for the compliments. I obviously like basket weave too. I knew it was a lot of area so I used my largest stamp to save some time. Randy -
I bought a new Henry 30-30 and thought it deserved a scabbard. I don't need it for a horse, but it'll come in handy for my Jeep. I used the Springfield Leather pattern. I'll make my own pattern for the next one. Comments and suggestions are welcome. Randy


-
Thanks for the comments. I've had the seat in the back of my mind as well. I'll try to post a picture when it's fit. Randy
-
I thought it would be nice to finish this thread. It's not perfect, but it'll do. Randy

-
Thanks for all the tips. I have been distracted from this task for a while, but hope to tackle it sometime this week. Randy
-
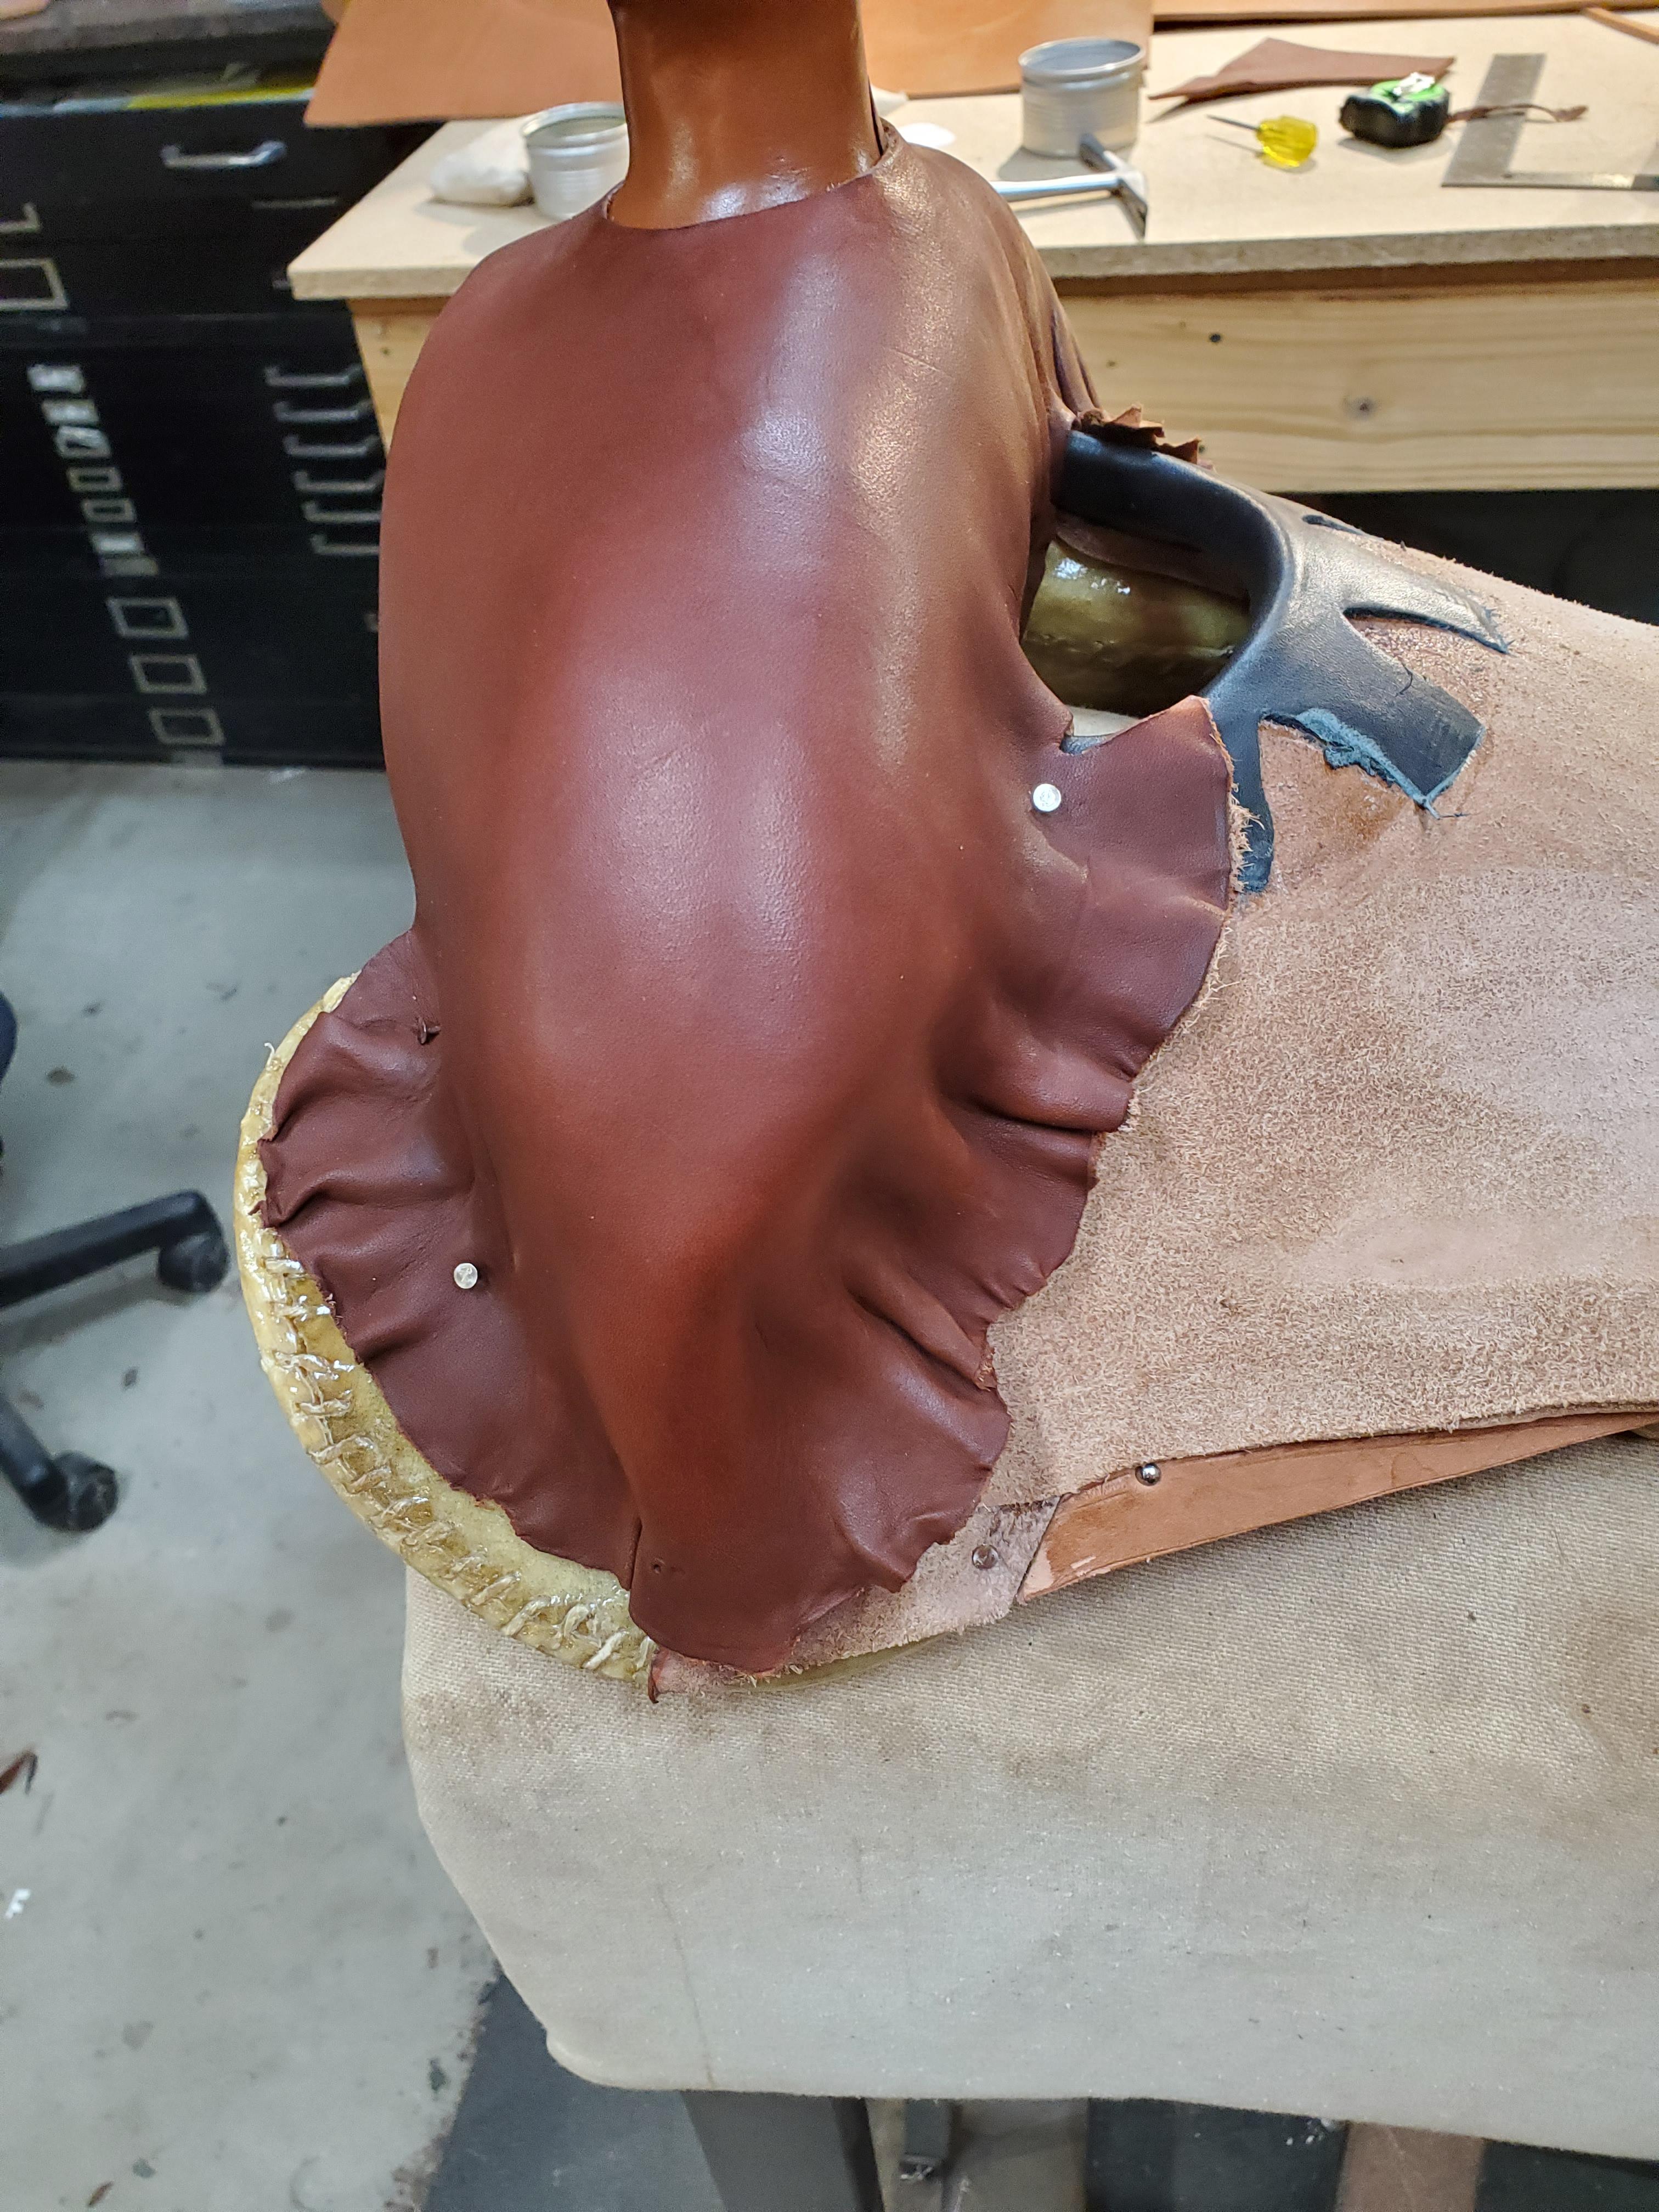
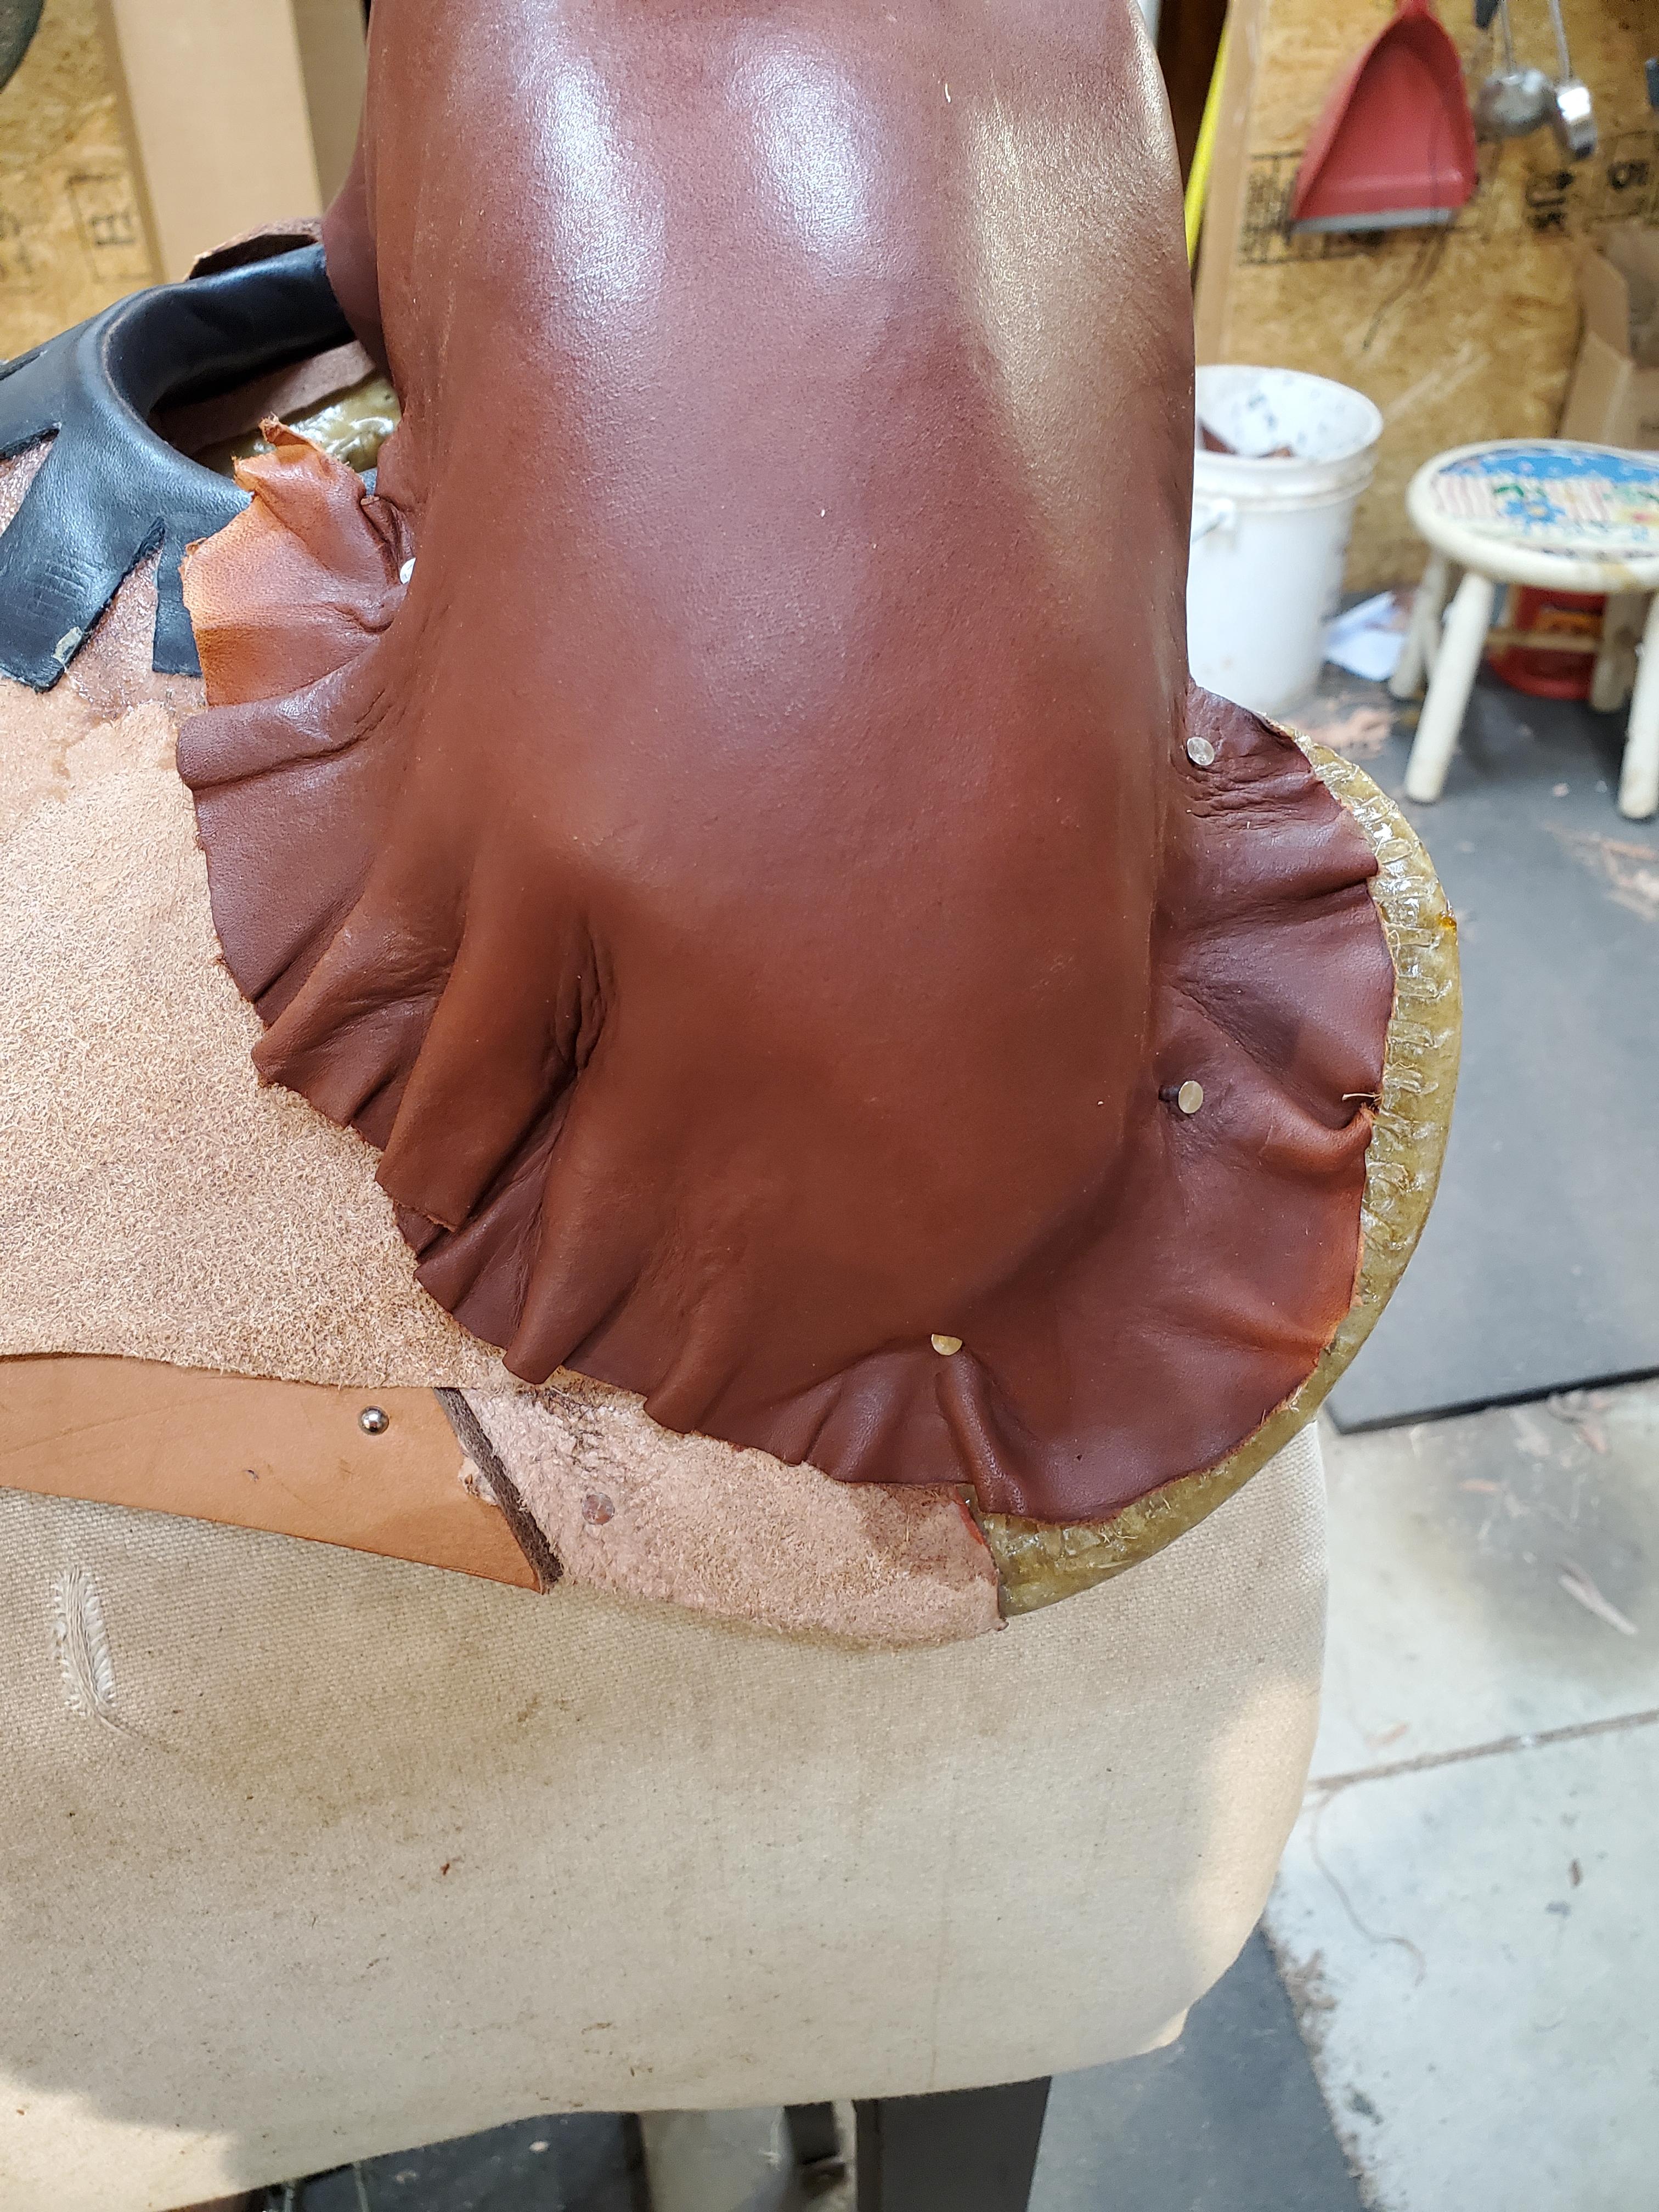
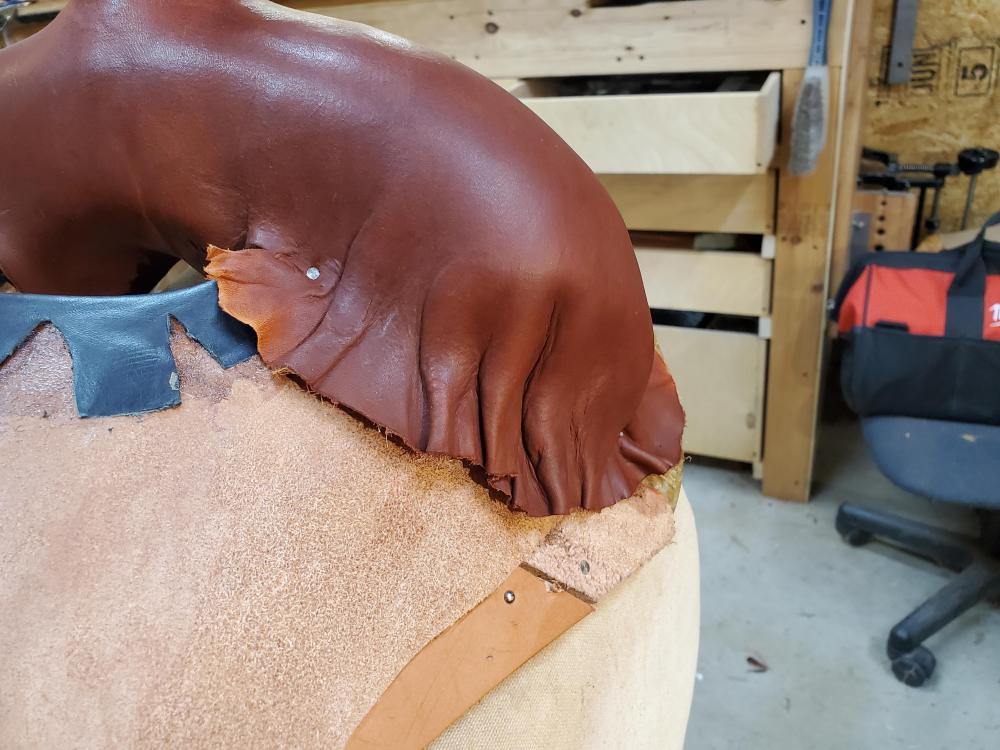
My plan was to sweat this cover on without a welt or lacing. It's a leg cut Olin Young, 12.5". The leather is from the belly near the shoulder and about 11/12 oz. I wrestled with it more than two hours and was making progress. However, I didn't think I could get all the wrinkles out. Any advice is appreciated. Randy

-
I am just starting #11. Thanks for reviving this thread. It reminds of some things that I've learned and others that should still receive focus. Randy
-
Ed, Thanks for sharing your knowledge and now your work on this forum. There's a lot to like about that saddle. Randy
-
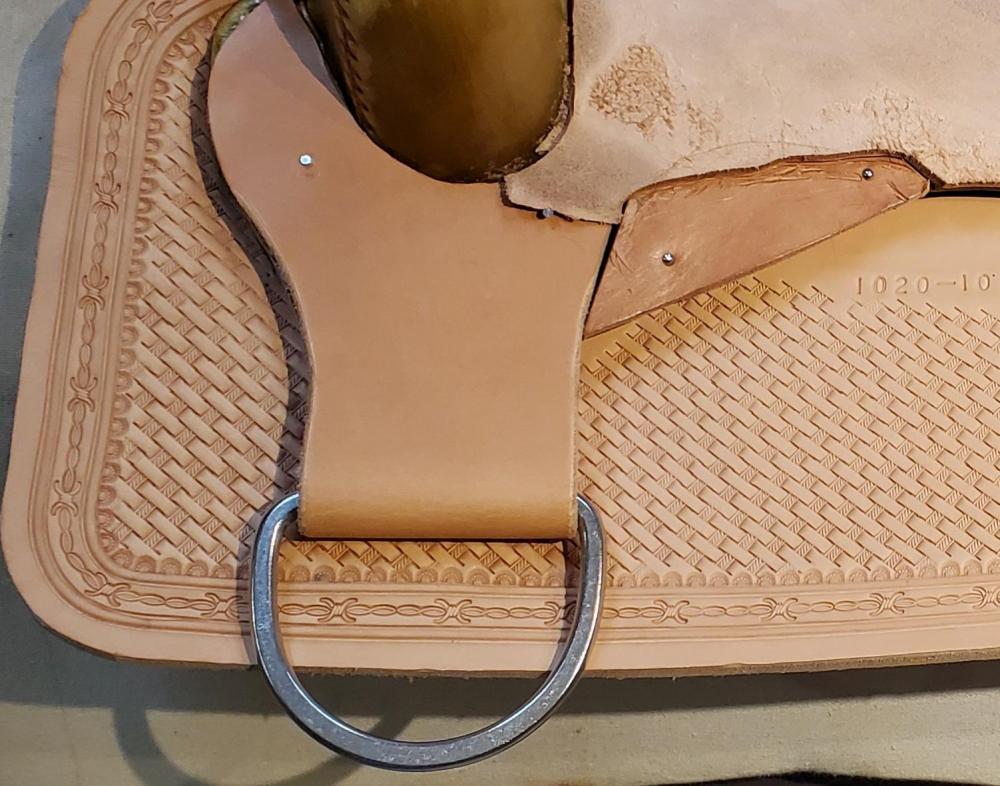
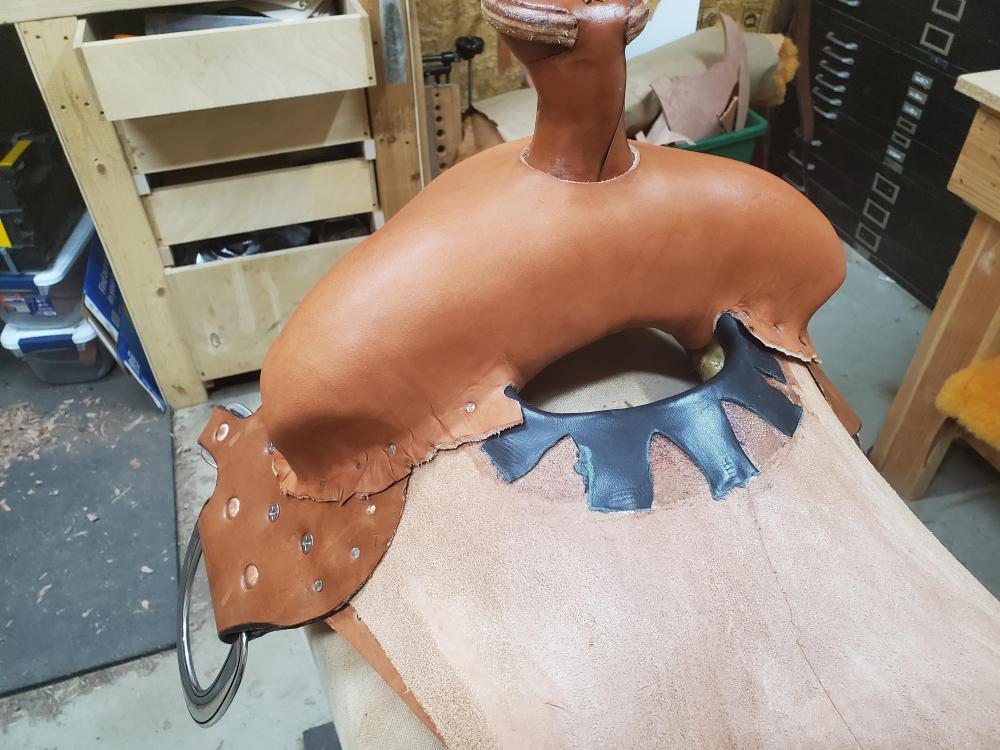
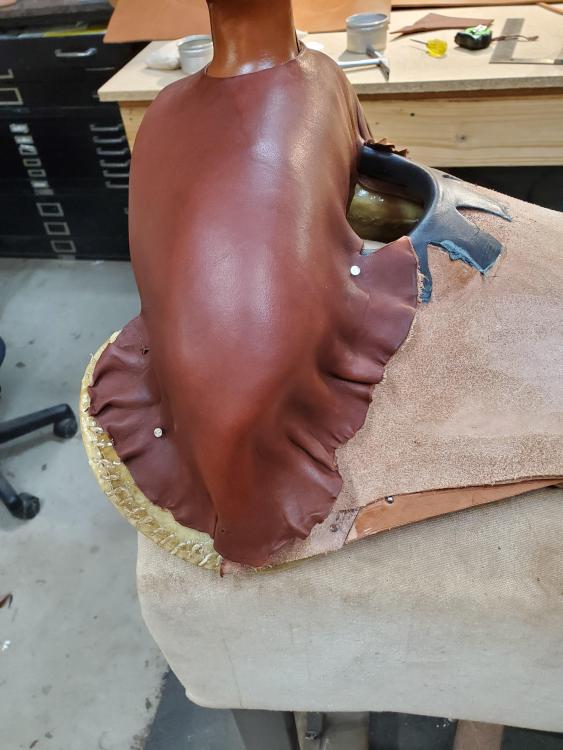
I personally like a little more and consistent rise going toward the swells but that's a preference. Are you following Watt's method on the ground seat? I suppose Stohlman's method isn't a lot different if those are the two resources you are using. While the strainer is the foundation, you can still do a lot of shaping with leather (with a lot of skiving). I fit the liner under the front tabs, but make sure you have enough to stretch over the finished ground seat. Randy
-
I like the photo with the mirror. Seriously Ed, thanks for freely sharing your knowledge. You explain everything so well. Dusty, keep us updated on your progress. RT
-
There may be better methods, but this is what I did on my last saddle with a dee rigging. The riser ends near the bottom of the swell. The rigging is skived to match the riser thickness and then follows the front edge of the stirrup slot. It slides up under the ground seat. This is closer to a full position than 7/8. More experienced makers might frown on this, but it worked for me. Randy