Uwe
-
Posts
2,221 -
Joined
-
Last visited
Content Type
Profiles
Forums
Events
Blogs
Gallery
Store
Everything posted by Uwe
-

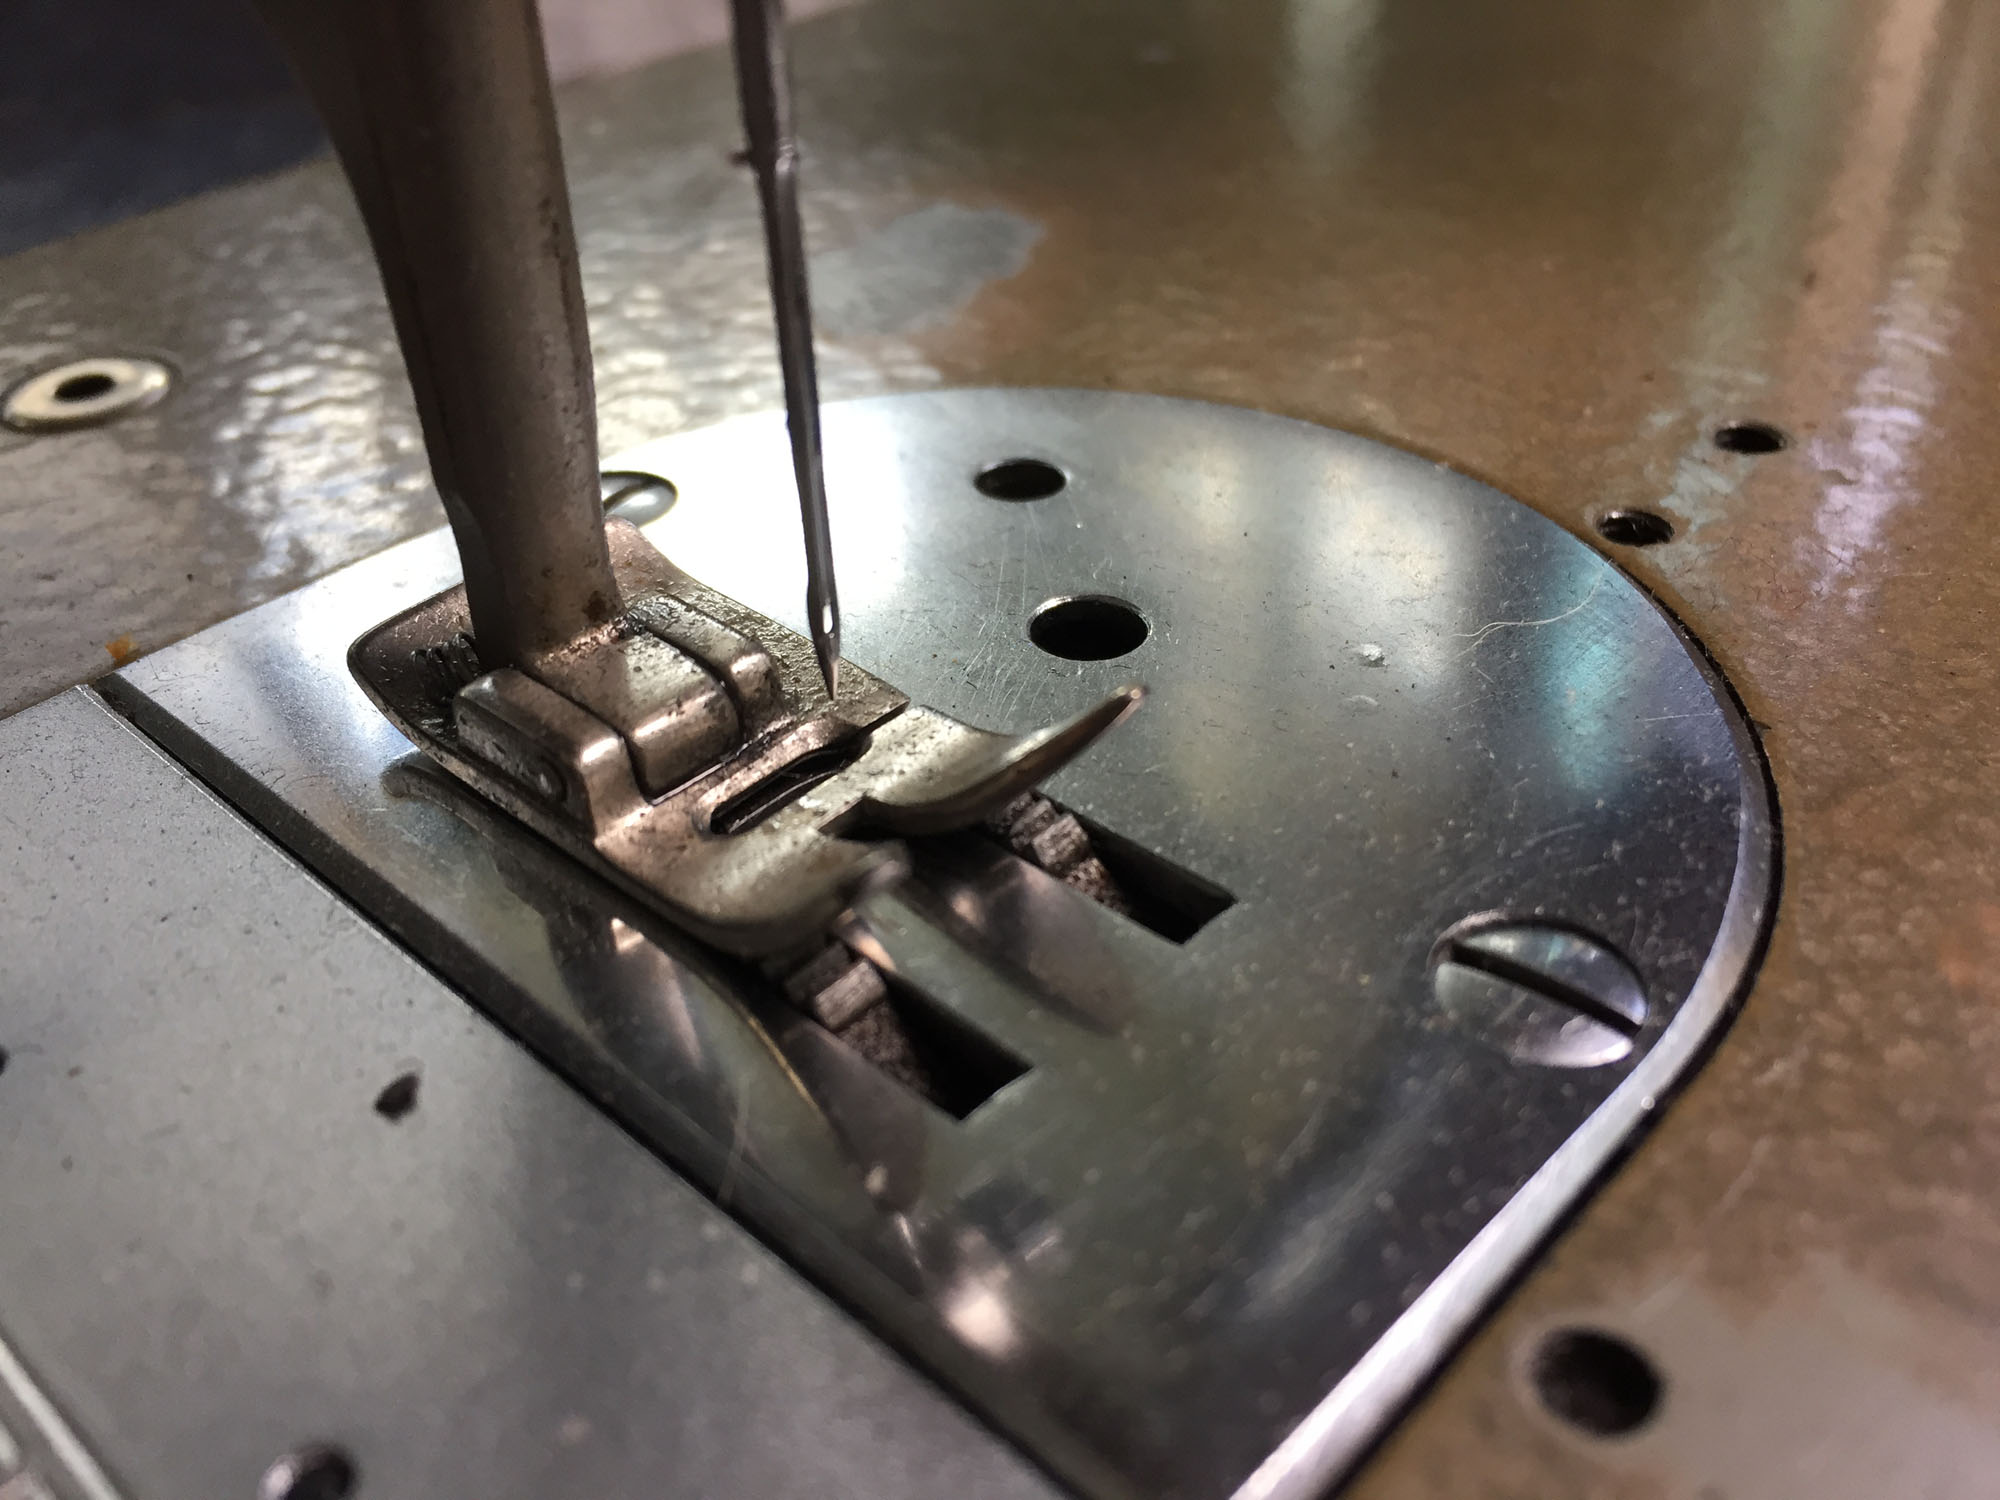
Needle bar hitting outside foot on Adler 67
Uwe replied to HardenGoods's topic in Leather Sewing Machines
You may simply need to rotate your needle bar a little so that the part that sticks out no longer touches the presser foot. That Q-design is taller on the left side than other feet. A picture of your needle bar near the presser foot would help. In general, don't run new accessories under power until you are certain that there is no interference. -
There are a whole bunch of parts that move when you actuate the reverse lever. A tight/dry spot could be anywhere. The feed dog and needle bar rocker are all supposed to move when you flip the reverse lever. If the feed dog and needle bar rocker are all the way up front, they move all the way back when switching to reverse. That's actually a good way to observe all the parts that move and need some lubrication. There's also a block behind the reverse lever that slides back and forth on a rod. Make sure that mechanism is well lubricated. In general, keep looking/cleaning/oiling.
-
Sounds like you made great progress in your machine adjustments! The mechanical knee lift works as intended/designed. The mechanical knee-operated foot lift is not supposed to lock in the up position. Some electrical knee-switch operated controllers (e.g. Efka) allow you to set the knee-operated foot lift action using two different modes. One mode is to momentarily lift the feet only for as long as switch is actively depressed. The other mode is a toggle switch, where you click the knee switch to raise the feet, then you click the switch a second time to lower the feet again. This usually requires an air cylinder or solenoid operated foot lift mechanism.
-
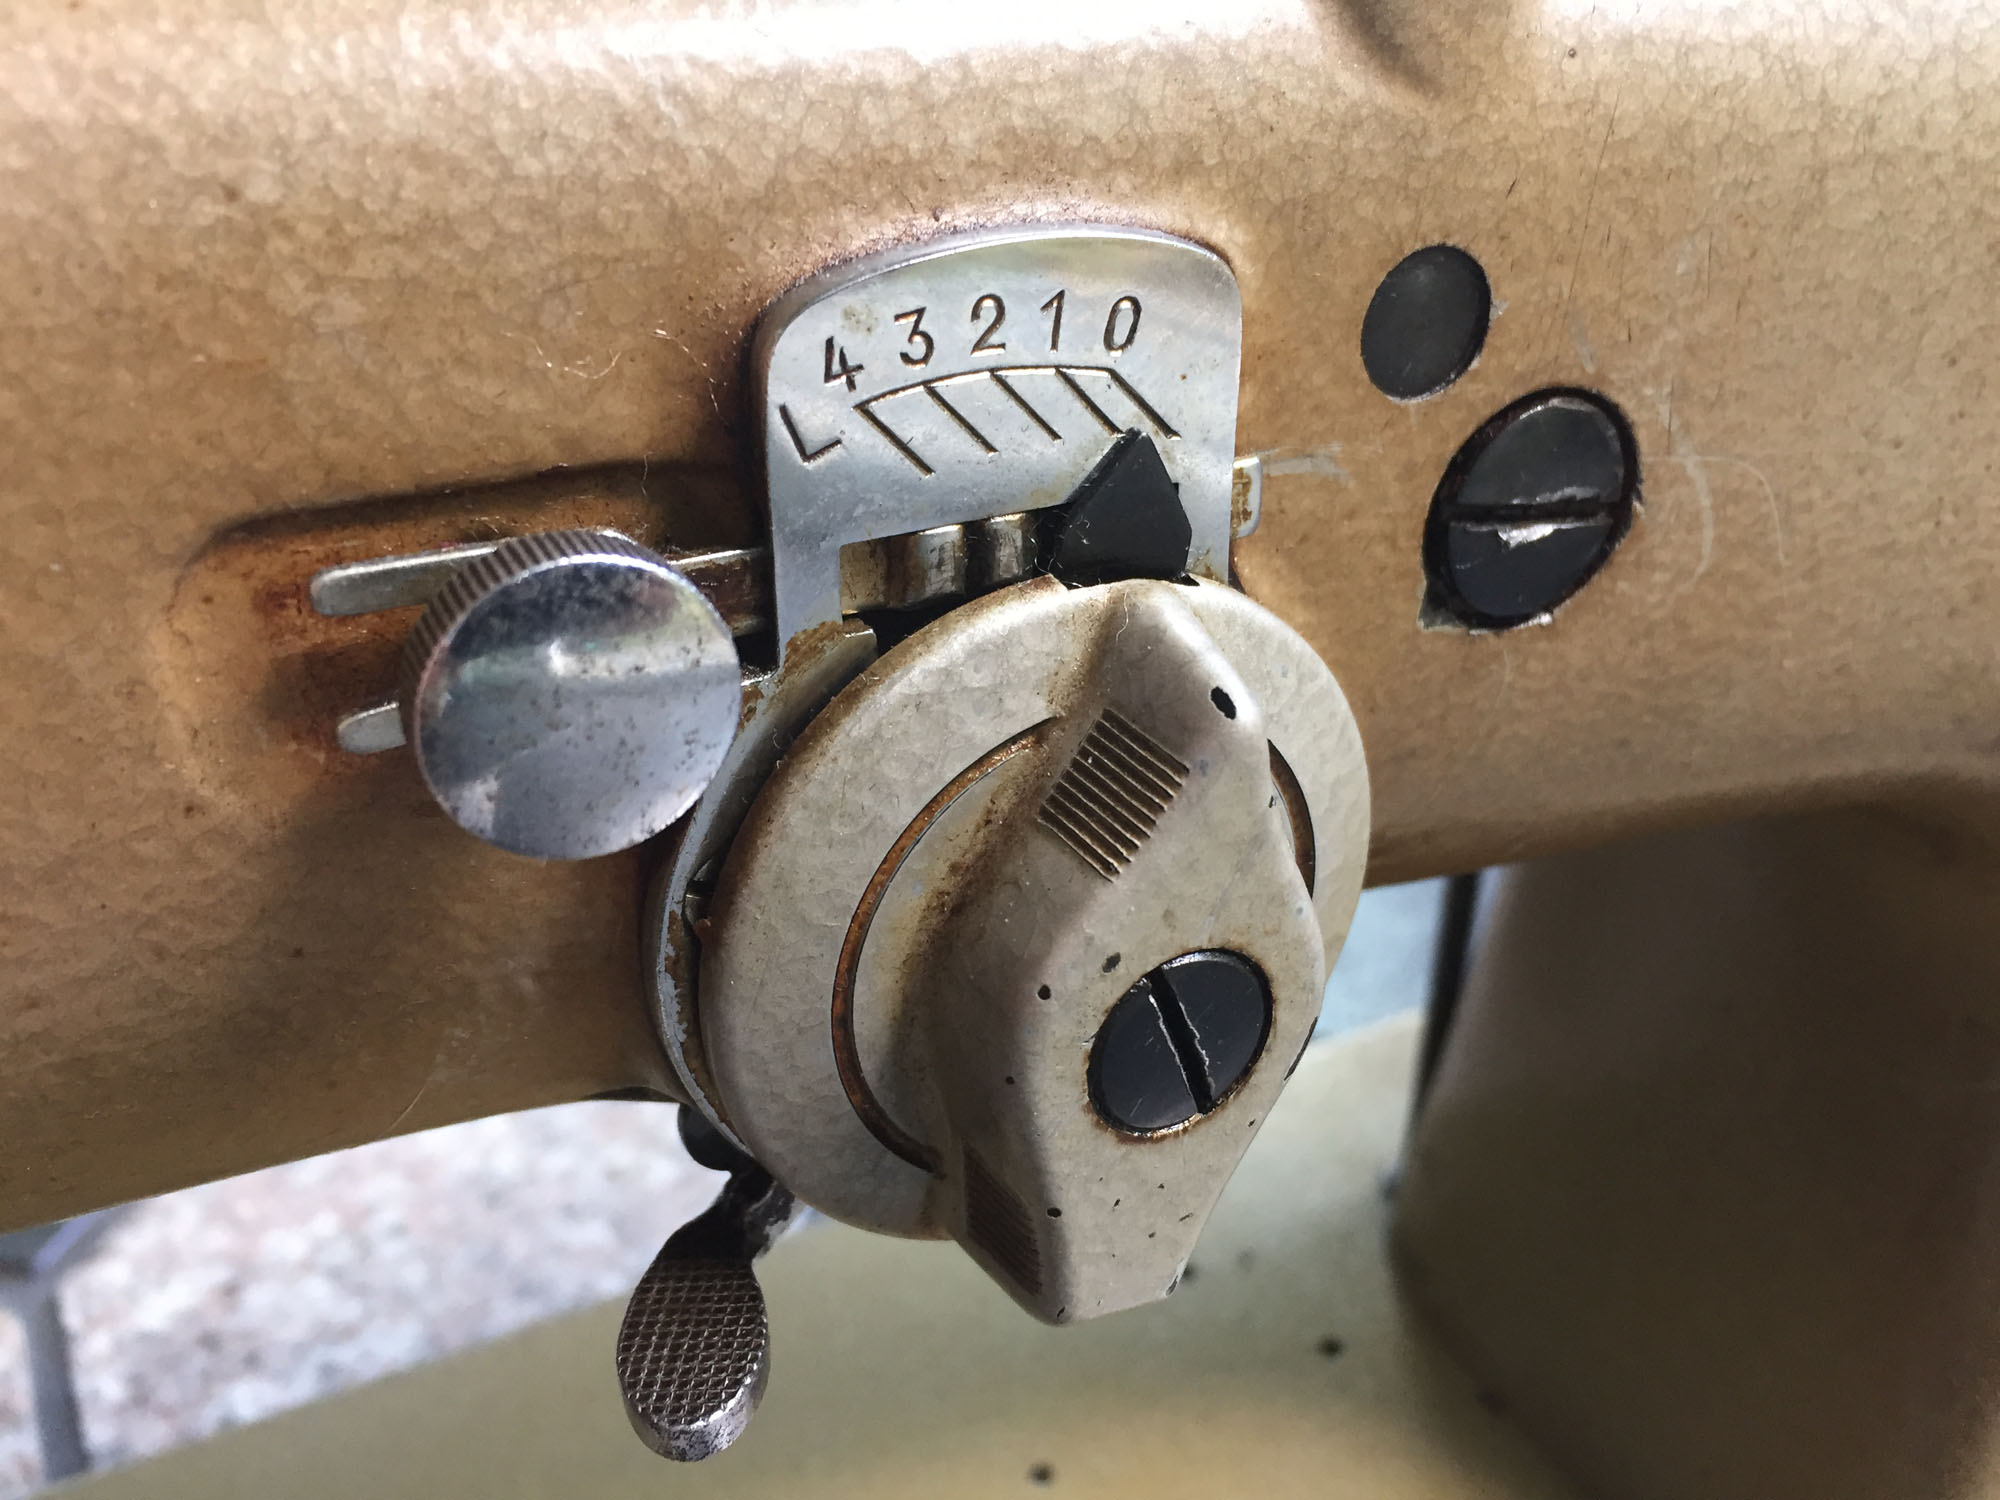
Your stitch selector does work, and likely as well as you can hope for. They're not intended to be mathematically accurate, they're more of a rough guide. Actual stitch length varies with material type and thickness and sometimes even sewing speed. The simple fix is a little cheat sheet that tells you which number corresponds to which actual stitch length for a given material. Trying to make that dial accurate for all possible material combinations will be an exercise in futility.
-
On the far end of the spectrum is this super heavy duty Singer top+bottom feed zig zag machine. I'm not sure which model this is. I keep it on a dedicated hydraulic lift cart for a reason.
-
Here's the sewing demo video with my Pfaff 138 sewing oil tan leather patches onto canvas material. Hopefully it will give you some idea of how this machine handles that particular task.
-
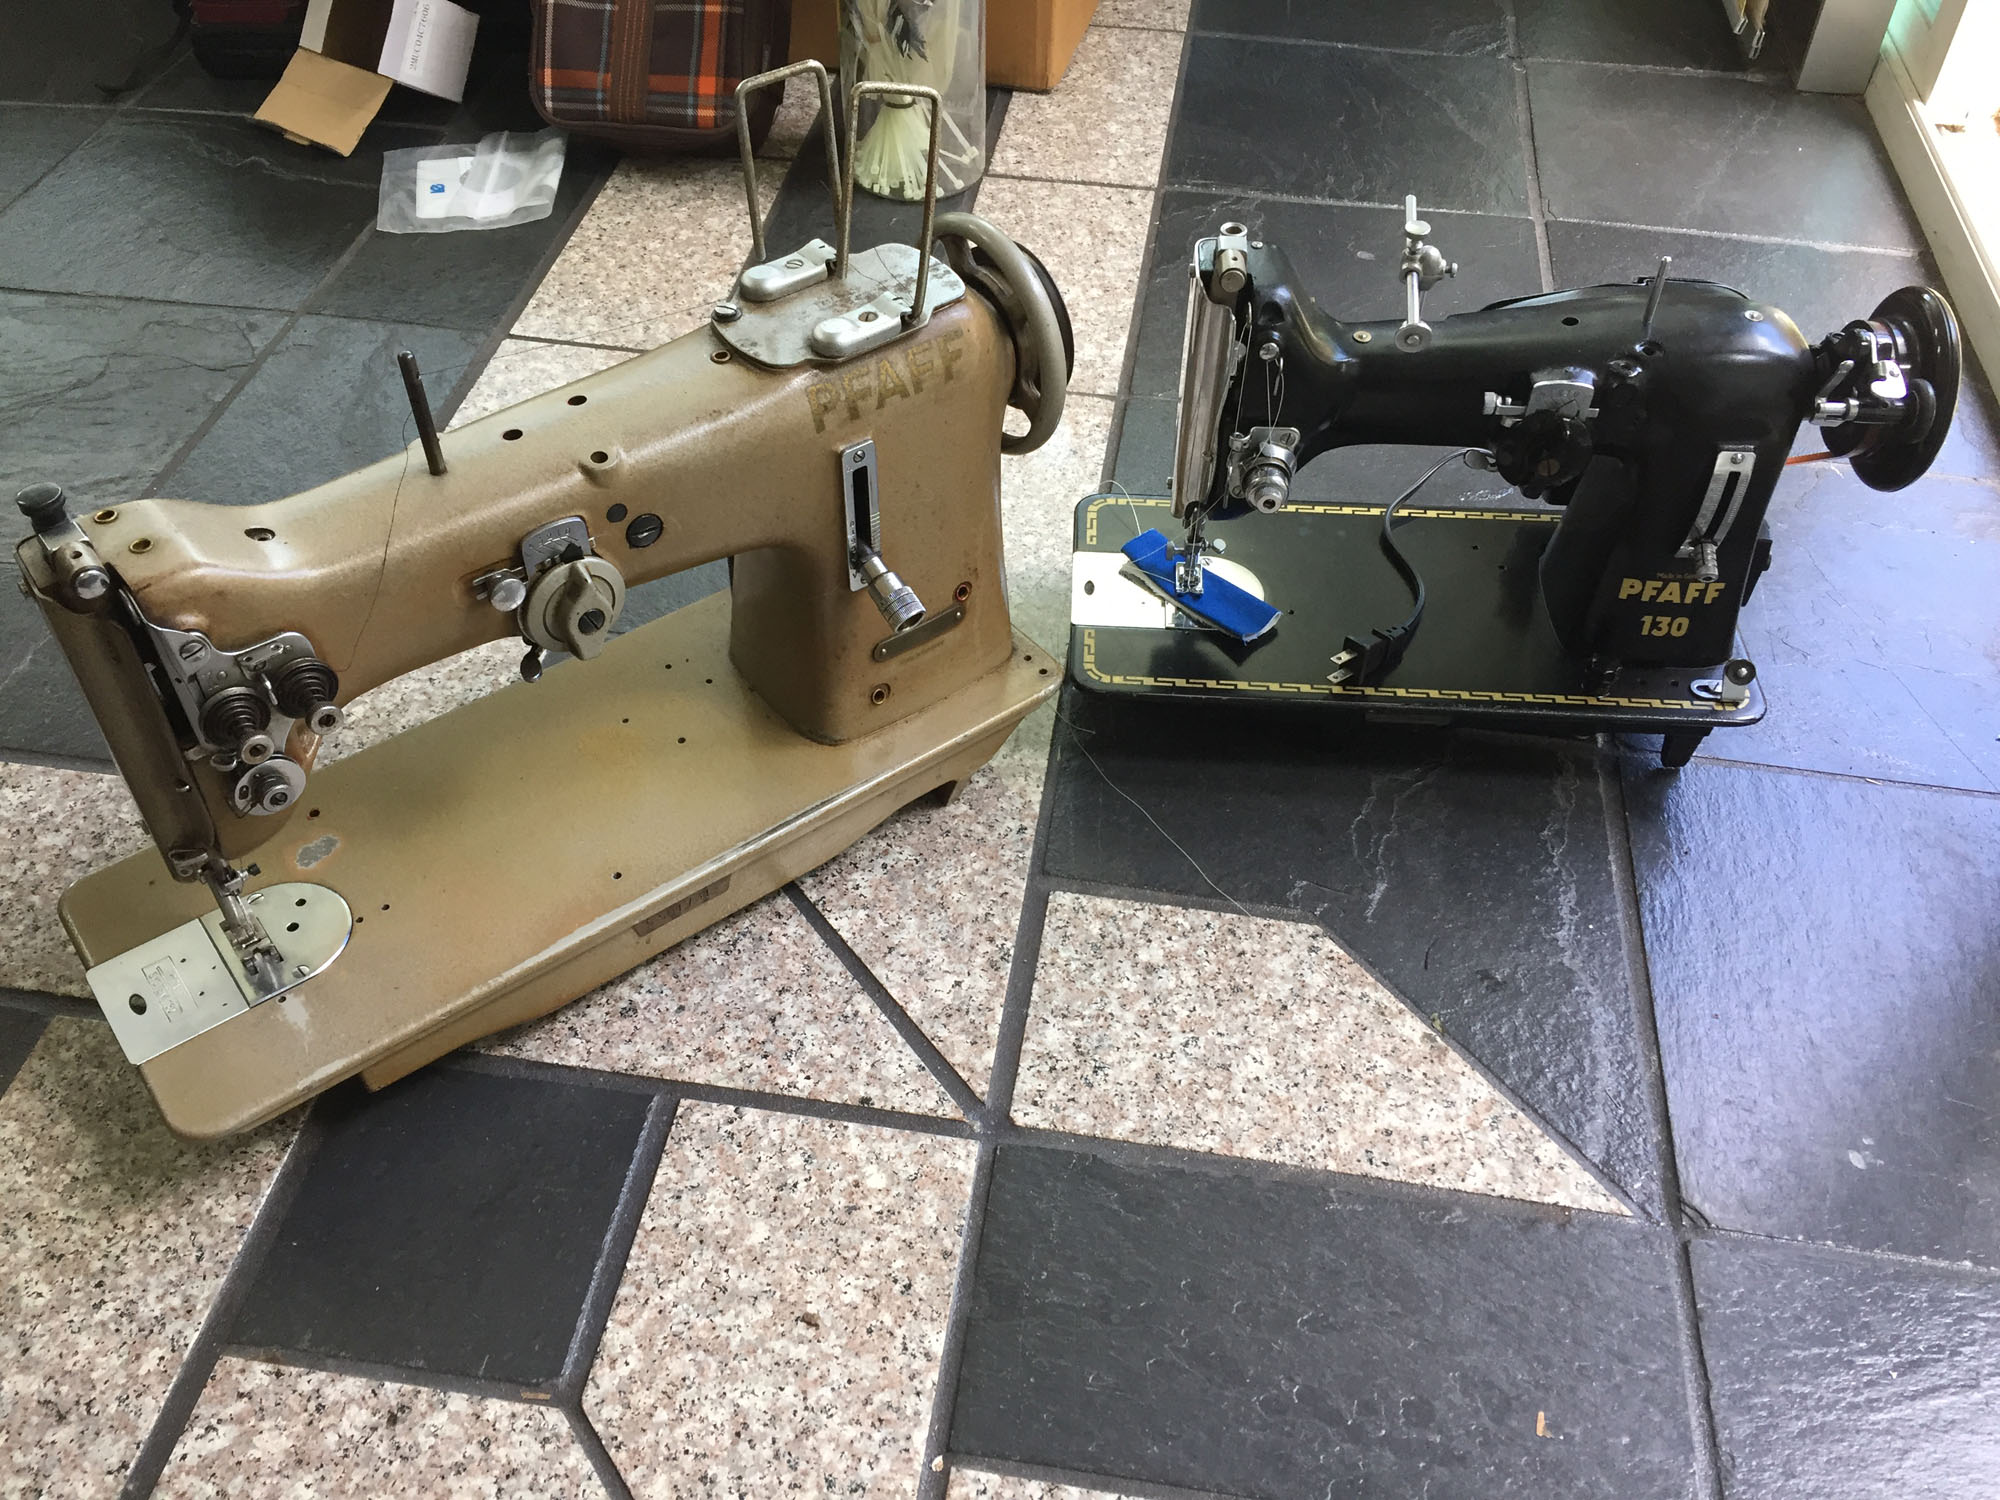
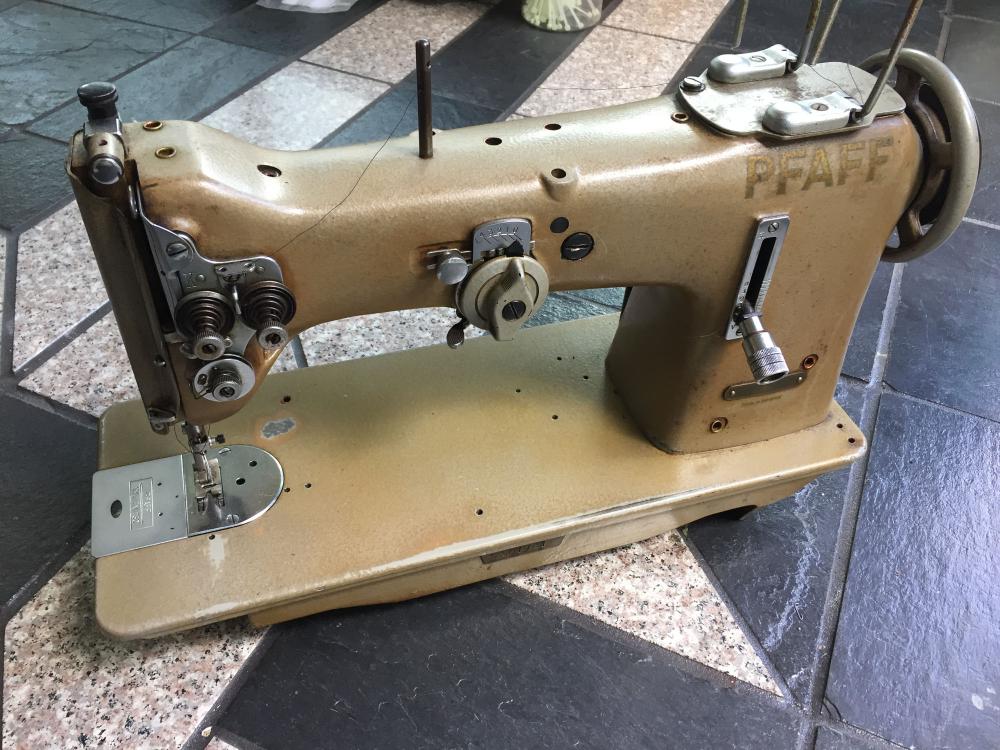
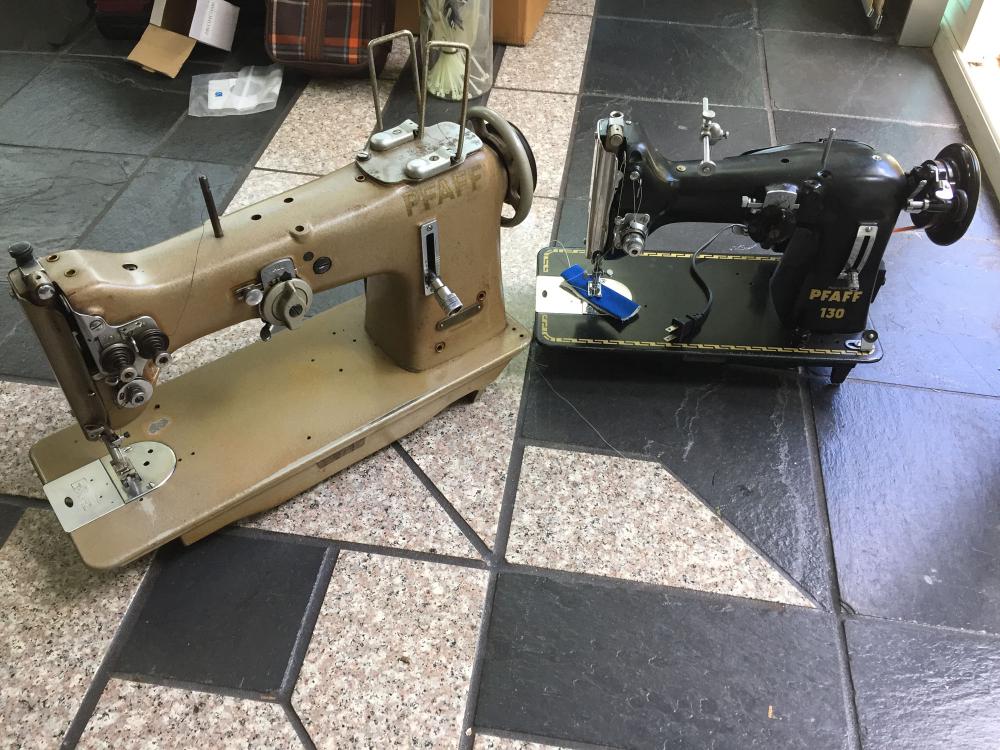
The Pfaff 138 is definitely a full scale industrial sewing machine, designed to sit in a table and run on a clutch or servo motor. Here are a few pictures of my machines for reference and size comparison between Pfaff 130 and Pfaff 130. If I find time I'll do some test runs with denim and leather.


-
Pfaff 545 H3 presser foot that doesn't work
Uwe replied to Haderimouve's topic in Leather Sewing Machines
I just made a video on the subject of walking foot adjustments for Pfaff 545. Perhaps it will help you resolve the issues with your machine as well: -
pfaff 545 145 Pfaff 545 Foot Movement Isues
Uwe replied to Kryptonite's topic in Leather Sewing Machines
Here's how my Pfaff 545 is adjusted to get proper walking foot movement: -
pfaff 545 145 Pfaff 545 Foot Movement Isues
Uwe replied to Kryptonite's topic in Leather Sewing Machines
Your feet don't walk because the front foot doesn't really make contact with and press against the feed dog - it simply goes in circles above the feed dog. The rear foot can only lift up if the front foot can press against something (feed dog or material.) If you put some 1/4" thick material under the feet, they will probably walk right now because the front foot can press against the material. As to why your front foot doesn't touch the feed dog, I can't tell from the information you provided. -
Let us know when you find a cheap industrial walking foot zig zag machine without issues. I want one, too.
-
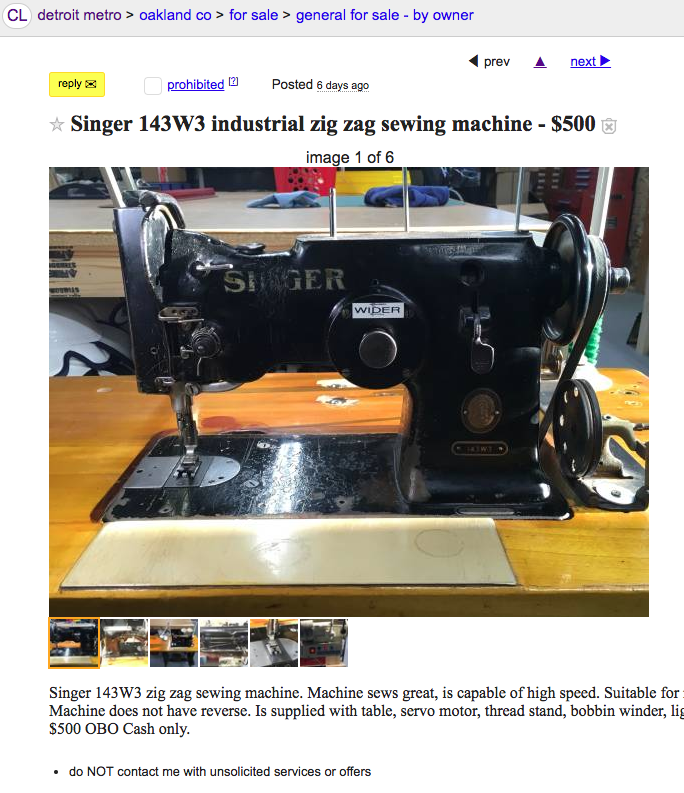
That depends on your bank. A Pfaff 130 is a very nice vintage zig-zag machine that will probably do what you have in mind. Pfaff 130 occasionally pop up on CraigsList and other places for $100-200. Other vintage options are Singer 143W and variations on that theme. New heavy duty industrial zigzag machjnes like the Consew 199RB are over $2K And then there's always Sailrite if you need to sew denim/leather on a sailboat (or at home.) They don't get much respect here on LW, but they are probably fine for your application.

-
The original post with more details:
-
This is a Singer stool we collectively fawned over some time ago:
-
Guess you need a thumb wheel controller then [sorry, way off topic, but I couldn't resist]
-
The machine may not be the limiting factor, it may be you. No matter what machine you get, you have to understand how it works and use it correctly. None of the machines discussed in this forum are the kind where you step on the pedal and it will simply do what you want it to do. I'd say you have to figure out how to use the machine you already have before you buy another one. Buying a different machine will not solve your sewing problems, it will only change them.
-
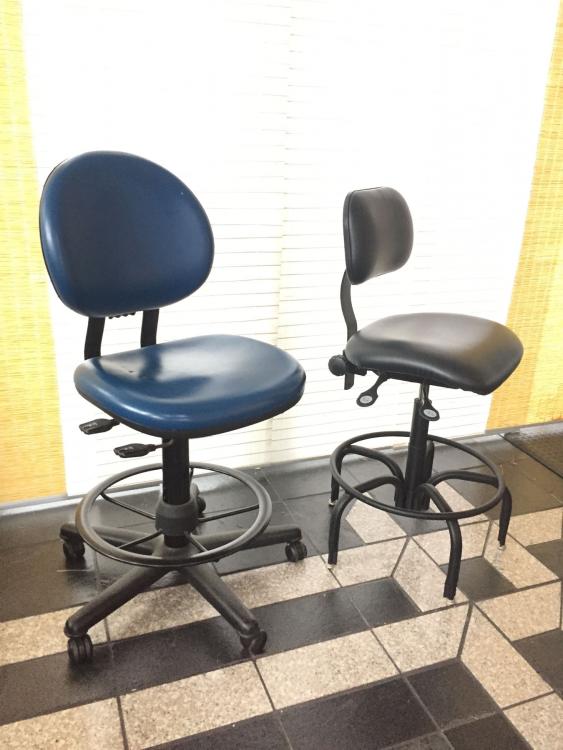
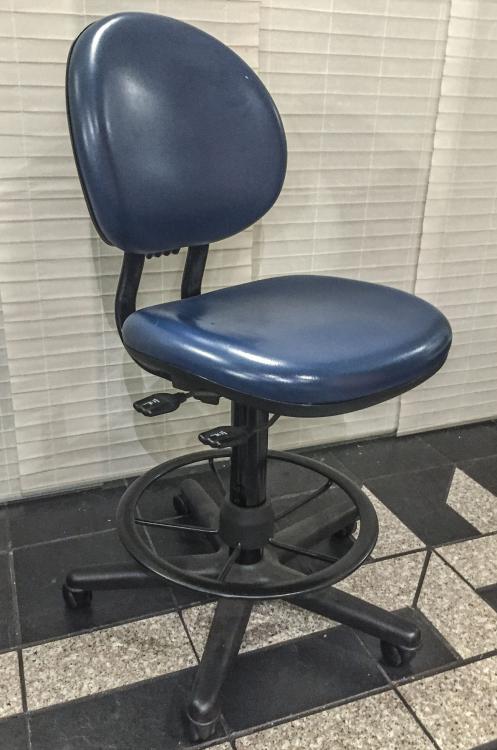
I made another trip to UofM today. There it was - a perfect tall BioFit task/shop/sewing chair, no wheels, like new, $20. Now it's here, next to my blue chair.
-
Here are all the Durkopp Adler 467 manuals from Nick-O-Sew and my own archive, just to make them easily accessible in one spot and to add them to the LW archive. Durkopp Adler 467 User Manual: Durkopp-Adler-467-Operation-Instructions.pdf Durkopp Adler 467 Parts List: Durkopp-Adler-467-Parts-List.pdf Durkopp Adler 467 Installation Manual: Durkopp-Adler-467-Installation-Instructions.pdf Durkopp Adler 467 Service Manual: Durkopp-Adler-467-Service-Instructions.pdf
-
The back on a sewing chair is useful to lean back and admire your handiwork, or to lean back and let out a primal scream, depending on how things are going.
-
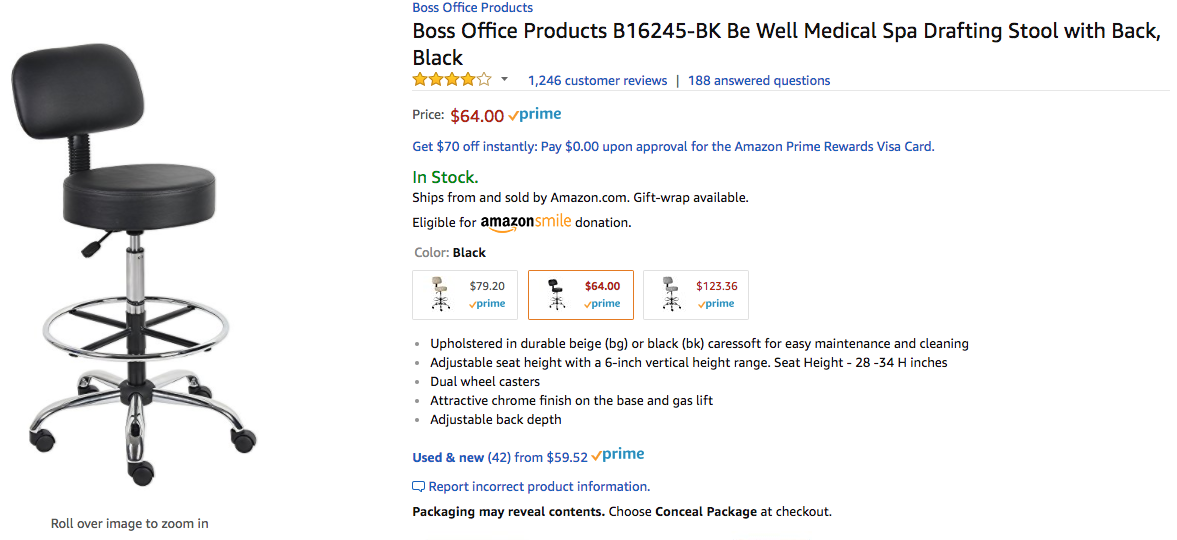
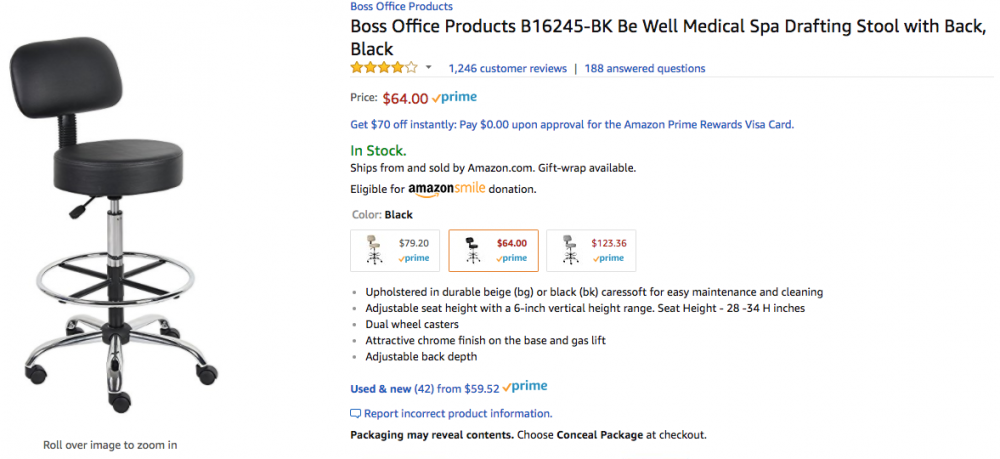
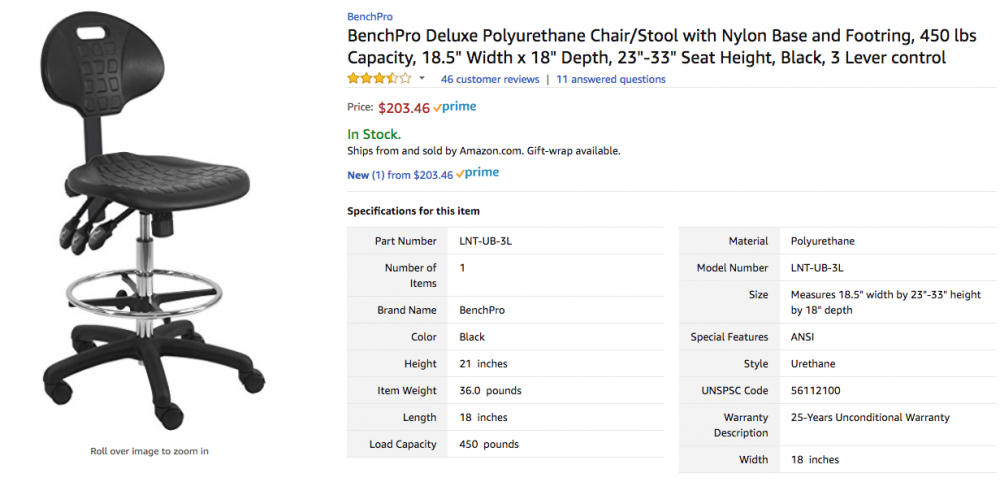
My favorite place to shop for high quality chairs and stools is my local University of Michigan property disposition (https://www.facebook.com/umpropertydisposition/). They often have high-end lab and medical stools and chairs that cost several hundred dollars new, for under $30. My favorite tall $25 chair from that place is this one: You can convert most rolling tall office chairs to sliders, to keep the chair from moving while you sew: As for items available for purchase new, Amazon is great resource, examples:

-
If reading a manual stops somebody from thinking, then they weren't doing a whole lot of thinking to begin with. But in reality the unthinking and uncurious masses just want to be told what to do. An original manufacturer's manual is one of the very few shared truths left out there. Most people would agree that the manual describes how the manufactured intended the machine to be used. Once you understand how things work then you can add variations and improvements to suit a specific situation. You'll know exactly what your are doing differently, and you'll know why you are doing it differently. If you don't (want to) understand how things work, then simply sticking with the manual is a workable approach. It sure sounds like the very same needle has been in that machine since the dearly departed mechanic's last visit years ago. The machine may be threaded perfectly. The thread breaking issue may have nothing to do with the threading path. A few close-up pictures sure would help diagnose the problem.
-
I cringed almost through the entire video. I wonder if that video is where that whole wrap-it-around-the-tension-disc-pin nonsense started. According to Youtube statistics, over 29,000 people may now believe that's the proper way to thread that class of machine. I've yet to find any evidence that manufacturers ever recommended this practice. That tension disc pin is indeed only there to keep the tensions discs from rotating, as @SARK9 said. And then Mr. Levy pulls the bobbin thread up through the presser foot hole, just to add to the confusion and to untangle the mess a few stitches later.
-
Nice looking stitches! You did a great job bringing this machine back from the semi-dead. And you're now well equipped skill-wise to keep it running for decades.
-
Cylinder Arm Table Attachment That Converts To Flatbed?
Uwe replied to mcfingrs's topic in Leather Sewing Machines
I also make flatbed attachments, including one for the Adler 69 class of machines. The UT069 is available in my online store: https://uwe.store/products/ut069-flatbed-table-attachment-for-durkopp-adler-69 -
I'm not aware of any flatbed machine that is designed to cover thread sizes 69-277 well, or at all, without major adjustment gymnastics or premature parts failure. One approach is to simply ignore the specs, install a 200Nm/#25 needle and some size 207 or 277 thread and put the pedal to the metal. One tarp shop I'm working with has apparently been doing just that for decades using various single and double needle Consew 339 machines - nobody ever told them "you can't do that!" Your Cobra 4 comes close, though - it will cover thread size range 92-277 (and higher.) [Shameless self-promotion alert!] A decent flatbed attachment like my UT441 is a good occasional or long-term solution in my (decidedly biased) opinion. It's plenty big for wallets and belts and installs in about a minute or two with a little practice. I'm also working on a small, modular flatbed (or huge flat-top throat plate, depending on how you look at it) for folks who just need a small-ish flat work surface for wallets etc., or have a short-arm 441 class machine (e.g. Cowboy CB-3200.) The UTP441-66 will measure about 6"x6", but currently exists only in my CAD program: [End of shameless self-promotion]