Uwe
-
Posts
2,221 -
Joined
-
Last visited
Content Type
Profiles
Forums
Events
Blogs
Gallery
Everything posted by Uwe
-

Simple Singer 241 large hand/balance pulley Mod
Uwe replied to Sledzep01's topic in Leather Sewing Machines
Clever solution. I suppose a second picture that shows how these pieces are nested and actually fit on the shaft would allow people to reconstruct what you did. I'm sure it's all clear and obvious in your mind, but that one picture doesn't really illustrate the story well. -
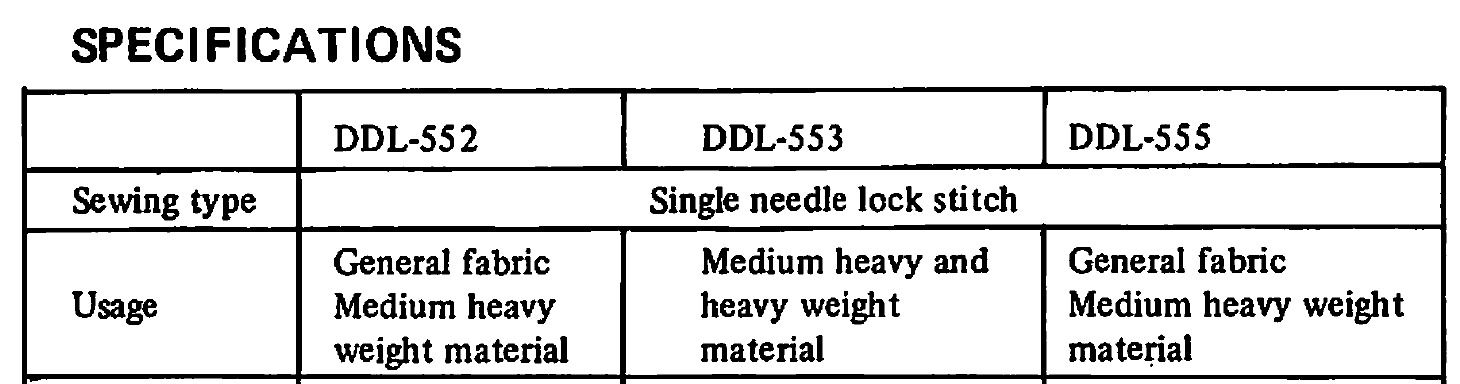
This really is the wrong forum. There must be others out there better suited. It appears you're using the wrong machine to sew Batiste (had to look that one up ) The Juki DDL-553 is designed for medium to heavy weight fabrics, which is why it works fine on denim and similar fabrics. You need a machine designed to handle delicate fabrics. The average home sewing machine is likely better suited than the Juki DDL-553. Even with suitable machines, people apparently sandwich very fine fabrics between tissue paper to give the material some stability. Then tear off the tissue paper after sewing the seam. (https://www.youtube.com/watch?v=uDADCZ20ce4 )

-
There are several subclasses of the Adler 205 design with different variations on the feed mechanism. They come in top+bottom+needle feed (compound/unison), top+bottom feed, bottom+needle feed, and some other variations. The Adler 204/205 model brochure leaflets show the different Adler 205 models available at one time. Here's a slightly hokey video that shows non-unison feed Adler 205 designs stitching some non-trivial seams:
-
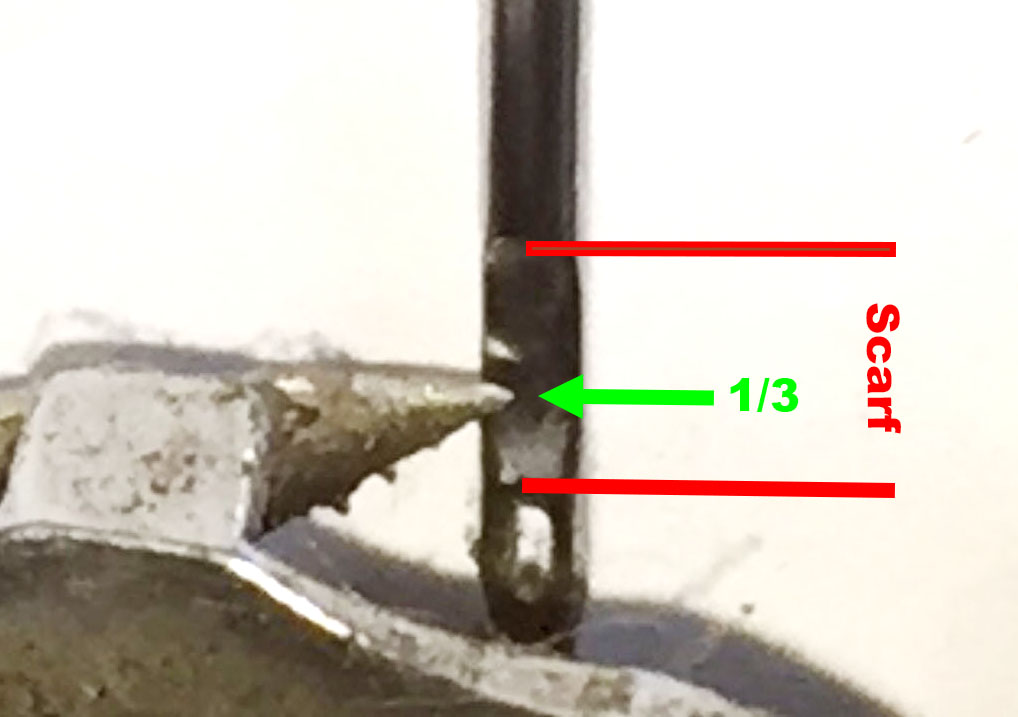
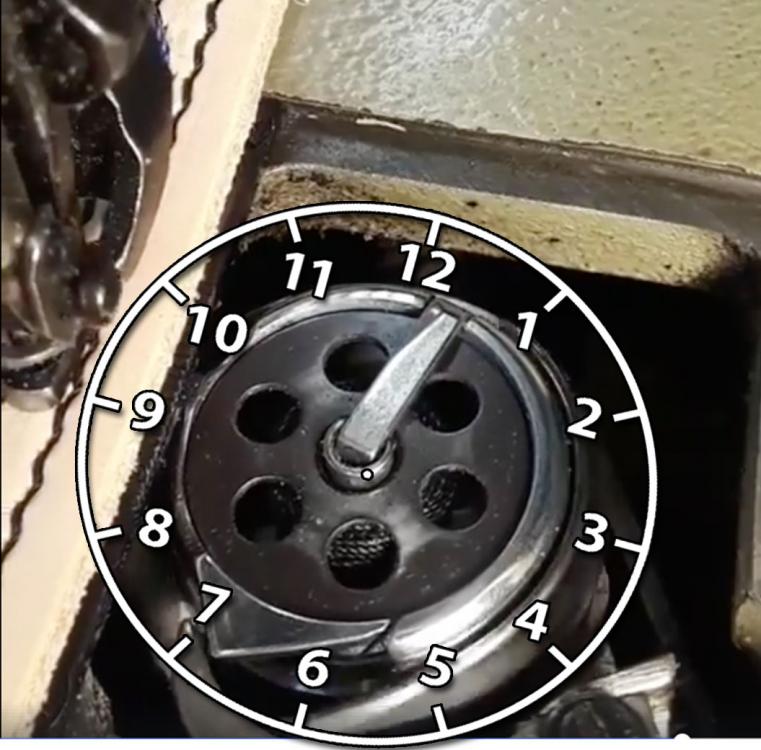
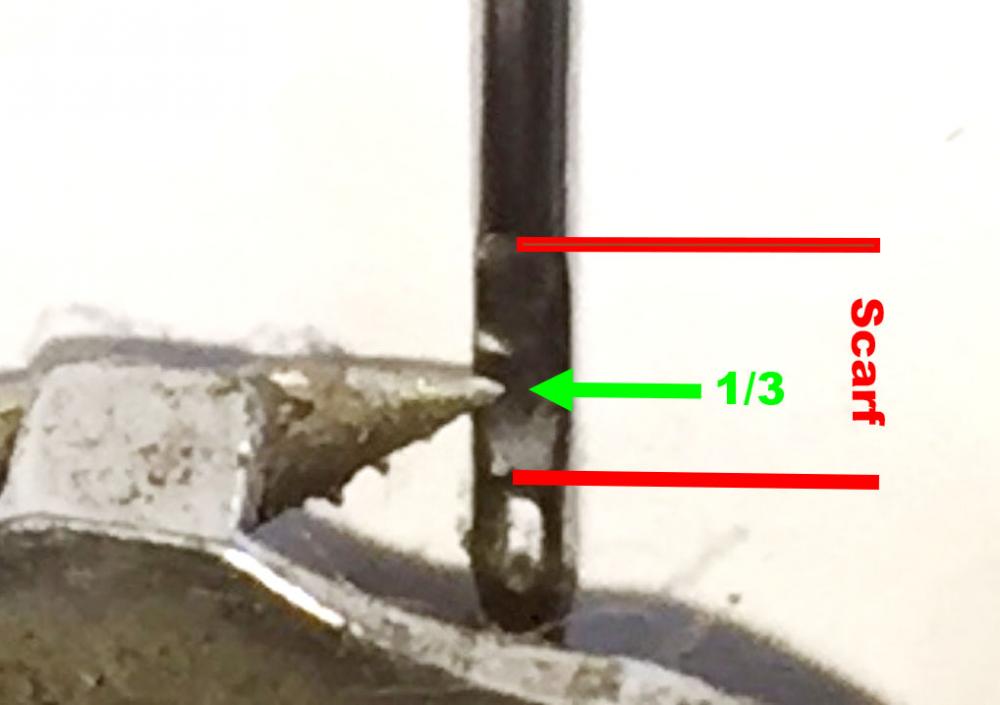
It looks to me like your hook timing is about "five minutes" too late. On machines with this vertical axis hook design, the hook timing criteria can be generalized like this: When the needle is in the bottom dead center (BDC) position, the tip of the hook needs to be at the 7 o'clock position. I superimposed a still frame of your video with a clock face to illustrate the concept. Your hook tip represents the Minute hand on that clock. On your machine the hook is about five minutes too late, i.e. hook tip points at 6 o'clock instead of at 7 o'clock when the needle is at BDC. I recommend advancing the hook timing clock-wise by "five minutes." After advancing the hook, you may also have to adjust needle bar height up a little to make the hook tip pass the needle near the lower third of the scarf. I think you will find that the other issues like thread snapping around the hook, then catching on the release finger, then snagging on the rectangular hook gib below will all improve as a result of the hook advancement.
-
111w155 Tension Unit Repair or Replacement
Uwe replied to Willie0's topic in Leather Sewing Machines
That tension screw post on your machine looks quite bent in that first photo - it must have absorbed a pretty good whack at some point. In case the post does not cooperate with a simple repair, a new tension unit is not expensive and easy to install. If you decide to replace the tension unit, I'd recommend getting a nice new OEM tension unit made for a Juki LU-562 or something similar. There are many compatible tension units out there. The super cheap Ebay tension units are cheap for a reason in my experience - I have several that I don't even want to install on a machine. Even a very nice OEM tension unit is not expensive. @Gregg From Keystone Sewing can hook you up, I'm sure. Luckily, installing a new tension unit is a very easy task on these machines. It may take you longer to find a screwdriver than to actually install the new tension unit. Here's a video I made just now that shows how to install a new tension unit in under two minutes. Here's another video I made some time ago that goes into more detail about the check spring adjustment: -
@Rustic, you can get the ball rolling by telling us why YOU think the machines you listed are even candidates for what YOU want to sew. The machines you list have been discussed dozens of times before. You have a better chance of getting a meaningful response if you give us some background, show us your homework, tell us what's important to you and what your budget is, and then ask specific questions. This may sound like work, but it's no less work on our end.
-
19/32" drills and 1/2" bore pulleys are readily available.
-
Even the cheapest plastic caliper you can buy on Amazon for $2.74 (http://a.co/475FoBc) is more accurate than your guessing game. Put some value on your time (and ours) and you'll be able to justify a decent caliper very soon. Once you have one you'll use it a lot.
-
The video below (starting around the 1:08 mark) is a little corny but shows a setup that looks promising for sewing thick leather extremely close to obstacles. I don't even know what subclass that Adler 205 style machine is, but that tall, skinny foot immediately behind the needle sure feeds that thick leather well and generally stays out of the way. The special throat plate also has cutouts that allow obstacles on the underside very close to the needle. I can see that combo working well with T-style buckles. Unfortunately, I have no idea where you can find such a machine, sorry.
-
The bobbin case opener finger on the machine in the video above is not adjusted properly and does not perform the task it's supposed to. That's why the thread snags on the tab. I made a video recently for a different topic related to bind conditions using my Juki LS-341(different machine, but same hook and bobbin case opener functionality.) The first half of my video shows how that bobbin case opener finger should be adjusted and how it moves the tab. Perhaps it can clarify a few things. The way you adjust the bobbin case opener finger is a little different on a Juki LU-563, but the same concept applies. Here's a video from my archive that shows a 563 class machine after I made some adjustments (unrelated to the bobbin case opener.,) It shows how the finger pulls back the bobbin case from a different angle.
-
I just edited my earlier post to add a demo video on how I use my iPhone magnifier/loupe function. Of course an old school magnifier would probably work just as well:
-
I can't come there an time your machine, sorry! But I can offer some tips on making it easier with not-so-perfect eyesight: 1. Use your (or somebody else's) iPhone as a magnifier loupe (https://9to5mac.com/2016/09/26/how-to-use-ios-10-magnifier-magnifying-glass-iphone/) . Android phones may have this feature, too. 2. Put a piece of paper behind the hook to see the gap between needle and hook better. Here's a video of my setup when I do very detailed adjustments: 3. Use the needle guard to keep the needle a safe distance away from the hook:
-
You could probably simply ignore the crack, too. If the machine sews fine, just put it in a proper, very strong table top and use it. That tiny crack at the 10" mark on your ruler should not affect functionality. Any hot welding fix attempts may just make matters worse. Properly supporting the machine may be all you need to do. Most tables only support the machine at the corners, but you can machine an edge that supports the machine along the "lip" instead of just the corners. The most likely cause of that crack is a bowing table top that only supported the machine at the very left and right edge. Many cheap industrial table tops are simply too weak to support the sewing machine without bowing in the middle. That big hole in the middle weakens the table top considerably. Especially particle board table tops are only straight for short while after you cut a big hole in them and drop 70 lbs of weight on them repeatedly. If the machine is supported only at the ends and you let it drop down often enough, a metal fatigue crack will develop in the unsupported middle on the underside. Fixing the crack without fixing the table top will only buy you a little time. Putting the machine in a proper, very sturdy table top, may keep the crack from getting worse and if the machine sews fine as it is, there may be no need to "fix" the crack. I had a machine with a similar crack in the bottom ridge that worked just fine. I built a new, straight, and sturdy table top for it (two layers of 3/4" plywood glued and screwed together). It's been performing well in a production environment going on two years now.
-
If, after watching that last video above, you can't figure out how to remove or install that thread tension unit, then my advice is to step away from the machine and let somebody else perform maintenance tasks.
-
This video shows, among other things, how to remove the tension unit and how the tension release pin works:
-
There's probably a set screw somewhere that holds the tension unit in place. Maybe you just need to move the tension unit out of the body a small distance to make everything work, as Wiz suggested. If the problem originates elsewhere in the tension release mechanism, replacing the tension unit itself may not fix your problem. You really need to investigate if everything moves the way it should when you raise the foot lift lever. Take off the cover plate and look at all the linkages the foot lift lever moves (or should move). One of them will press against the pin on the rear of the tension unit to separate the tension disks. You should be able to see the disk move a tiny bit when you raise the foot lift lever. Take some pictures around your tension unit so we can add an arrow or two to explain things. Don't make us beg. This video also shows nicely how this machine should be threaded:
-
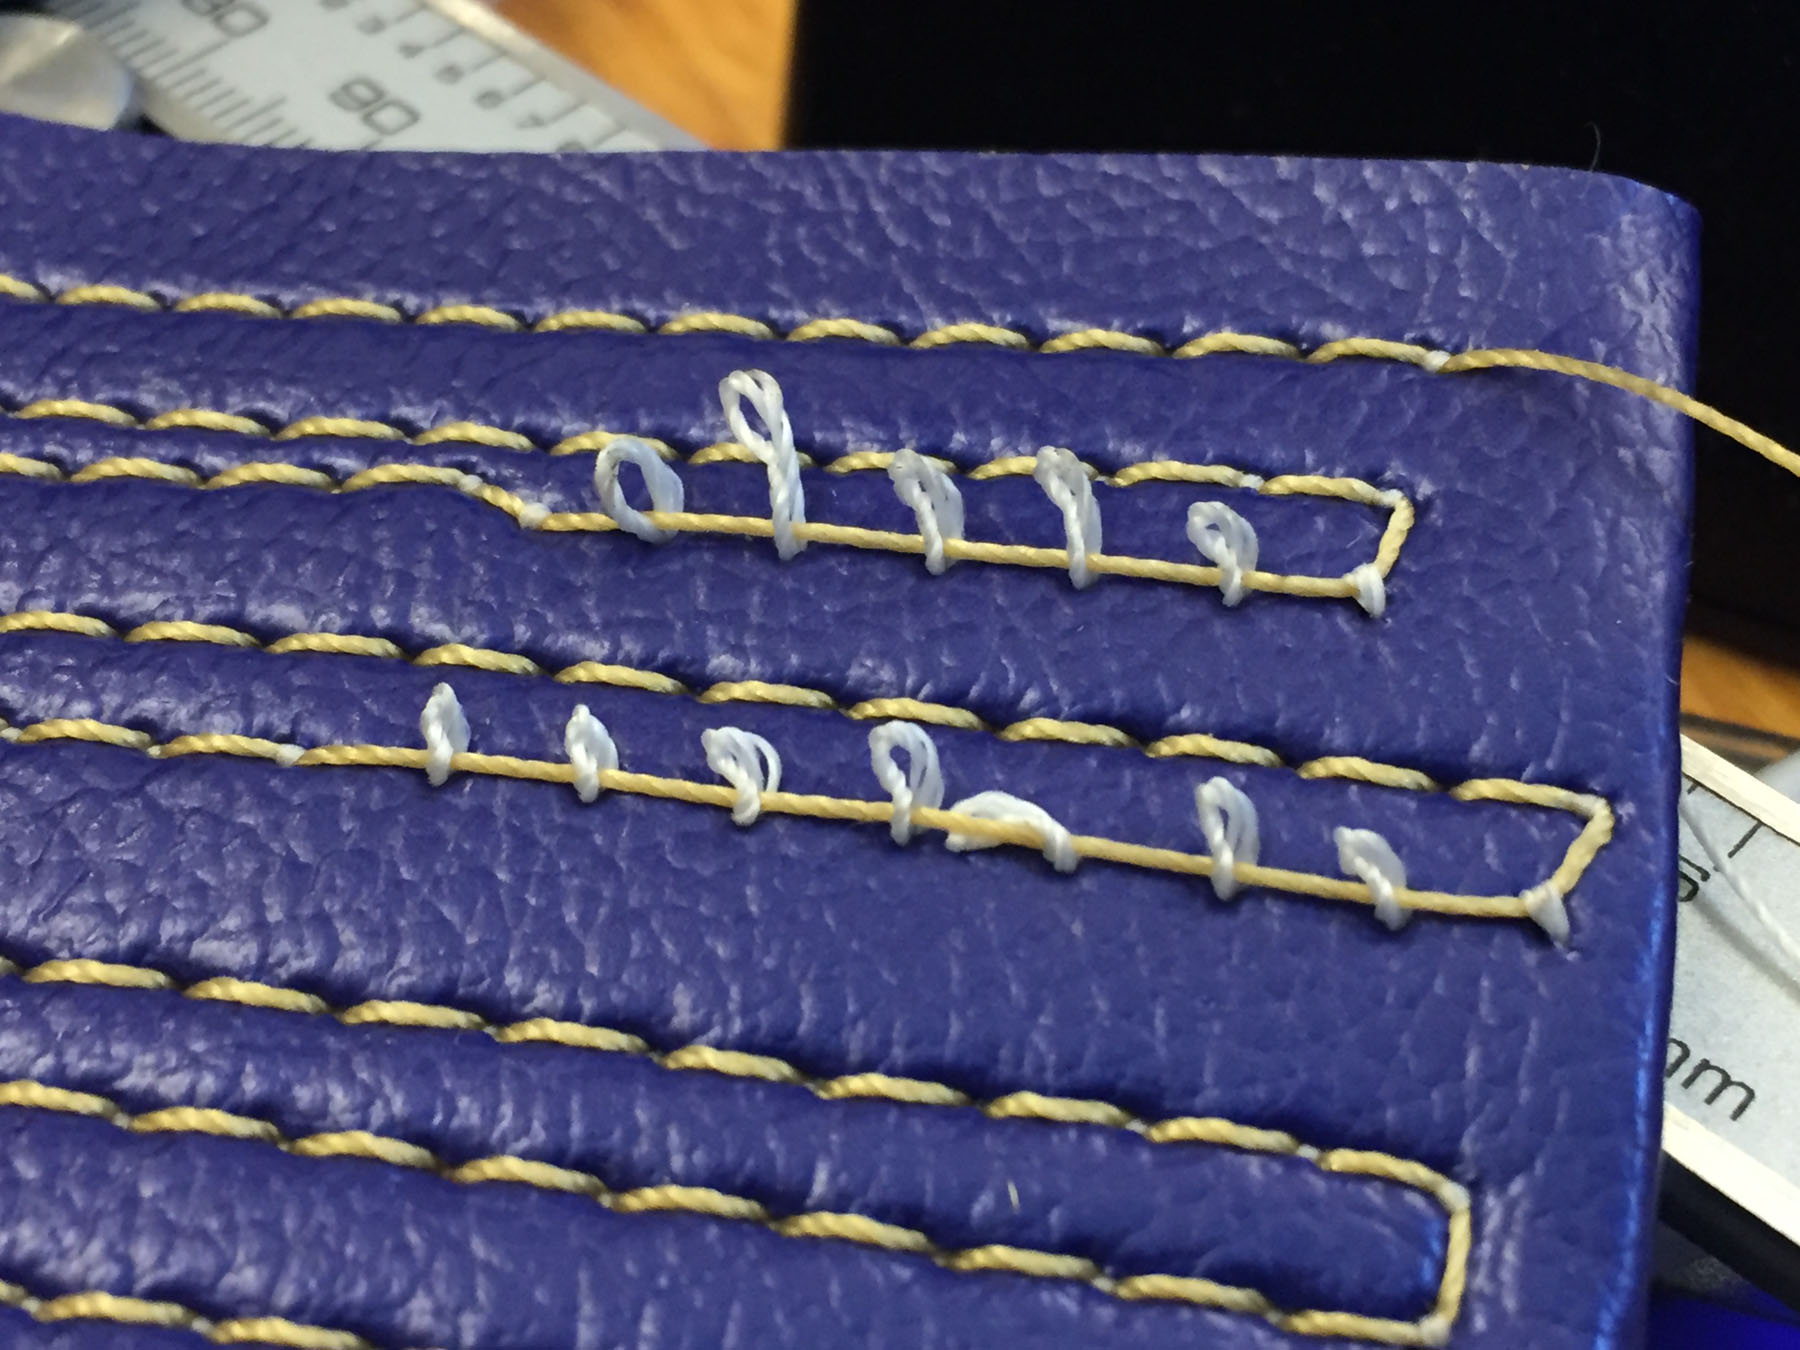
There may be more than one thing wrong. Bottom loops have two major causes in my experience: loss of top thread tension, or top thread snagging/catching somewhere during the stitch cycle. I highly doubt the bobbin tension is causing this. It's much more likely in my mind that your bottom loops are forming because your top thread tension goes missing entirely for some reason. Check to make sure your tension release mechanism is working properly. I was working on a Pfaff 145 yesterday that occasionally had loops at the bottom. On my machine, the culprit turned out to be a thread tension release mechanism that occasionally got stuck in the "release" position after lifting the feet to make a turn. Your upper thread tension discs should definitely NOT be "wiggly" loose when you sew. Please post some pictures of your full upper thread path (spool to needle) and maybe a video snippet or two of your machine sewing (it may take two people to do that.) Here's a picture of what my bottom stitch looked like - note the loops right after a corner, with perfect stitches elsewhere.

-
Still for sale. Still would need to be shipped on a pallet via freight, which would probably cost nearly $300 to a residential address, and I'd spend better part of a day arranging it. Send me a PM with your address if you're interested in having this machine shipped to you. It is a very nice machine and definitely worth more than $600.
-
Lost a screw - anyone know what replacement I need?
Uwe replied to SheltathaLore's topic in Leather Sewing Machines
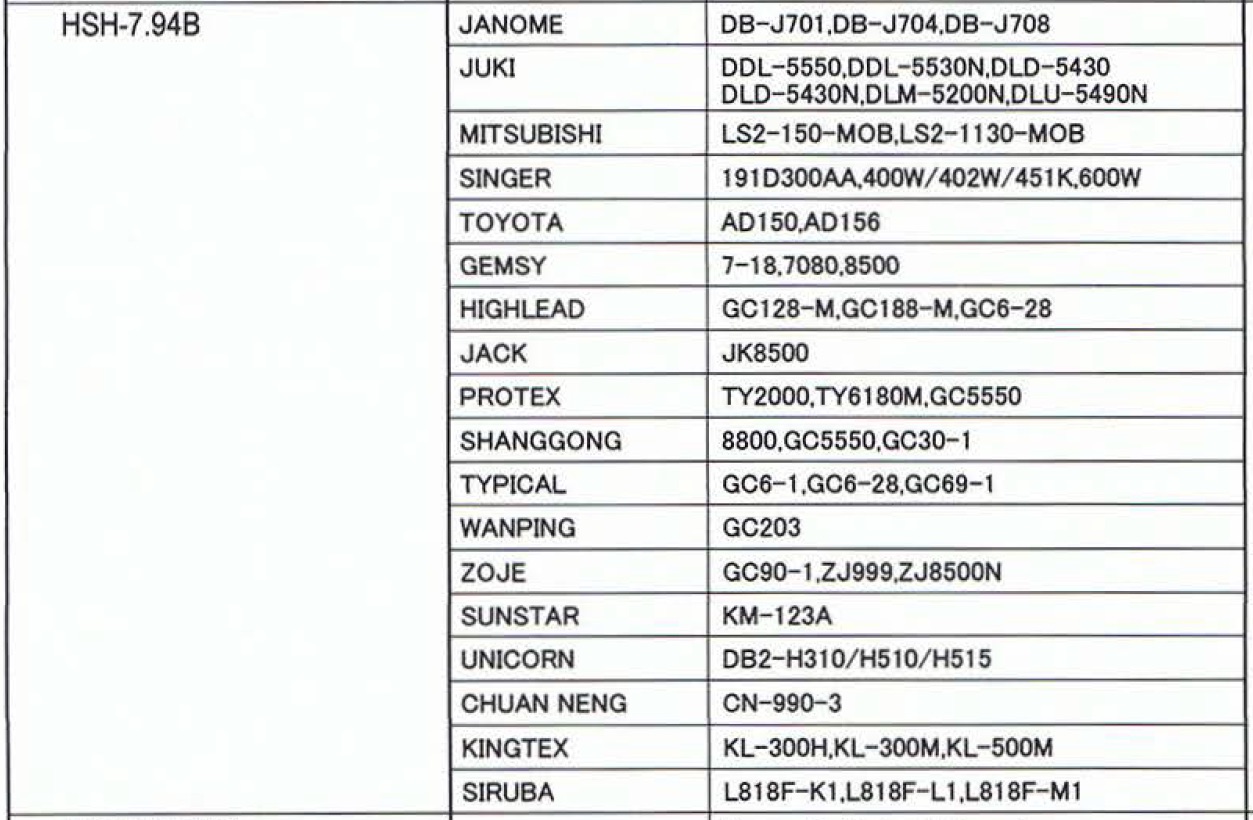
That's probably a 1/8"-44 or #5-44 screw written in weird metric/imperial mishmash dimensions. 1/8"=3.175mm That missing hook screw might be tough to find individually. Your best bet may be to buy a cheap hook that has a good chance of using the same screw. I doubt Hirose invented a new screw for each of their hundreds of hook variations. One candidate is the Hirose HSH-7.94B hook, which is used in dozens of machines and therefore cheap. Available for around $15 on Ebay and I guess some of our trusty banner vendor have them, too. At this prices, the clone manufacturers have little incentive to make their own. Here's the list of machines this hook fits, according to the Hirose Catalog (Hirose Catalog Low Resolution OCR.pdf) :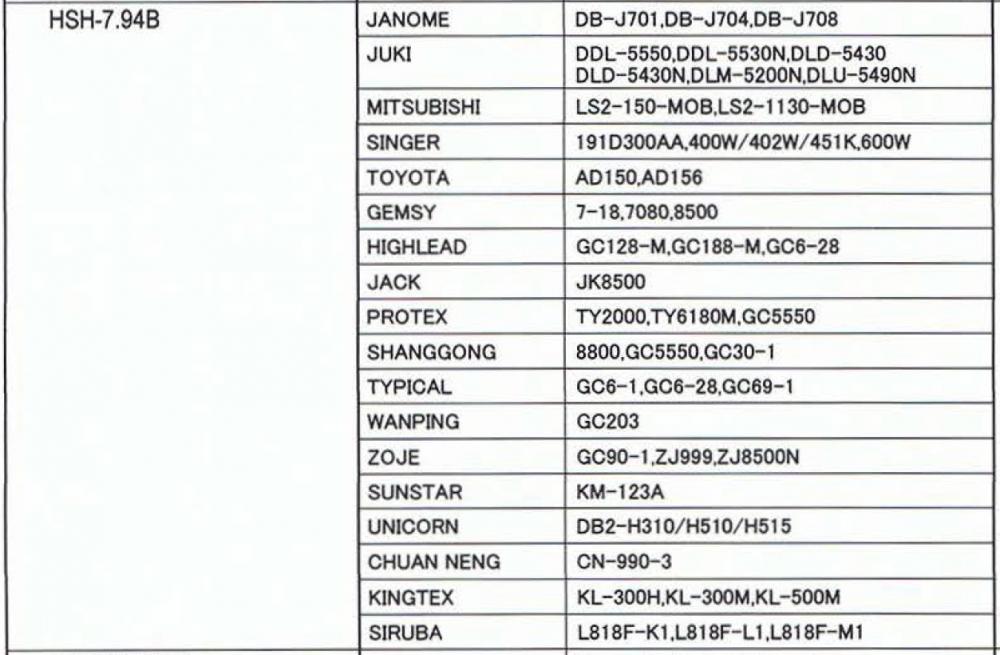
-
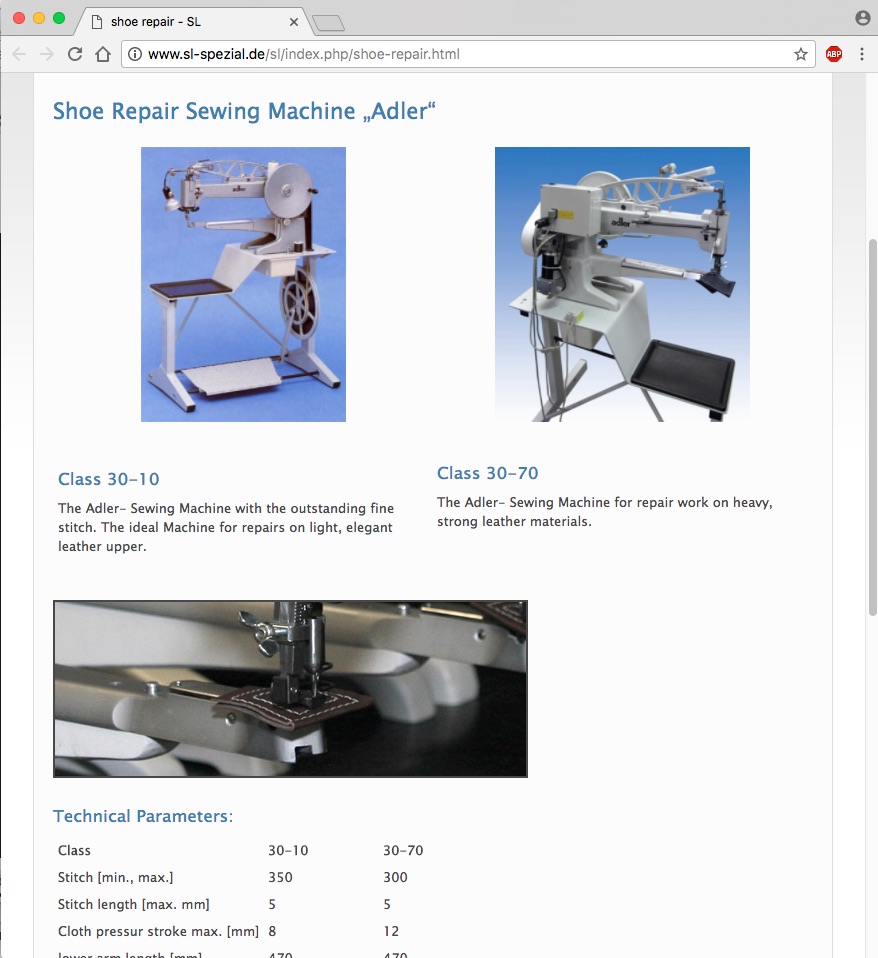
You can still buy Adler 30-10 and Adler 30-70 patcher sewing machines new, made in Germany, and with a price tag to match. The production, development, and support of these machines was taken over by a company called, take a breath, "SL-Spezialnaehmaschinenbau Limbach GmbH & Co. KG", exhale. You can find them online at http://www.sl-spezial.de/sl/index.php/company.html Our resident patcher experts on LW are @Constabulary, who had some beautiful patchers for sale just recently, and @shoepatcher, who apparently owns every patcher ever made, or something close to that. In the clone world, I had a Techsew 2900 (a copy of a late Singer 29 style patcher) some time ago that appeared to be very nice quality:

-
It's probably a Singer 45K-SV99 like the one described on this page: https://www.jomimachines.co.uk/shop/uncategorized/singer-45k-sv99-industrial-sewing-machine/ It's a Special Version of the base Singer 45K. What exactly it is that makes that particular version special is hard to tell. It's also often hard or impossible to find documentation about particular SV models.
-
If you're sewing Kevlar thread, you'll definitely need a machine that you can still get parts for. That Singer 51W55 is not one of those machines. Kevlar thread is hard on machinery and will wear through metal parts over time. In the vintage post bed category, I'd recommend looking into machines like Durkopp Adler 168 or 268, or Pfaff 595 or 1295. In the cylinder arm (beam) category, the Durkopp Adler 269, and Juki LS-341 class machines are candidates, as are the heavy duty Adler 205 and Juki TSC-441 class of machines. Some of these machines have modern aftermarket clones. I have some used and new candidates in that category, just in case you're interested. I built a binding workstation around an Adler 205 cylinder arm machine once to sew laptop fire containment bags (for airplanes) with Kevlar thread. It's holding up nicely in a demanding production environment.
-
Please share the information you already found and upload documents and a picture or two here so that others can benefit from it in the future.
-
On my Juki LS-341 that bobbin case opening finger is rock solid, has no noticeable play and makes no clicking sound when pushed. Perhaps something didn't go back together quite the right way after you removed the hook. I'm also a little surprised that we have totally different hooks in our supposedly identical machines.
-
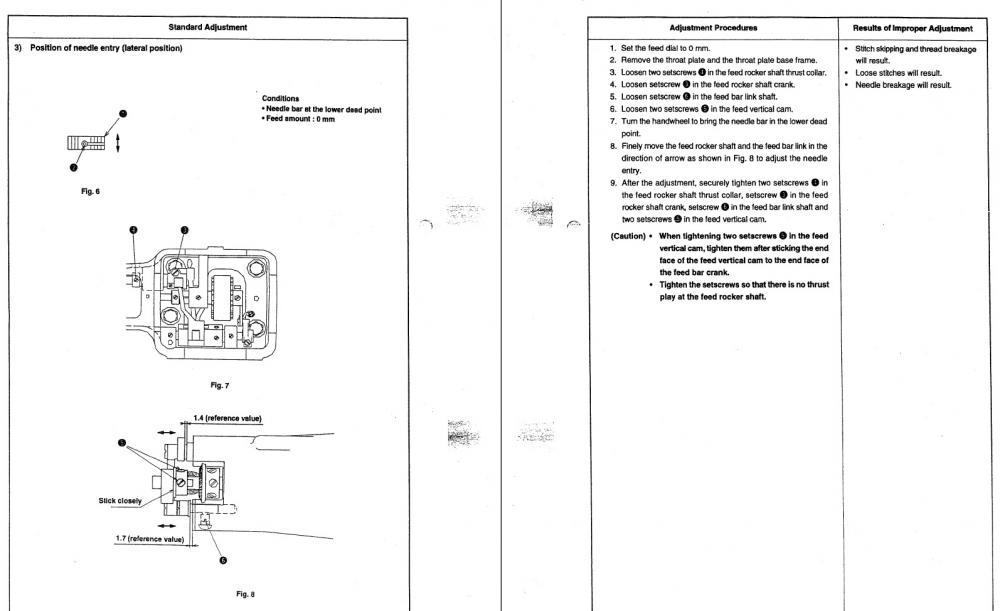
Page 4 and 5 of the Juki LS341N Engineer Manual (Juki_LS-341N_Engineers_Manual.pdf) describe how to adjust the feed dog position sideways to center the feed dog hole with the needle.The feed dog touching the side of the throat plate opening is probably not a super big deal (unless the feed dog dips below and catches coming up.) The feed dog touching the front or back of the throat plate opening, on the other hand, IS a big deal.