MADMAX22
-
Posts
3,201 -
Joined
-
Last visited
Content Type
Profiles
Forums
Events
Blogs
Gallery
Store
Everything posted by MADMAX22
-
Hey guys Ive been tasked with making a dog collar for christmas present. Pretty straight forward Im using a latigo strap, some spikes and emerald inlay type rivets and some other rivets. Ill put a layer of vegtan on the inside to cover up the rivet ends and make a nice smooth color then seal it up. Its for a big ol dog so strength is all important. Now for the question, I understand how to cut the holes and slot for the buckle and the chicago screws or rivits to hold the end together. Now for the D-ring, does that get attached inbetween a couple of the chicago screws and thats it or do you need to sew it in to keep it from moving around. I know for keepers on a belt ya can just put them inbetween the screws and your good to go. But with the d-ring thats gonna have the leash pulling on it and such is there another method thats recommended. Thanks
-
 Agreed that book is a great reference. I got so many good pointers from his books its not even funny.
 -
It still amazes me some of these saddles. I love his 2005 saddle I think it is from Butch's link he posted. That thing is simply amazing (IMHO).
-
Very good looking finished seat David. Im sure that is gonna be another happy customer when they get that on there bike. Oh also when you say atom wax, is that the same as the leather balm with atom wax? Ive been using that stuff lately and I really like it, just make sure the dye is dry or youll be pulling most of it up lol. Has a lovely finish though.
-
Yeah sorry didnt mean to sound so rude now that I reread my post. Im sure if I had a laser I would either use it on leather or mount it on a shark ..... I think it looks pretty cool
-
Pretty cool, allthough not sure about the laser thing. I would feel kind of like I am cheating. Kind of like doing the engraving on a gun with a laser instead of by hand. It is nice that it makes it easier though. Nice looking watch bands. Is that a sub of some kind? I dont recognize the outline.Another question, can you adjust how deep the laser cuts into the leather or is it dependent on the power of the laser that you purchase? Guess Im asking is there a range of depth per power laser that you buy, say one can do 1mm to 3mm (just as an example) and another can do 1mm to 5mm?
-
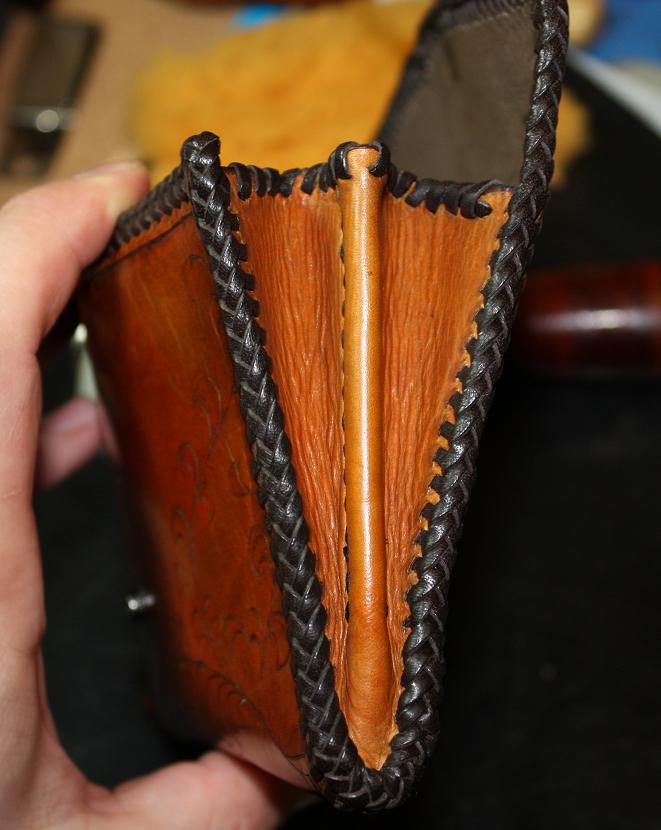
Yep thats it, I just seemed to bunch up the lacing down in that area. I did however punch all the holes before hand so I may try punching the holes after I get them mated up together. I started thinking about it and may try widening out the bottom of the gusset just a bit to aid in making the job a bit easier.
-
That turned out really nice, definatly looking forward to the finished product.
-
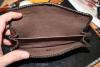
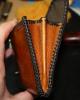
OK so when you guys lace around a gusset corner how do you keep it from looking like a big ball of ..... On the inside run do you use less holes then the outside and just double up the inside lacing while doing normal on the outside? Or just make the gusset wide enough in the area so that you can do it like you would a normal corner? Here is a pic of the latest project that I got into trouble trying to lace and what Im talking about. Thanks for any help.

-
Dragon Skull Note book
MADMAX22 replied to carr52's topic in Purses, Wallets, Belts and Miscellaneous Pocket Items
Ahh the secret comes out, lol just kidding. Its hard to find the time in a day to get everything done ecspecially when you have more then one creative hobby. Good job, simple but very cool looking. Oh and I think all leather workers got stuck in the midevil era, we just occasionally are forced to make a more modern piece of work. -
Made myself a wallet
MADMAX22 replied to BradB's topic in Purses, Wallets, Belts and Miscellaneous Pocket Items
Thats nice and simple looking. So its just two layers right, the inside the way its dyed makes it look like you have three layers in there. Nice stitching also. -
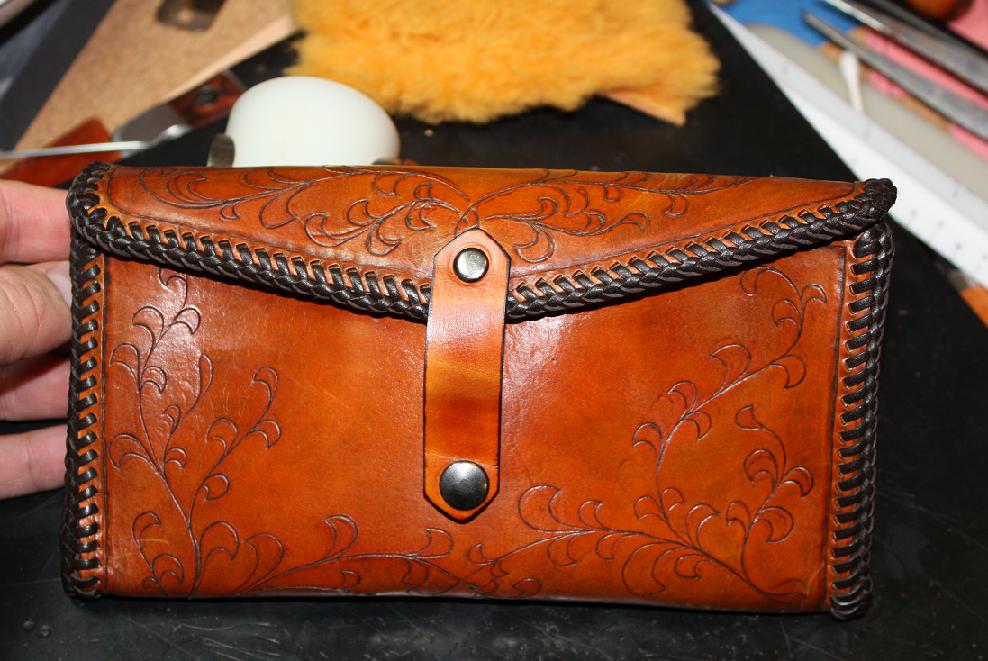
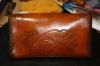
Well the girlfriend decided she wanted a coupon pouch thing to store all her coupons in when we go to the store. Two pockets really one for all of them then as you get the stuff you put the ones your gonna use in the other pocket. Anyways ..... Its 3/4oz except for the strap which is 6oz, lined with pig skin. The center wall is doubled up pigskin. I used deluted light brown (feibings), then a shot of neats foot, then leather balm with atom wax, then antique followed up with leather balm, and finally a coat of oil and a final leather balm. Kind of a process in developement sort of playing around with finishes. The lion is one of the dover series designs, the vine things are just a little drawing I made up, just simple one liners. Now some issues I had 1)The gussets first time trying these and they were easy to make but a pain to get lined up right. Then I made a huge mistake of not tiying off the lacing slits every 10 or 15 which ended up getting my cocked over. 2)The lacing at the bottom of the gussets where the inner circumfrance is smaller then the outer one thru me for a loop. I could use some help with what people do for that type of lacing. 3) The lines form my pattern that I traced on ended up taking up the antique and showed up, partly due to I kind of went freehand on the leave/vine things. Plus the lines for my reference ended up staying. Kind of sucked but oh well. Oh and the lace is 3/32 dark brown tajas Criticism welcome and incouraged, thanks
-
maglight/gerber holder
MADMAX22 replied to MADMAX22's topic in Gun Holsters, Rifle Slings and Knife Sheathes
Thanks for the input guys. Its much appreciated. -
Chuck is right as far as how strong you can get that stuff by the boiling method, I played with a piece of 8oz just for fun and put it thru several stages of heated water. Stuff by the end was like a piece of rock, totally useless but you could throw it at someone and do some damage lol. That was a fun experiment. As far as holsters you have to think that someone once had one that collapsed on them so people started wanting a little stiffer or wanted to make sure that the holster they were getting was stiff enough not to collapse on them when they go to reholster. This probably led to sellers talking about this since the customers were "concerned" about it. So then one seller decides to put a weight on theres to show how strong it is then it snow balls into I can drive my f250 on my holsters. Its got merit in some respects it just gets going a little to far I think, ofcourse that is the nature of things nowadays, gotta do it just to get noticed half the time lol.
-
knife sheath number two
MADMAX22 replied to jbird's topic in Gun Holsters, Rifle Slings and Knife Sheathes
I think you did a very good job on this one.The sheath its self looks good and I like stamping. The bear head looks really good. Now just IMHO I am not to keen on the bear being attached via a seperate piece of leather like that.I think I would have put that in the sheath and stamped around it but thats just me. It all still looks really good and you did a great job.Oh and what color is that, it allmost looks like black with a red hue to it but I cant be sure, -
Thanks for all the info and help guys. For now I am gonna try out the Henry knife, grabbing the one from Pete. A good deal and Ill get to try out something different. I think Ill save my pennies and after the holidays try and look into getting one from Leather wranglers.
-
Thanks for the input guys, Ive got some more options now to try out.
-
Hey guys, Ive got the tandy standard swivel knife that comes with some of there smaller kits. Im starting to get a little displeased with it, it sweaks and doesnt glide freely when Im doing circles and such. Now the girlfriend wanted to get me one for christmas but not spend a small fortune so Im trying to figure out which one to get. Tandy has the al stohlman brand on sale for around $80 and the AS regular ones for around $45 club price. Ive scene the CS osbourne ones on ebay for pretty cheap but dont know if they are any good or not. THe barry king and similer all seem to go for about $150 or so which is a little high for our price range. What would be your guys's suggestions on what to pick up. Thanks
-
A little different inlay
MADMAX22 replied to DCKNIVES's topic in Gun Holsters, Rifle Slings and Knife Sheathes
Ah yes Ive scene that stuff before, very cool stuff. I gotcha ya on the lip thing and concave back to take the shape of the sheath, Thanks for the info. -
maglight/gerber holder
MADMAX22 replied to MADMAX22's topic in Gun Holsters, Rifle Slings and Knife Sheathes
LOL yes that is my old school light that is used for fitting and such. It is not included. Thanks for the comments everyone. I kind of screwed up a tad on the last one though as the hardware was installed prior to dipping and it tarnished the metal a bit and Im sure got to the rivit as well. Still it will serve its purpose as it is gonna see some seriouse abuse which will be a good test to its stamina. If it brakes or comes apart Ill make em a new one (hopefully not too soon lol) -
Tiger packs of color
MADMAX22 replied to zhh660626's topic in Purses, Wallets, Belts and Miscellaneous Pocket Items
Thanks anyways. Very good work. 反正謝謝。非常好的工作。 -
A little different inlay
MADMAX22 replied to DCKNIVES's topic in Gun Holsters, Rifle Slings and Knife Sheathes
That is really nice looking, I like it. Kind of makes me think of a really modern version of the old mongel style embelished knife/sword sheaths they use to use, just a far simpler design ornamentally wise. Do you have any pointers for doing the stone inlays? -
Tiger packs of color
MADMAX22 replied to zhh660626's topic in Purses, Wallets, Belts and Miscellaneous Pocket Items
Thats very cool. Very good job, nice pictures too lol. I am wondering did you mold the leather out to make it bulge out for the tiger or is it like skived down around it or something. Very good work. -
6 Alligator belts by Peter Main
MADMAX22 replied to Rawhide's topic in Purses, Wallets, Belts and Miscellaneous Pocket Items
Does he have a website that you can purchase them from and to get a look at one. Sounds interesting. -
Bulldog Avenger Holster
MADMAX22 replied to Randyc's topic in Gun Holsters, Rifle Slings and Knife Sheathes
Very nice job Randy, looks excellent. Question on the dye and finish, what dye did you use and how did you seal it to prevent any rub off and such. Also for the people looking for the punches and such from Tandy, get on the emailing list/mailing list/wholesale club member. Once you have that then wait for sales and check all the resources. Ive rarely if ever paid full price for something from tandy, usually about half price.