MADMAX22
-
Posts
3,201 -
Joined
-
Last visited
Content Type
Profiles
Forums
Events
Blogs
Gallery
Store
Everything posted by MADMAX22
-
 Hey guys I read a while back that you can thin feibings dye (the regular stuff) with denatured alcohol. So I have been doing that for some time now and it works fine, however it doesnt seem to give me the finish I am looking for most of the time. I have heard of adding some neats foot to the thinned dye which makes it kind of like the feibings oil dyes. However with the denatured alcohol it doesnt mix with the oil. So how do you guys go about doing this. I have also heard of using rubbing alcohol to mix with your dye's. Does this mix with the oil better? Thanks for any input.
 -
strap retainers on flap or no
MADMAX22 replied to esantoro's topic in Satchels, Luggage and Briefcases
Holy .... lol thats one pricey bag. Ofcourse atleast its useful and would probably last a full lifetime. I think what I would do is try it without the strap retainers and see how it looks with your overall design, color, type of leather. In your pictures I like the way the black one looks as far as shape/form. I like your bag style better and the color but its hard to see/think of what it would look like without the certain parts on there and make up a opinion. -
It seems too, I know not doing it and the odor was pretty bad alot longer but not too seriouse. When doing the baking soda wash it makes it so that you gotta get your nose right up to the piece to get a wif of the vineger.
-
Try a little more oil. I know that mine will do that and Ill just add some more oil to the areas that bend, I usually bend them and apply some oil and then they are good to go. Its still trial and error for me but the stregth of my solution is really good and I get a nice black in about 35s to 1min of dipping. I think the vinagaroon really draws out the oils in the leather. That and I give it a baking soda wash then a rinse so all of these probably really get rid of it. It also depends on the leather, Ive had some that got really tough afterwards and others that were nice and flexible even after all the treatment.
-
Thats cool as all heck. That would be perfect to inlay into the bench if you could swing it.
-
How You Can Help Leatherworker.net
MADMAX22 replied to Johanna's topic in Announcements and Administrivia
Hey I was wondering if there is a way that you could send out a pm to those of us whos paid subscriptions run out. I know its all voluntary to donate and I cant donate much but I can do a certain amount every couple months however I forget about it. Just an idea for the people who generally pay a little bit. It doesnt have to be a spam attack or anything just a friendly one time only PM. Thanks -
Welcome, the stuff youve done is really good. The construction is outstanding. Well on your way to, and enjoy the forums.
-
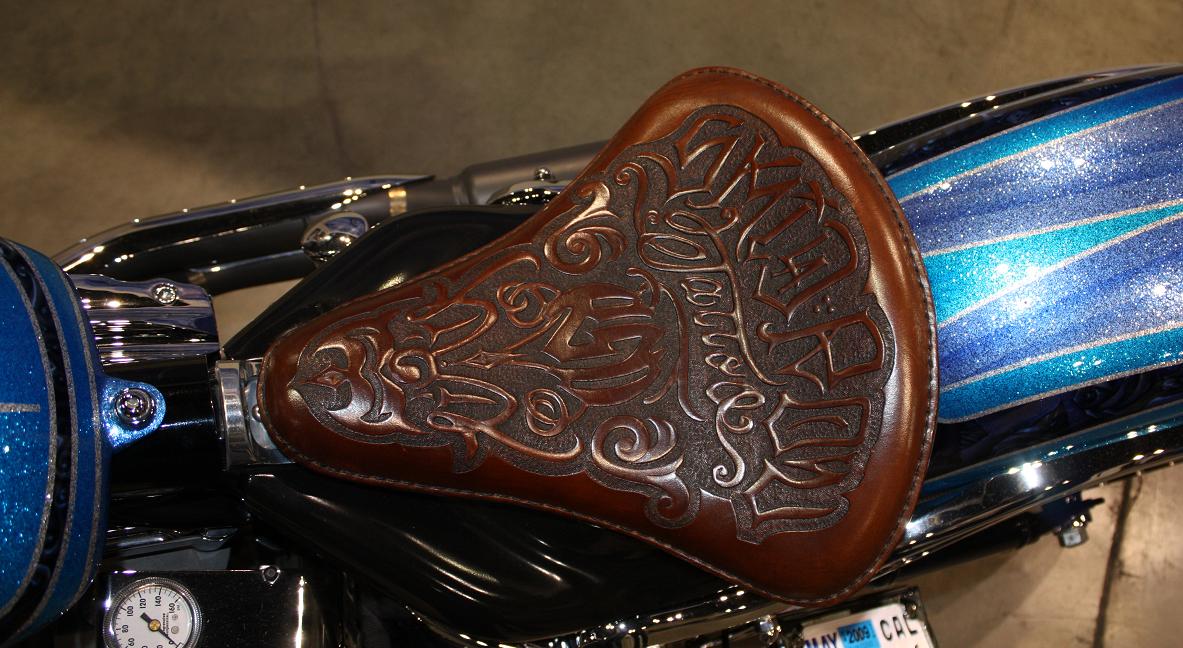
That looks really cool, its kind of like doing filigri without the filigri (spelling). How do you get that nice light mahogany color. Mine allways ends up being way too dark.
-
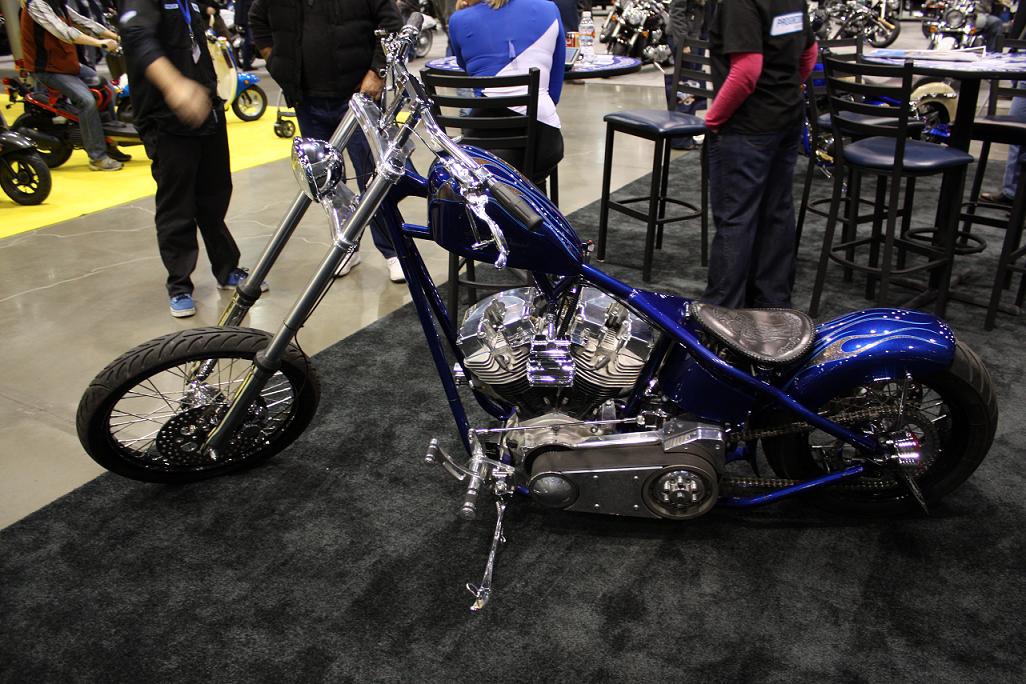
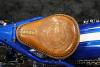
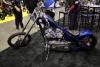
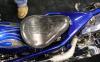
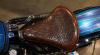
Thanks David, I must say your seats still looked aewsome. It was great seeing your work in person, I think people thought I was a little weird because I was more interested in your lacing and such then the motorcycle. I know your tooling looks really good in your pictures but seeing it in real life I was like wow thats great. There were two other seats that I saw that were custom but I couldnt get to them to get close ups because they were roped off. Both were from the early 90's. Ahhh well.
-
Hey went to the motorcycle show today up here in seattle and guess what I saw. A few of David's seats and a couple of others that I have no idea. One looked really good but when I asked who did it they said it was a trade secret, lol whatever. Anyways ...... David your seat still looked great but I would try and tell those people how to take care of them. However they were still very nice and the tooling was excellent. Great job.
-
Hey Jbird I know that on ebay lately there have been alot of scrap lots of decent size upholstery leather. This stuff would work great for making a apron, it may just be a little bit of a funky color but after a few years it wont be the same color anyways lol. But if you got a sewing machine it may be worth taking a look at if you want one made out of leather.
-
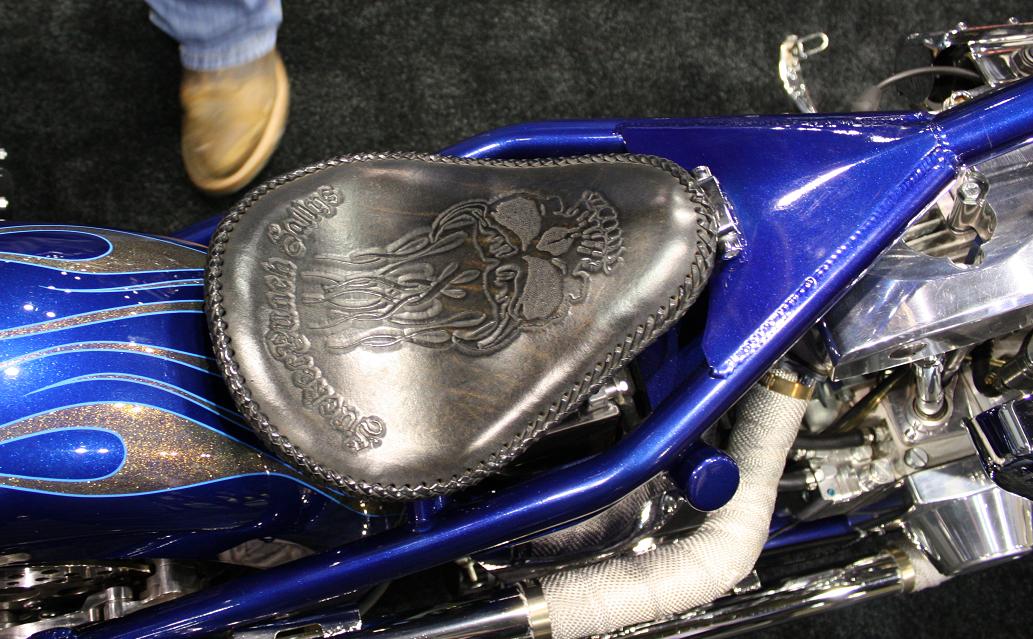
That looks good. I am glad you posted this because Ive got a silver/chrome bike myself and was wondering how the naturel browns would look on it. Very good job on the seat. Do you use Windows? If you do you should be able to resize them with paint.
-
What Tools Are Needed
MADMAX22 replied to JRB's topic in Gun Holsters, Rifle Slings and Knife Sheathes
The boning tool that comes with the kit has a burnishing half wheel on the end of it. Basically you get from looking at the picture and from what I remember (thats what I got about a year ago, in my case should of just gotten the ultimate workshop) Plastic boning/burnishing tool strap cutter (wood) utlity knife hammer (rawhide) single hole punch wheel holepunch set of mini and maxi individual punches compass sheers safety skiver rivet/snap setting kit stitching slot punches (multi and single) edge beveler stiching groover tool awl with mutlipe blades granite slab rubber mat I think that pretty much somes it up. I could have missed something but eh. There are some things you may not use but for the most part I pretty much used all of it and got alot more but I do alot of different stuff. Thing is you will need needles and stuff like that along with thread and such. -
What Tools Are Needed
MADMAX22 replied to JRB's topic in Gun Holsters, Rifle Slings and Knife Sheathes
Just wanted to add that tandy has there pro leatherworker tool set on sale right now for $200. Its a pretty good starter set if you dont have anything at all. -
Thats really cool, good job on getting those guys restored. I love the look of both of them. Gotta keep us informed of how it goes.
-
For the ladies in my life
MADMAX22 replied to Wyvern's topic in Purses, Wallets, Belts and Miscellaneous Pocket Items
Hey um where did you get that clasp at. That thing is nice looking. Thanks -
I use 1000grit sandpaper on a flat surface. Take it and lay it flat so that it is just at the edge of the shiny portion and draw it away from the tip (toward the handle) while raising it in its natural arc. Its kind of hard to explain for me but basically the shinny portion on the back, thats what you want to repolish, this puts the edge back on the cutting surface. Also same thing works for the french skiver they sell.
-
Welcome to the forum and great looking work.
-
Ford did the same thing as well. I still try to work on as much as possible but the computers,airbags,sensors,........
-
Thats the same method I use but it sounds like you need more steel wool. I used about 3 or 4 of the steel woolies in a gallon of vineger and I put it all in a big coffee container (plastic one). After a while the steel wool has pretty much all desolved with a few chunkies in the bottom. The solution is a nice black color now and as long as you dont have any wax or anything on the leather (wax acts like a resist) then it will turn my stuff a black to black/navy blue within a minute if not less. Once out I usually give it a quick shake in some water/baking soda mix. Then it goes under the water for a few secs to get everything cleaned off. After it dries off formed or not for whatever project your doing, I then have to oil it a few times. The process really pulls the oils out of the leather and gives it a waxy feel on the outside for a while. You really need to get some oil back into it. Also remember that depending on the tannery and what they use the leather will react differently to the DIP (as I call it).
-
Thanks Tina, I didnt know that and well worth the not using it then. I may have to line it with some chrome tan or something.
-
For the ladies in my life
MADMAX22 replied to Wyvern's topic in Purses, Wallets, Belts and Miscellaneous Pocket Items
Great job on that purse, any pics of the inside by chance. Really nice lacing. On the gussets I have the same problem but I am just a beginner. About the only thing I can say is make it out of construction paper first and see how everything lines up. -
OK so now I know what was meant by a ruby blade, I saw that one on ebay and was like what the heck. I didnt even realize it was a small portion of ruby used as the cutting edge. Thats really cool.
-
Thanks for the help guys.
-
Do you get request for double stitching?
MADMAX22 replied to Shorts's topic in Gun Holsters, Rifle Slings and Knife Sheathes
Agreed about the glue and stitching. The double stitching lines and even triple is from the work force boots and clothing. Its from the fact that machine stitching once it starts to unravel obviously will just come apart. Hence if you have two or three of them the chances of your stuff coming apart are very slim. With your holsters they are not only stitched but also glued together and in alot of cases are saddle stitched which to be honest most general public people dont even know what that is. If I was buying a pair of say redwing work boots and they werent double stitched I would probably be a little peeved. However when I look at a handstitched holster with a single stitch I am not gonna get peeved because I know there are other factors that are gonna hold that thing together. Personally I would explain to the customer why its not necessary and maybe try to educate them a bit.