MADMAX22
-
Posts
3,201 -
Joined
-
Last visited
Content Type
Profiles
Forums
Events
Blogs
Gallery
Store
Everything posted by MADMAX22
-

First Knife Sheath With Stingray Inlay!
MADMAX22 replied to Goldwing's topic in Gun Holsters, Rifle Slings and Knife Sheathes
Thats cool, rather different which is good. Nicely done on the knife also. -
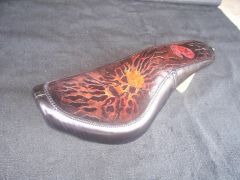
I reapply about every 3 months of hard riding (thin coat) or about every 6 months or so if its just normal dry weather which we dont get alot of up here in northwest WA. On my seat I used about 8oz on top and about 5oz on the sides. I think anything from around 4 to 6oz works pretty good for the sides since on the cruiser type seats you gotta wet form them around the padding. Ive only done my seat though and will say you will be up for a little bit of a challenge. They are alot different then the chopper style seats in alot of ways. If you can try and get her to try out the seat before you finish covering it to make sure you get the padding right. I know it took me a few times to get mine right.
-
Interested to see what your making with it. That does look like alot of detail painting. I dont even think I could lay out that pattern without messing it up lol.
-
Graduation Bronc Halters
MADMAX22 replied to Double U Leather's topic in Saddle & Tack Maker Gallery
Look great, good job on the antiquing. I am still working on getting the hang of that. -
Yeah I like the sno seal or similer just for that reason, you can recondition the leather. I use it on my seat and have had it going strong for a while now and its gotten soaked many times. Its black though so doesnt show the water stains. It still looks really good though.
-
Tooled Vinegaroon Belt
MADMAX22 replied to MADMAX22's topic in Purses, Wallets, Belts and Miscellaneous Pocket Items
Thanks for the compliments. As far as vinegaroon its really easy. I use a old coffee can (the plastic folgers kind) and fill it mostly full with vineger. I use the apple cider stuff. Get some steel wool (some of it has oils and such so give it a shot of acetone and burn that stuff off) you can use any iron, shavings, nails whatever just make sure its straight iron. Put that in it and let it sit for a couple of weeks. I poke a couple of holes in the top of the cap to let it vent. Some heat and occasional agitation will help speed things along. After a couple weeks it is good to start using generally. Let it sit in the mixture for a few minutes, take it out and give it a quick (quick) rinse in a baking soda water mix. Dont let it sit in that too long as it will make the leather too basic and leather should be slightly acid. I take it out of that and rinse it off with fresh water and let it out to dry. Just before its dry give it a oiling, may need a couple of light oilings after that. Its fun stuff and results can vary with alot of good effects acheivable. There are also several methods to get the same result this is just the one I like to use. Chuckborrows is really good at this kind of stuff and knows alot about it, he has posted several times with good tips and instructions if you look up his postings. -
Tooled Vinegaroon Belt
MADMAX22 replied to MADMAX22's topic in Purses, Wallets, Belts and Miscellaneous Pocket Items
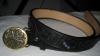
Sorry thanks for the reminder. The front is some WandC about 8-9oz and the back liner is some 3oz (cheap tandy stuff unfortinately but it works). The buckles I get off ebay, they range from what I paid for this one $9 for a two pack up to about $20 a piece depending on the buckle. I really like the BTS buckles, they are well made, solid brass and come in some pretty cool designs. -
I dont know of a pattern per say but if you are gonna be making a few of them you could always just buy a cheaper one and use that as the base for your pattern and go from there. Check the used sporting goods places and such, its like weights people get them intending to use them and many of them dont see the intended amount of use and get sold pretty cheap.
-
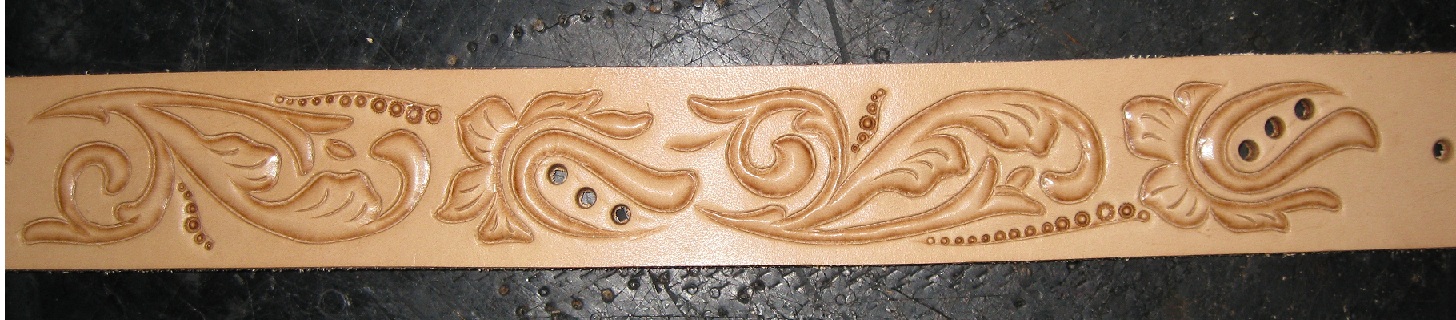
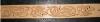
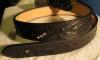
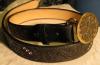
Well did another belt this time I was like screw black dye, I have far better luck with vinegaroon. So this one is all black with a little bling and a bts buckle. I tooled then dunked it, handstitched the liner with linen 6cord dyed black. Went with a natural finish on this one, just oiled, then waxed it with some of my home brew stuff and a light coat of sno seal. Its still settling in so there are some in the tooling impressions but I will give it a final buffing tonight. I really kind of like this one. The crummy pics dont really do it justice. I think she will like this better then the other one I did. Anyways comments and critique welcome, enjoy. Oh and would like to add I am pretty stoaked, I got the hand stitching for this one down to just under 2 hours. Not bad for me on a belt measuring total 45"

-
Looks great man. Nice colors. I dont think the back off centering is even noticeable. Just remember with the sno seal, picards and others like that you gotta throw some more on every once in a while.
-
nice, sturdy, swivel, seat stool
MADMAX22 replied to Mike Phelps's topic in Furniture: Inlays and Upholstery
Great looking setup you got there. Seats turning out looking real good. Next one I would just as a friendly suggestion think about trying out some good neoprene. You can cut it and shape it to a nice shape and it works wonders when your sitting on it for extended periods of time. I made one for my bench stool which is just wood, I put the neoprene covered in some good thick chrome tan stuff and it works out really well, I can sit there for hours and the ol butt dont get sore. Tattos pick up the boot "encyclopedia of rawhide and leather braiding", think you can get it for about $20 on amazon and its well worth the money. Tons of different braids in there. -
Lizard Little Wallet
MADMAX22 replied to pitman's topic in Purses, Wallets, Belts and Miscellaneous Pocket Items
Turned out pretty cool, I really like the lizard, its got a good feel looks great and is relatively easy to work with. Nice touch with the cobra in there also. -
I have ordered from here before and have no complaints. http://www.closedcellfoams.com/polyethylene.html Have also heard of these guys and they have that nice glued side so you peel and stick and your good to go. I cant vouch for them but have scene them recommended before. http://www.foamforyou.com/neoprene.htm <BR><BR><BR>As far as the design I cant offer much but would suggest whatever you can tool well and make look good if its gonna be for show. <BR><BR>Would like to add almost forgot but I have gotten several gel pad inserts off of ebay. Its actually usually one of the best deals I have found. Ive only gotten a couple but have not had any issues with them. I dont remember the seller though sorry.
-
Small Purse Round 1
MADMAX22 replied to MADMAX22's topic in Purses, Wallets, Belts and Miscellaneous Pocket Items
I will be doing another one here shortly and will post pics of the process this time around. Its really pretty simple but takes a little work. You can see on the inside there is the one piece of leather that is cut with half circles on each end, make two of these just like on the inside, make two more that have extra length that go around aboutmost of them to use as a tab to bend out. On the two outer ones I wet form the extra tab portion kind of like you would a tool bag for a motorcycle. Once they they are wet formed I ad the d-ring keeper. Then I glue the inside ones (without the tabs) to the inside and stitch these in. Now you have the double layered portion with a lip around most of it to sew to your purse body. I take the body and put on any clasp hardware that I want covered on the inside then glued my suede to it. I then match mark where the gusset portions I made will go and skiv the suede in this area. I used a french edger for this. Not to much of a skiv, just enough to take the suede down at a angle to the vegtan leather. Next I glue and clamp one gussett at a time and stitch that to the body. Stitch around the flap at this time also as you go around. I forgot to add also I stitch the front (under the flap) before I put the gussetts on. Thats about it, kind of hard to explain but is relatively easy once you get it. Ive got another one I will be making at the end of the week and Ill take pics of my process as I go along and post it up. -
Thats great thanks for sharing, very nice page I agree. Great layout and great pics.
-
These Edges Are Driving Me Crazy!
MADMAX22 replied to Sixer's topic in Gun Holsters, Rifle Slings and Knife Sheathes
He is just talking about the water or mix that you use to wet the leather. Some people use various things in the water especially when tooling to get a smoother knife cut and better tooling. I just put some saddle soap in my liter bottle and fill it with filtered water. -
Do you have a link for the dewey knives by chance? I wanna get one or two of the Jeff Cook knives but gotta wait for a little more cash (spent the leather cash on Ed mauls lol). They arent cheap but then again I have heard nothing but good about them. Gotta let us know how it all works out and post some pics of your new knives once you get them.
-
Turned out great,
-
Interesting setup, looks really good. Guess the guy doesnt wear a uniform lol.
-
These Edges Are Driving Me Crazy!
MADMAX22 replied to Sixer's topic in Gun Holsters, Rifle Slings and Knife Sheathes
I agree with Boomstick on this one, with a few things I do slightly different because I have to do everything by hand with the occasional use of the dremel which isnt very often nowadays as I have learned to get a better cut on my edges. -
Looks excellent, I like it.
-
 This case turned out amazing, great job.
 -
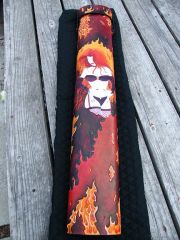
 Wicked looking seat, great job.
 -
Tooled Flower Belt
MADMAX22 replied to MADMAX22's topic in Purses, Wallets, Belts and Miscellaneous Pocket Items
Thanks guys, I think I need to carve out a bunch of little things and sit there and practice antiquing them. I really need to work on two areas, carving and finishing (colors). I do reasonably well at assembly, stitching and such but after that is where I need to practice more. -
I think what you wanna do and it kind of says this in the book is use a hole punch to punch out the 90* bend. This will give a slight bevel to the edge anyways. If you are edging I use the regular edgers for the corner work, its kind of a pain but you can start toward the center of the 90 and work out in both directions. If you are doing this on the flesh side I take a small razor and after doing as above will use the knife on the little bit if any left at the center of the 90. Usually though you can make the 90 with the regular edger if its nice and sharp (not the keen edge type). Hope this helps some.