MADMAX22
-
Posts
3,201 -
Joined
-
Last visited
Content Type
Profiles
Forums
Events
Blogs
Gallery
Store
Everything posted by MADMAX22
-

Ranger Belt Questions
MADMAX22 replied to dmr400's topic in Gun Holsters, Rifle Slings and Knife Sheathes
Someone posted this a while back. Not sure if this is what your looking for. http://home.windstream.net/henryh/Make_Handmade_Leather_Belt.html -
Agree with Luke, also it doesnt hurt to look around the holster section, I think several people have posted there should rigs. Another good idea is online, check out the suppliers of such things and see how the mass marketers make theirs if even for ideas.
-
Good start, the human figure and face seem to be the hardest art wise to master. You are on to something, go big as you can so your not fighting the detailed small work and the figure itself.
-
Frontier Indian Sheath
MADMAX22 replied to DCKNIVES's topic in Gun Holsters, Rifle Slings and Knife Sheathes
Great job Dave, looks like it came straight out of that time period. On the inside of the sheath is it form fitted to the knife or does it have alot of room to move around in? -
Custom Guitar Strap
MADMAX22 commented on Edwards Custom Saddles Tx's gallery image in Our Leatherwork Galleries
 Thats excellent, love it.
 -
Yeah it could be, or by hand. Either way it was definitely burnished a little.
-
My first thought would be a rein rounder, you pull the leather thru to round it out however I am not thinking that is how this was done. I think this is just pretty thick leather, guessing maybe 12oz or so, edge bevel both the flesh and grain side, then form your edges. You can see in the natural finish one where the person ran the edger on both sides. If it is thick enough leather this will give the desired effect. Then its just a matter of your edging practice. The edges in the above picture were not totally finished to give the slightly rough look.
-
I think its called RIT dye or something similar. Can be found at craft stores and is suppose to work pretty good for dying fabric of various sorts and will work on leather for some decent results. I think it is pretty stead fast. Worth a shot to play with.
-
That turned out awesome. One of a kind bags for a pretty rare motorcycle. Looks great on the bike.
-
Fiebings Pro Oil Dye Vs. Fiebing Regular Dye?
MADMAX22 replied to skyblast's topic in How Do I Do That?
I think Bob Parks has a great how to down in the holster making section on burnishing edges. Its kind of a trial and error and personal preference thing. I dont have any power tools yet to do the edges so I do them by hand. Some people dye them after burnishing but I usually dye the edge first, get the edge damp or slightly wet, work in some saddle soap then start burnishing with a cocobolo edge burnisher I made. Once it is nice looking and properly formed I come back with a bees/parafin wax mix and rub that in with some canvas. They turn out pretty good for doing it by hand. I dont know if the direction matters just I tend to once I get a direction going keep to it but not sure if it is really necessary. Here ya go http://leatherworker.net/forum/index.php?showtopic=16609 -
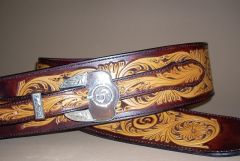
Turned out real nice cowboy. This is that design you came up with a little while back right? I gotta try that two tone lacing, it does add to the overall look of the project.
-
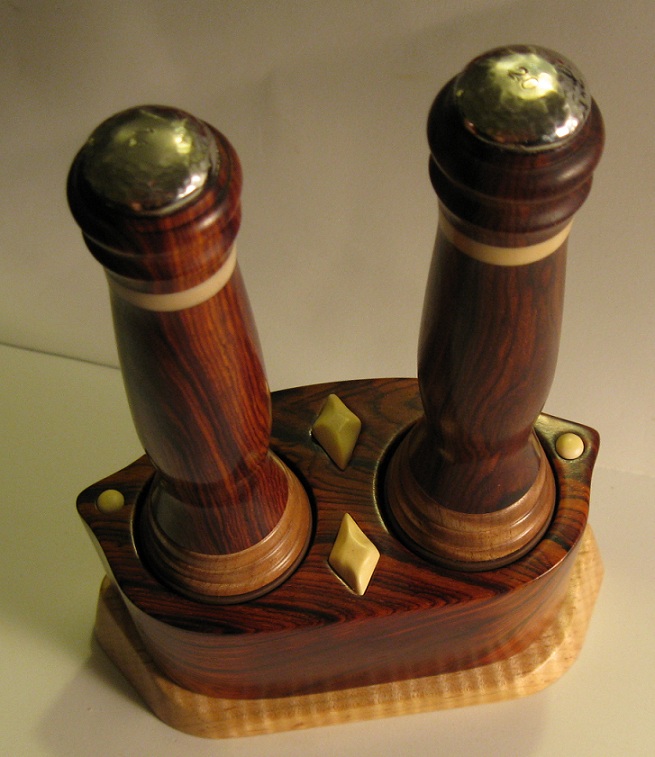
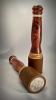
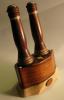
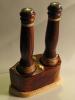
I know what ya mean Colter, money well spent in my book. I wanted to add that yes the stand does hold the mauls at an angle. I also wanted to add a couple of Ed's pics as his are better then mine, he just didnt have the mauls and stands together at the same time to take pics of the whole setup together.
-
Thats way cool Ed. I could see those being great gifts for any leatherworker.
-
Fiebings Pro Oil Dye Vs. Fiebing Regular Dye?
MADMAX22 replied to skyblast's topic in How Do I Do That?
I have not started airbrushing my work yet but on my projects have had the best results with the pro oil dyes or the angelus dyes. I think you would do good by experimenting a little with the different ones, just buy a couple of small containers of each and try them out. I get mine from springfeild. -
Gotta show this set off as I think Ed deserves it for making something this nice. A little while back I decided I wanted to try that brown head mauls that Ed started making. They work wonderfully, the best maul or mallet I have tried and more then likely the last one I will need. Well at the time I did not get a stand to go with them but they looked to good to be sitting on a bench without a proper home so I had Ed make up a stand for them. All this design and everything is Eds artistic talent at play. The only thing I said I wanted was cocobolo wood and the weights for the mauls (14oz and 20oz). The rest was Eds imagination. Anyways here they are enjoy.

-
Tree Of Life Purse
MADMAX22 replied to MADMAX22's topic in Purses, Wallets, Belts and Miscellaneous Pocket Items
Thanks Tom. I am really liking the inverted carvings, looks good and makes some things a little easier. -
Tree Of Life Purse
MADMAX22 replied to MADMAX22's topic in Purses, Wallets, Belts and Miscellaneous Pocket Items
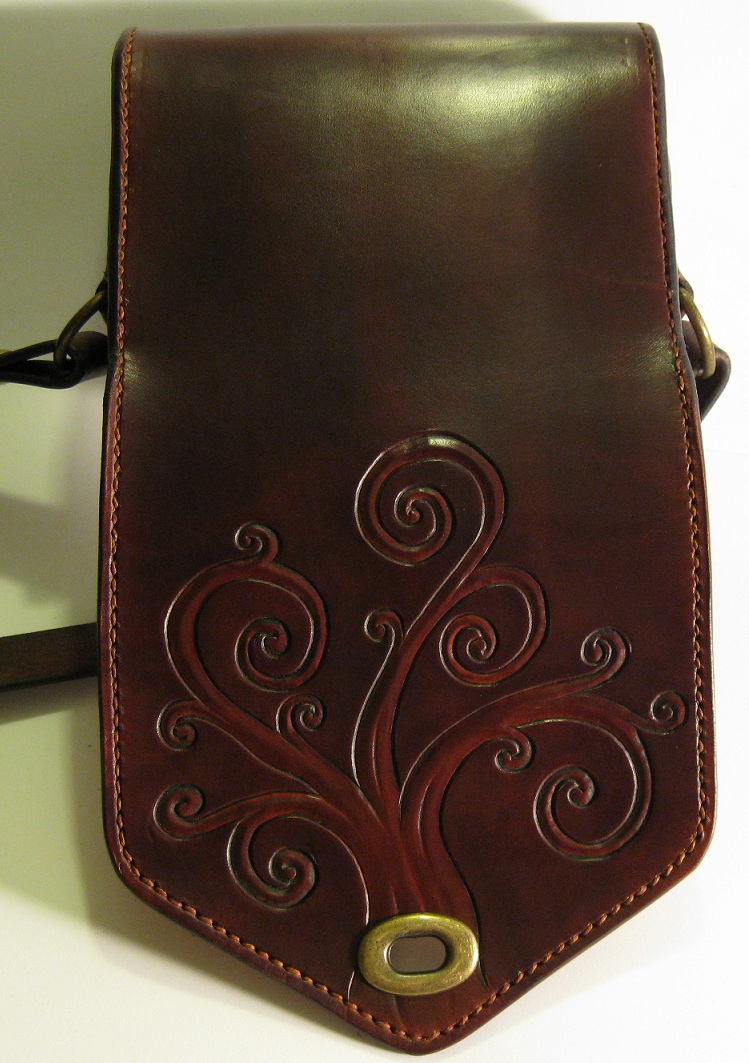
Thanks Russ and TTcustoms. TT I have been really looking hard at how I finish my leather. I have read many of Christians (xian leather) post over at the biker forum and he loves using just picards and gets wonderful finishes, the same with many people here on this forum. Ive started using snoseal alot and then made a mix of bees and parafin wax with neatsfoot oil and a small amount of glycerine saddle soap. It ended up being about like hard butter but white in color. When I rub it in it goes clear and leaves a nice mellow sheen and seems to be pretty water proof. Also oils the leather nicely. The more I learn the more I like the idea of natural finishes like this because you can reapply to the leather without having to try and strip it or wait till the finish comes off over time. I think this in the long run will be better for the leather since oiling and waxing occasionally seems to be one of the better methods to keep leather looking good and lasting a long time. I still like neatlac for a nice high shine to things but have started to veer away from that as well. Plus its one less step to end up with streaks and such on the projects. Oh and I would like to add that it works excellent as a resist for feibings antique past. -
Tree Of Life Purse
MADMAX22 replied to MADMAX22's topic in Purses, Wallets, Belts and Miscellaneous Pocket Items
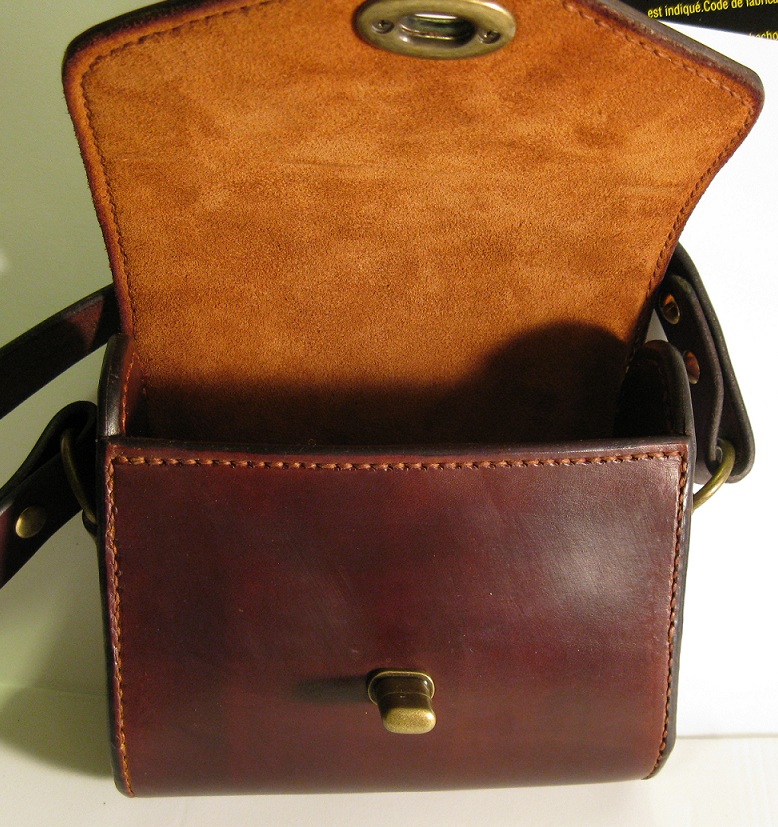
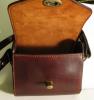
Thanks guys. Yeah I was happy with the color. I am still having a heck of a time with my miter joint stitching. This is only the second set of these joints that I have done but they are proving to be a little difficult to get the stitching to come out nice. -
Shrunken bull shoulders will have a texture like that but more pronounced. Several of the seat makers use it. It looks alot better then the texture on that particular seat. Other then that there are many chrome tanned upholstery style leathers that are embossed with all sorts of textured finishes.
-
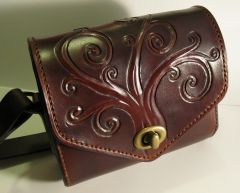
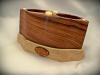
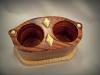
From the album: MADMAX22 Leatherwork
© © leatherworker.net
-
Hey guys just finished this one. Overall its 7oz lined with suede except on the ends where it is just doubled up 7oz. Dyed dk brown, finished with my wax oil mix finish I made. This ones for a friend who decided she wanted the same as a iron wall hanging they have. So I tried to match design as close as possible but still make it look decent in leather.


-
I think it turned out great, looks excellent black IMO
-
I dont have a business and charge far less then what its worth but I have recently been trying to keep track of my time while making things. I am a somewhat slow tooler due to not that experienced so that has some factor in it. For say a 50" total belt (about a 34" waste I think) it takes me roughly about 5-8 hrs tooling, about 2-3 hours hand stitching (hand stitch everything right now), say about 2 hours for all finishing and edging. Throw in some reasonable fudge factor so around total 15 hrs say for a complete belt of actual work time. Personally I would be happy to get around $160 or so for a tooled nice belt. Then again like I said I dont have a shop and with limited experience. Once I get better I could see charging more. Ofcourse that depends on what the customer is willing to pay as well. Would love to see some pictures of your work by the way.
-
Its all over the web it seems. If you had a larger pic the makers mark is that metal tab on the seat I think. Did not find any info on it though, real nice looking seat.
-
That turned out excellent. Great job.