-
Posts
240 -
Joined
-
Last visited
Content Type
Profiles
Forums
Events
Blogs
Gallery
Store
Everything posted by Instinctive
-

Need ideas for deer hide sheath
Instinctive replied to archeryrob's topic in Gun Holsters, Rifle Slings and Knife Sheathes
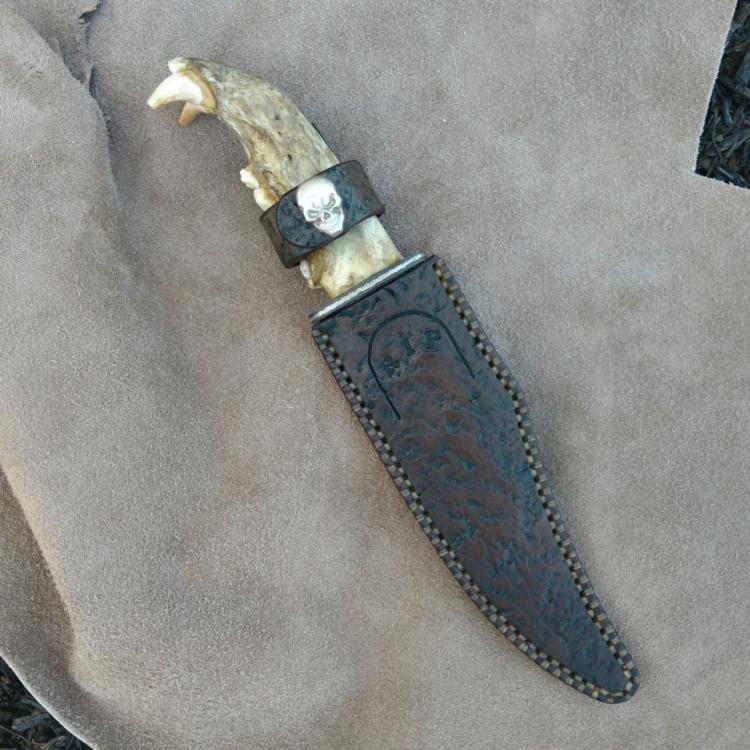
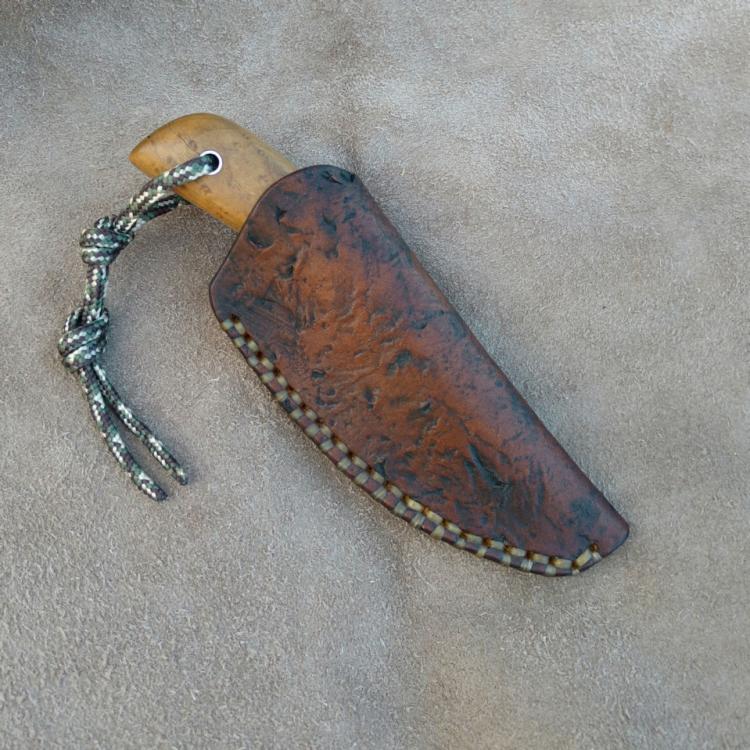
You can "fake it" a bit too with veg tan leather, a bucket of warm water, gravel pile and a 3 lb paver stone (or orther suitable heavy object) plus stain of your choice. Here are a couple I did for my necker knife (3" blade) and a bear jaw handled knife (7.5" blade). Stitched with artificial sinew, -
Thanks all and yes @bikermutt07 is was a shame to cut it in half but the blade was only so wide. I'll aske him to make a cleaver next time.
- 6 replies
-
- knife sheath
- tanto
-
(and 2 more)
Tagged with:
-
That, in my view looks a lot better. I use a matte finish alot my self. Is that the satin Varathane spray you used?
-
Looks fantastic. Carving straight lines and curves is one one of the toughest things to do (at least for me). Minimizing the coloring is really good to. I like my coffee to taste lake coffee and my leather to look like leather.
- 13 replies
-
- valet tray
- hawaii
-
(and 1 more)
Tagged with:
-
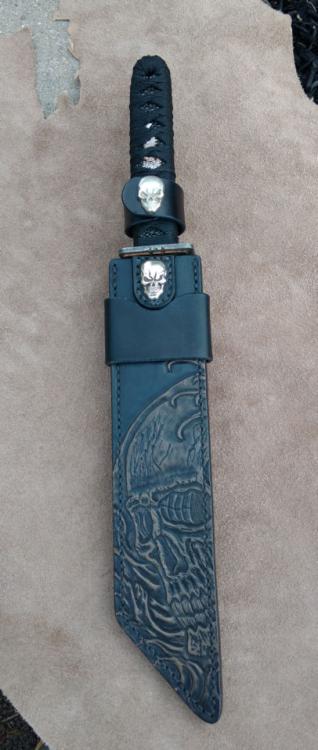
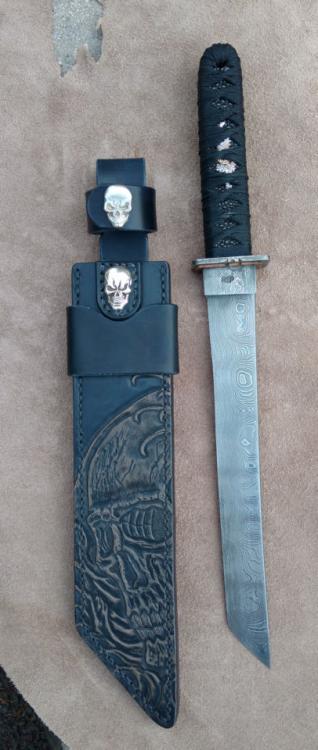
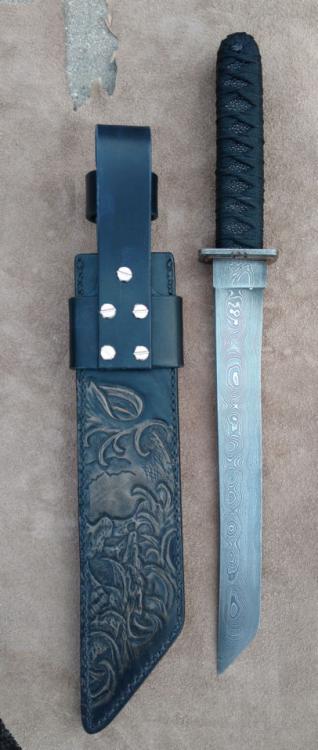
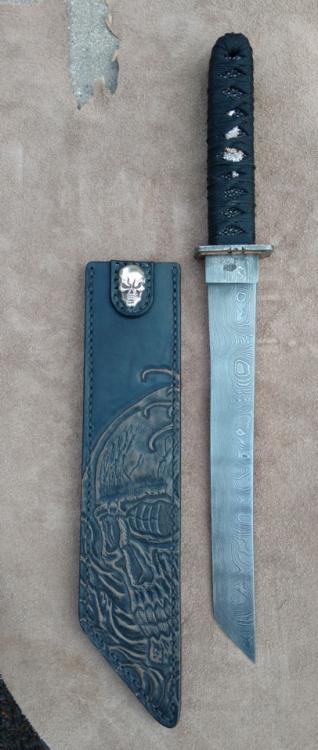
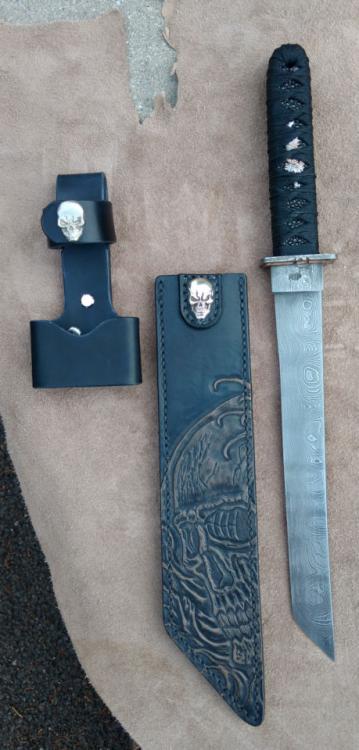
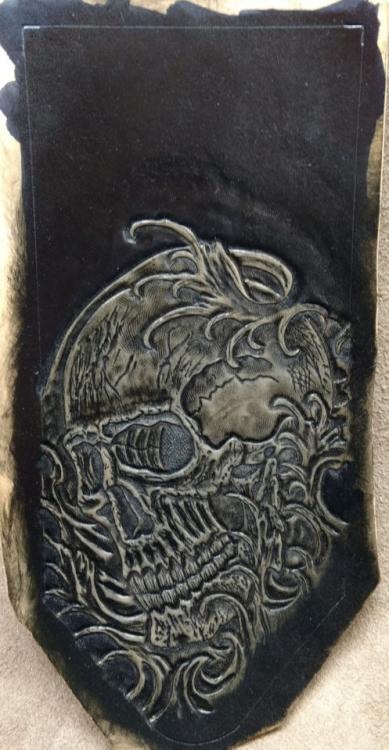
Local knife maker (www.ripcustomknives) made a show knife for the upcoming Atlanta Knife Show and asked me to make a custom sheath for it. His theme is skulls and the knife is Japanese tanto style with a forged, 150+ layer Damascus steel blade, 10-1/4" long. Total length is 15-1/2". This is what I made him. Hand sheath with a removal belt holster. The carving is based on a Japanese style skull tattoo. Carved and dyed it in one piece, then cut down the middle to make the front and back.
- 6 replies
-
- knife sheath
- tanto
-
(and 2 more)
Tagged with:
-
The sprays are acrylic. I have used Varathane Diamond Wood Finish with great success. It is available from Home Depot or similar and in a satin or gloss finish. Make sure you get the outdoor version. It has UV protection so won't yellow over time. Makes a great resist too for antiquing.
-
If you know the straight line length = X Circle diameter D=X/3.14
-
This might help. You will need to trial and error the calculations to get the size you want to have an even number of stamps. N= Number of stamps for the circle L= length of Stamp D= Diameter of Circle If you know the number of stamps you want: D=(NxL)/3.14 Example: N=20 L=13 D=(20x13)/3.14 = 260/3.14 D=82.8 ~ 83 mm If you have a diameter of circle in mind. N=(Dx3.14)/L Example: D=100 L=13 N=(100x3.14)/13 =314/13 N=24.15 stamps. Adjust diameter to make even number of stamps. In this case a diameter of 99.5 mm = 24 stamps (that's likely being a bit too accurate :-) Either way, measure twice, cut once and do a practice piece.
-
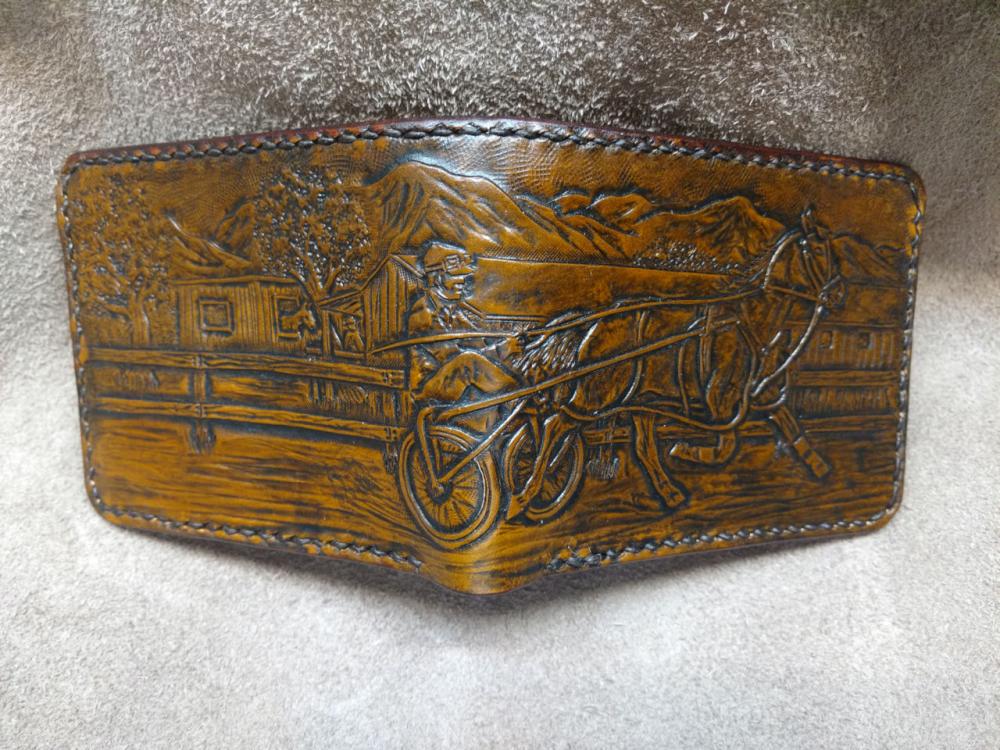
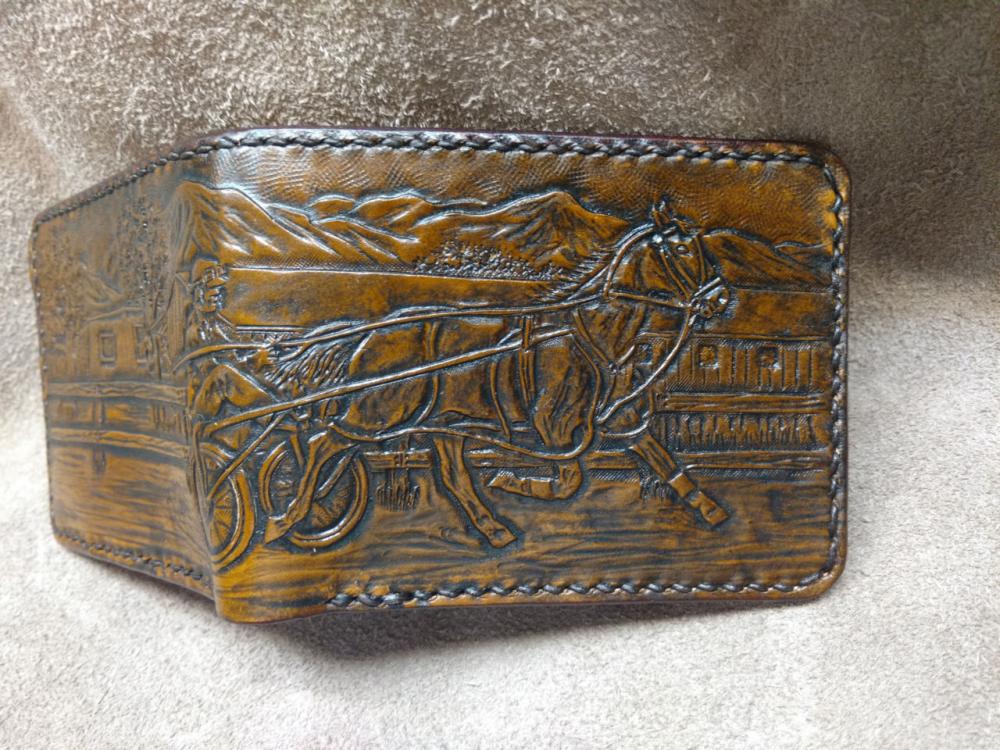
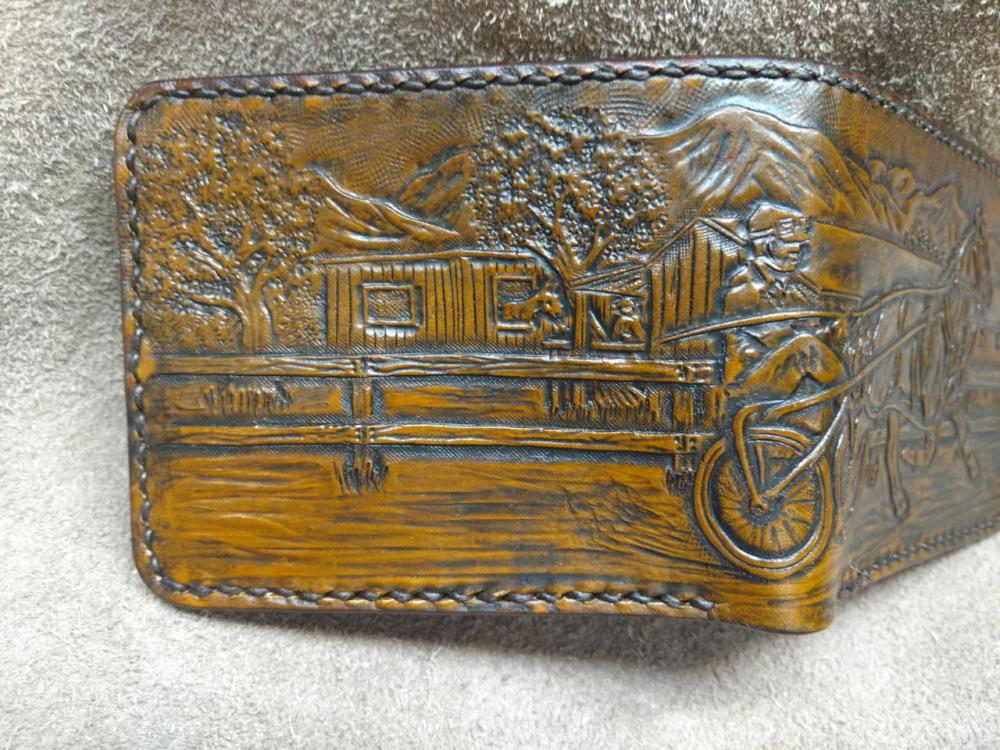
I never thought I would be doing this again. About 30 years ago I made a wallet with a harness racing scene on it. Still in use today y my father-in-law. Last week I was asked if I could make it again. Someone wanted it for their 85 year old grandfather who kept horses all his life (and still has one). Proving, no matter what your wife says, you should never throw anything out, I was able to find my original mylar tracing pattern. For the younger folks on the forum, to put the time frame between projects in perspective, when the first one was done: The internet did not exist. Portable cell phone weighed 5 lbs and you carried in a bag the size of your mothers purse. Fax machines were the new technology rage. I had just gotten my first laptop. It had 640K memory, 10 mb hard drive and cost $6,000. No such thing as a digital camera, let alone one in your phone. First three pictures are the 2018 version. Last two pictures are the 1988 ish version.
-
What type of leather are you using? You can only burnish veg tan leather. Typically if I am using a pre-dyed veg tan, I will dye the edges before burnishing unless I want the contrasting edge color. Natural veg tan will burnish to a caramel color (at least the stuff I use).
-

First Holster Finished
Instinctive replied to Instinctive's topic in Gun Holsters, Rifle Slings and Knife Sheathes
It took 42 years it get to my first one. Just a big knife sheath really. And yes on this edges. Gum Trag, Wax and an assortment of smooth sticks to rub them down with. -

First Holster Finished
Instinctive replied to Instinctive's topic in Gun Holsters, Rifle Slings and Knife Sheathes
Everybody should have a drum sander with multiple size drums on there bench. Very handy executing around those tight curves :-) -
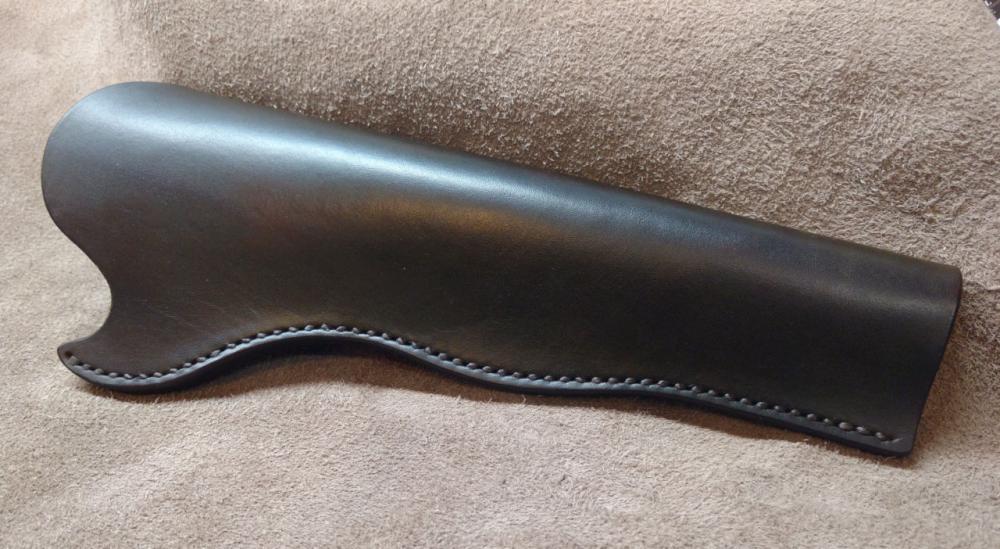
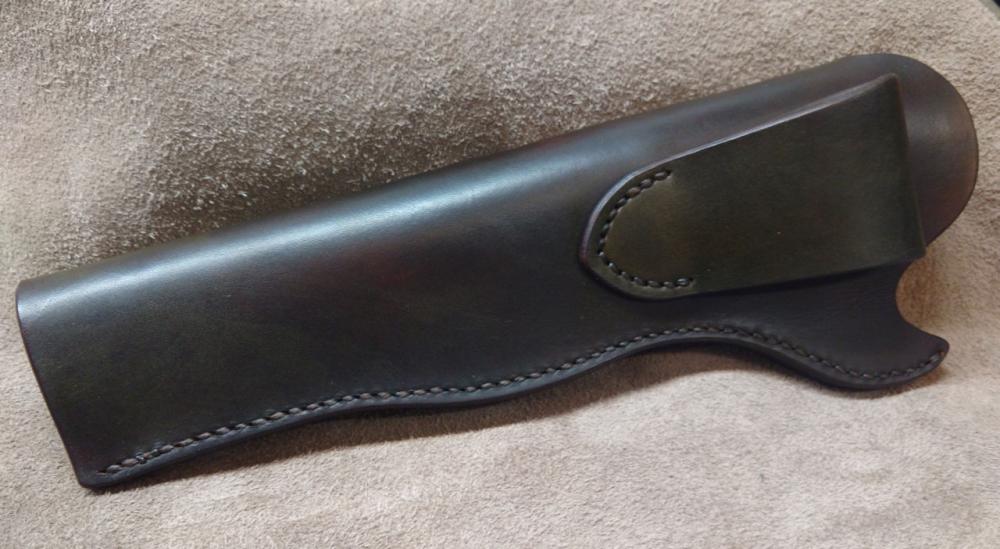
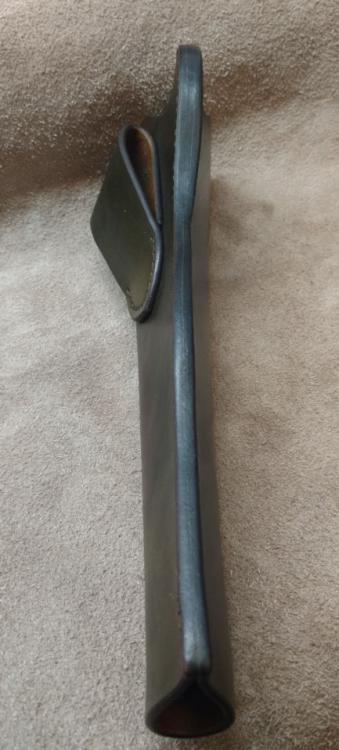
Finished my first holster. 1860 Colt 44 Slim Jim. NIce simple design to start with. Thanks to members "Northmount" and "Frank" for significant help with the pattern.
-
Thanks for that. A lot of practice on other people stuff before I did my own. Just skin and bones.
- 4 replies
-
- stool seat
- tooling
-
(and 1 more)
Tagged with:
-
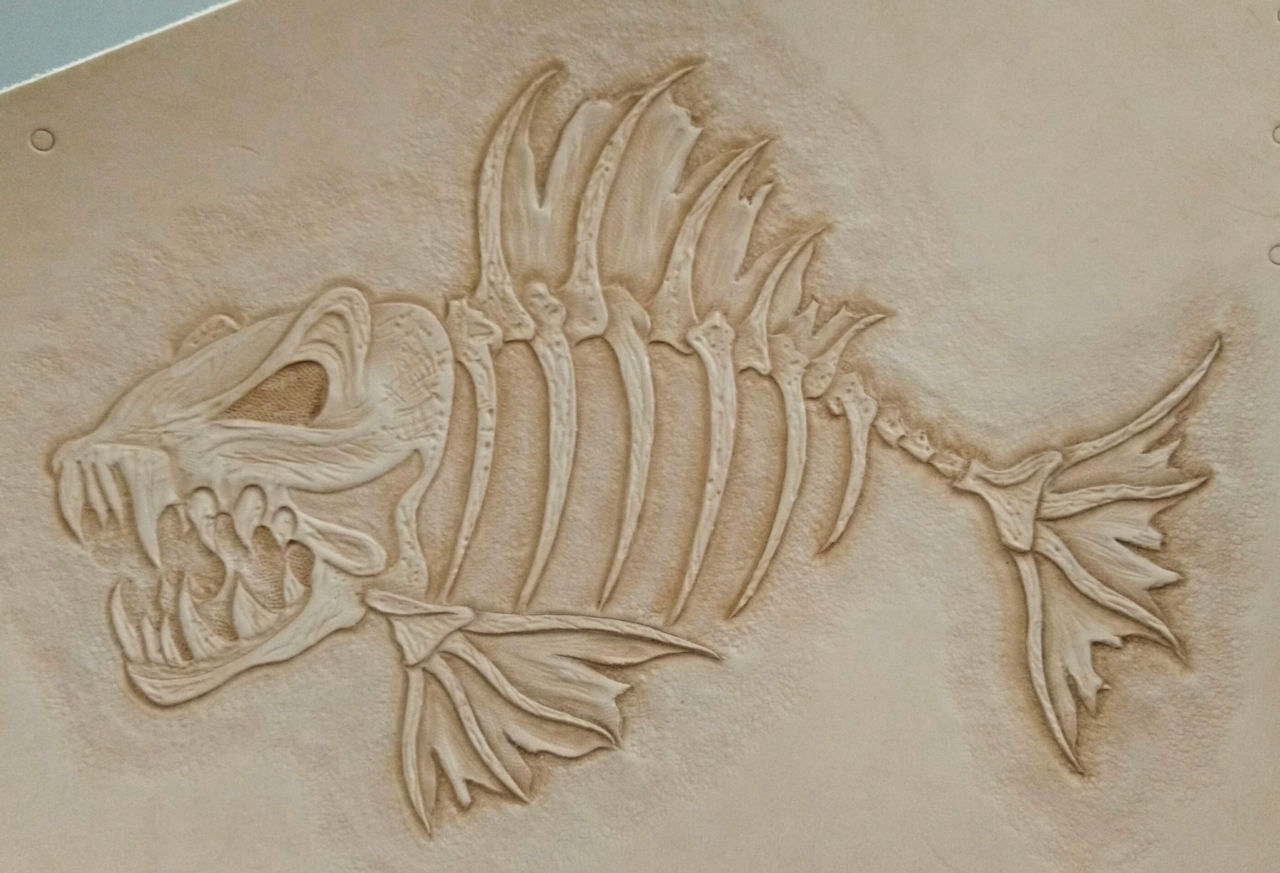
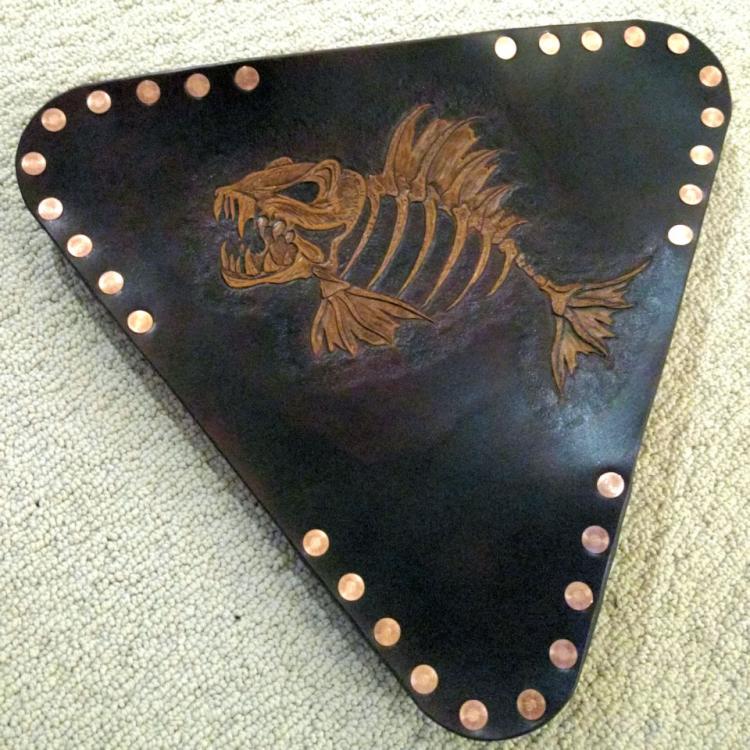
Finally got up the nerve to dye this project. Tri-leg stool seat with a "fierce fish" carving (modified tattoo design). Carve this about 6 month ago but did some practice on smaller pieces before deciding how to do the dye job. 9 oz veg tan. Fiebings dark brown dye, neatsfoot oil, Tandy Ecoflo chestnut hi-lite stain, many coats of 50/50 Resolene/water top coat sprayed on with an air brush applied in that order. #9 copper rivets to attach the leg pockets. On to the legs...
- 4 replies
-
- stool seat
- tooling
-
(and 1 more)
Tagged with:
-

1851 Colt Slim Jim Holster
Instinctive replied to TimberWolf's topic in Gun Holsters, Rifle Slings and Knife Sheathes
Northmount. Thank you very much. That is incredibly helpful. -

1851 Colt Slim Jim Holster
Instinctive replied to TimberWolf's topic in Gun Holsters, Rifle Slings and Knife Sheathes
Thanks bikermutt07. Search here with no results so I'm going to go the paper trace route and make a pattern which I can then digitize in my CAD system to tweak as necessary. -

1851 Colt Slim Jim Holster
Instinctive replied to TimberWolf's topic in Gun Holsters, Rifle Slings and Knife Sheathes
Hopefully you can help me. I have been asked to make a holster for an 1860 Colt 44. Never made a holster before. Any chance you could share the pattern? Thanks, -
Get some cork Duck Tape. Very thin. Use it to back all my stuff. https://www.amazon.com/Duck-1-88-Inch-5-Yard-Single-284879/dp/B00T59NFRM/ref=sr_1_1?ie=UTF8&qid=1521050361&sr=8-1&keywords=cork+duct+tape
-
My go to now is tribal tattoo patterns in what ever subject I want to carve. Once I find a design, I tweak it to be suitable for carving. I found them excellent for skill development. "Line" drawing look simple, your swivel knife and beveling skills get elevated really quickly. Be sure to get yourself a set of modelling tools. Very helpful to add the finishing touches (and fixing a bad bevel line).
-

wallets WALLETS - Specifically card slots/edging for them.
Instinctive replied to samNZJP's topic in How Do I Do That?
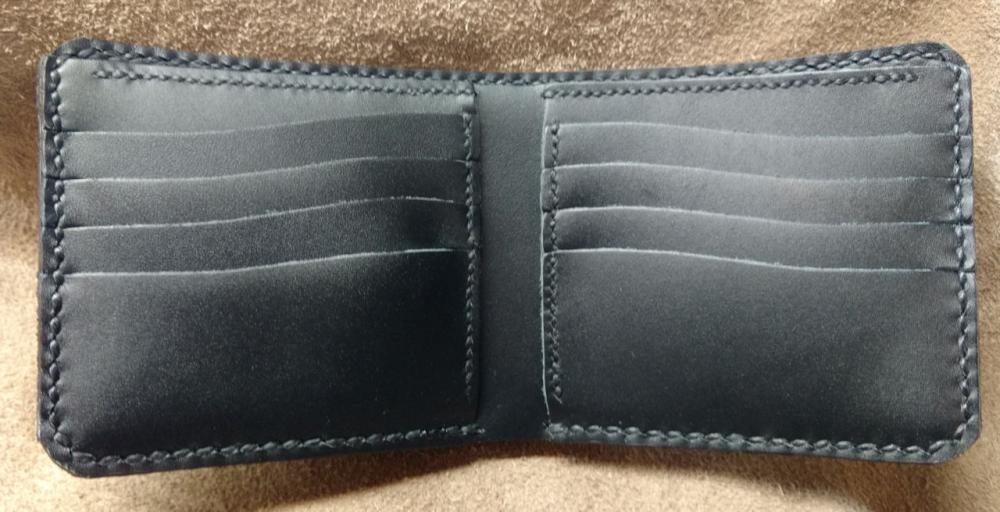
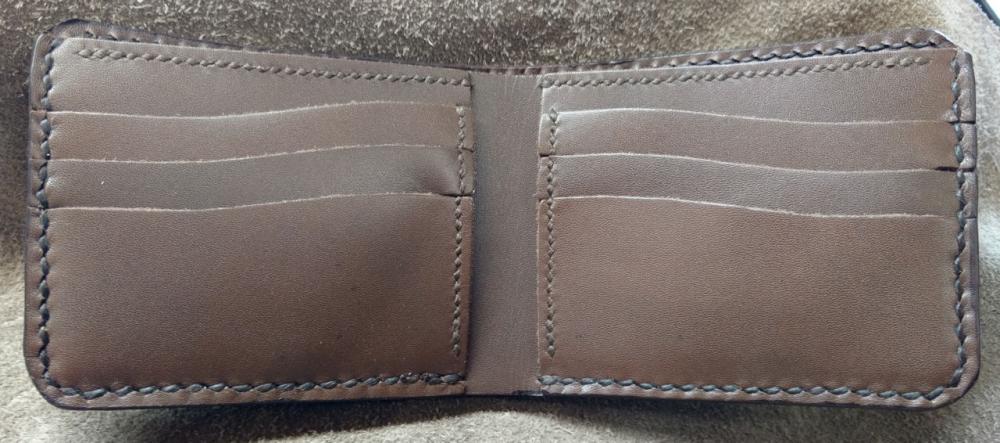
Having just finished a bunch of wallets, I will jump in on this. T- slot pockets, yes. The bottom of bottom of each T is stitched to the backing piece. I used a single layer of 2-2.5 oz calf skin for these interiors. I would say that gluing to thin pieces together in the not the norm unless you are doing very high end builds. Tightness just may be because the slots are not wide enough for the number of pockets. This 10 pocket (2 hidden) interior have slots 4" (100 mm) wide. I have placed 12 cards in this interior with no difficulty. 10 pockets (black) is a lot. 8 pocket (brown) is better in my view. Slimmer wallet and the slots can be a little narrower if desired.


