


dikman
-
Posts
4,862 -
Joined
-
Last visited
Content Type
Profiles
Forums
Events
Blogs
Gallery
Store
Everything posted by dikman
-
I just got around to watching the video, and yes, I wouldn't last long with that infernal beeping! That's really bizarre.
-
That's good. My homemade burnisher (a bit like TT's) is attached to a grinder motor that runs at 3450 rpm and works fine.
-
That speed control mentioned earlier may not work with your motor. That control is meant for brush-type motors (as used in most power tools, hence their reference to a router). Most AC motors are induction types and if you use that controller it will probably go poof!
-
Thanks Ralf, if so seems pretty expensive for a speed reducer?
-
Darren, thanks for the comment on the serial numbers, all good info.
-
-
What type of Servo Motor and Reducer for a Consew 230?
dikman replied to MaryGladys's topic in Leather Sewing Machines
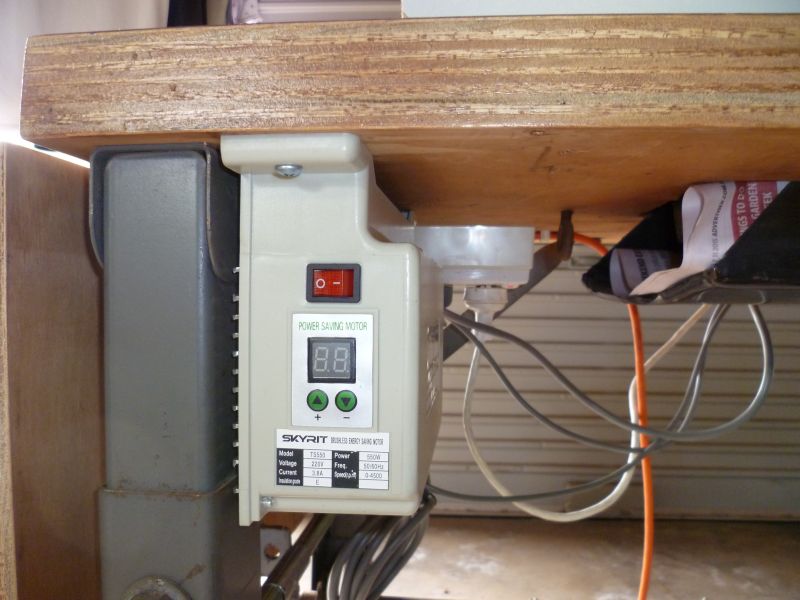
A very interesting setup. I have a vague recollection of seeing something similar to that small cylindrical device but I can't remember! My guess is a small motor to drive some sort of adjustment inside the main motor? Anyhow, my recommendation, with something that old, is don't touch it! Generally the insulation on old things like that will be deteriorating and will fall apart if moved too much. That servo JLS has should suit you fine and you'll find the speed adjustment knob will be easier to use than messing around with the settings like mine has. Looks like a good deal. Fit that and it'll be like a new machine . A couple of photos of mine, which is a fairly generic China made servo (I have three of them and so far had no issues). Two are 500w and one is a 750w, and to be honest the 500w has more than enough power for my needs.
-
An extra 500 Euros for a "tuned" servo motor? Wonder what an earth a "tuned" servo motor is, first time I've heard of that in all my searching.
-
What type of Servo Motor and Reducer for a Consew 230?
dikman replied to MaryGladys's topic in Leather Sewing Machines
Well, he's had many years using it so it's no wonder he can handle it. My first effort with a clutch motor was scary, to say the least! I quickly realised that it wasn't going to work for me. There are two or three vendors on this site who will no doubt be able to help you out with supplying a servo motor (I'm assuming you don't want to to order one via ebay/China). The controller is simply the device that controls the servo, I won't bother you with the technical details.Some servos may be an all-in-one unit with the motor, some may have a separate controller and motor, but they all do the same thing. A needle positioner allows the machine to stop with the needle either up or down, depending on the setting, when you take your foot of the pedal. I don't think too many on here use them. I bought one but decided I didn't really like it, I'm sewing slow enough that's it's easy to stop the needle just where I want it. Fitting a speed reducer as well as a servo will allow you to get very slow speeds with lots of torque, but may not be necessary for your needs. Start with a servo first (easiest) and fit a speed reducer later if you think you need it. -
I don't think those internally geared models are available anymore? (Probably too expensive to make compared to a DC servo motor). My servos, from China, basically have two settings that I can adjust using the digital display - one sets the max speed and one sets the startup speed (I think, haven't got the book handy). Both settings affect each other to some extent, but between them and the speed reducers that I've fitted I can get the machines to run as slow, or fast, as I want. Probably the same basic type as yours, Mike.
-
Yep, nice looking machine. Looks very much like a 111 head dropped onto a cylinder arm base. I like it. As Mike said, it would probably be easier to just paint the base, if you can find a close match to the paint.
-
Glad to hear the 155 is working. I can't help with the 153's as I don't know anything about them. My usual process is to download as many manuals/parts lists as I can find on the various models and then start looking for differences. That's how I came to the conclusion that my 111WSV77 is closest to a 111W153. I'll be interested in what you find out.
-
Oldnslow, it looks more like it was the "original" that the Chinese patchers are based on. This appears to be a bit more refined. Very nice looking machine.
-
If you've never sewn on a machine like this before (and I assume you mean an industrial machine?) then you have a steep learning curve ahead. Starting with a twin needle machine is probably not a good idea, as Uwe said. I must say though that it looks like a nice machine, being a Seiko and a walking foot. If you only want to have one machine then a cylinder arm is probably the most versatile, and a servo will let you learn to use it without having to fight a clutch motor. Wiz's sticky at the top is a good place to start learning about industrial sewing machines.
-
Makes sense, or at least as much as anything can with these machines. If a "special" machine proved to be of worthwhile design it makes sense that it would be put into production. Of course, trying to figure out which SV became which model(s) could be a bit of a problem. Due to the records of the K factory surviving it may be possible to work out some of these, but the W machines will be extremely difficult, if not impossible, to do with any degree of certainty.
-
Carved Loop Holster for SAA
dikman replied to Josh Ashman's topic in Gun Holsters, Rifle Slings and Knife Sheathes
Josh, thanks for the detailed response, most informative. And yes, I did notice the edges before, very nice indeed. Much like I'm sort of doing (but I've got a little way to go yet). I prefer trying to get good edges with a "natural" finish as I don't want to use edge coats/colours - while they look "sharp" they still look somewhat artificial to me, my aim is to try and get my holsters/belts so that they will age gracefully as they get used (and probably abused!). -
The logical assumption is that someone else did it for the OP. If that is the case then I would hope they didn't touch anything else 'cos if they couldn't even fit the handwheel correctly then they shouldn't be touching the machine at all.
-
Carved Loop Holster for SAA
dikman replied to Josh Ashman's topic in Gun Holsters, Rifle Slings and Knife Sheathes
I'm not a great fan of leather carving (personal thing) but that is beautifully executed! The definition of the carving is superb. Which brings me to a question - do you wet form the holster to the gun? The reason I ask is that in my limited experience with stamping I've found it's very easy to lose definition by wet molding after the stamping, but yours doesn't appear to have lost anything. -
Thanks for that Bob. It's nice to know there was a genuine reason (just sounded a bit strange as no mention was made of slipping).
-
Singer 96-10 Clutchadjust adjustment
dikman replied to Gregg Dispoto's topic in Leather Sewing Machines
"The 2 lock nuts have an extended barrel on and are probably done up." Thanks Rocky, that makes sense (I like to know these things ). -
I'm really at a bit of a loss as to why, on a brand new, unused machine, you feel the need to check this one particular part. What makes you think that it's not fitted correctly?
-
Singer 96-10 Clutchadjust adjustment
dikman replied to Gregg Dispoto's topic in Leather Sewing Machines
I agree about the screw, Constabulary, but from what I can see all that is going to do is vary the amount of pressure required on the foot pedal to engage the clutch, and that's simply an adjustment to suit the operator. It's not going to make it any smoother. Does it work ok now, or is there an actual problem? I just noticed two screws/bolts in the top picture (right at the top) which I presume are for adjusting the angle of the clutch to ensure it's parallel to the motor part of the clutch assembly. Hard to tell, but it looks like they're locknutted screws but the locknuts aren't engaged? Like I said, hard to tell. -
Lining opinions
dikman replied to CaptQuirk's topic in Gun Holsters, Rifle Slings and Knife Sheathes
As JLS said, it will look "unfinished" (and a bit cheap) if the lining suddenly stops. It might not normally be highly visible, but if someone gives the work a close inspection and sees the lining only covering part of the work they might think it's a bit "amateurish"? As for finishing the flesh side, the wooden burnisher I made (fits on my grinder) has a fairly wide flat area and I've experimented with running the flesh side over it, either dampening it slightly or applying a bit of wax, and it does give a slightly flatter finish with a very slight sheen. But normally I don't do anything to the flesh side other than stain it. -
Mike, I fiddled with my 211G166 but the best I could get was about 5spi. I think the feed eccentric would need to be changed completely to get any better - and that's not a job I intend taking on! My 111WSV77 will give me 3 1/2 spi, even though the number wheel is only marked down to 5. Looking at 3 1/2 spi, however, with #138 thread, looks a bit "odd" to me and I don't think my '77 will handle heavier thread.
-
Madmax, that looks like it's in better condition than mine! No, there's no cap it's just an optical delusion caused by the camera angle. It looks just like yours, in fact from the front the machines look identical. The 155 is probably the pick of the bunch for leatherwork.