


fredk
-
Posts
5,974 -
Joined
Content Type
Profiles
Forums
Events
Blogs
Gallery
Store
Everything posted by fredk
-
use the extra holes as often as they align, or nearly align with the fewer holes
-

Total noob w/ bullet loop question…
fredk replied to Ravenshurst's topic in Gun Holsters, Rifle Slings and Knife Sheathes
Thanks chaps for sharing all this information. I don't make such belts but its interesting to larn not to use fired cartridges cos they've expanded -
Boys-o, that some job in 3 hours I have several item on the go and I should do a '3 hour' on them cos these jobs wont take near that time
-
@mous3 you should get together with @machineage He's got a Wimsew W-0618-1 Walking Foot Sewing Machine for sale in Staffordshire and its within your budget
-
You can use wood-workers rifflers to roughen up the leather
-
An idea. Not fully formulated yet. A work around Government tariffs? I know that most of you in the US really prefer to buy in the US but some may buy from overseas producers Have the item sent to me in UK which has no tariffs. Then I'll repackage it and send it on to you. Still working on this idea but I need to go out now
-
More basic than that. My intention is to replicate what my friend had and did. A medium sized draw-string bag of thin veg tan and a leather lace The chicken fat/grease was taken from a cooked chicken. The cold fat was liberally applied to the bag and excess wiped off The bag was kept in with his other kit, so it was warm and dry I'm not sure how long between applying the fat/grease and it started to go rancid and how long until he brought it to me My friend did this as the 'expert', who taught him to make the bag, told him to as it would water-proof it and 'thats what they would have used' (in medieval times)
-
I'm actually having difficulty getting chicken fat/grease. All our chicken is extra lean and don't provide as much as a couple of grams
-
3000 beeves suddenly stampeded Near the back one beeve asked another 'What are we running for?" The second beeve says 'Well, I don't know about you but I'm running for Cancer Research'
-
Cows never listen to instructions You tell them to do something and it goes in one ear and out the udder
-
Daffy Duck and Elmer Fudd raiding an off licence Daffy - Is this Whiskey? Elmer - Yeth, but not ath whiskey ath wobbing a bank.....
-
An old Belfast joke 4 new convicted criminals sat down to lunch together The first says "I got 3 years for robbing a post office What did you others do and what sentence did you get? The second man says "I got 2 years for stealing a car" The third man says "8 years for armed robbery of a bank" The fourth man was quiet for a while then he says "20 years" "Well? What for?" asks the others "Shoplifting" "Shoplifting?!?" the others say in astonishment "Well the bomb did lift the shop about fifty feet in the air"
-
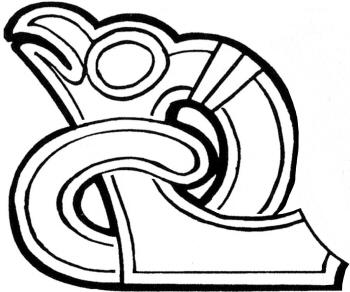
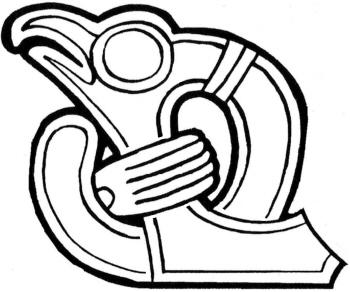
I would like to see more imaginative designs to compliment the 3D stamps already available. And some more modern designs, 21st century style eg. a surfer on waves, a swimming sea diver (with waving seaweeds), a sunken ship, (for the diver), a pick-up truck. On cowboy types; a (stampede) of cattle which can be repeatedly stamped along a belt, with mounted drovers placed/stamped at intervals ( I've been watching Rawhide on youtube! ) Some of your samples are already available from Tandy and Ivan For my own use I'm looking for decent Viking and Medieval style stamps I have these in a large size and will get them cut to a smaller size, probably 1 inch This is a Viking style "Eagle". The one on the left heads a line-up of the one on the right
-
I haven't 'pasted' the back side but I do rub in a bees wax & carnauba wax mix. I rub in plenty and buff it up real good. Belts have kept that smooth finish
-
Medieval/renaissance/fantasy Pattern Pack
fredk replied to mrdabeetle's topic in Patterns and Templates
Usually, unless the pattern supplier says 'No' then a modest number of items may be sold. If its a Tandy pattern they actually encourage you to sell items -
Mummy, is Daddy dead? No darling, he's in his leather room doing some basket-weave stamping
-
Making a Hat Band
fredk replied to Rockrz's topic in Purses, Wallets, Belts and Miscellaneous Pocket Items
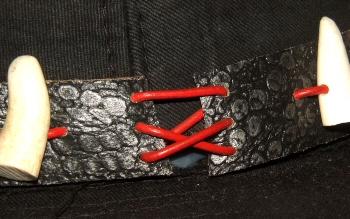
I assumed the OP was intending to use a buckled belt as that was what he showed For information; these are some of the closures I've used; On a concho ed repurposed belt; a buckle with a large keeper Lacing, which went through the antler tips to hold them on, then criss-crossed. Enuf lacing so the band can fit on a larger hat This one uses elastic cord glued to the band. Enuf elasticity to expand to fit a larger hat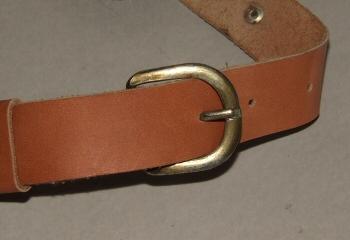
-
Making a Hat Band
fredk replied to Rockrz's topic in Purses, Wallets, Belts and Miscellaneous Pocket Items
Some of the US members will be along soon and they can best advise where to get oval punches -
Making a Hat Band
fredk replied to Rockrz's topic in Purses, Wallets, Belts and Miscellaneous Pocket Items
I can't advise as I don't know where in the world you're located. This is a world-wide forum 1" conchos on a 1 1/4 will be big enuf -
Making a Hat Band
fredk replied to Rockrz's topic in Purses, Wallets, Belts and Miscellaneous Pocket Items
For punching the slots in the leather buy a rectangular hole punch of the appropriate size. They are easily available Your chosen belt size might be too narrow for the conchos -
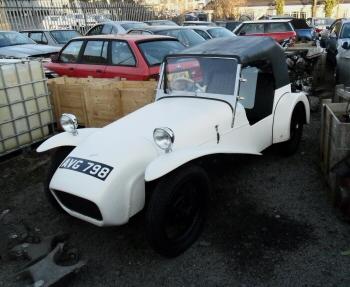
My son bought us another Austin 7 recently. Its a 1937 Austin 7 Ruby rebodied with a Lotus 7 styled body. That black roof is steel and its meant to look like a fabric roof. It tilts up and back so you can get in & out
-
We are checking the oils for racidity et cetera; but they are all coated and left in the air/weather. My friend's pouch was kept in a closed box with his kit. Although it was brought out at weekends it was mostly stuffed in a box I'm going to try chicken fat on leather and keep it sealed up in a plastic box. The box will be opened occasionally to sort-of replicate the conditions his pouch was kept in. If I can get enough small plastic boxes, and somewhere to put them (!) I'll do the same for some of the other oils/fats I shall presume the chicken fat came from a cooked chook. mmmmm. time for roast chicken, yummmy
-
What was the cause of the rancid smell? Can we replicate the conditions? The only time I ever encountered a rancid smell was when one of my historical presentation group (HPG) brought me a belt pouch which he had smeared chicken fat over. 'Cos thats what they would have used in medieval times' quote he. Nothing I could do at the time could save that pouch. It was not only rancid but the thread was rotting away. As it was cheap pouch we binned (trashed) it and I made him a new one FOC and told him to keep way from chicken fat I think it was Winston Churchill who said 'A lie gets halfway around the world before the truth has a chance to get its pants on'. Even more so with internet and social media and 'influencers'
-
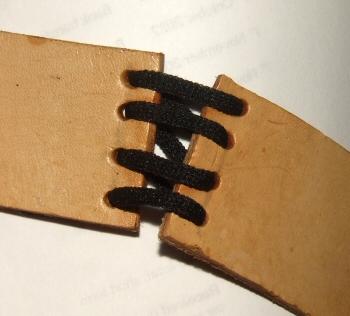
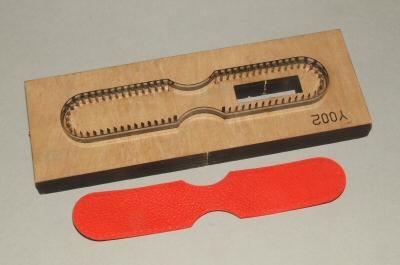
I can only buy pre-made. I'd like to get custom-made ones but there isn't anywhere I can get them made. But I don't sell enough to warrant the cost of custom-made dies Good steel that retains its sharpness over several cuts Most definitely, very useful; but sewing slits not big holes Like these in this; I use a Tandy Pro-press for everything, including for cutting dies, and occasionally a mallet & a piece of wood
-
I've used both to dilute dyes and sealers. Never noticed a difference. Only difference was the availability & cost; at one time denatured alcohol was far cheaper and easier to get, now its the other way round