motocouture
-
Posts
475 -
Joined
-
Last visited
Content Type
Profiles
Forums
Events
Blogs
Gallery
Store
Everything posted by motocouture
-

Bag stiffener - Anyone know this product?
motocouture replied to KingsCountyLeather's topic in Leatherwork Conversation
Joann’s stocks fusible interfacing, Pellon brand, link below. Not sure if they ship internationally. Just be careful you don’t iron the wrong side....hypothetically a friend of mine did that once.....also, I’ve found that a low to medium heat works best, absolutely no steam or your leather won’t be happy afterwards. http://www.joann.com/search?q=pellon fusible -
Nice!
-
Croc clutch!
motocouture replied to motocouture's topic in Purses, Wallets, Belts and Miscellaneous Pocket Items
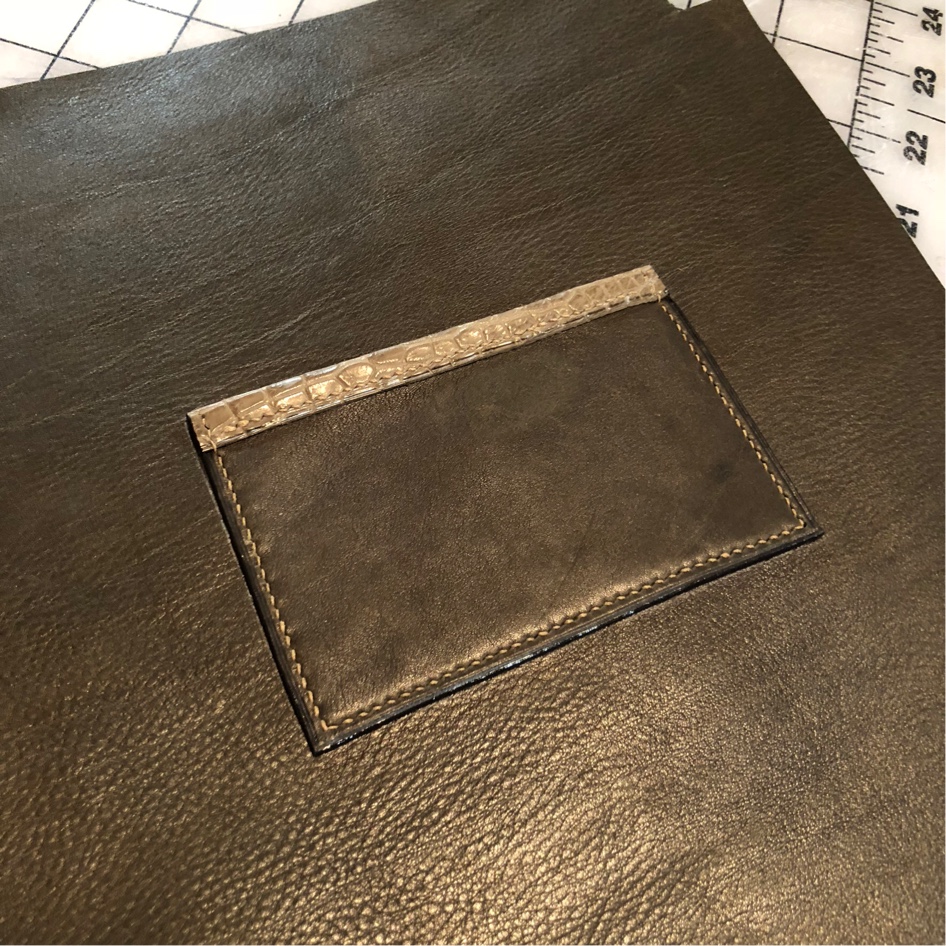
My pleasure! I always feel like I gain more here than I could possibly give back, so I try where I can Great question, and makes perfect sense. I’ve attached another pic below which might help. The border is just extra lining, which I trim off after everything is glued in. That way I’m not struggling to line up edges as I go. This time, I took a little extra time though to keep the excess lining the same width all the way around, and draw in the actual outline, so that the pocket placement ended up right on the inside.
-
Croc clutch!
motocouture replied to motocouture's topic in Purses, Wallets, Belts and Miscellaneous Pocket Items
Thanks mate! Fingers crossed!! Thank you so much, it’s nice to get back to it after having been on the road. -
Croc clutch!
motocouture replied to motocouture's topic in Purses, Wallets, Belts and Miscellaneous Pocket Items
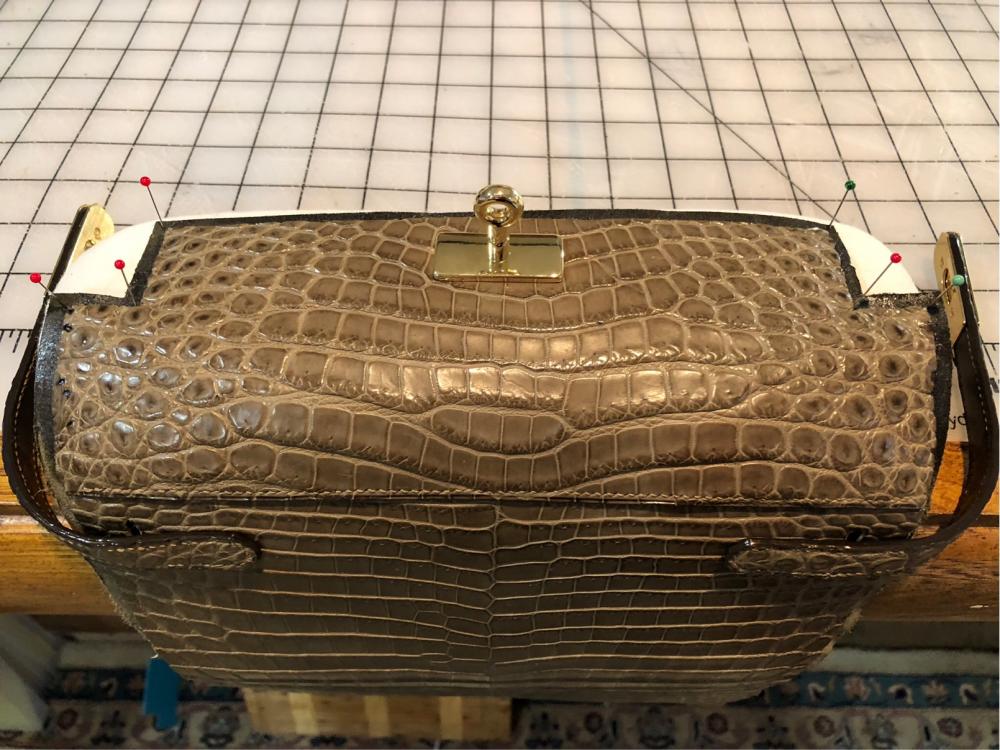
Another couple of shots. Stitched the inner pocket in, which I was procrastinating on, since stitching floppy calf leather to floppy calf leather is always fun . Second pic is glueing in the liner, after first stitching on the straps at the back. I left the clutch in a rolled up position for a while, to gently start shaping the outer croc, then heeded the wise words of @RockyAussie, who suggested glueing in the liner at a 90 degree bend to reduce wrinkling on the inside when it’s finally assembled. I used the pins to mark the corners of the liner, and to help key the two layers as I glued. The pins are also pushed through into a sewing ham underneath, which helps stops everything wriggling around.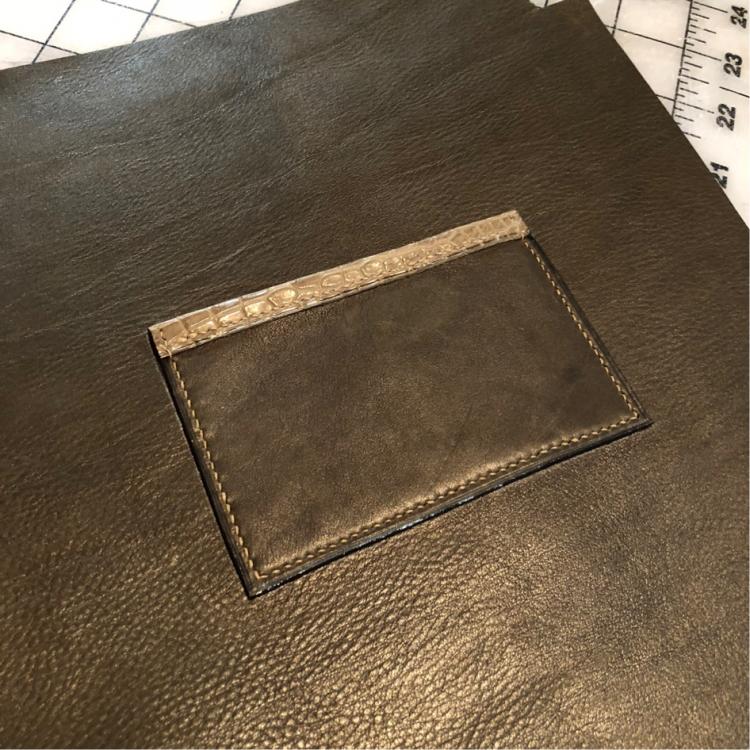
-
Croc clutch!
motocouture replied to motocouture's topic in Purses, Wallets, Belts and Miscellaneous Pocket Items
Thank you so much! Unfortunately, work has been interfering with my bench time sigh... I bought the croc from a fellow forum member. It’s originally from the American Tanning Company (AMTAN USA on Instagram); they do have some great deals occasionally on leftover hides / end of runs etc. -
Croc clutch!
motocouture replied to motocouture's topic in Purses, Wallets, Belts and Miscellaneous Pocket Items
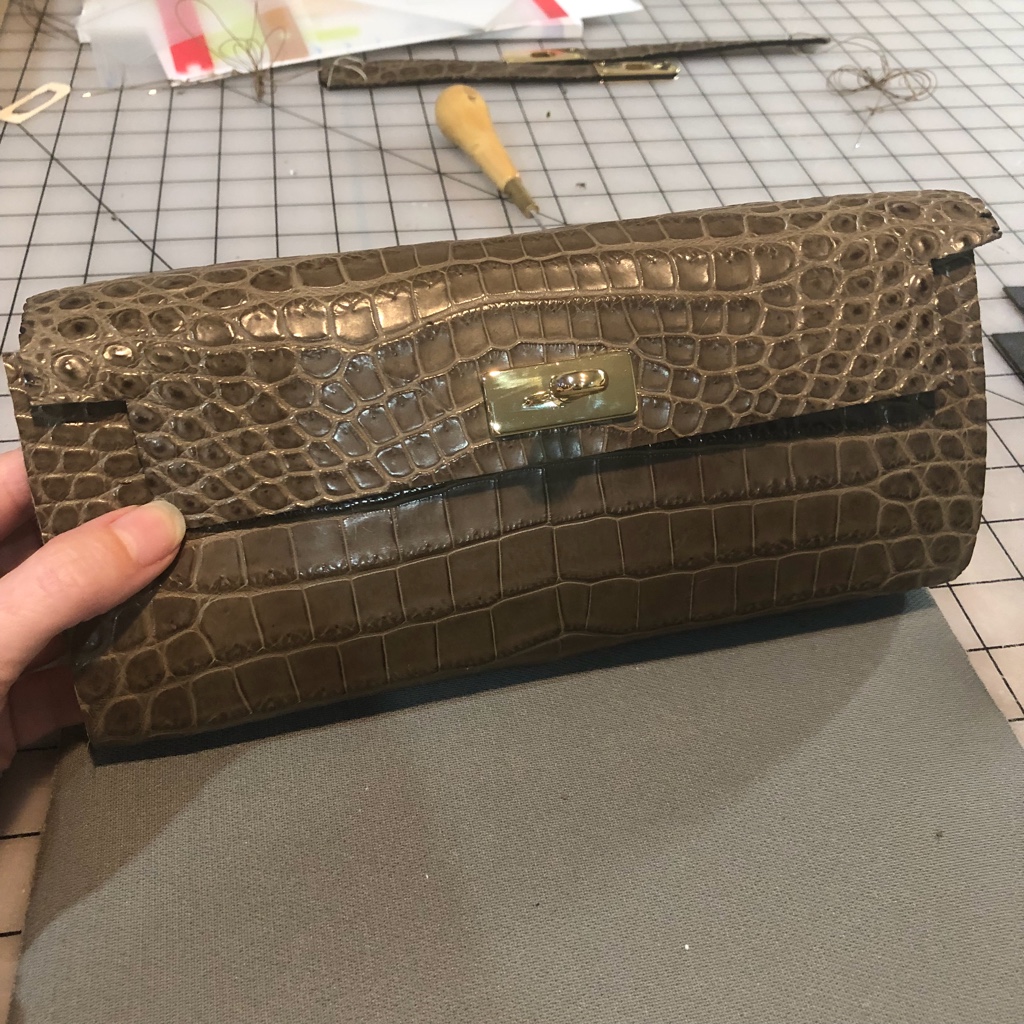
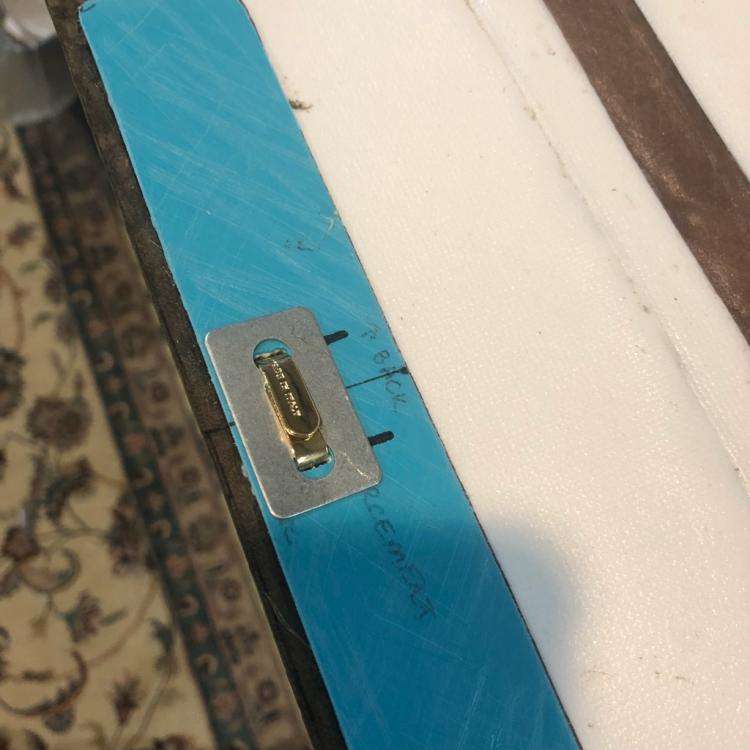
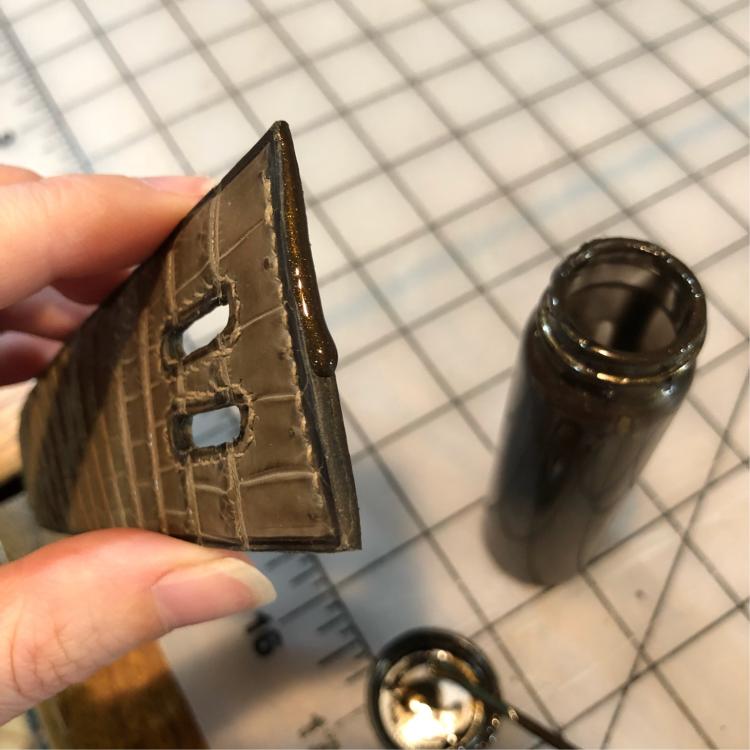
Making progress! Edged the straps, added the strap hardware, and reinforced the front flap (with kitchen mat) before adding the post fastener.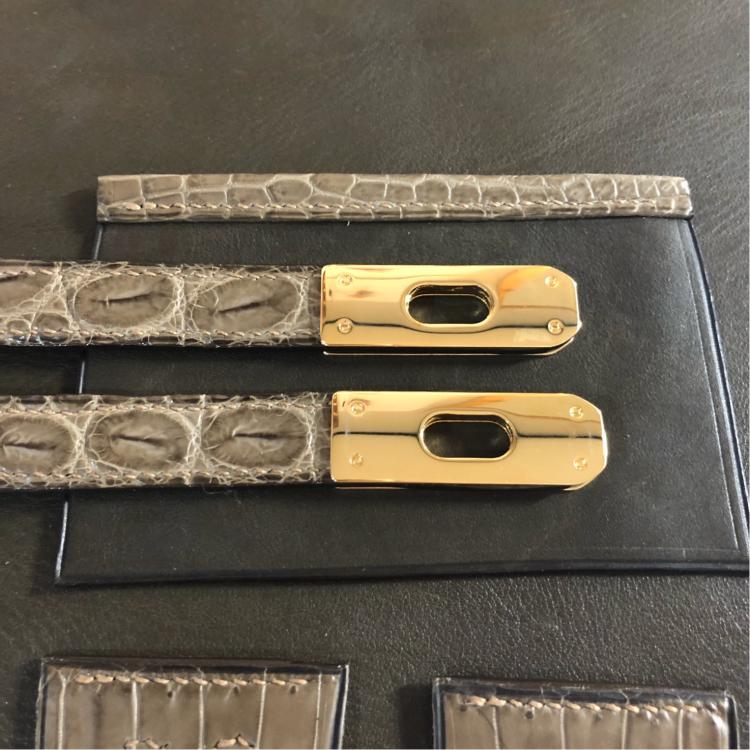

-
Leather Satchel
motocouture replied to KingsCountyLeather's topic in Satchels, Luggage and Briefcases
Oh and I might have to borrow that closure design if I do a bag that I carry in my motorbike’s saddle bags - that way it won’t scratch the paint at all.... -
Leather Satchel
motocouture replied to KingsCountyLeather's topic in Satchels, Luggage and Briefcases
Love it! Really clean lines and great design. I think the closure is great, simple and stylish (and quiet, if you’re in a meeting ). Ton of hand stitching there!! -
Croc clutch!
motocouture replied to motocouture's topic in Purses, Wallets, Belts and Miscellaneous Pocket Items
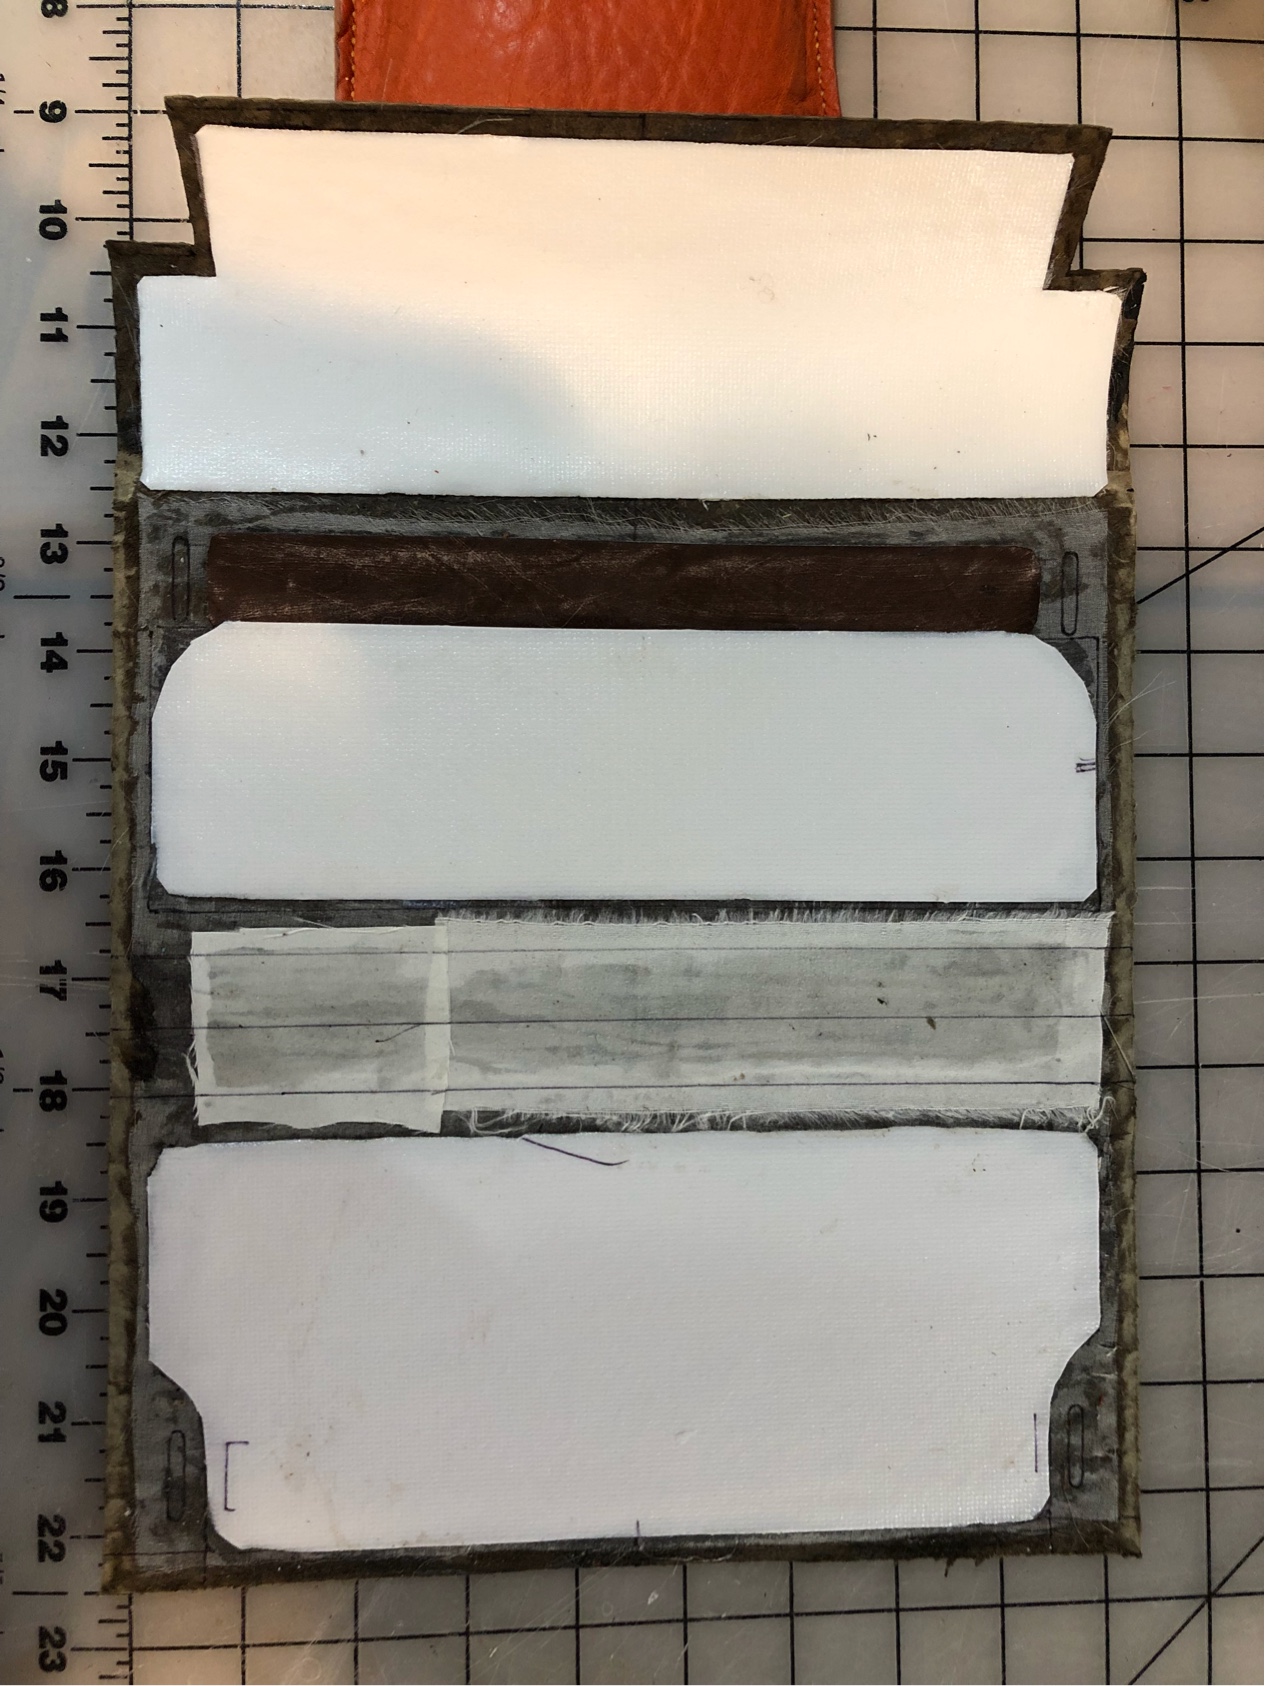
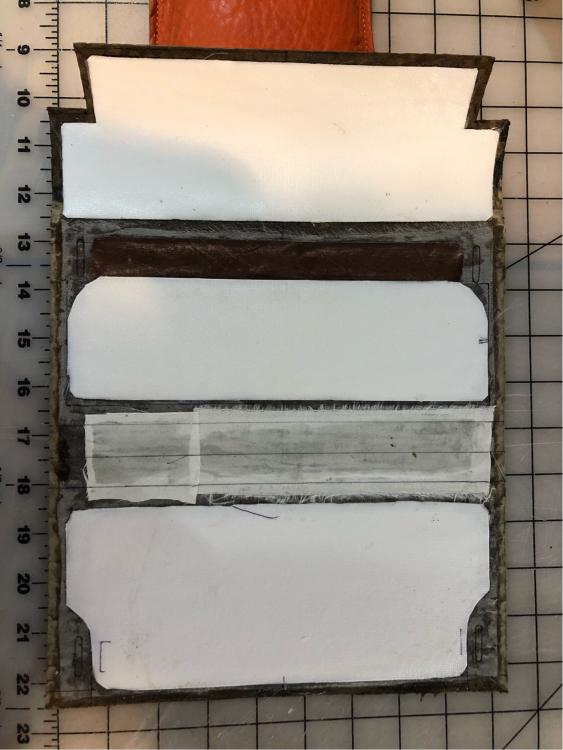
Here’s a pic of the liner, called “Easy Liner”, from duckbrand.com (https://www.duckbrand.com/products/shelf-liner-bath/non-adhesive-shelf-liner/white-12-in-x-7-ft). Also another shot of the interior, with the foam attached. Making this up as I go along, but wanted to leave the bottom rolled edge more flexible and add some body to the front and back panels.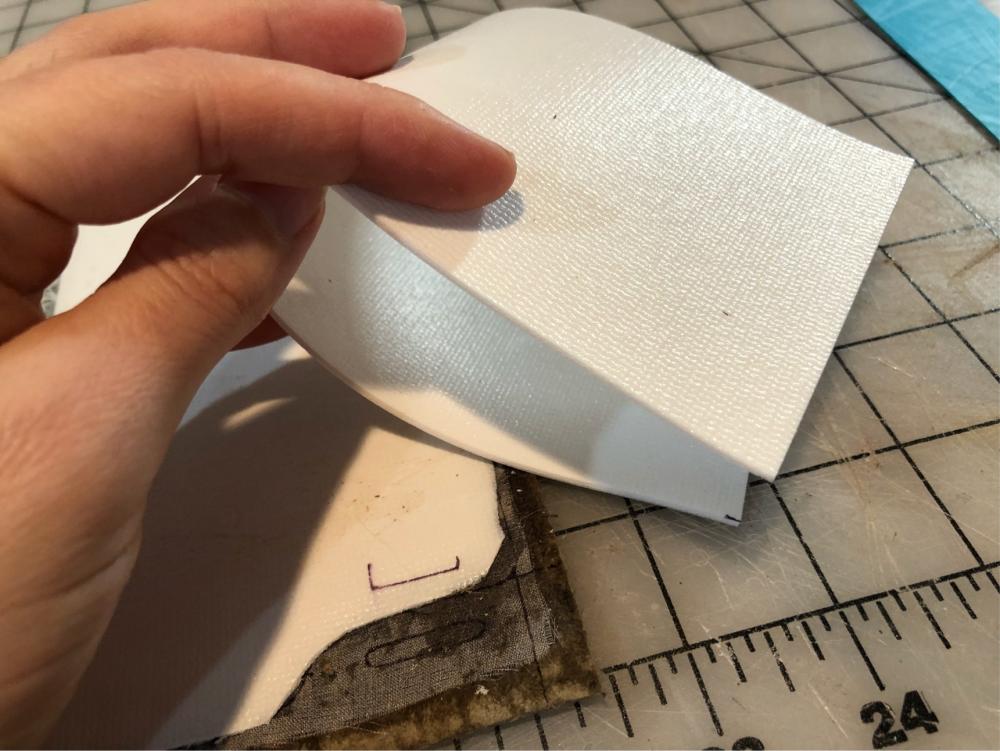
-
Croc clutch!
motocouture replied to motocouture's topic in Purses, Wallets, Belts and Miscellaneous Pocket Items
Thanks! I remember that stuff lol! Great for caravans . This is a little different; will post a better pic in am; it’s about 1.5mm thick, I think closed cell, smooth, with no holes and a super faint grid impression on both sides. Ha! Got that idea from someone I know.... -
Croc clutch!
motocouture replied to motocouture's topic in Purses, Wallets, Belts and Miscellaneous Pocket Items
Foam liner drying at one end (weighted to dry in a curve through 90 degrees). The rest looks a little hodge-podge at the moment. Decided to try strengthening the croc with silk organza (had some laying around), then wanted a bit more support through what will be the bottom curve of the clutch, so added some fine cotton fabric. The green plastic piece is a template I made to mark out the strap slots a little more precisely. Using here to draw the slots on the wrong side so that I don’t overlap them with any liners or stiffeners.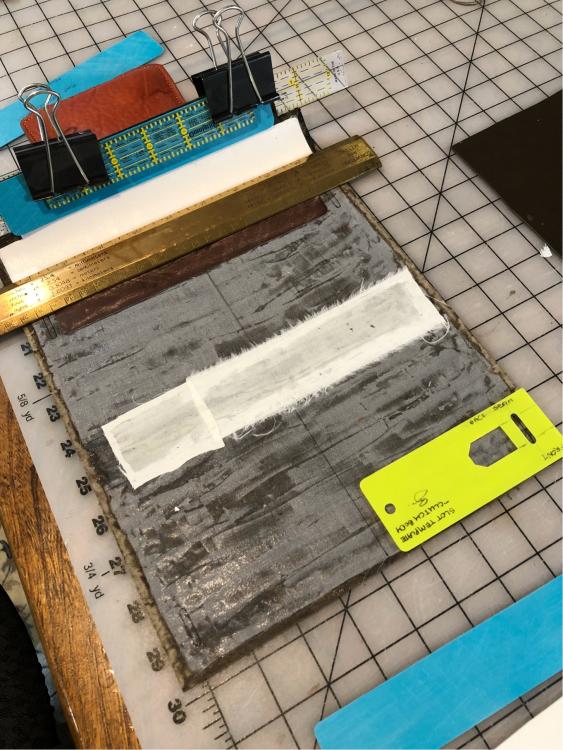
-
Croc clutch!
motocouture replied to motocouture's topic in Purses, Wallets, Belts and Miscellaneous Pocket Items
Finally managed to pry myself free for an hour from work and rediscover how much left I have to do on my clutch Managed to get some edging done on the straps and gussets, and line the main body. Shoutout to @RockyAussie for the advice on the foam liner . He recommended some great products, for thin, dense foam, but because I have no patience, I decided to try out some kitchen drawer no -slip liner from the Container Store just down the road. So far, so good - it skived well, doesn’t adversely react to the Rena glue, and gives a bit of body to the soft croc without being too “fluffy”.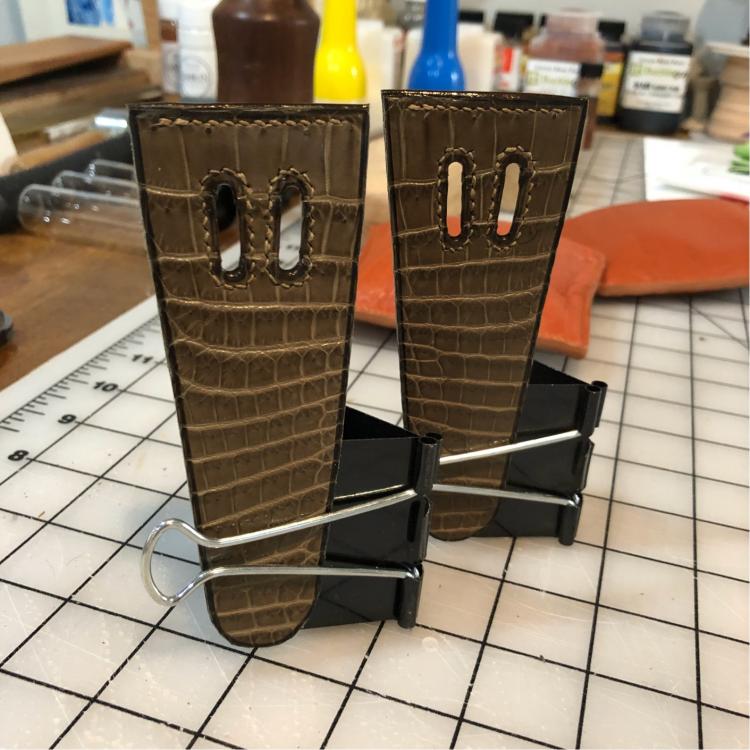
-
Croc clutch!
motocouture replied to motocouture's topic in Purses, Wallets, Belts and Miscellaneous Pocket Items
My apologies, completely missed replying to this! Thank you so much! i use John James size 4 needles, with 532 Lin thread. Considering trying some of the other threads out there on my next project though (Amy Roke, Vinymo), as I don’t like the occasional unevenness of the Lin thread. No! It’s still curing in the garage. I keep bugging hubby to level the top for me. Maybe once it finally stops snowing here..... A small amount of experience as a kid, between self taught, a Ron Edward book or two, and tripping up my local saddler in his shop. Hadn’t really touched leatherwork since then, but have done a lot of couture sewing, which I think really helps with understanding design / pattern making, and an “engineering” type approach to projects. And this forum and its members have been amazing. -
I think it looks great! I actually like the effect on the feathers
-
Croc clutch!
motocouture replied to motocouture's topic in Purses, Wallets, Belts and Miscellaneous Pocket Items
+1 on that! Exactly!!! Especially when the wife has access to sharp Knip knives Oh that’s a cool idea! Would love to see how that works out Thank you! They are definitely challenging but fun. -
Croc clutch!
motocouture replied to motocouture's topic in Purses, Wallets, Belts and Miscellaneous Pocket Items
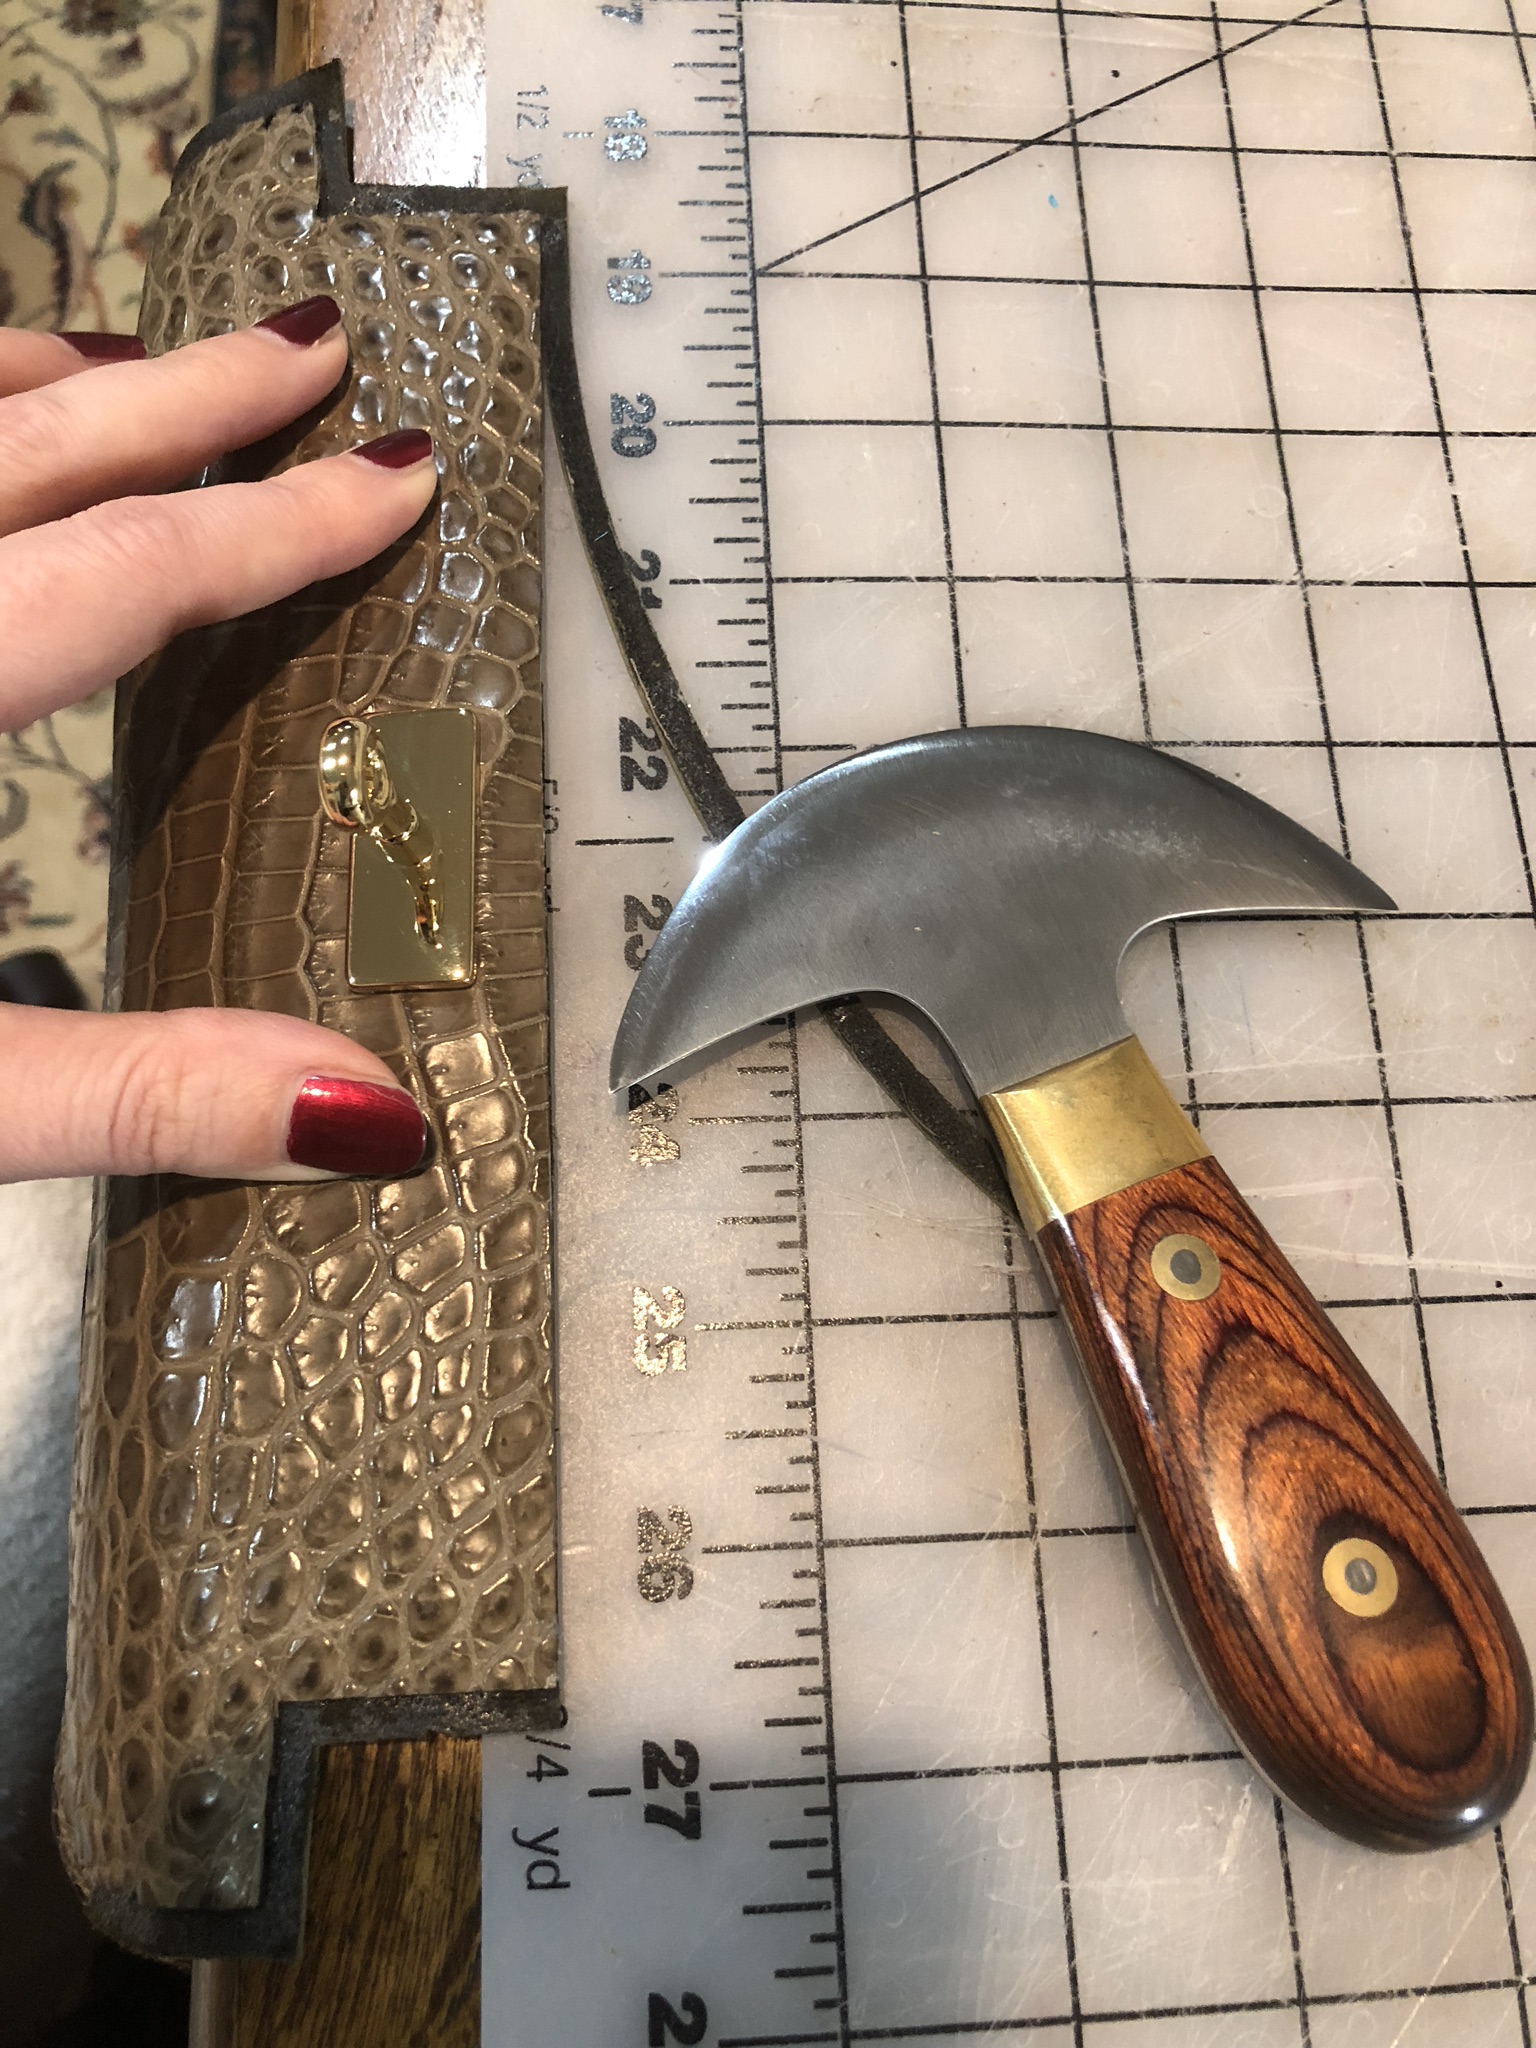
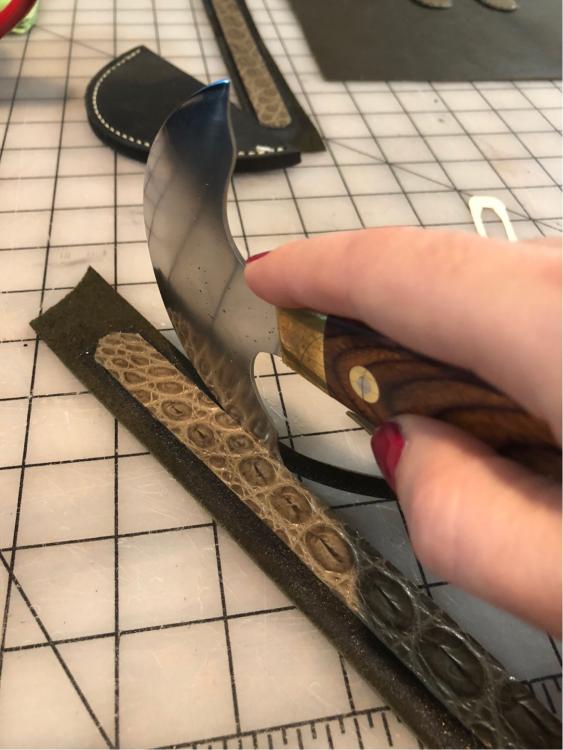
Thank you!! I do the same with fabric layouts as well, cos as you know, once you cut.... Thanks! Should get some more time at it this weekend. The other one is a Knipschield “Texas Rosebud”, a slightly smaller version of the traditional head knife. Also have his bevel point knife (which is soooooooooo sharp). Looking to add his skiving knife and curved detail knife to my collection, so if anyone has one spare lying around that they want to part with.... -
Croc clutch!
motocouture replied to motocouture's topic in Purses, Wallets, Belts and Miscellaneous Pocket Items
That’s a good way to avoid cabin fever during a snowstorm My pleasure! its a little of both. Still experimenting with my regad creaser (croc takes a lot less heat), but some is just shadow. I love the finished look the creaser gives. The leather is I’d say about 1 to 1.2mm for the croc, and 3-3.5 lbs for the calf lining (just a touch thicker than the croc). -
Wow that is a ton of work!!! Respect! I love my KS irons, I think you’ll really notice the difference. The Parisian pink is a nice touch, too.
-
Croc clutch!
motocouture replied to motocouture's topic in Purses, Wallets, Belts and Miscellaneous Pocket Items
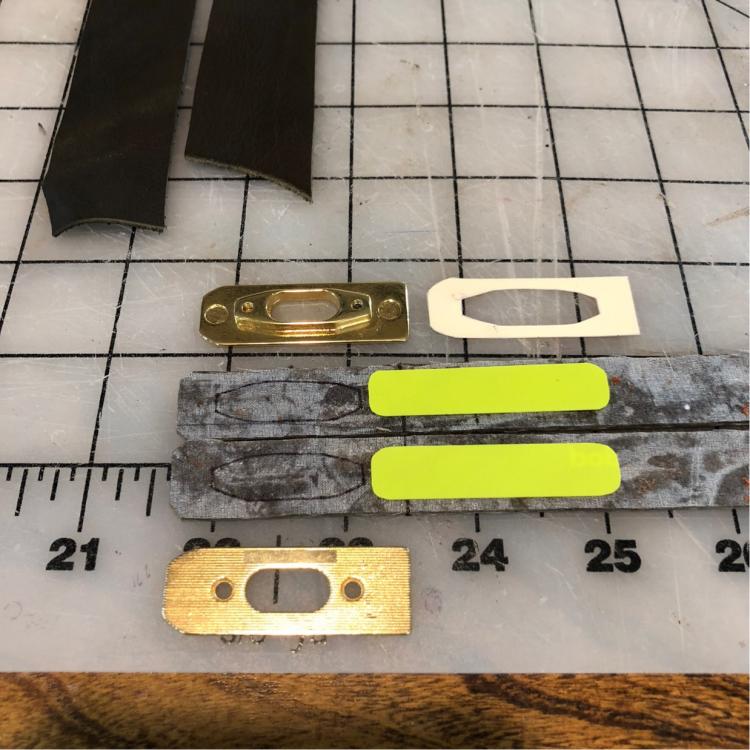
Here is a pic of the straps being cut. Made a template out of clear file divider, then worked out if you sprayed the back of the plastic with 3M 45 adhesive, it doesn’t slip all over the place, and doesn’t hurt the croc. This hardware (thanks Ohio Bag Supply) is slightly different than the previous hardware. For this set, the leather isn’t exposed in the slot that slides over the main post, so the hole in the leather needs to be cut a bit larger to accommodate the internal metal lip. Cut a quick template to help later. I also reinforce the ends of the strap with some kitchen cutting mat - figuring most of this out as I go along, but reckon the reinforcement will help at the flex / stress point between the hardware and straight leather.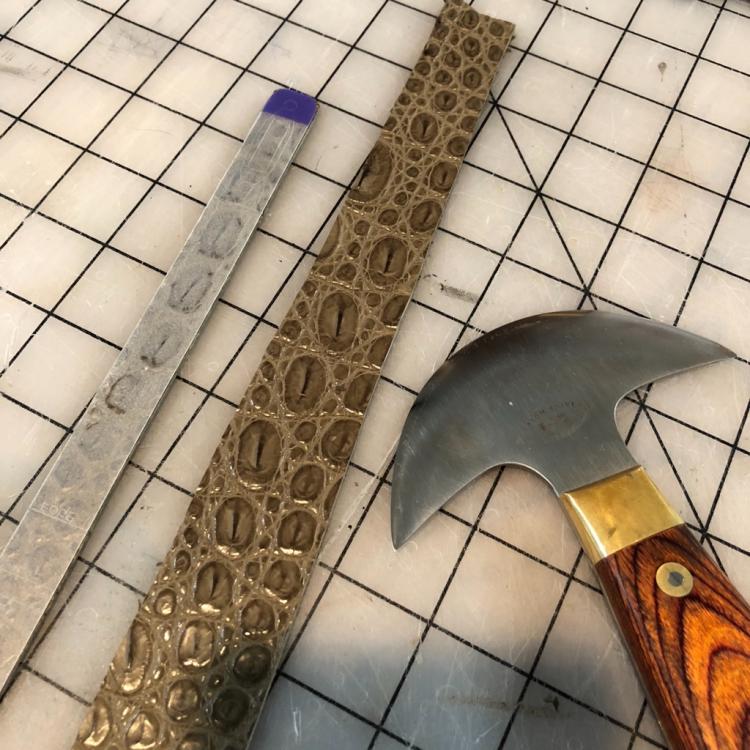
-
Croc clutch!
motocouture replied to motocouture's topic in Purses, Wallets, Belts and Miscellaneous Pocket Items
Some more progress pics (in between shoveling snow it was a lot, for spring...). Finished the gussets, creased the edges with my heated edge creaser, and stitched the top edges. Also stitched and edged the internal pocket for the lining. Next up are the straps.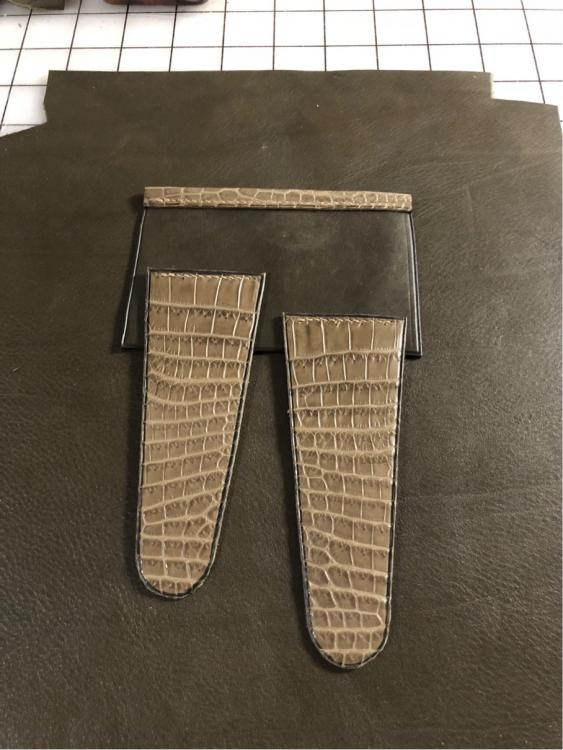
-
Croc clutch!
motocouture replied to motocouture's topic in Purses, Wallets, Belts and Miscellaneous Pocket Items
Thank you so much! Completely made my day. Glad that my pain and frustration can maybe help ease someone else’s that is a stunning bag! Really clean lines, stitching looking great, and I love the contrast with the edging. Well designed! -
If it’s any consolation, I’ve sewn a couple of shirts / jackets over time where the left sleeve has gone in backwards on the right hand side....after that, started writing left and right on them lol
-
Croc clutch!
motocouture replied to motocouture's topic in Purses, Wallets, Belts and Miscellaneous Pocket Items
Yes, 665 is the winner! Matches the croc beautifully. Going with a beige thread, that will be a soft contrast with the croc. The hardware is going to be gold, so didn’t want too much going on. -
What to use for inlays in horse tack
motocouture replied to Kj86's topic in Leatherwork Conversation
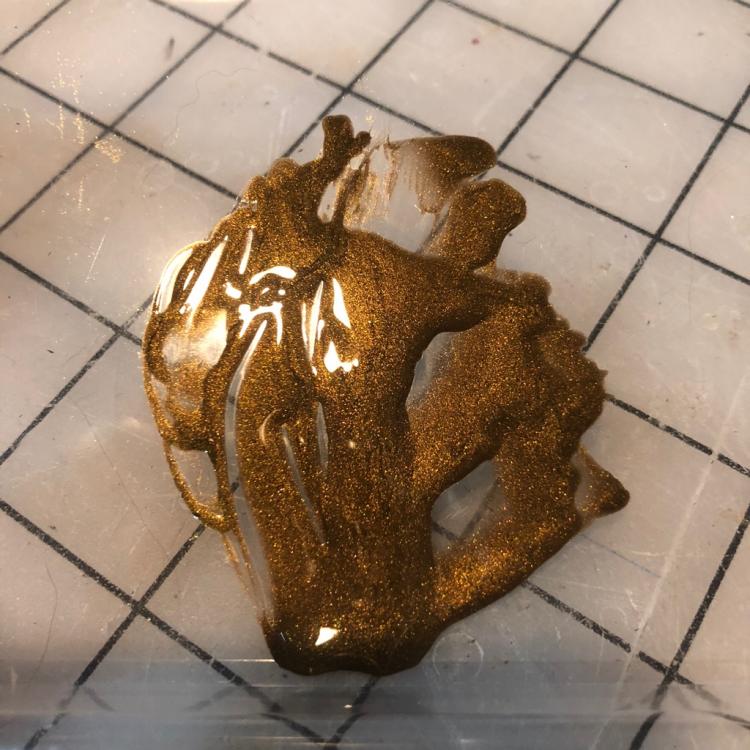
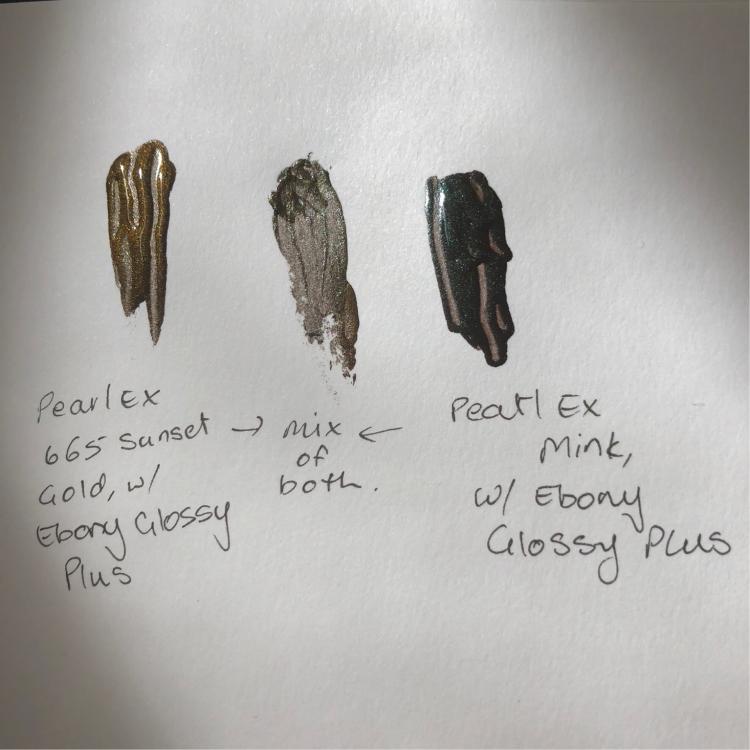
If you want sparkly, you might be able to use dry pearl pigments mixed in with whatever finish you’re using. Just did an experiment with pearlex pigments + edge paint, and I was impressed at the sheen from a very small amount of pigment. Might not work if airbrushing, though.