motocouture
-
Posts
475 -
Joined
-
Last visited
Content Type
Profiles
Forums
Events
Blogs
Gallery
Store
Everything posted by motocouture
-
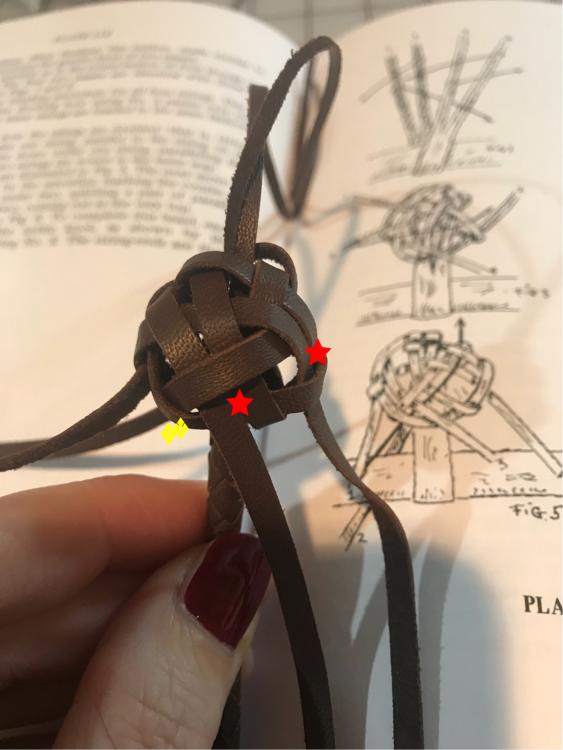
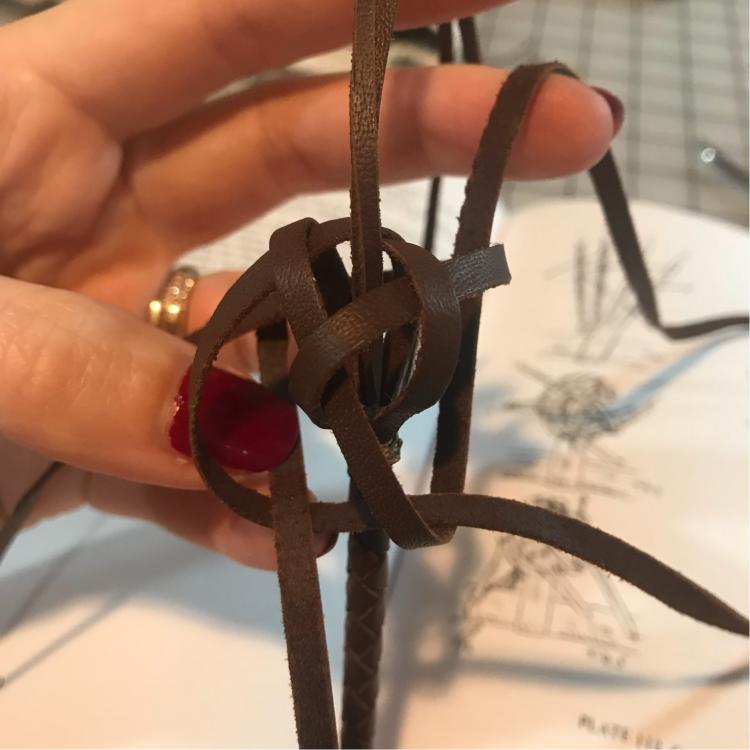
Once all the pairs of strands are split in figure 5, the knot should look like below...
-
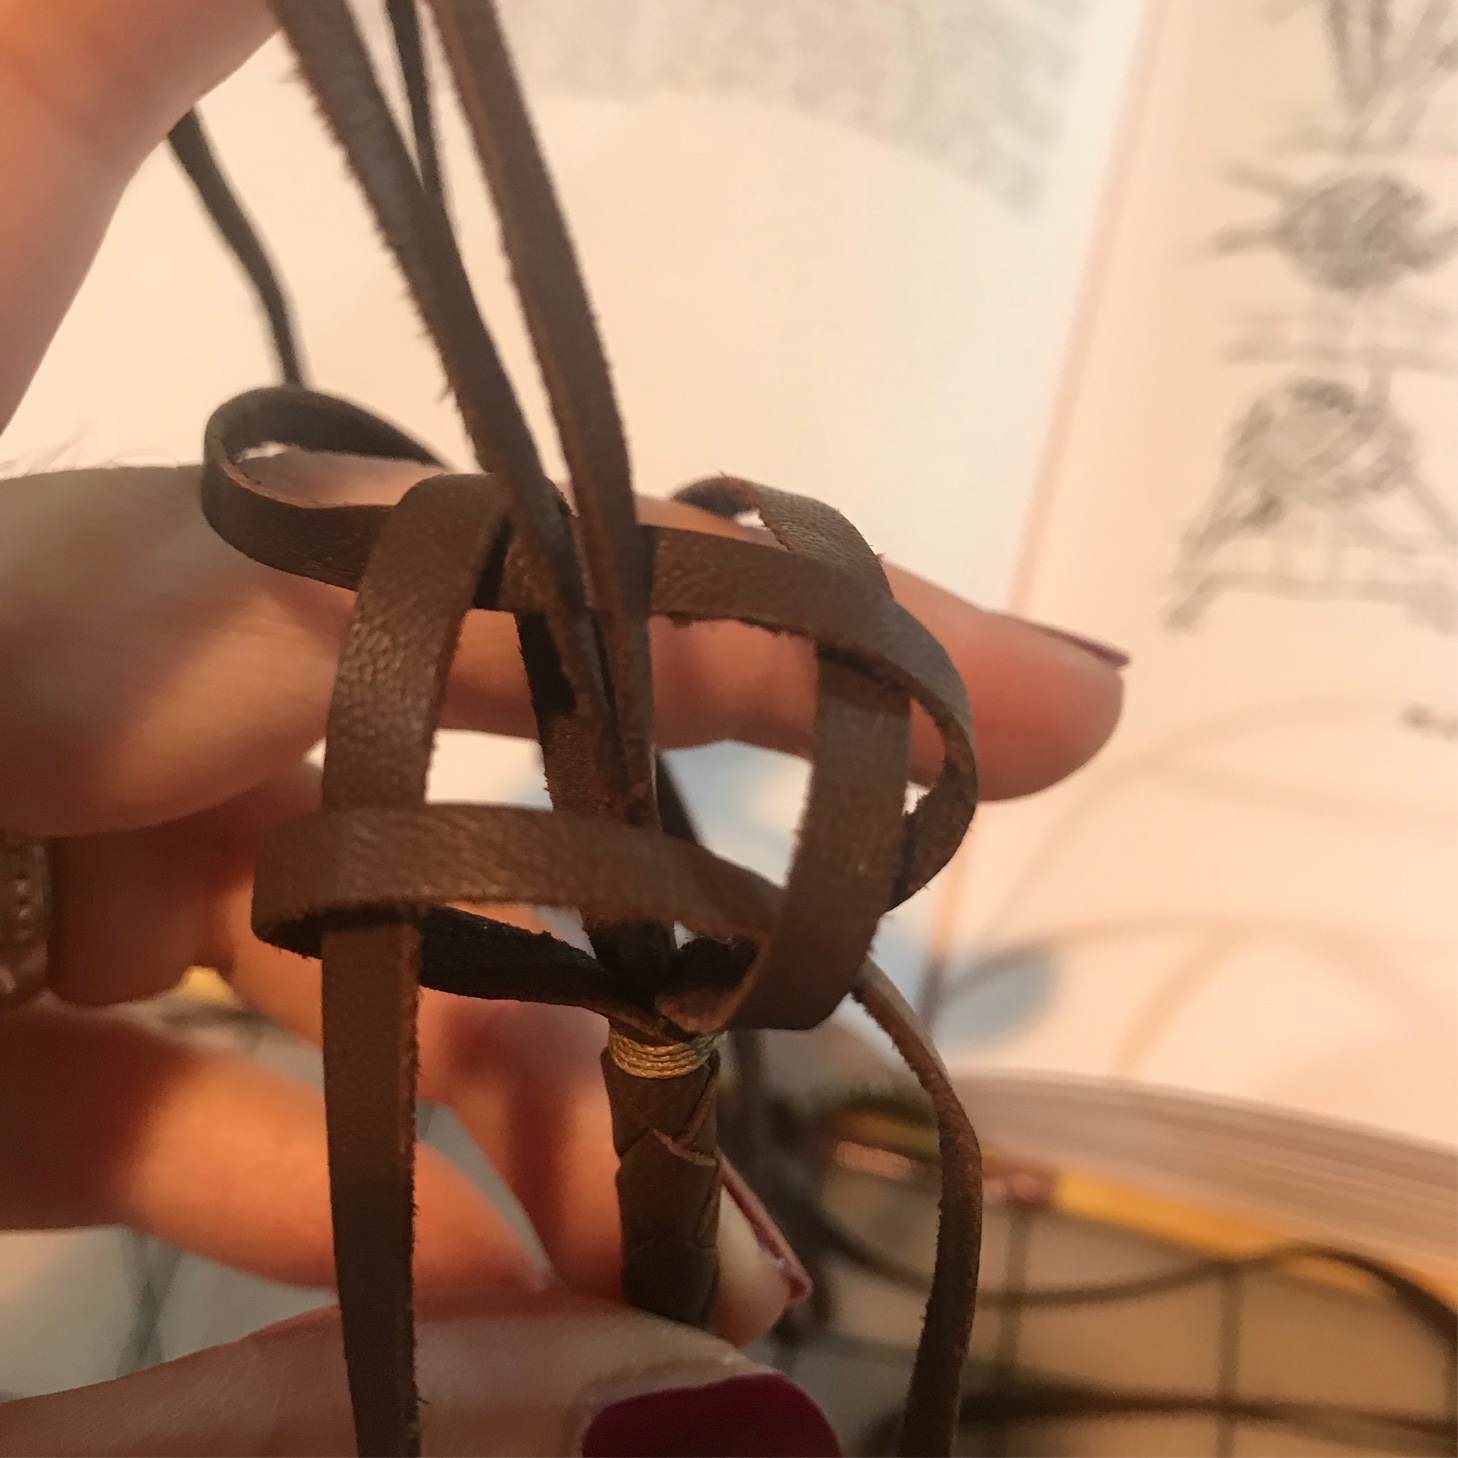
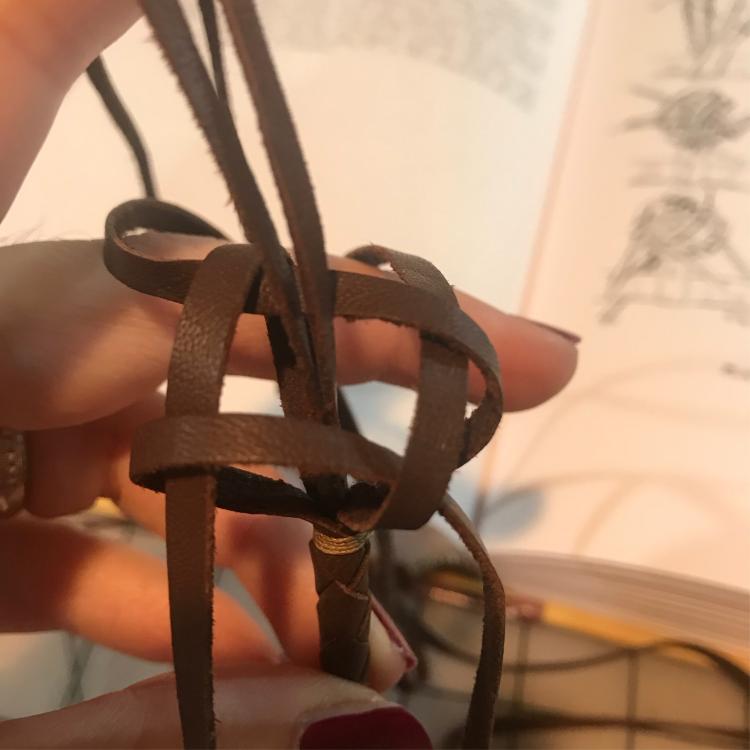
Onto figure 5... this is the step I always have to pause and think hard on. The strands weave through to split the pairs. Strand 1 (front left) goes under at the yellow diamonds, passing beneath two strands before coming up at the first red star. Then passes over two strands before going under again at the second red star. The strand then goes under another two strands, and that completes the weave of that strand for this step. Again, it helps to mark strand 1 somehow, so you know when your back to the start.
-
I like that idea! Ah, c’est la vie
-
Hello there, and welcome to the community! For dress gloves, I would have said a thin cashmere knit, however, for work gloves you probably need something more robust. If you’re going the non-leather route, and it’s for colder weather, I believe ‘Thinsulate’ have some good materials. I’ll see if I can find a website I’ve used previously to source active wear / outdoor fabrics from. Pretty sure I have a reproduction of a vintage glove making book in my stash somewhere; will see if I can dig it out and scan the pattern for you.
-

Banged out a little bangle
motocouture replied to DS STRAPS's topic in Purses, Wallets, Belts and Miscellaneous Pocket Items
Very nice! Where do you source the bangle insert from? How odd, @alpha2, I happen to have some too... -
Love it!!! Great idea!
-
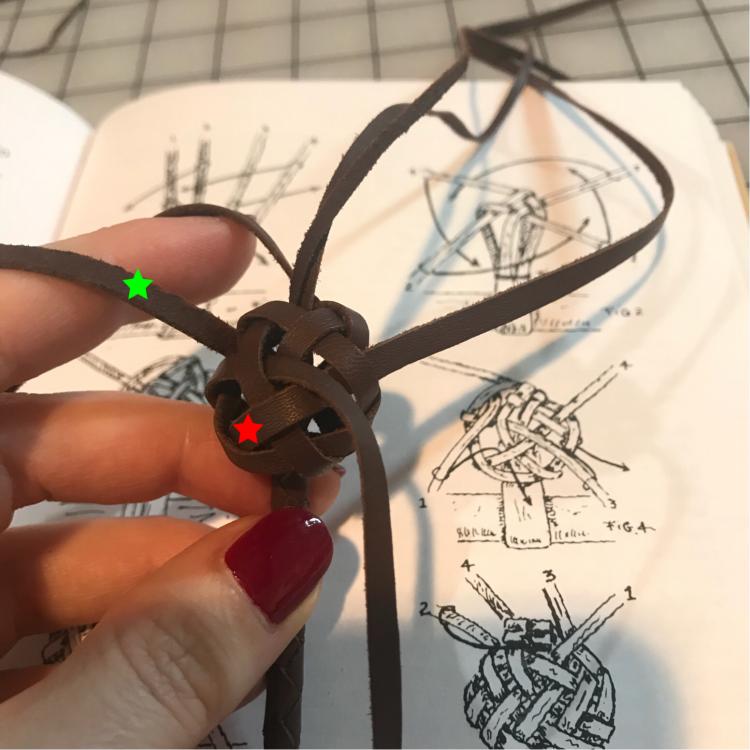
Once figure 3 is done, the next pic shows the setup for figure 4. The strand in the photo with a green star is strand 1 in the diagram, folded back ready to slide under the red star strand. If it’s done right, it should lay parallel to the strand beside it.
-
Accidentally posted too early lol. They should be up now!
-
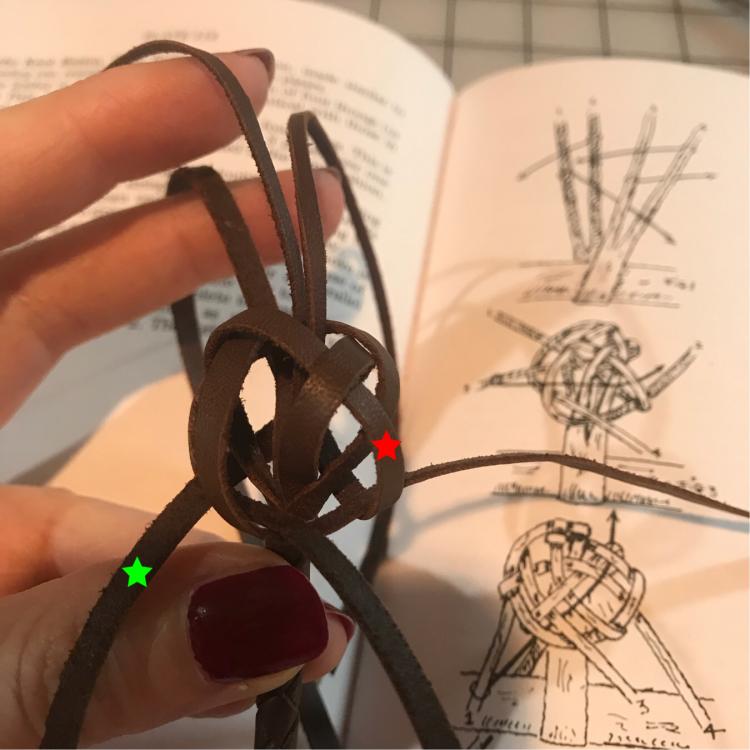
On that note, @ChasCS, here are some more pics : ) Once the crown and wall knots are done, next is to weave the strands under as shown in figure 3. I find it helps to set up the knot and strands so that they look exactly like the drawing, and to tie a small scrap of thread around the first strand you work (green star strand). This really helps when you get back to the start and need to figure out where the fourth strand works in (which is where I usually make mistakes ). The green star strand works in under the red star strand. To work the next one, I rotate the knot 90 degrees, so it looks the same as the image again, and work the next strand.
-
Thanks for the detail, will take a look. I have immense respect for the work these authors put into writing those books.
-
Thanks! It was definitely a change in speed after all the stitching I’ve been doing lol. Knots are good at teaching.....patience.....and a colorful vocabulary
-
Thank you! I’ll have to take a look at Robert Woolery’s books, too
-
Absolutely! And thank you
-
These ones show the first couple of steps (Figures 1 and 2 from the book), quoting Grant, a crown knot then a wall knot. The first crown knot will become the top of the finished button, so I leave some room between it and the tied off portion of the round braid. The two strands up the center are the core of the round braid; left them in here just to give some stability until the knot’s finished.
-
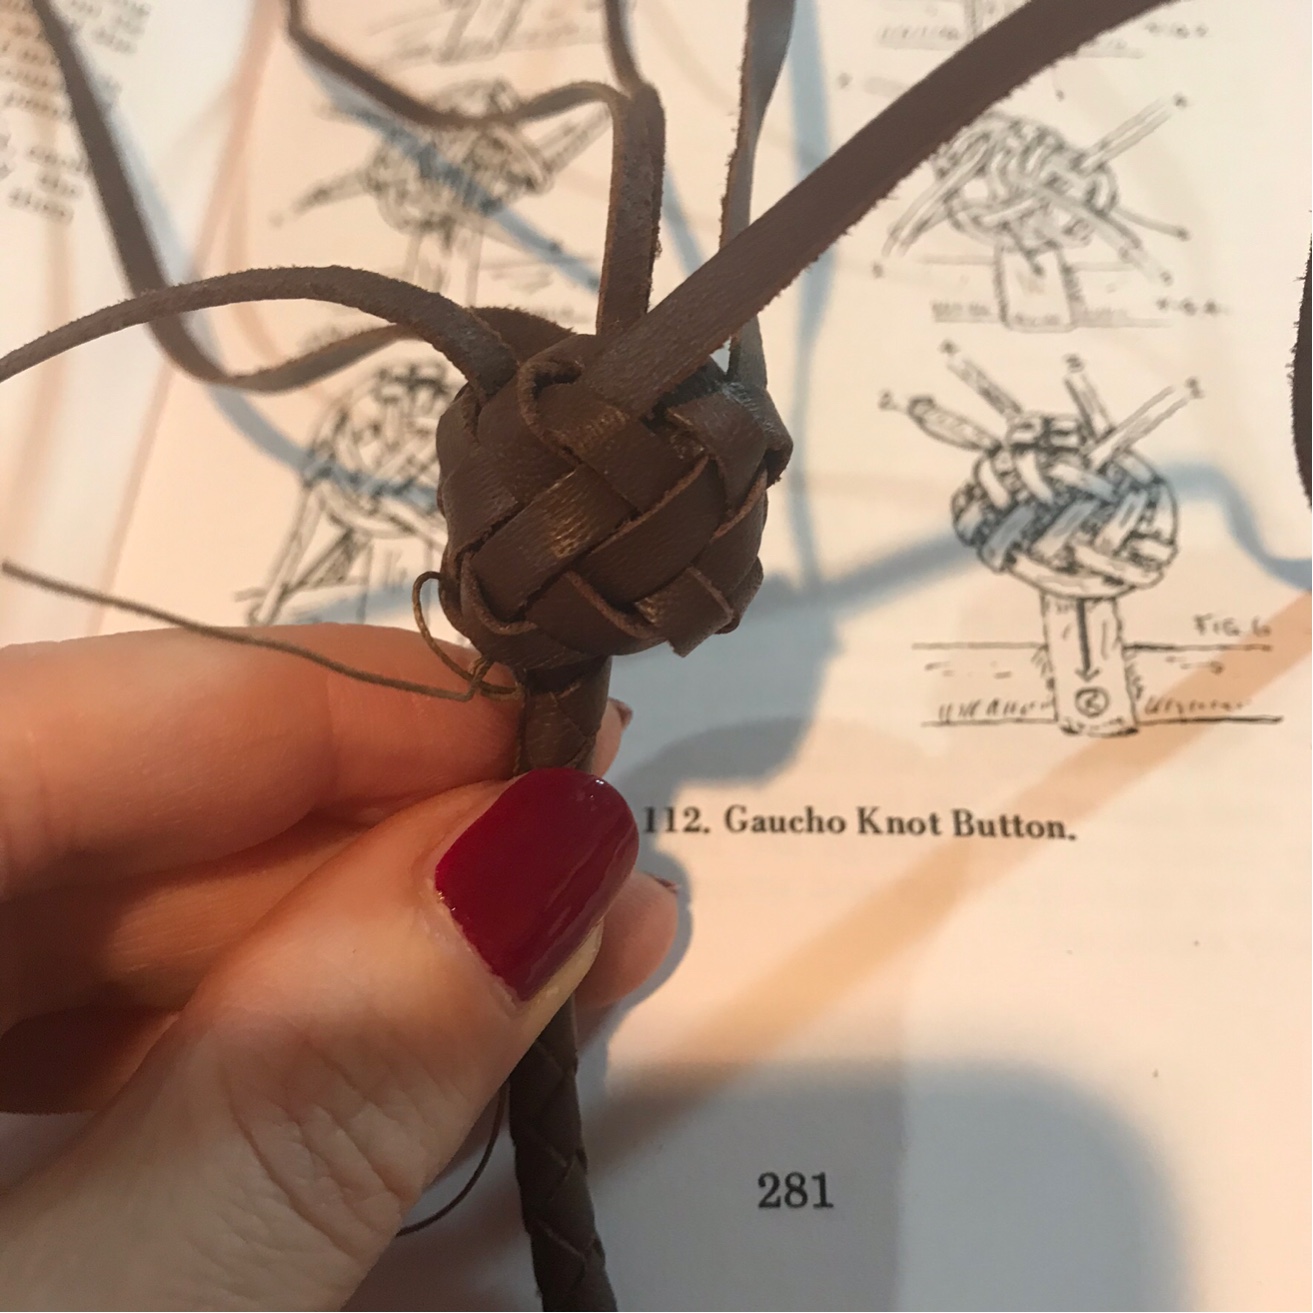
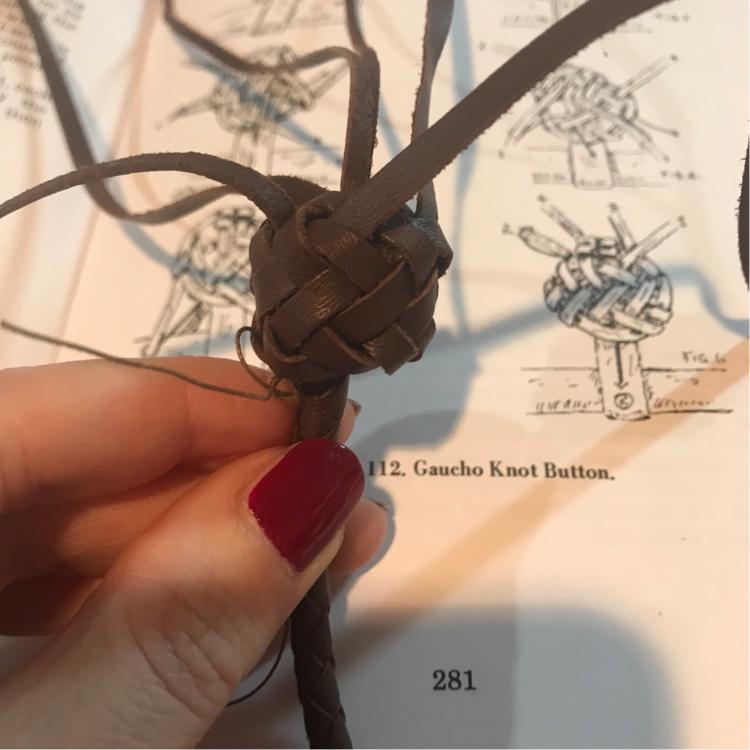
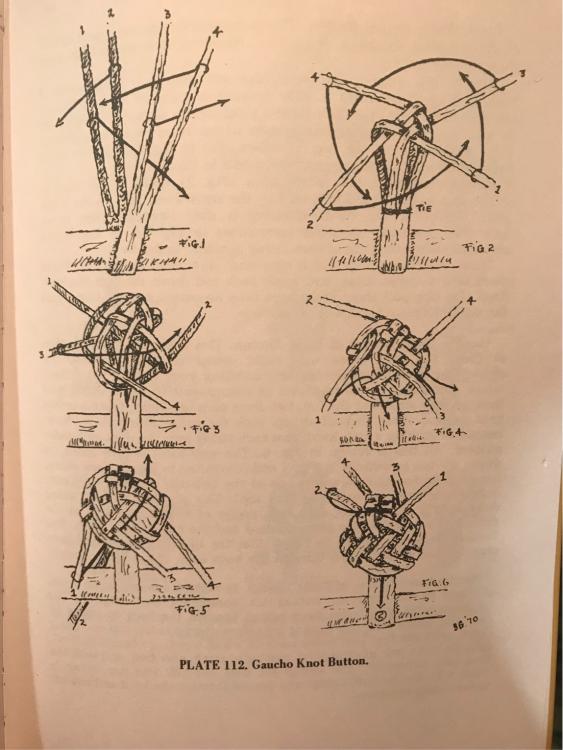
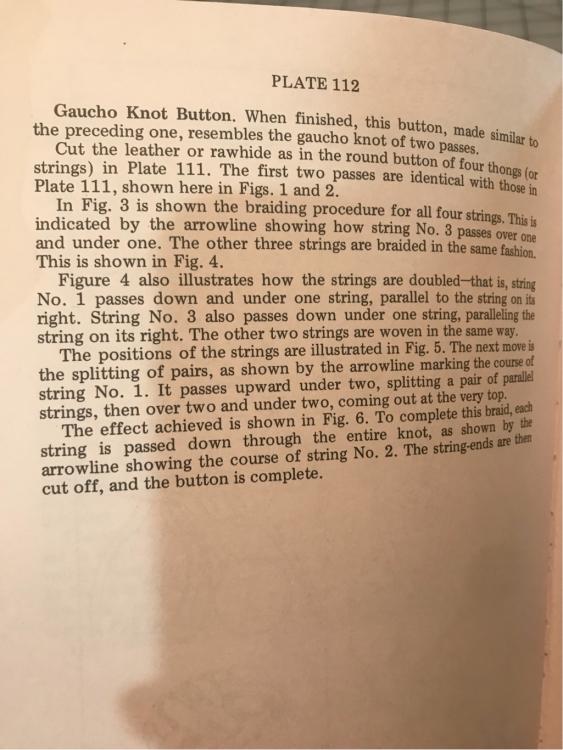
The next step is to tie a gaucho knot button. I used the instructions from Bruce Grant’s Encyclopedia of Rawhide and Leather Braiding, p281 (pictured below). The following pics then show (as best I can) the main steps.
-
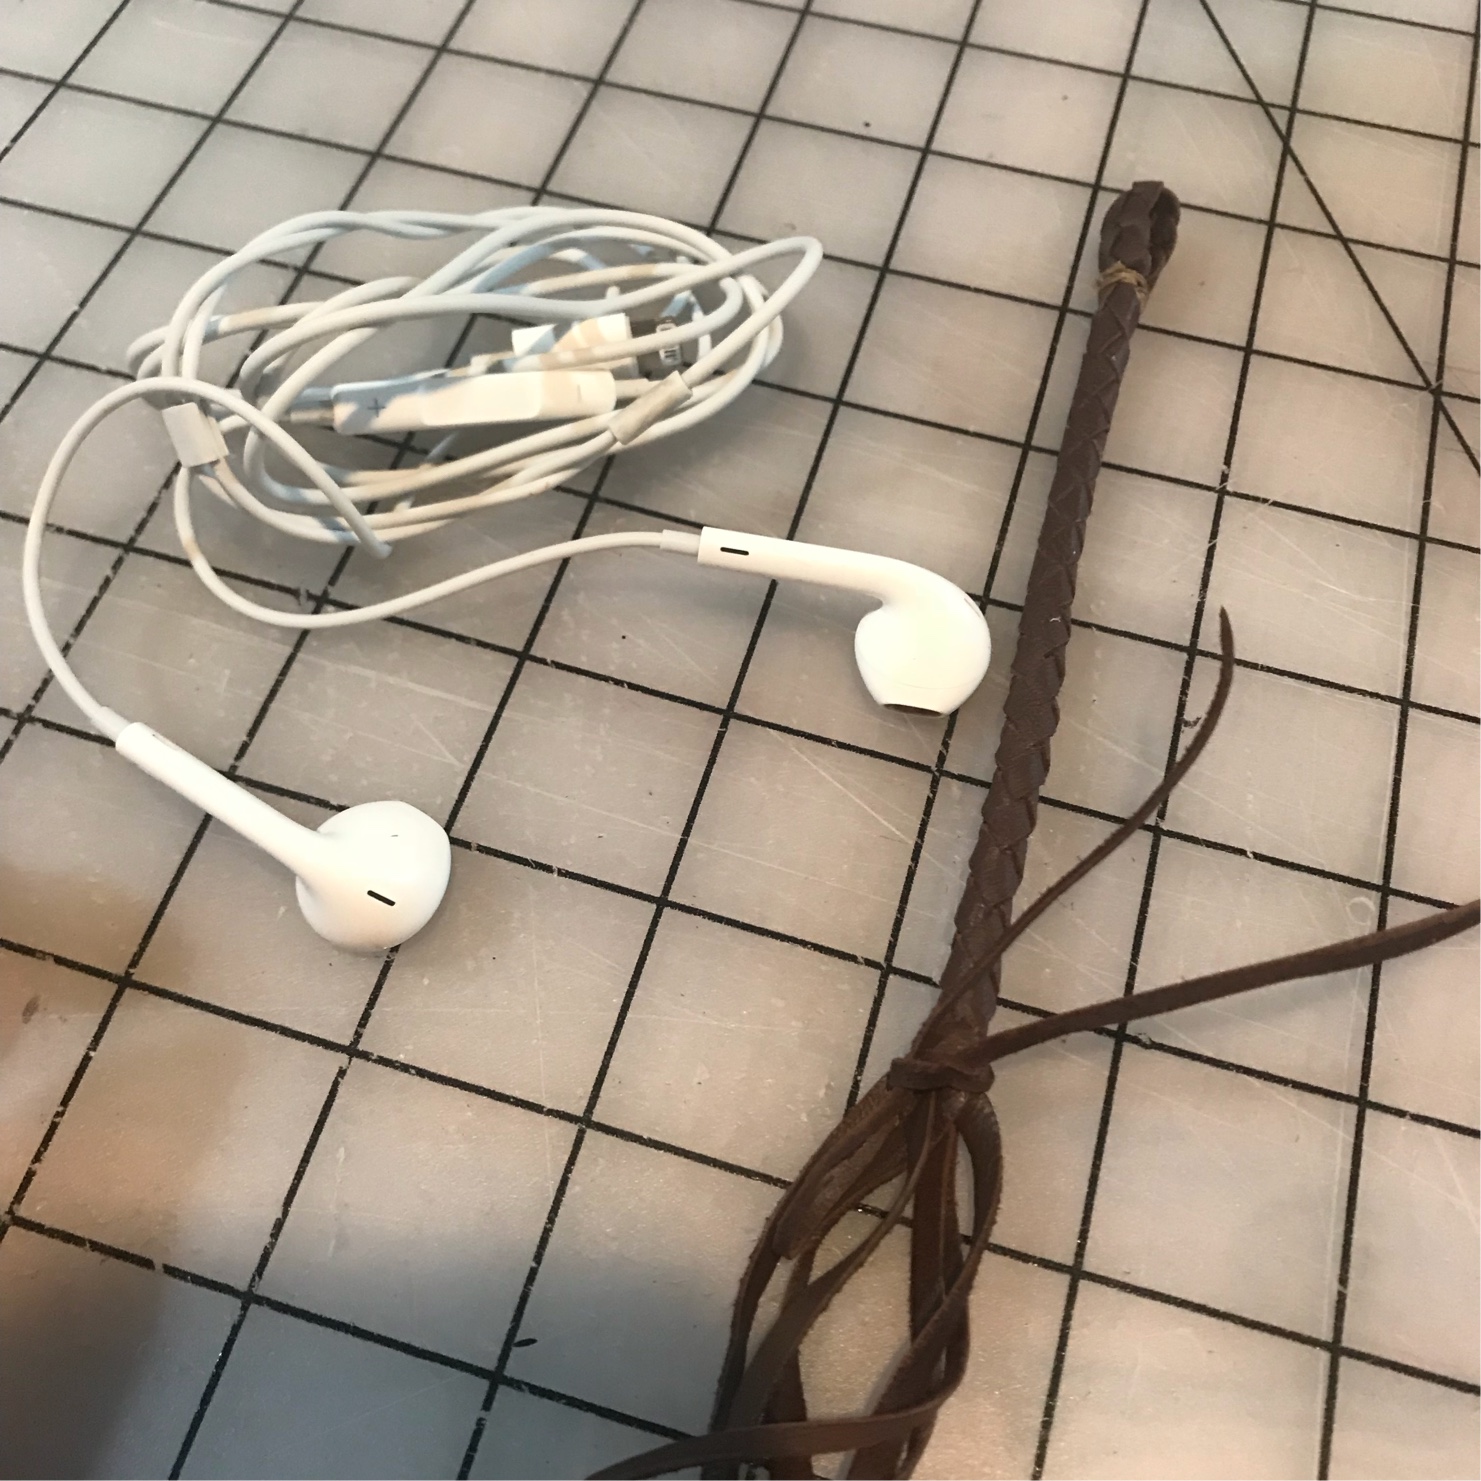
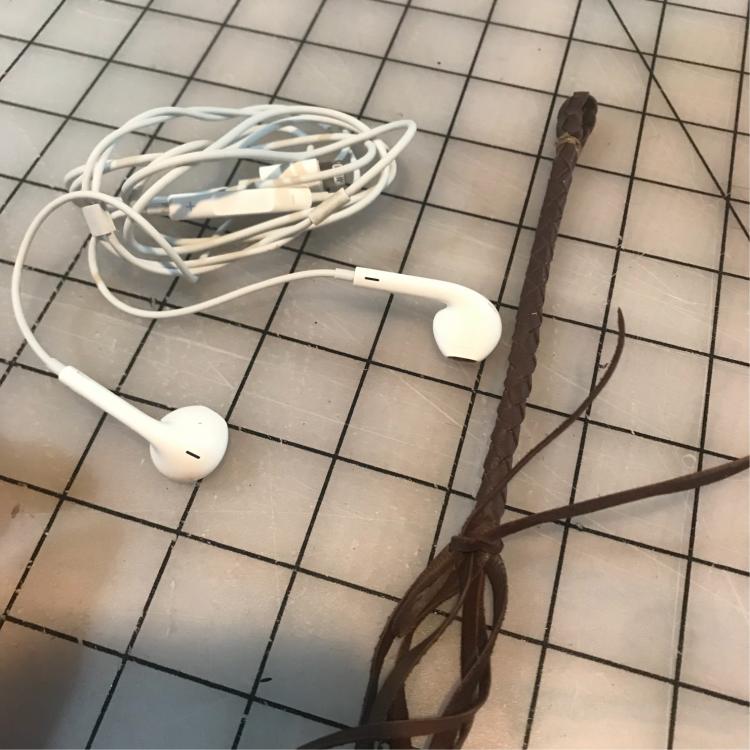
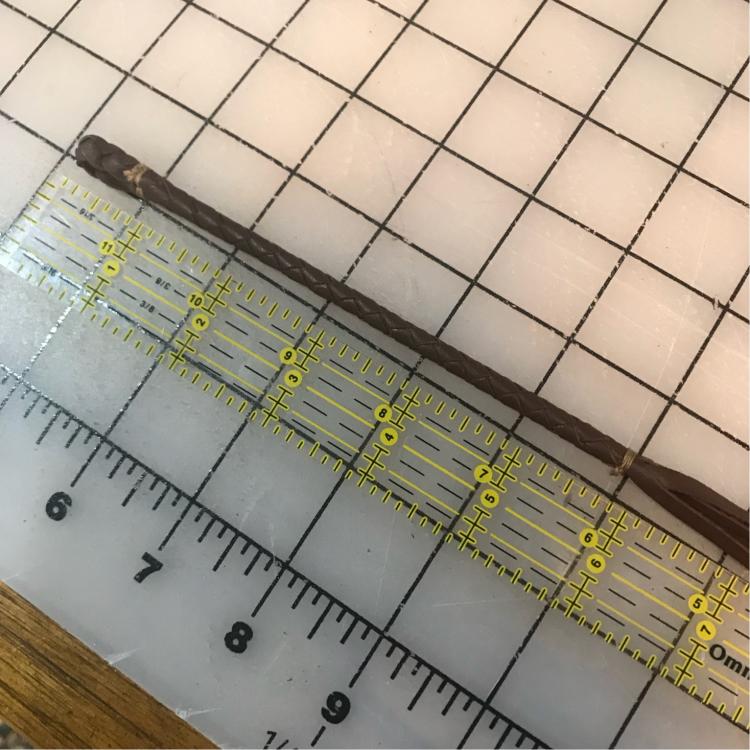
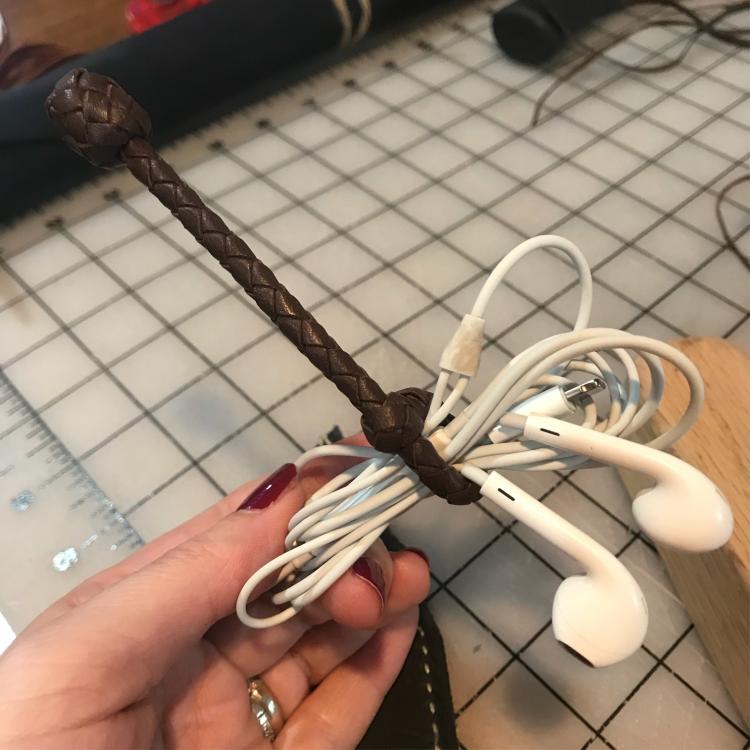
I just made a small braided headphones holder as a gift. Figured I’d post more detailed pics of the process here, as knots can sometimes be hard to follow (for me at least) just from diagrams in a book. The piece starts as a simple flat three plait, which is then folded in half and tied off with scrap thread to form the loop at one end. Two strands are then thinned down to make the core for a round four braid. The start of the round braid doesn’t have to be super neat, as it’ll be covered later by a knot. I then braid for about 6 inches (can be longer but wouldn’t recommend any shorter), then tie off with scrap thread (will also be covered by a knot). I then roll the braid under a bread board to stretch it out and smooth down the texture.
-
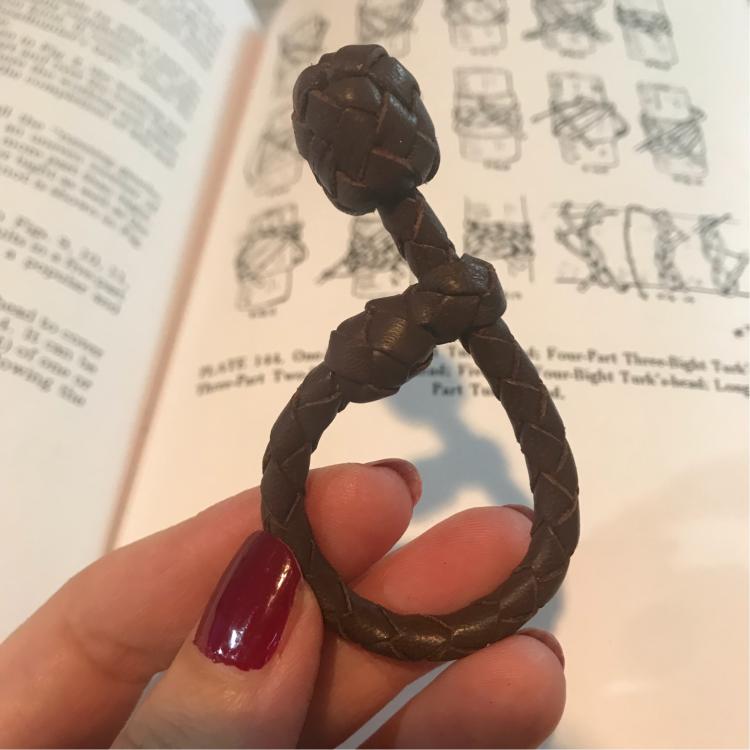
Small Christmas gift; braided headphones holder. Starts with a simple three plait, then folded in half, using two strands as a core for the round four-braid, finished with a gaucho knot button. Will post a more detailed process overview of the knot in the ‘how to’ section. I forgot how fiddly braiding and knot tying is lol
-
Beautiful and thoughtful work!
-
Jewlery related "What do I need, where do I get it?"
motocouture replied to CaptQuirk's topic in How Do I Do That?
Rio Grande is a great jewelry supply site, they have thousands of ‘findings’ and should have those end caps or something similar. https://www.riogrande.com/category/chains-and-findings -
Nice work, and I like the separate pass cover! I travel a lot for work, and I’ve thought of doing one of those for my hotel cards, now that a lot of the cards are proximity vs insert cards. How did you find the kangaroo inner? I’ve been thinking about substituting kangaroo for goat as a liner on small items...
-
-
Amazing precision, and a ton of practice. With my luck, I’d sneeze on the last stamp in the last corner and it’d all be over....
-
First watch band!
motocouture replied to motocouture's topic in Purses, Wallets, Belts and Miscellaneous Pocket Items
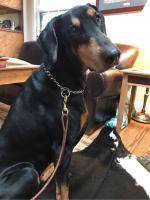
Thanks! Couldn’t even get started without all the help from this forum. Thank you! And my dog appreciated the compliment, by the way. Thanks! The clasp is very nice, well machined, which is hard to find. The website is http://www.mywatchmaker.net/; everything shipped quickly and smoothly. -
First watch band!
motocouture replied to motocouture's topic in Purses, Wallets, Belts and Miscellaneous Pocket Items
Thank you so much! I’m glad the process pics are helpful, along with adapting to mishaps along the way lol. Thanks! It’s awesome seeing everyone’s different work shops. -
First watch band!
motocouture replied to motocouture's topic in Purses, Wallets, Belts and Miscellaneous Pocket Items
Why thank ya! Much appreciated! Thank you!