motocouture
-
Posts
475 -
Joined
-
Last visited
Content Type
Profiles
Forums
Events
Blogs
Gallery
Store
Everything posted by motocouture
-
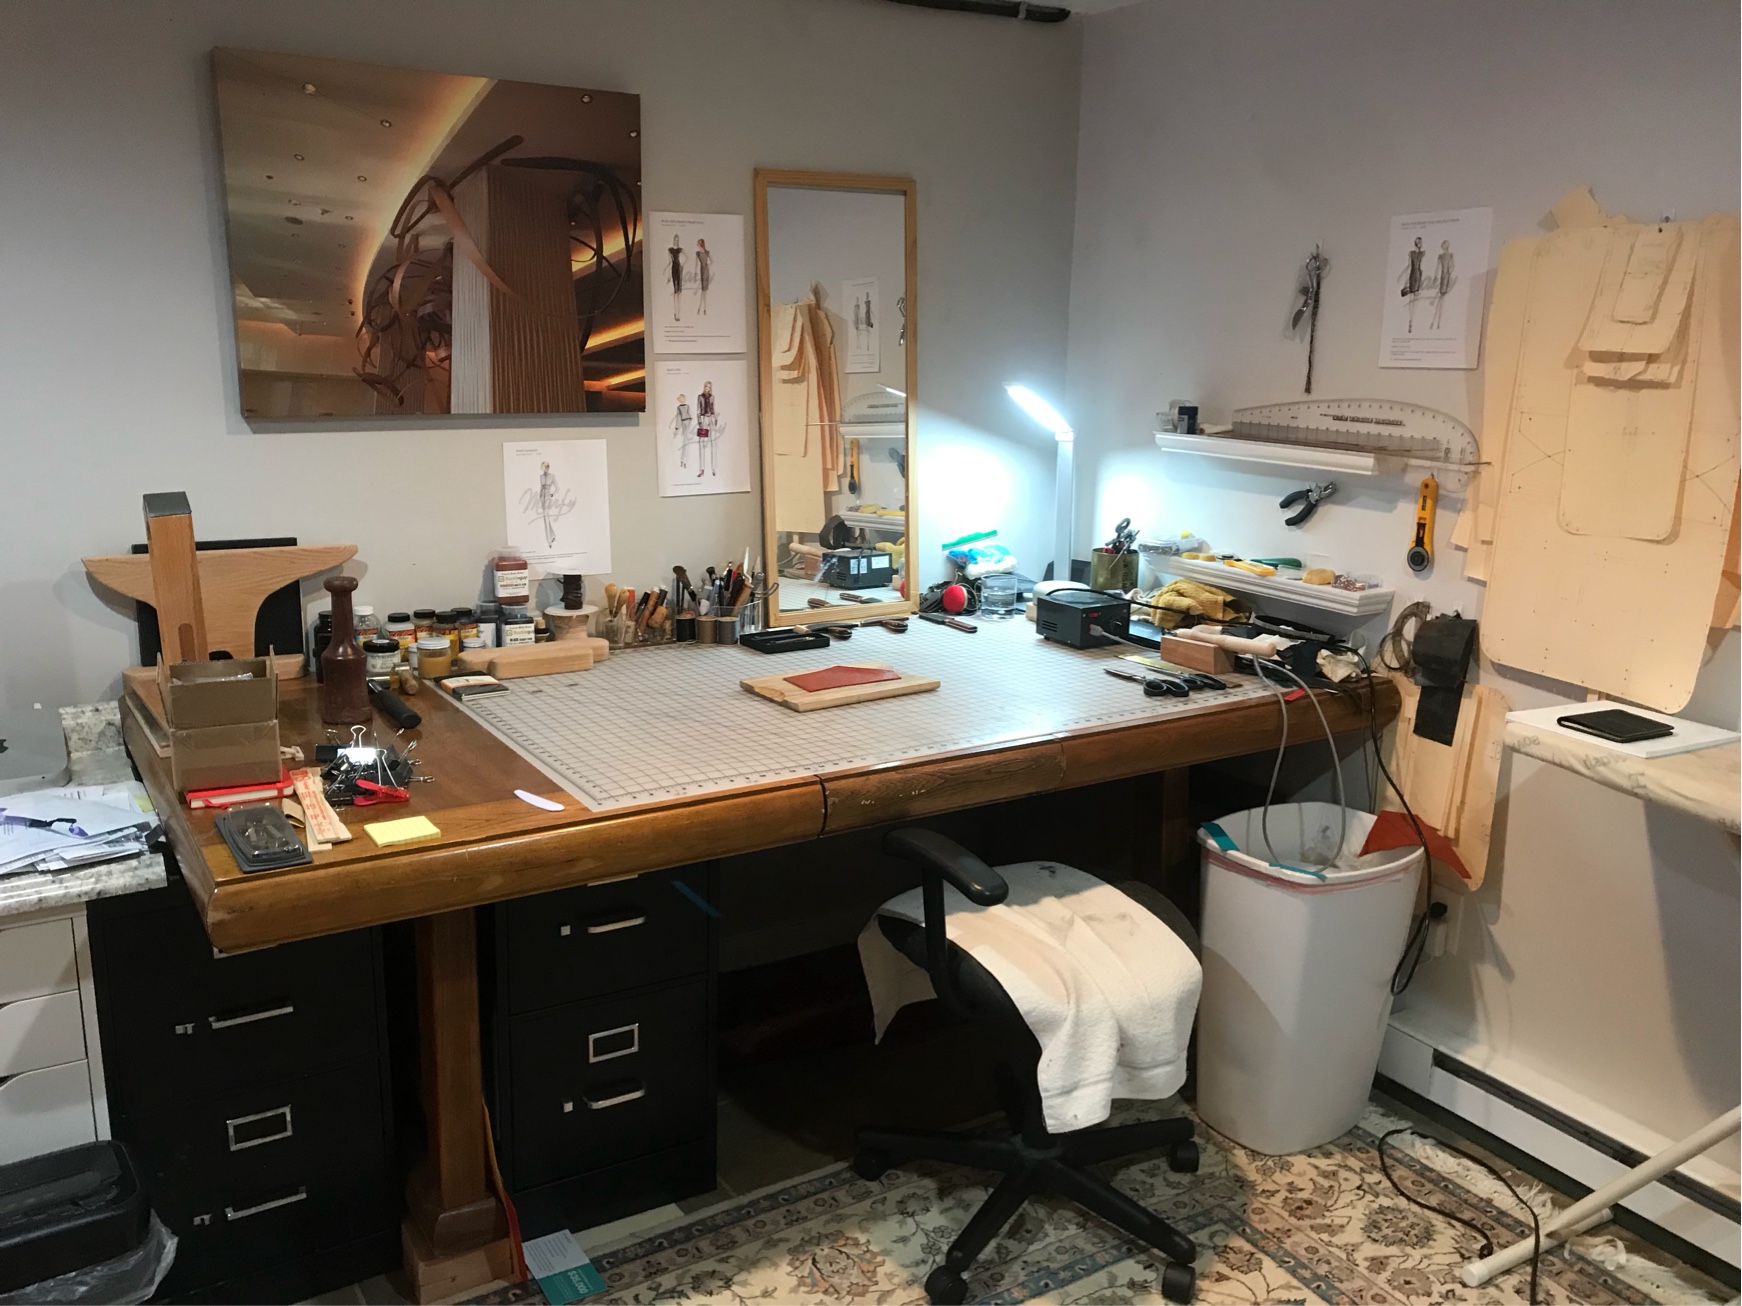
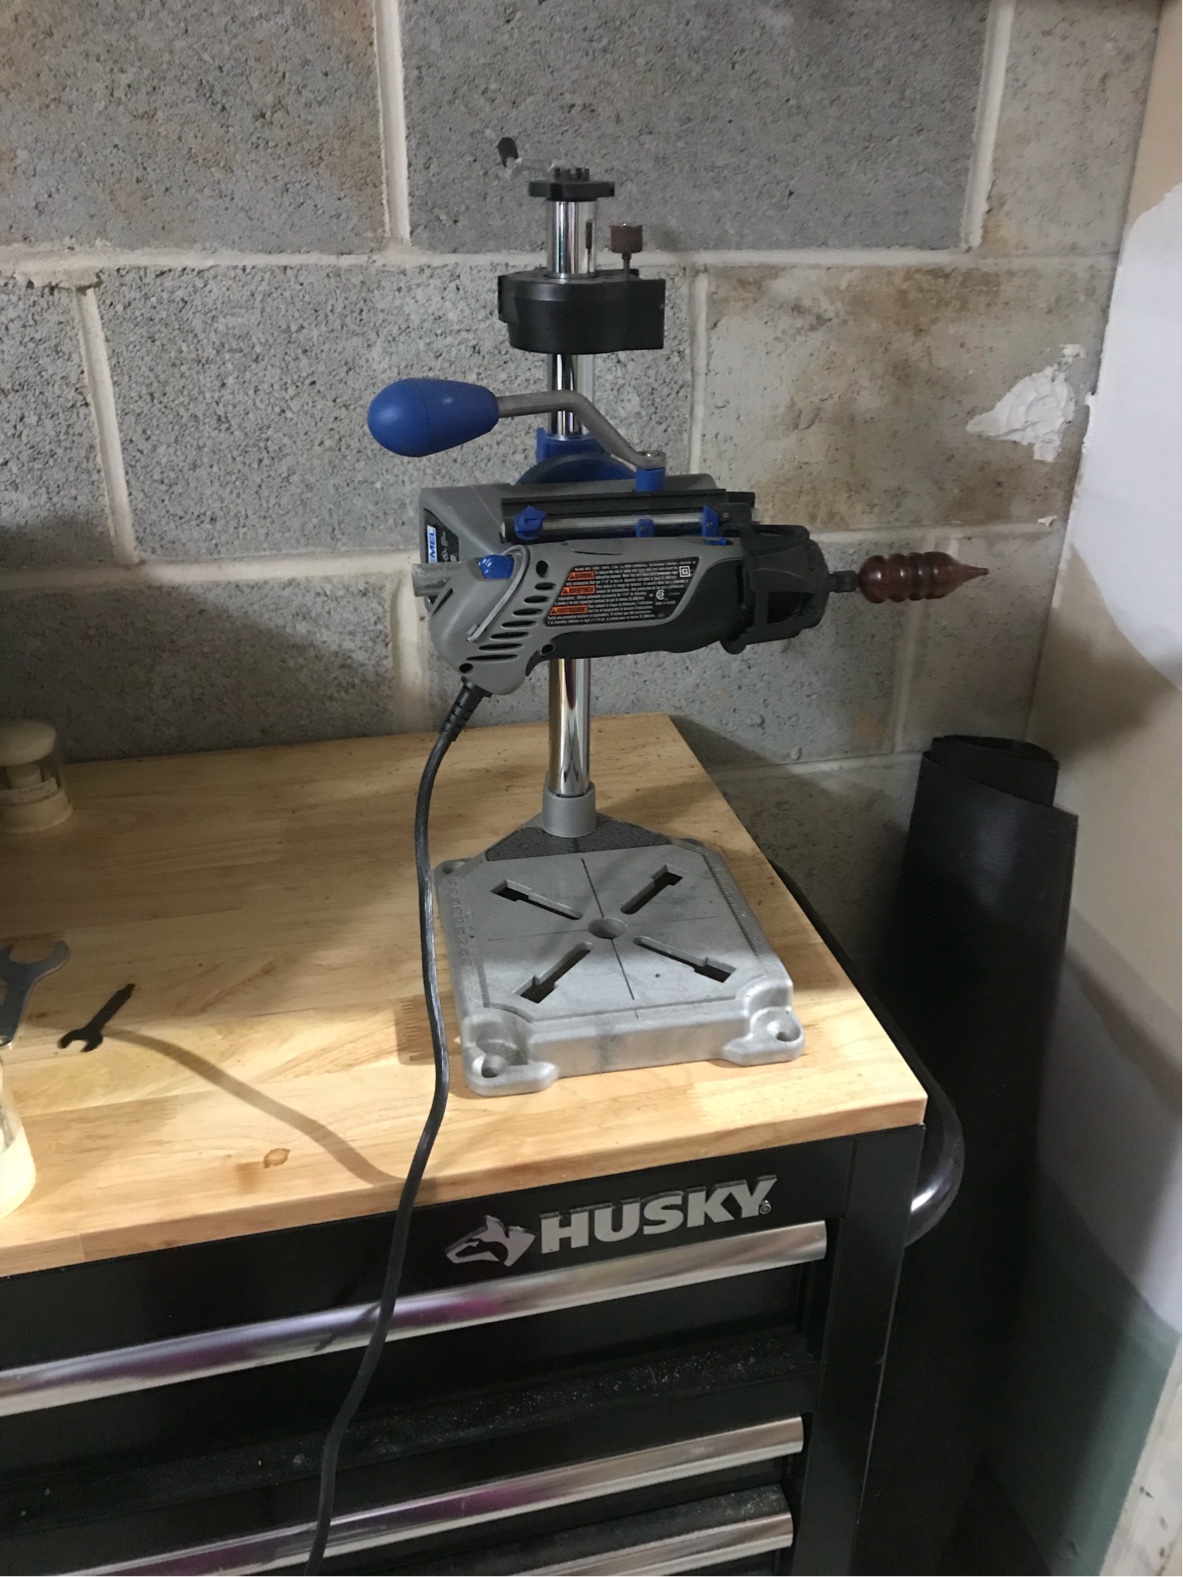
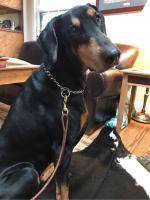
Ha true! the wood anvil thing is a slightly esoteric sewing tool. I had that and the two ‘clappers’ made for me out of oak by a local carpenter. The anvil is used for pressing fine points on collars or sleeves, and the clappers are used the beat or ‘clap’ seams after steaming to force the fabric fibers into shape. Turns out all three come surprisingly in handy for leatherwork. And thank you, he’s one of three fluffy helpers
-
Close up of my bench - I bought clear, plastic makeup holders from TJ Maxx. $5 each, and perfect size to holds small tools and thread etc

-
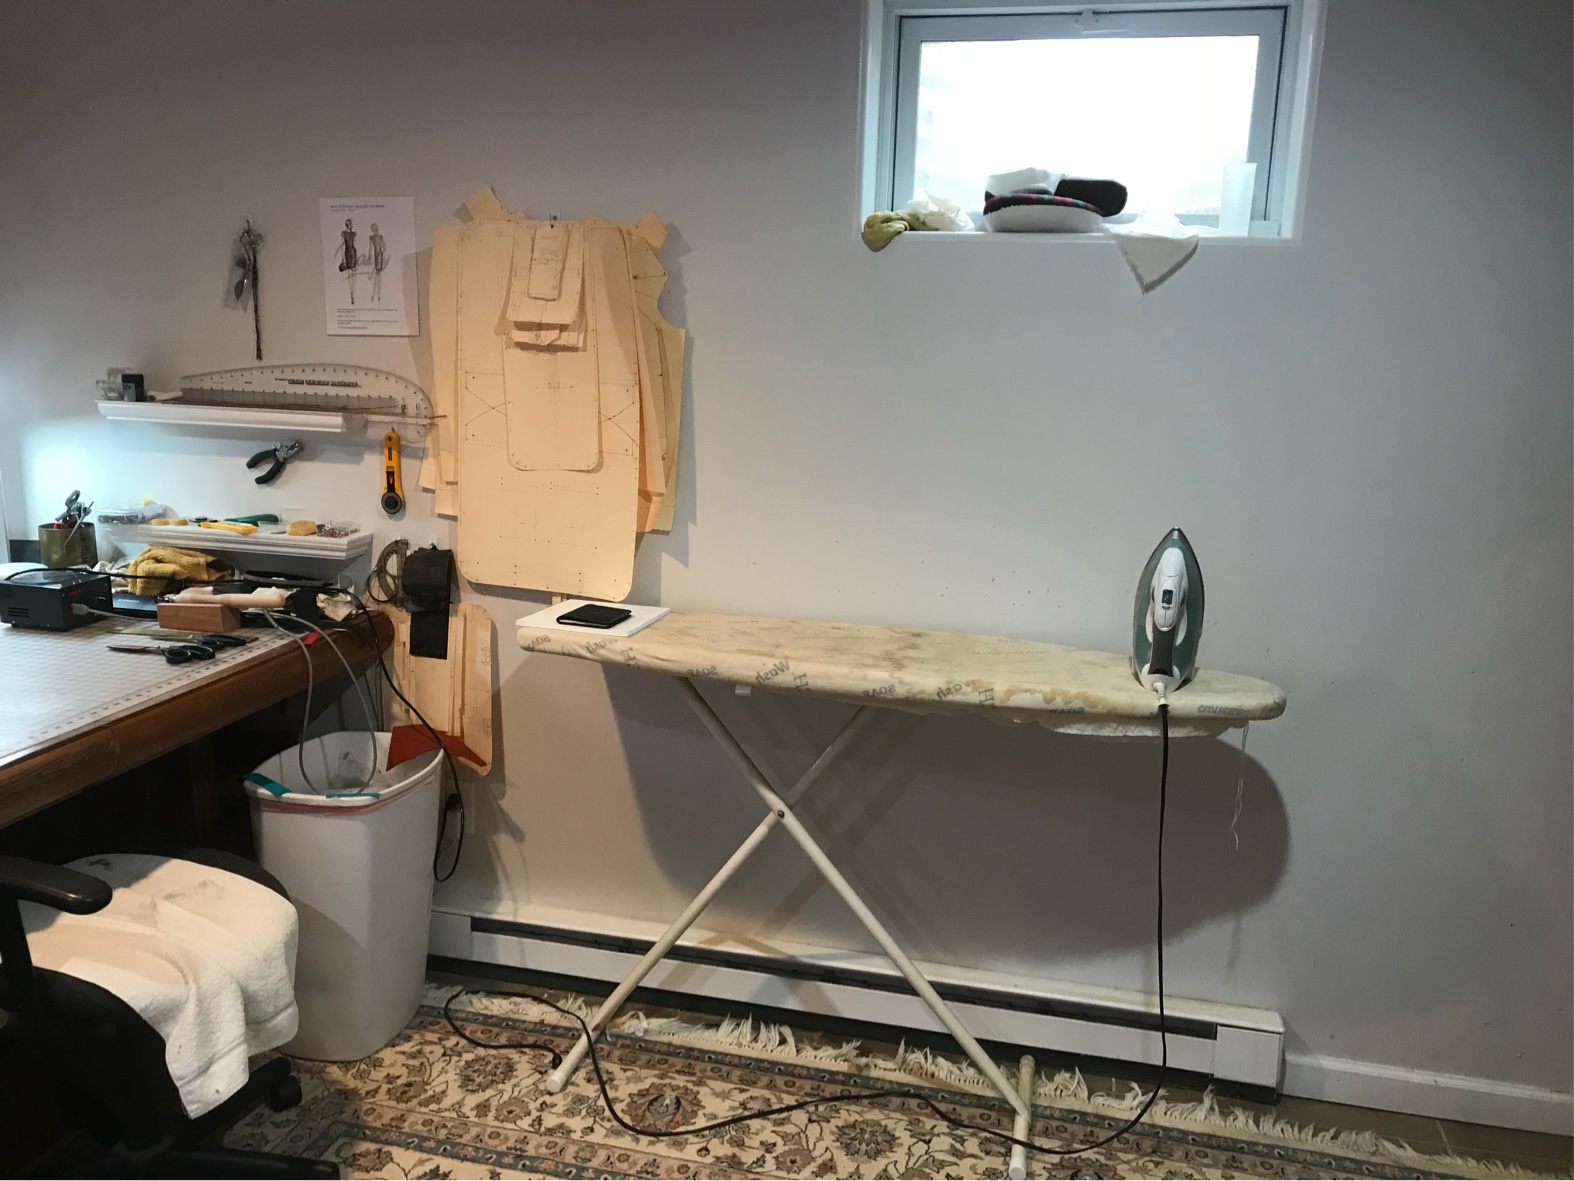
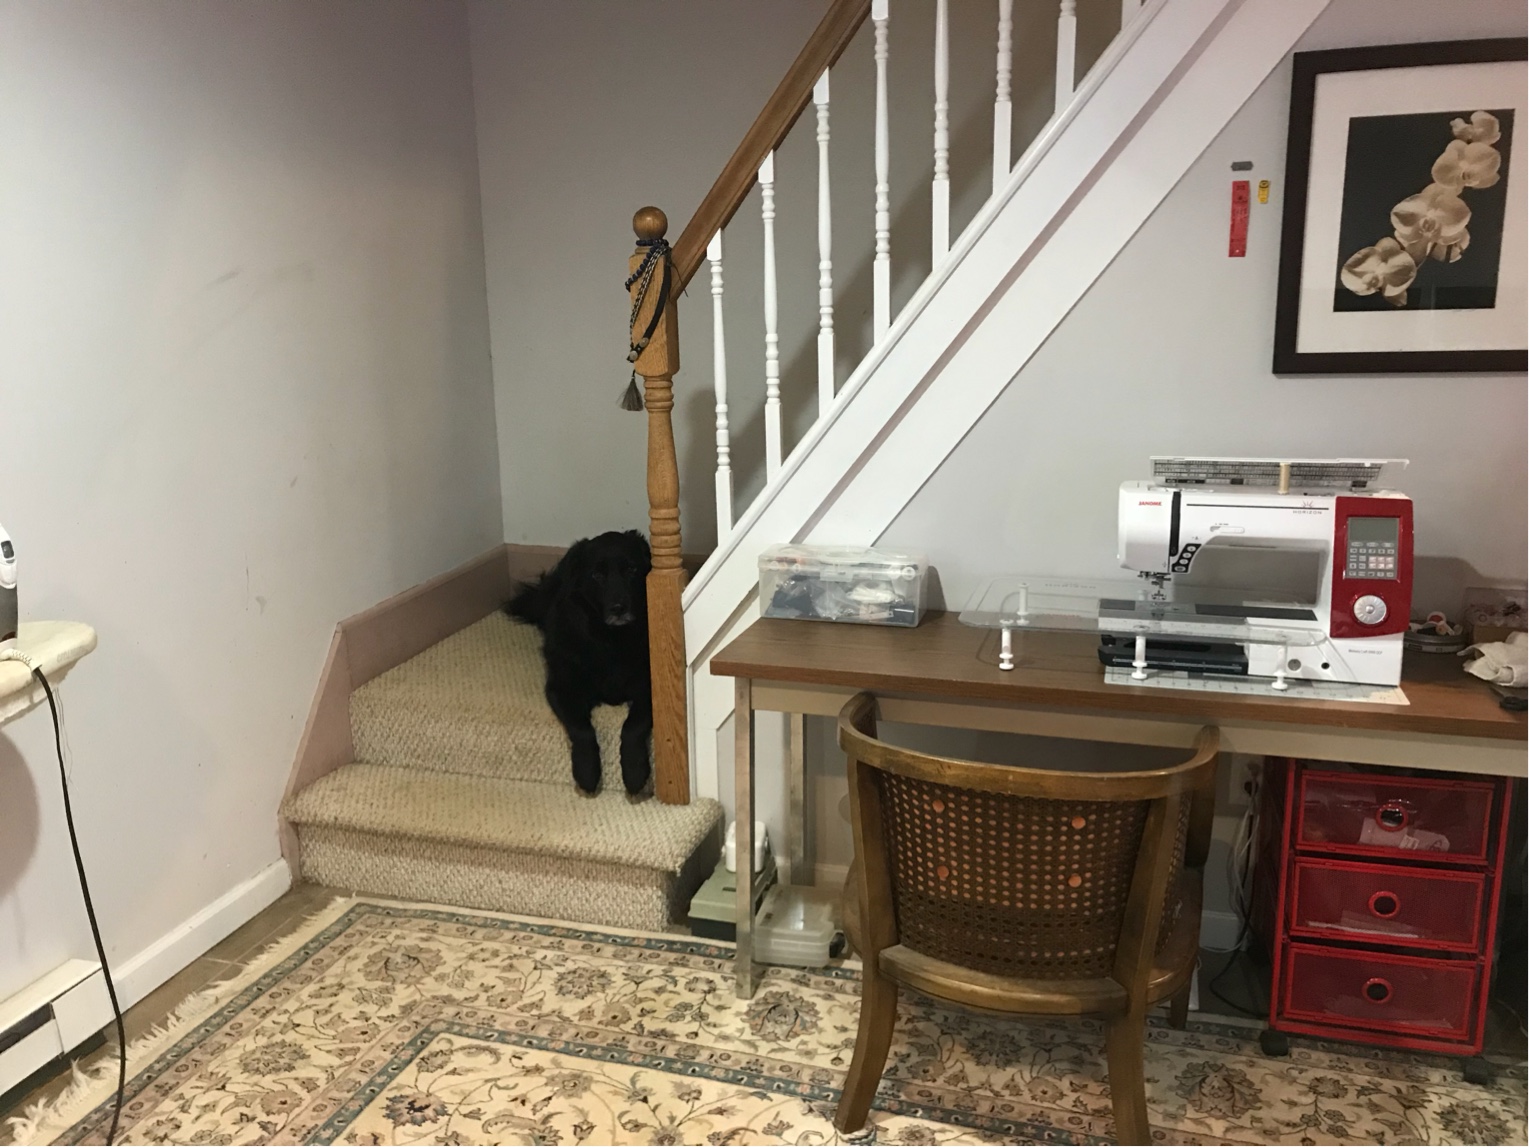
Love this thread! Appreciate everyone sharing their workspaces. Here are a few pics of mine; I work out of a finished basement, which luckily has good natural light. I have three mini-areas - my bench / fabric cutting table, ironing station and sewing table. And furry helpers, who love to slide in under my bench when I’m working. I also have my burnished set up in a corner of the garage The table is an old oak dining table I picked up off Craigslist eons ago, that hubby raised up so that we could fit the filing cabinet underneath (to my left is our home office).


-

First watch band!
motocouture replied to motocouture's topic in Purses, Wallets, Belts and Miscellaneous Pocket Items

-
First watch band!
motocouture replied to motocouture's topic in Purses, Wallets, Belts and Miscellaneous Pocket Items
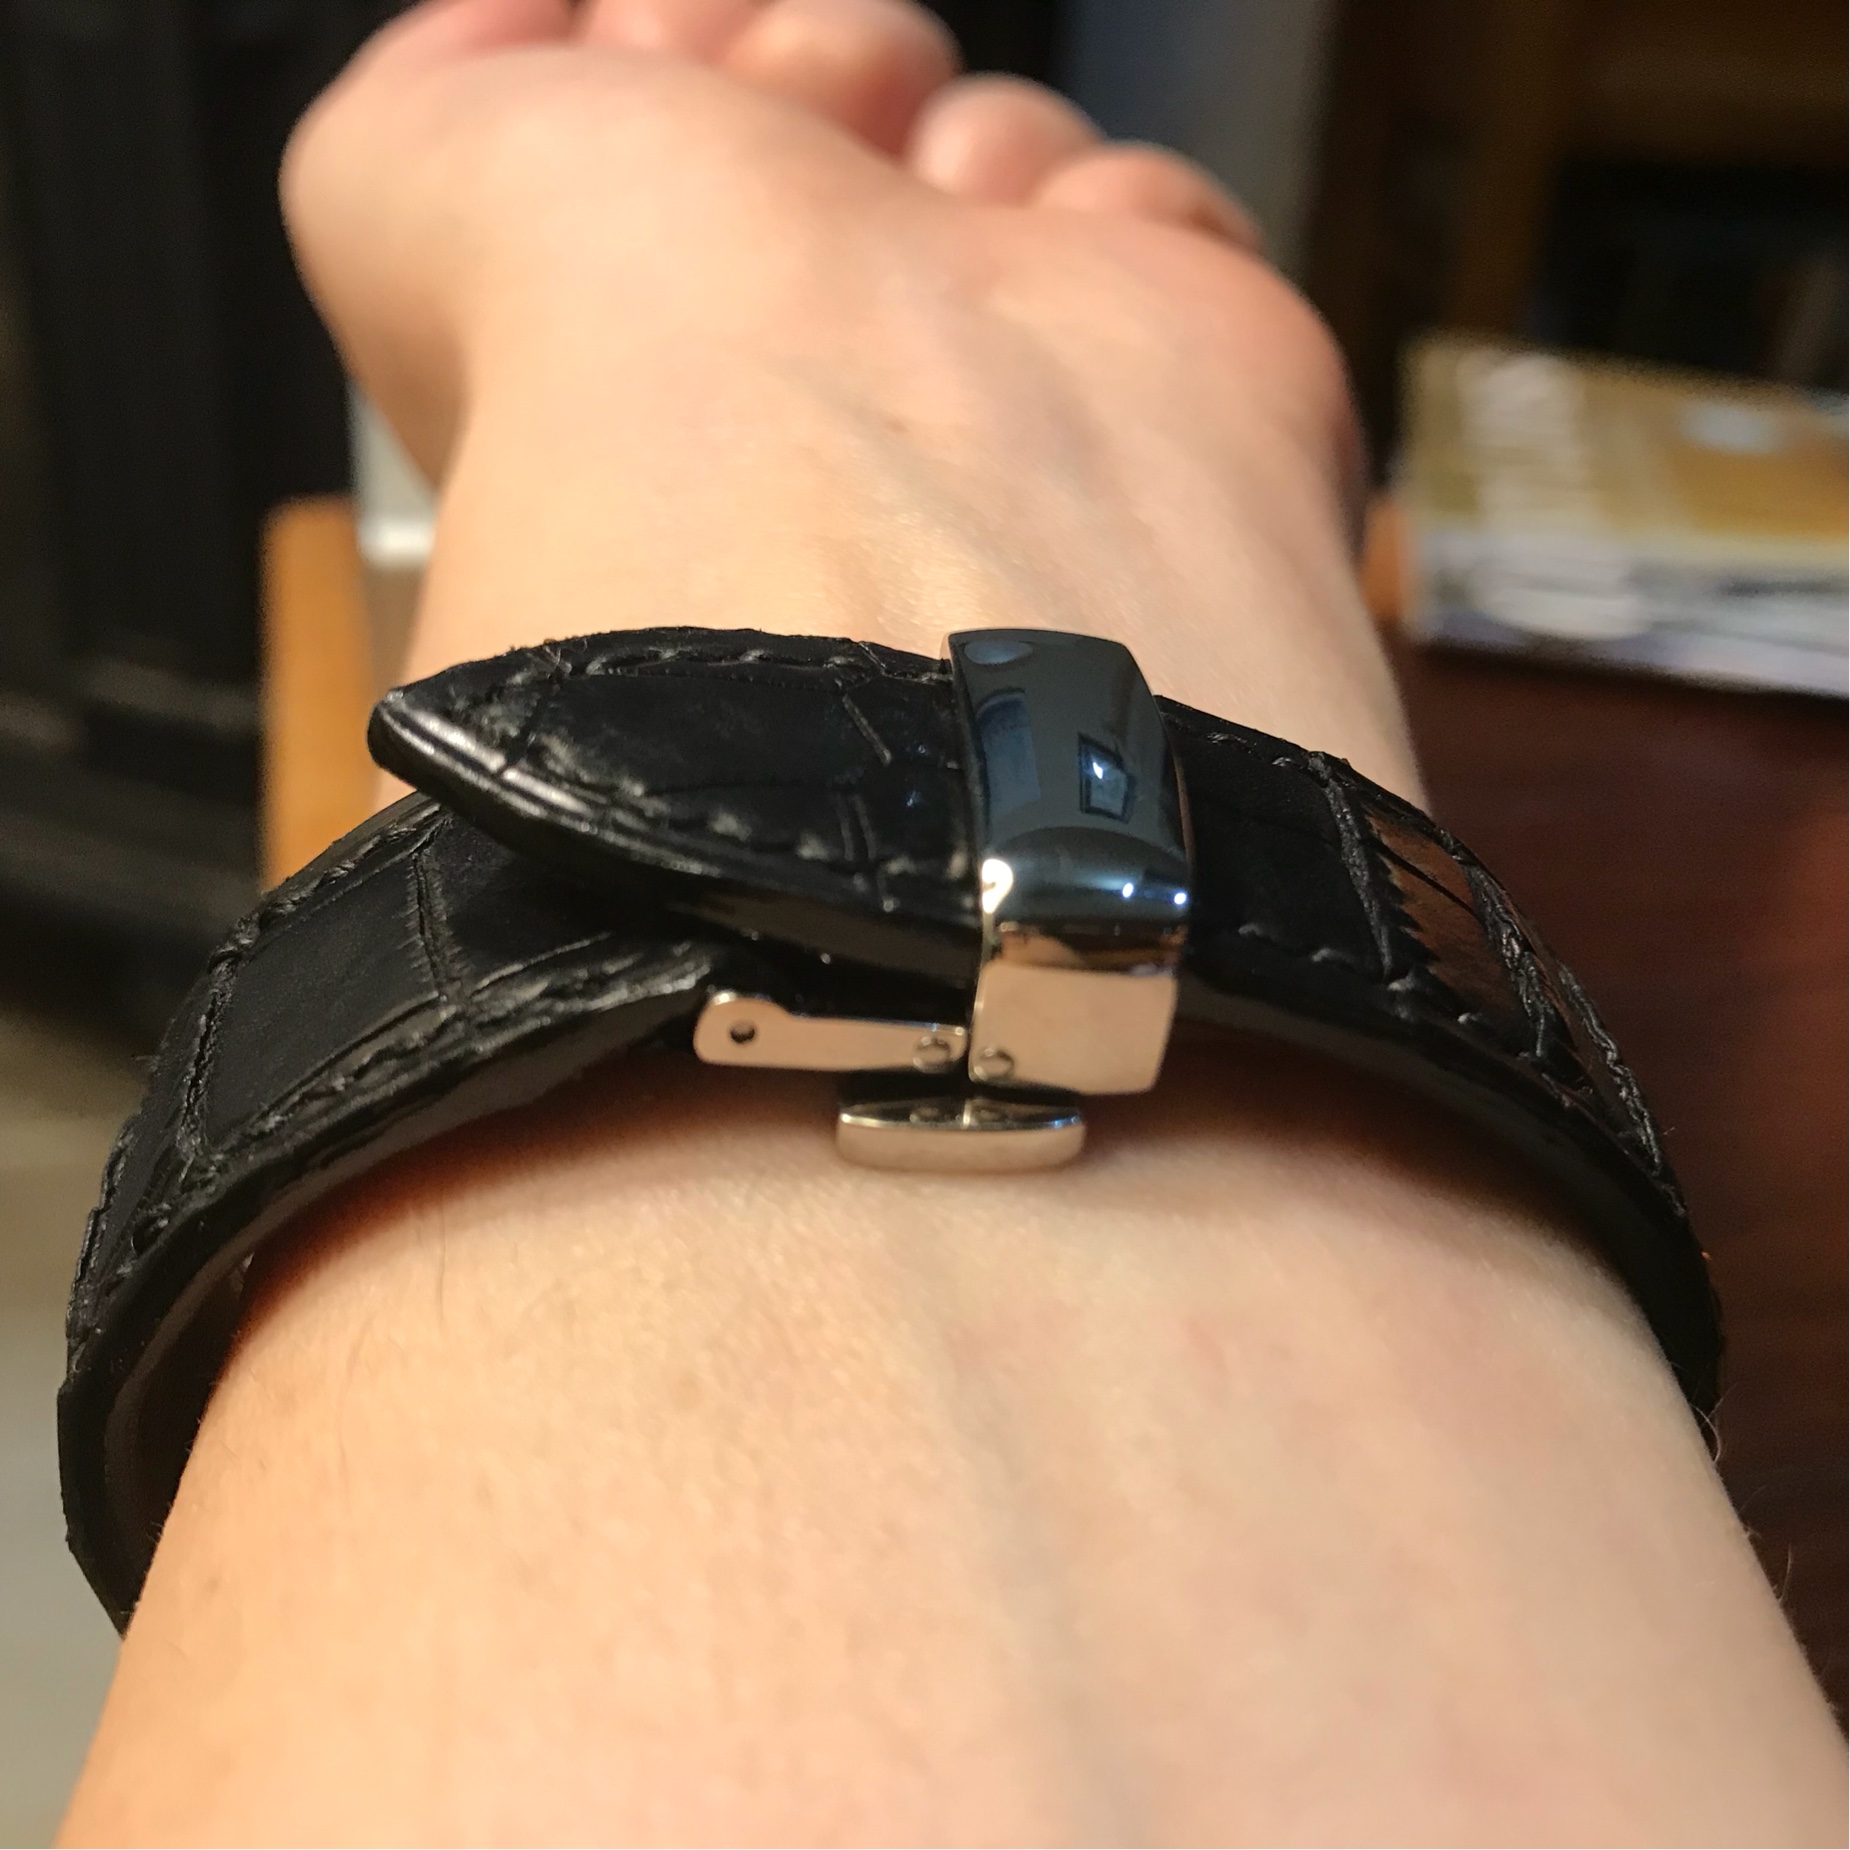
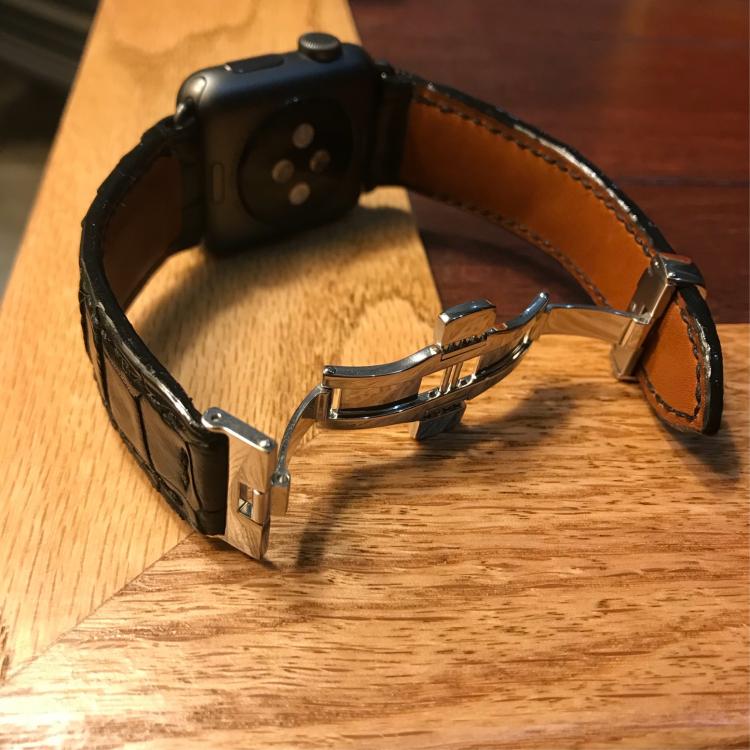
And last but not least, some pics of the finished band on the watch (really hard to get good shots lol). Hubby has already suggested some refinements for the next one - he’s “selflessly” offered to be my test dummy , including tweaking the band lengths, including a keeper and trying a single fold deployant clasp instead of a butterfly / double fold. Also of note for the Apple Watch, as it measures your biometrics, ideally it needs to have good contact with your wrist, so the band can’t be too stiff. I think this one will wear in ok, and shape to his wrist, but I definitely wouldn’t put any more padding in or make any thicker.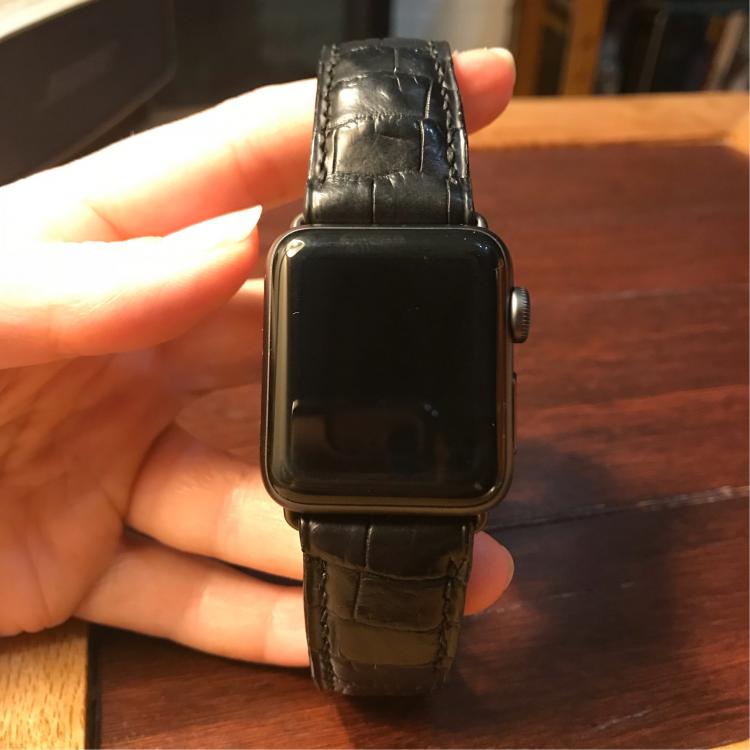
-
First watch band!
motocouture replied to motocouture's topic in Purses, Wallets, Belts and Miscellaneous Pocket Items
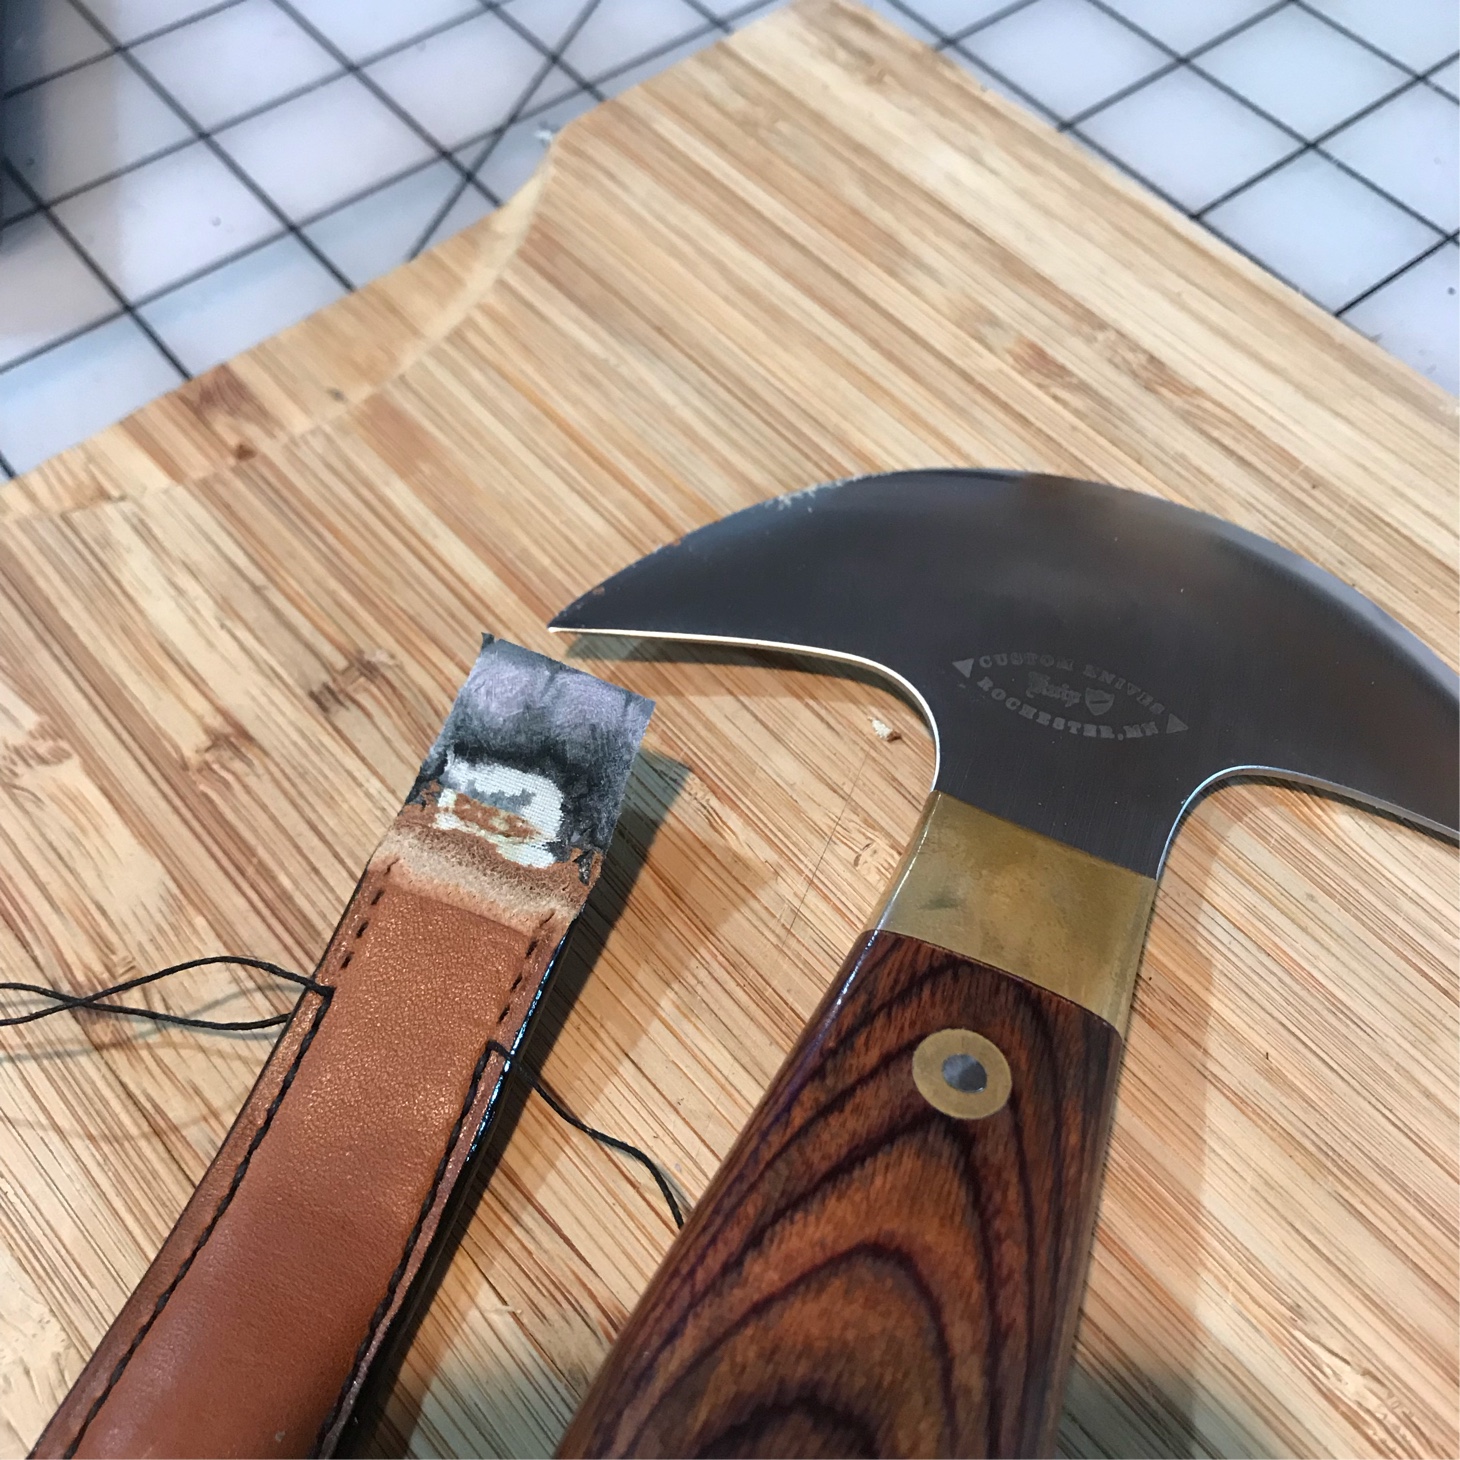
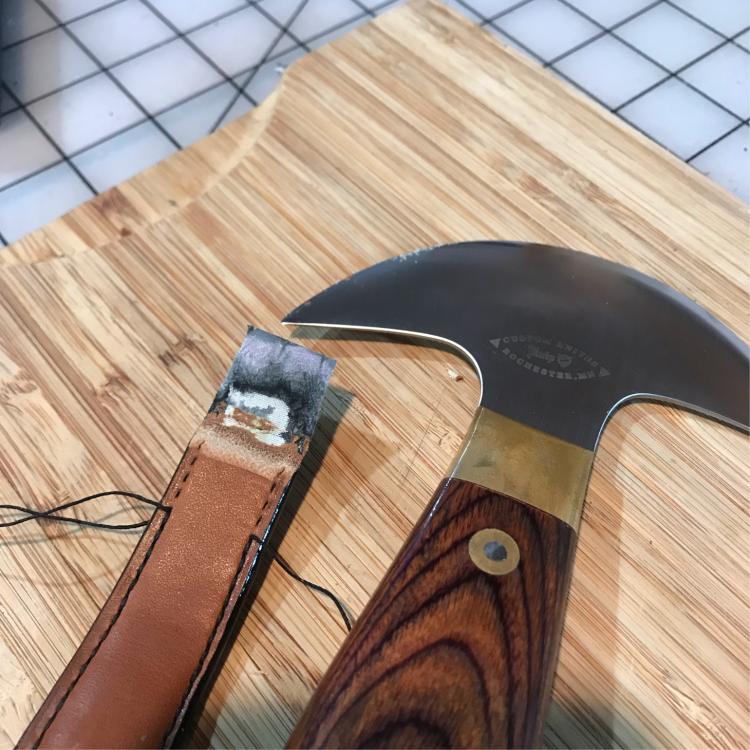
I managed to shorten the one end, folded over, glued and restitched the side seams, with an extra two stitches to help hold the turn. Avoided stitching right across the strap so that I didn’t weaken the stress point any further. For the edge finish, I first trimmed off some with my awesome knip head knife (so, so sharp), then sanded a little. Reapplied edge paint on both the exposed area and the previously done edge, then when dry, used my fileteuse to smooth the overlap, re-sanded and reapplied. Not as completely clean a finish as I’d like, but it’s hidden under the overlap somewhat on the underside of the wrist. It was good to learn that you can work in a new edge if need be and refinish the edge.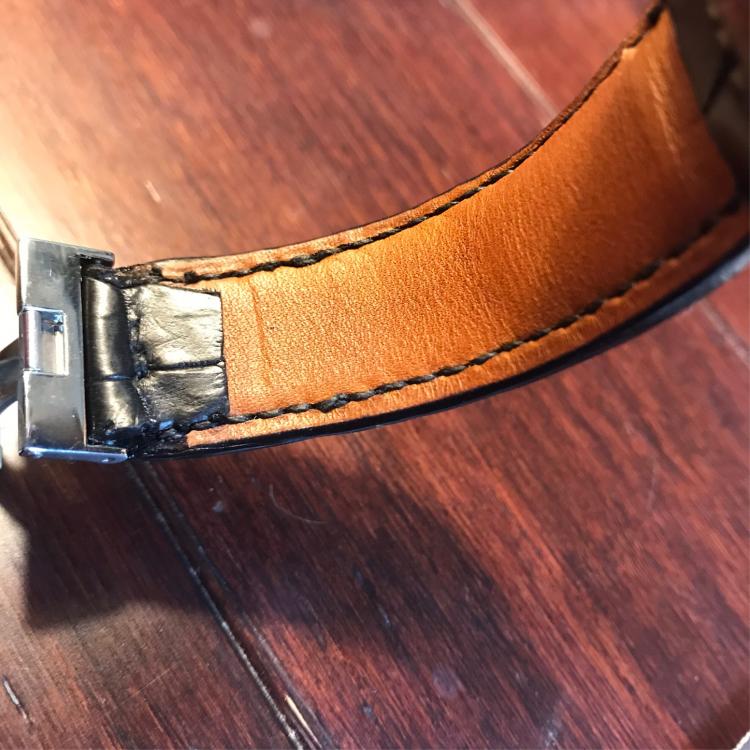

-
First watch band!
motocouture replied to motocouture's topic in Purses, Wallets, Belts and Miscellaneous Pocket Items
Thanks! Will post more pics today Thank you so much! Makes me laugh, whenever I stitch I think about gravy now -
First watch band!
motocouture replied to motocouture's topic in Purses, Wallets, Belts and Miscellaneous Pocket Items
Making me blush here! It’s such an enormous help to have the tips and input from this forum thanks so much! Will do! Thanks! I tell ya, it was hard making that first cut into finished work lol -
First watch band!
motocouture replied to motocouture's topic in Purses, Wallets, Belts and Miscellaneous Pocket Items
Thank you! And agreed on taking more effort than it looks like....Unfortunately, it turned out that I overestimated the size of my hubby’s wrists, and clasp side of the strap was waaaaaayy too long ....so, back to the bench to do some, ahem, rework....undo the stitching in preparation for cutting and seeing if I can rescue it...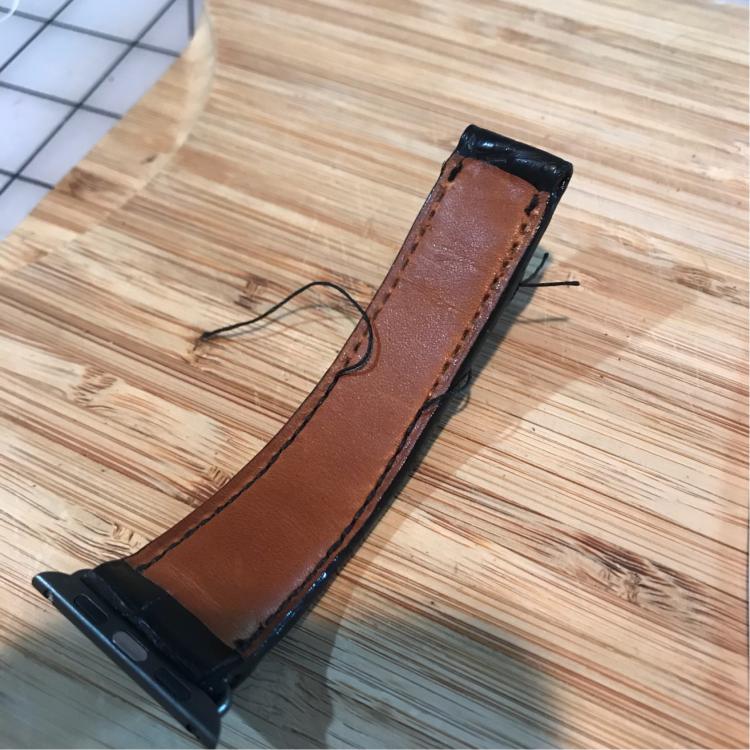
-
First watch band!
motocouture replied to motocouture's topic in Purses, Wallets, Belts and Miscellaneous Pocket Items
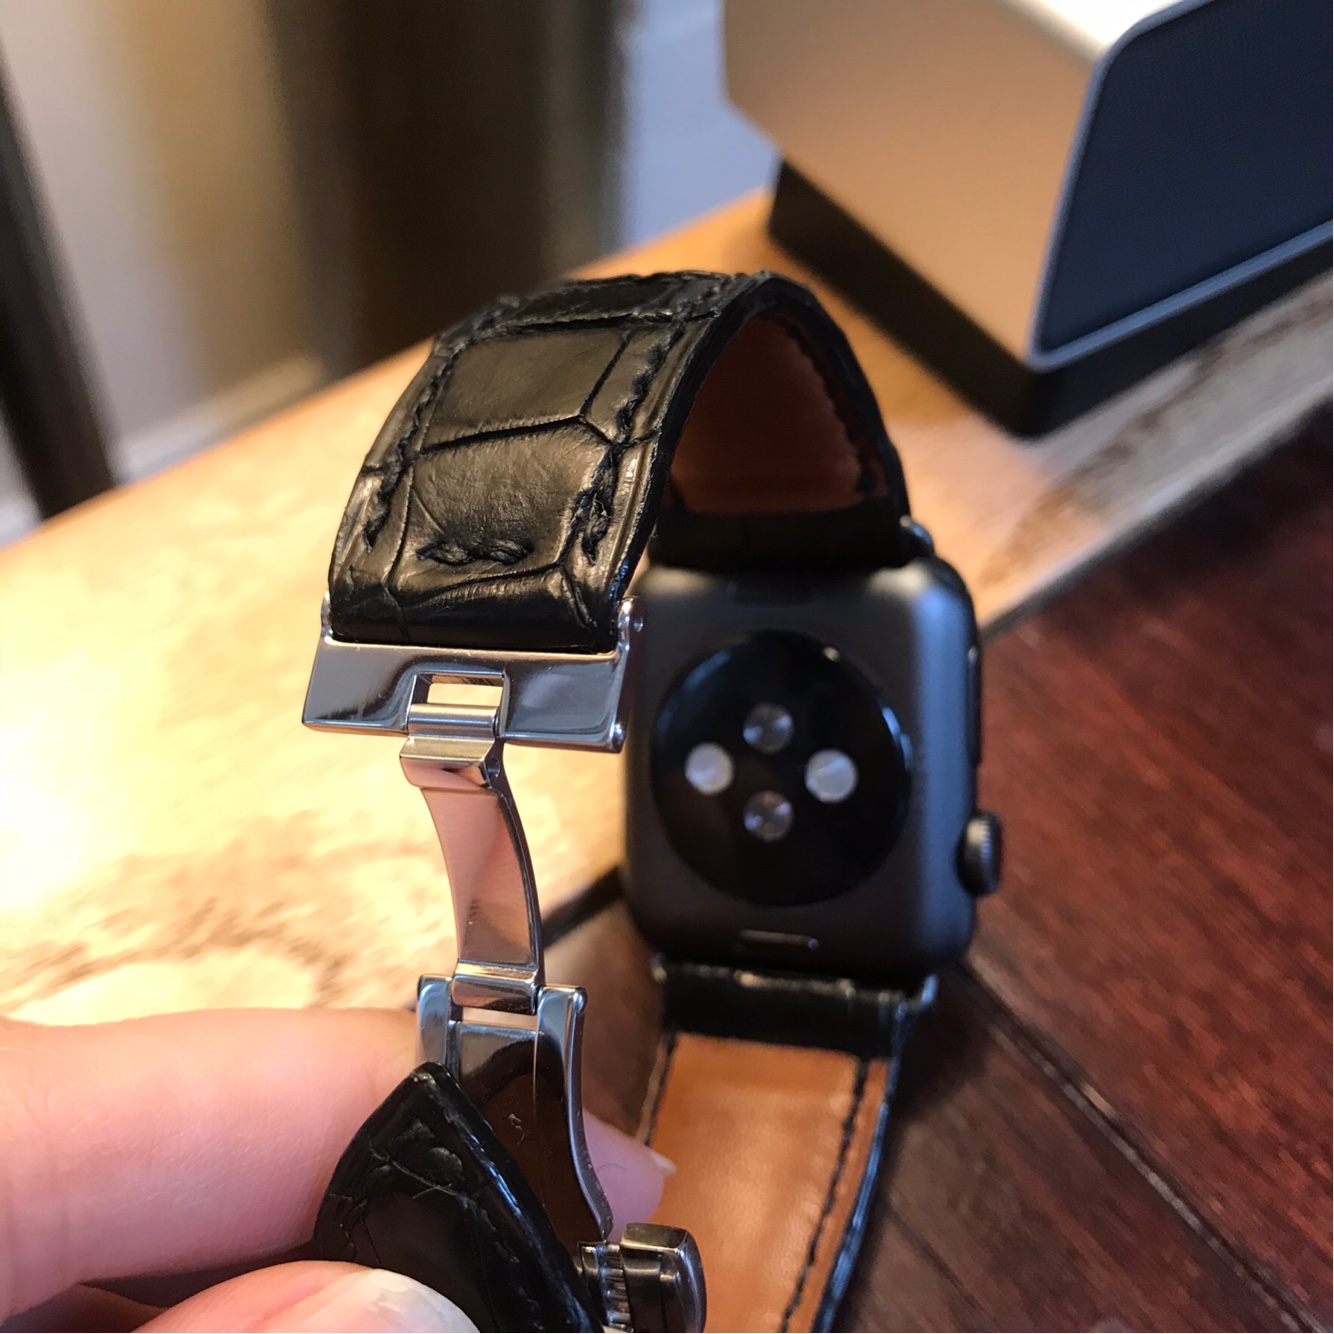
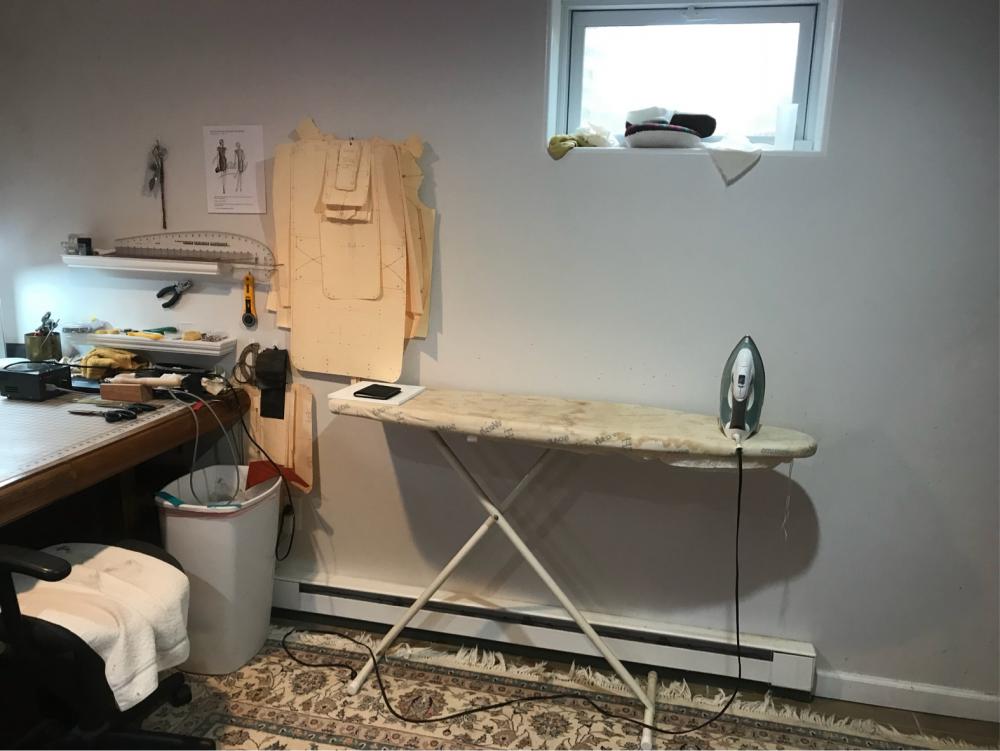
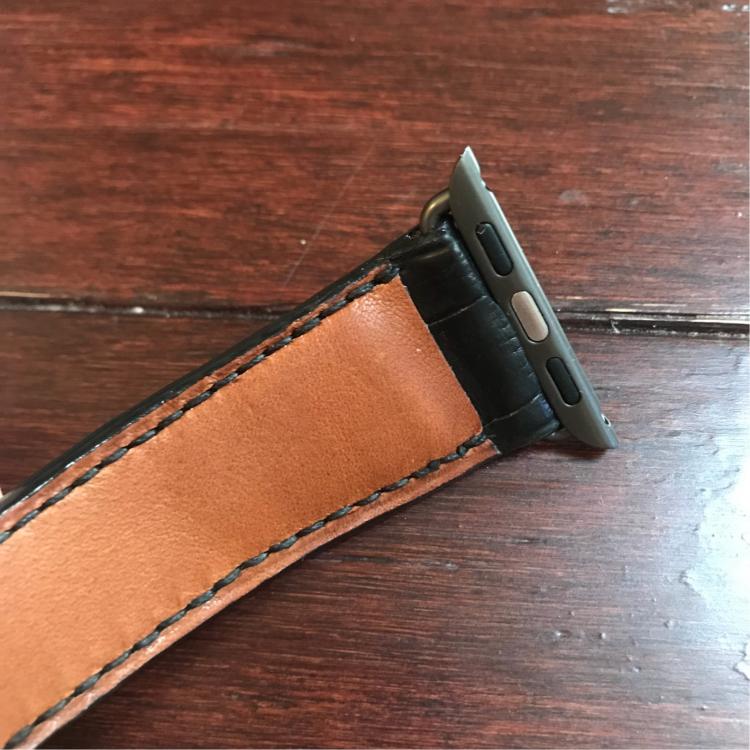
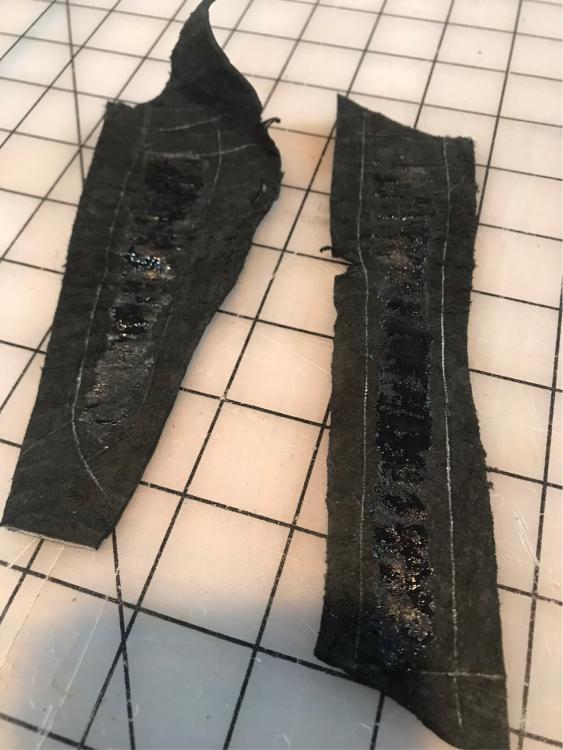
Some more pics of the process. Here are the two halves stitched, followed by an inside view of the Apple Watch adapter installed on the band.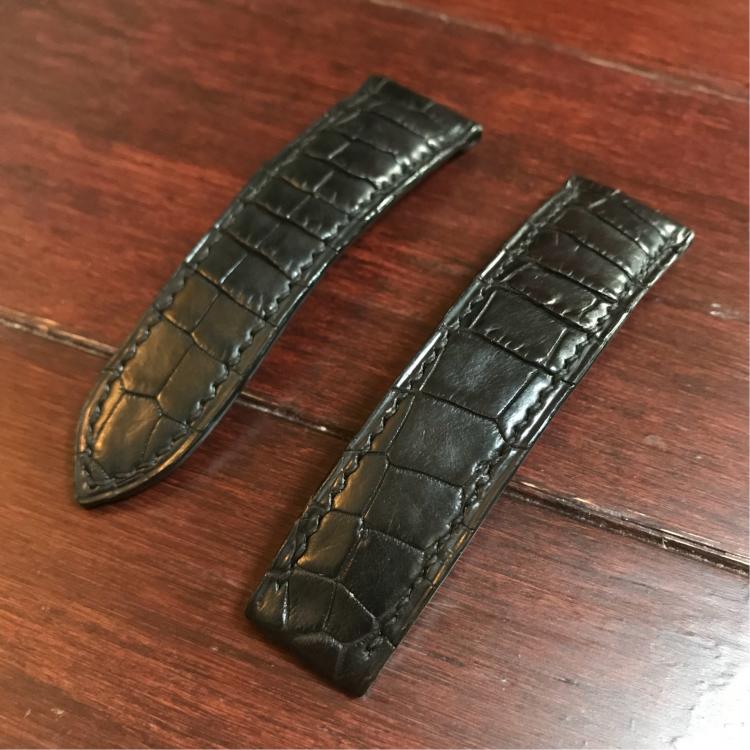
-
First watch band!
motocouture replied to motocouture's topic in Purses, Wallets, Belts and Miscellaneous Pocket Items
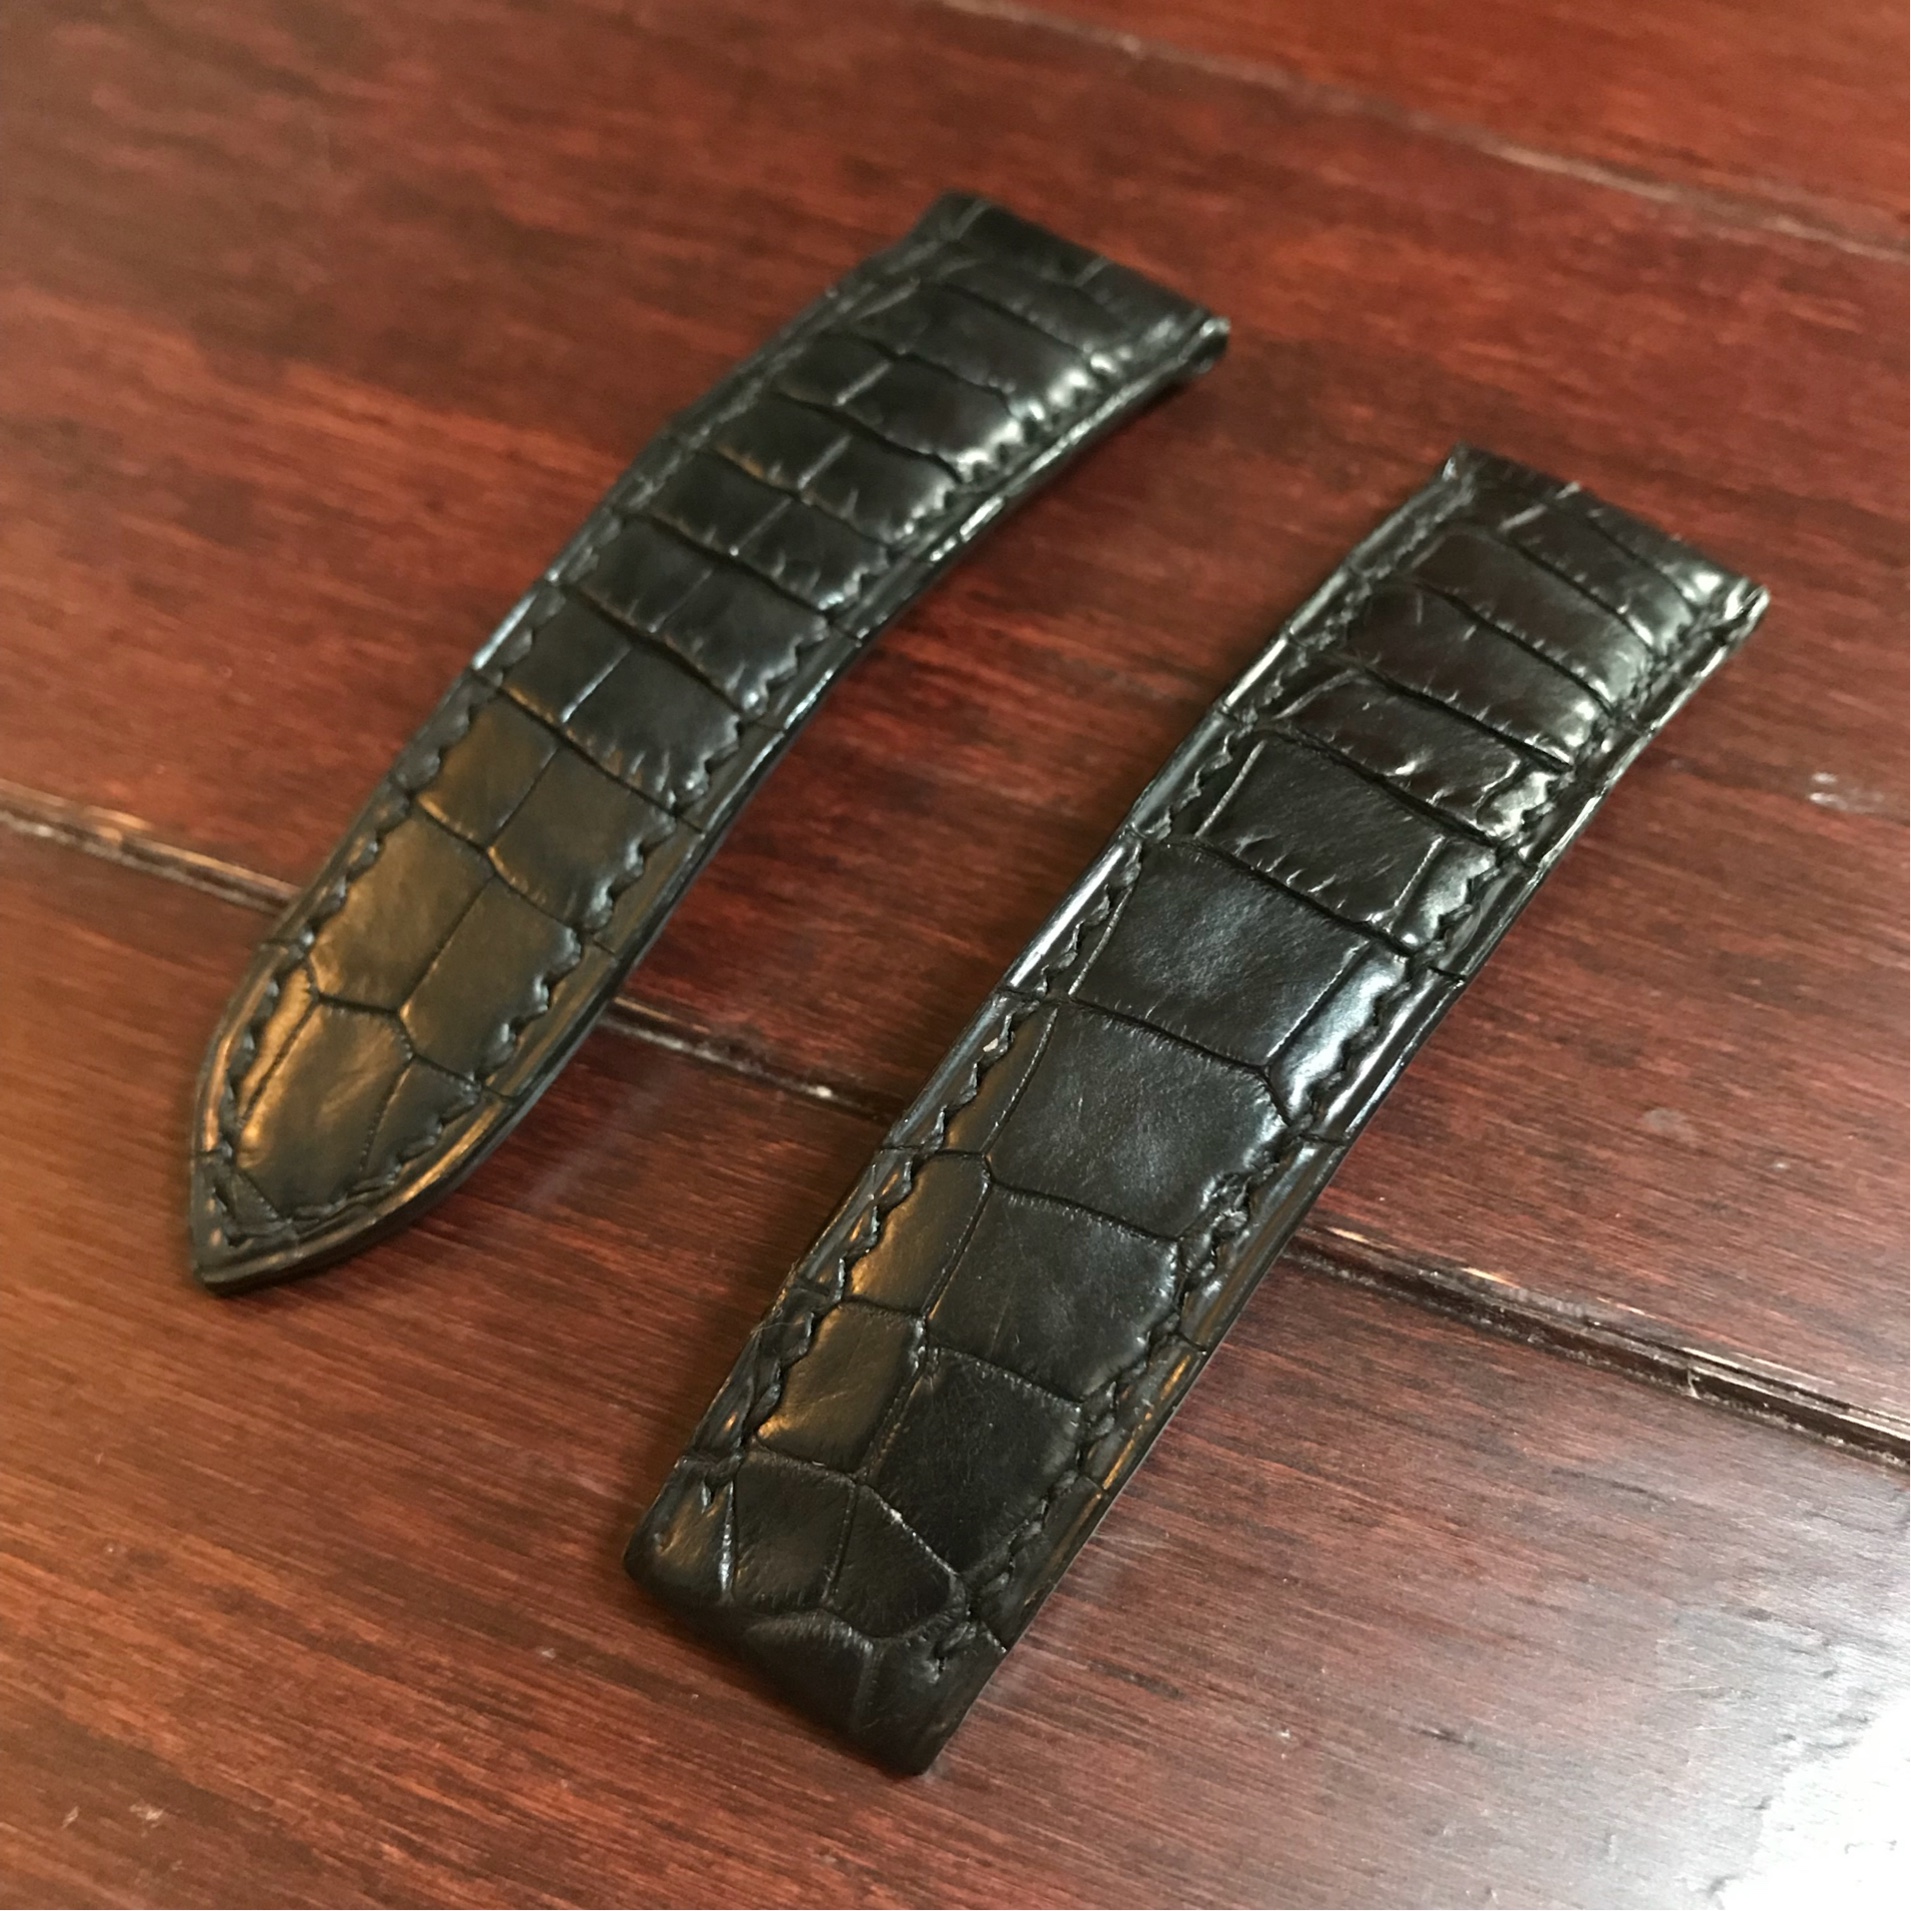
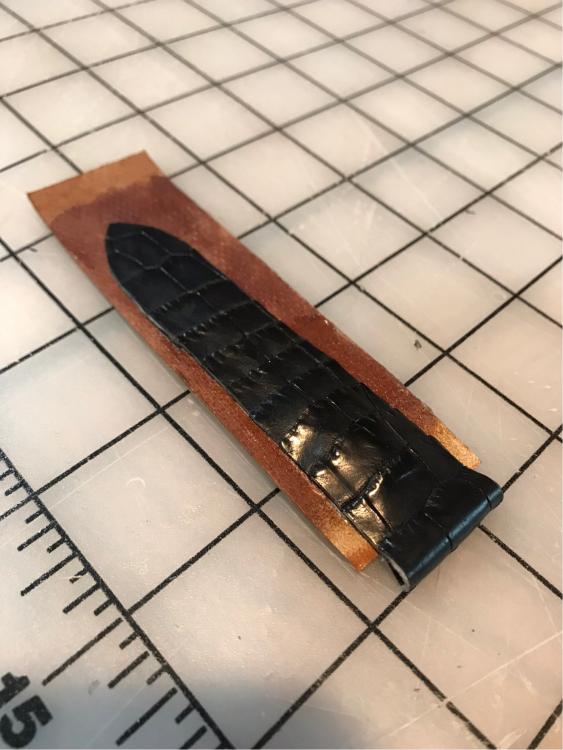
Here are a few more progress pics. First one shows the top edge of one strap skived, turned and glued (over the aforementioned coffee stirrer), along with the calf liner skived on one edge. The next one shows the croc glued down onto the liner; I then used one of my 1lb diving weights (lead shot in a mesh bag) wrapped in a handy tea towel to apply pressure without crushing the croc.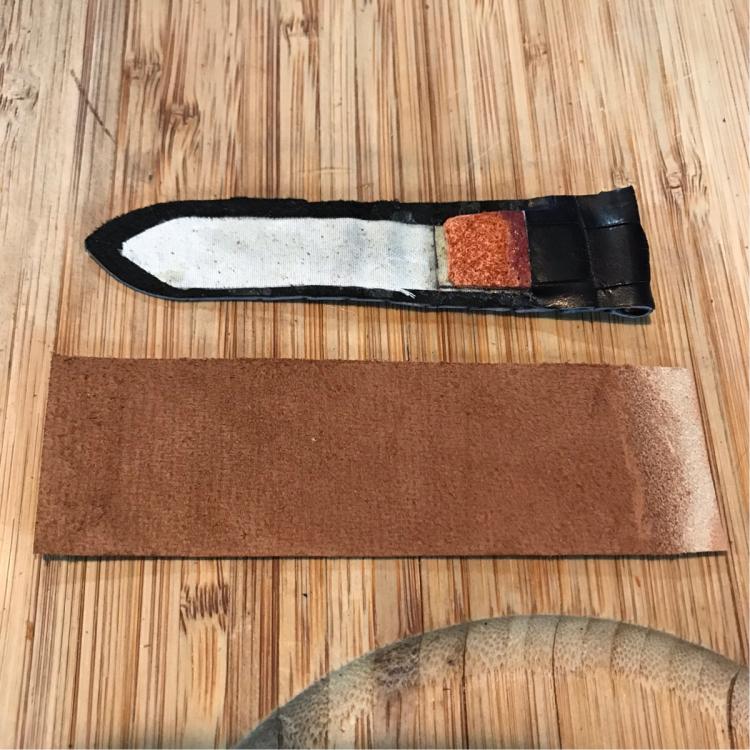
-
First watch band!
motocouture replied to motocouture's topic in Purses, Wallets, Belts and Miscellaneous Pocket Items
Ha! Exactly! Couldn’t agree more on the first, and thank you for your kind words! -
First watch band!
motocouture replied to motocouture's topic in Purses, Wallets, Belts and Miscellaneous Pocket Items
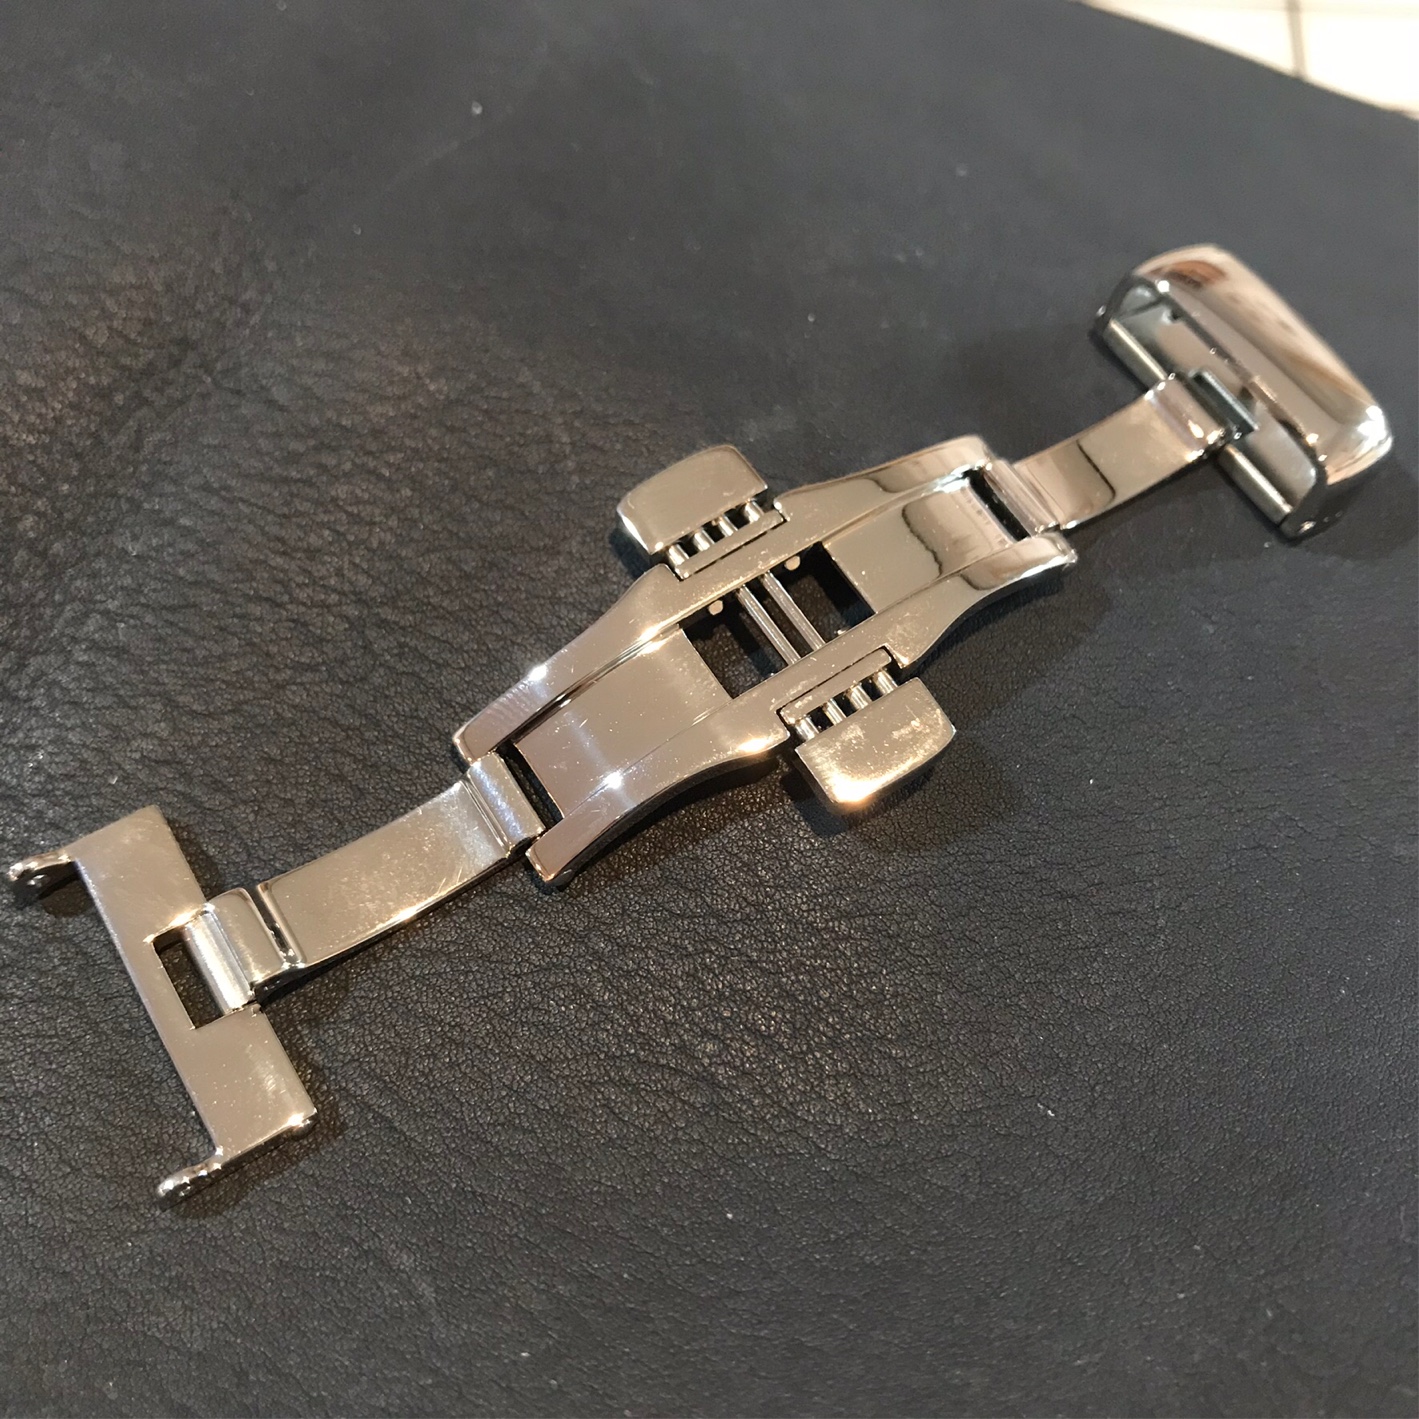
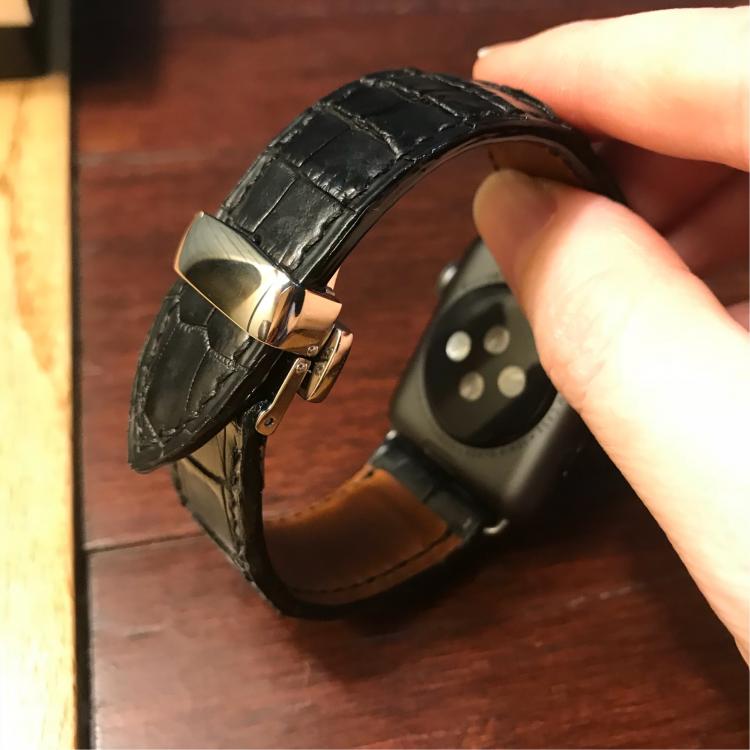
Stouch Apple Watch adapter (Amazon image) 22mm internal width on the bar
-
First watch band!
motocouture replied to motocouture's topic in Purses, Wallets, Belts and Miscellaneous Pocket Items
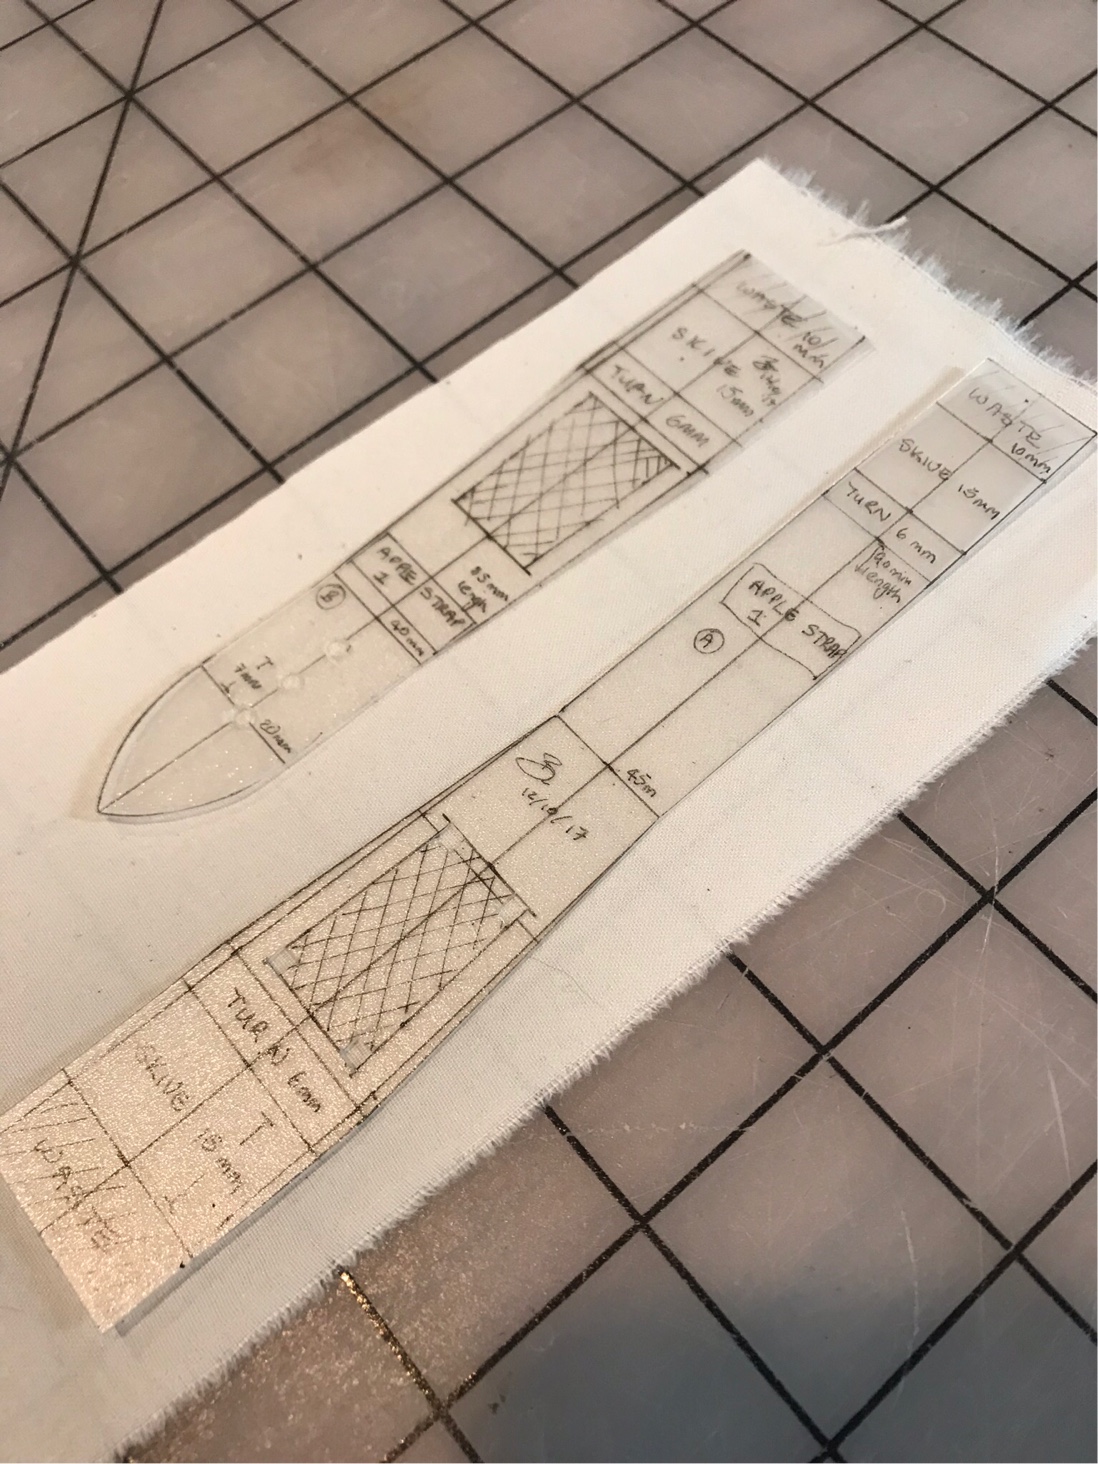
Thanks for the detailed advice! I think I remember seeing you mention the wool bud tube idea (awesome idea!). The Stouch lugs are a little thicker than an average pin, so I nicked a couple of fine coffee stirrers from the last hotel I was at, and used those. The diameter aligned nicely with the depth of the padding at the top. Also tried to make sure the fabric interfacing ran up past the bend - I noticed as I was flexing it just how weak some area felt, like you said. Here are the templates laid out, along with the trimmed calf. I reinforced the croc with some finally woven cotton I had in my stash (not very neatly, but ah well...), then used some scrap Horween Essex to pad the upper part of the strap.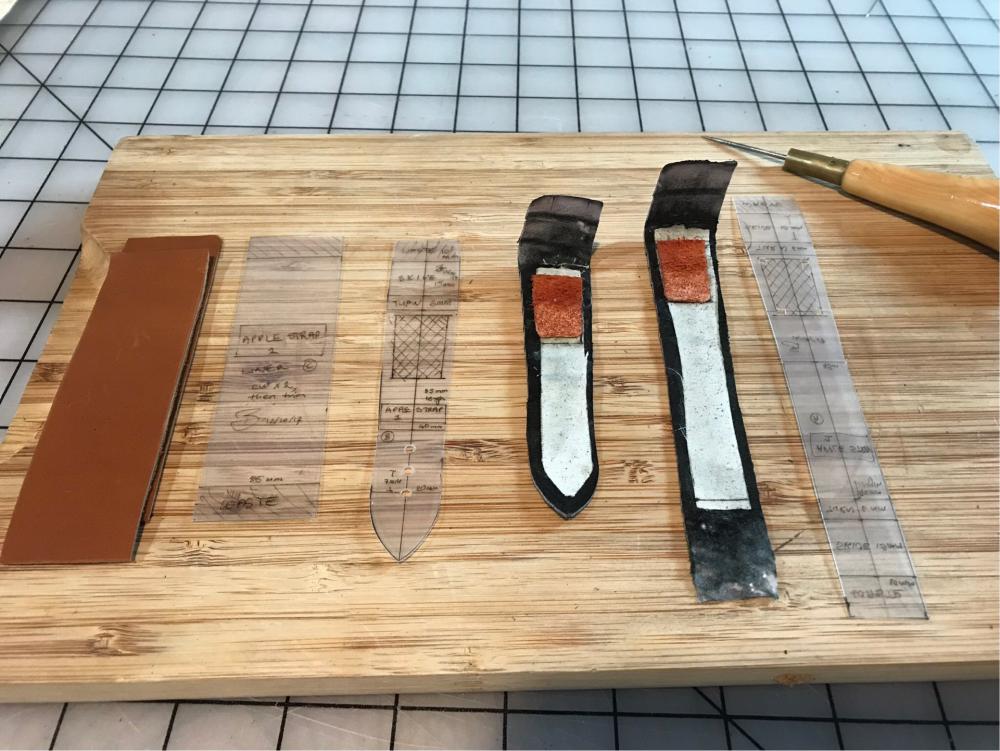
-
First watch band!
motocouture replied to motocouture's topic in Purses, Wallets, Belts and Miscellaneous Pocket Items
Thank you! I’m enjoying working on something that’s not 16 x 6 in lol -
First watch band!
motocouture replied to motocouture's topic in Purses, Wallets, Belts and Miscellaneous Pocket Items
For the strap hardware, I’m using Stouch Apple lugs (slide into the body of the watch) and a stainless steel deployant claps from Bob Davis (18mm width)
-
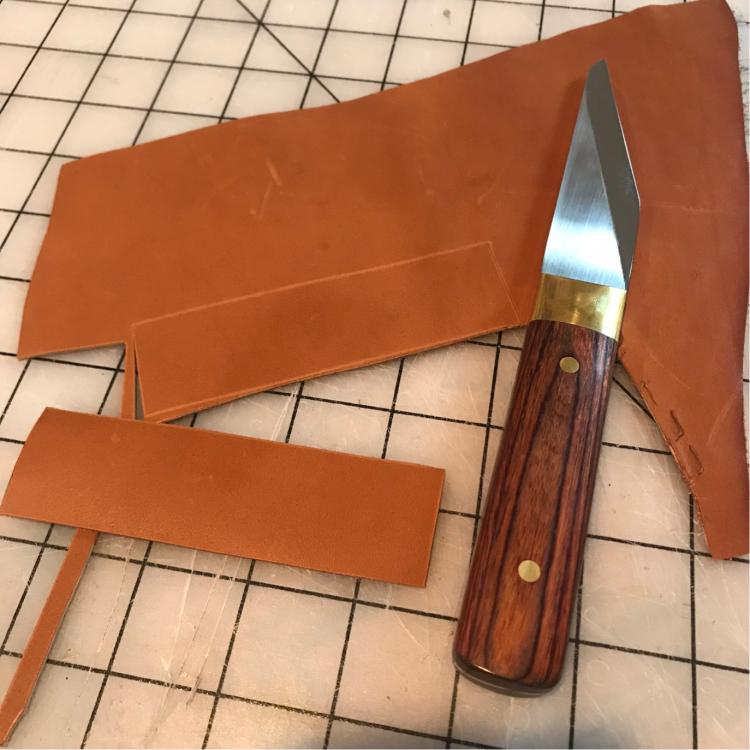
So, in order to convince hubby that I needed a another croc hide, I had to promise him a watch band for his shiny new Apple Watch. This is my first watch band, so learning as I go. Outer is Nile croc scrap, liner is HAAS Zermatt (?) calf in tan, stitched with 532 Lin Cable using KS 3.0mm stitching irons.

-
Onto the third bag....
motocouture replied to motocouture's topic in Purses, Wallets, Belts and Miscellaneous Pocket Items
For this, I used some really great HAAS calf (3-4oz weight I think) that I got from @nstarleather ; he may still some available (great pricing, too!). -
leather techniques Secrets from the Workshop
motocouture replied to Dangerous Beans's topic in How Do I Do That?
I subscribed a little while back, and greatly appreciate the resource! @mikesc as someone who does financial analysis In order to create disposable income to spend on much more fun things like leatherwork, always good to see a logical build! That said, I’m happy to subscribe early to provide a small measure of support to someone dedicated to sharing knowledge on the craft. Perhaps I’m just part of the ‘invisible hand’ ... -
Cahier Journal Covers
motocouture replied to motocouture's topic in Purses, Wallets, Belts and Miscellaneous Pocket Items
Thank you! Glad to hear that, since I’m not completely up to speed on gift giving etiquette in the corporate world lol . -
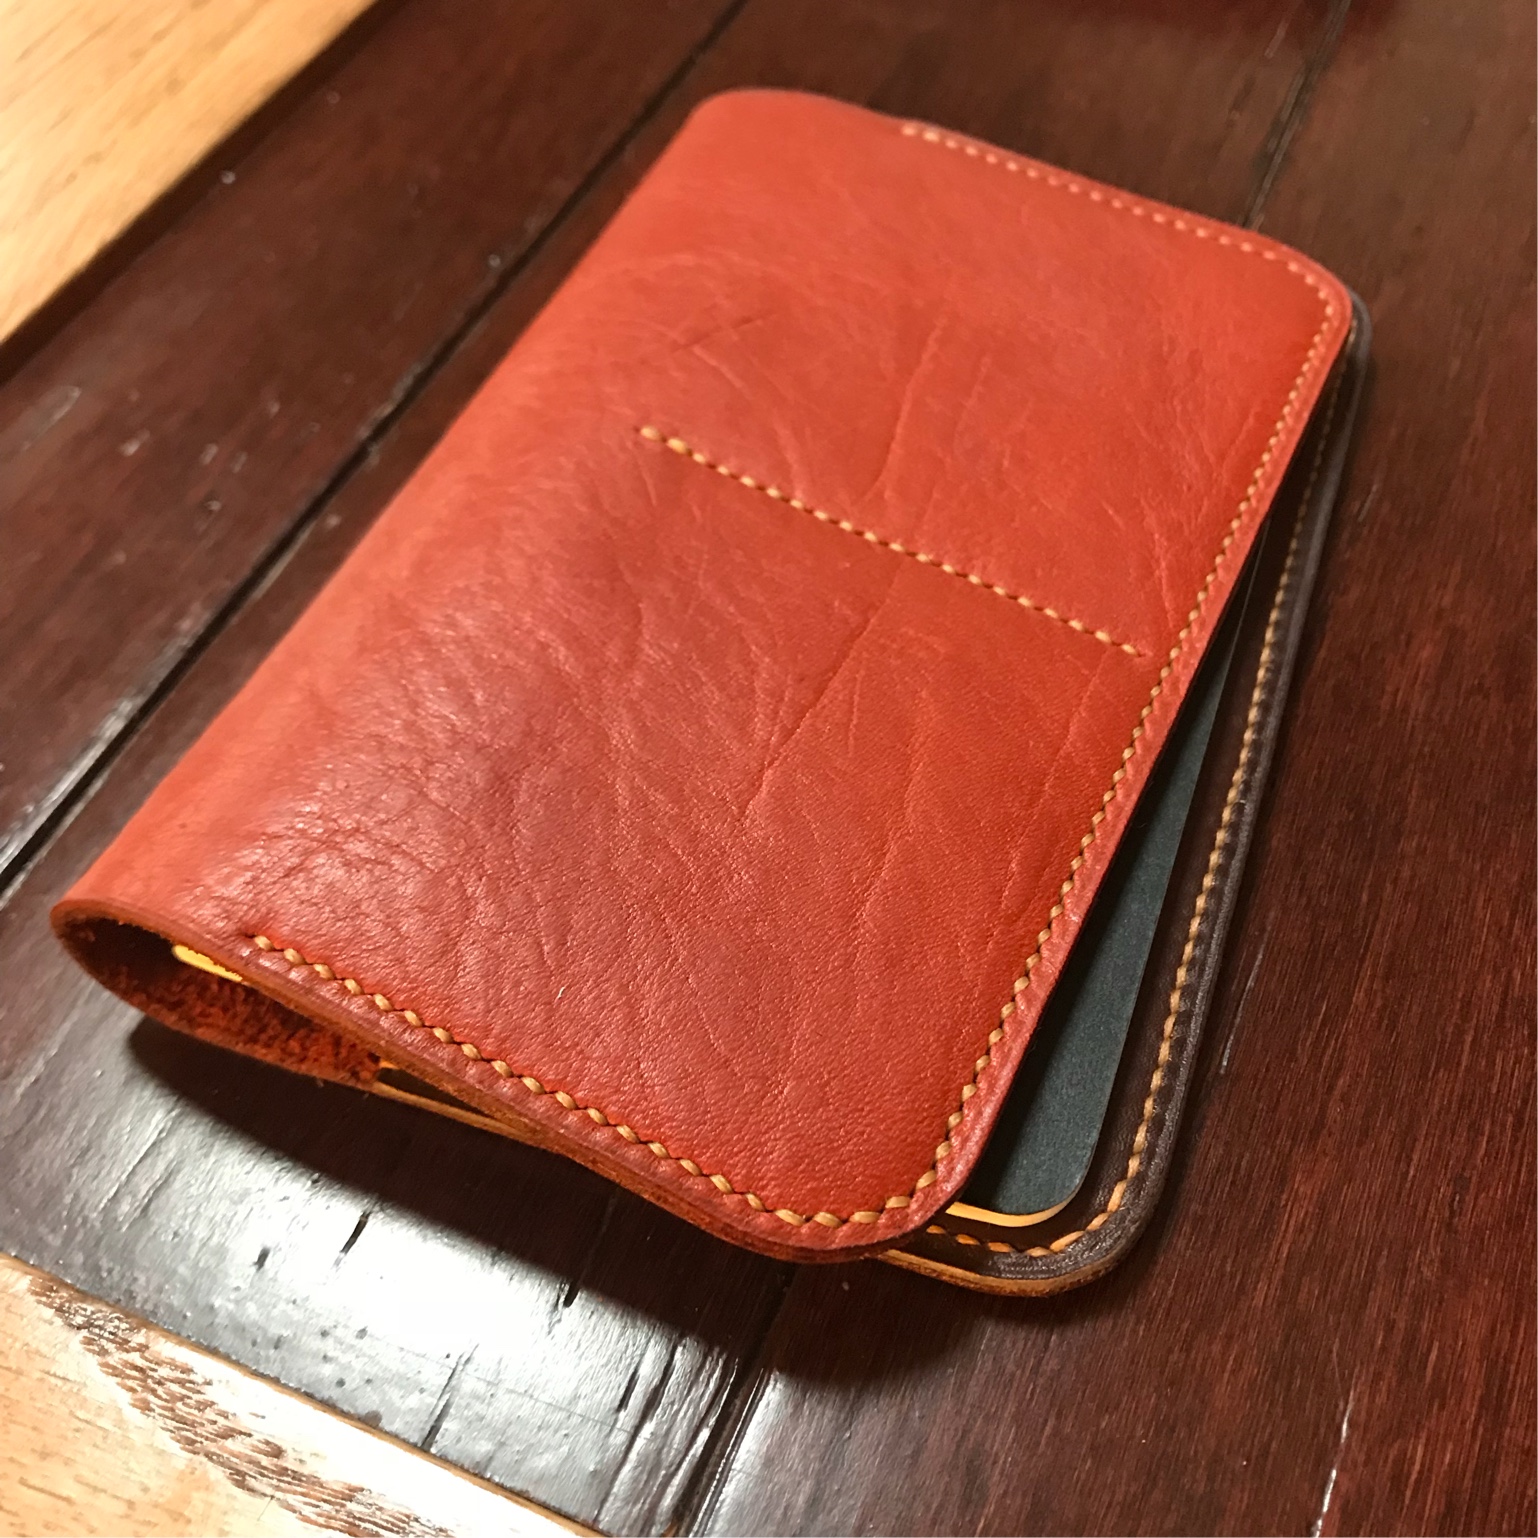
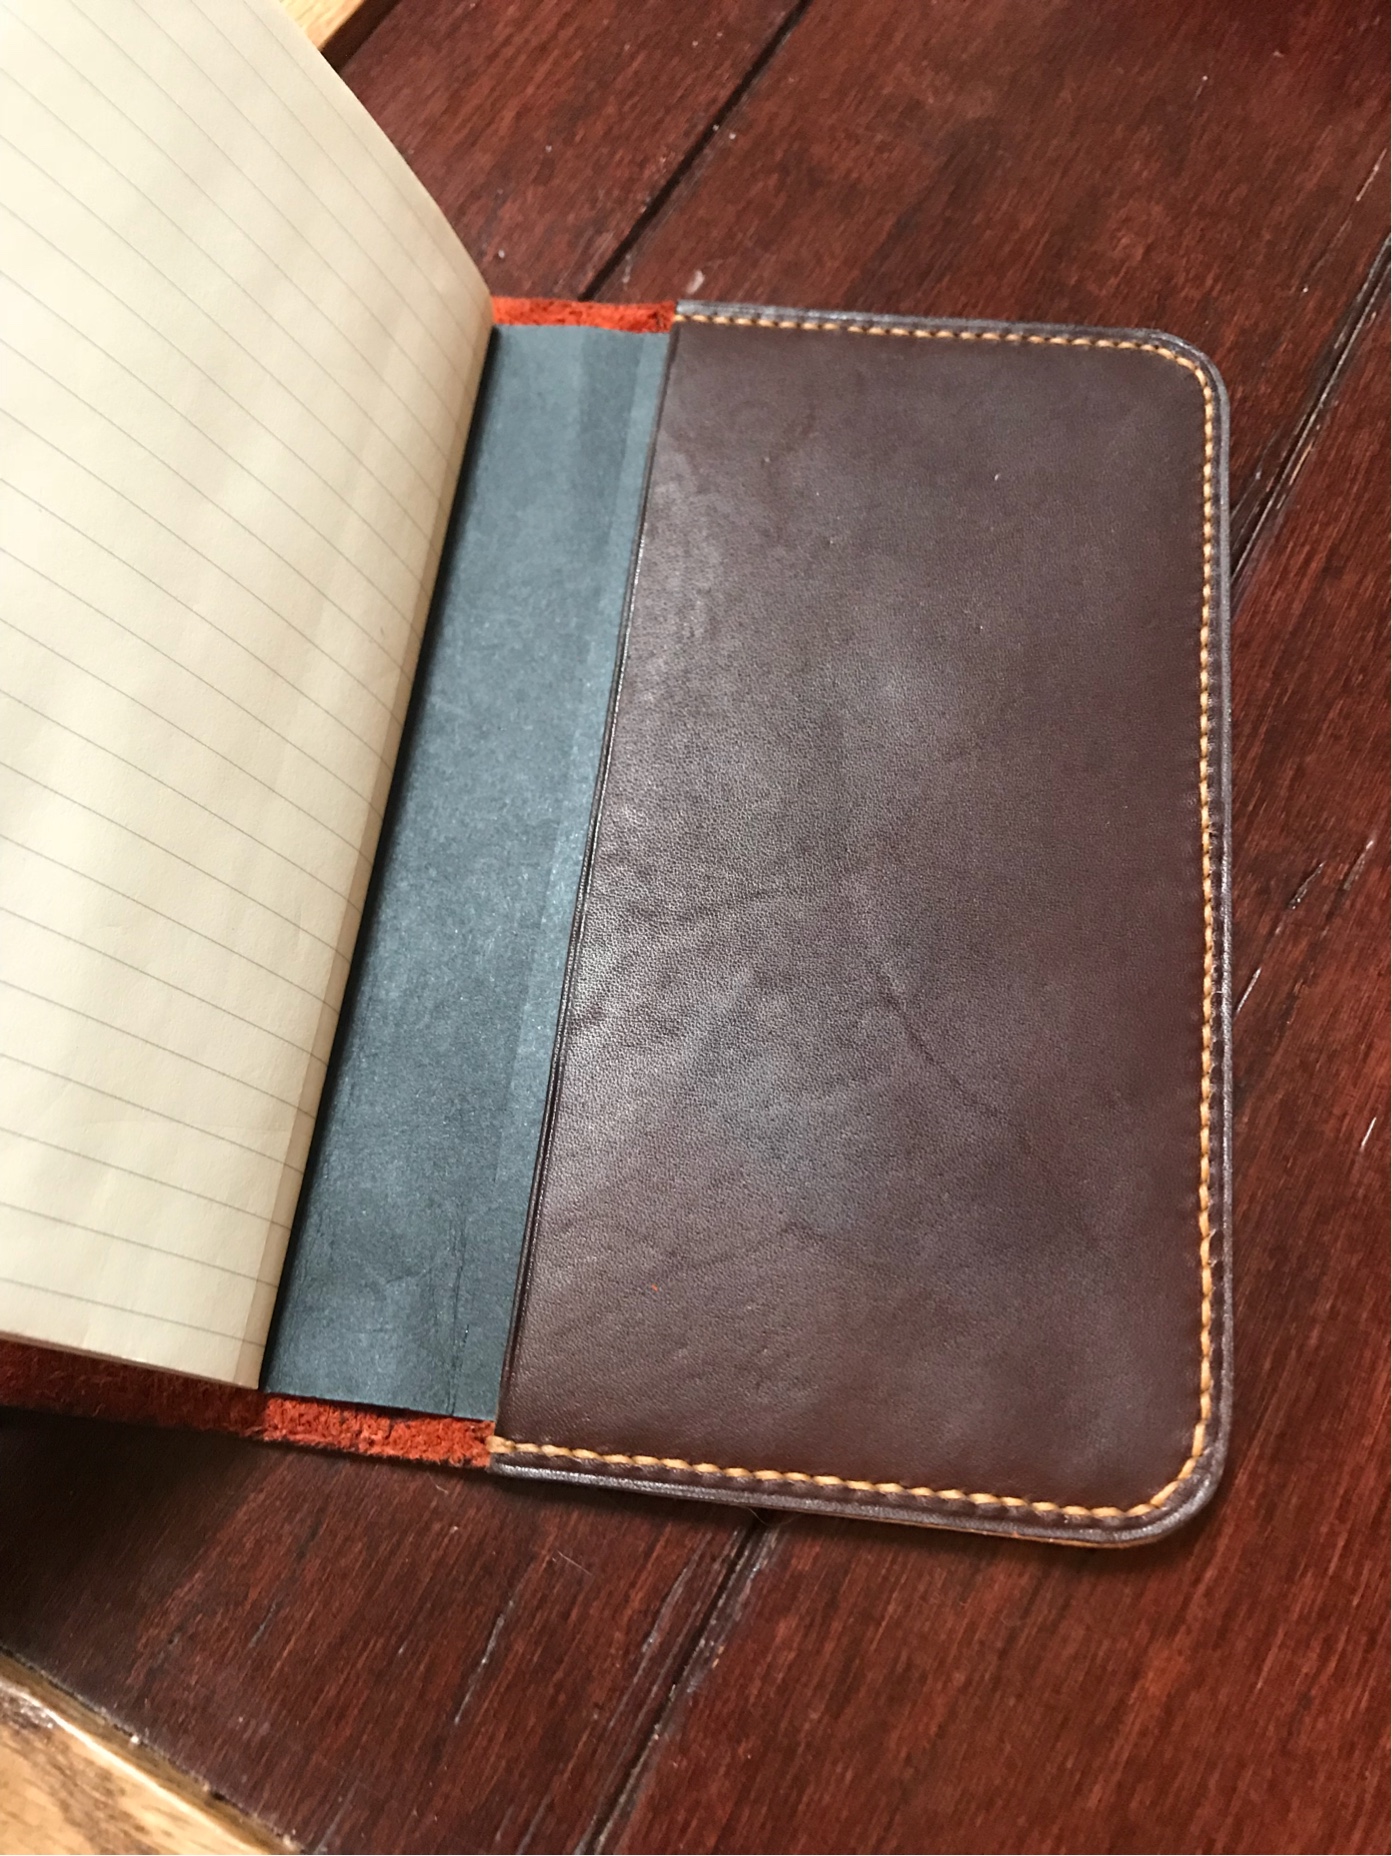
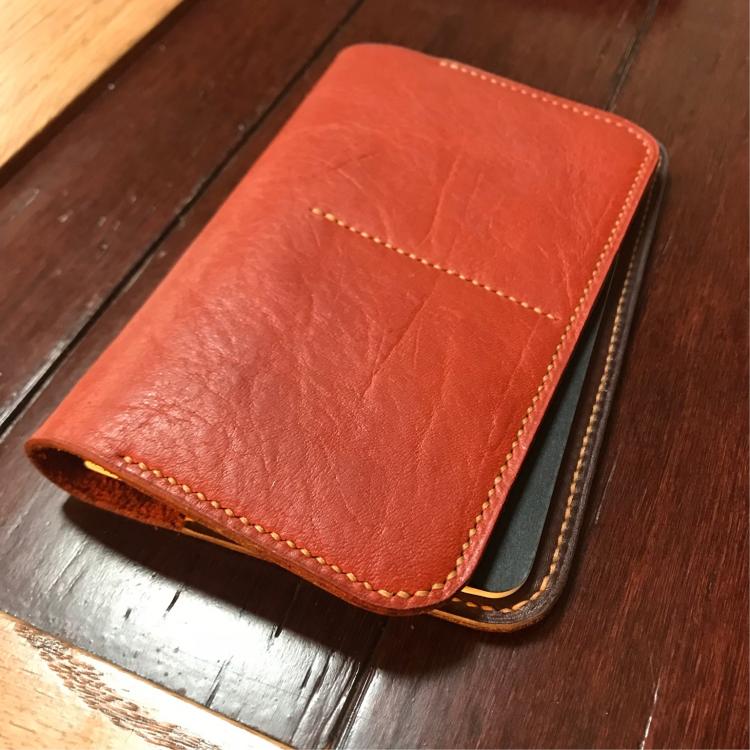
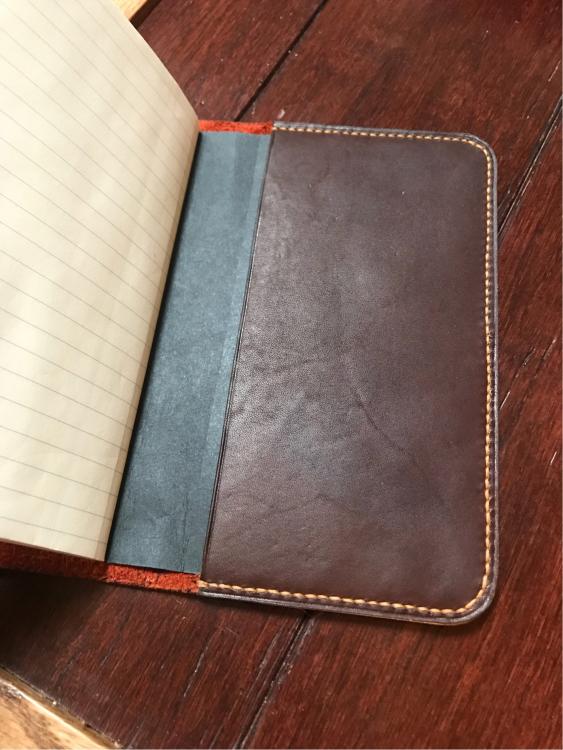
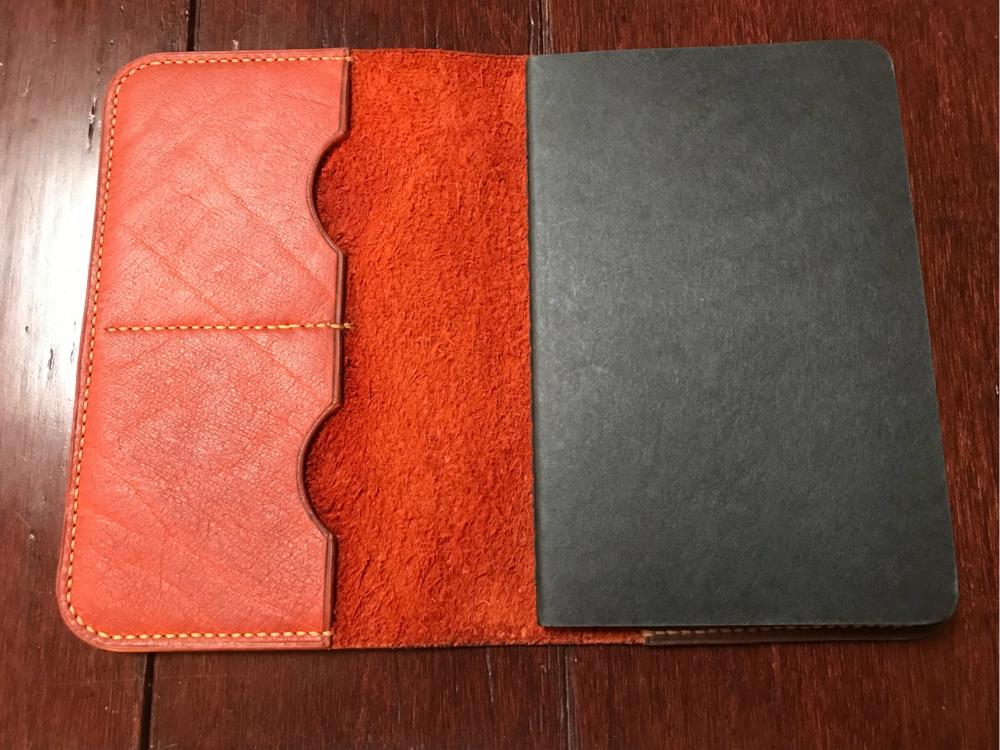
Christmas time again already, and instead of doing the gift card thing, decided to make simple journal covers for each of my direct reports (there’s four, so I need to stitch quickly!). This was the prototype; fits a Moleskine Cahier journal (approx 9 x 14 cm), with room for a couple of cards on the left hand side. Trying to use up my scrap leather, this one is tumbled Horween Excel, with some scrap split (I think) for the journal pocket. Stitched using 3.0mm KS irons and 0.6mm Tiger thread.
-
Custom Knife and Sheath
motocouture replied to Rossr's topic in Gun Holsters, Rifle Slings and Knife Sheathes
Great work, sleek lines on the knife -
Thanks for the info! Will try focusing my search there...
-
Great, thank you! Likewise, will let you know if I track it down. Love the croc shot! Very carefully, from a distance?? while your mate asks the croc? Ba-boom tching Perfect timing!!
-
So you piqued my curiosity lol. Here are a few I found, not sure exactly what you need, but hopefully you won’t have to reinvent the wheel!